

100% Completion in Ronny's Climb

Introduction
Ronny's Climb is a cute and charming 2D platformer developed by Zephyrix, an indie developer from Germany! You play as Ronny, a deer competing with other furry friends to see who can climb their local mountain the highest. This guide will walk you through EVERYTHING so you can achieve 100% completion!
To achieve 100% completion on your save file in Ronny's Climb, you must:
- Clear all 6 stages
- Collect all 100 gems in each stage (except for Finale)
- Beat the par completion time for each stage
- Earn both badges from each stage
In addition to those requirements, there are also two bonus stages that you can unlock with secret codes! They don't contribute to your overall completion percentage on the stage selection screen, but they do have their own gems and badges, so I'll cover them as well.
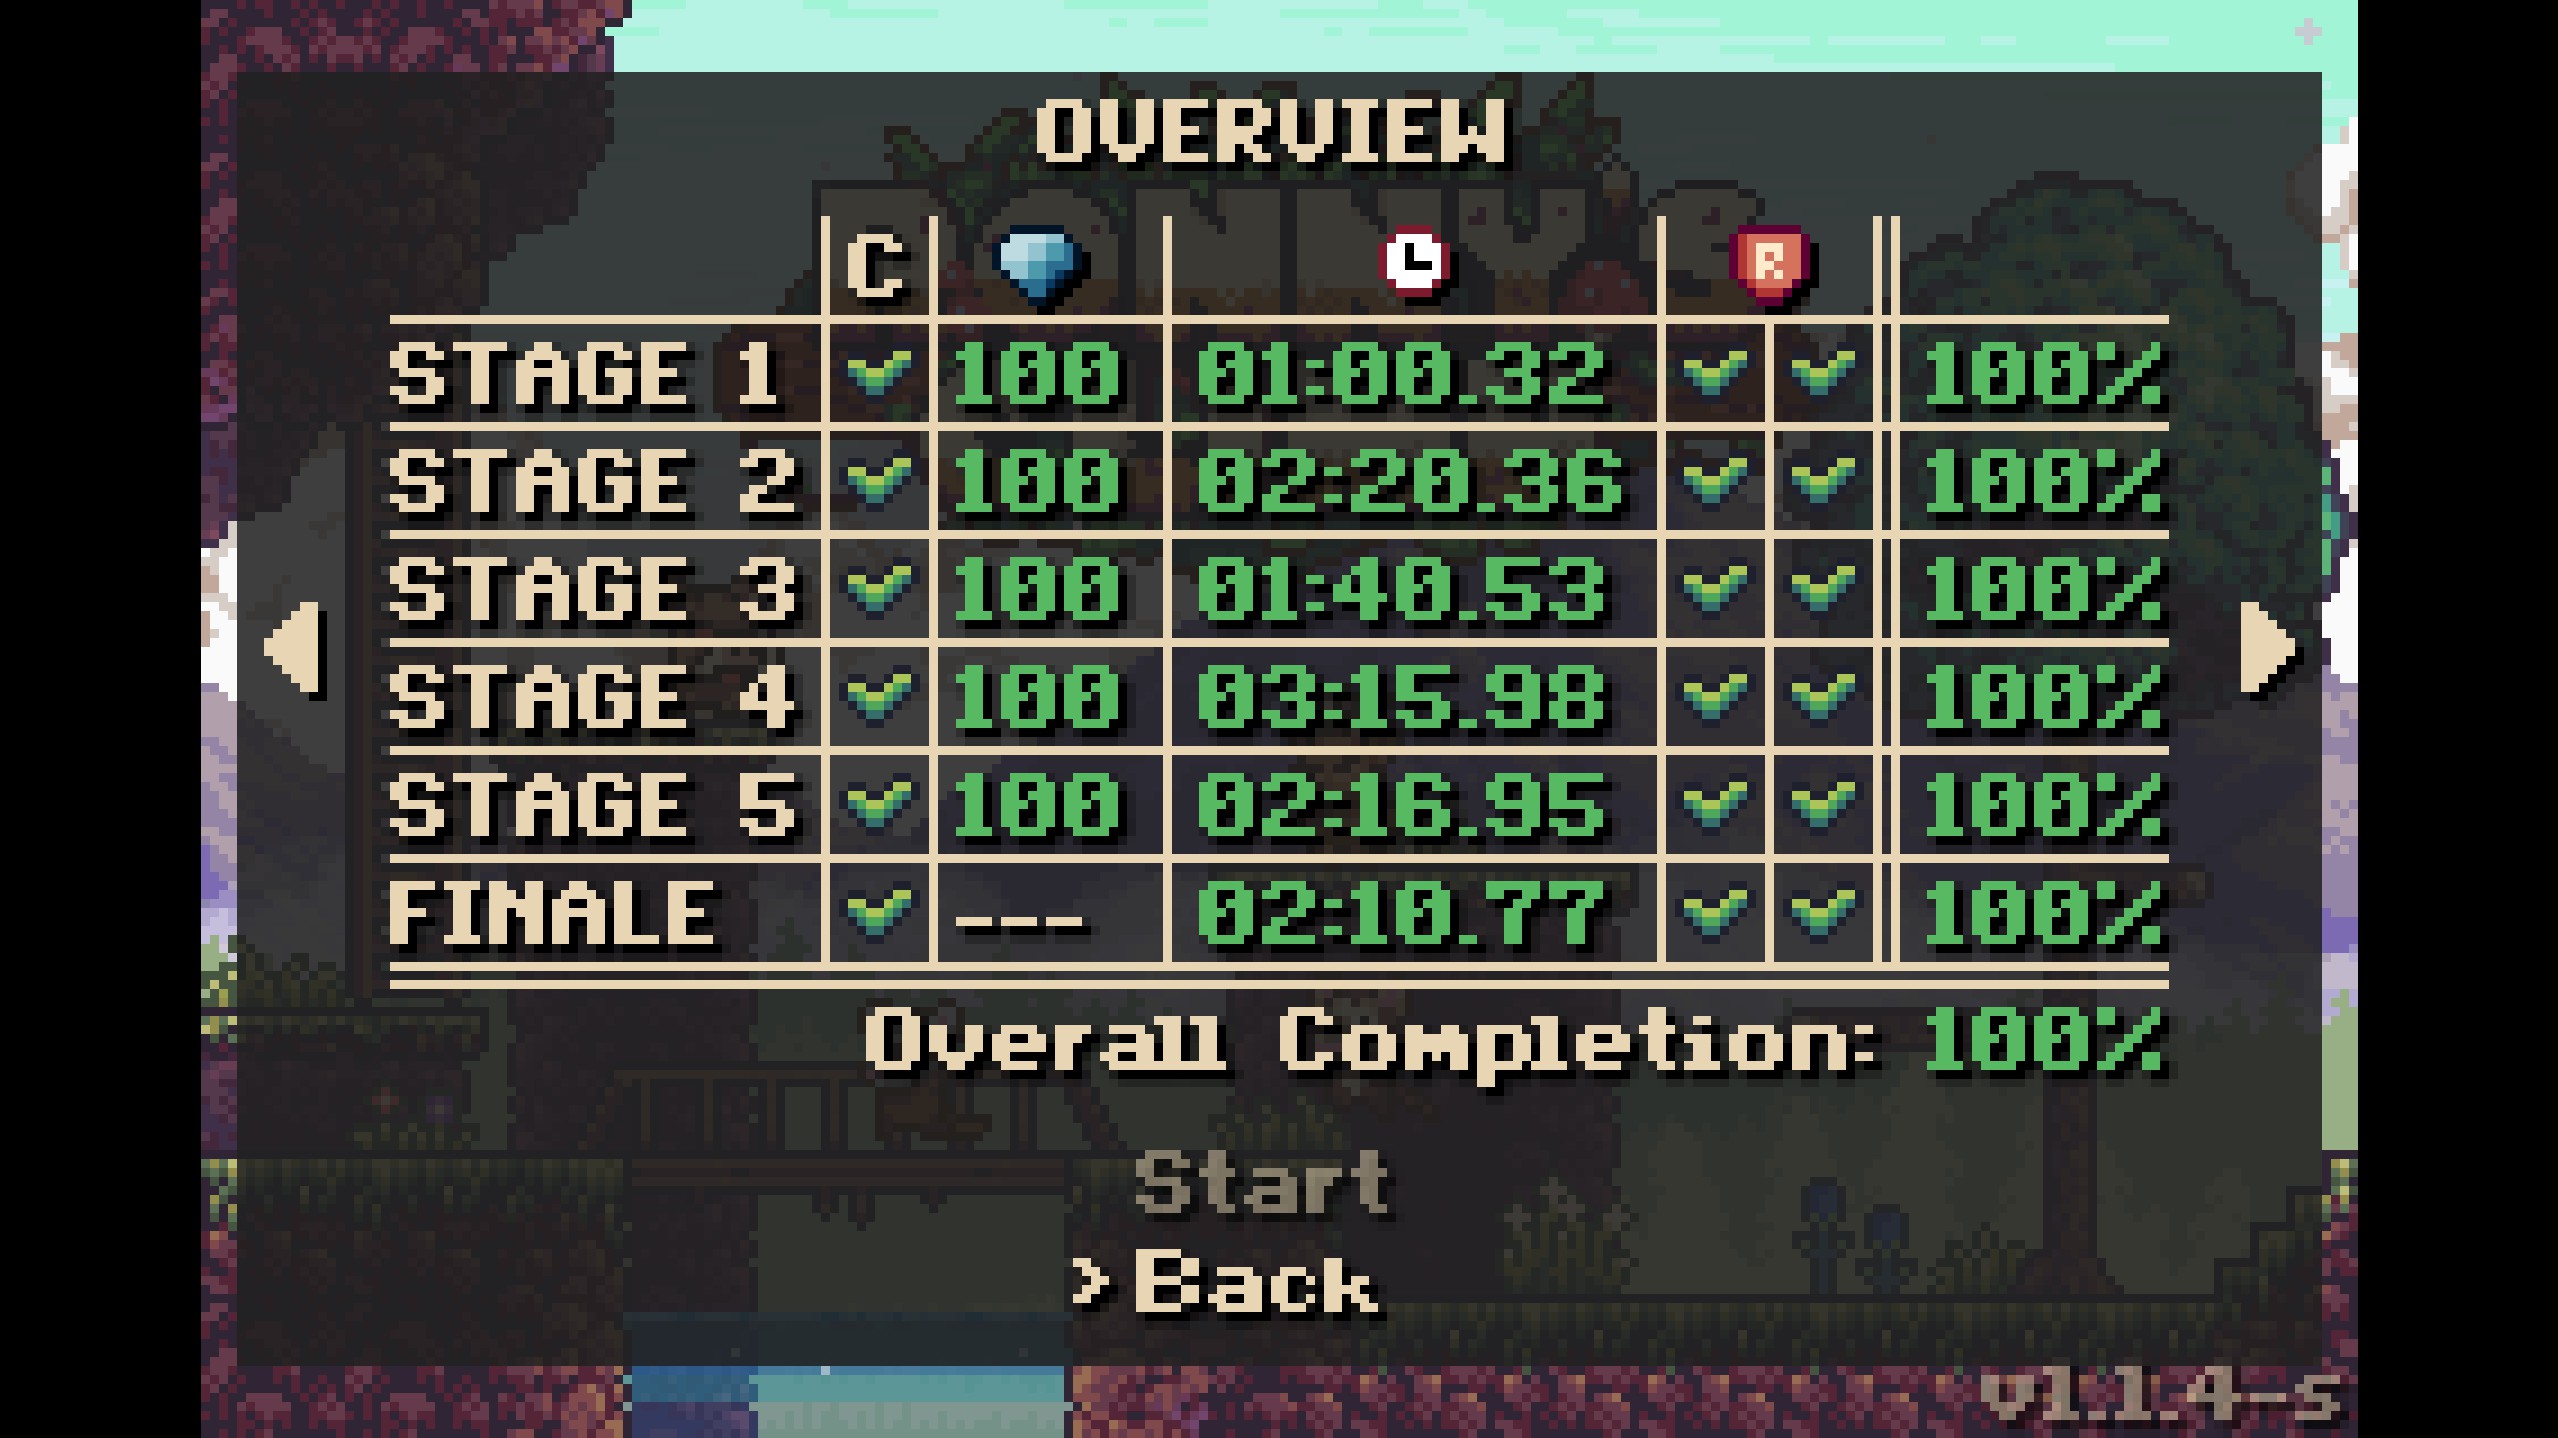
Table of Contents
- Emerald Vale
- Fungus Grotto
- Treetop Trails
- Crystal Caverns
- The Summit
- Finale
- Balloon Bonanza (Bonus Stage)
- Retro Ridgeclimb (Bonus Stage)
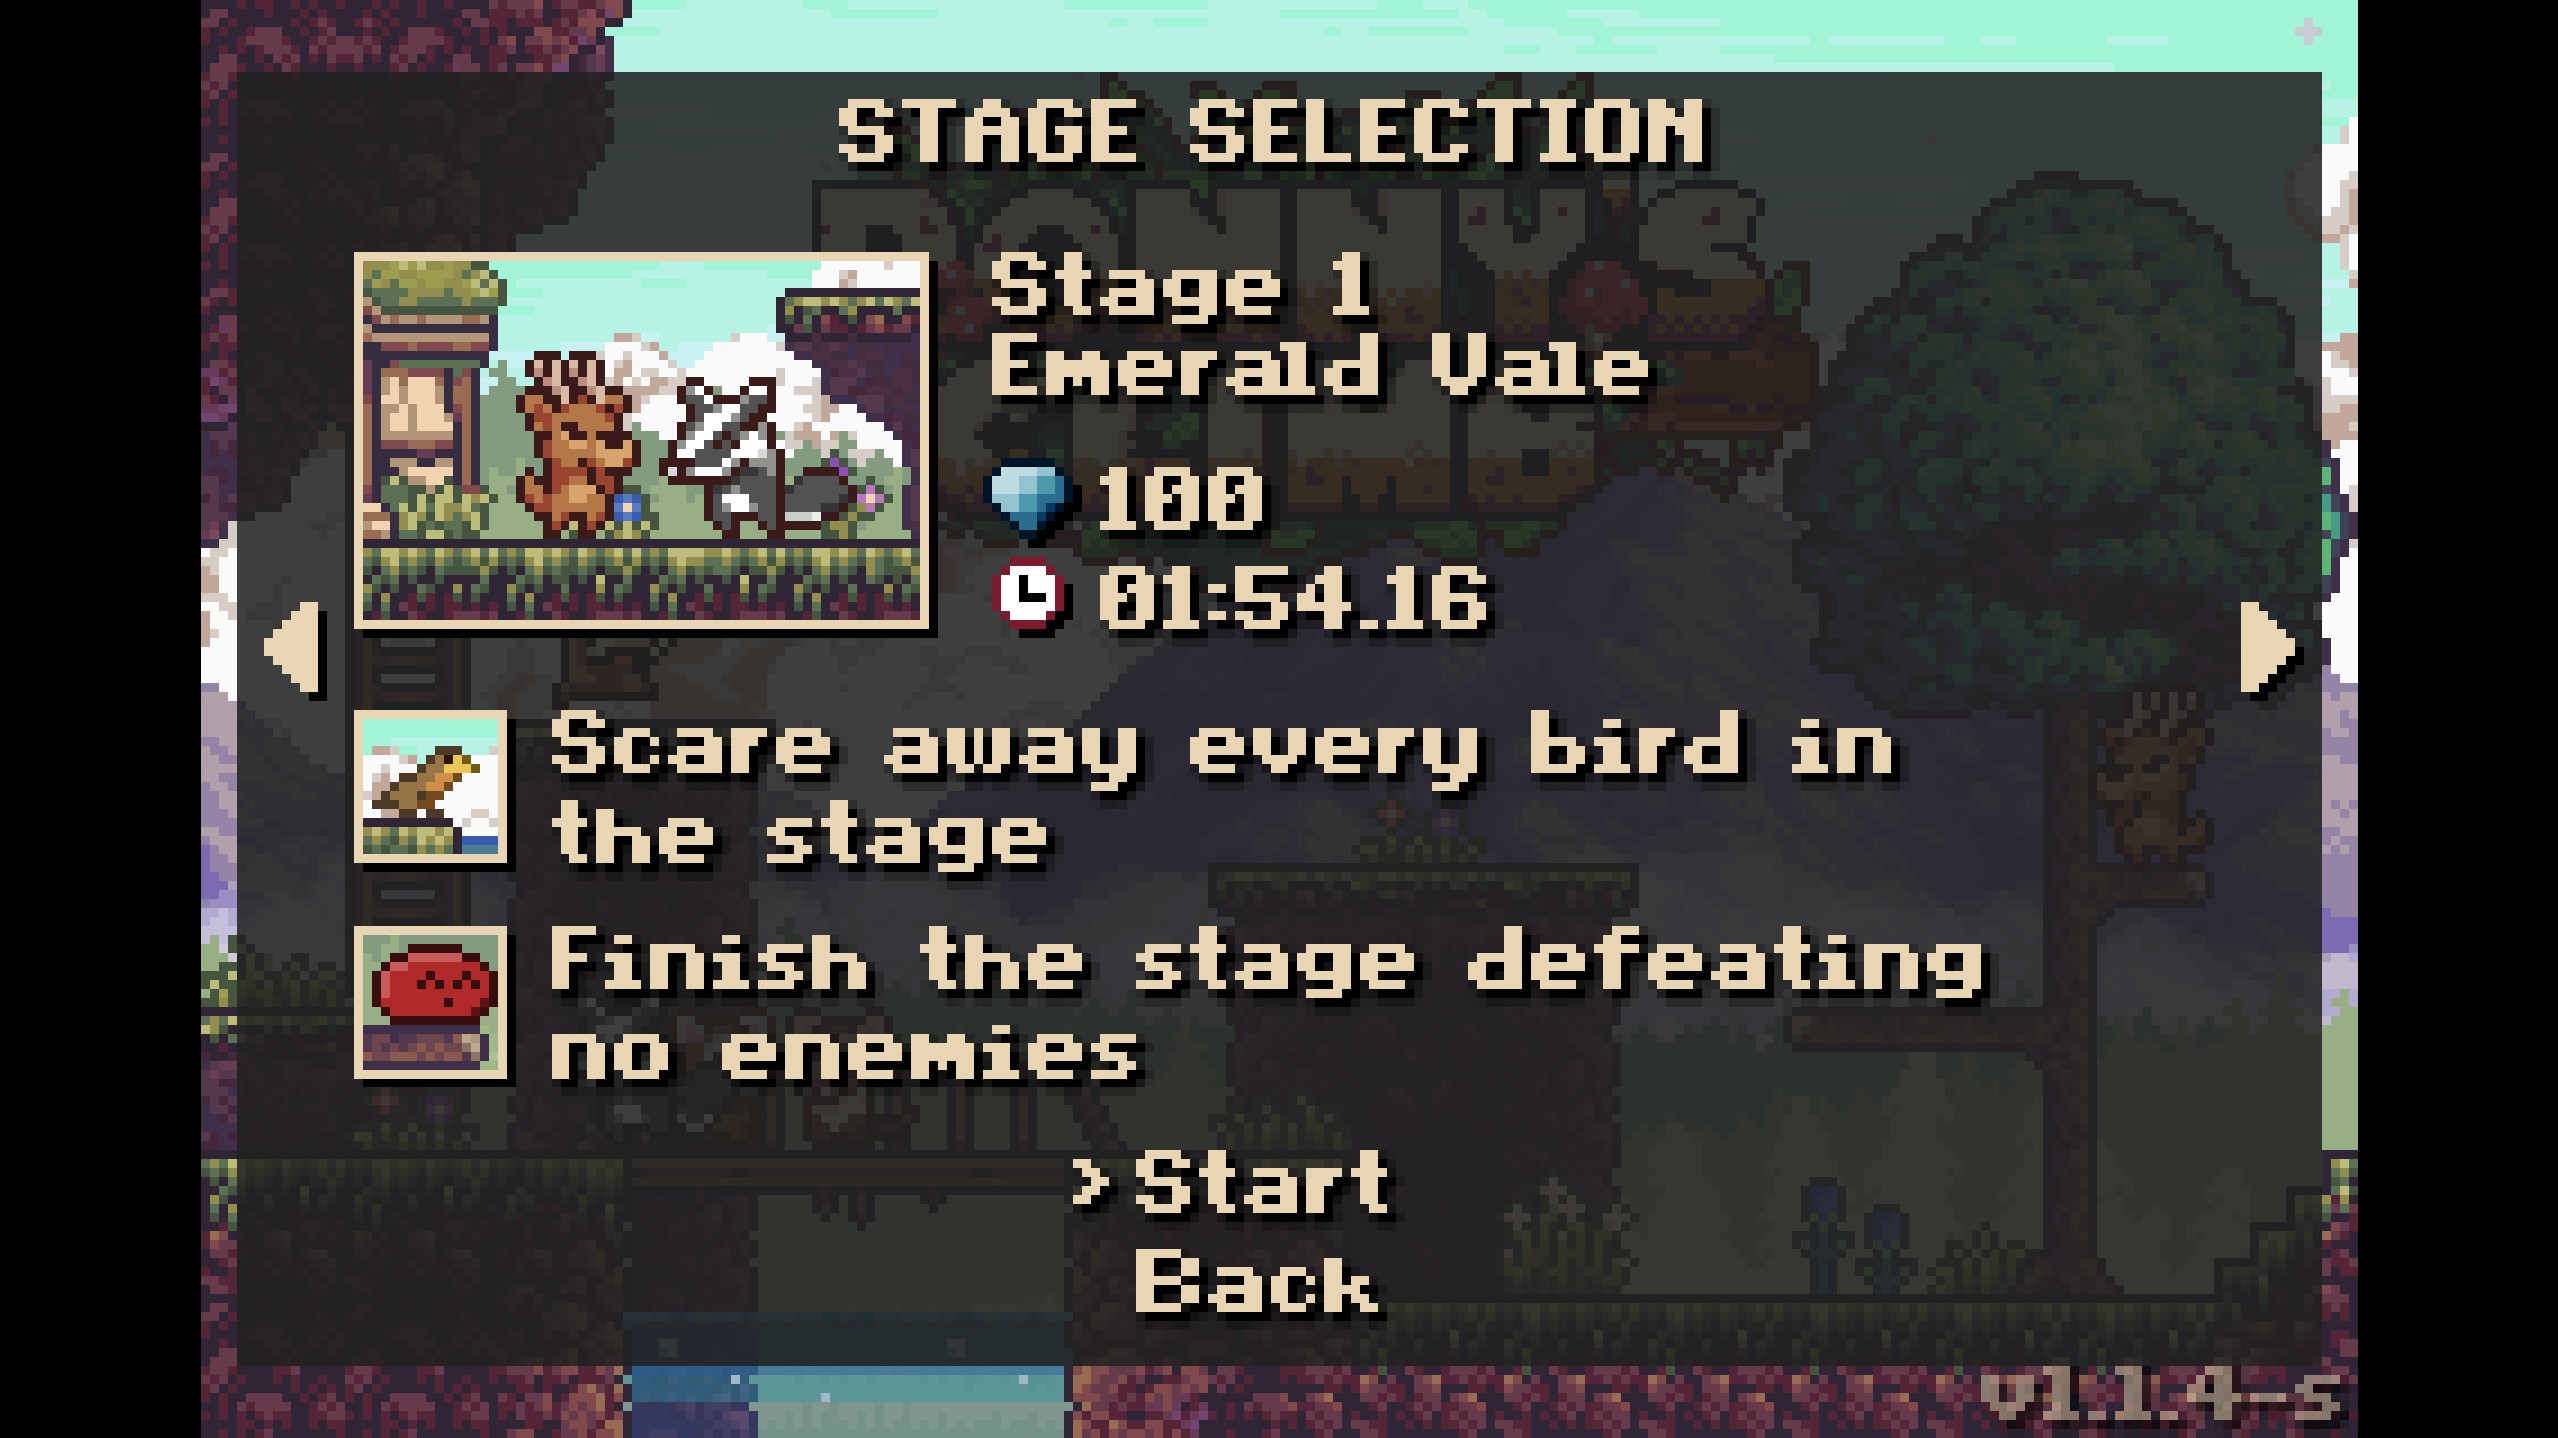
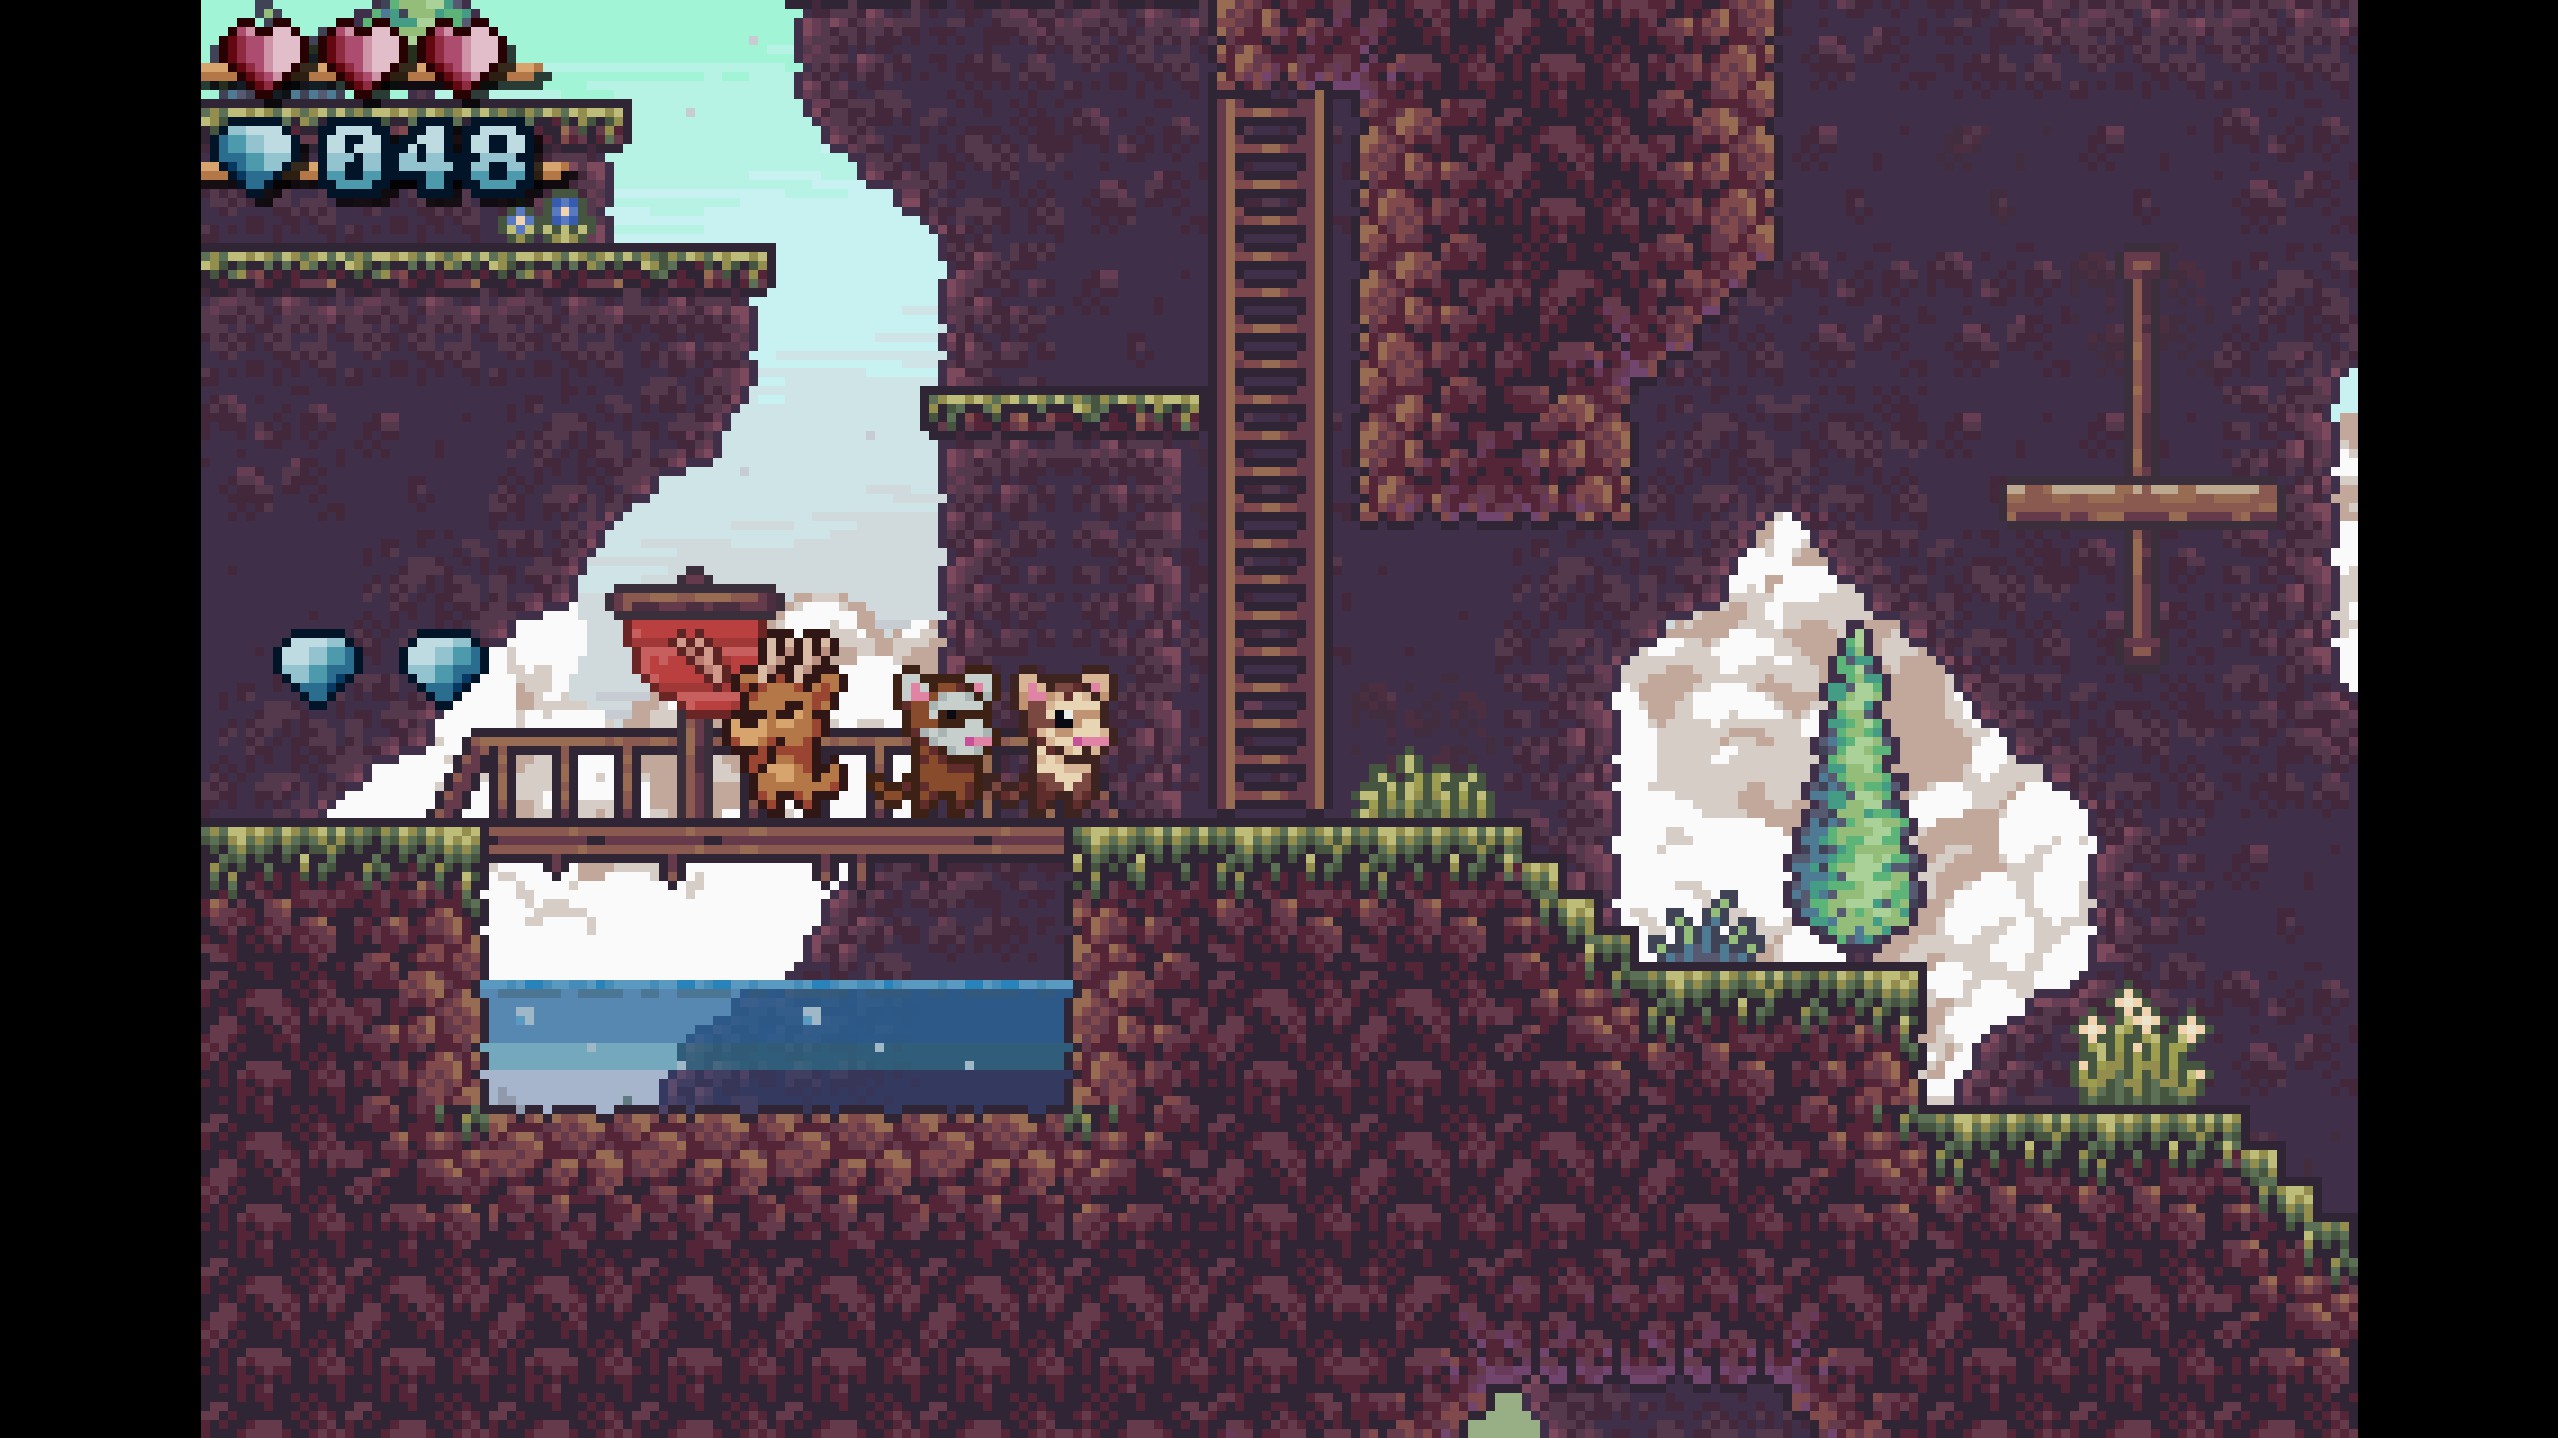
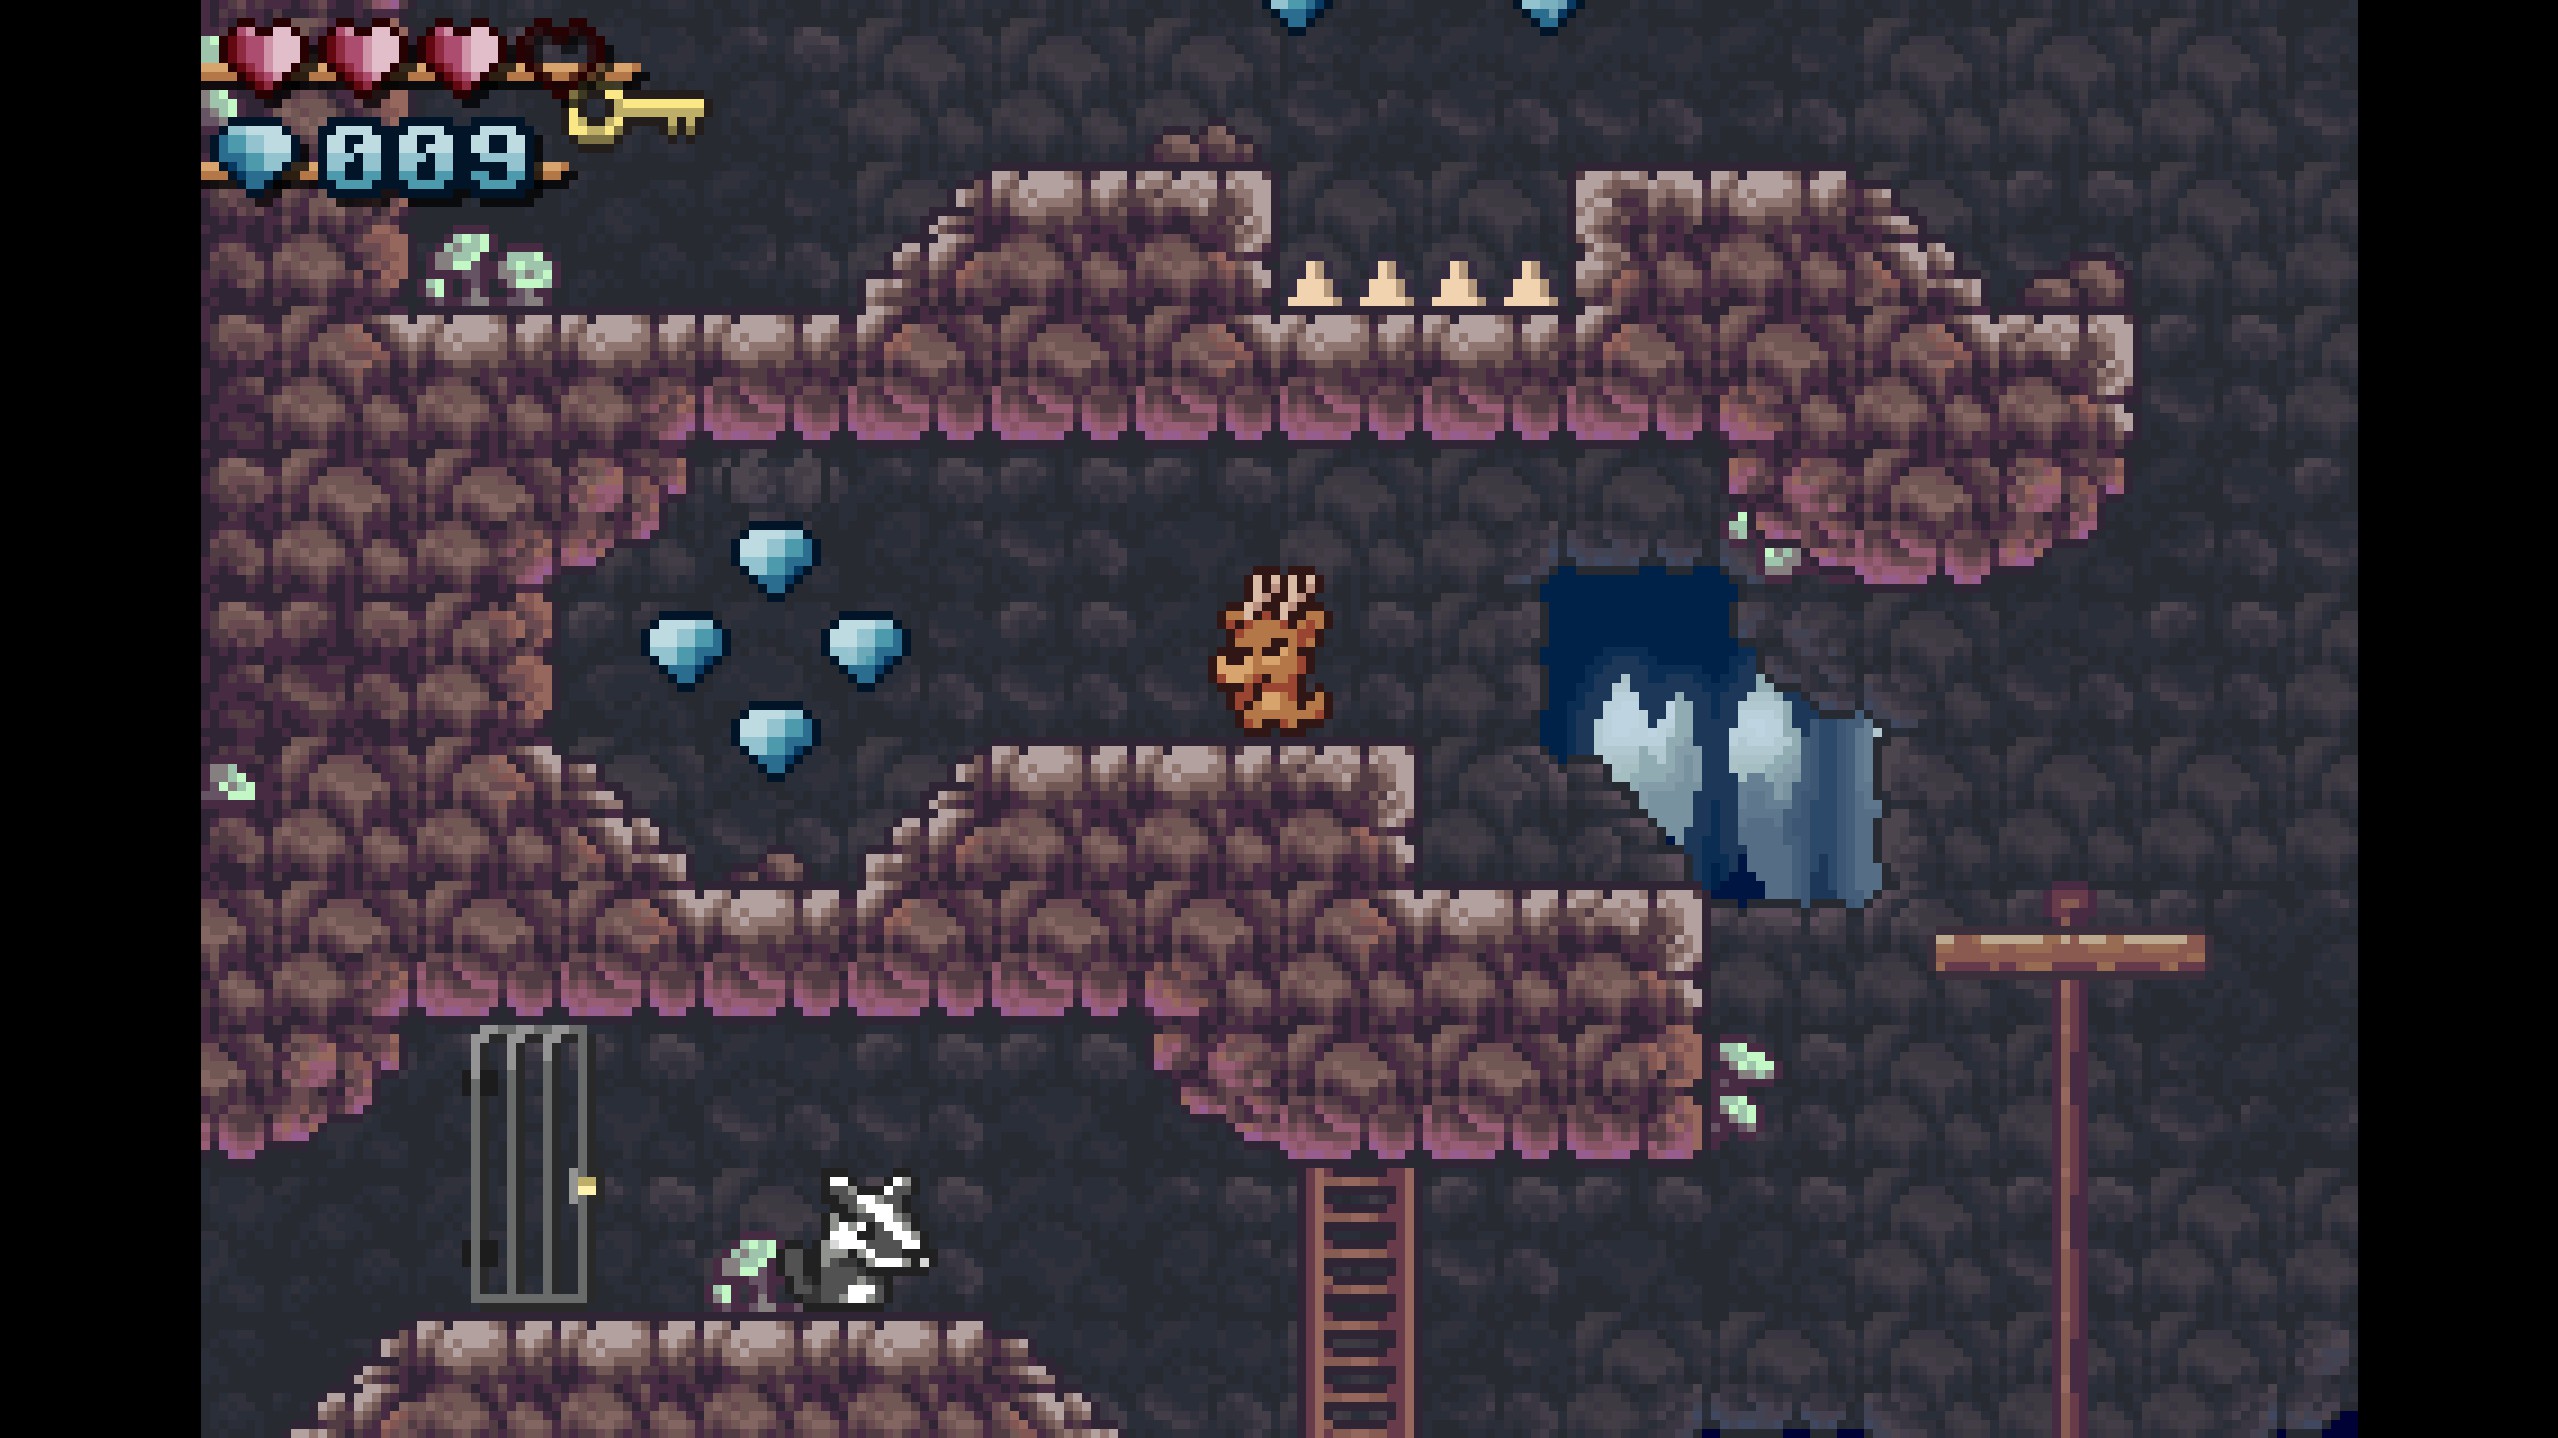
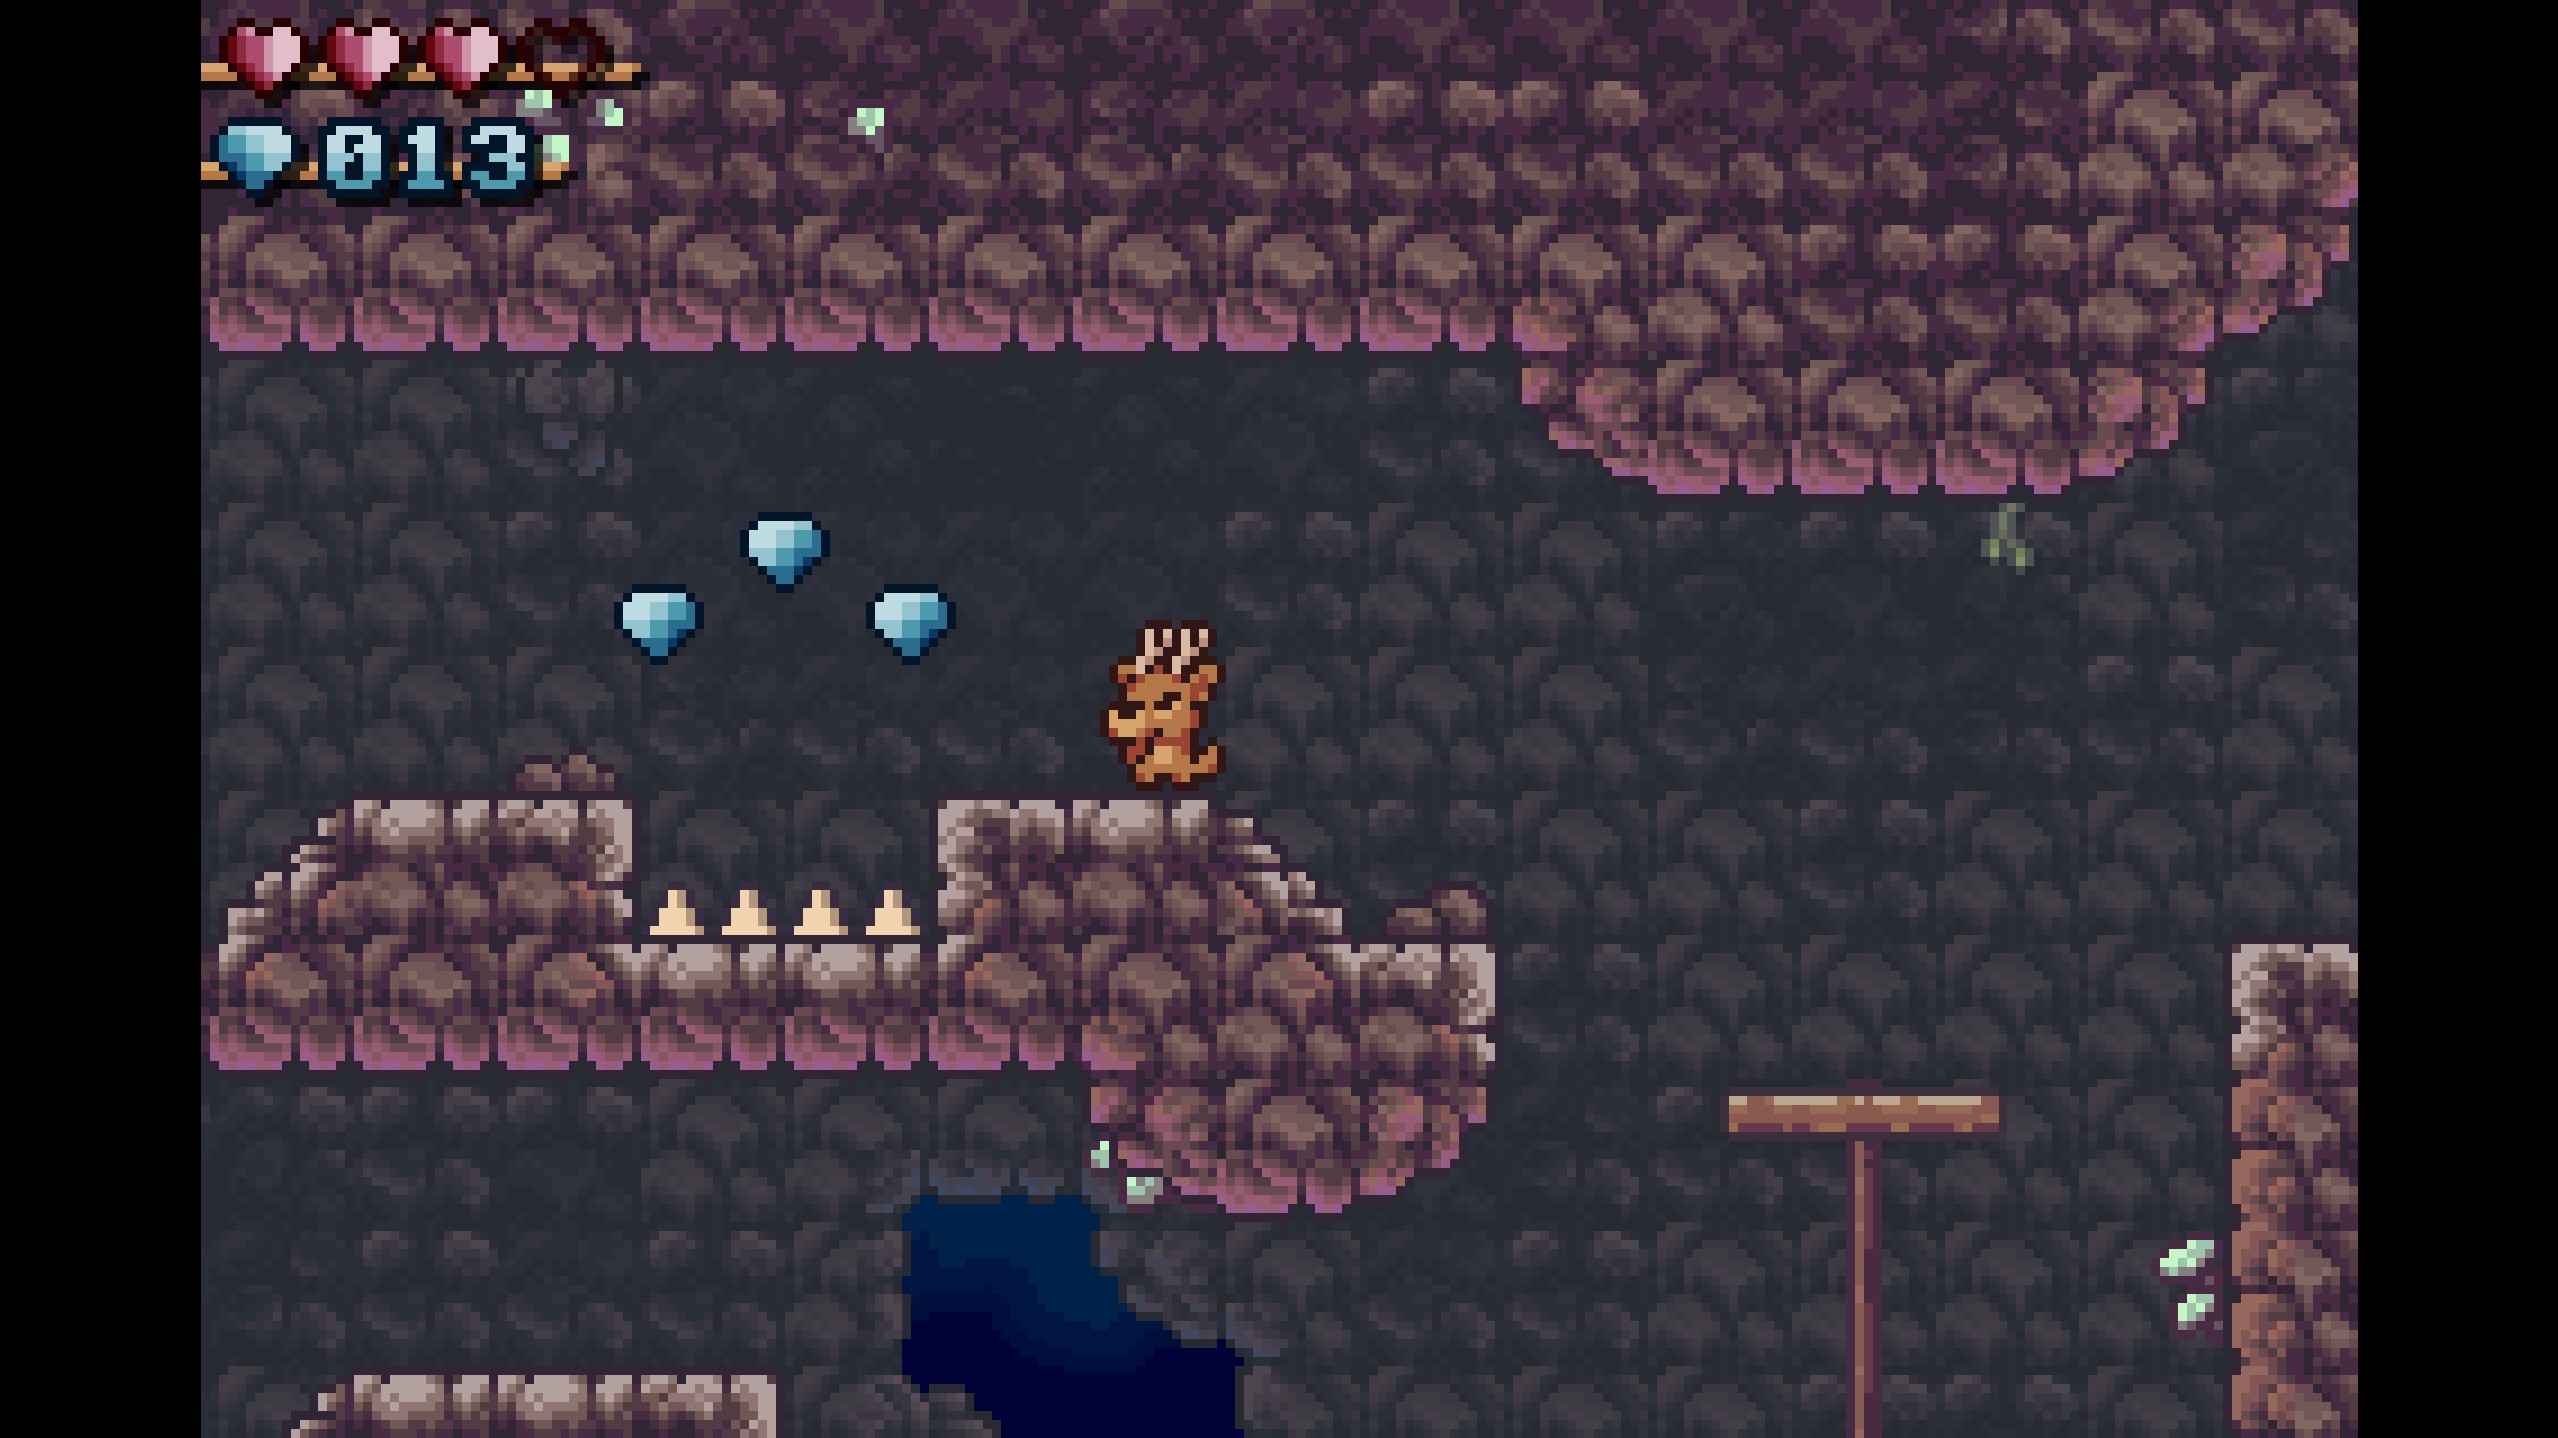
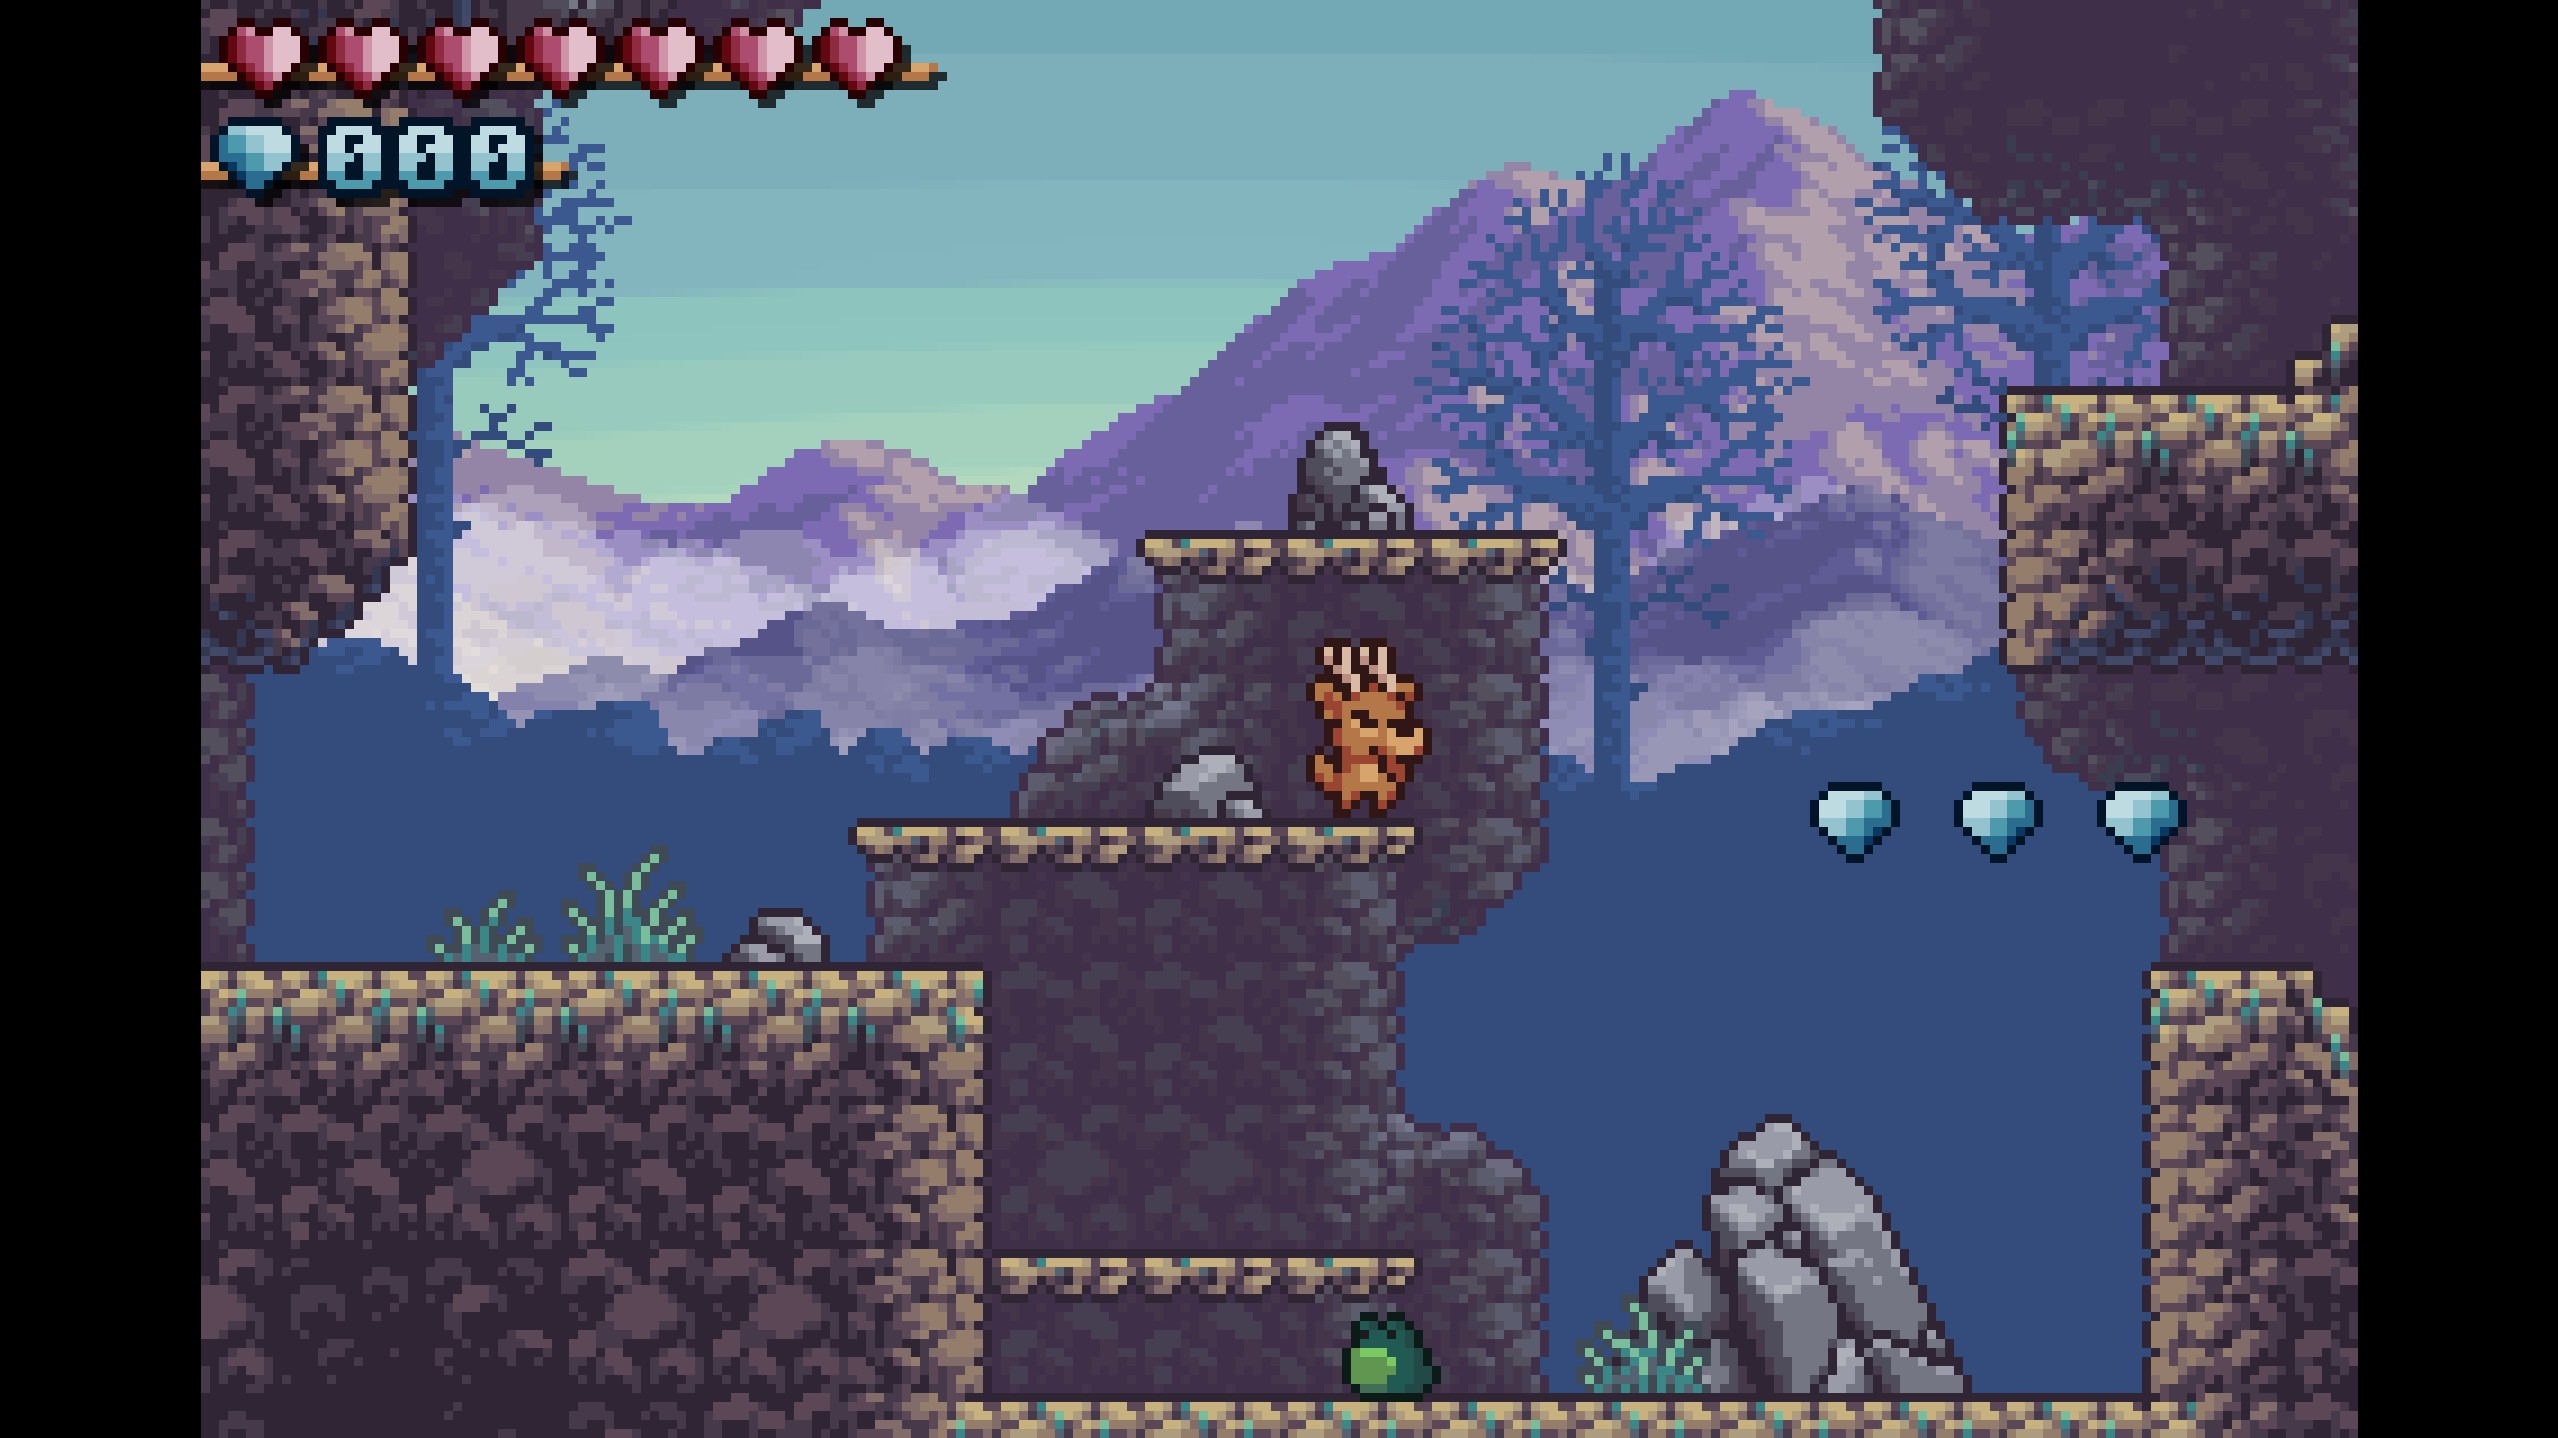
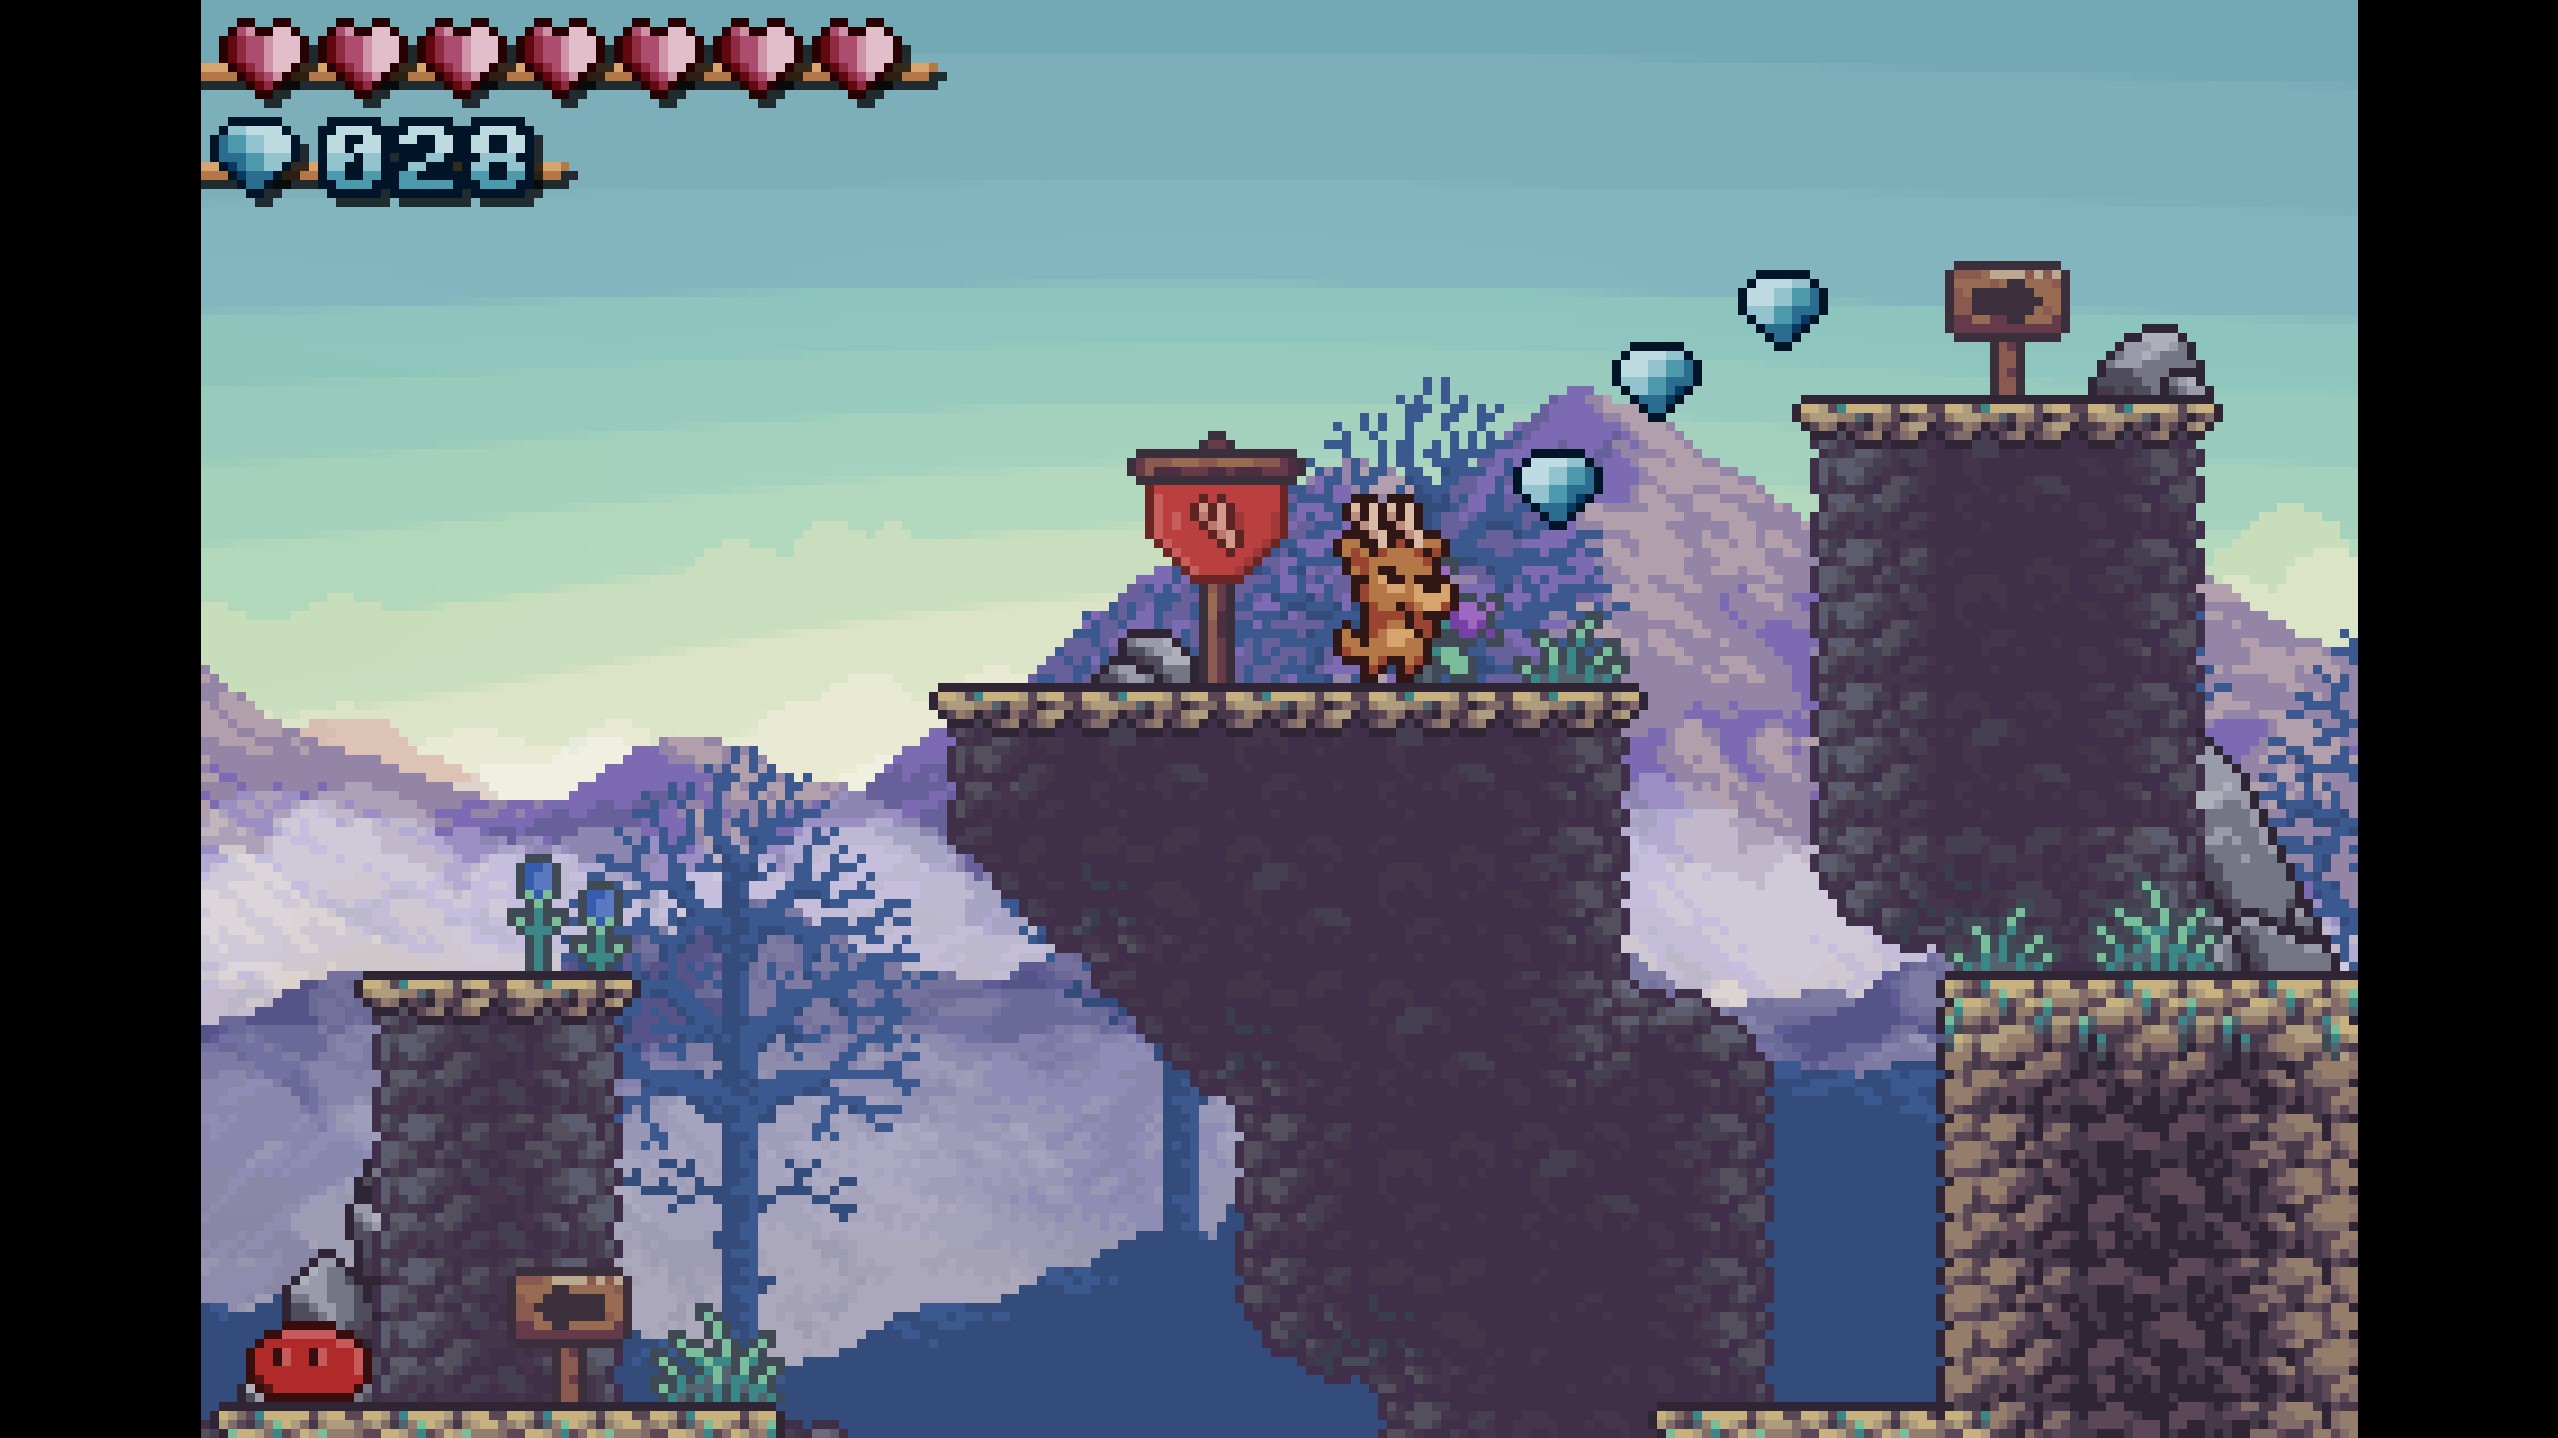
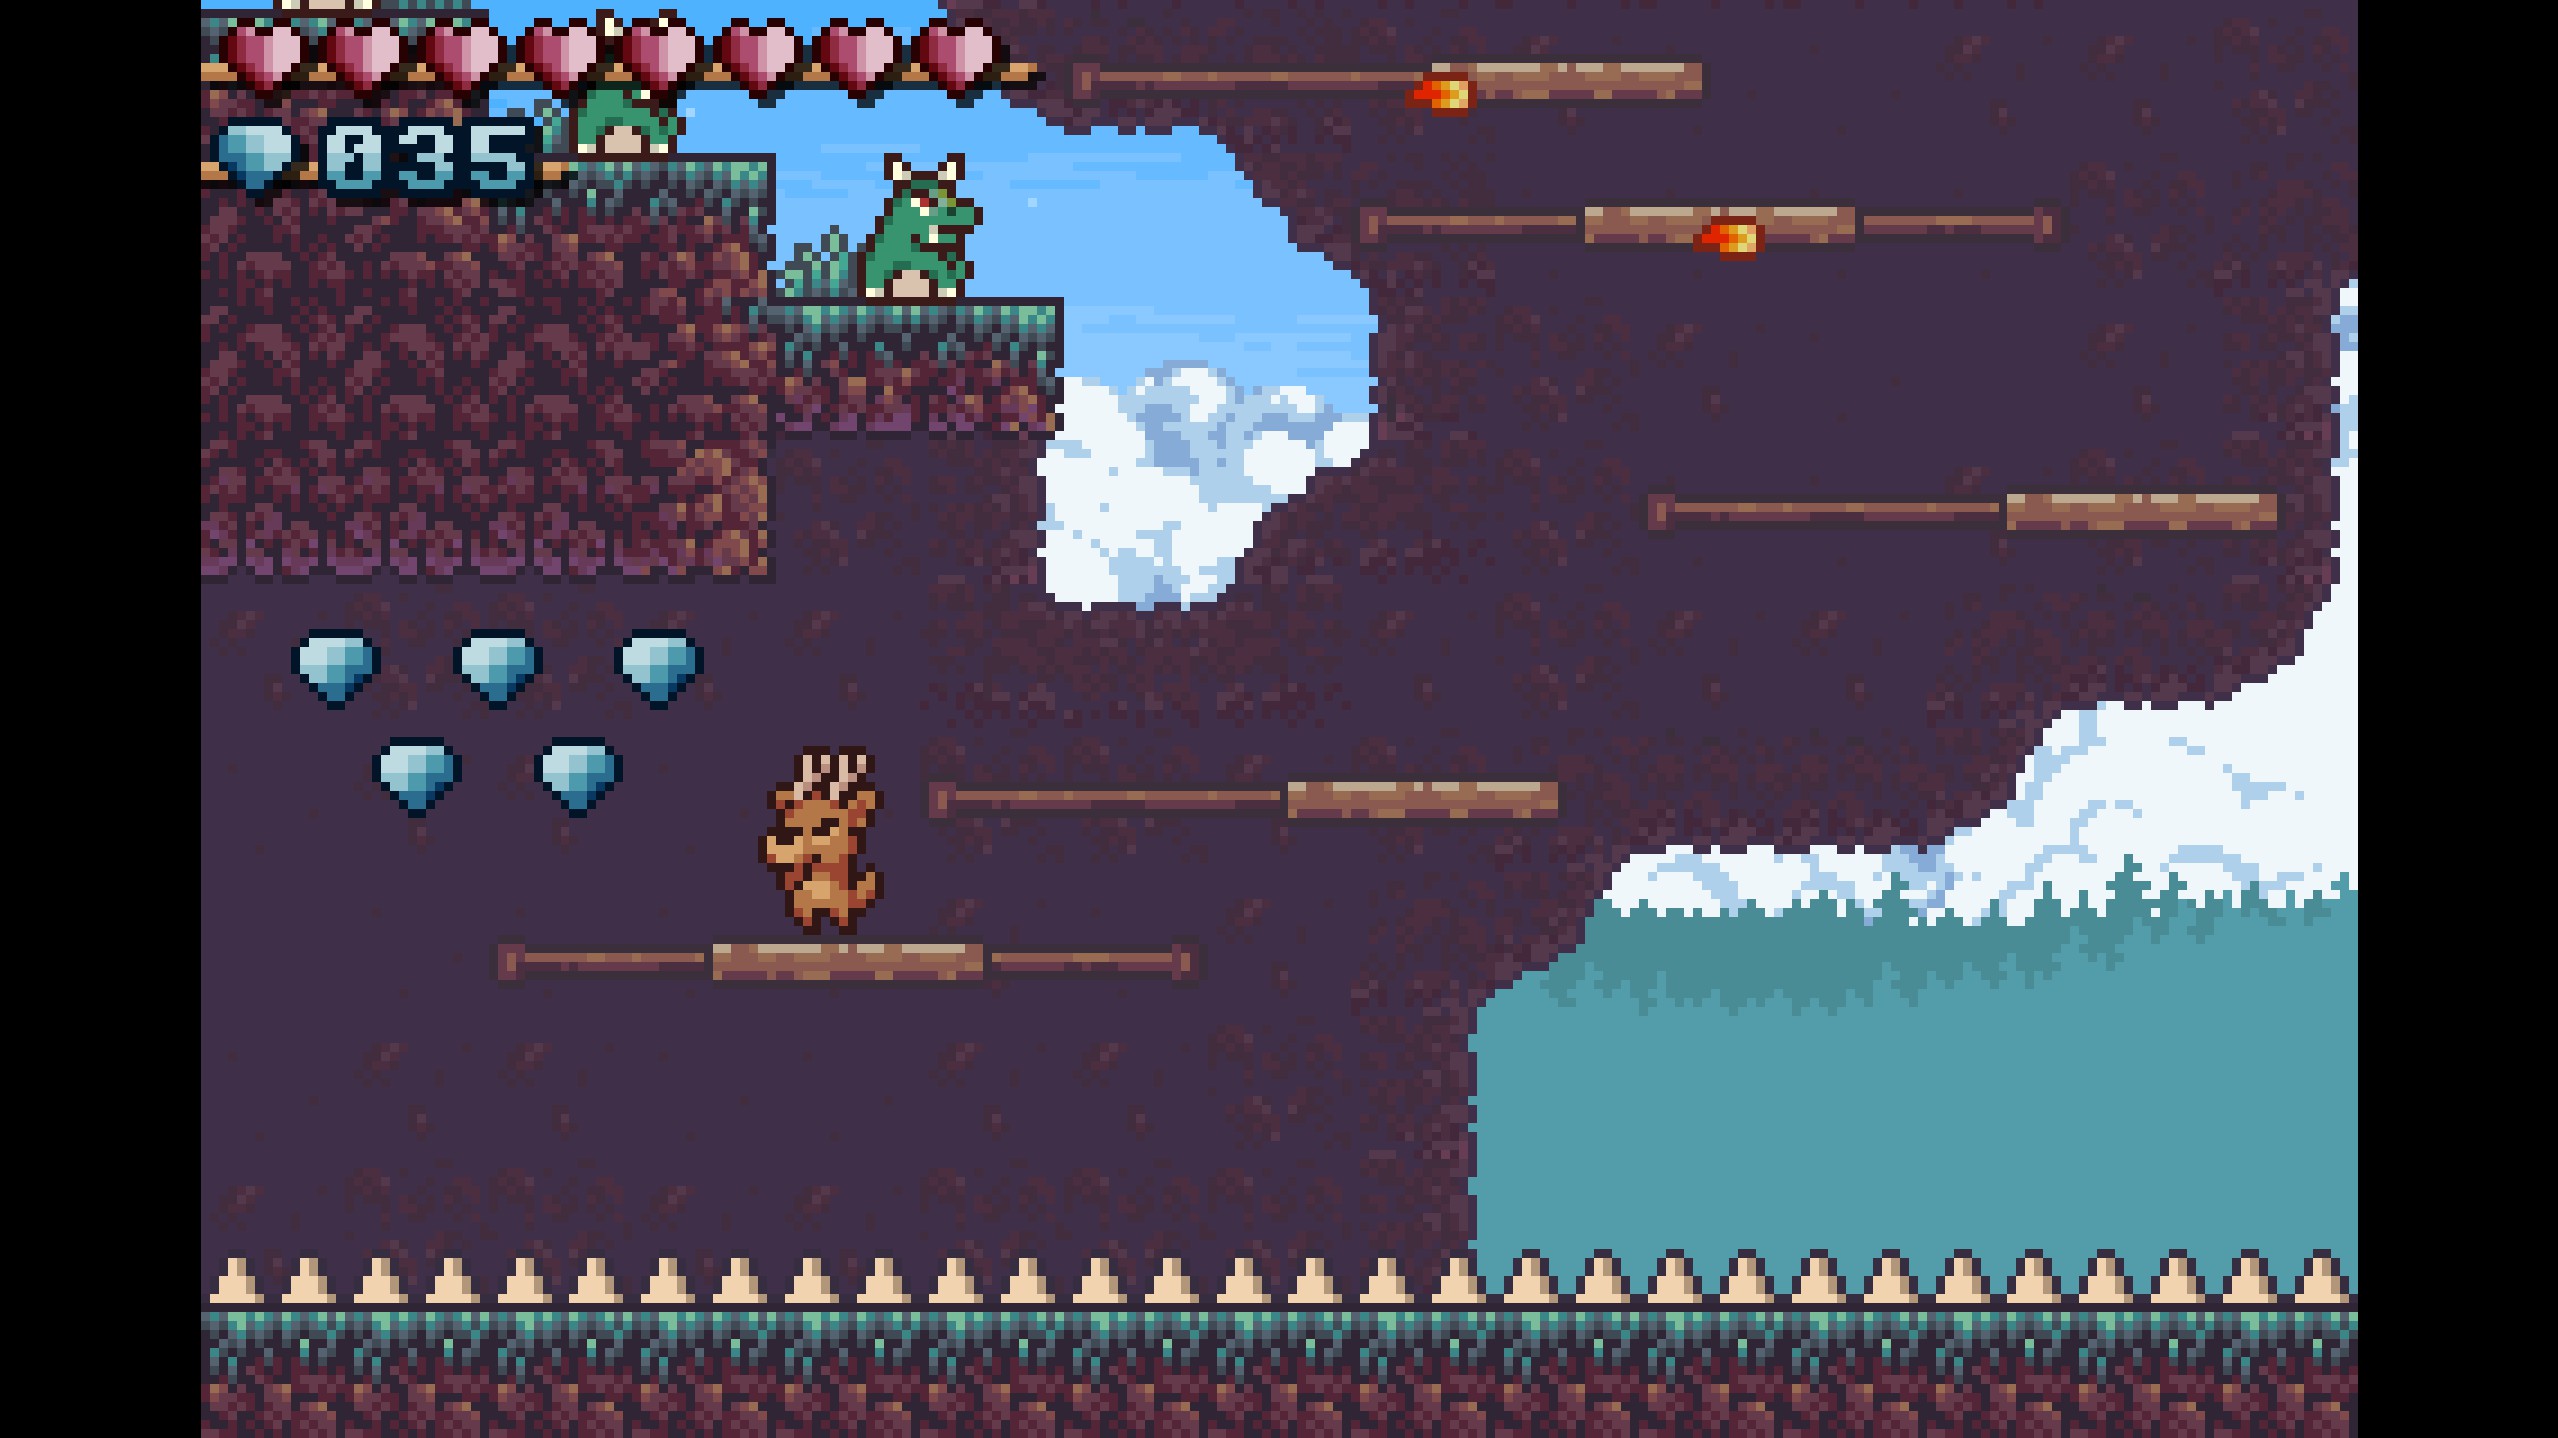
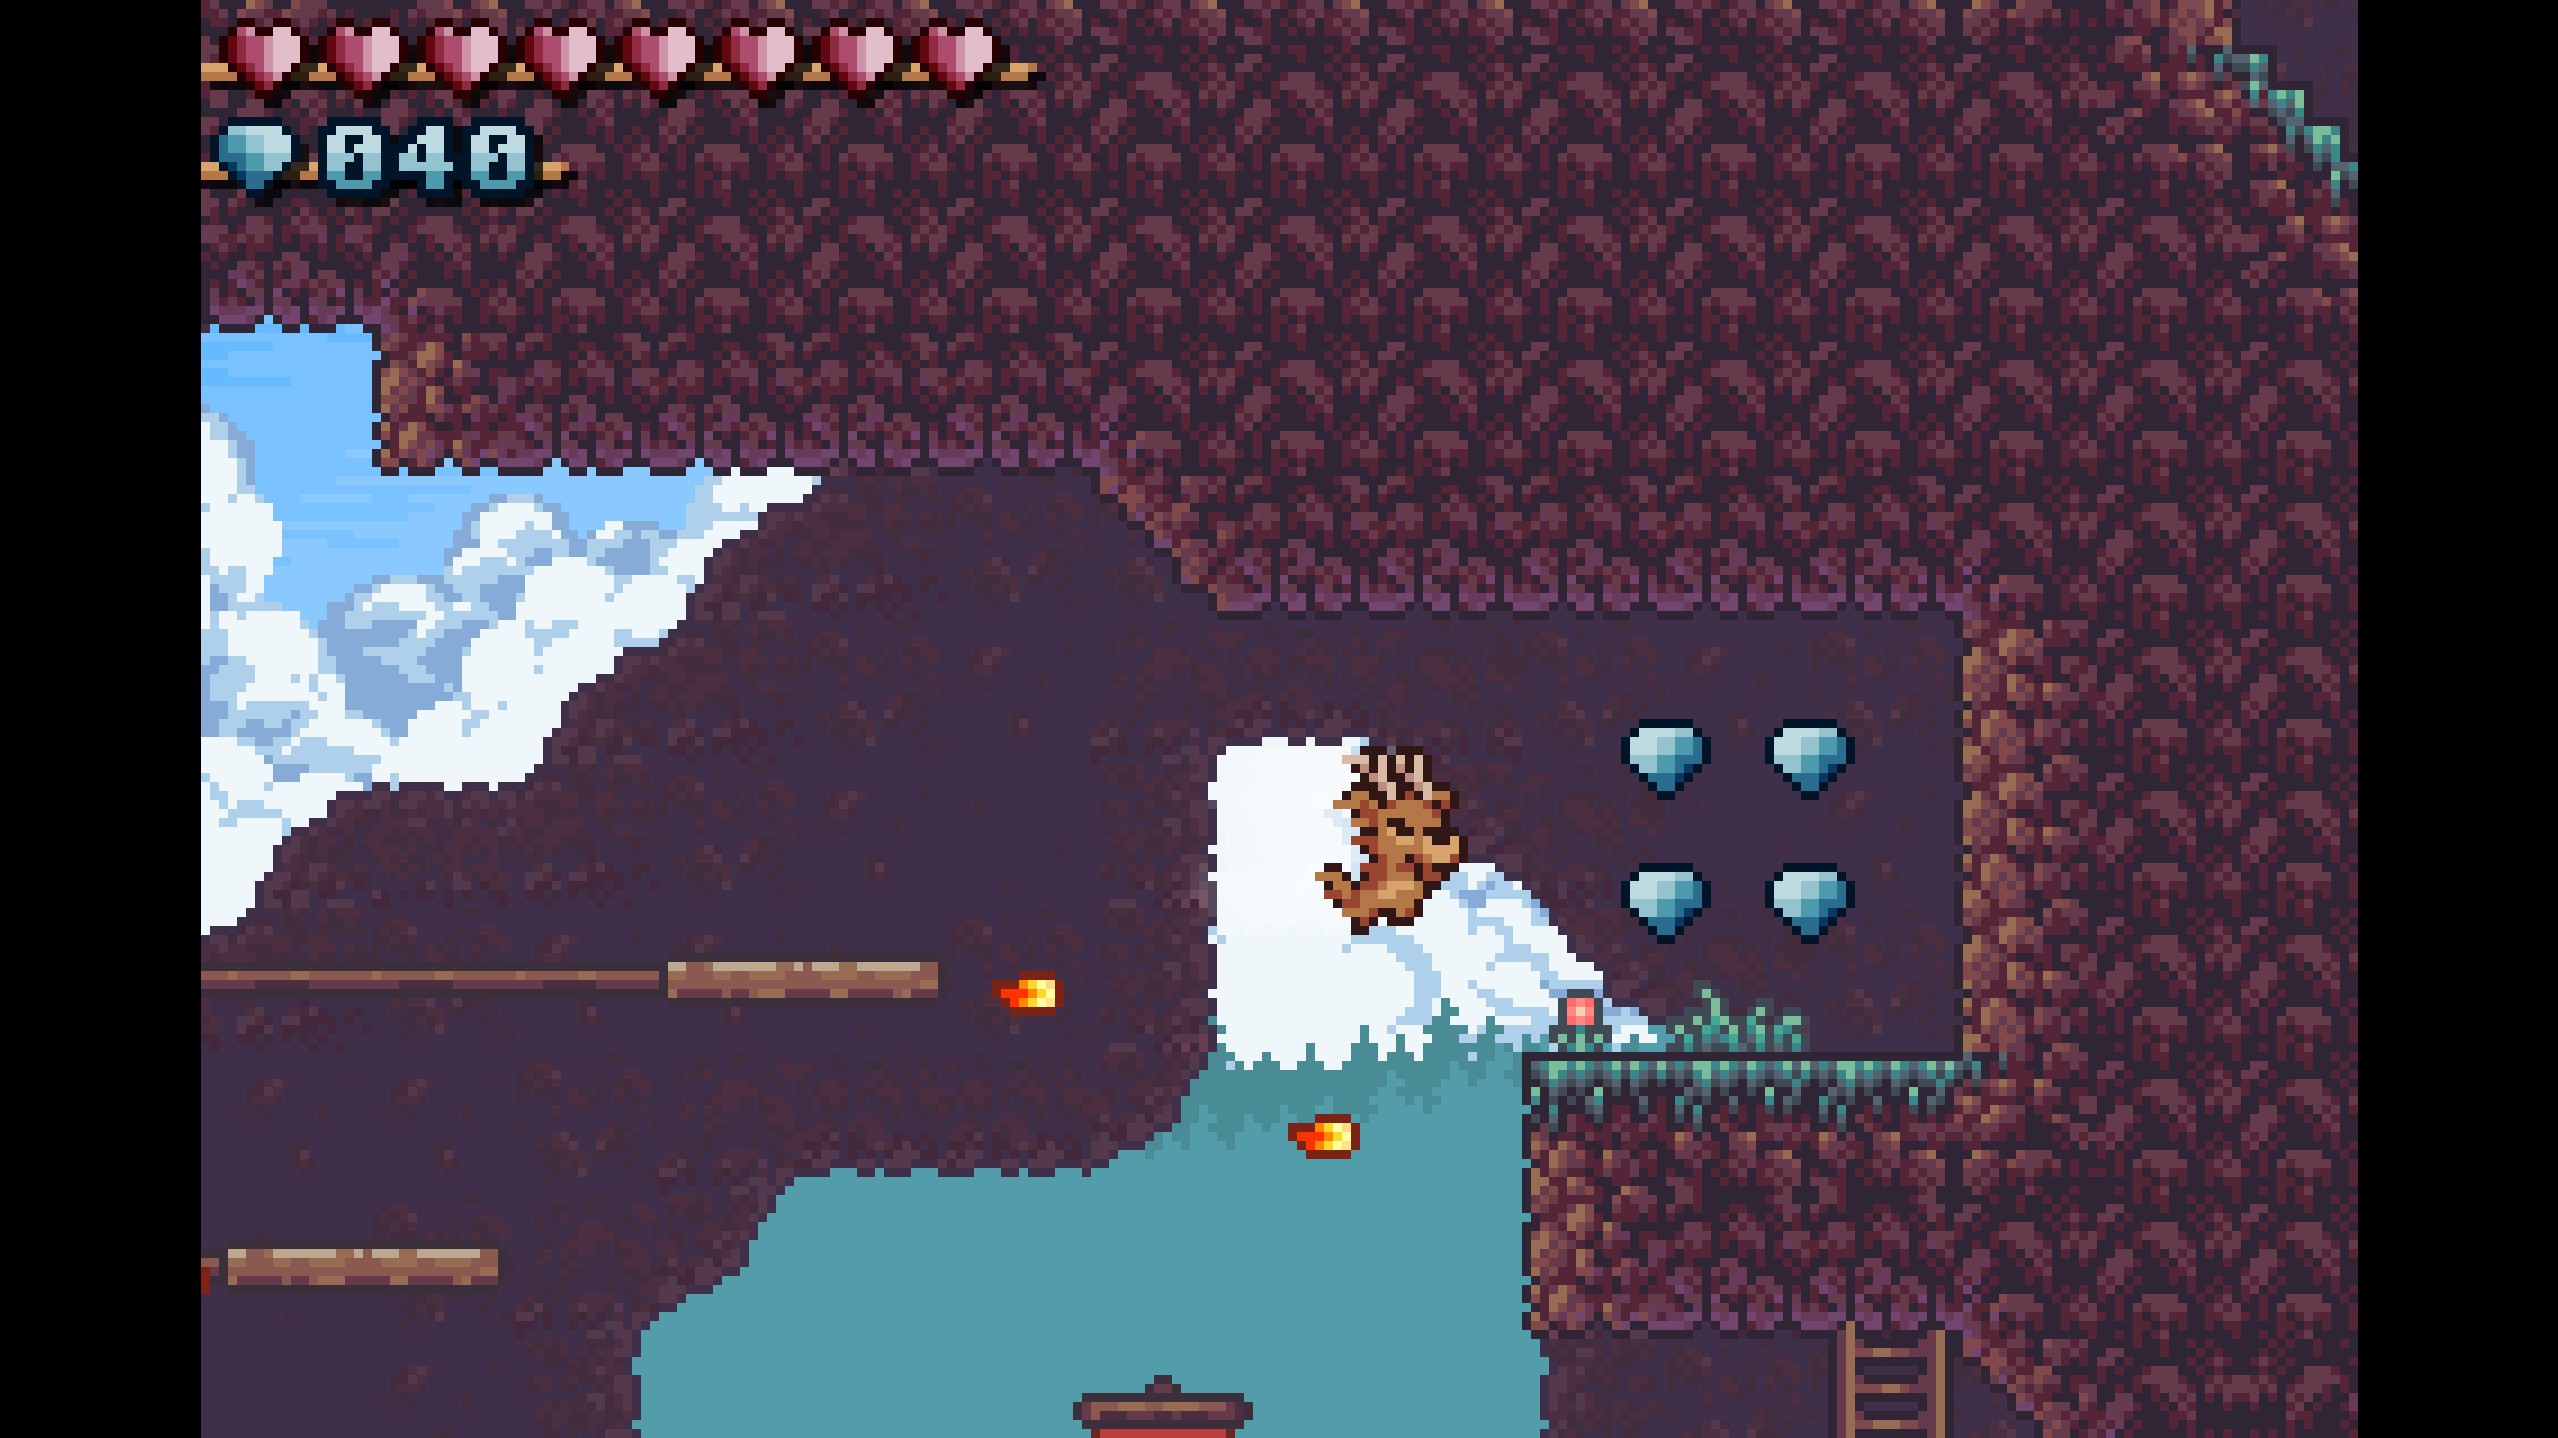
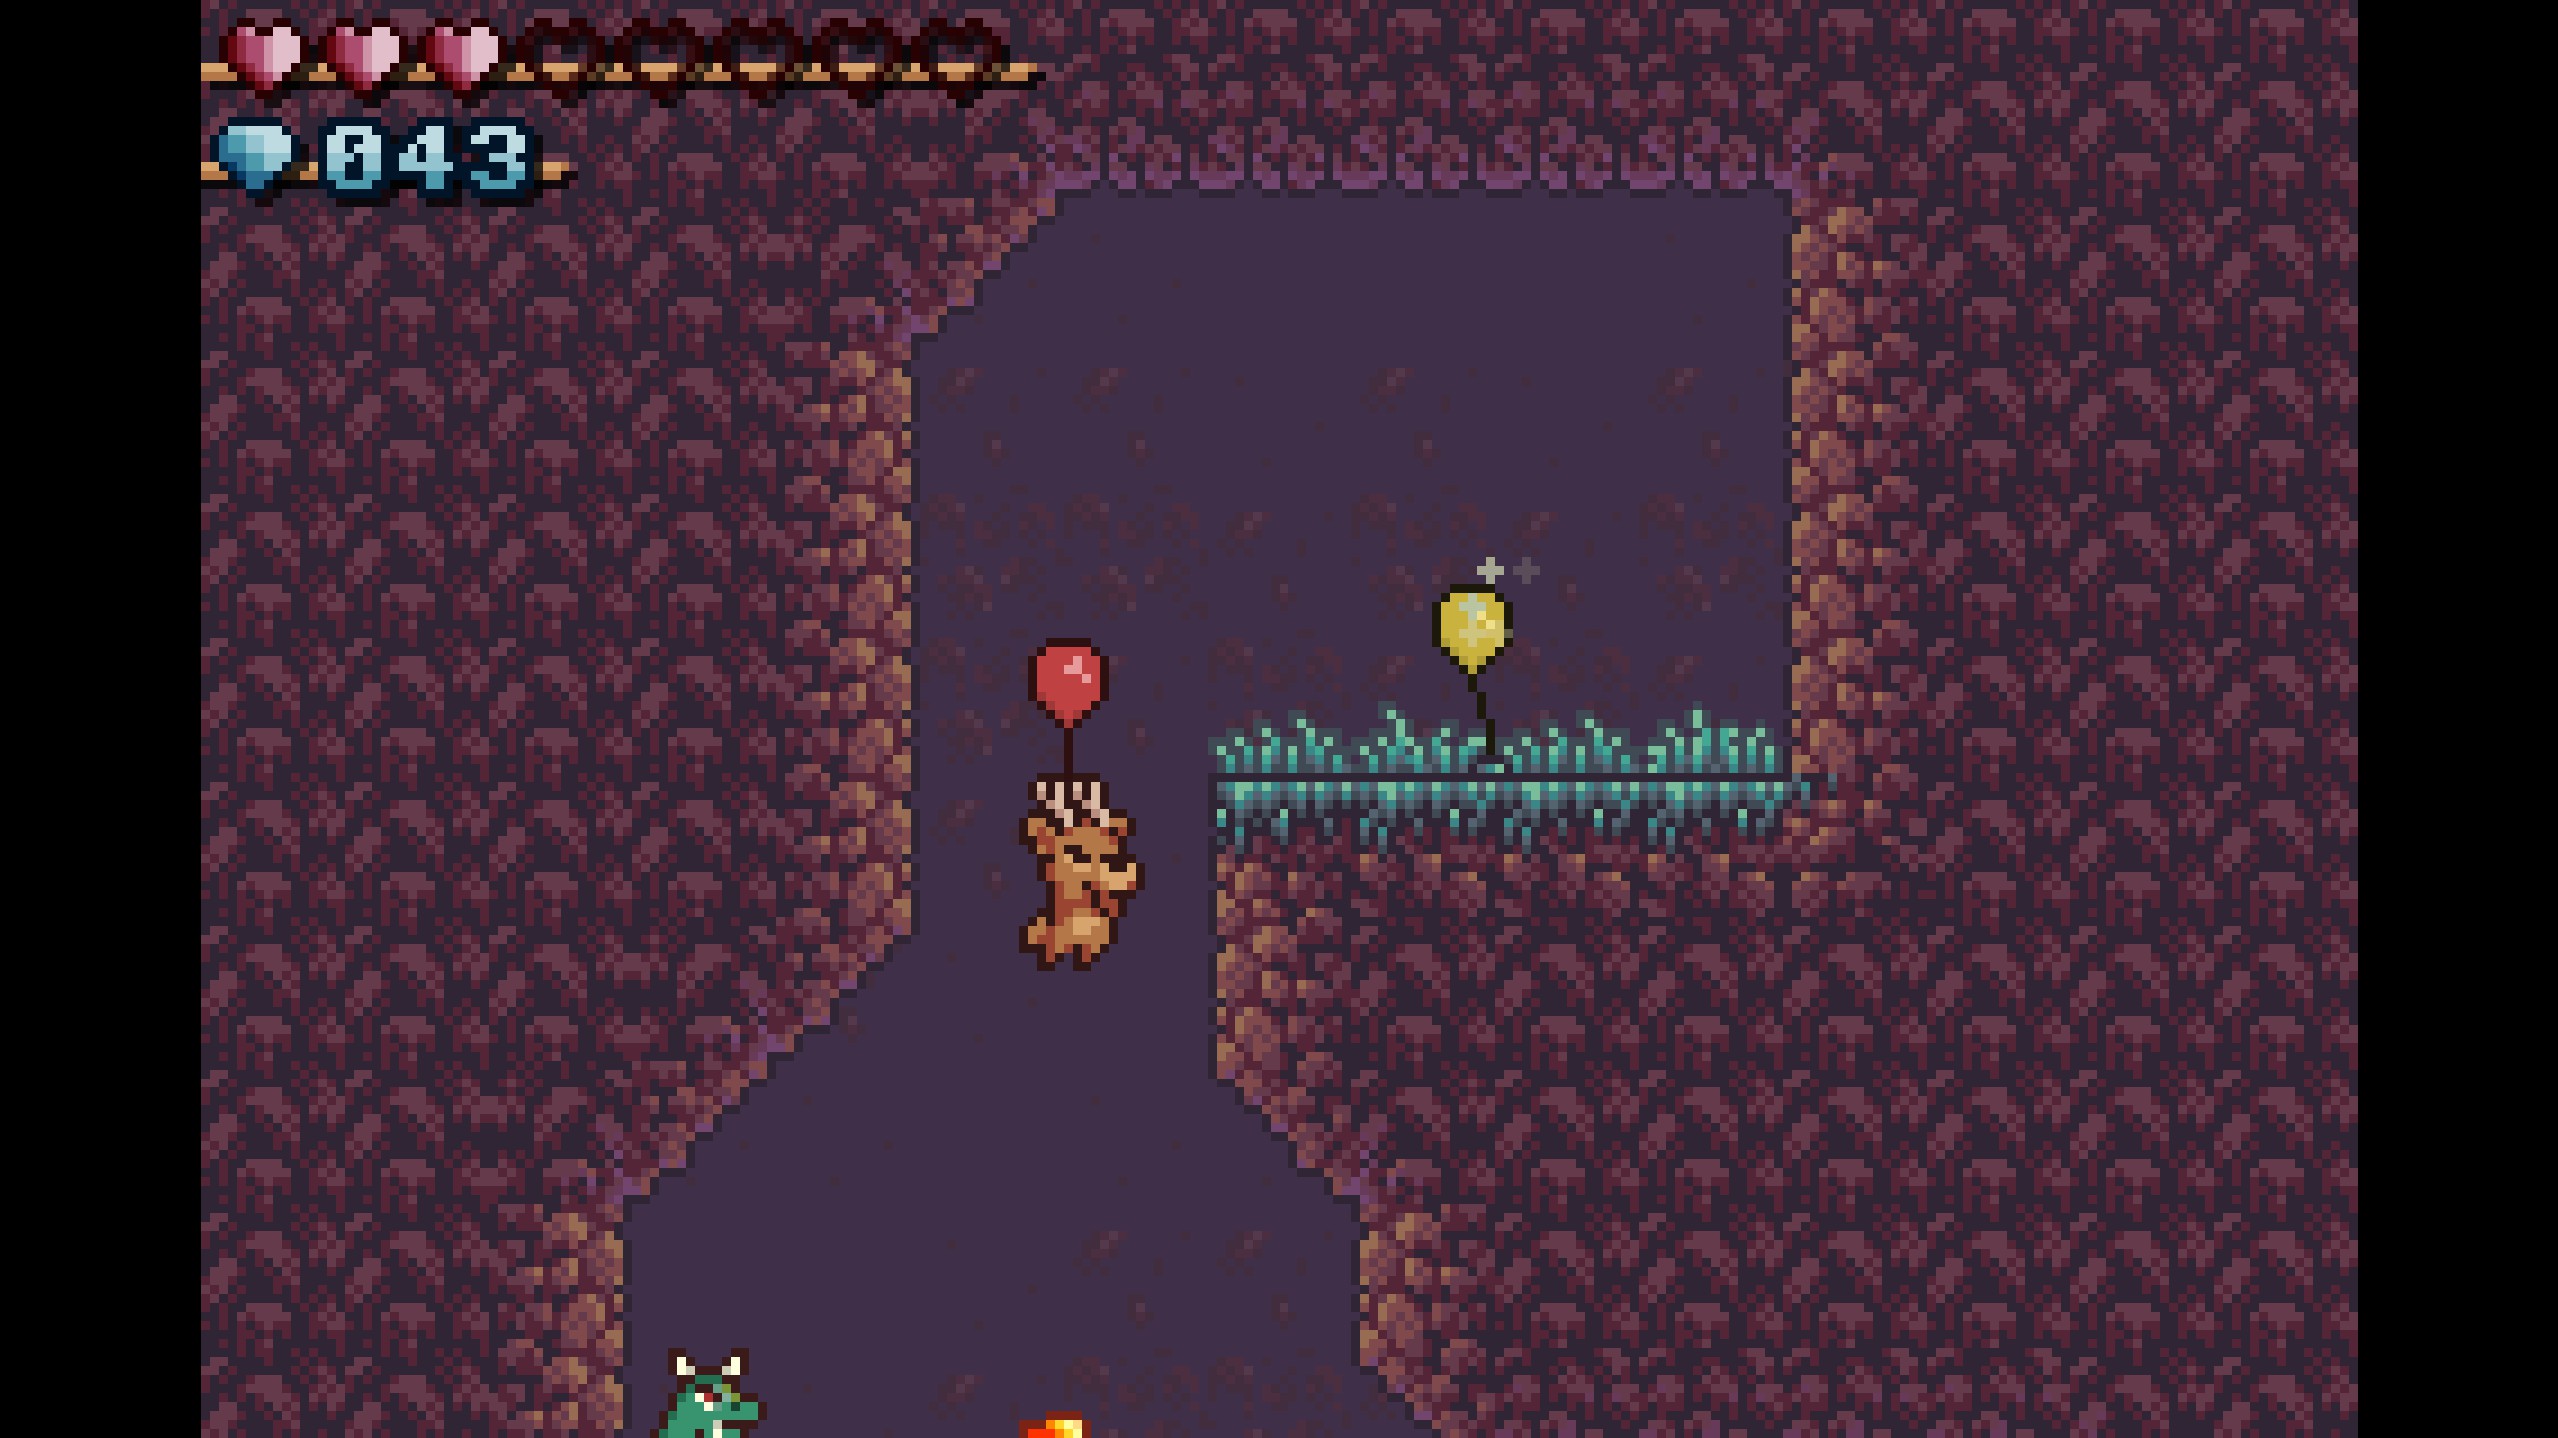
Emerald Vale
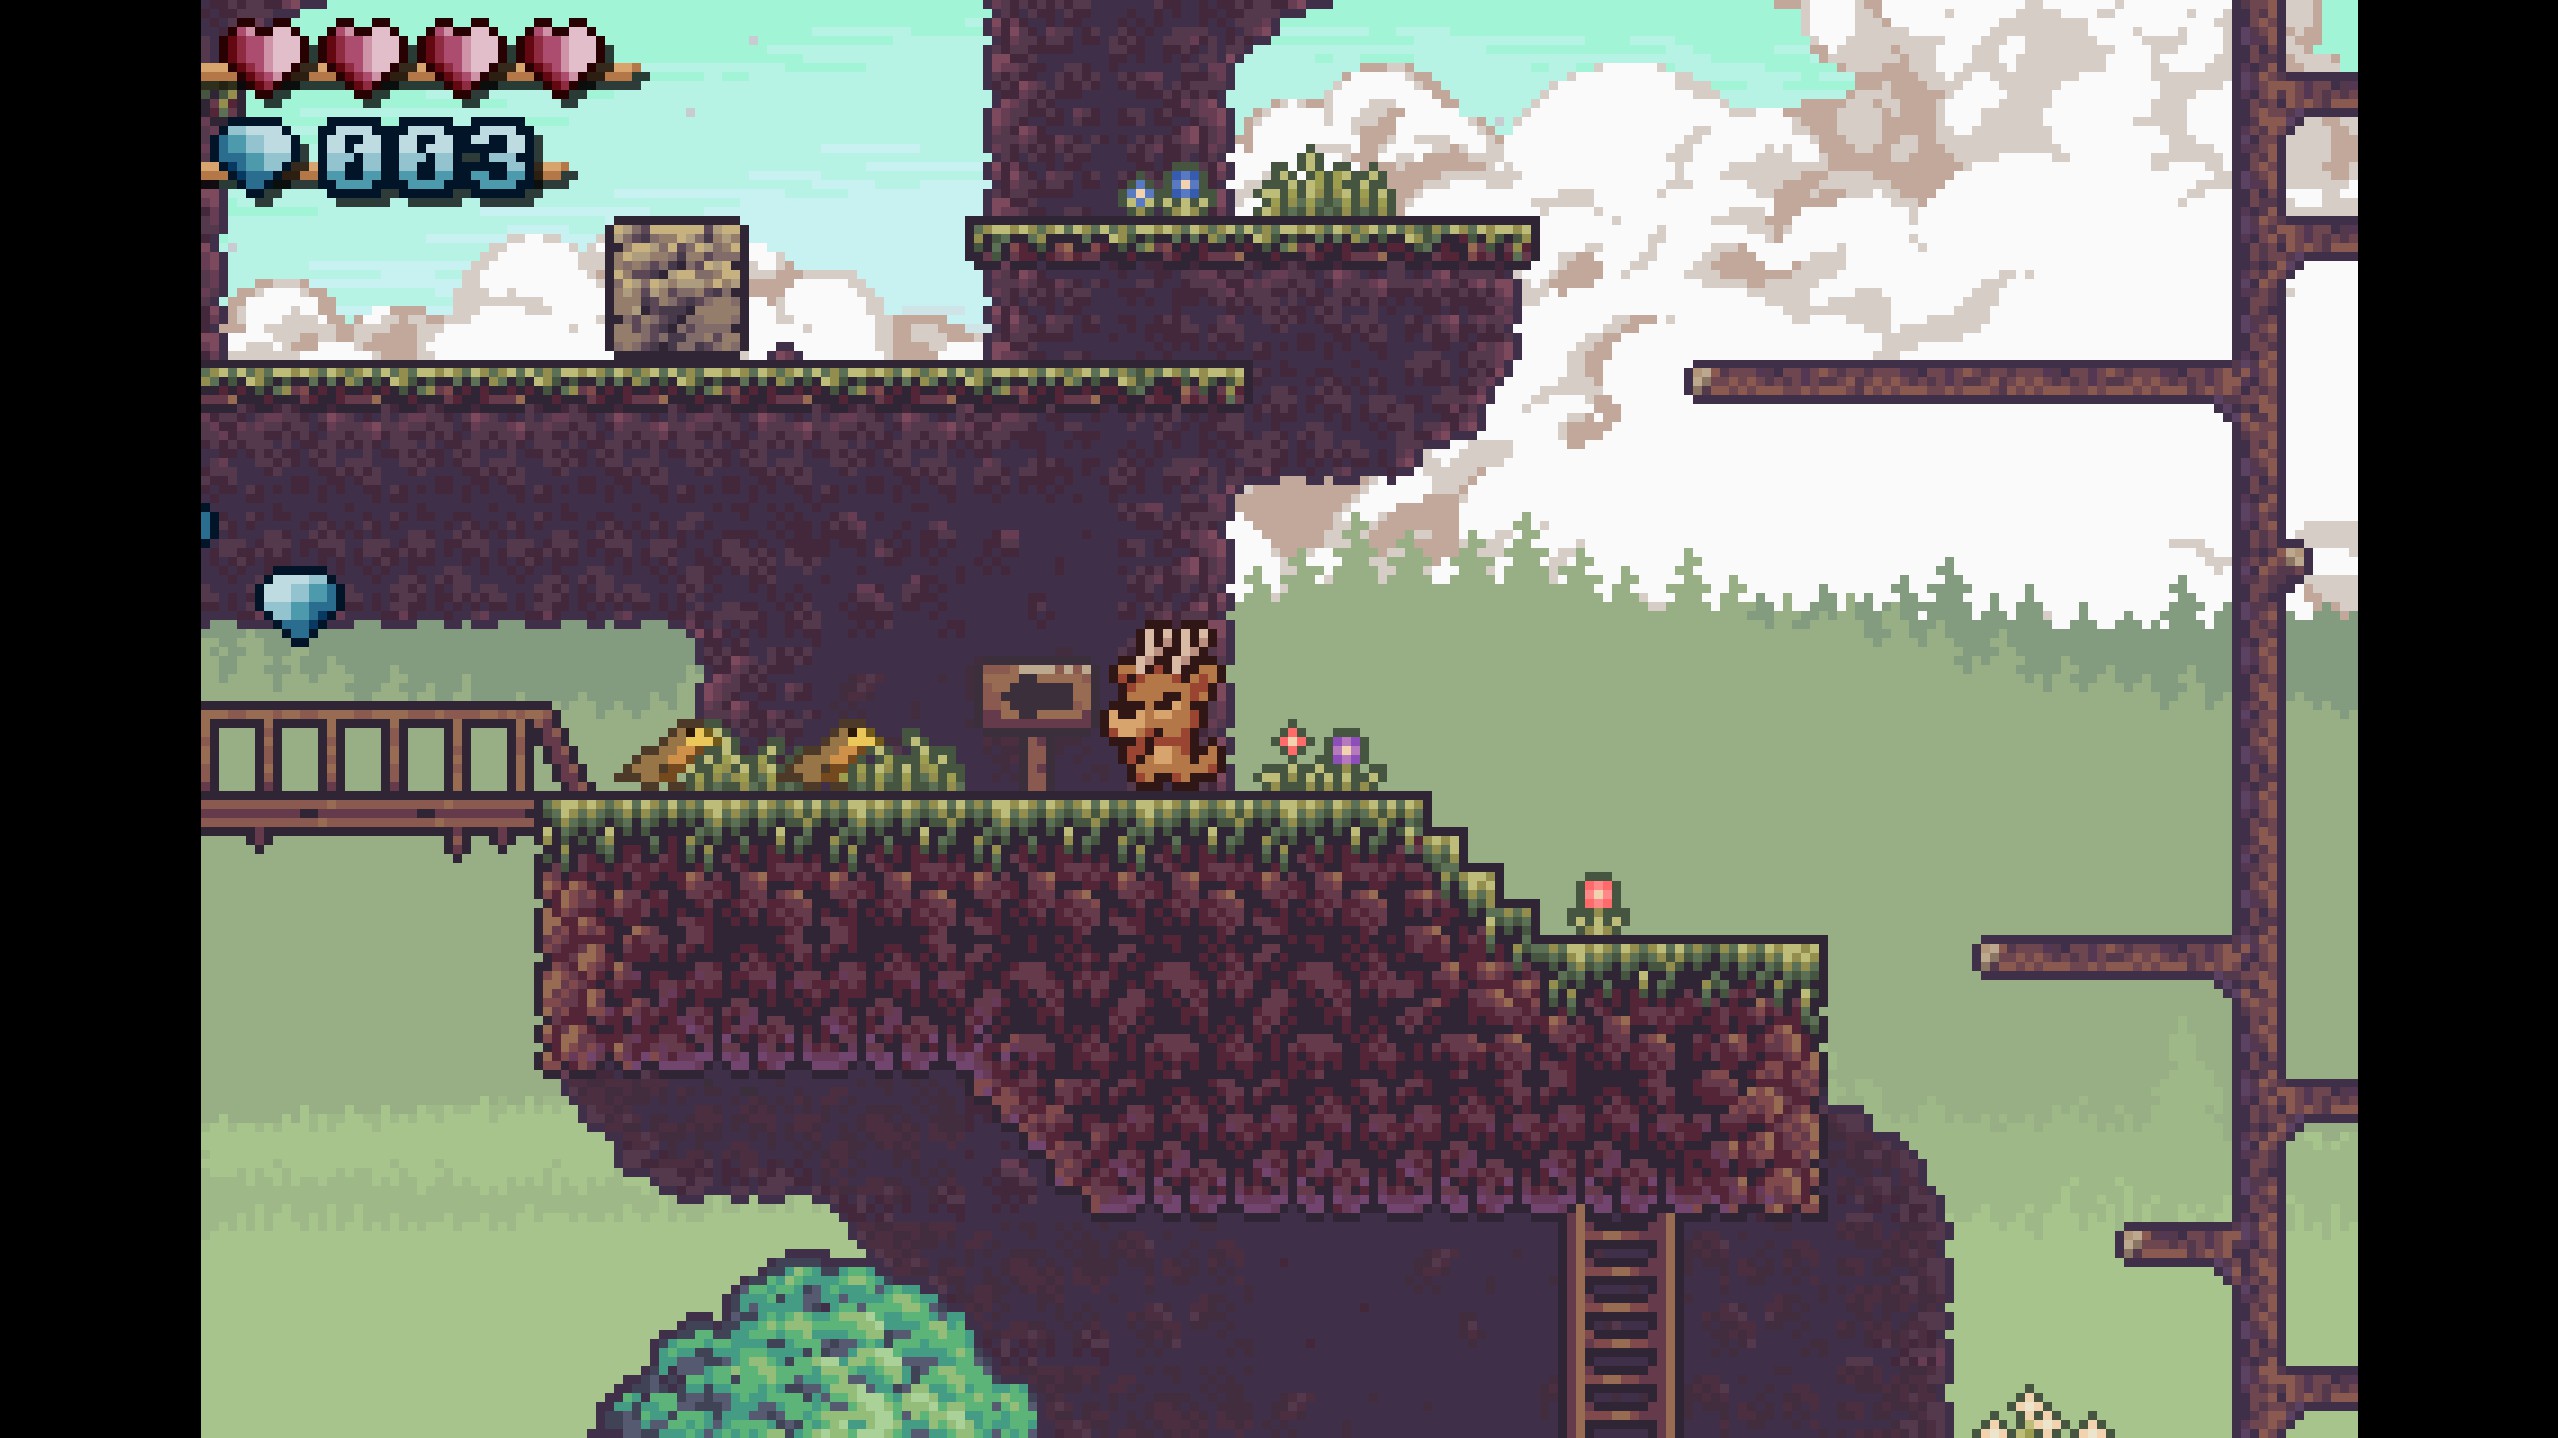
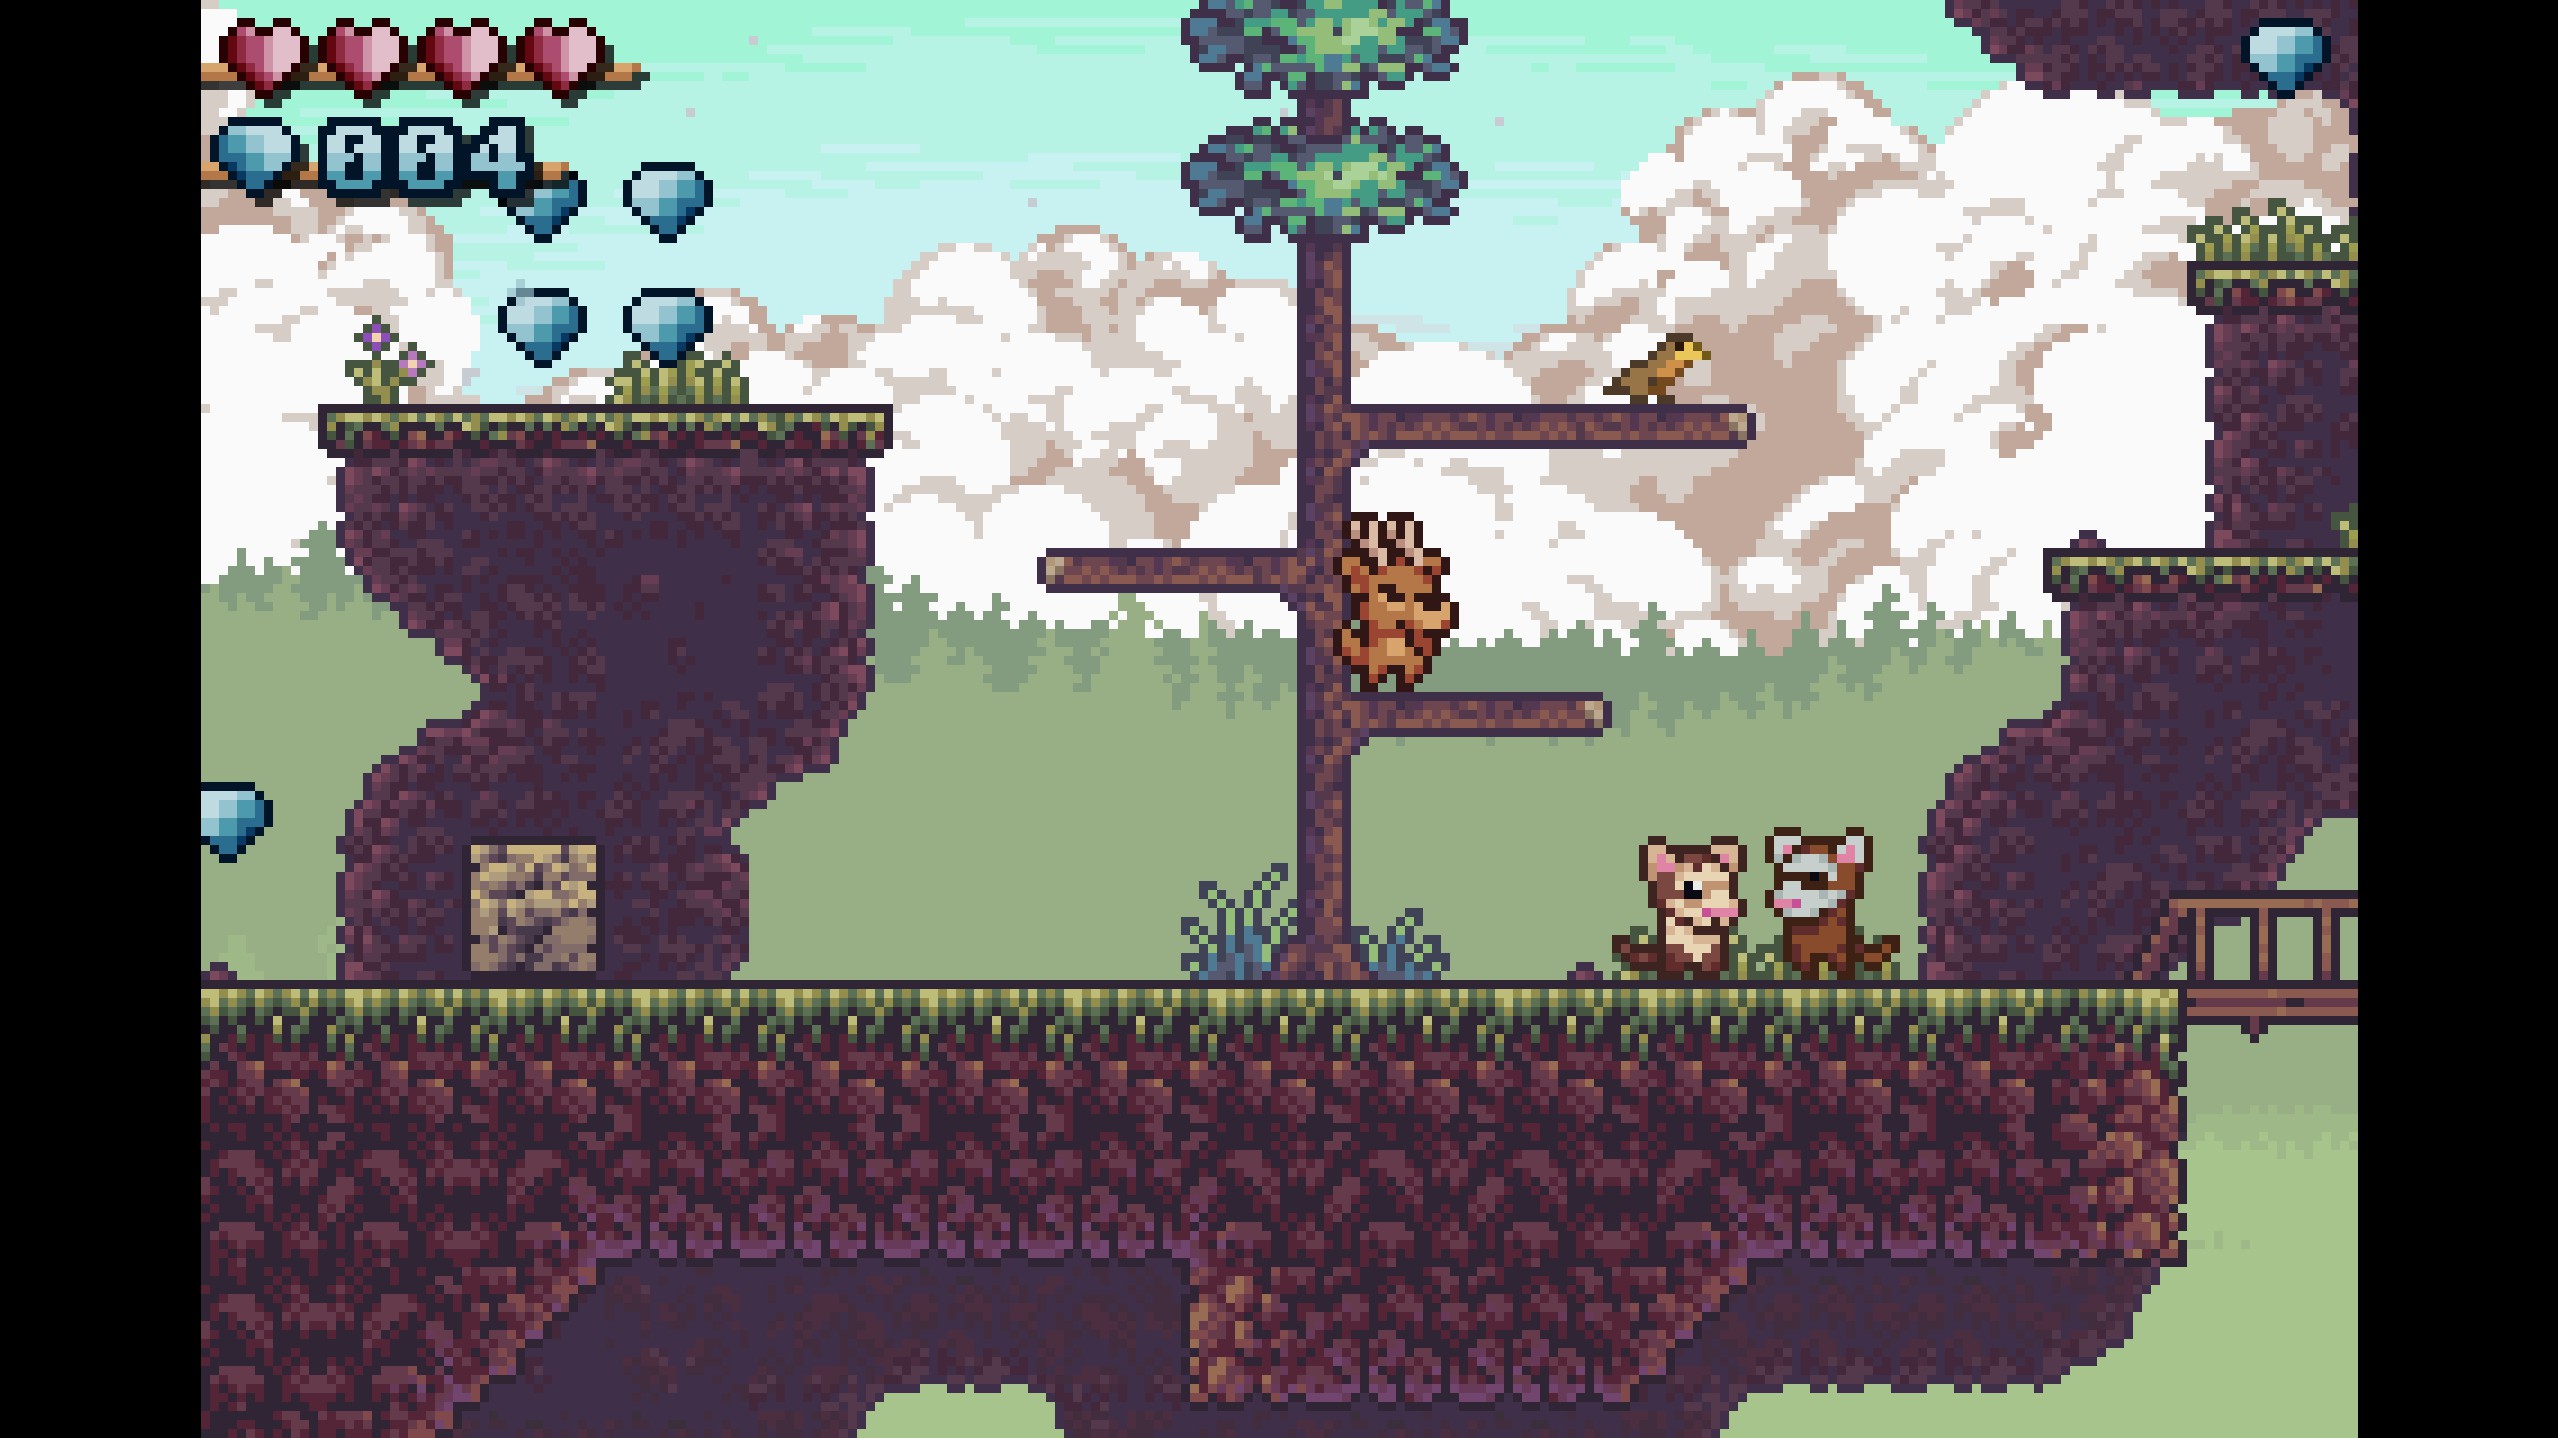
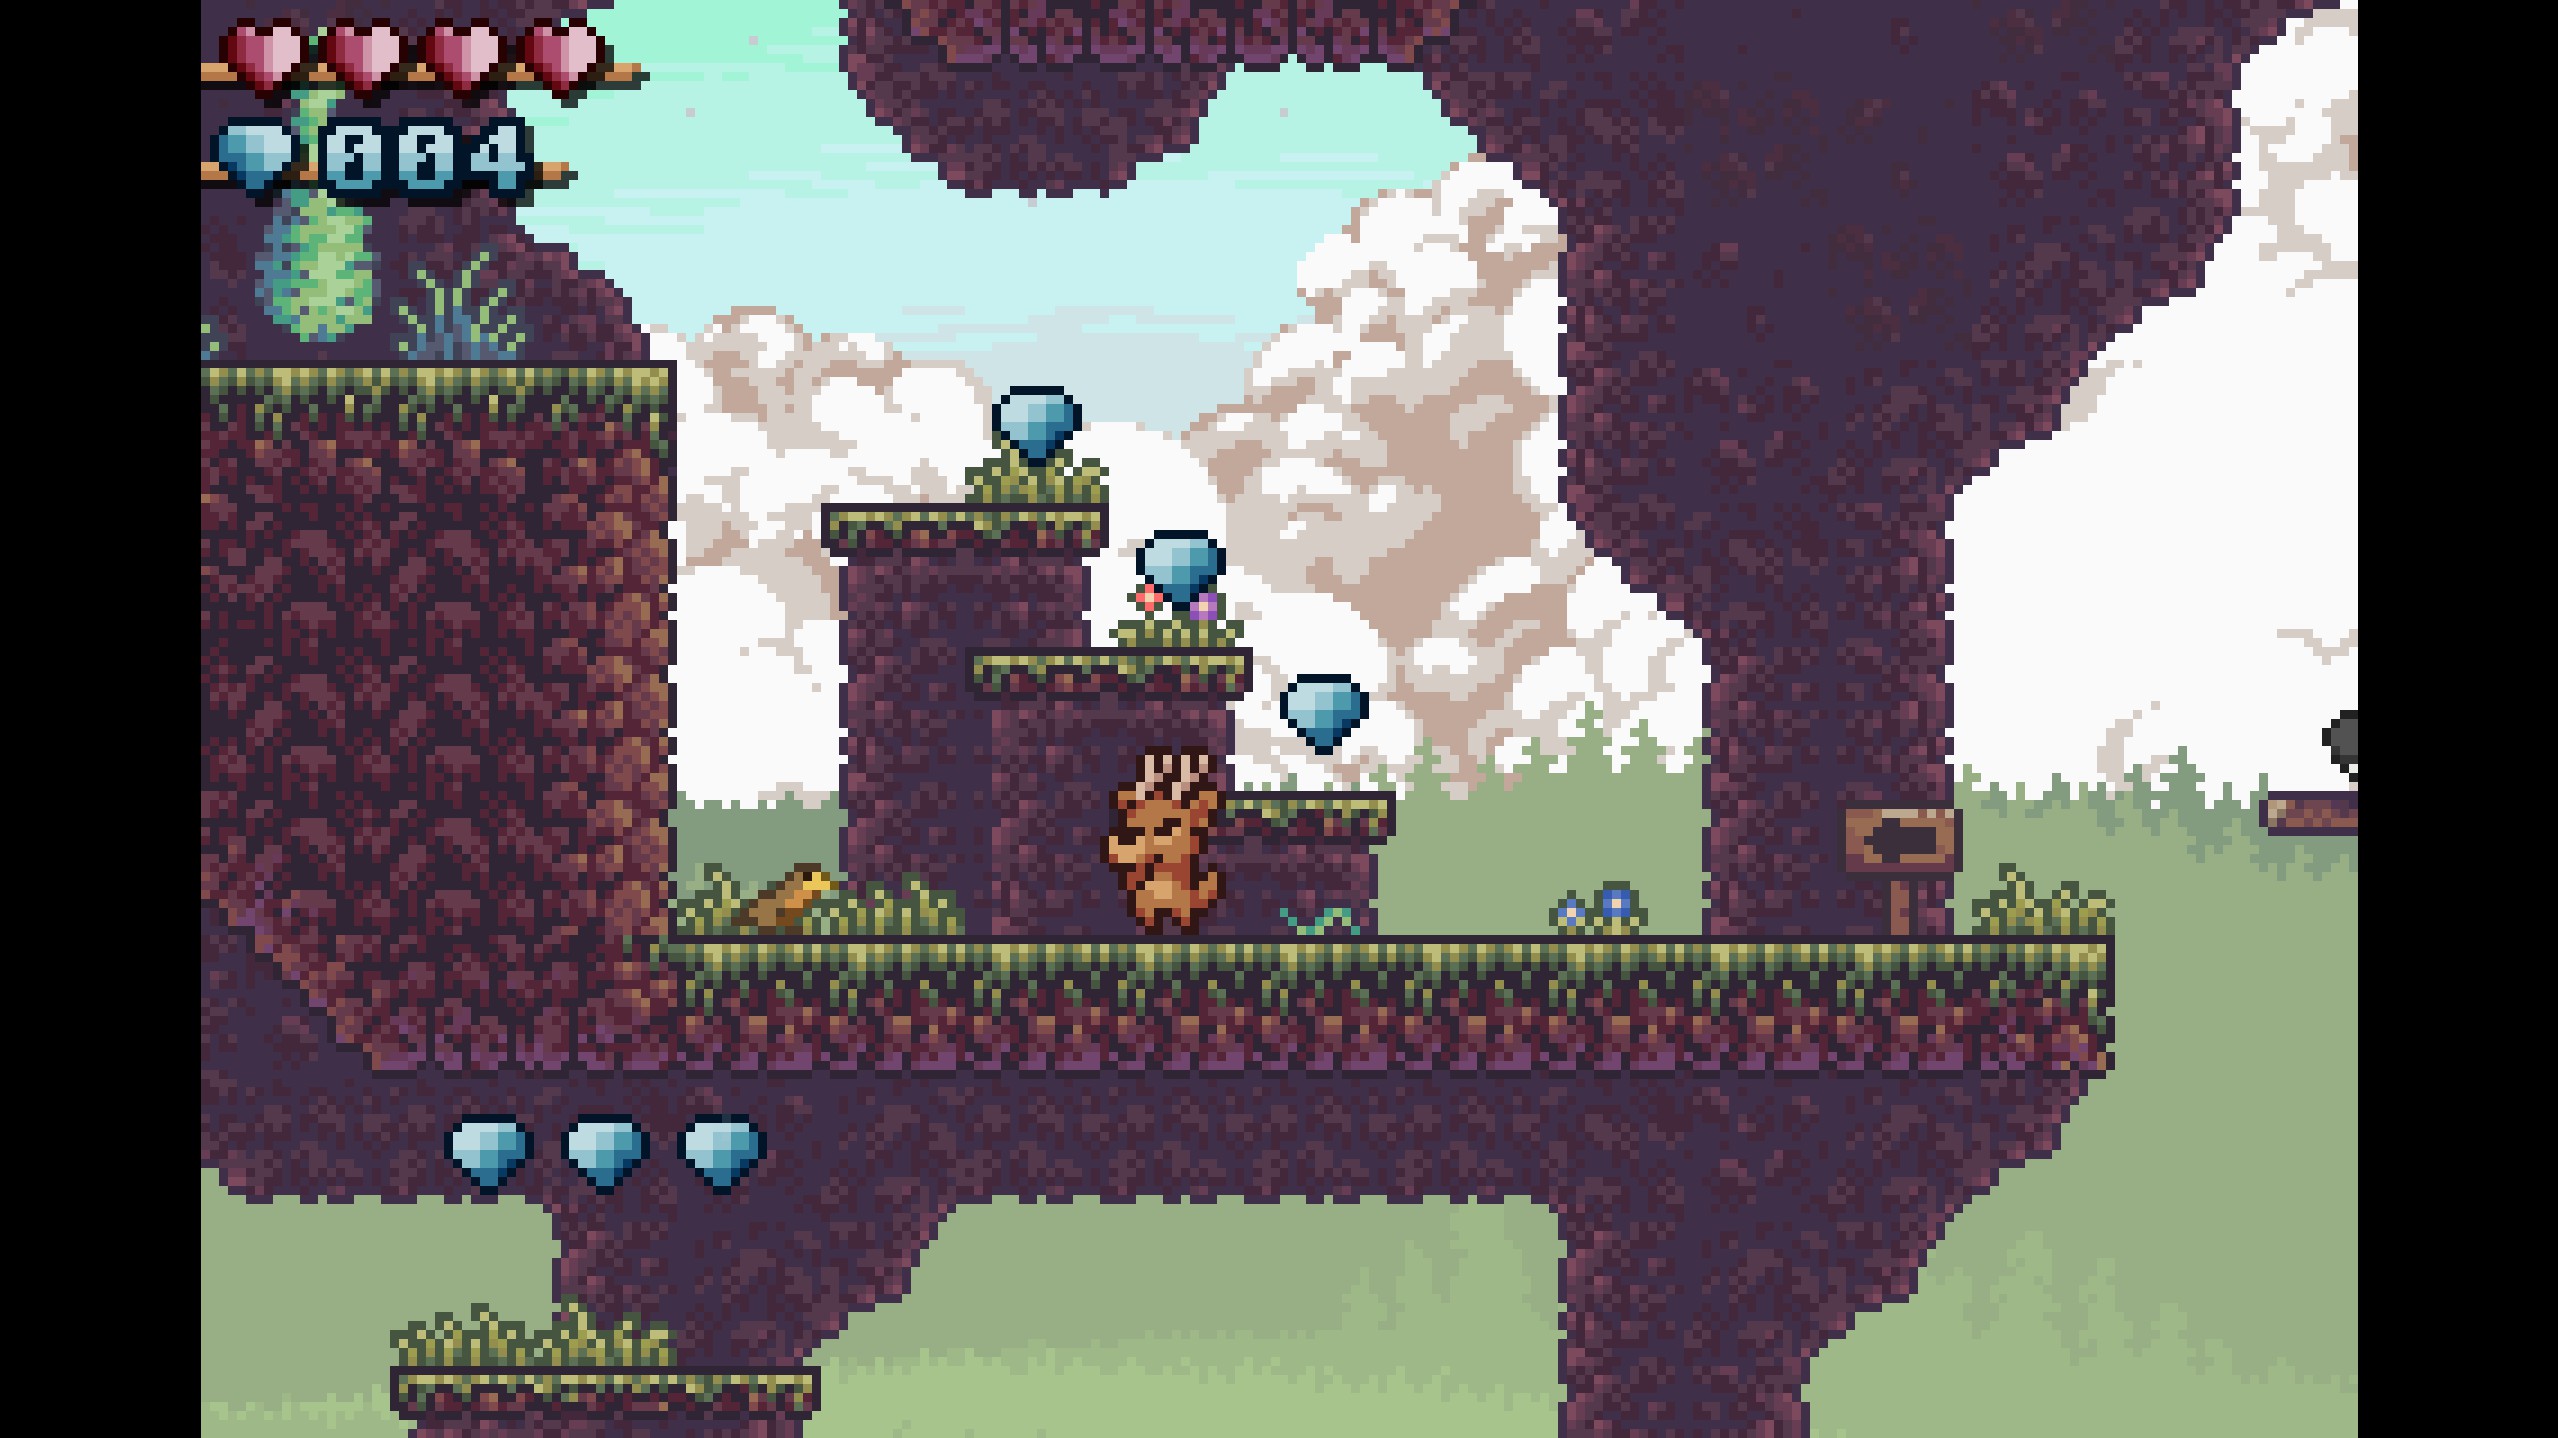
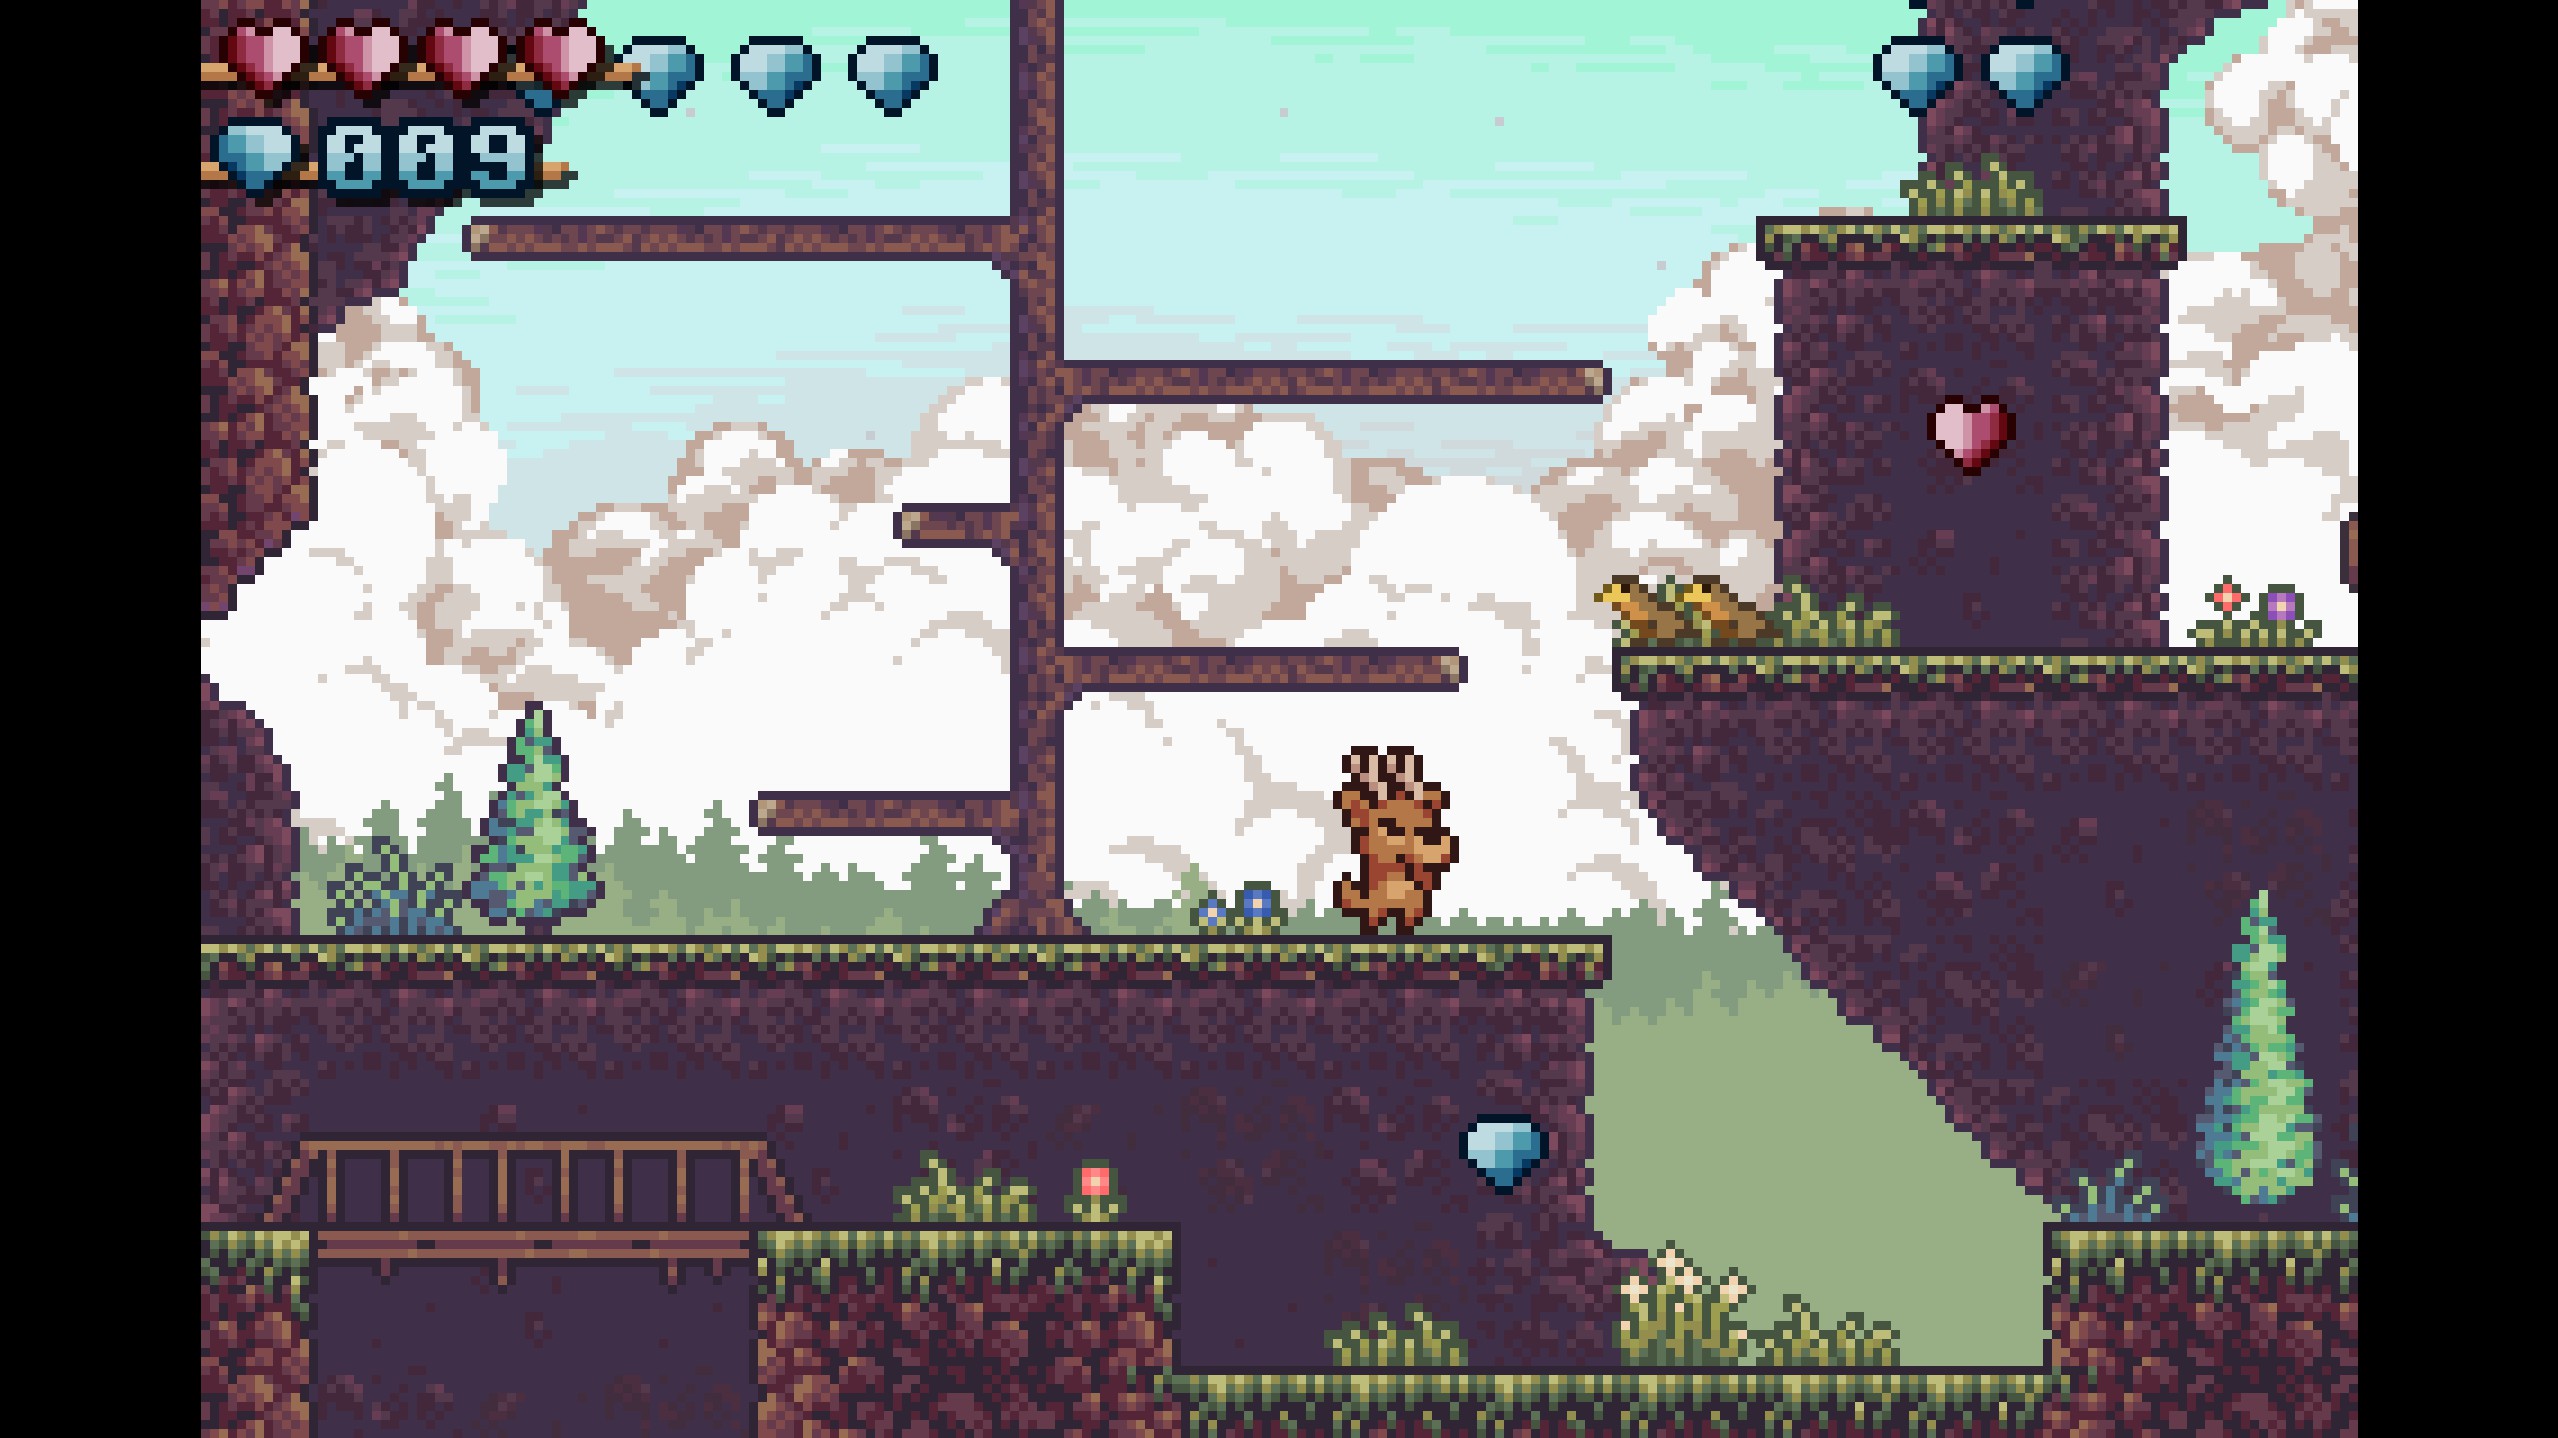
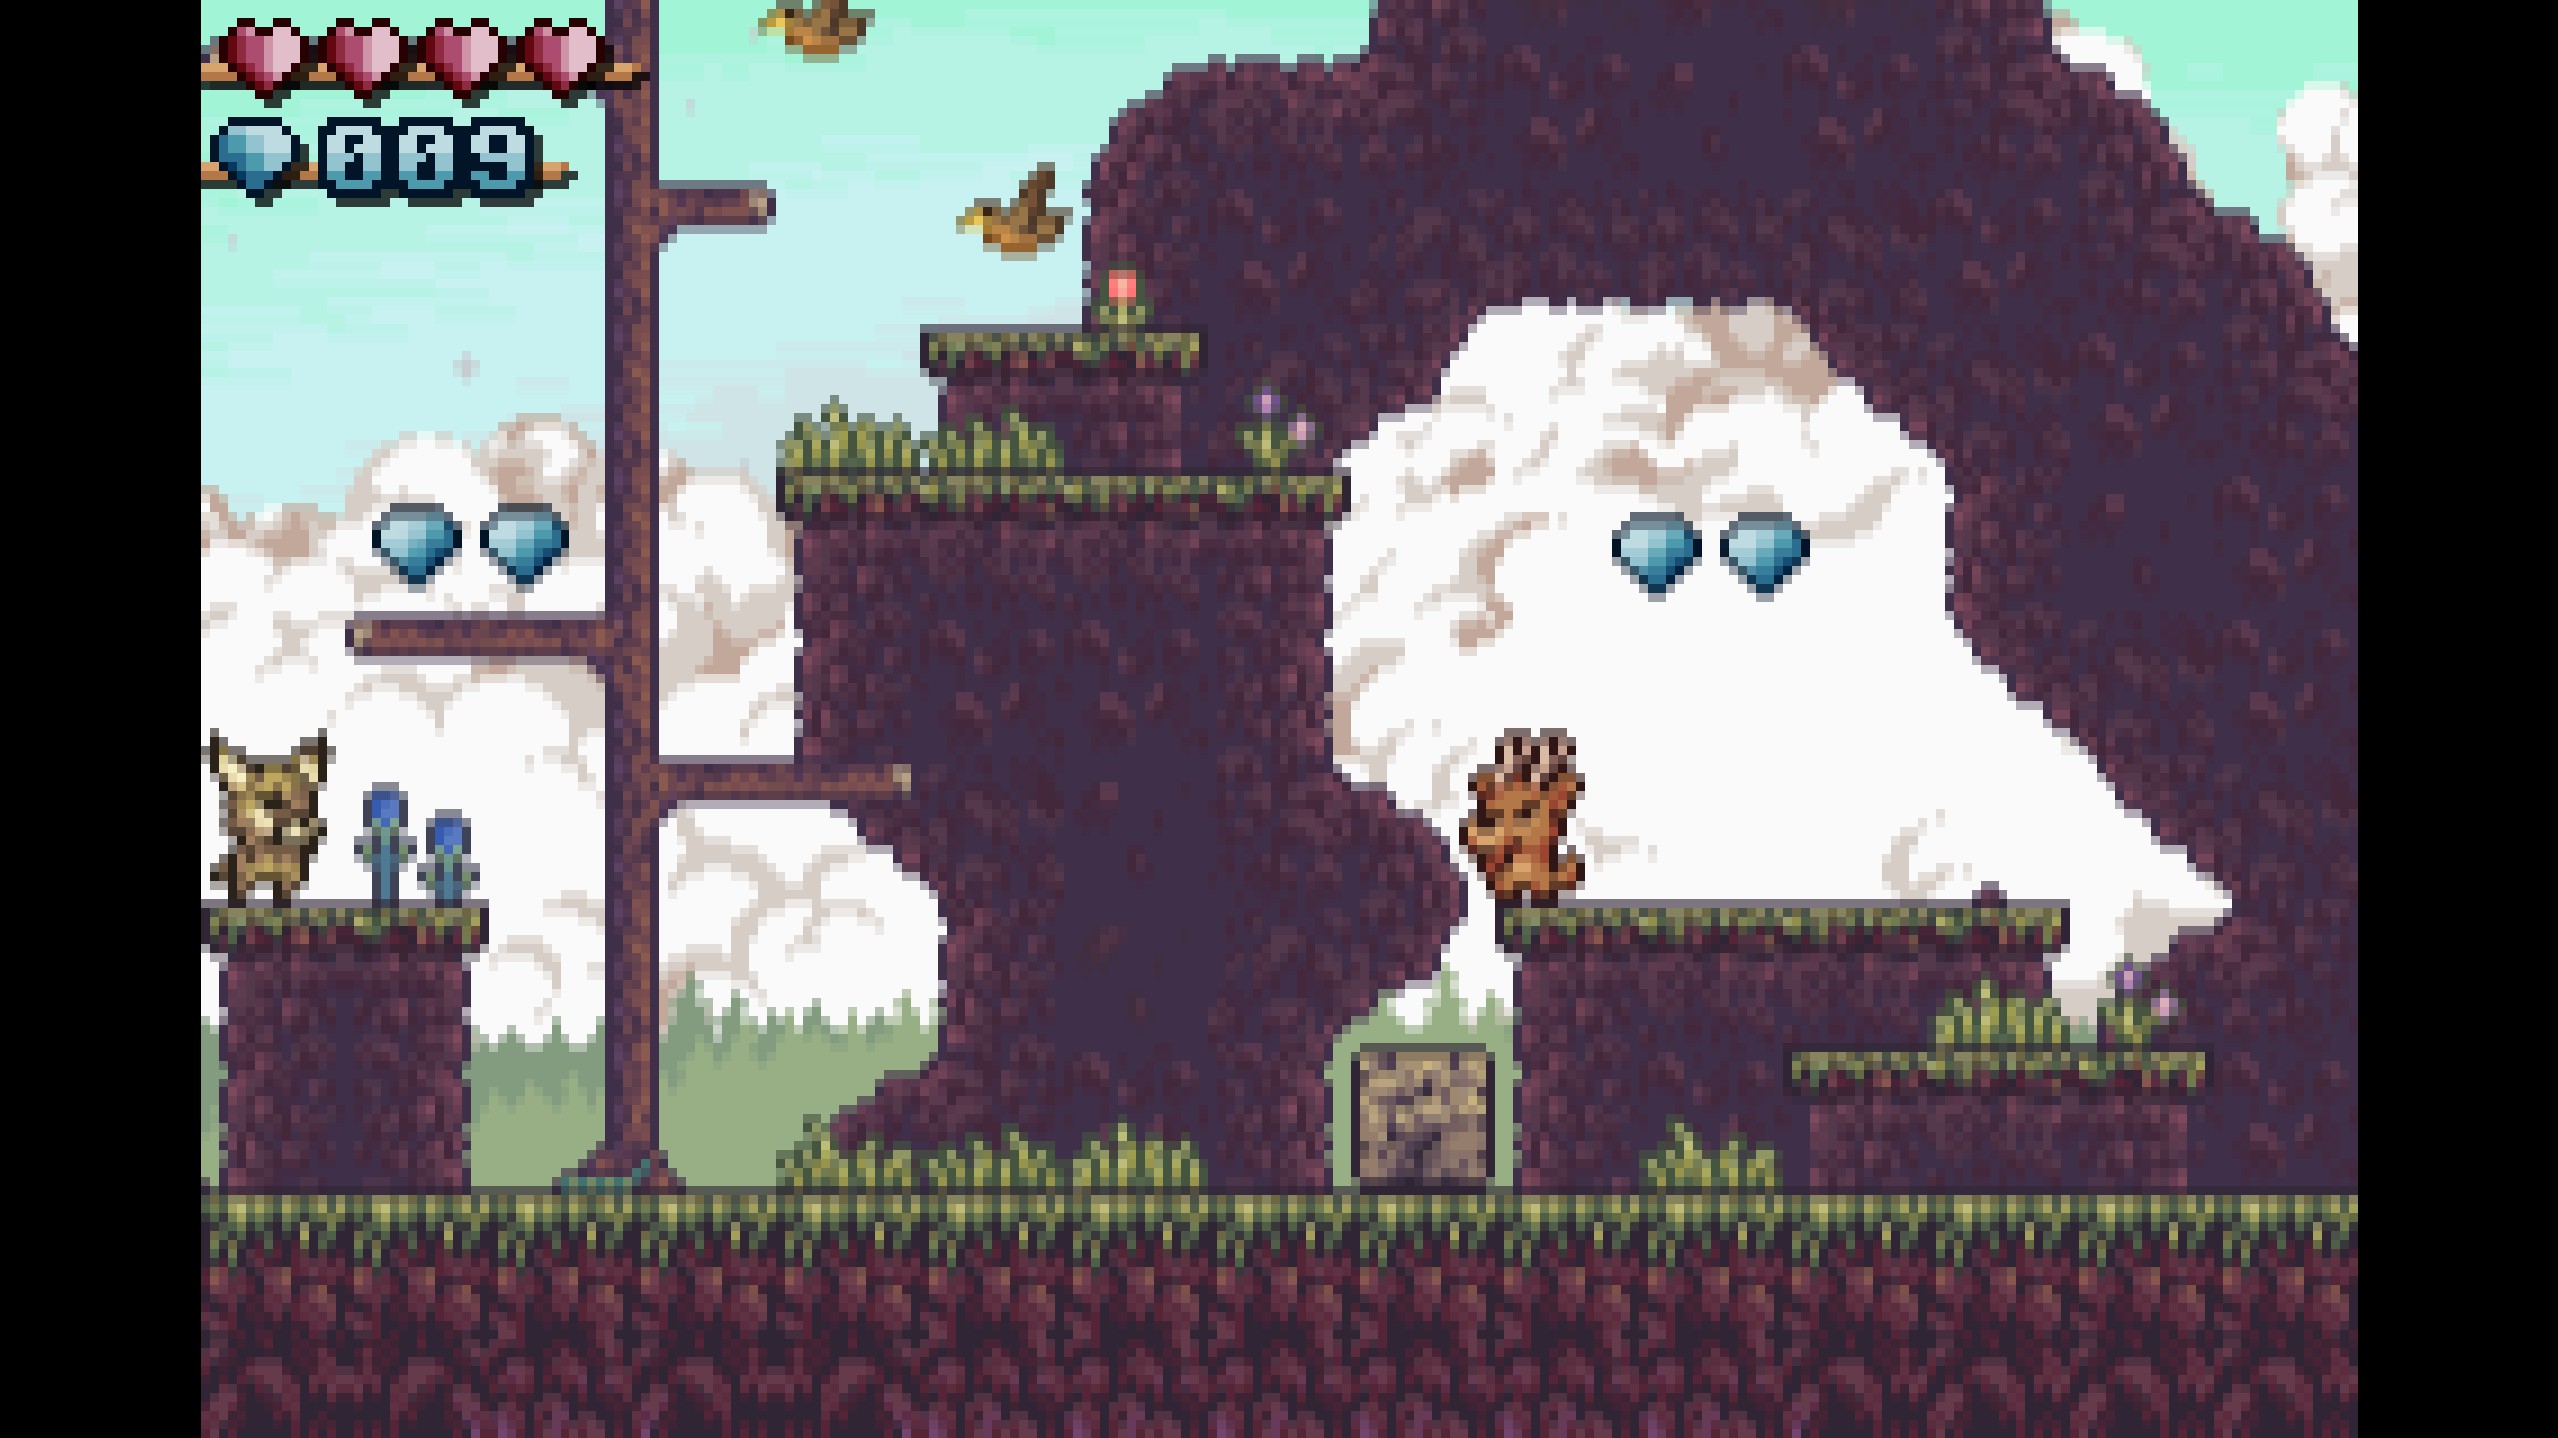
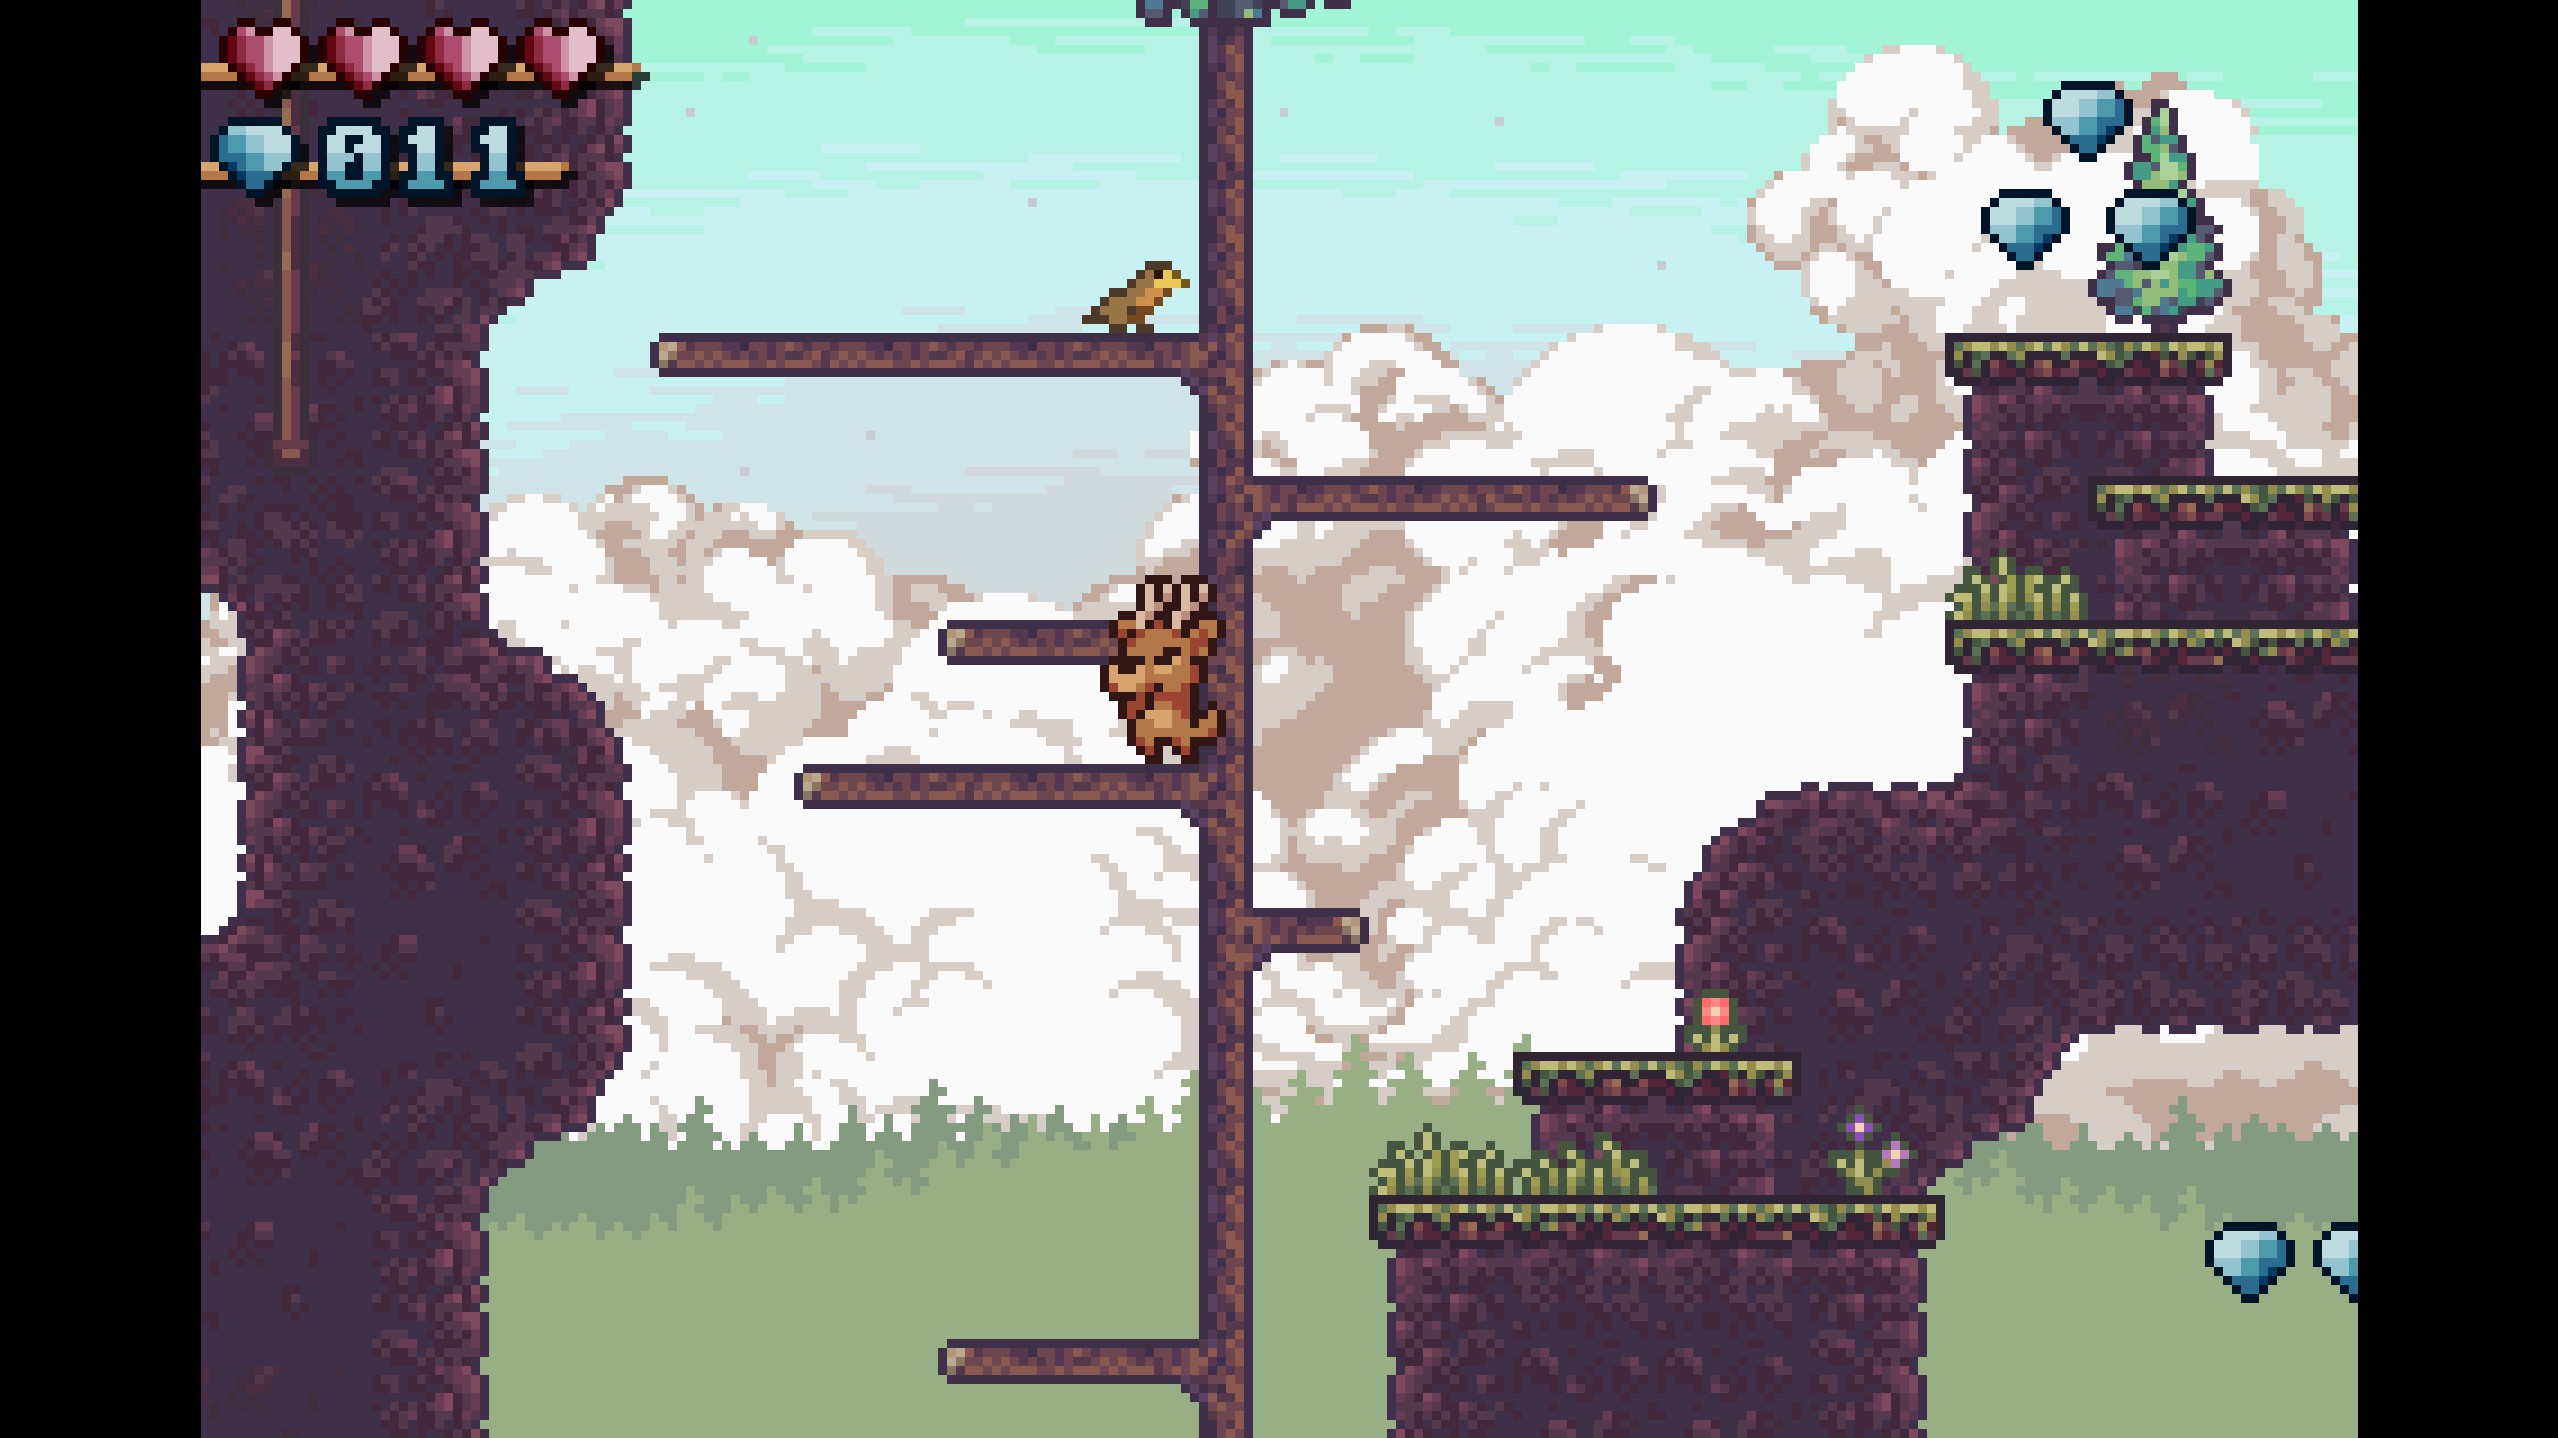
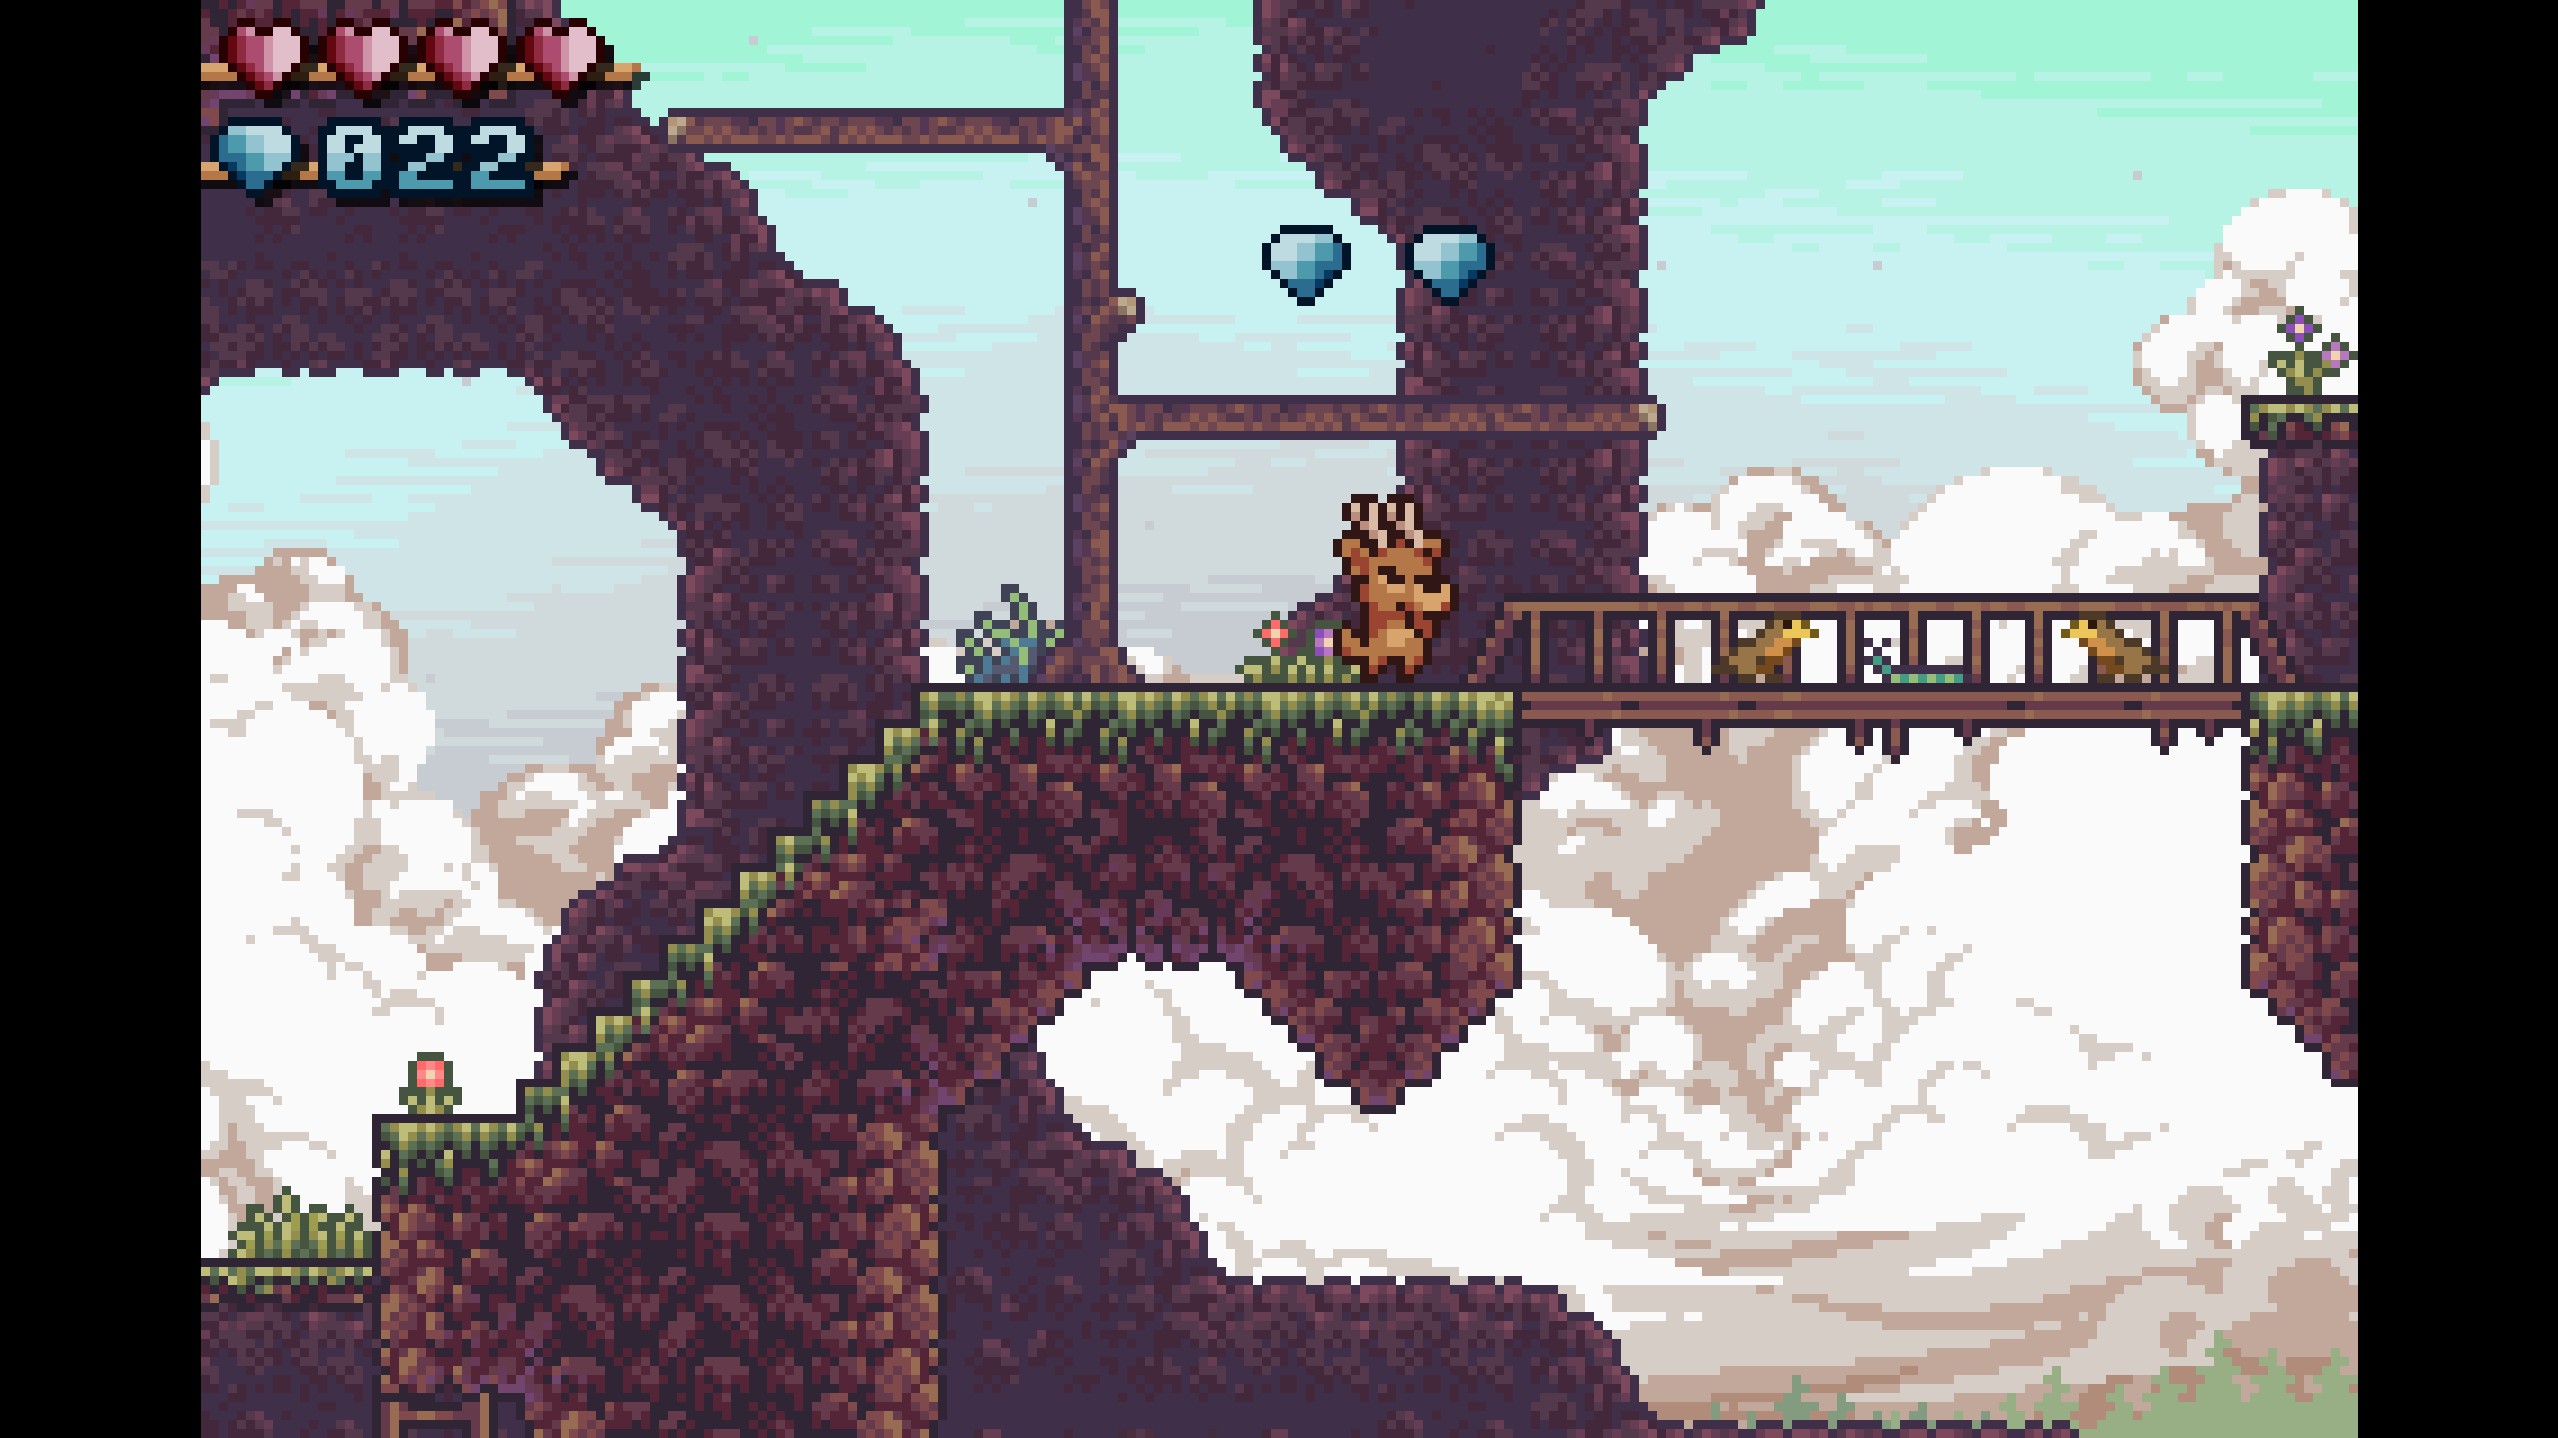
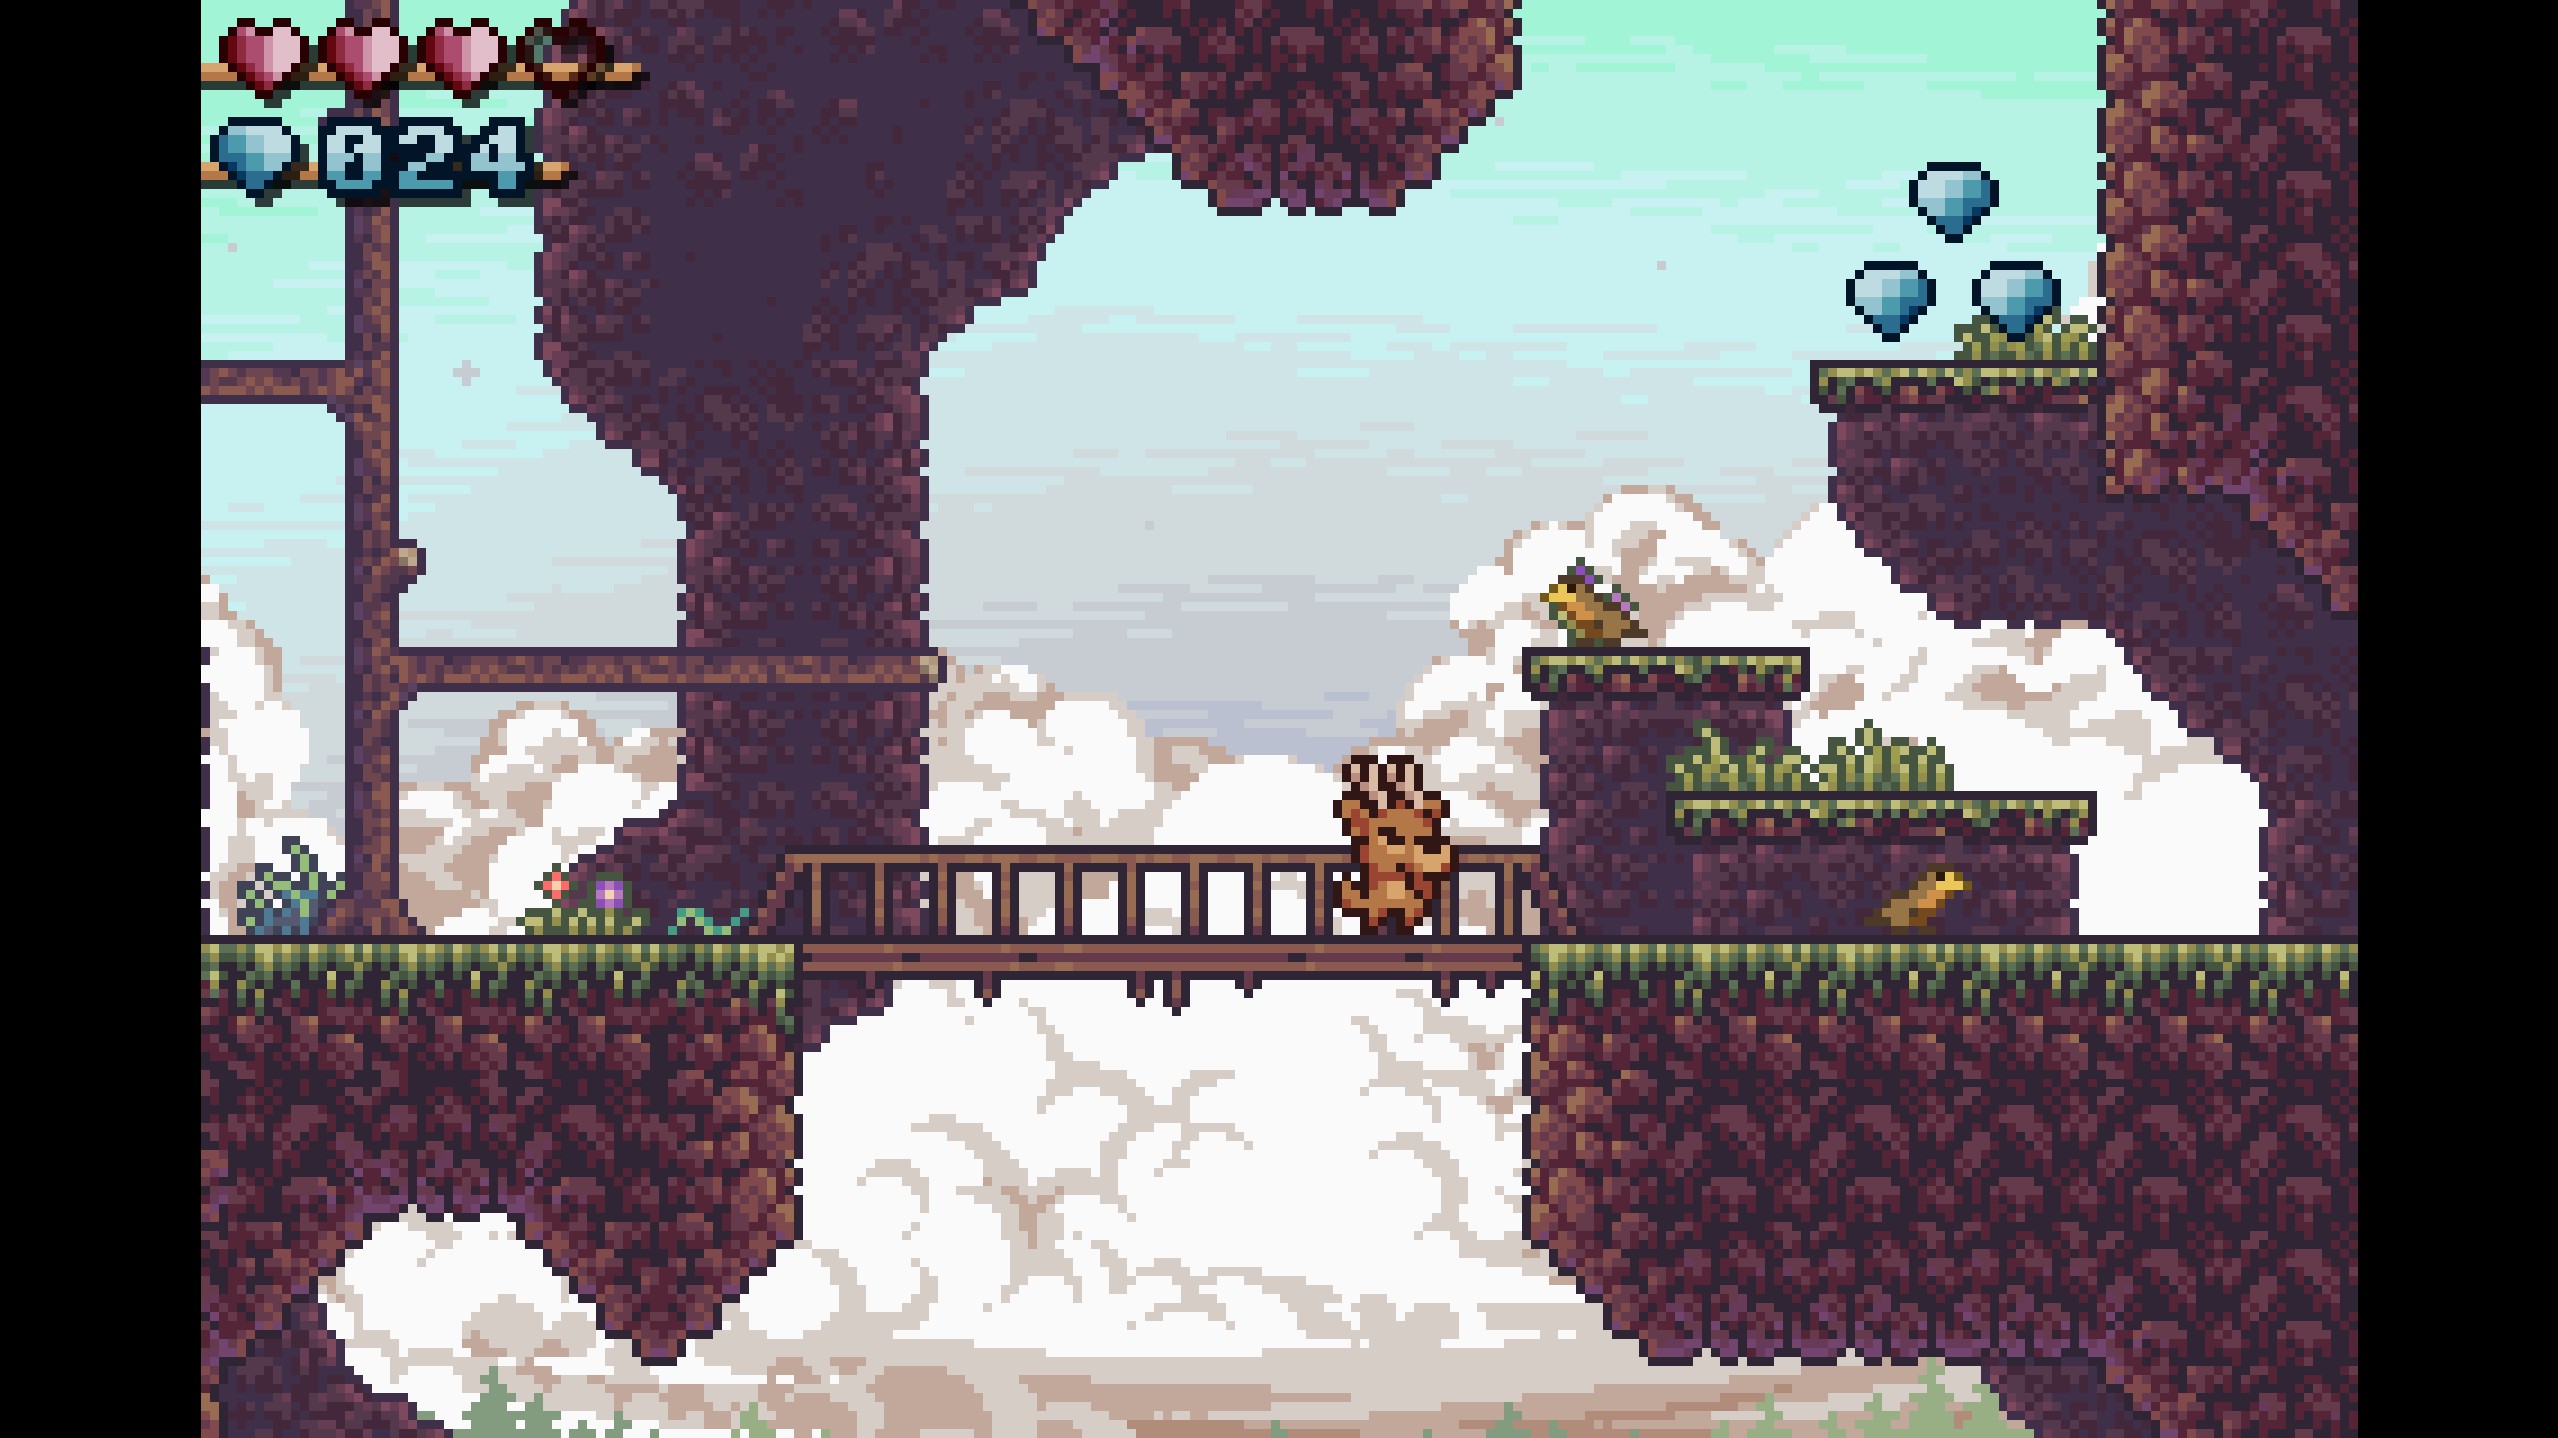
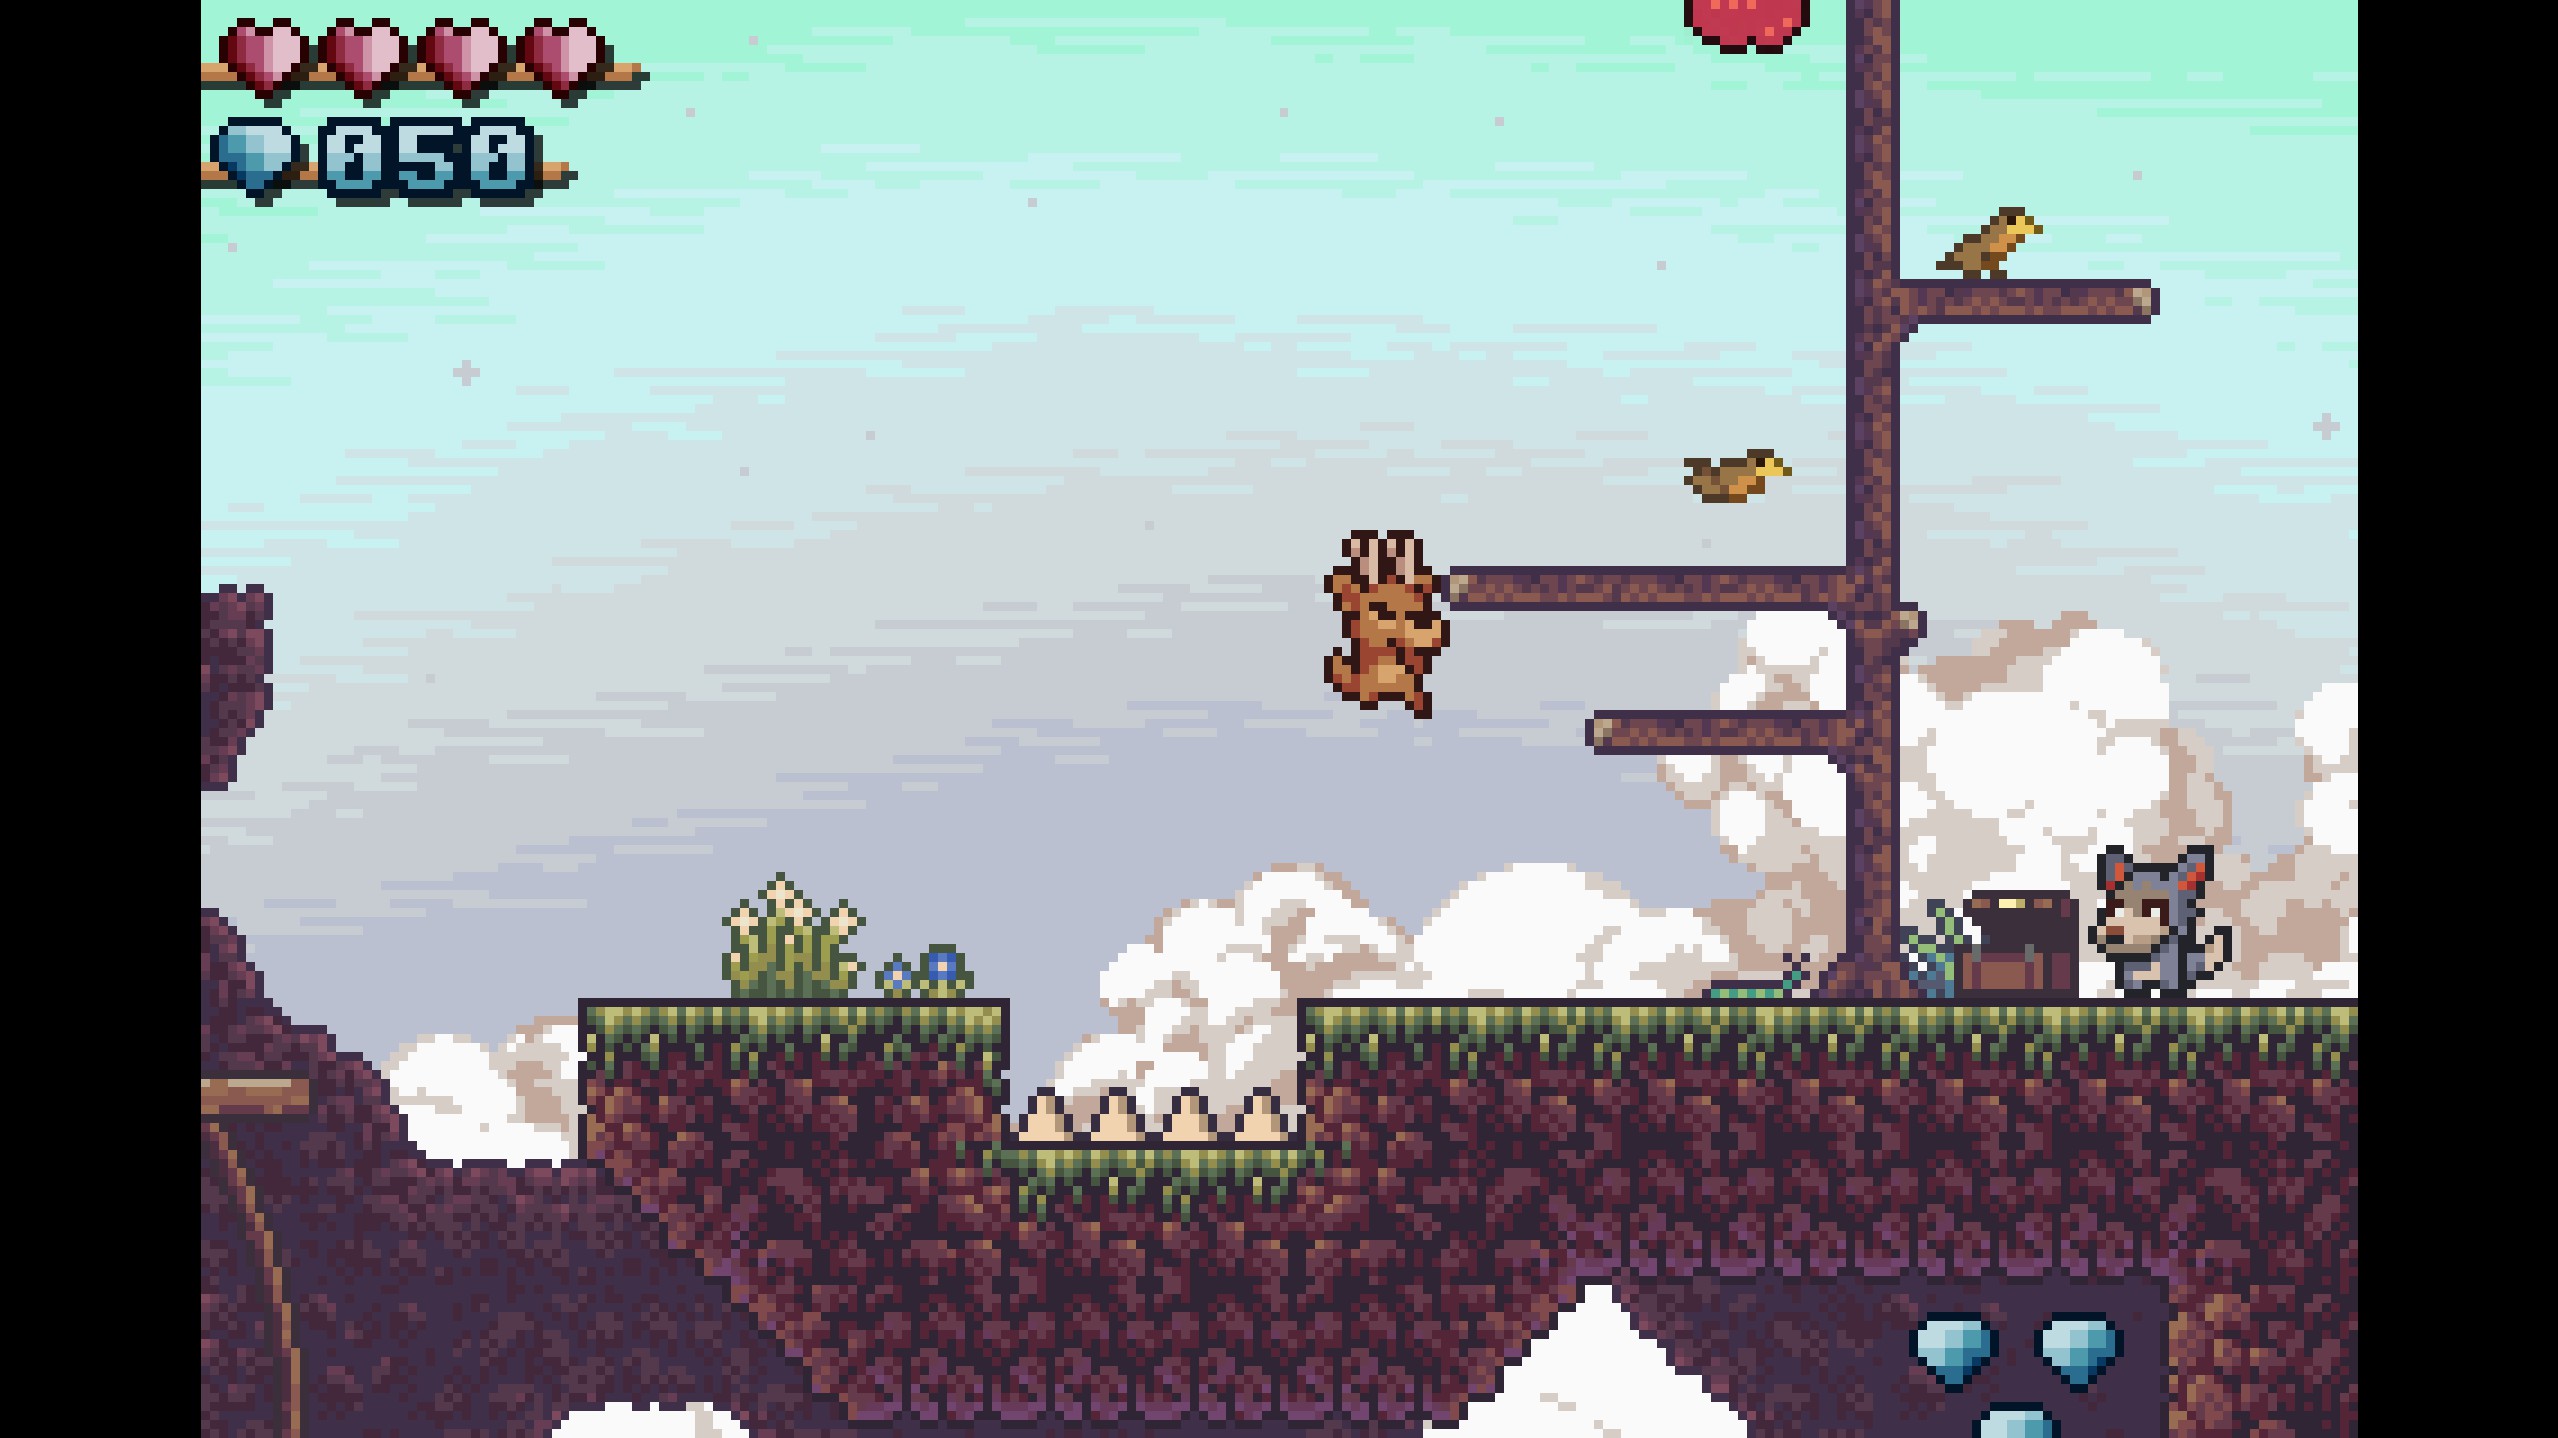
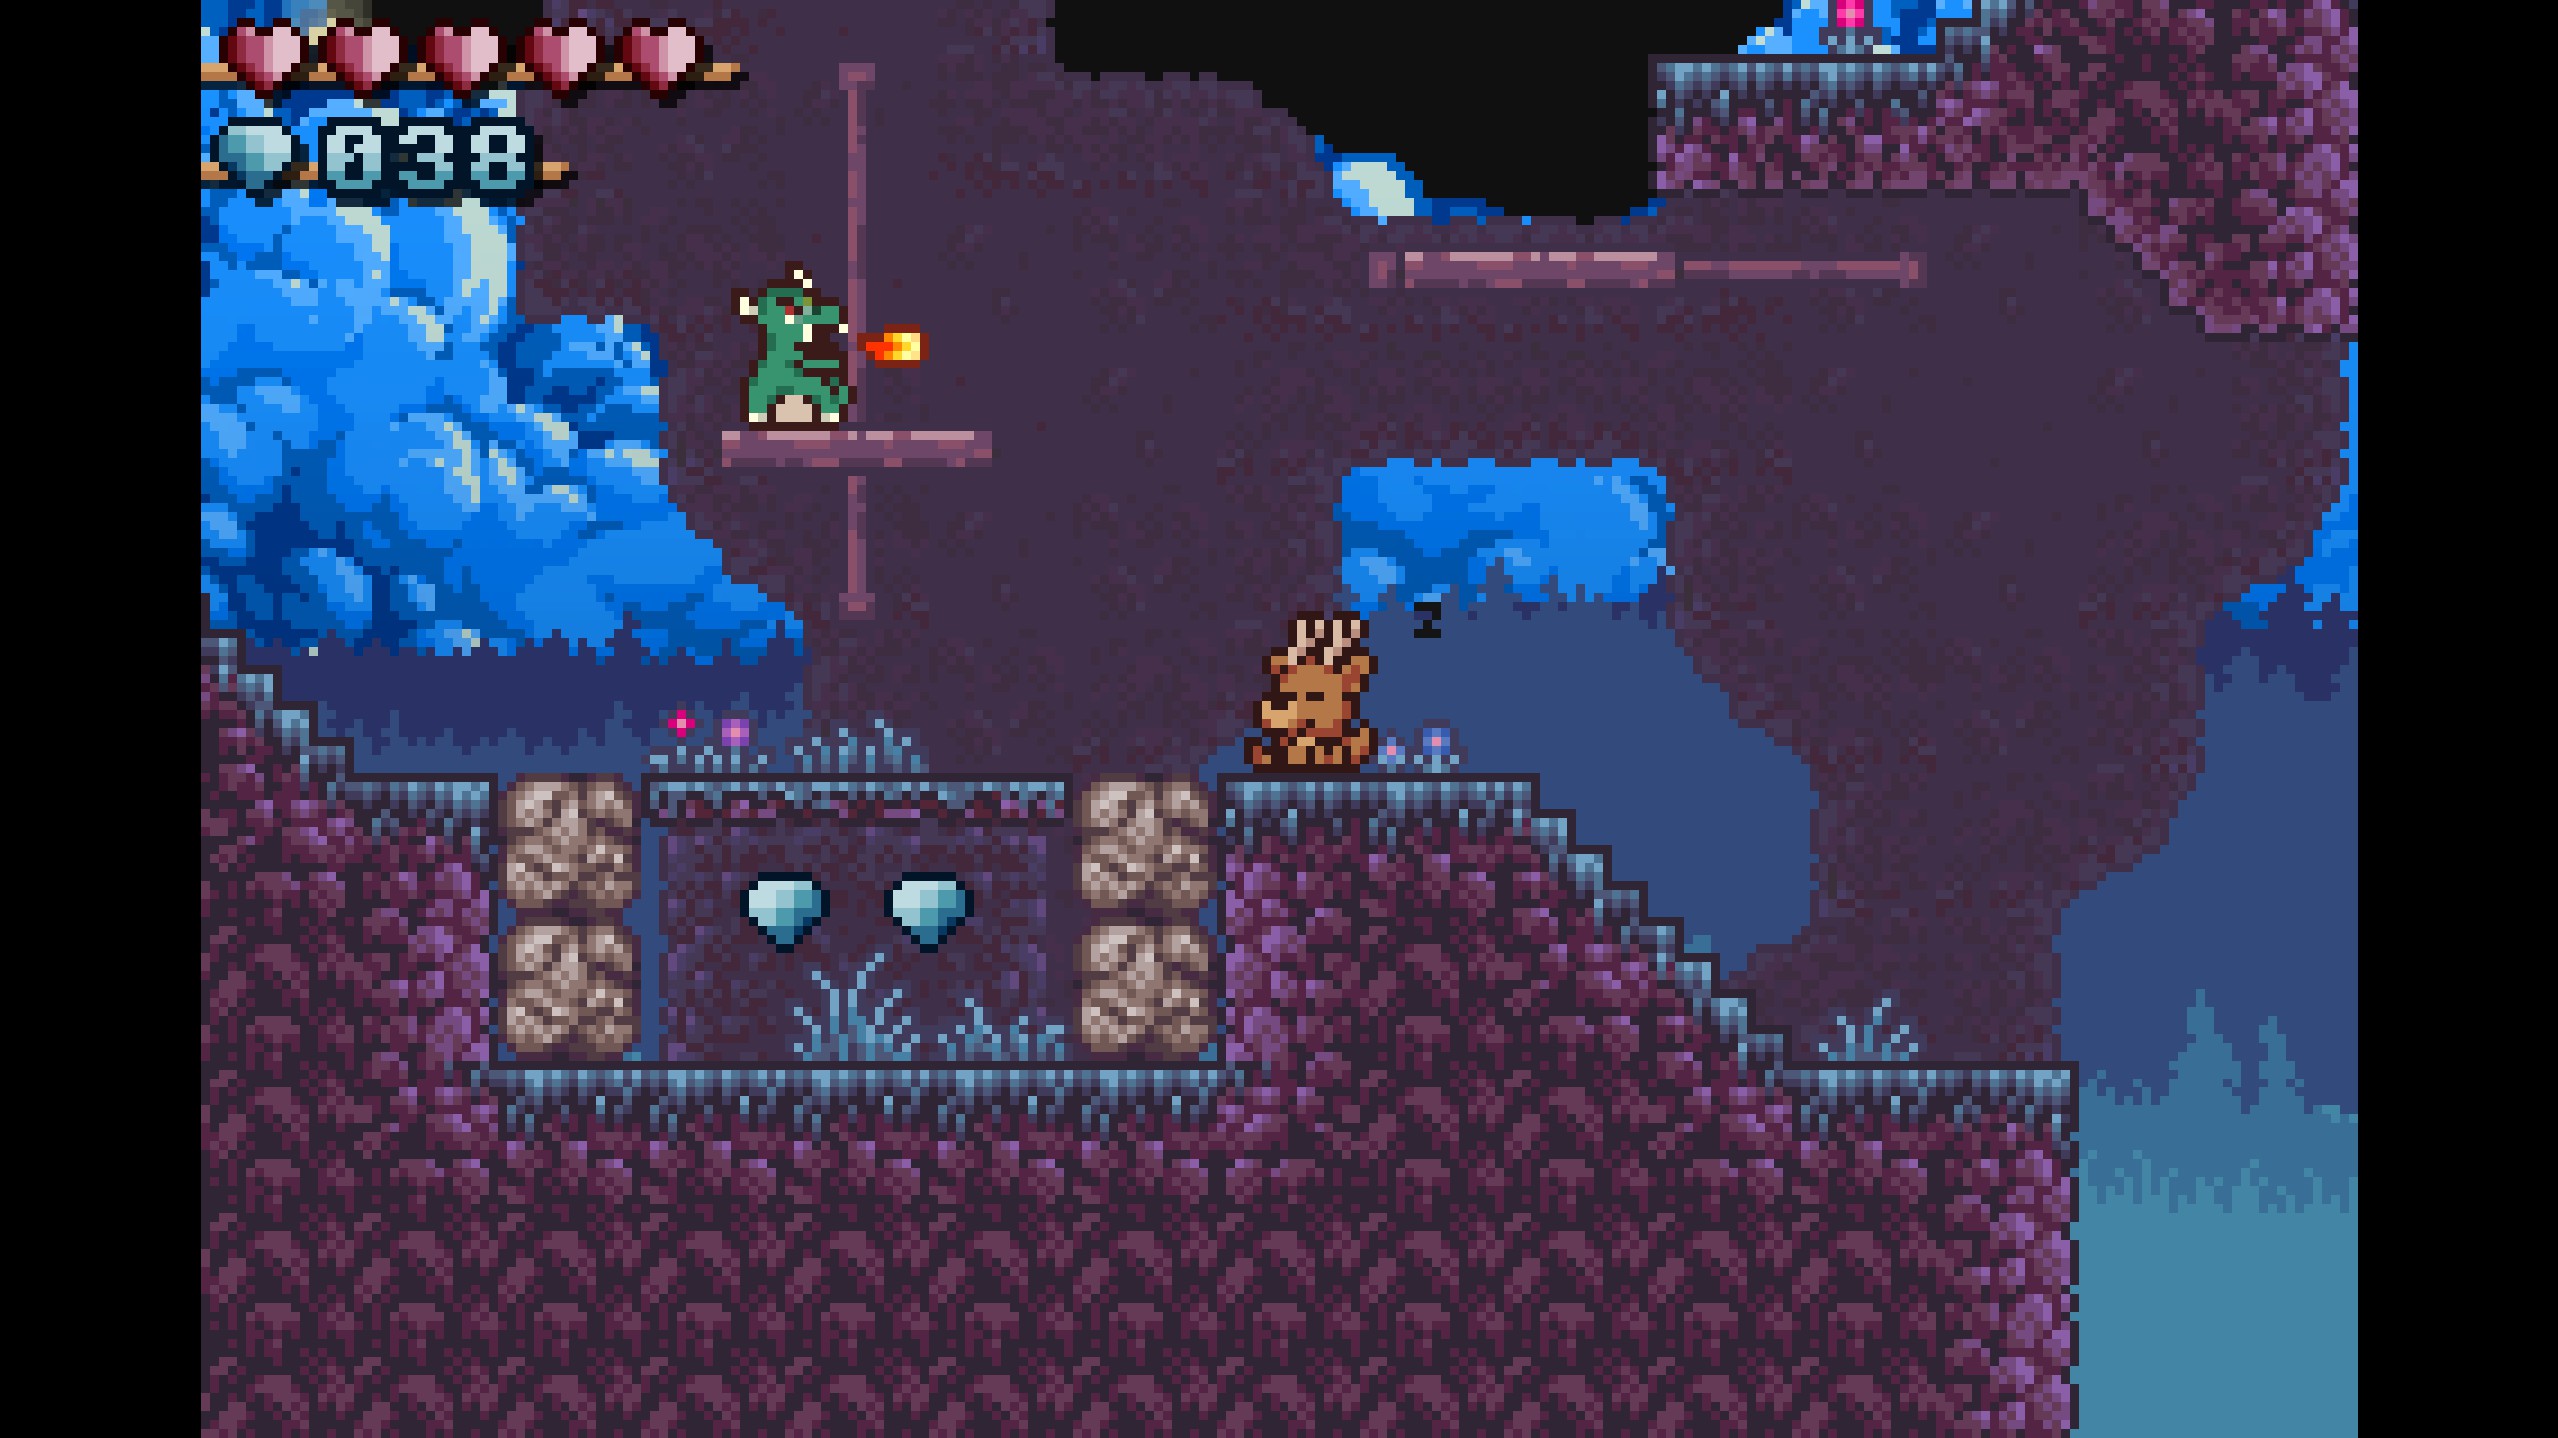
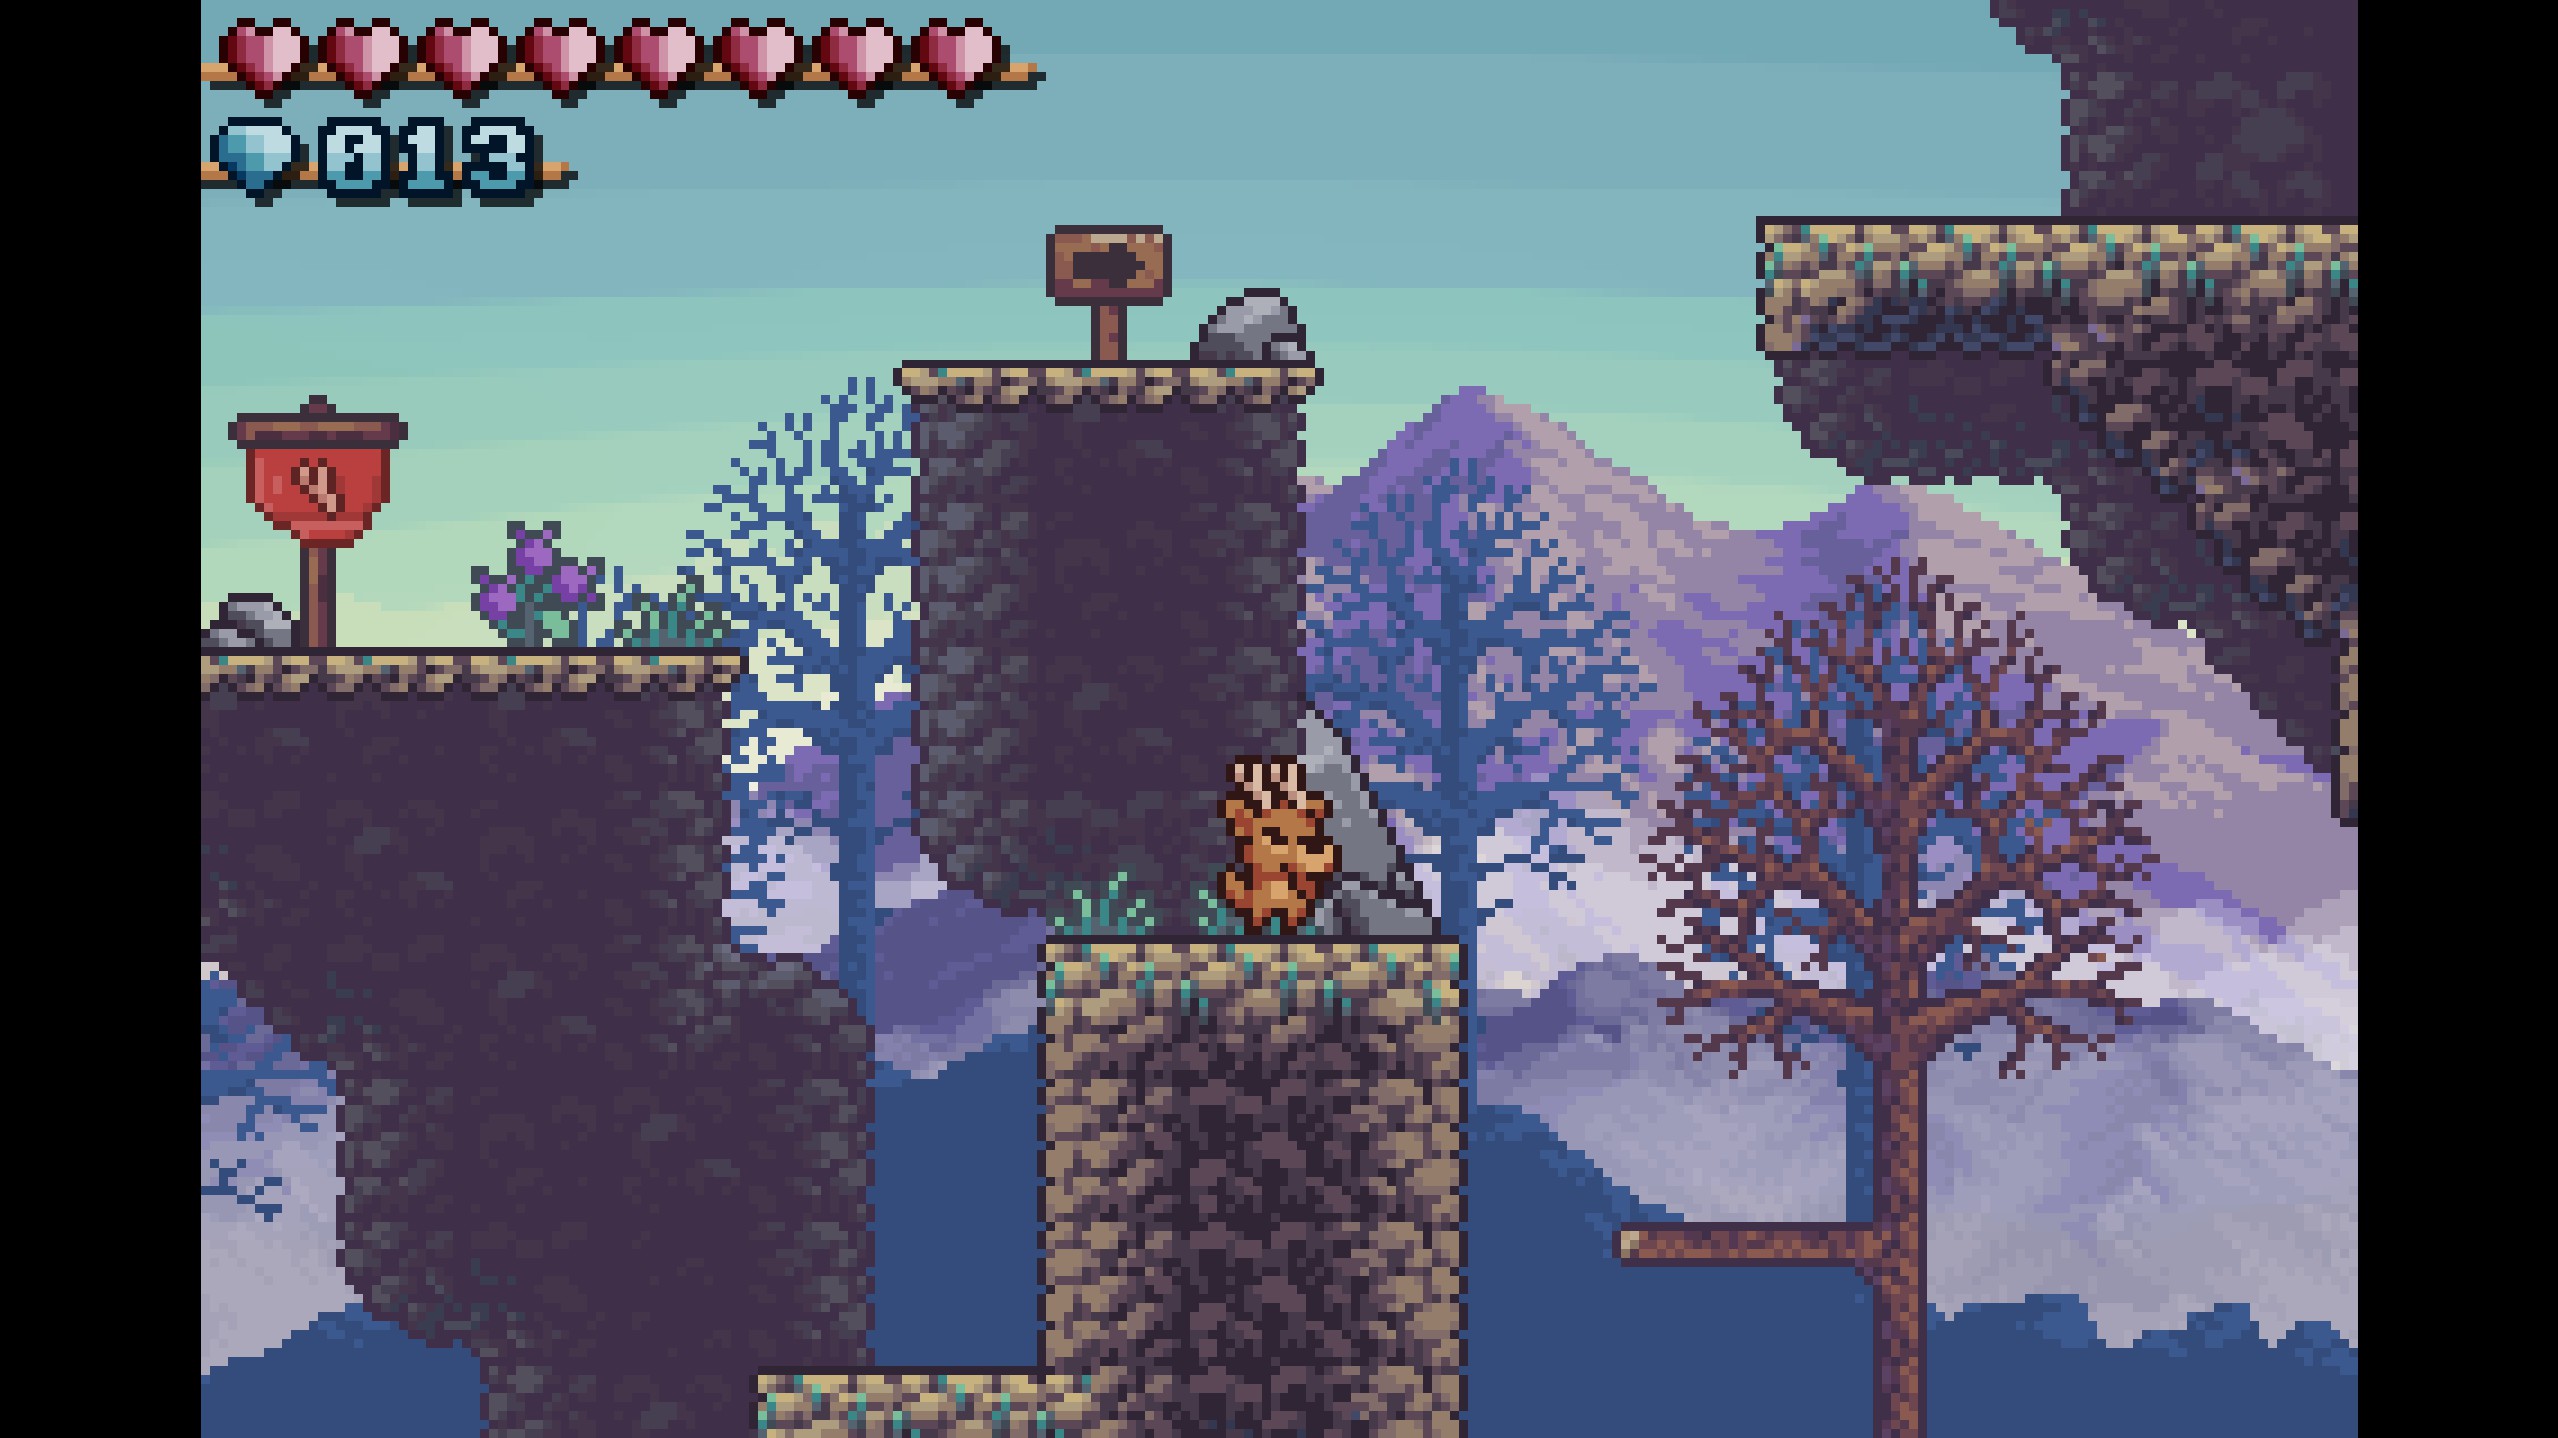
Emerald Vale is the first stage in Ronny's Climb! It's a grassy, hilly, and filled with birds, trees, and sunlight! Most of the gems in this stage are straightforward and pretty hard to miss, and the badges aren't too much trouble, either!
Gems
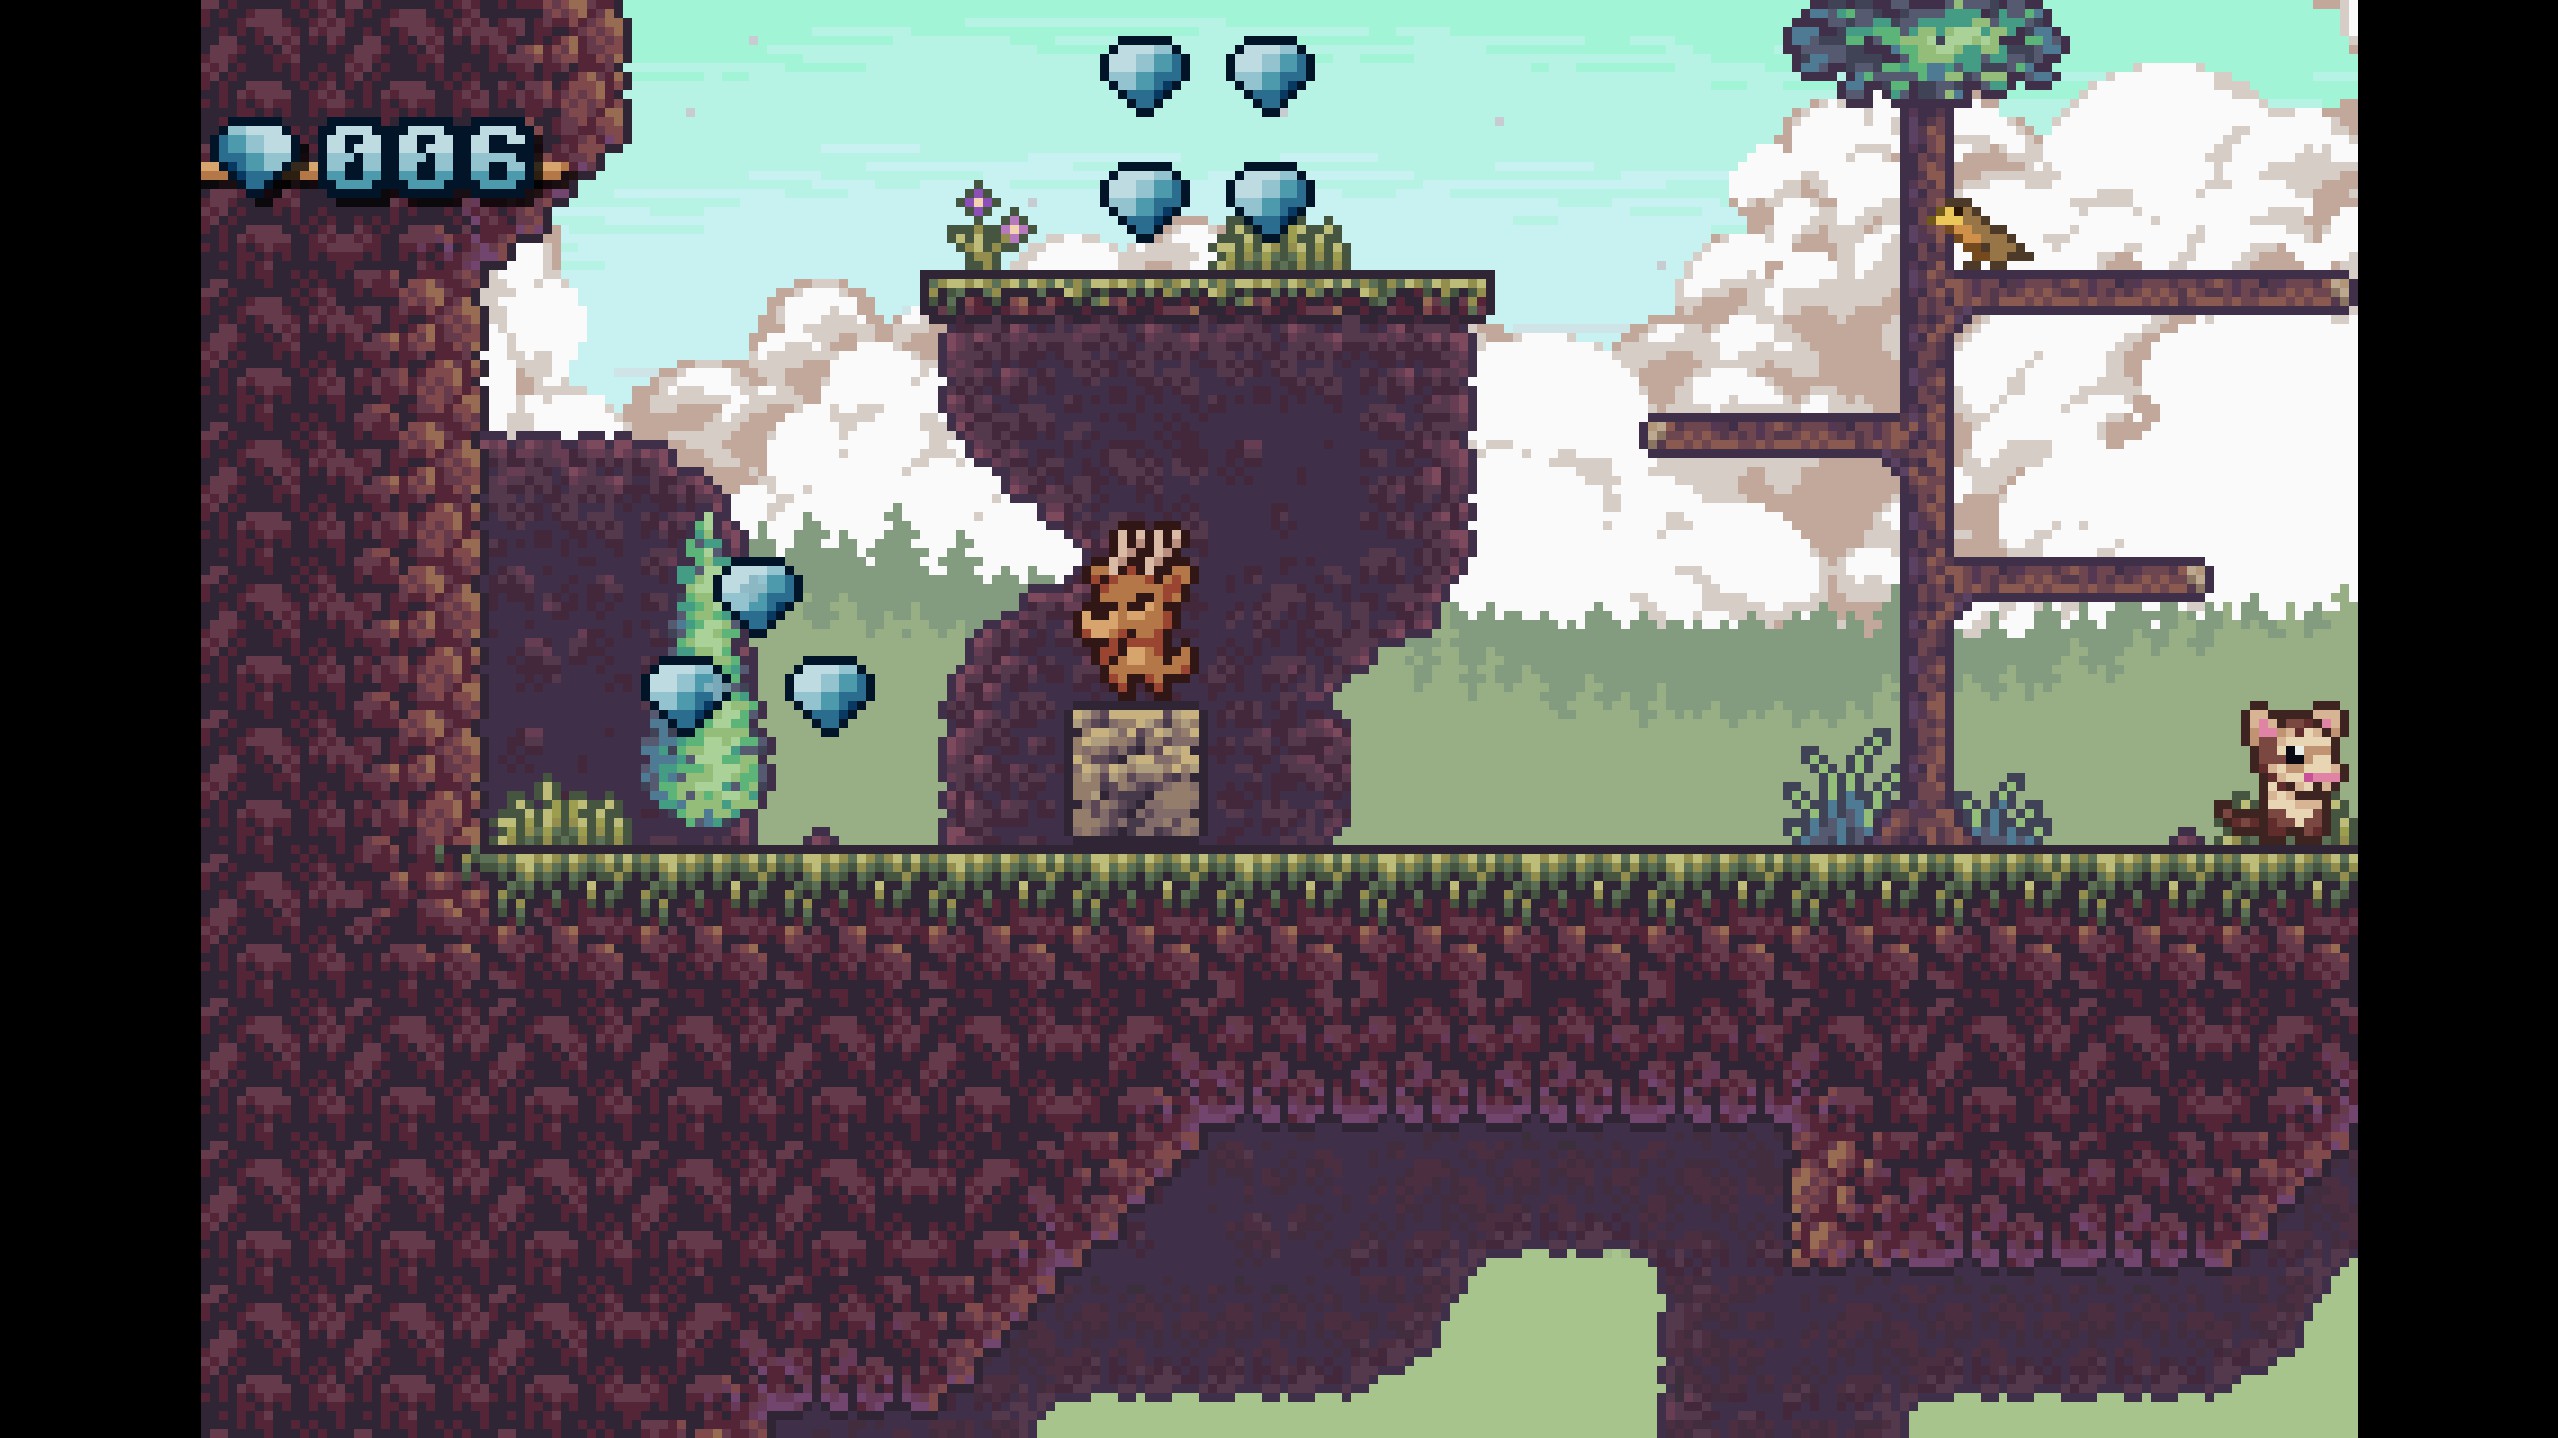
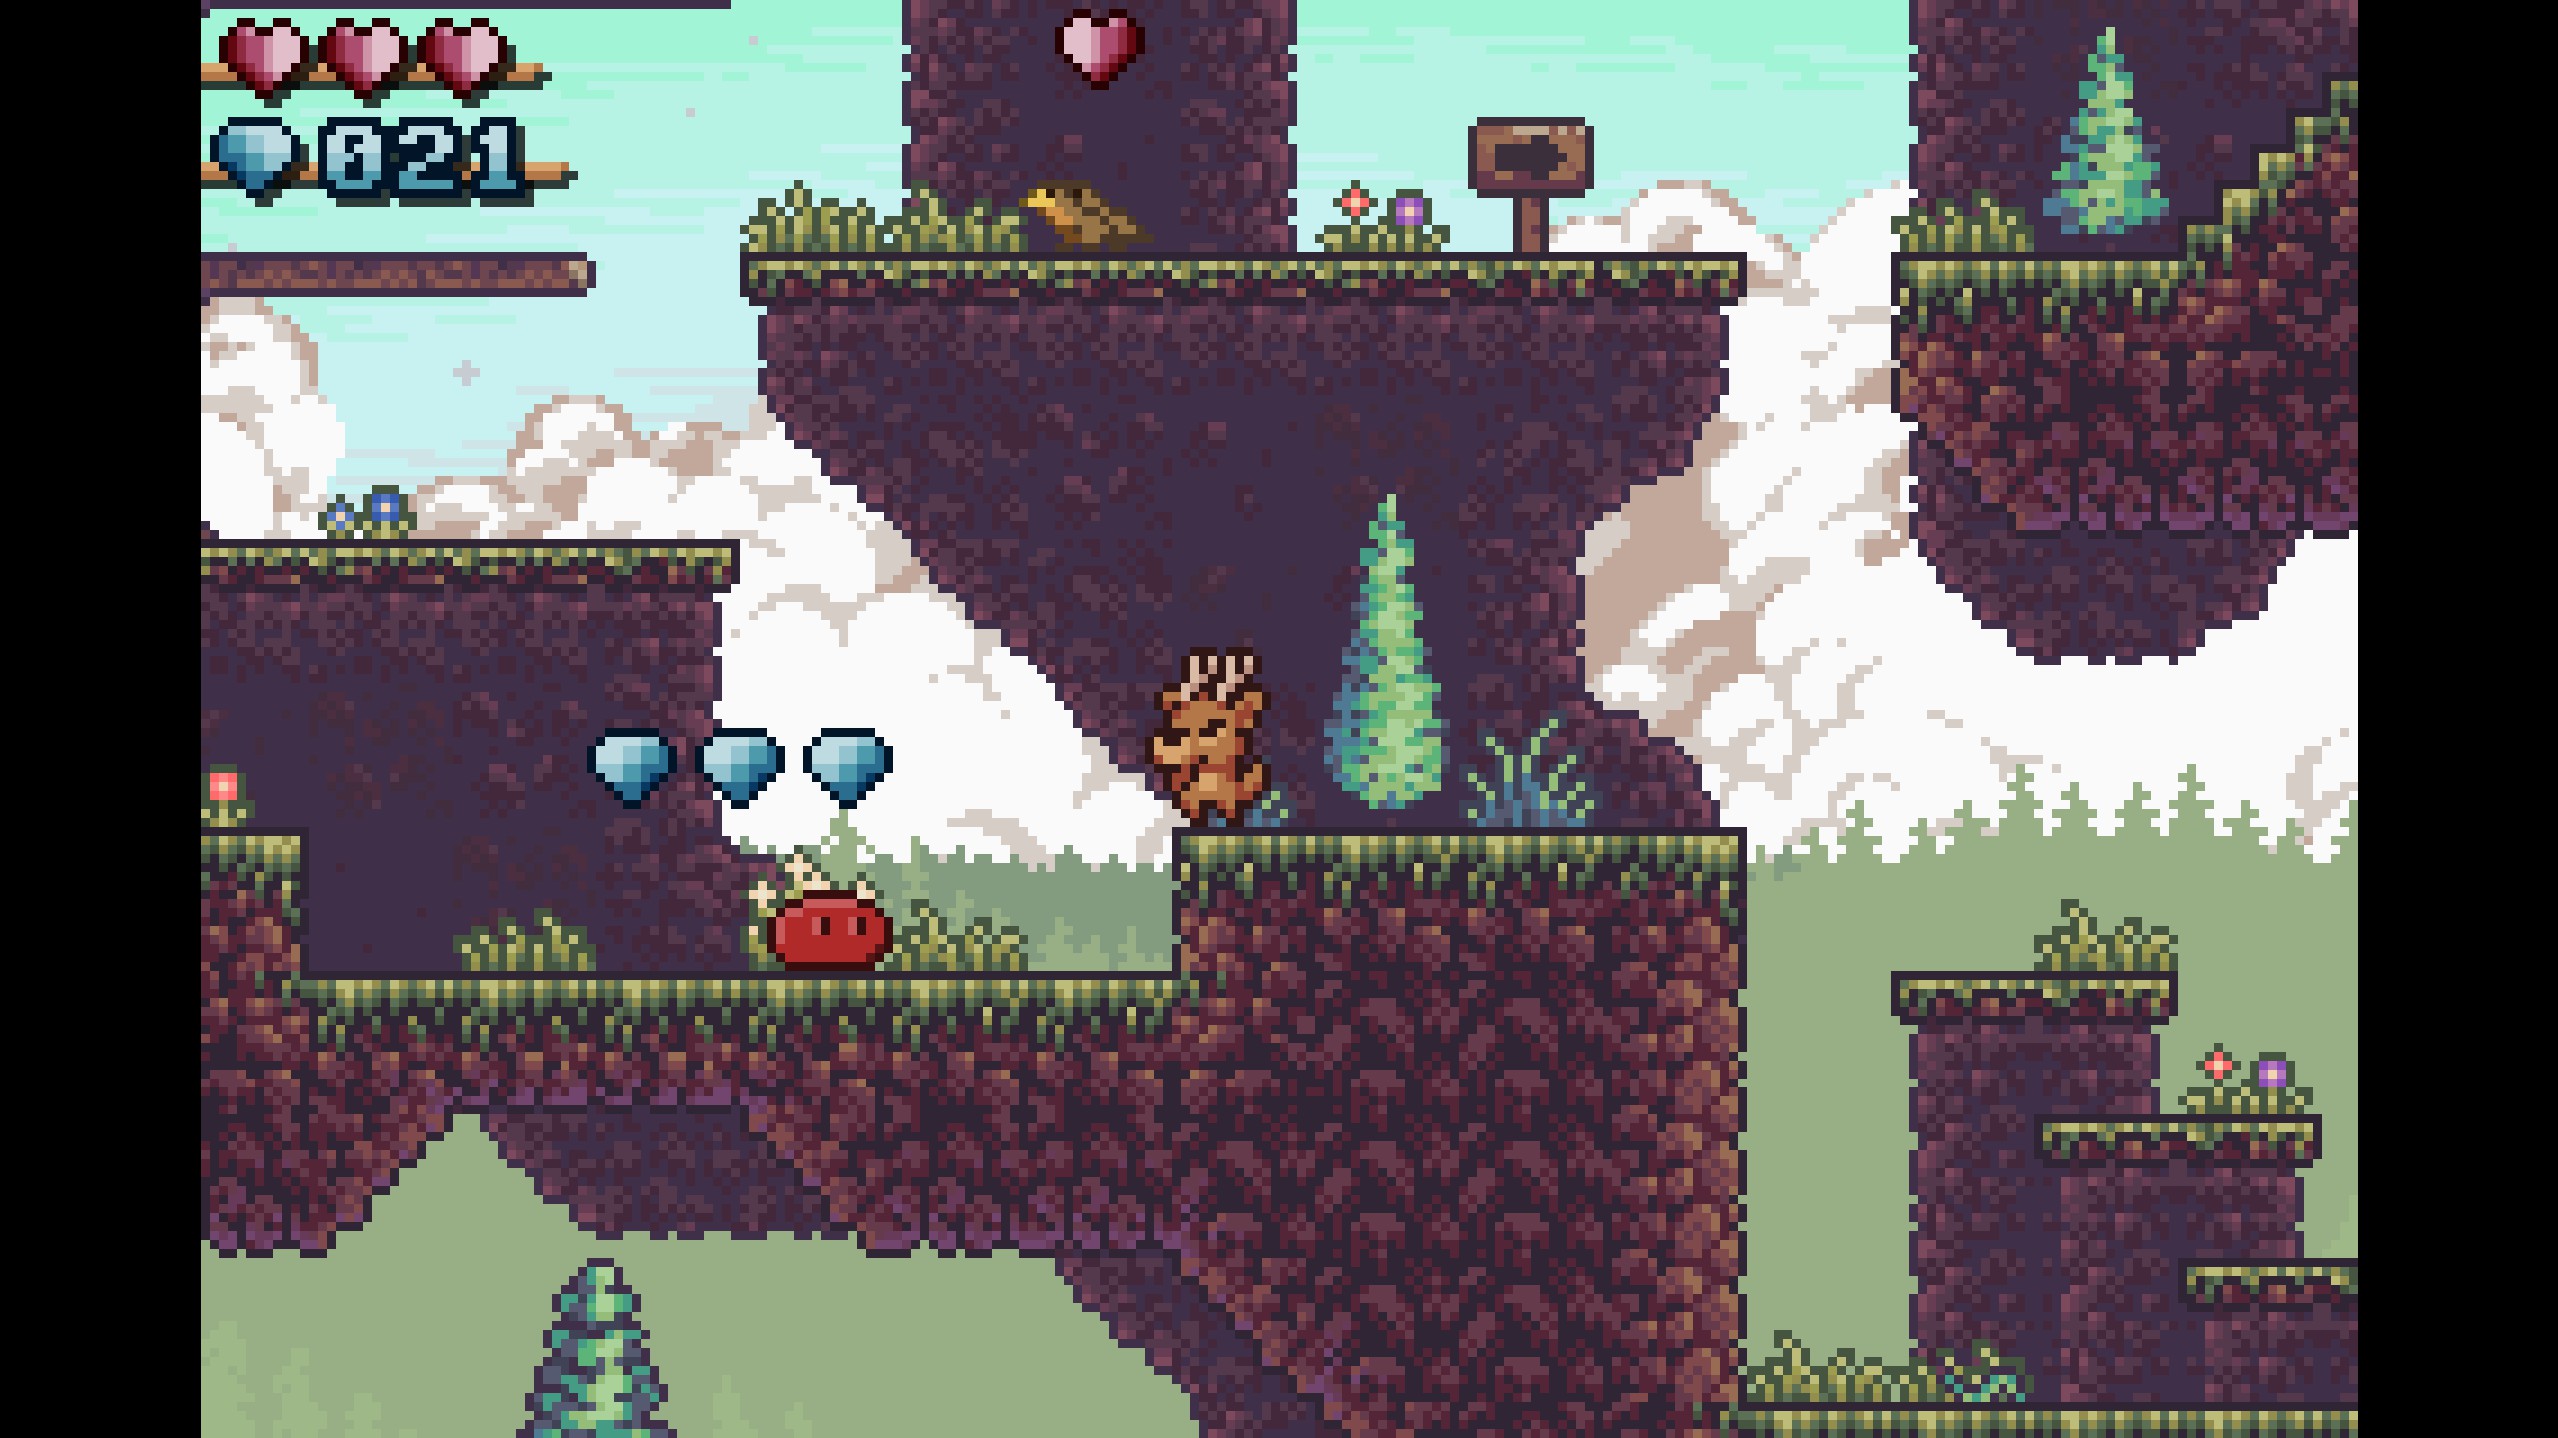
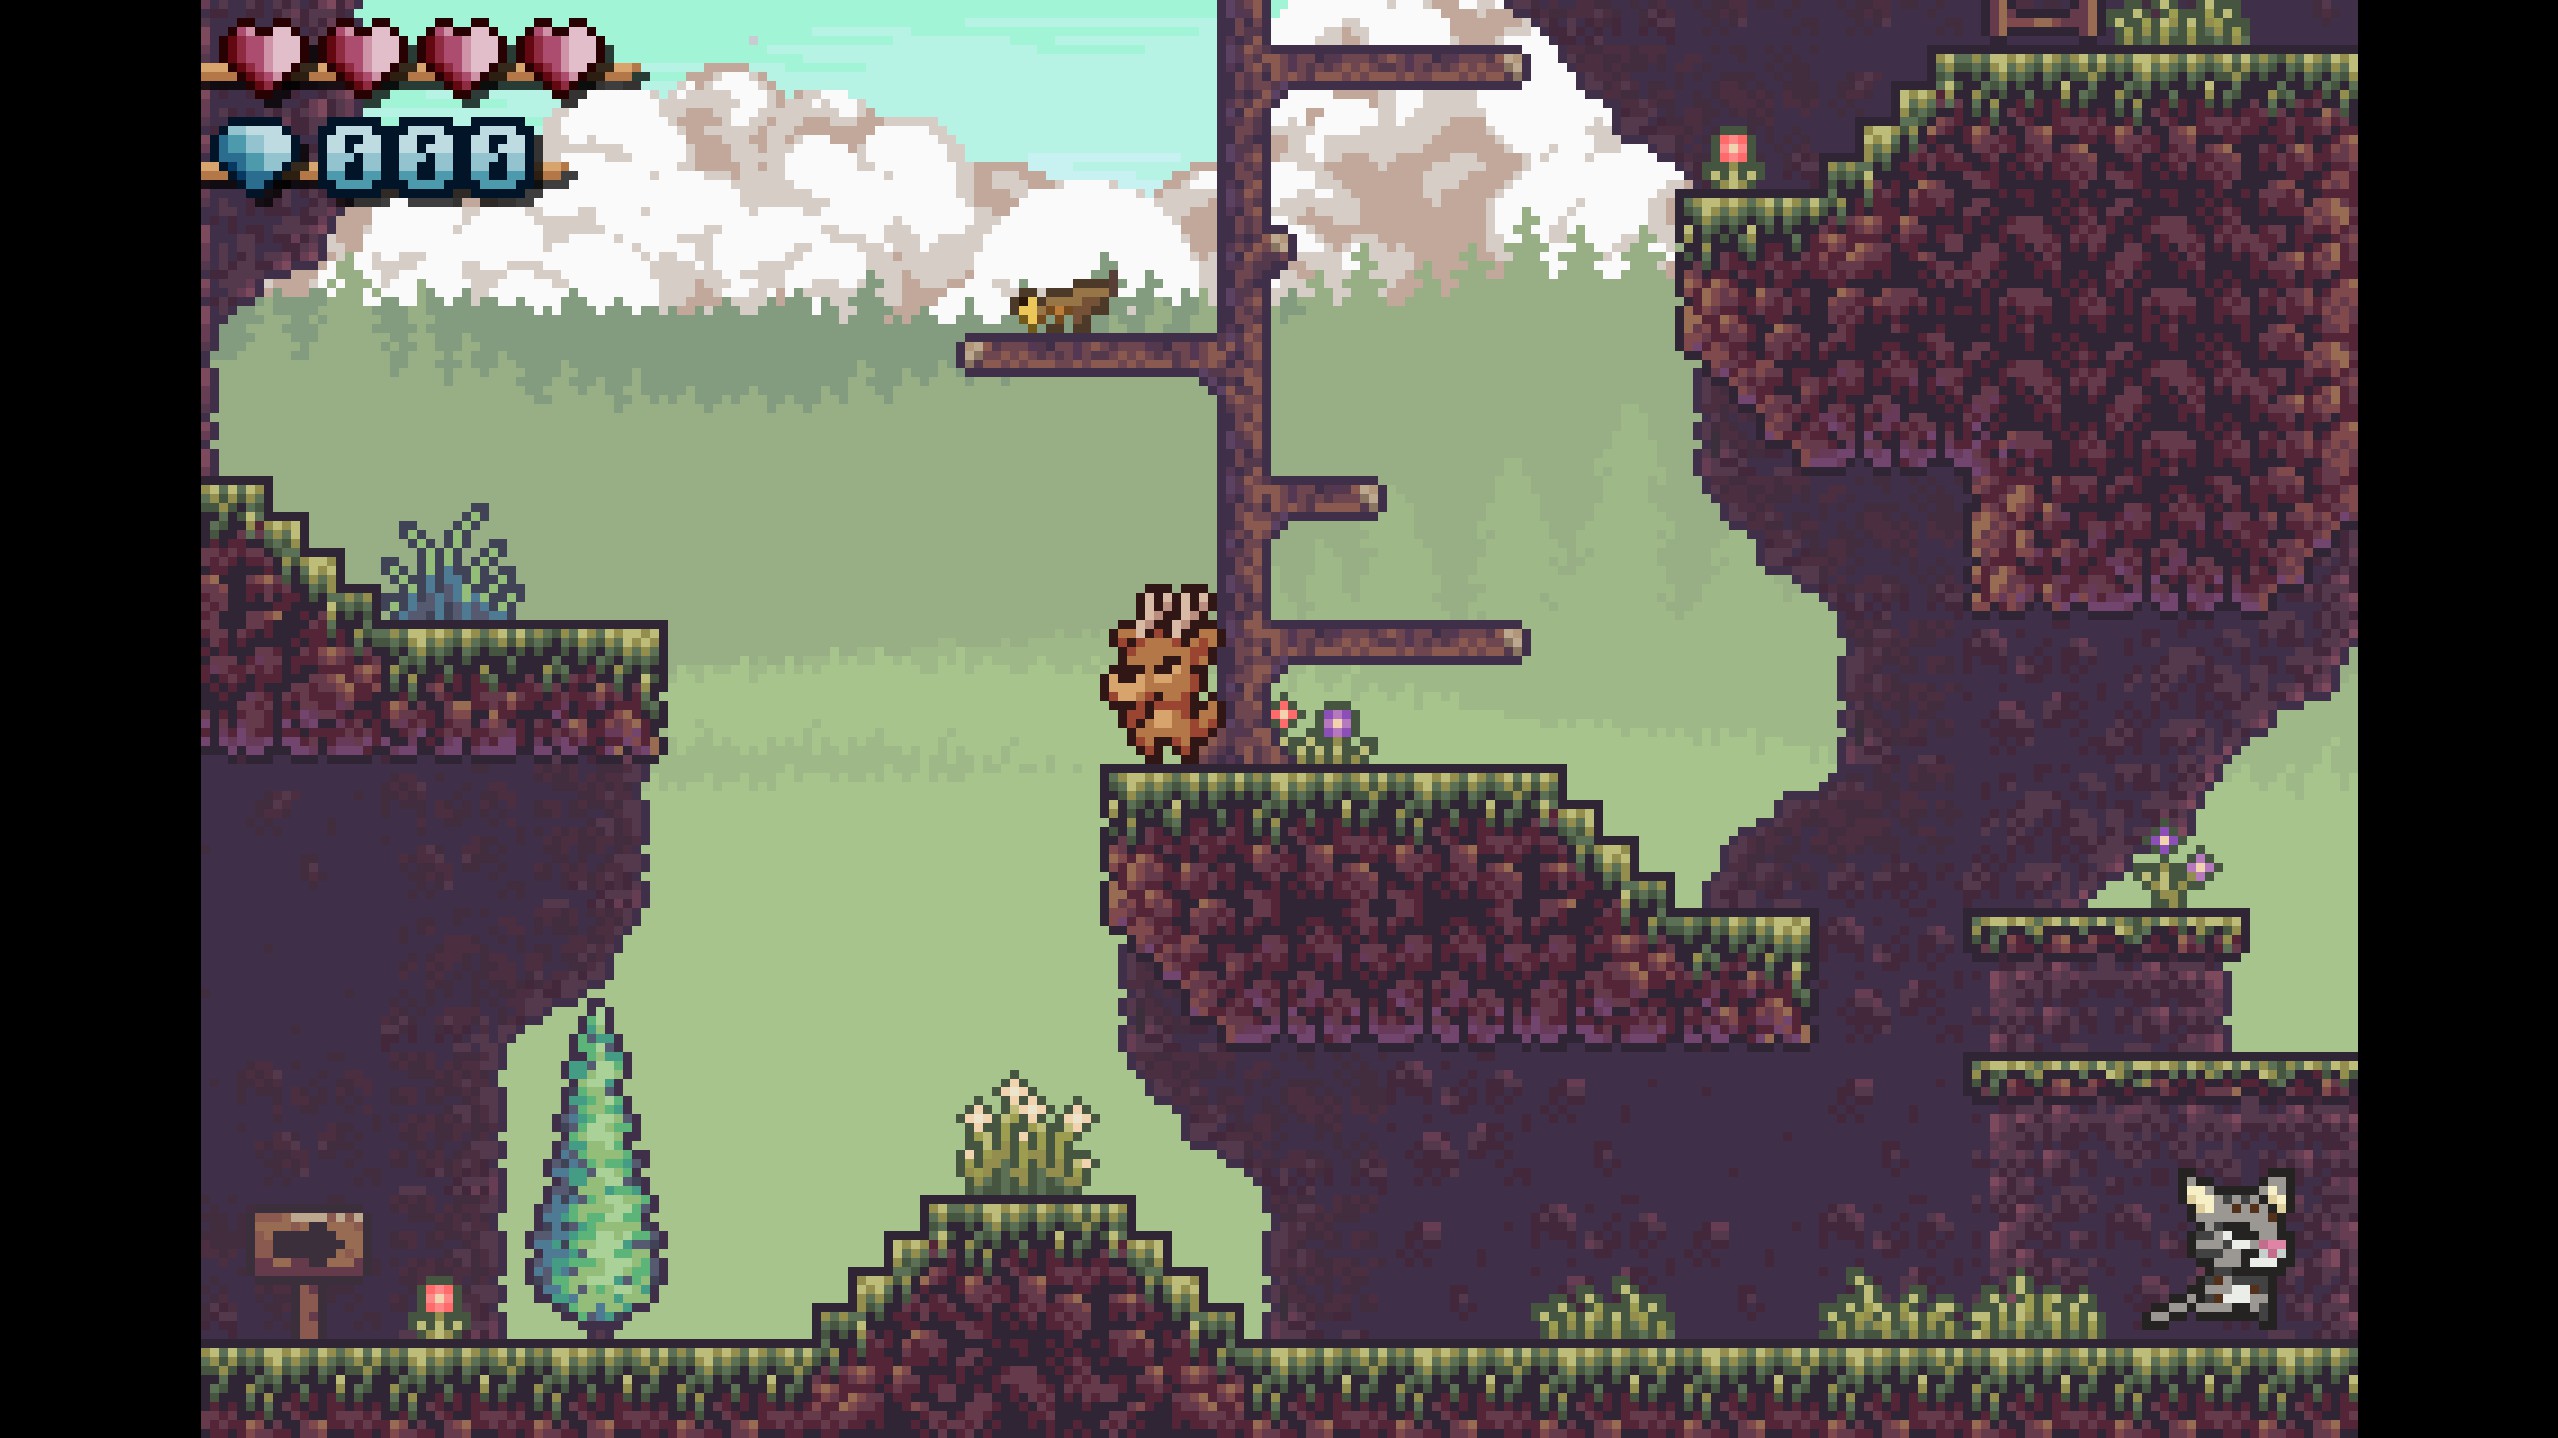
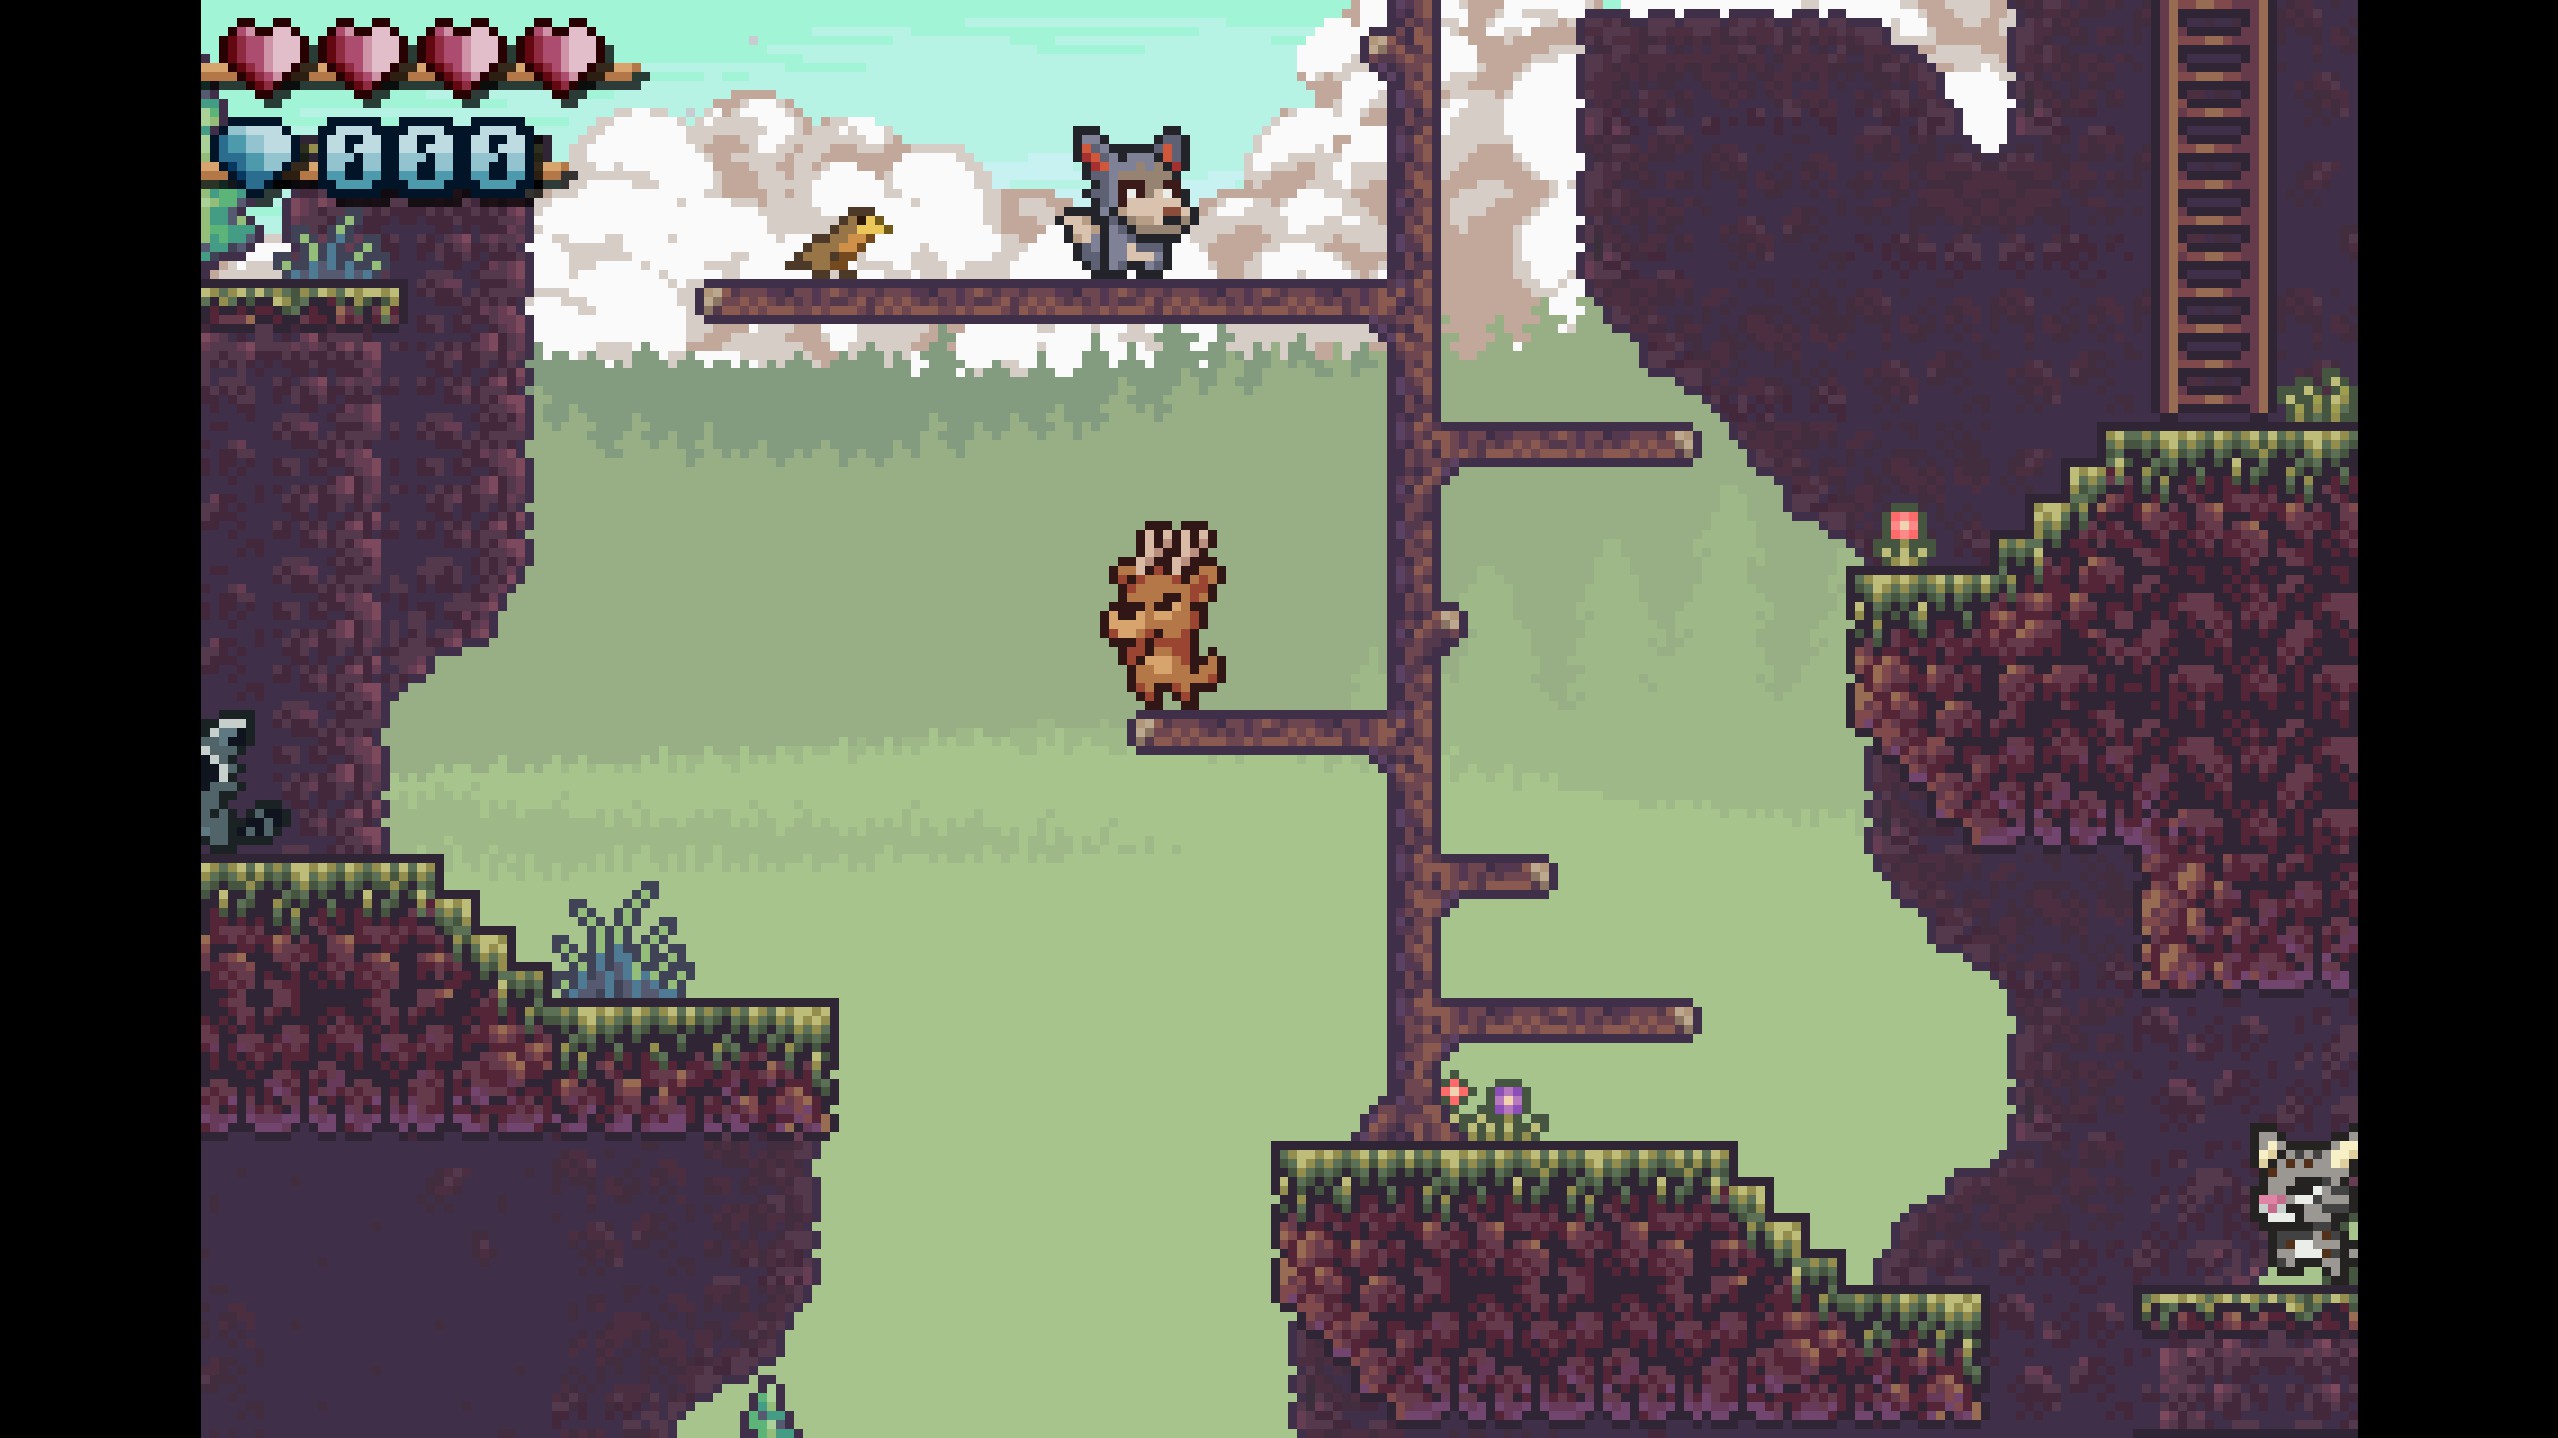
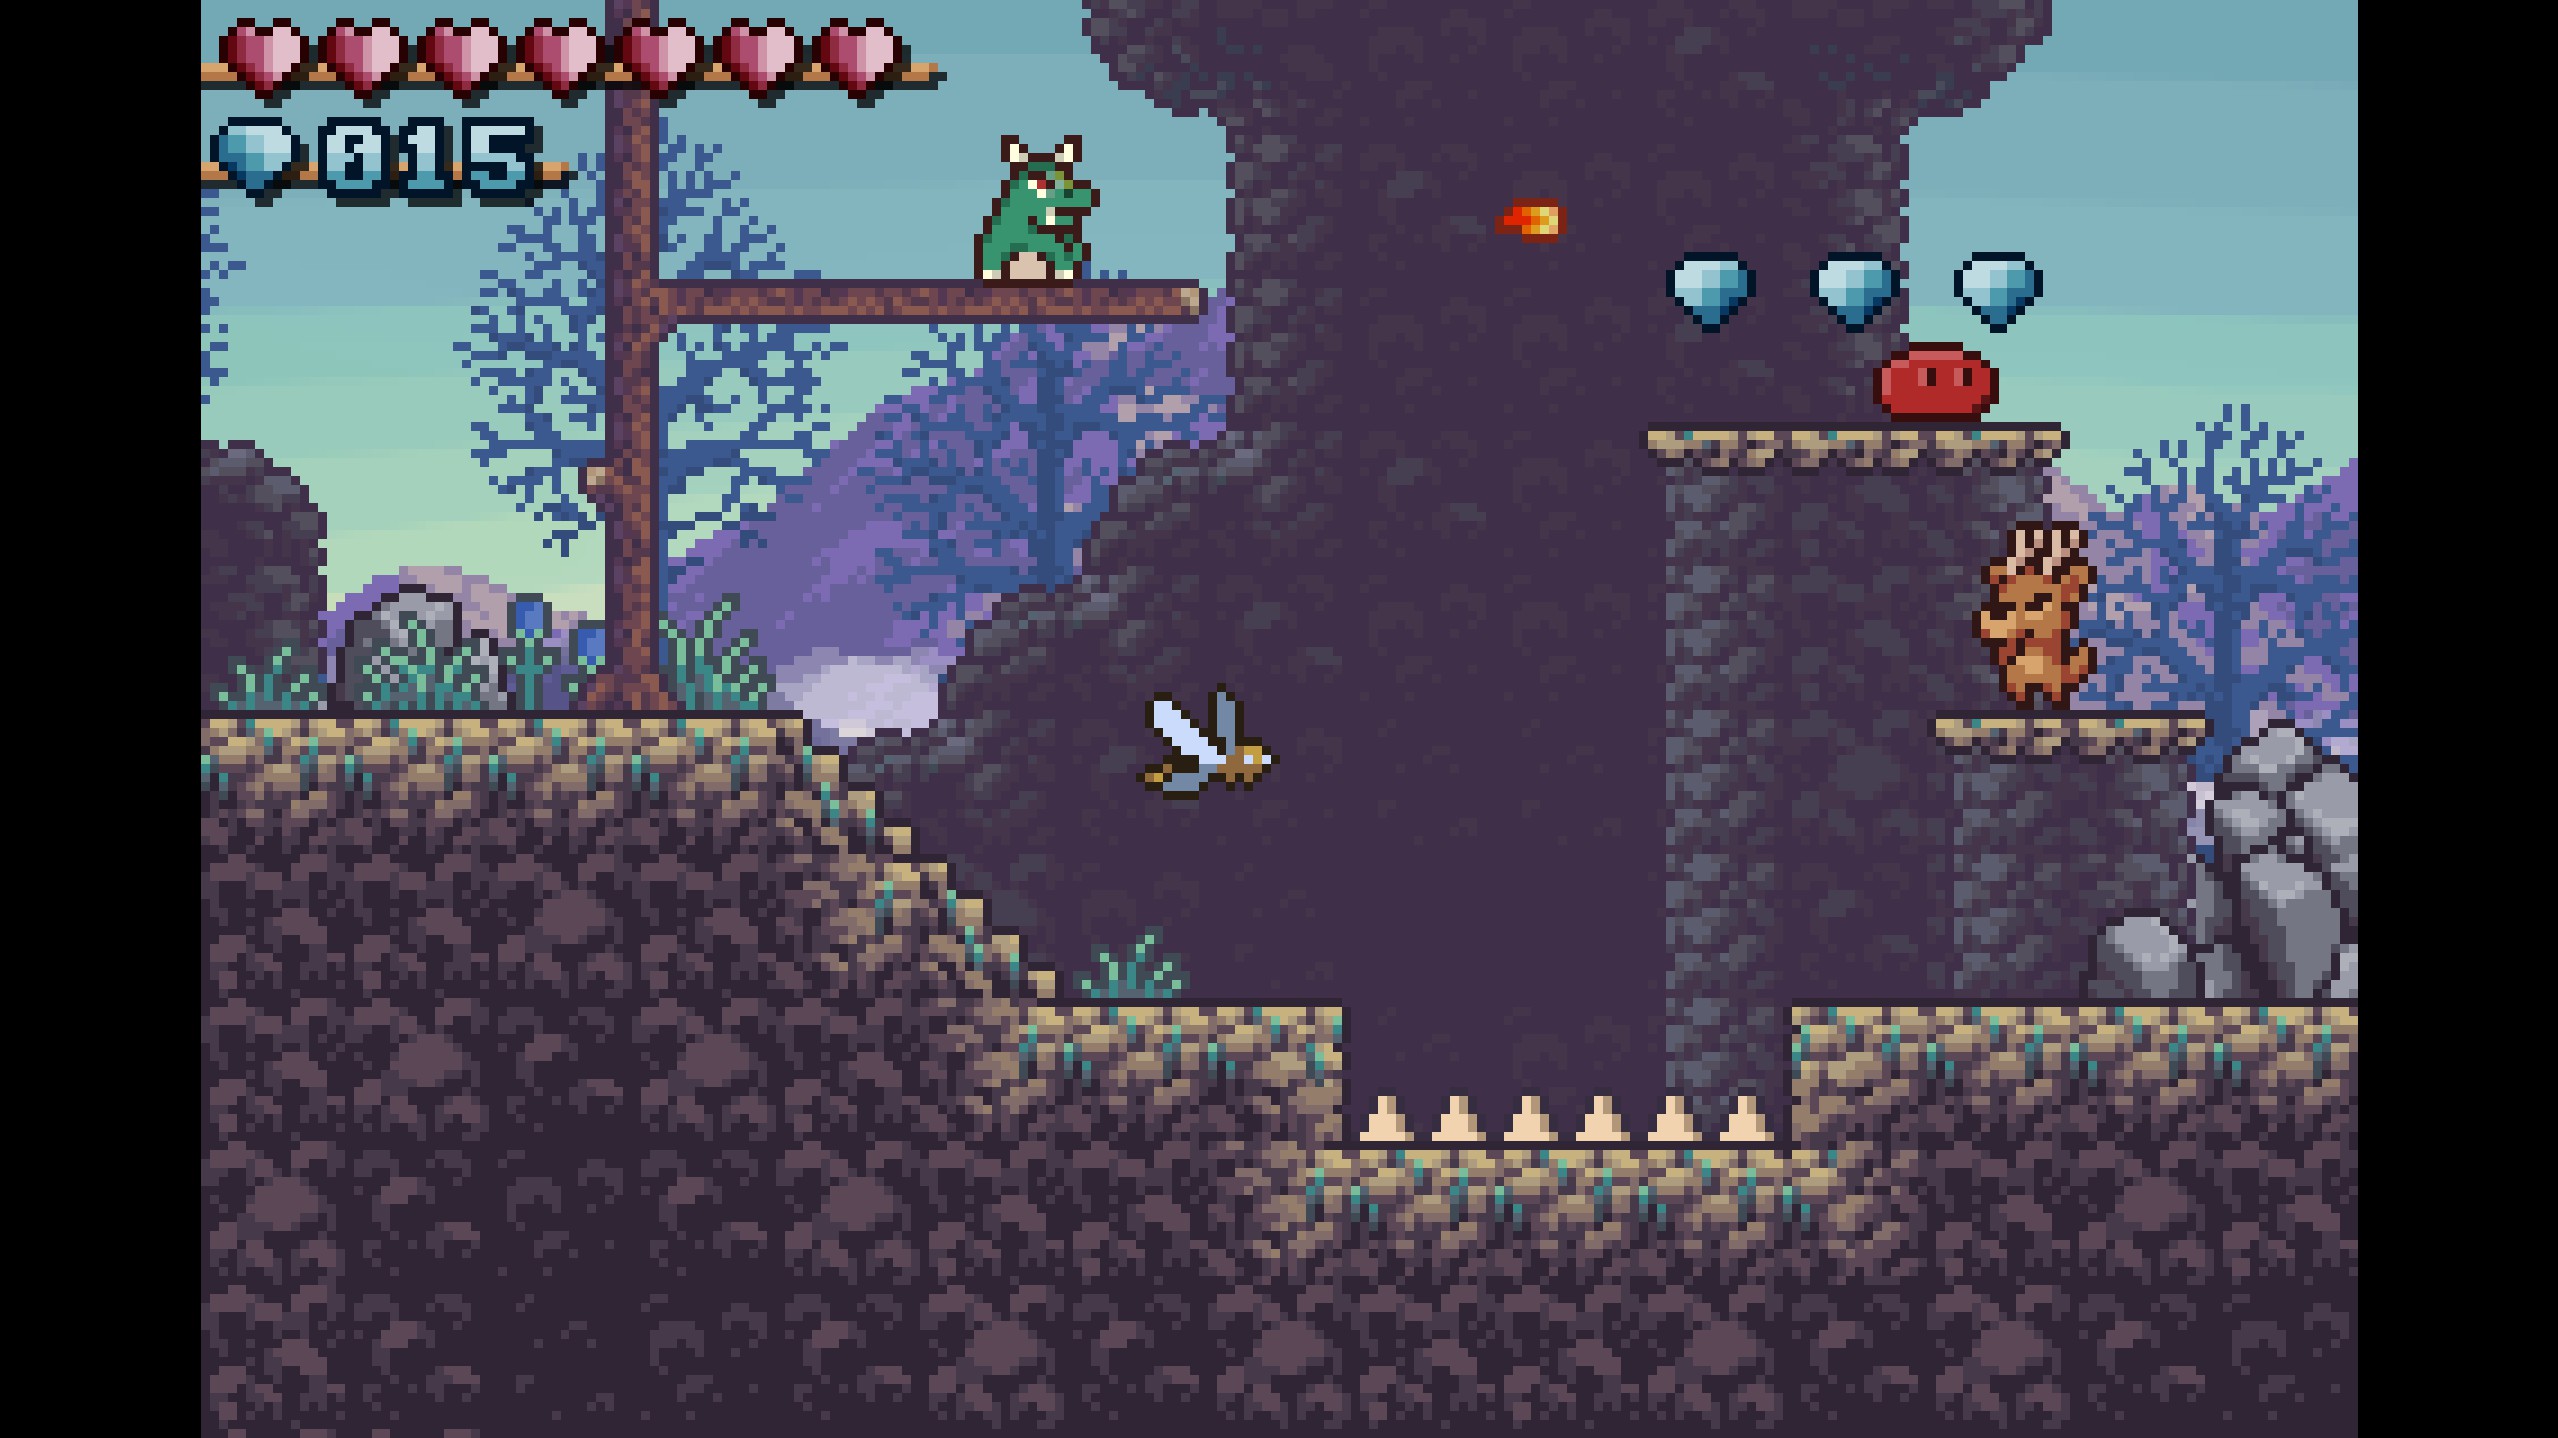
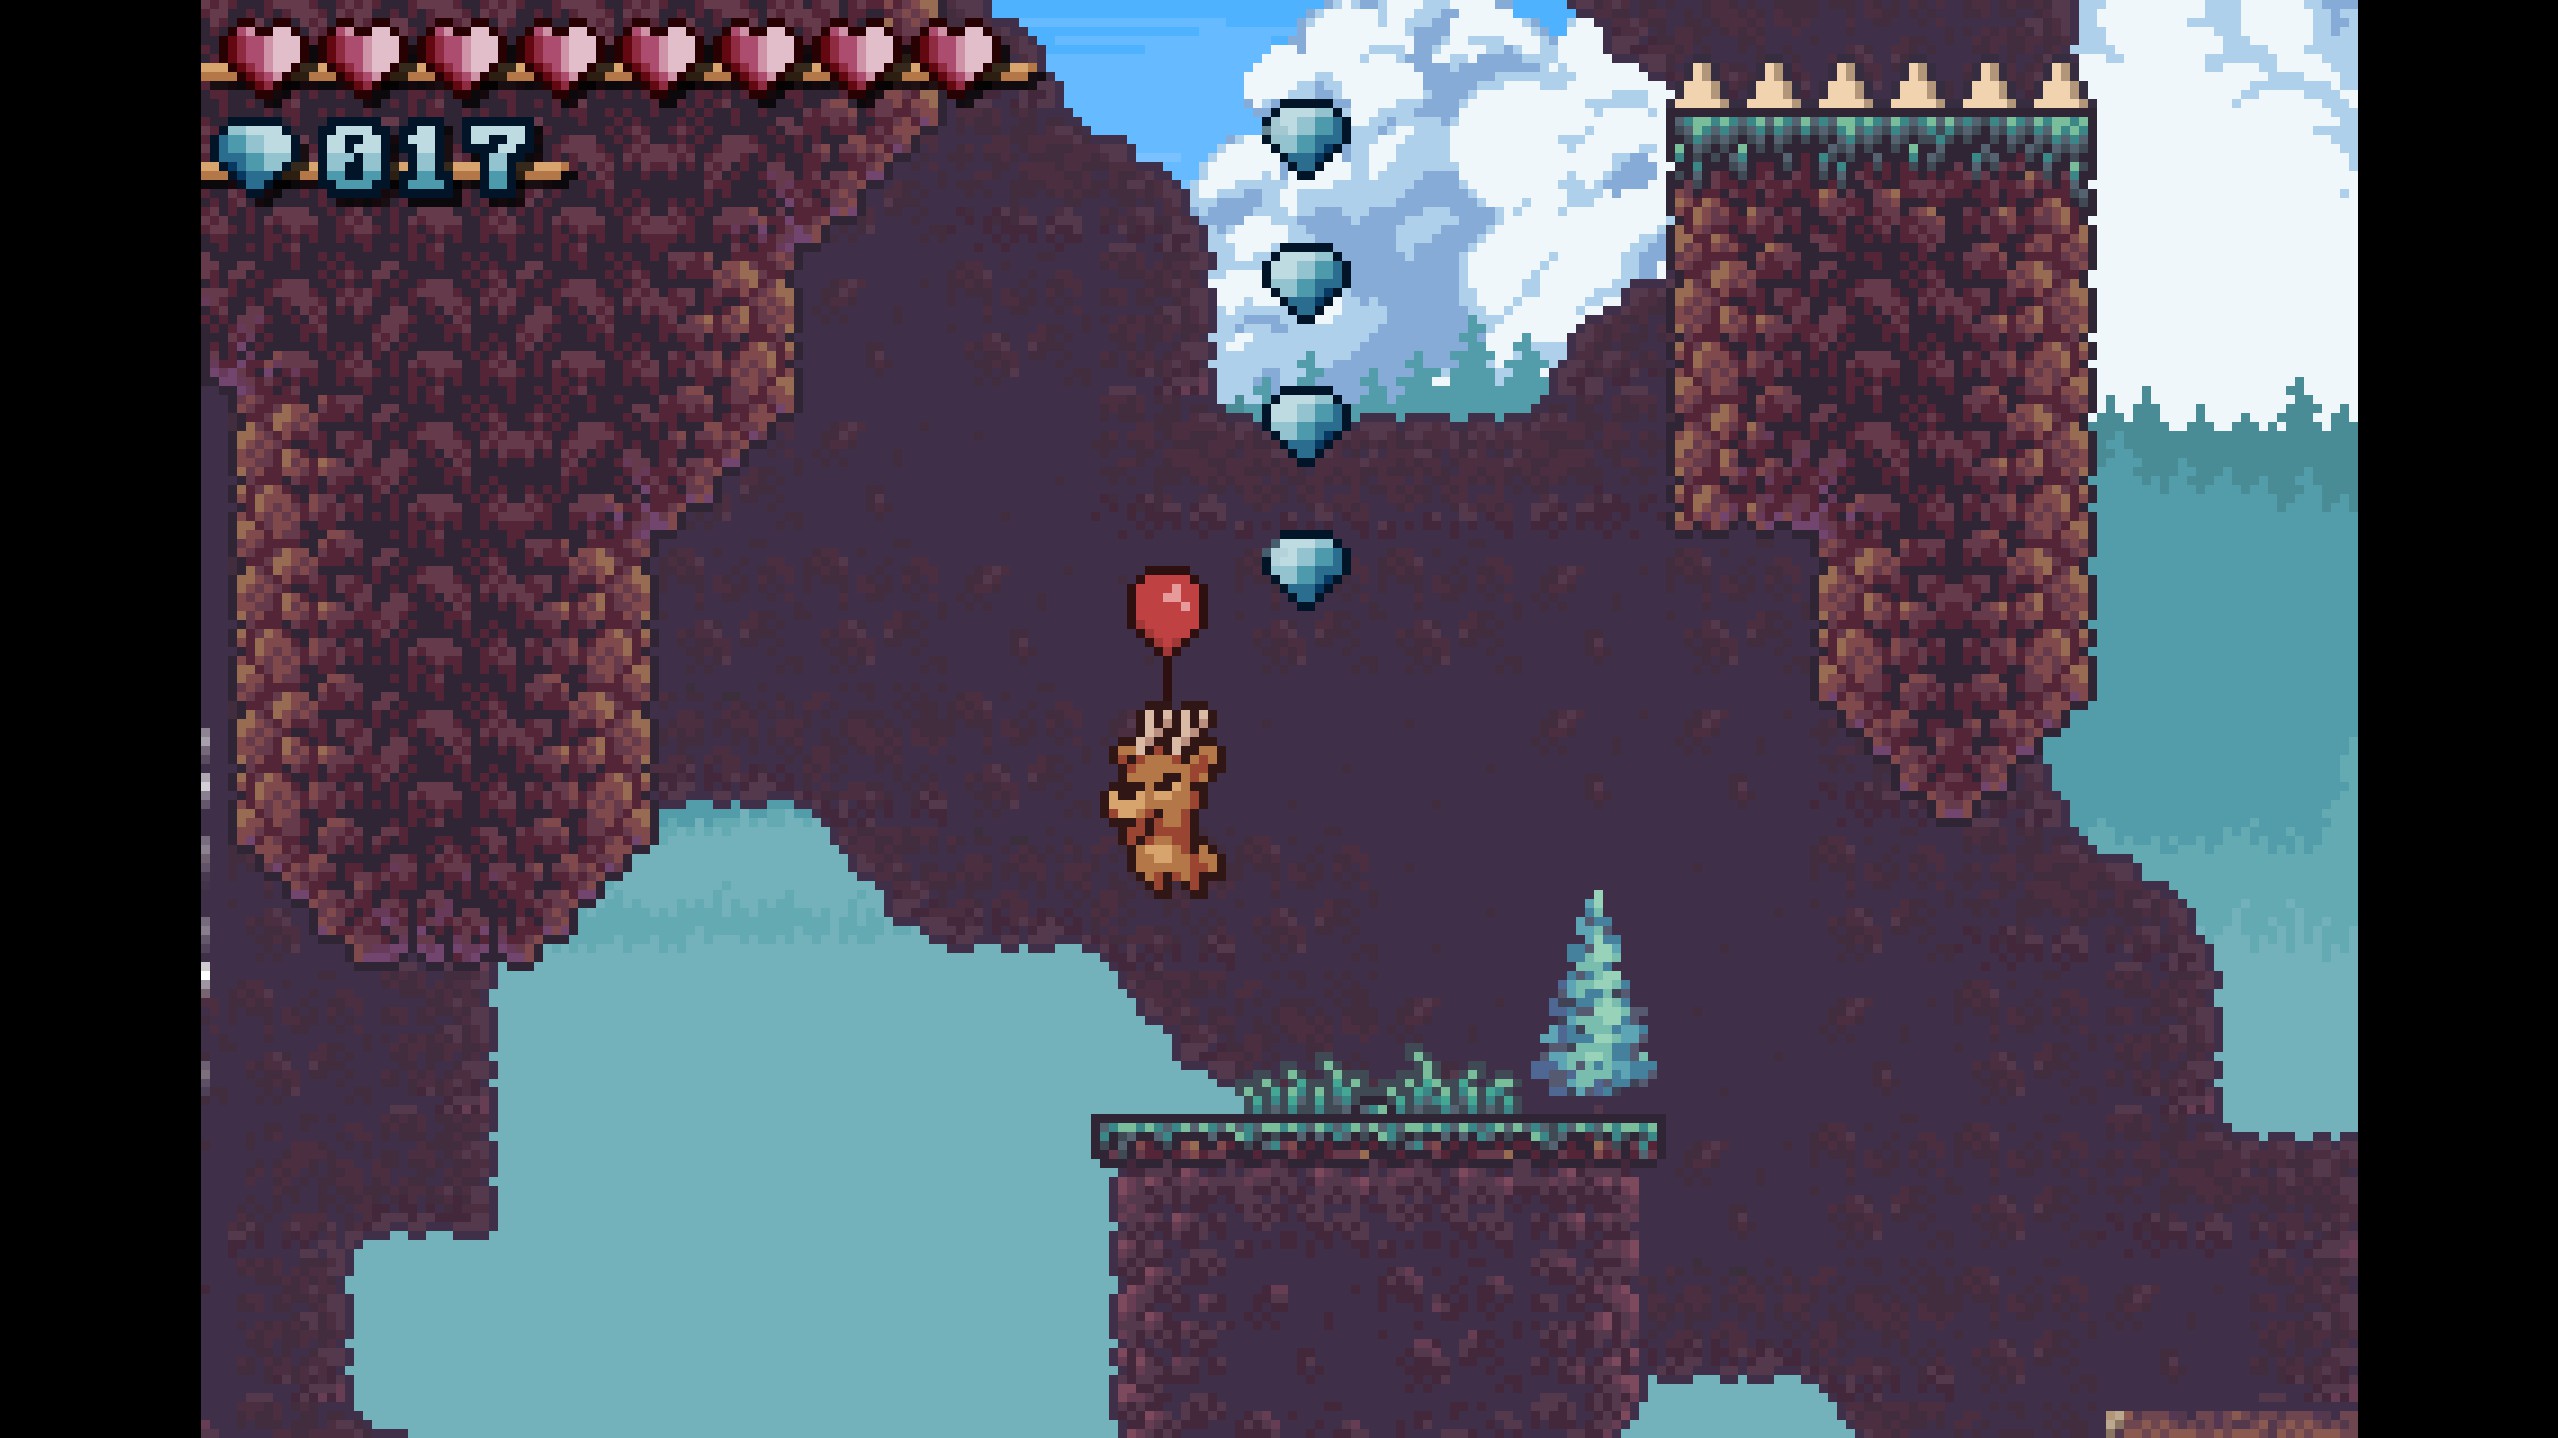
- Gems 1-3
- The first gems in Emerald Vale are found along a tree branch on the normal path, just after climbing up the second ladder.
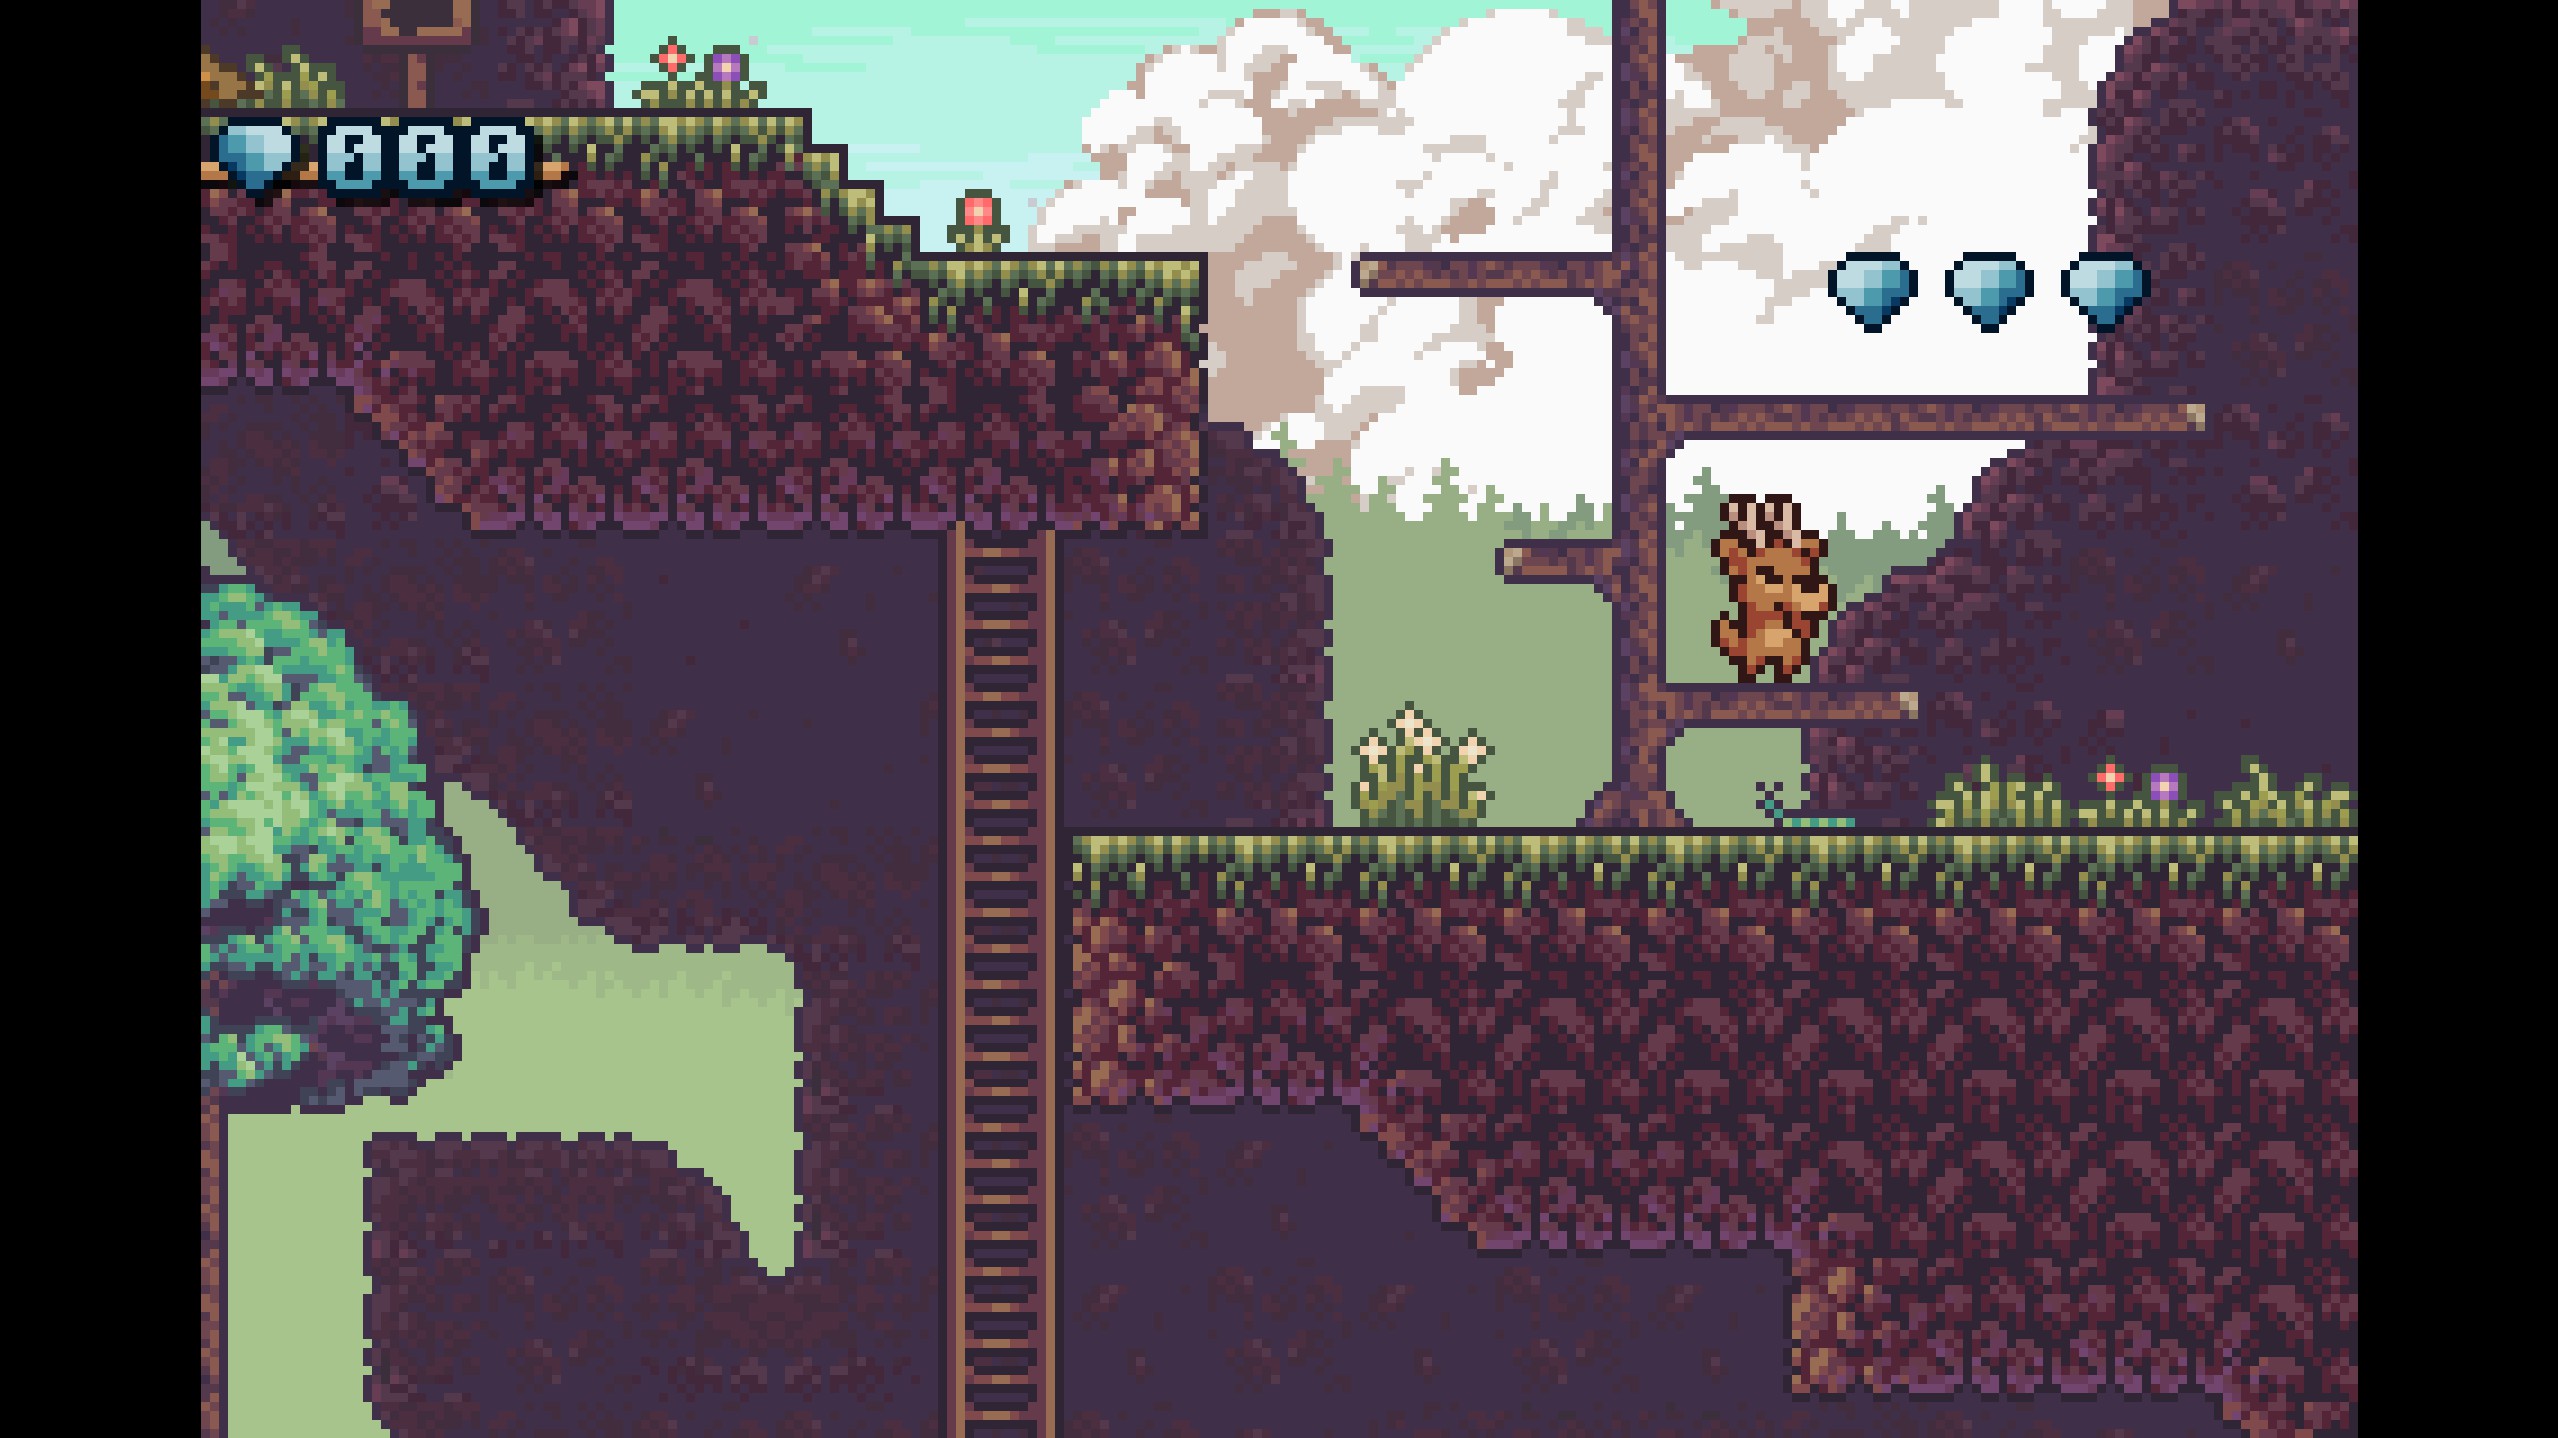
- The first gems in Emerald Vale are found along a tree branch on the normal path, just after climbing up the second ladder.
- Gems 4-6
- These gems are found in an arc along the bridge to the left of gems 1-3, still on the normal path.
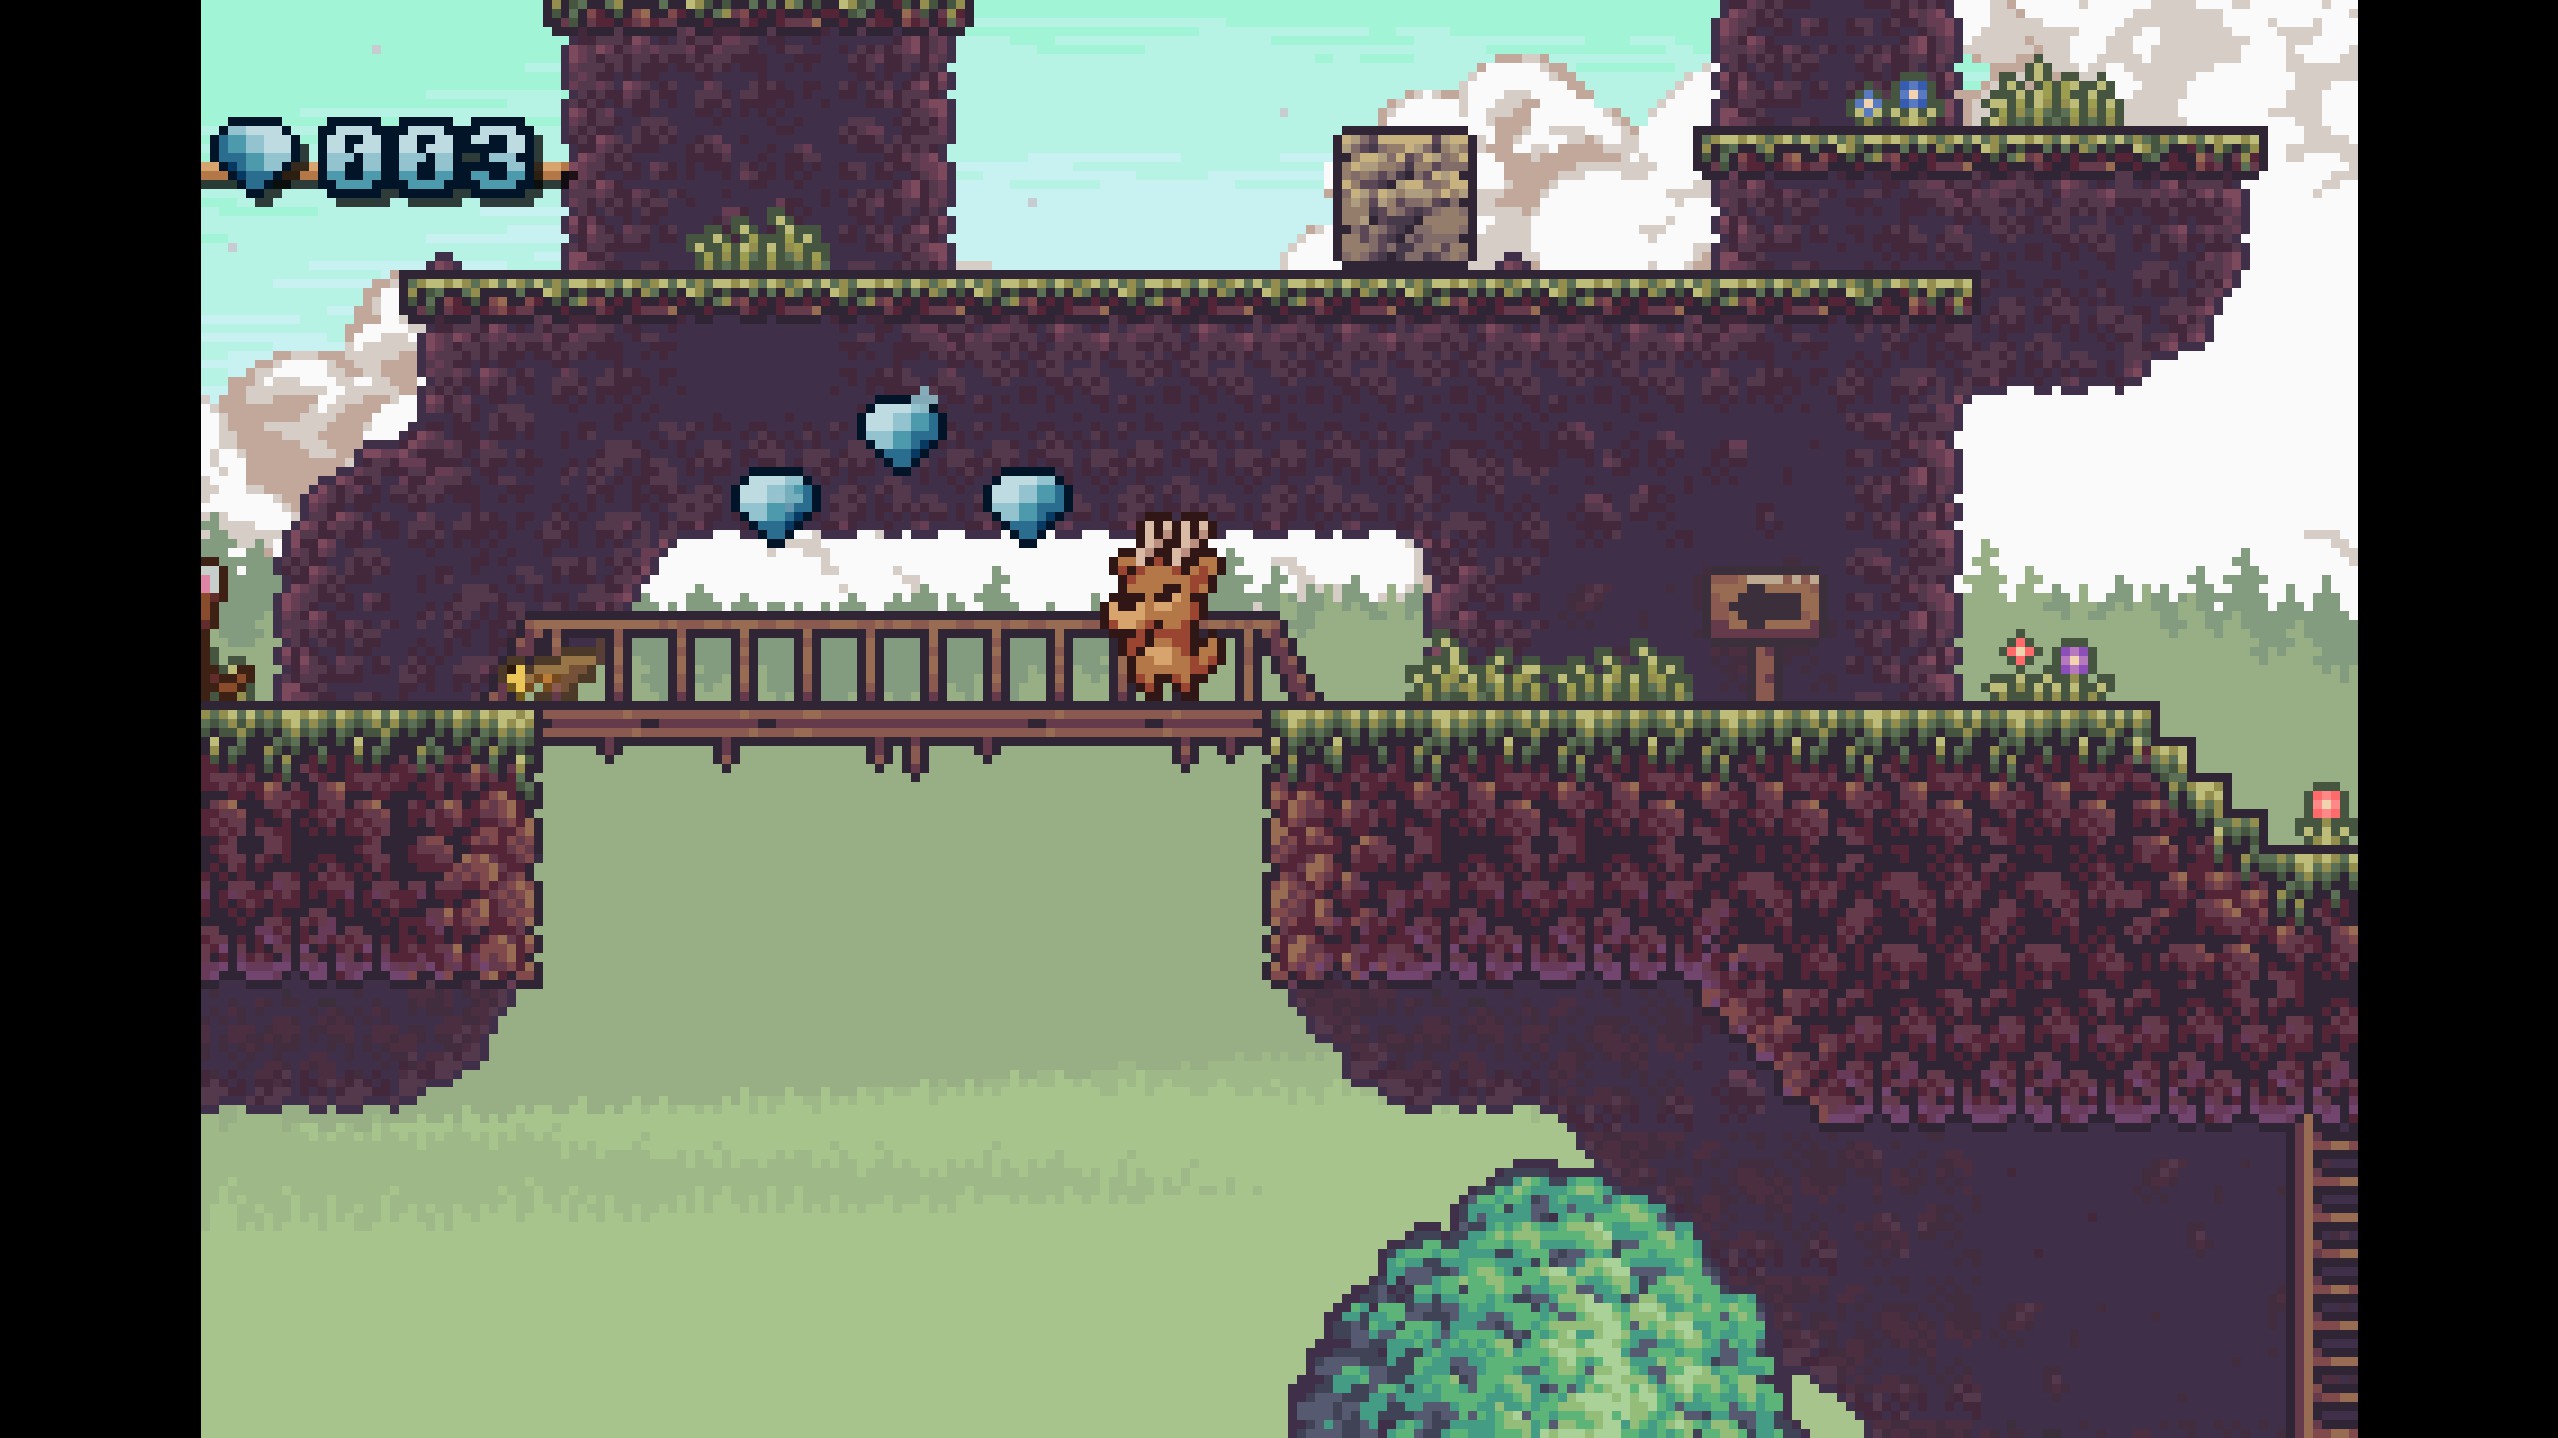
- These gems are found in an arc along the bridge to the left of gems 1-3, still on the normal path.
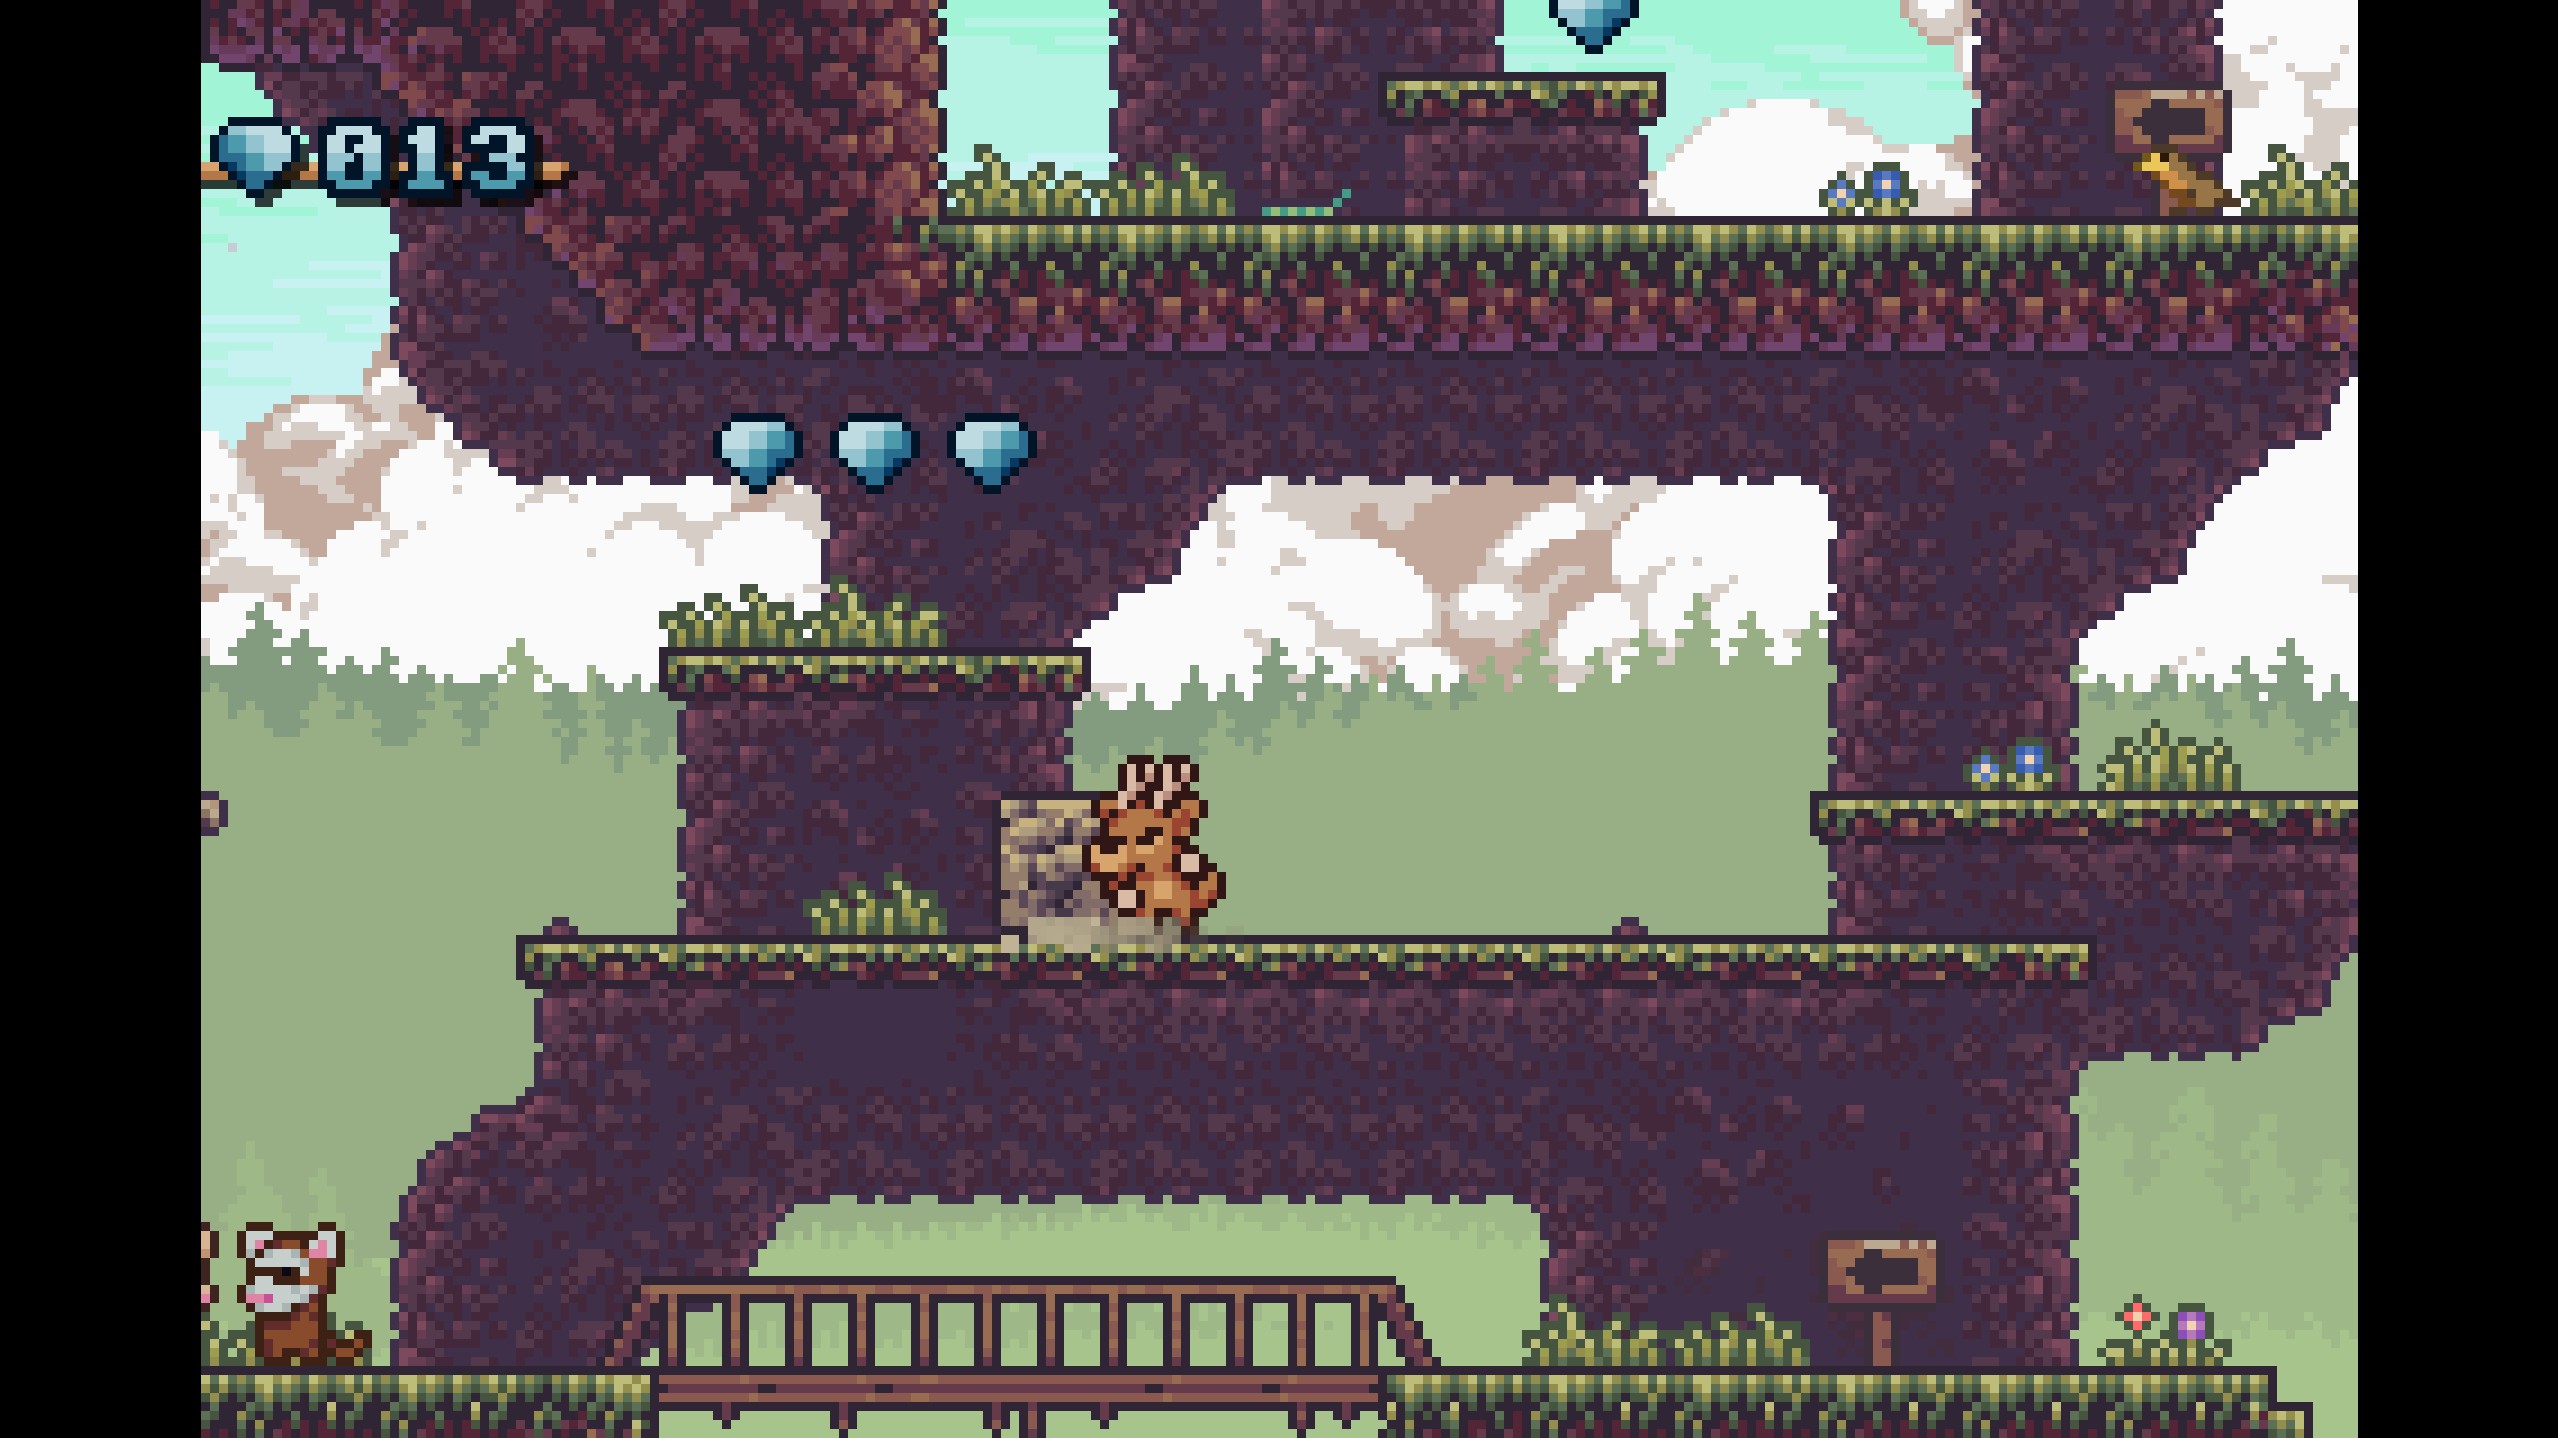
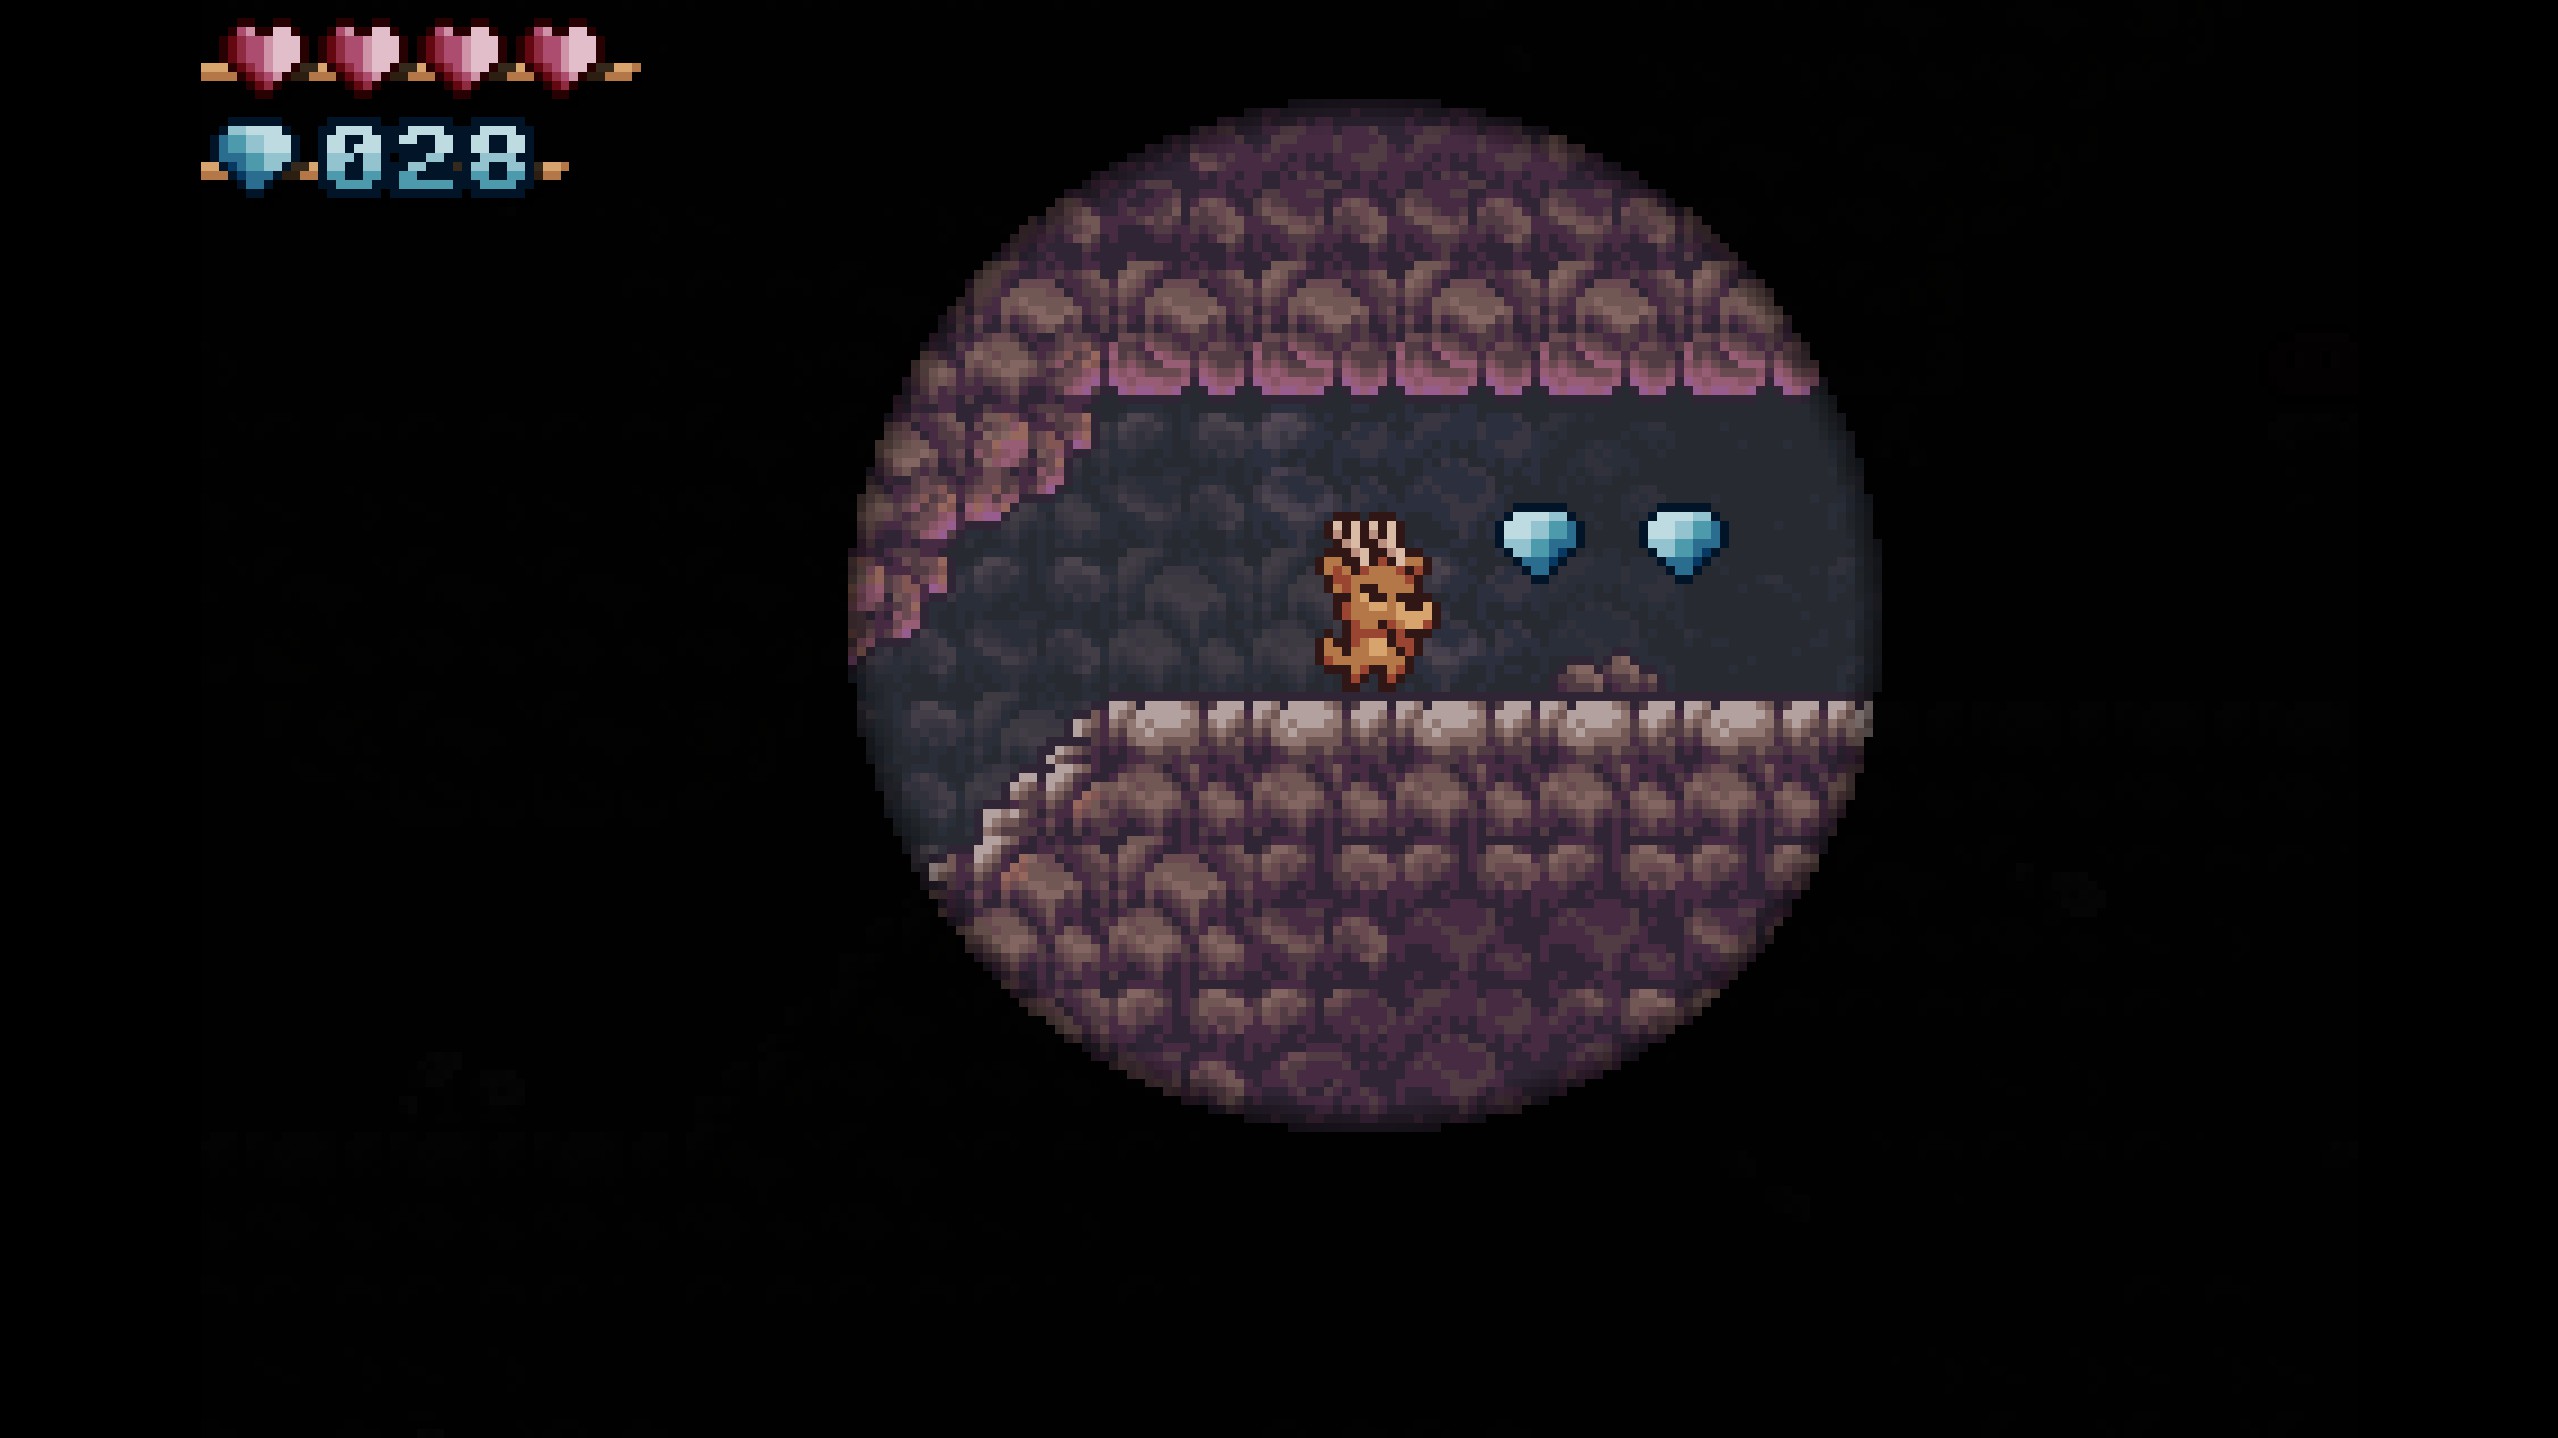
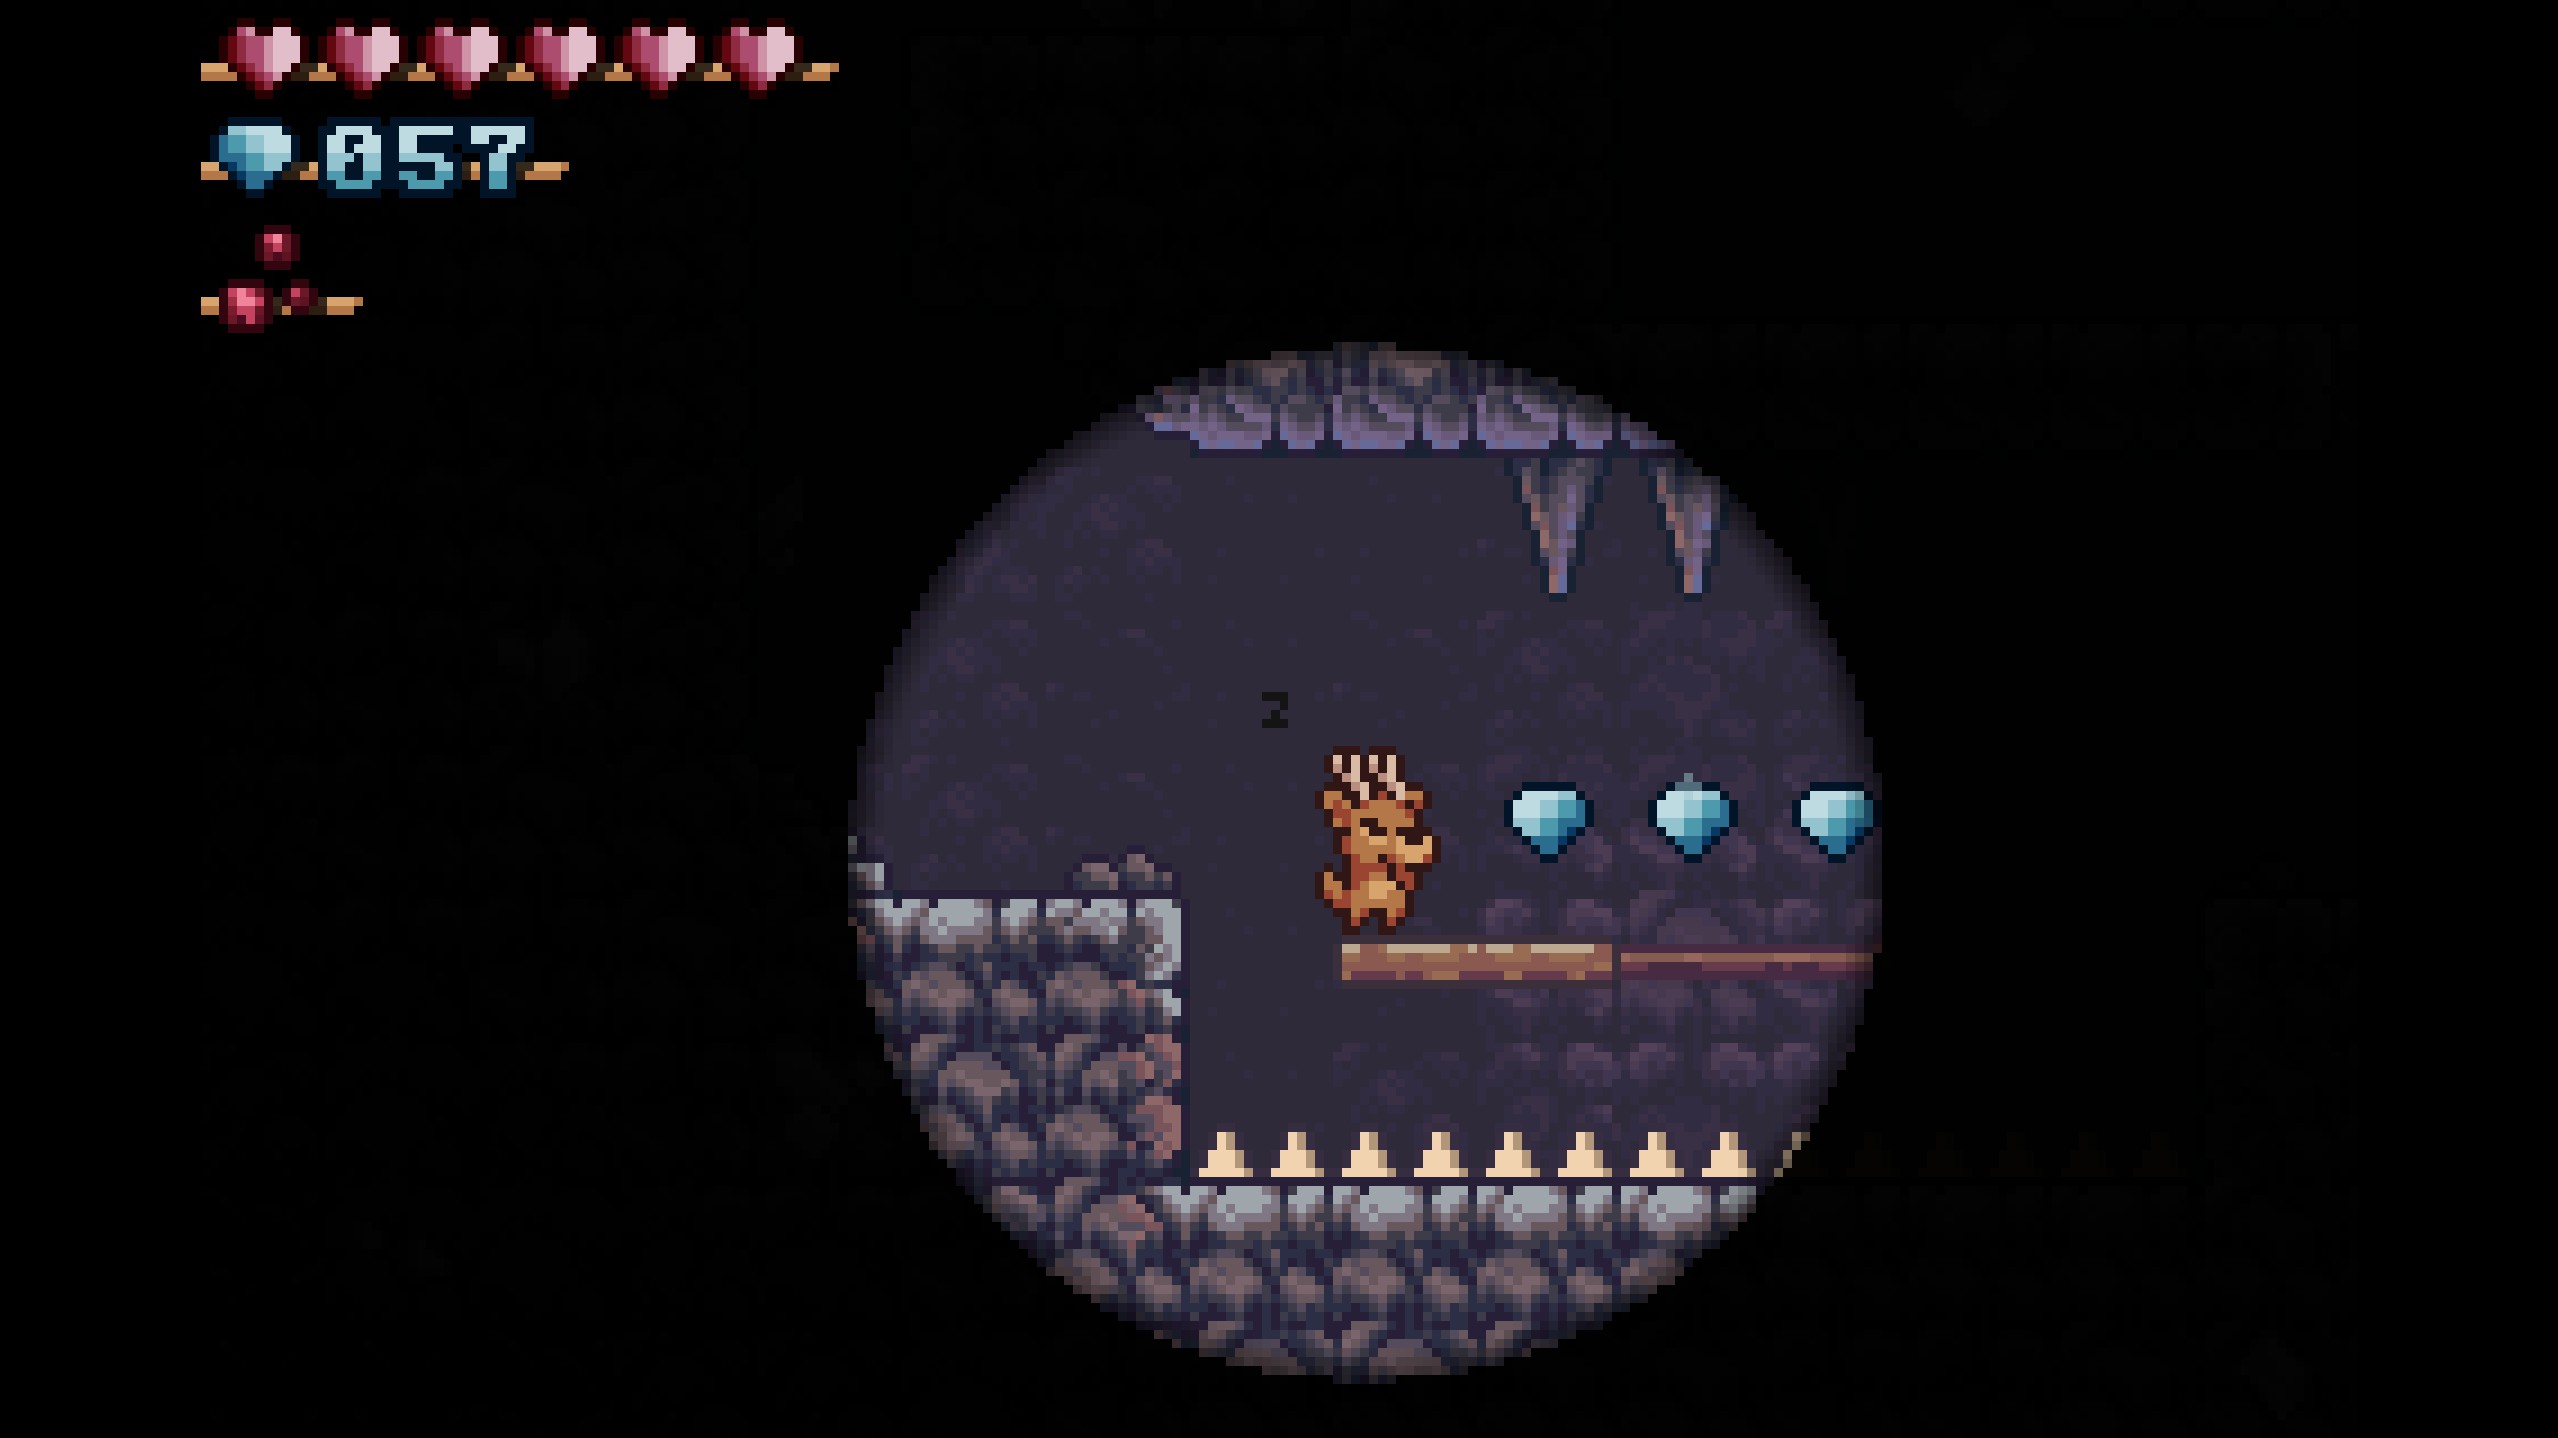
- Gems 7-13
- These gems are found to the left of the bridge. After easily collecting the first three gems, push the stone over to the base of the tree and jump on it to reach the branches. Climb up and collect the remaining four gems to the left!
- These gems are found to the left of the bridge. After easily collecting the first three gems, push the stone over to the base of the tree and jump on it to reach the branches. Climb up and collect the remaining four gems to the left!
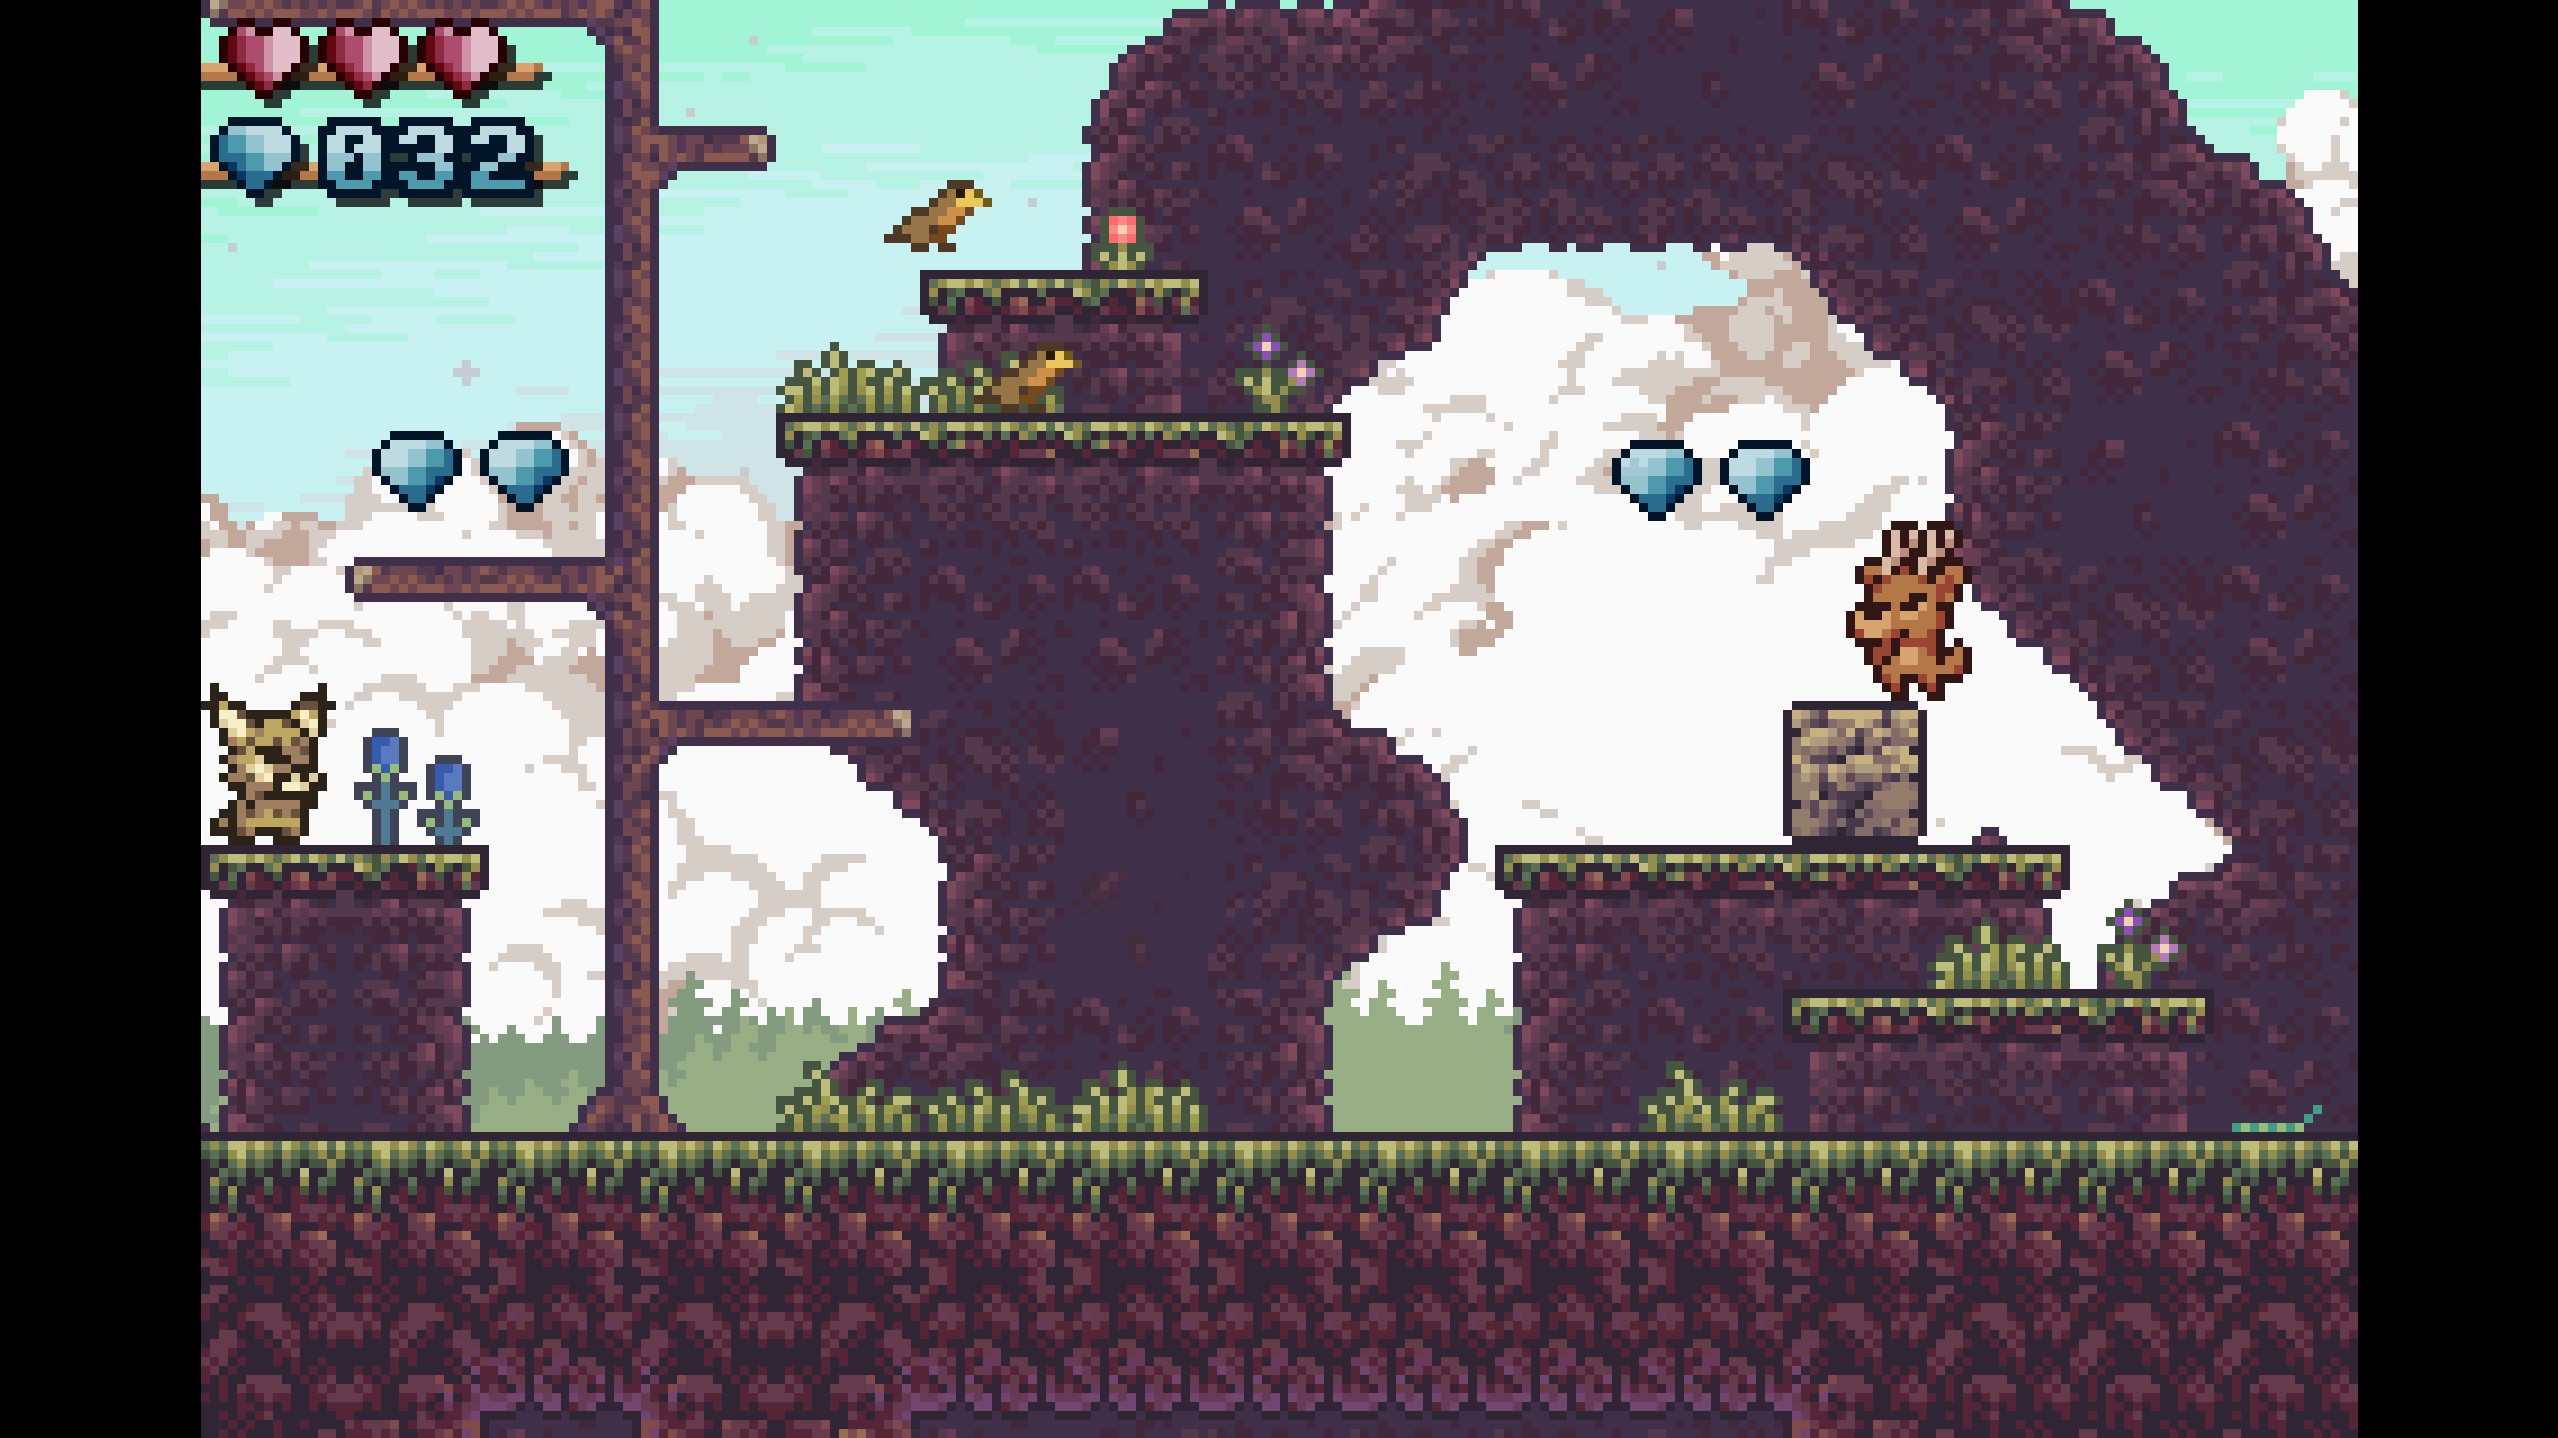
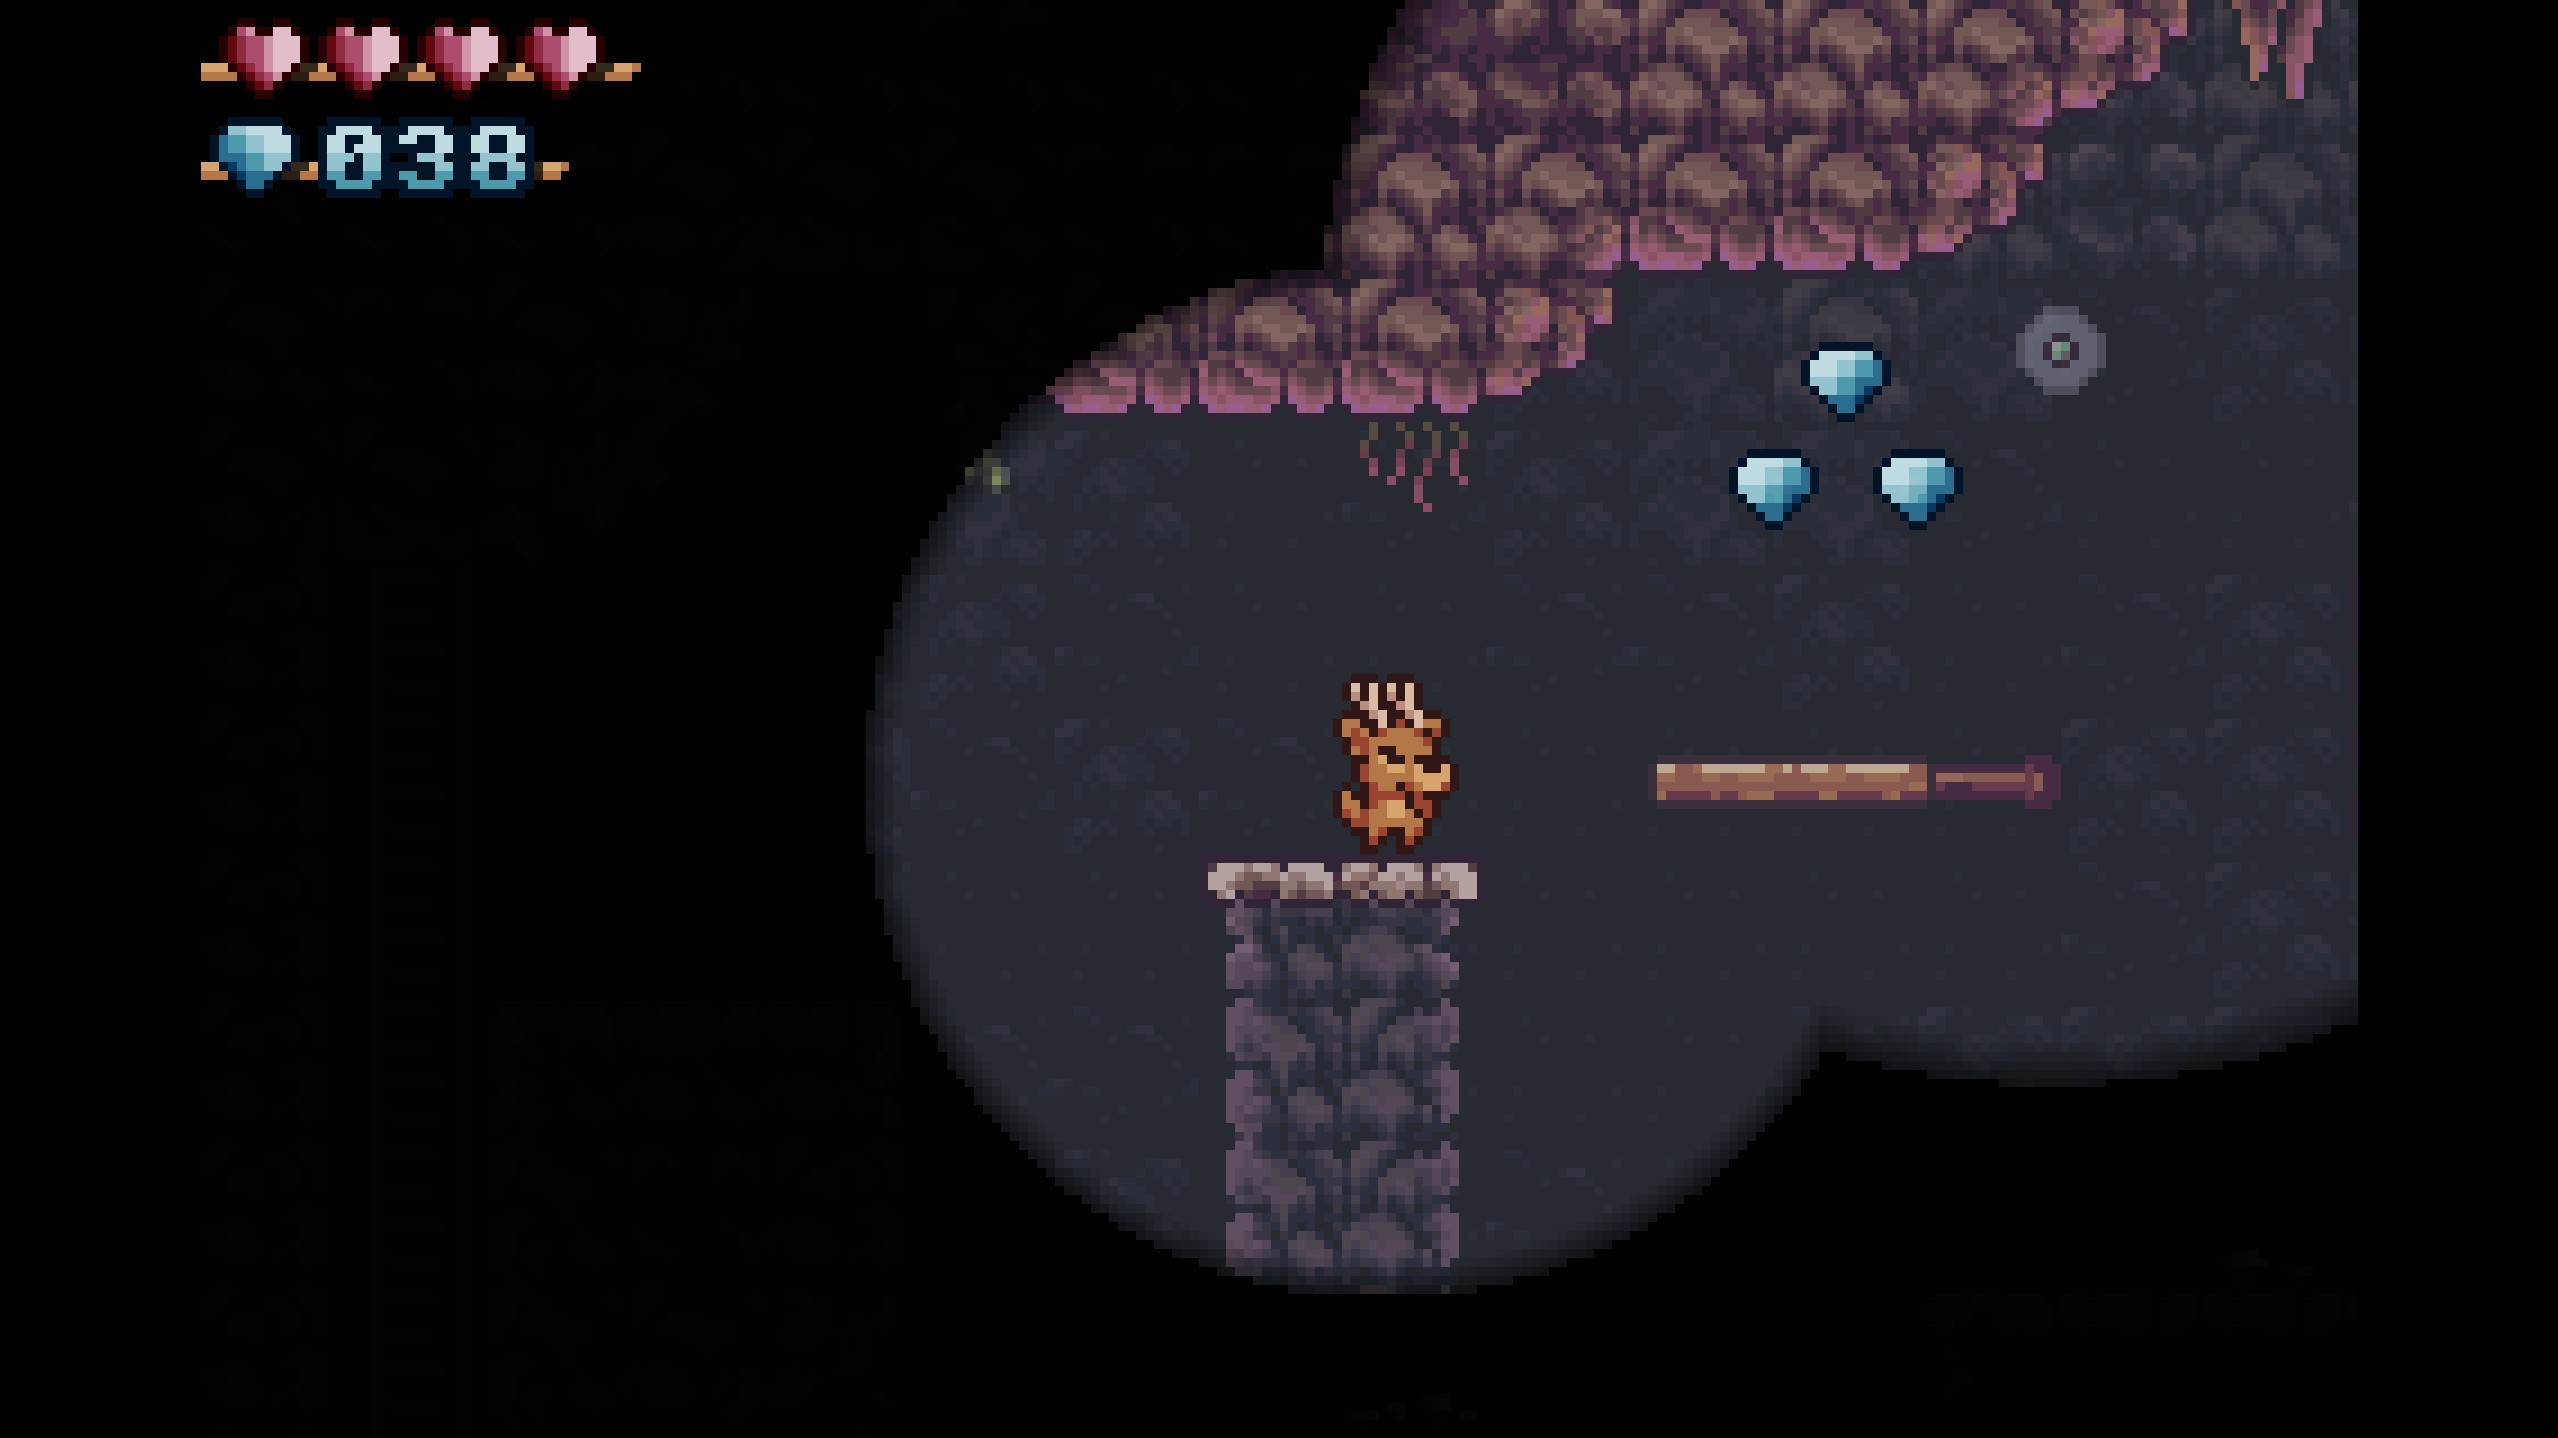
- Gems 14-16
- These gems are found to the right of the tree you just climbed. Push the stone over to the semisolid platform and jump up to reach the gems.
- These gems are found to the right of the tree you just climbed. Push the stone over to the semisolid platform and jump up to reach the gems.
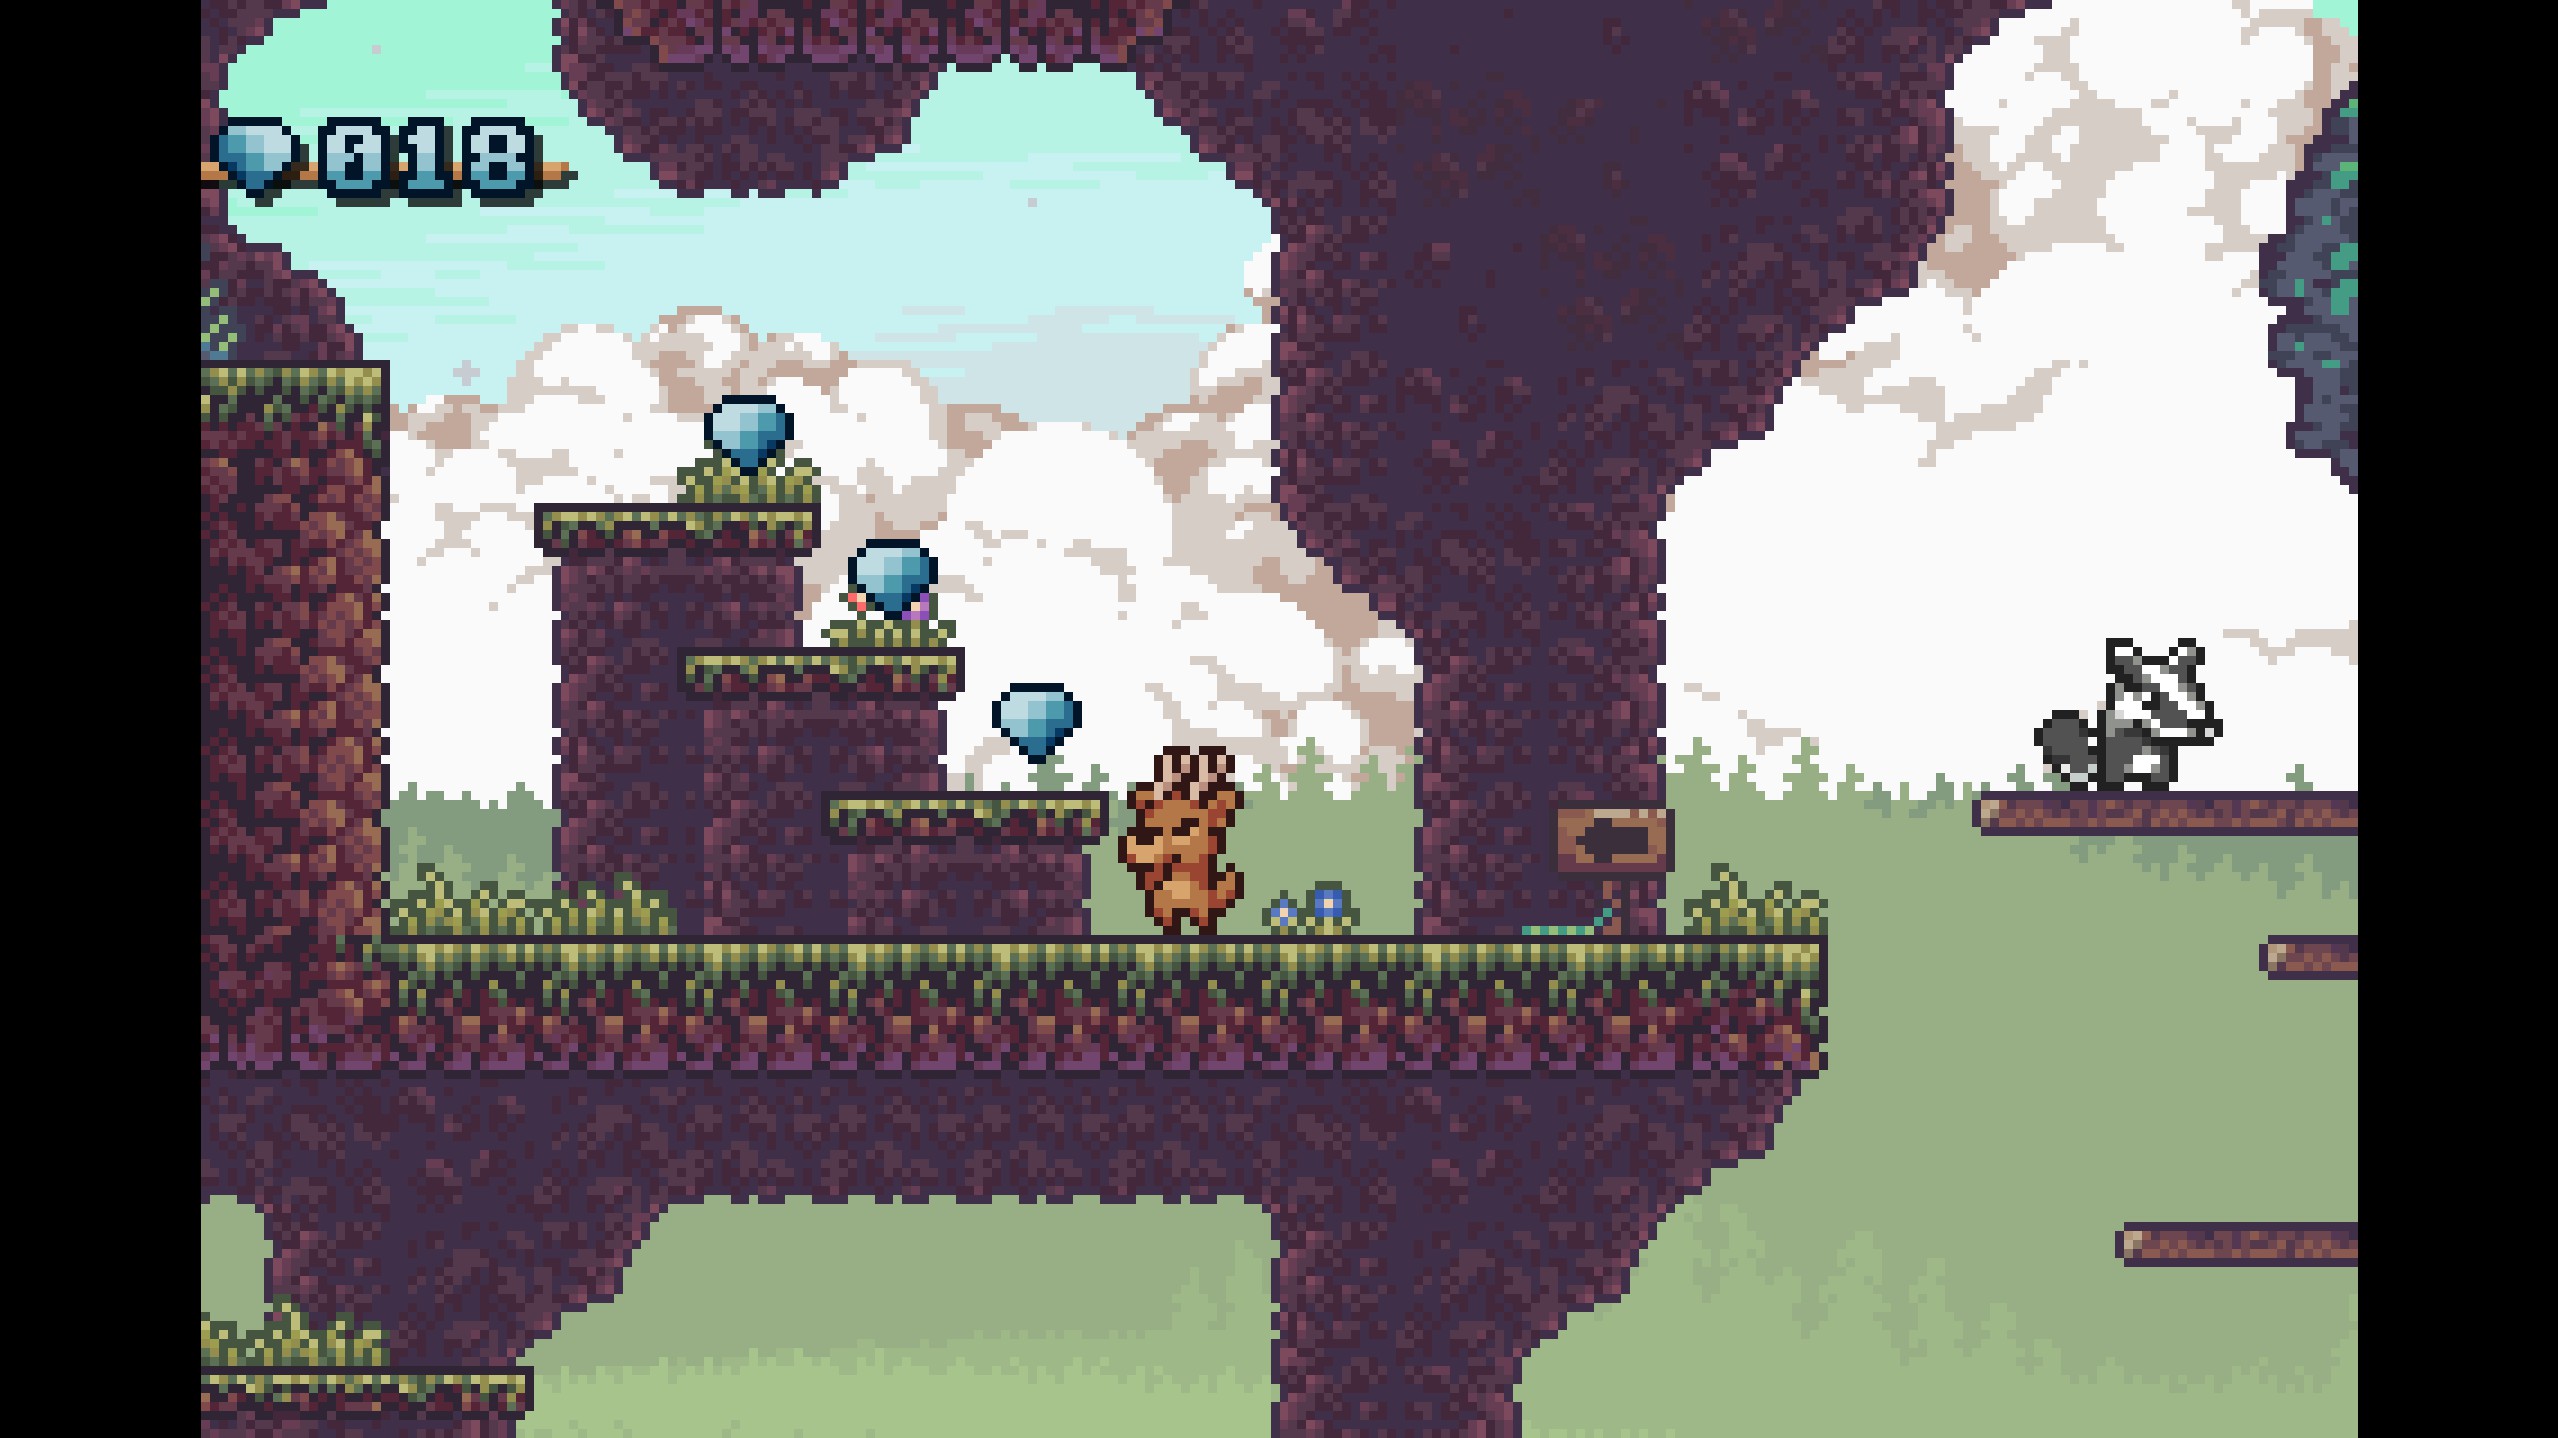
- Gems 17-18
- Continue along the normal path and climb up the tall tree to the right to easily collect these gems.
- Continue along the normal path and climb up the tall tree to the right to easily collect these gems.
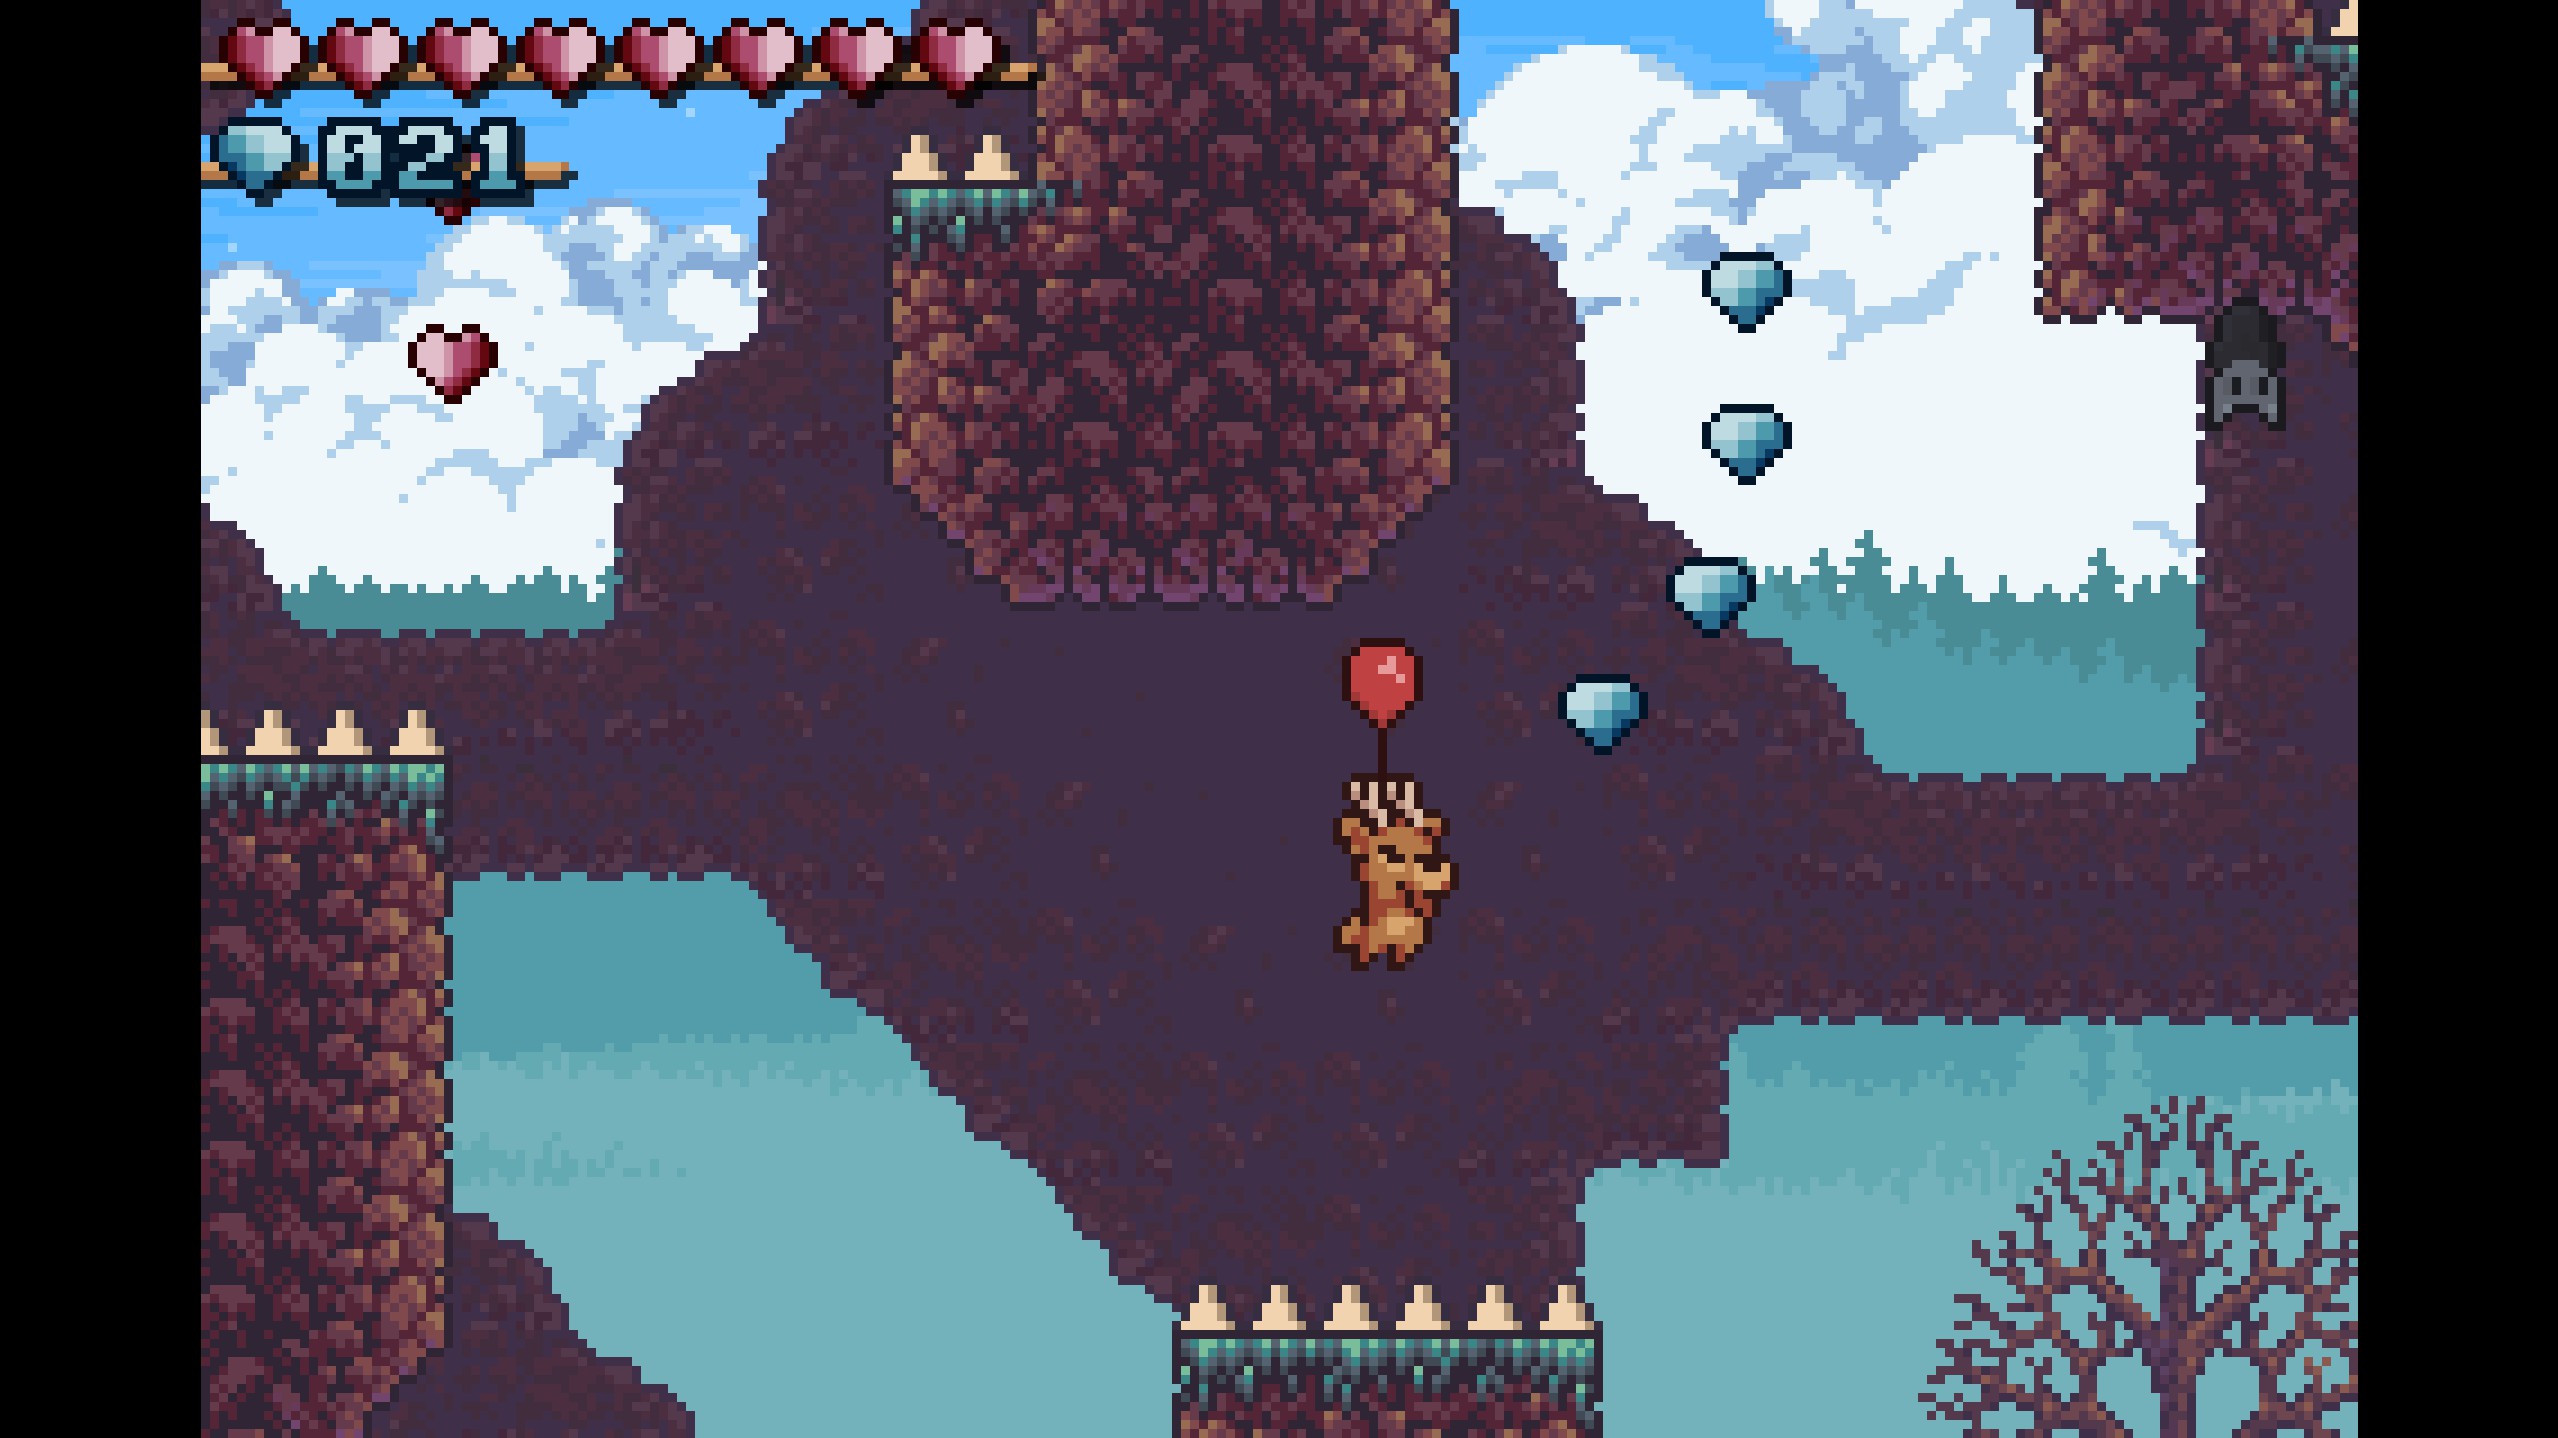
- Gems 19-21
- Continue along the normal path and collect these three gems as you jump up the semisolid platforms.
- Continue along the normal path and collect these three gems as you jump up the semisolid platforms.
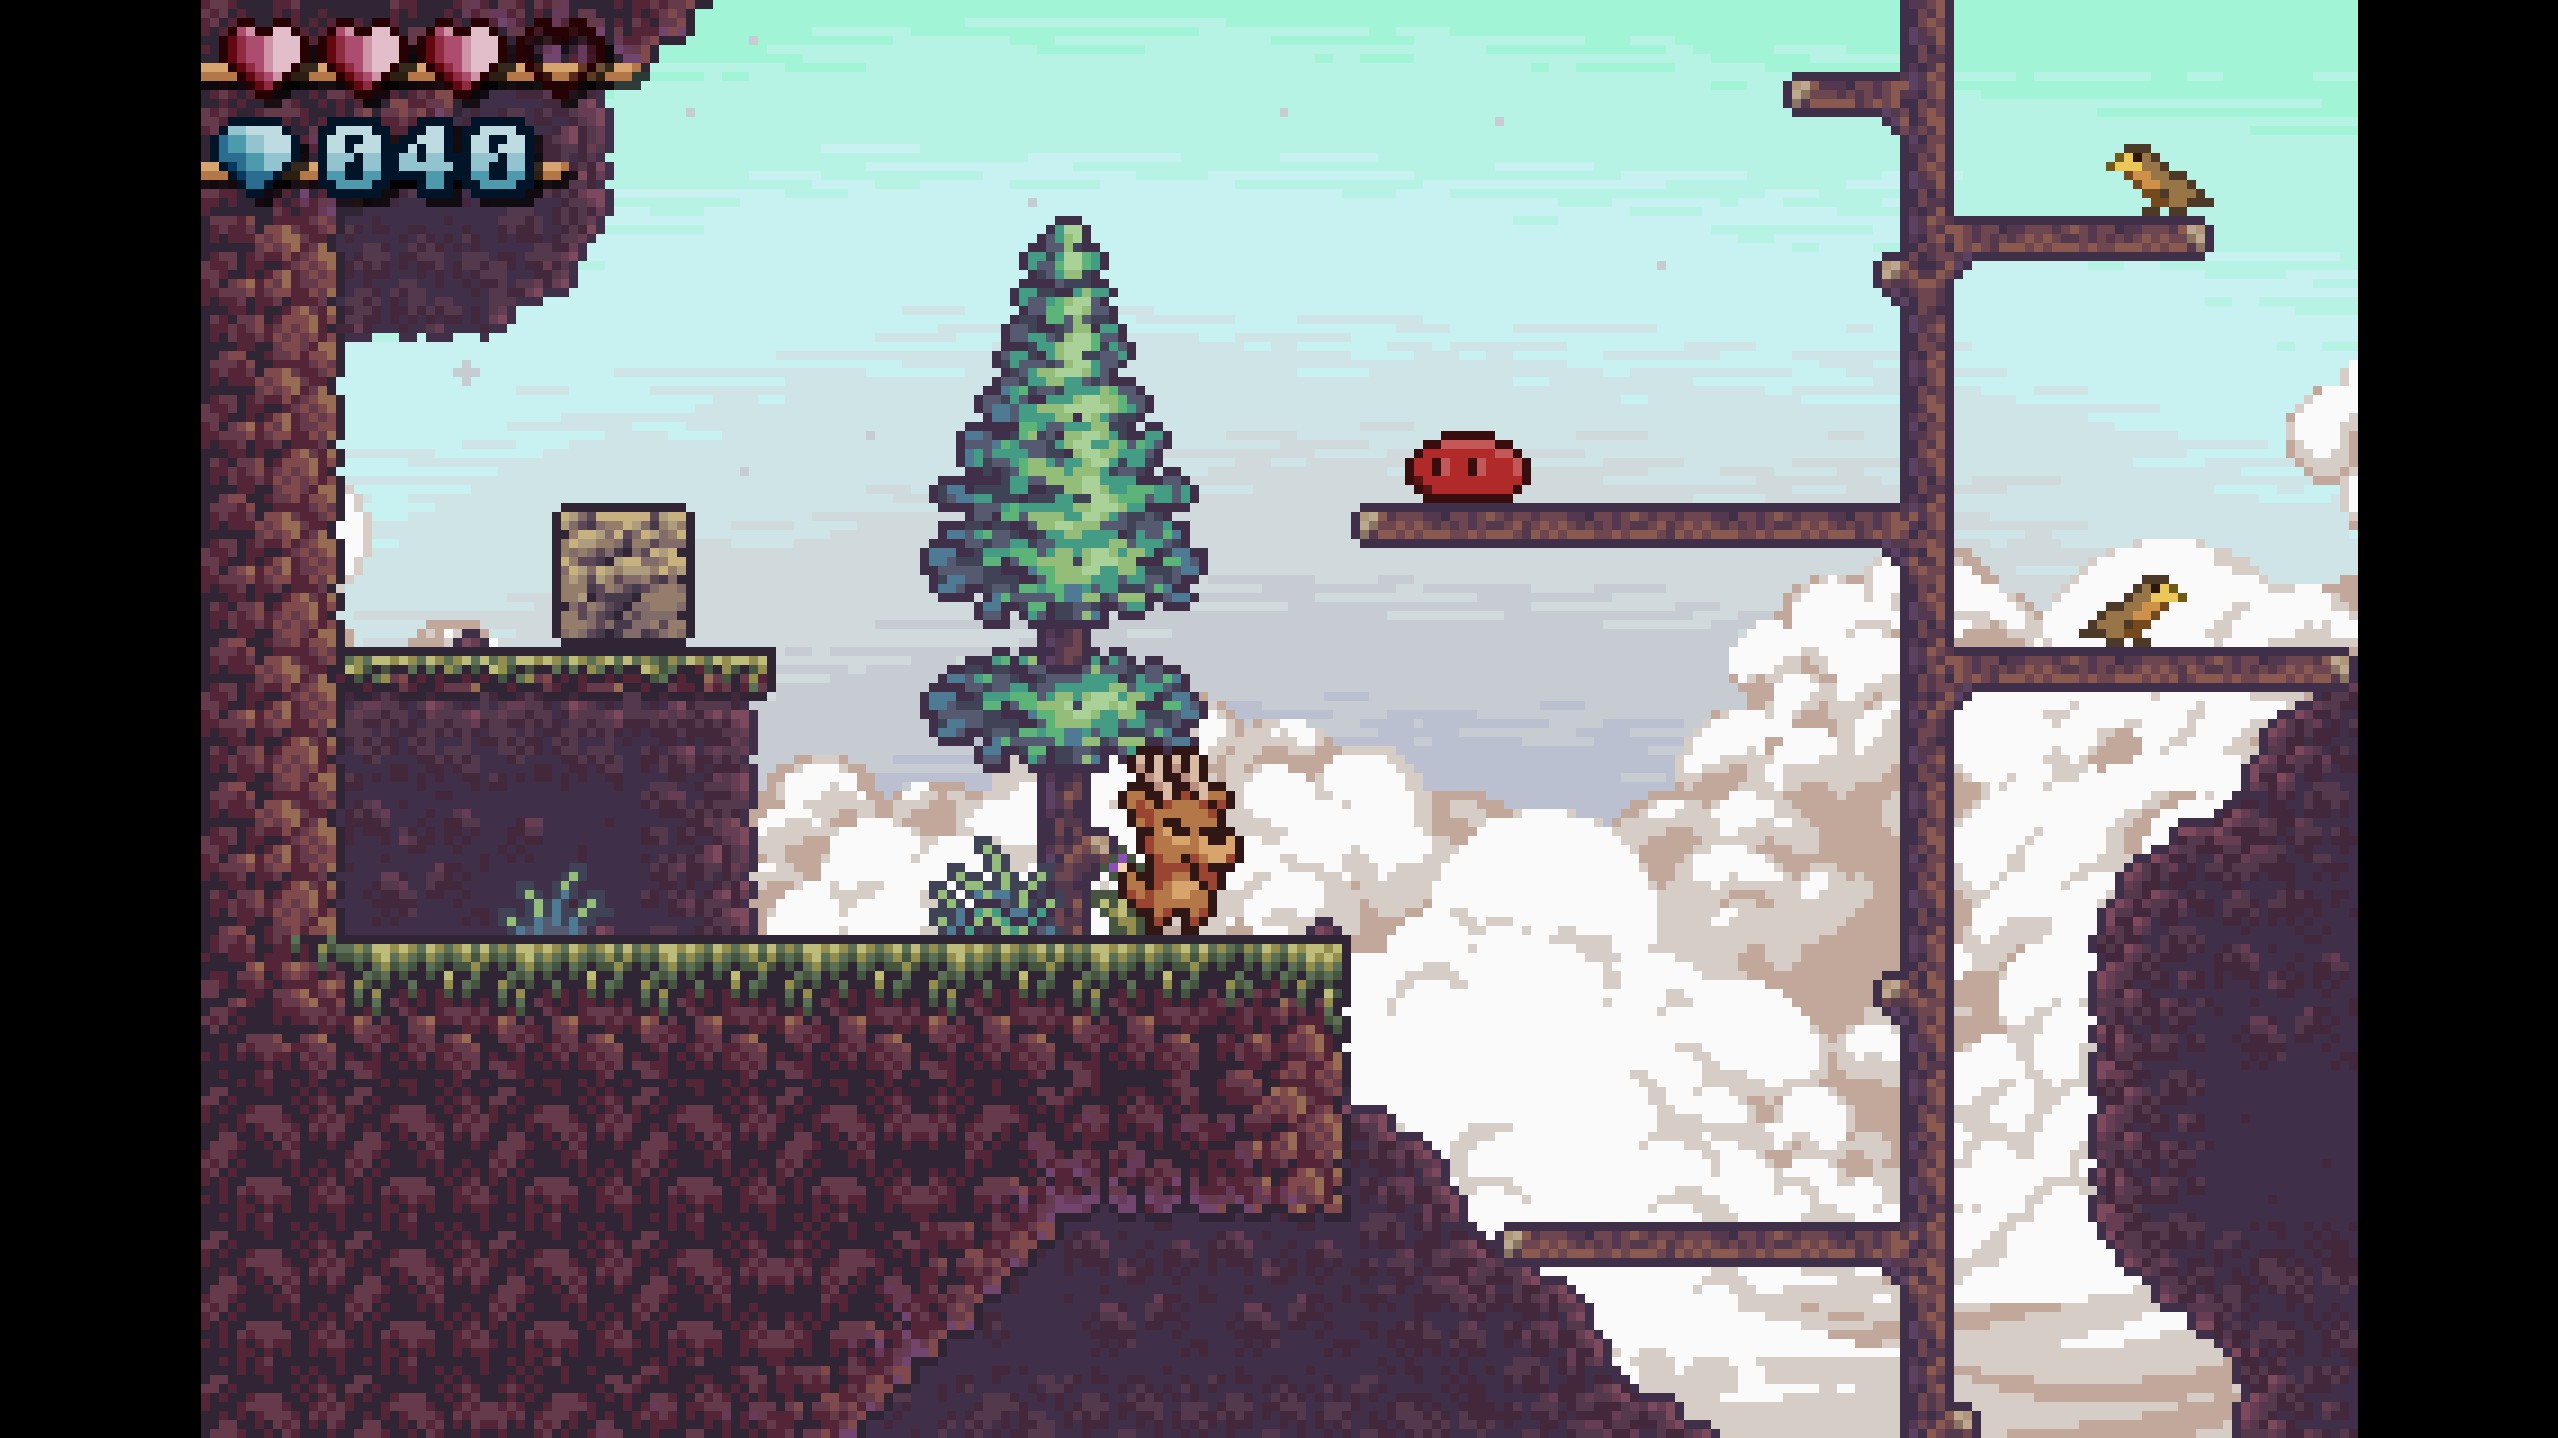
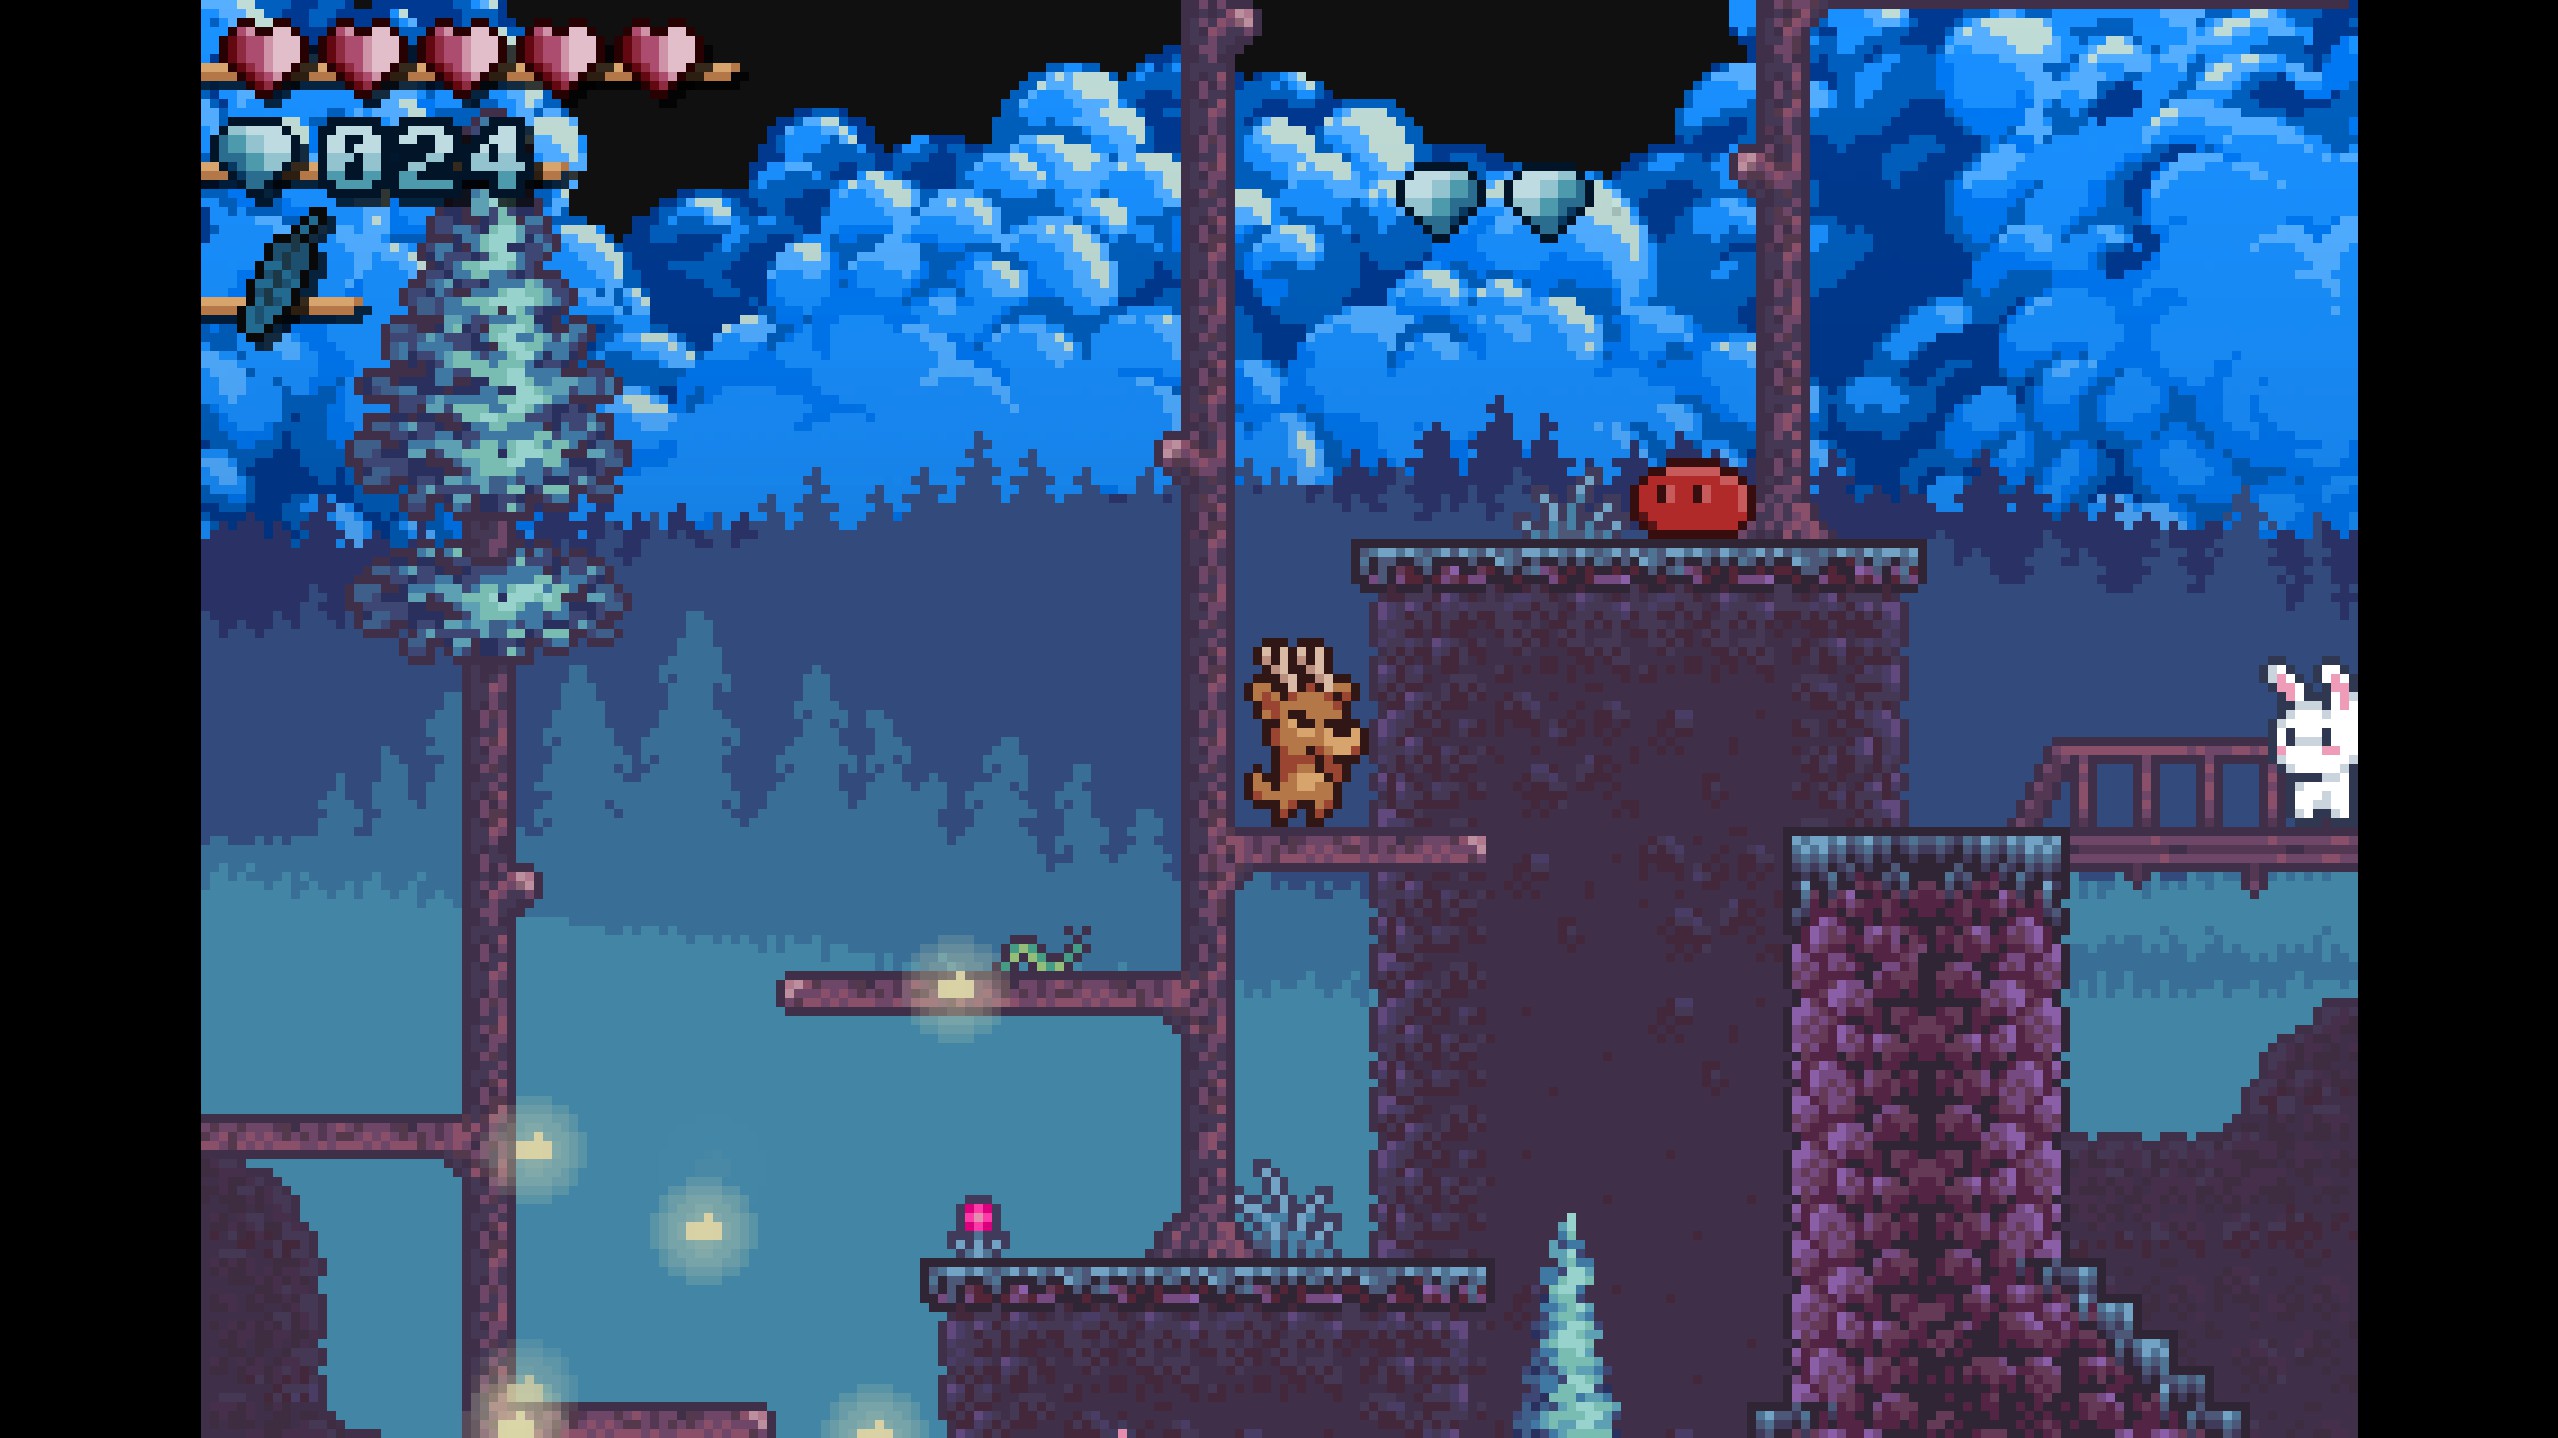
- Gems 22-24
- Continue along the normal path to collect these three gems. Watch out for the red slime!
- Continue along the normal path to collect these three gems. Watch out for the red slime!
- Gems 25-32
- After defeating the red slimes, (or not) climb up the tall tree's branches. These gems are easily accessed by jumping to the left and right!

- After defeating the red slimes, (or not) climb up the tall tree's branches. These gems are easily accessed by jumping to the left and right!
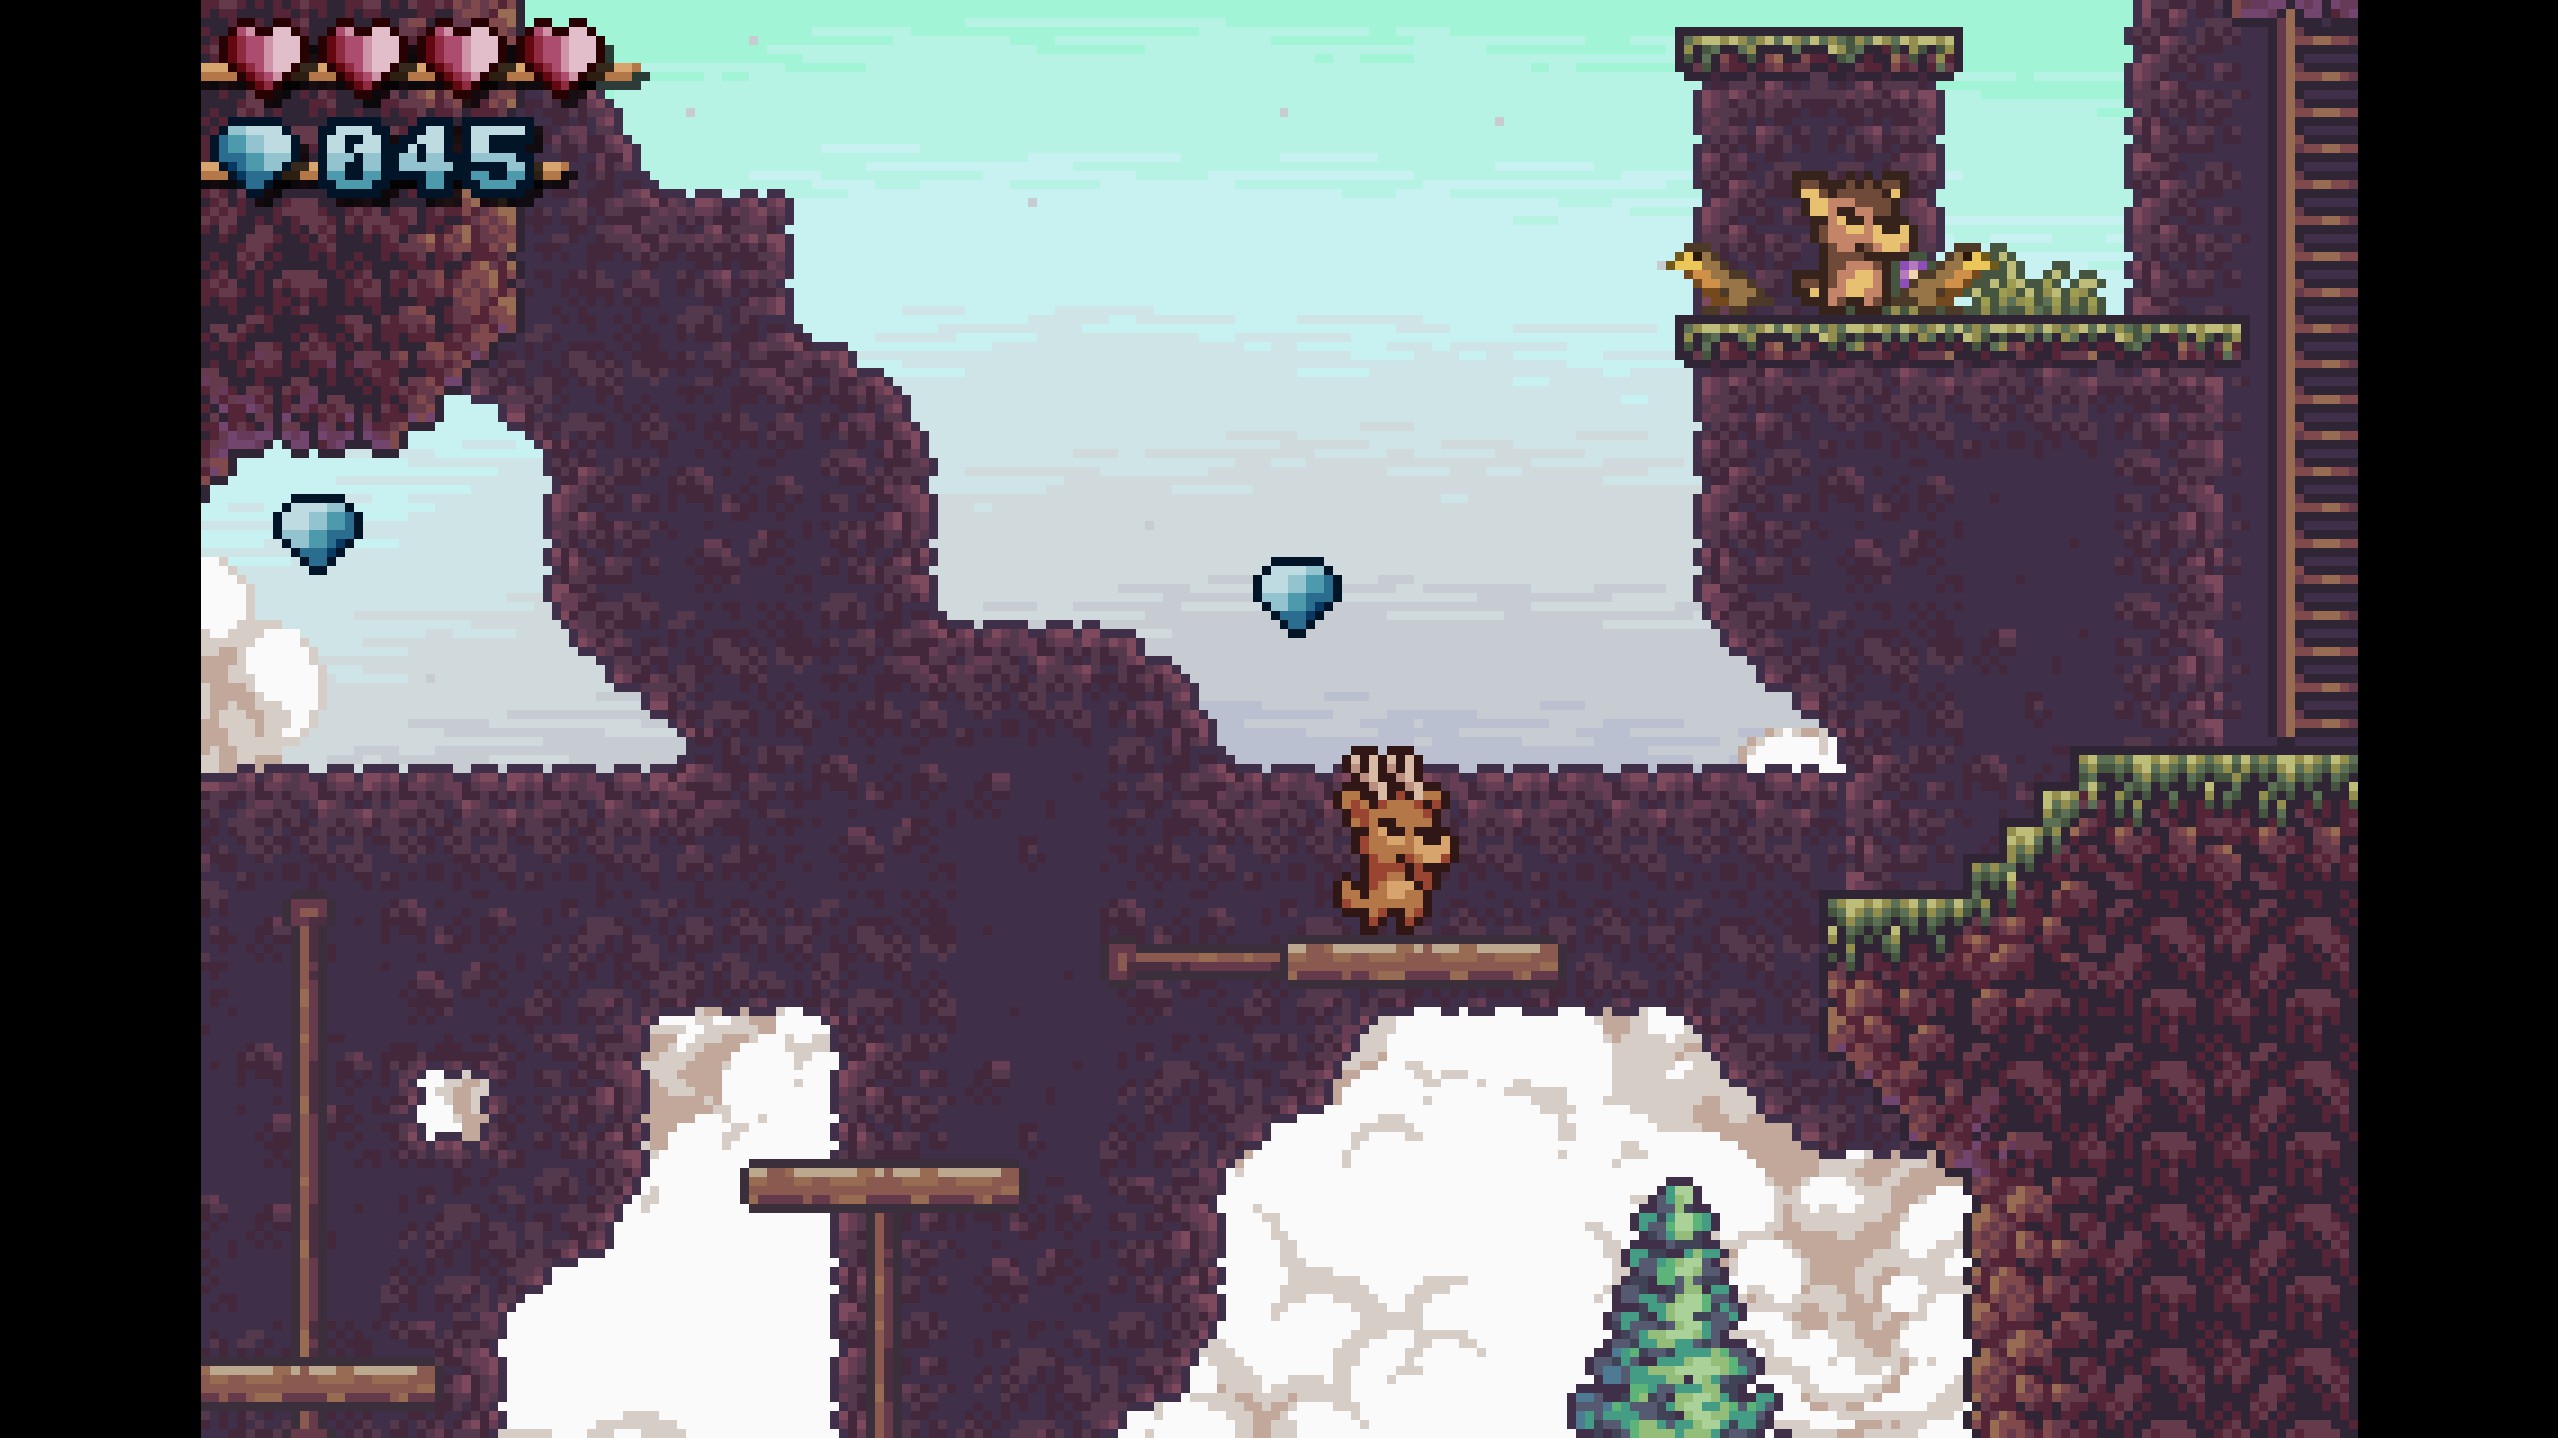
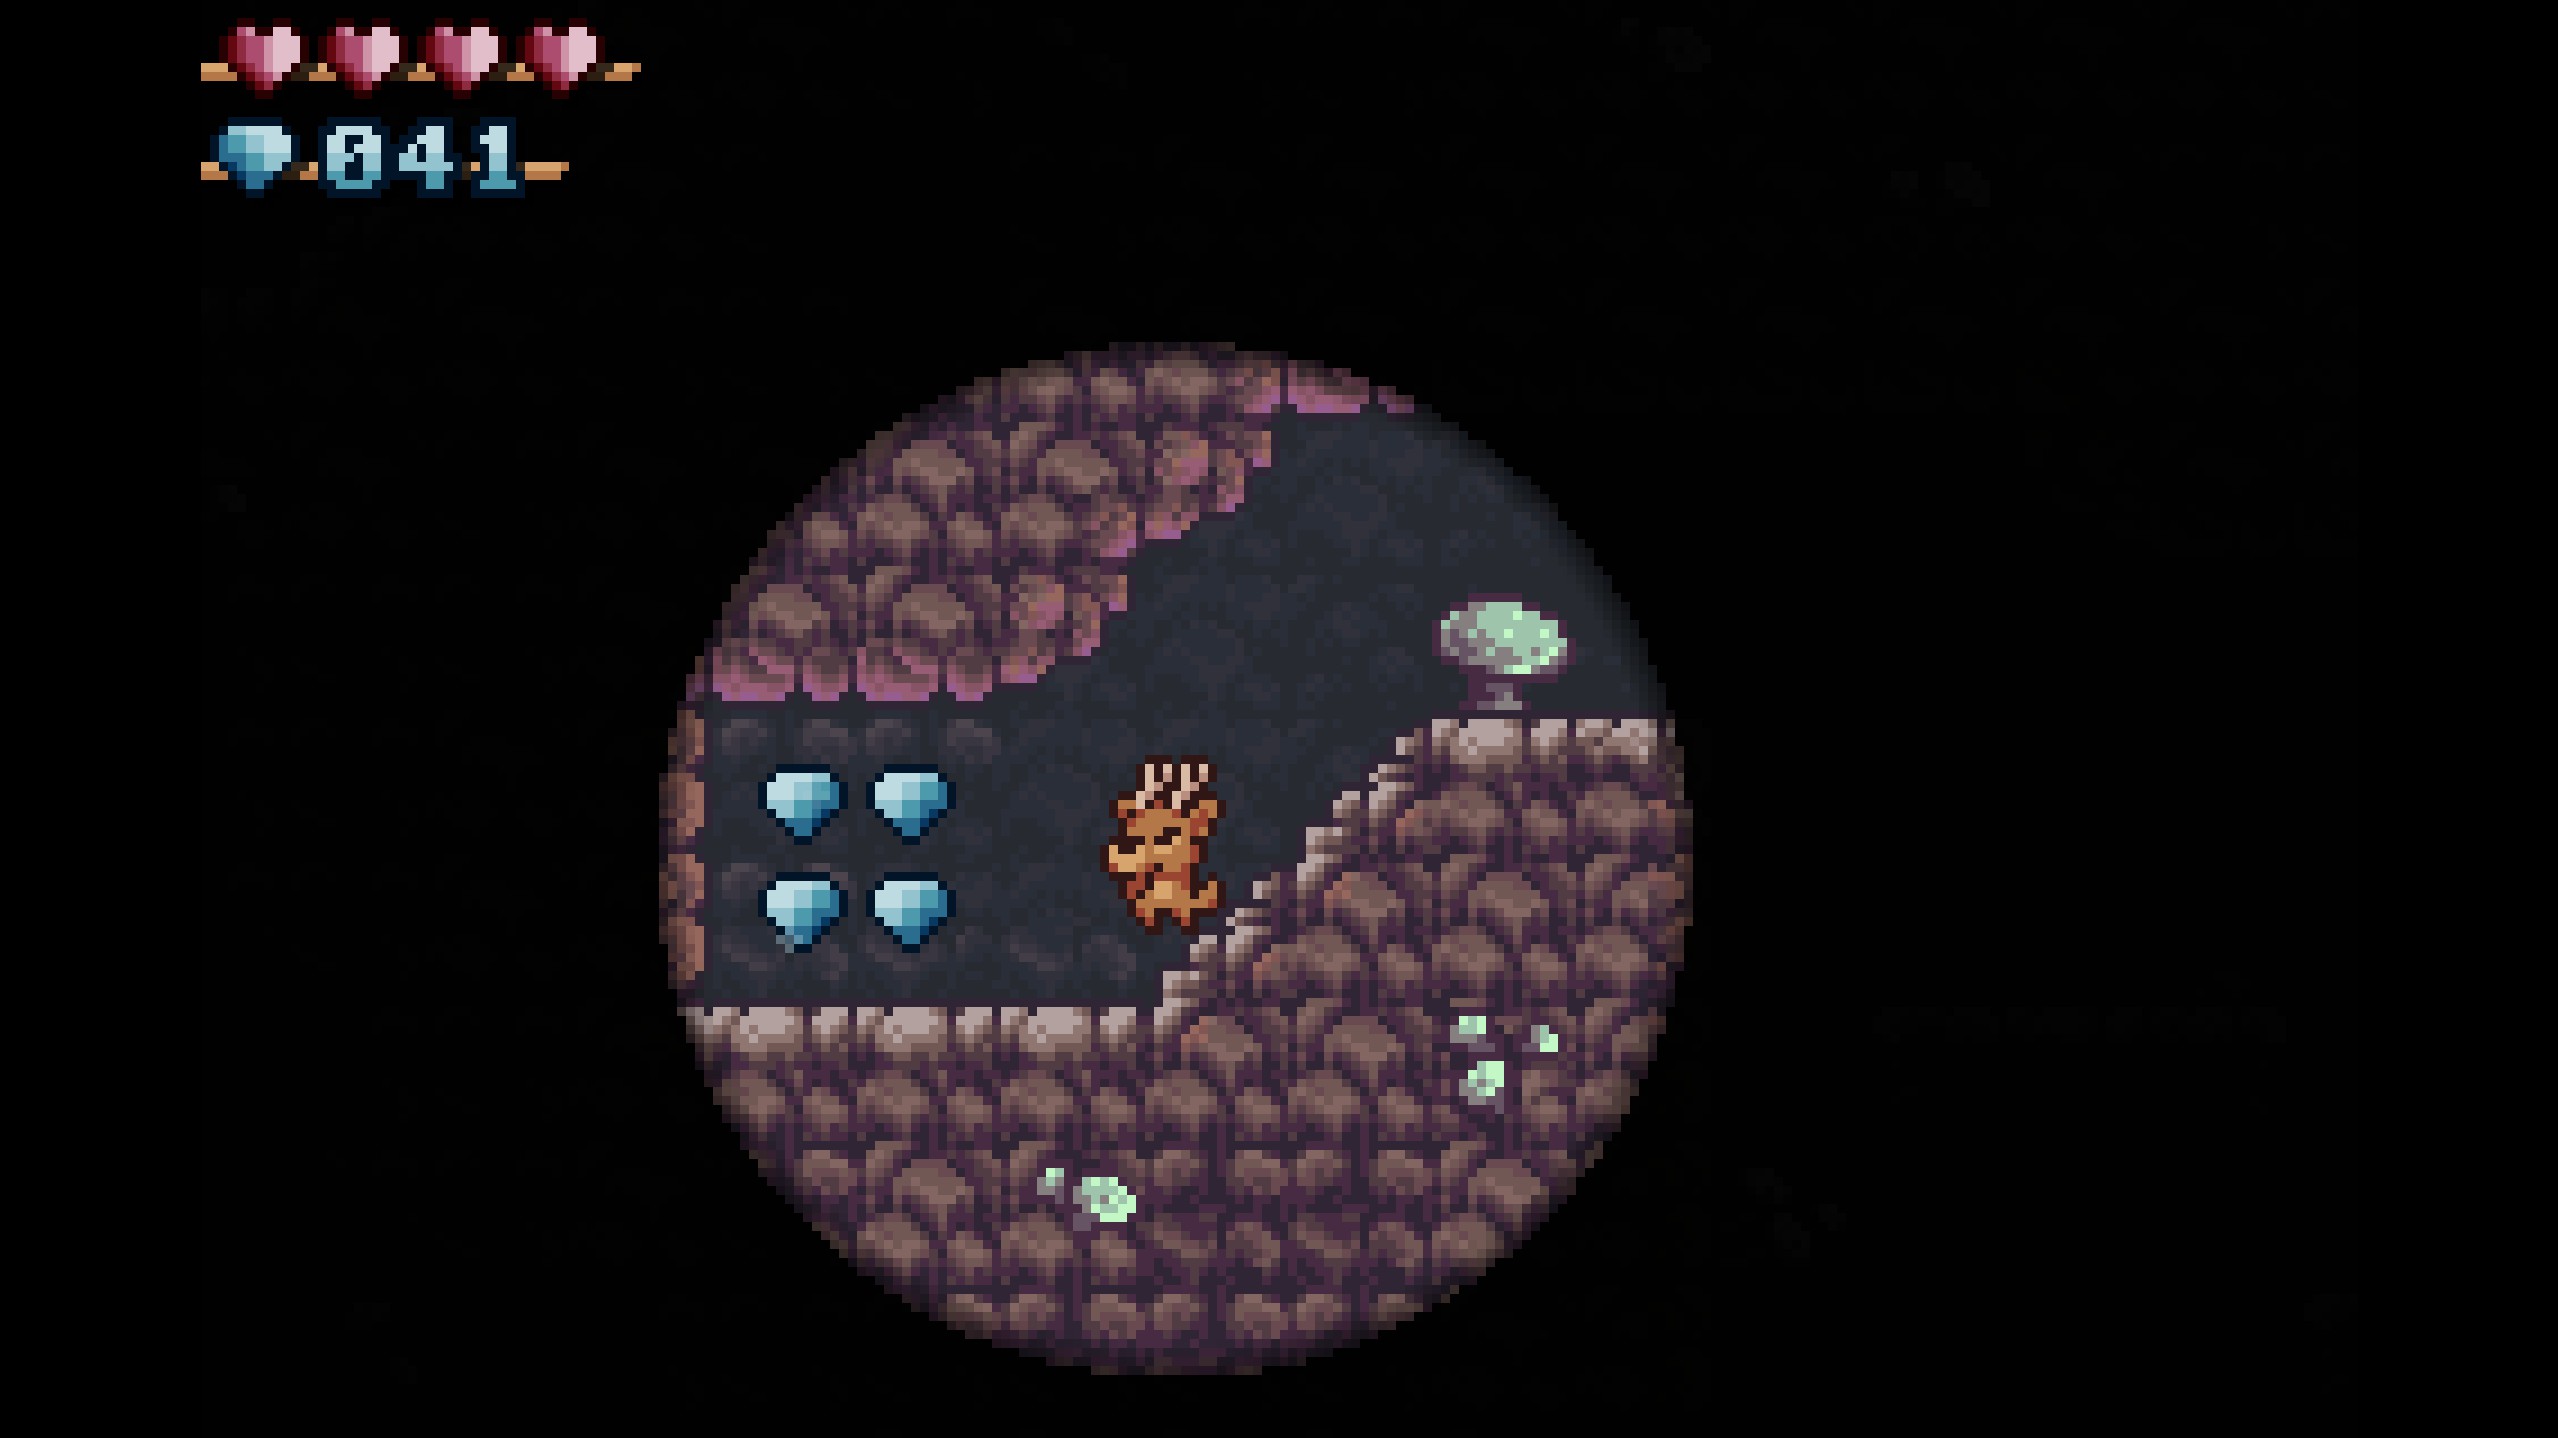
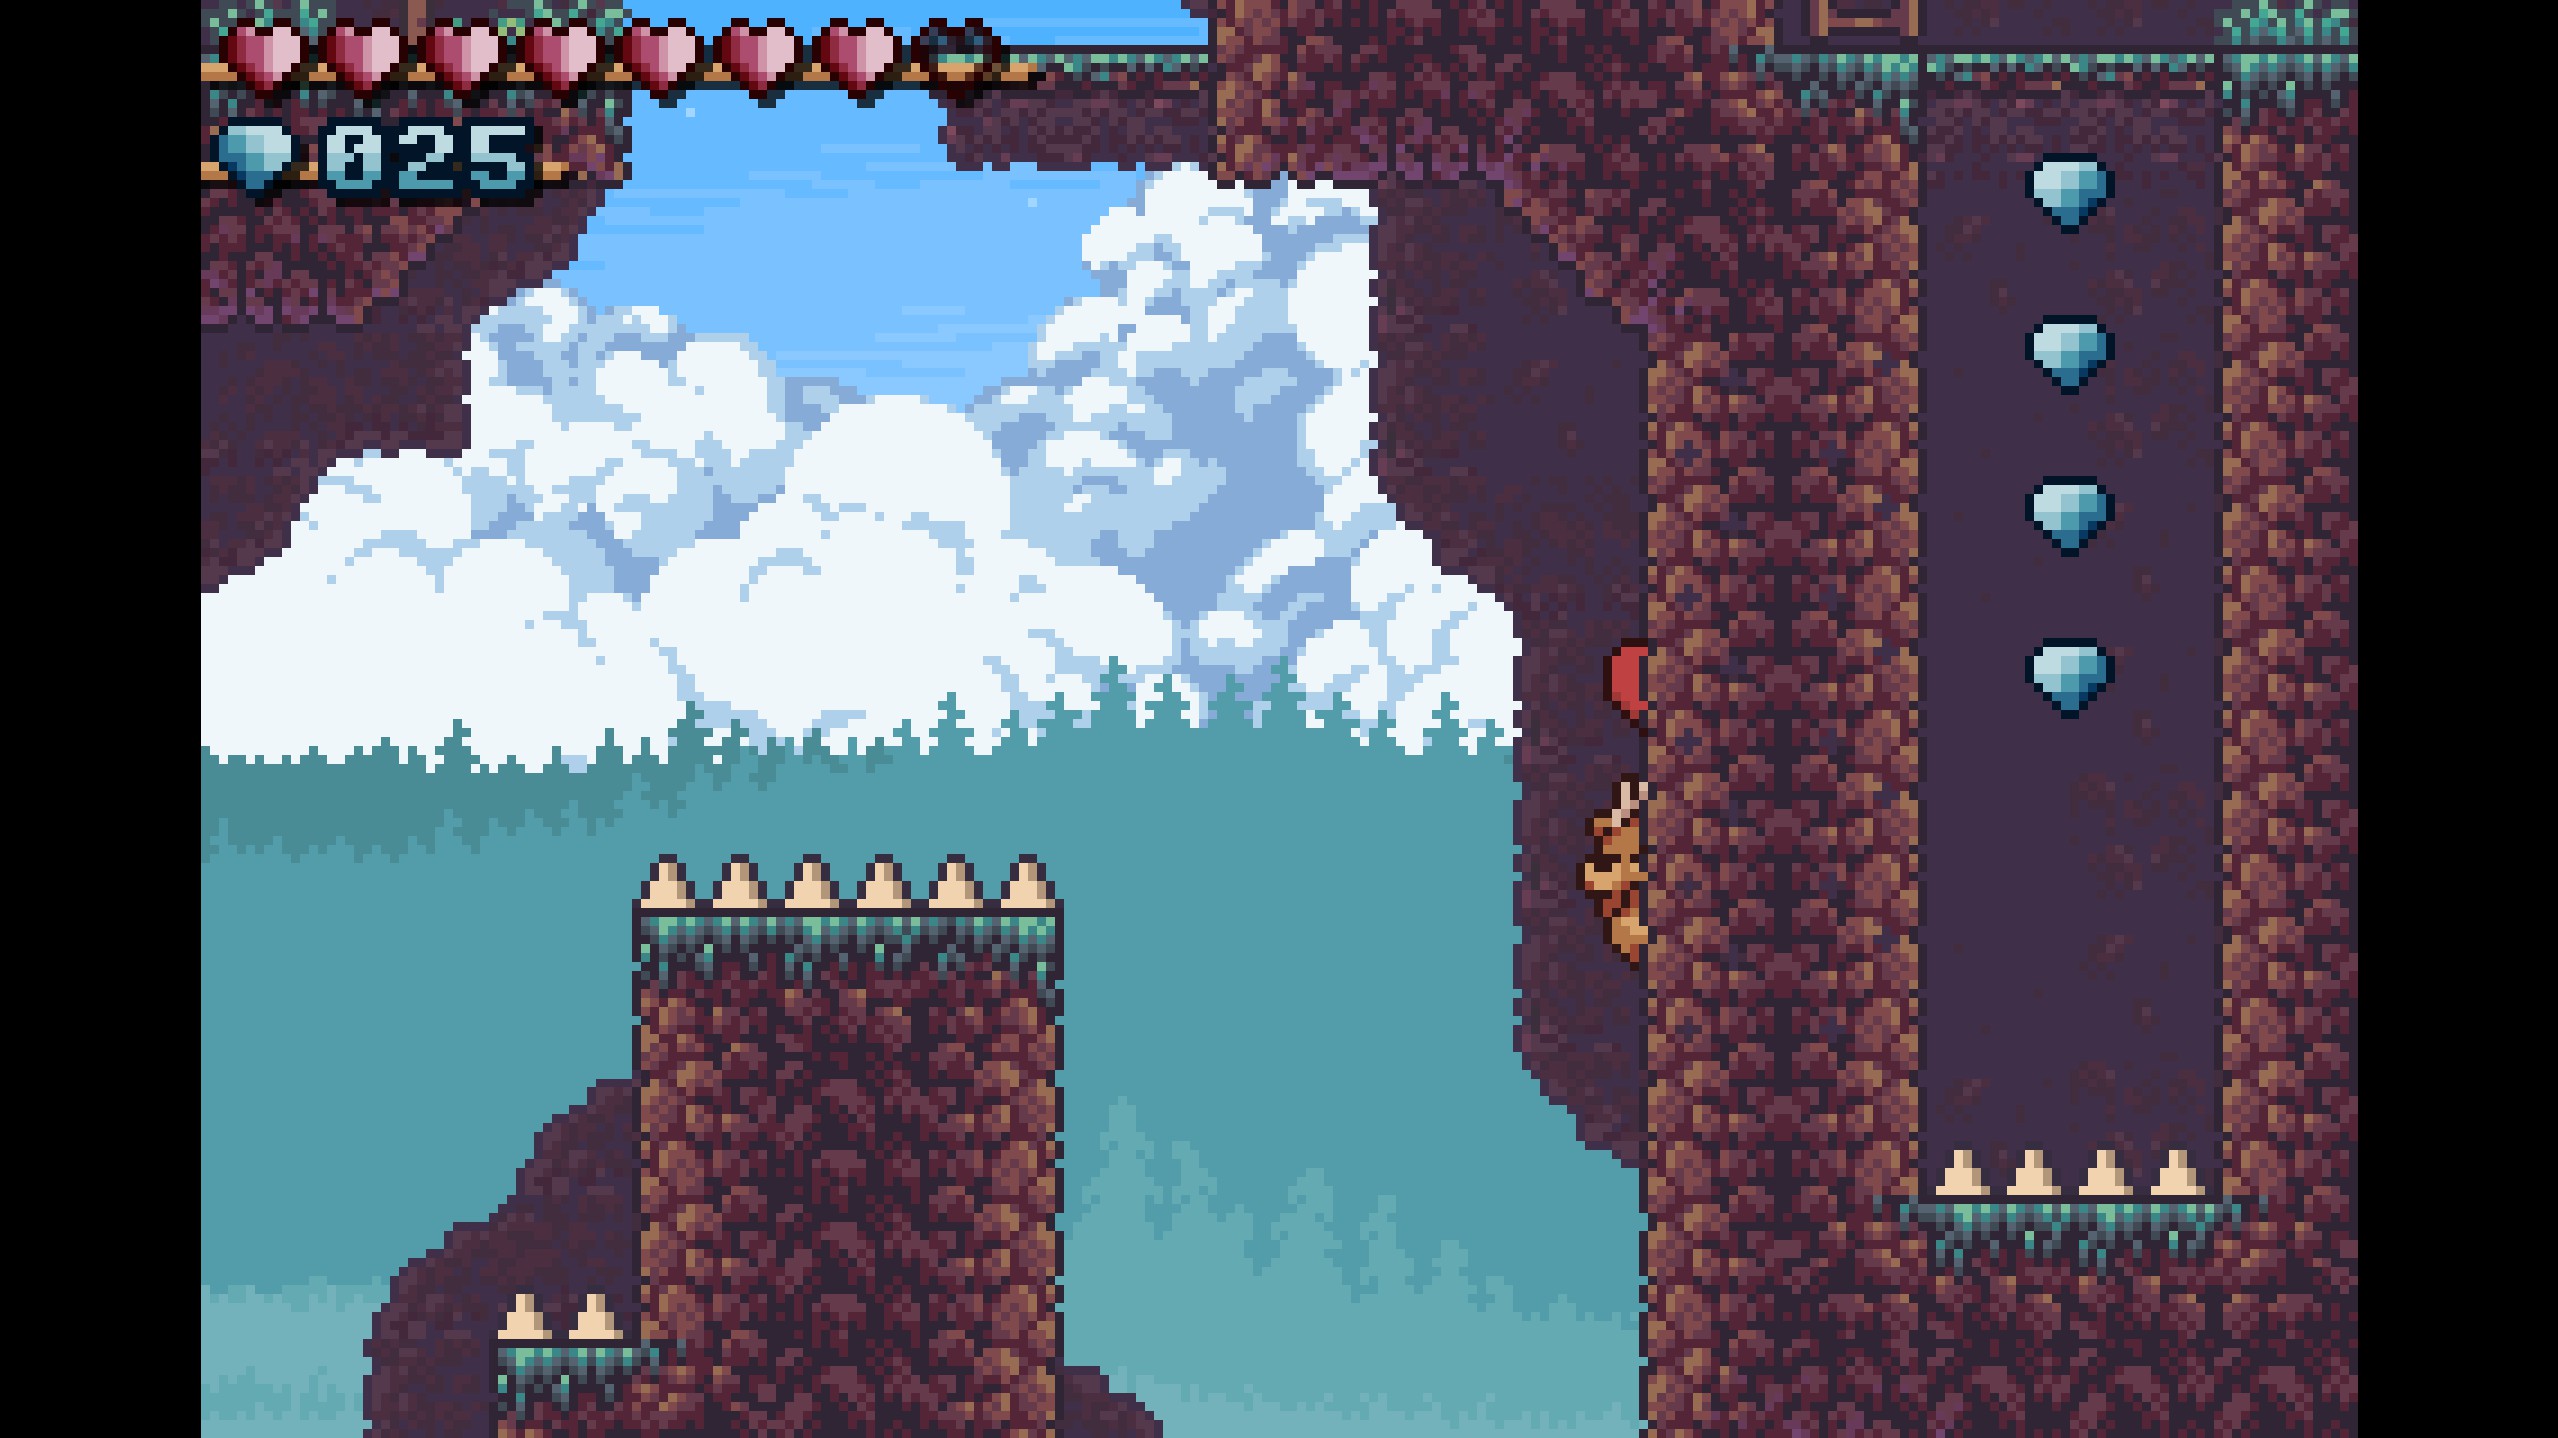
- Gems 33-36
- Continue until you reach this area with tall semisolid platforms. Jump off of the stone to reach the first two gems, then push it off of its platform and move it over to the leftmost platform. Jump up and climb the tree's branches to reach the other two gems!
- Continue until you reach this area with tall semisolid platforms. Jump off of the stone to reach the first two gems, then push it off of its platform and move it over to the leftmost platform. Jump up and climb the tree's branches to reach the other two gems!
- Gems 37-39
- Continue up the tree and jump onto the right platform to reach these gems.
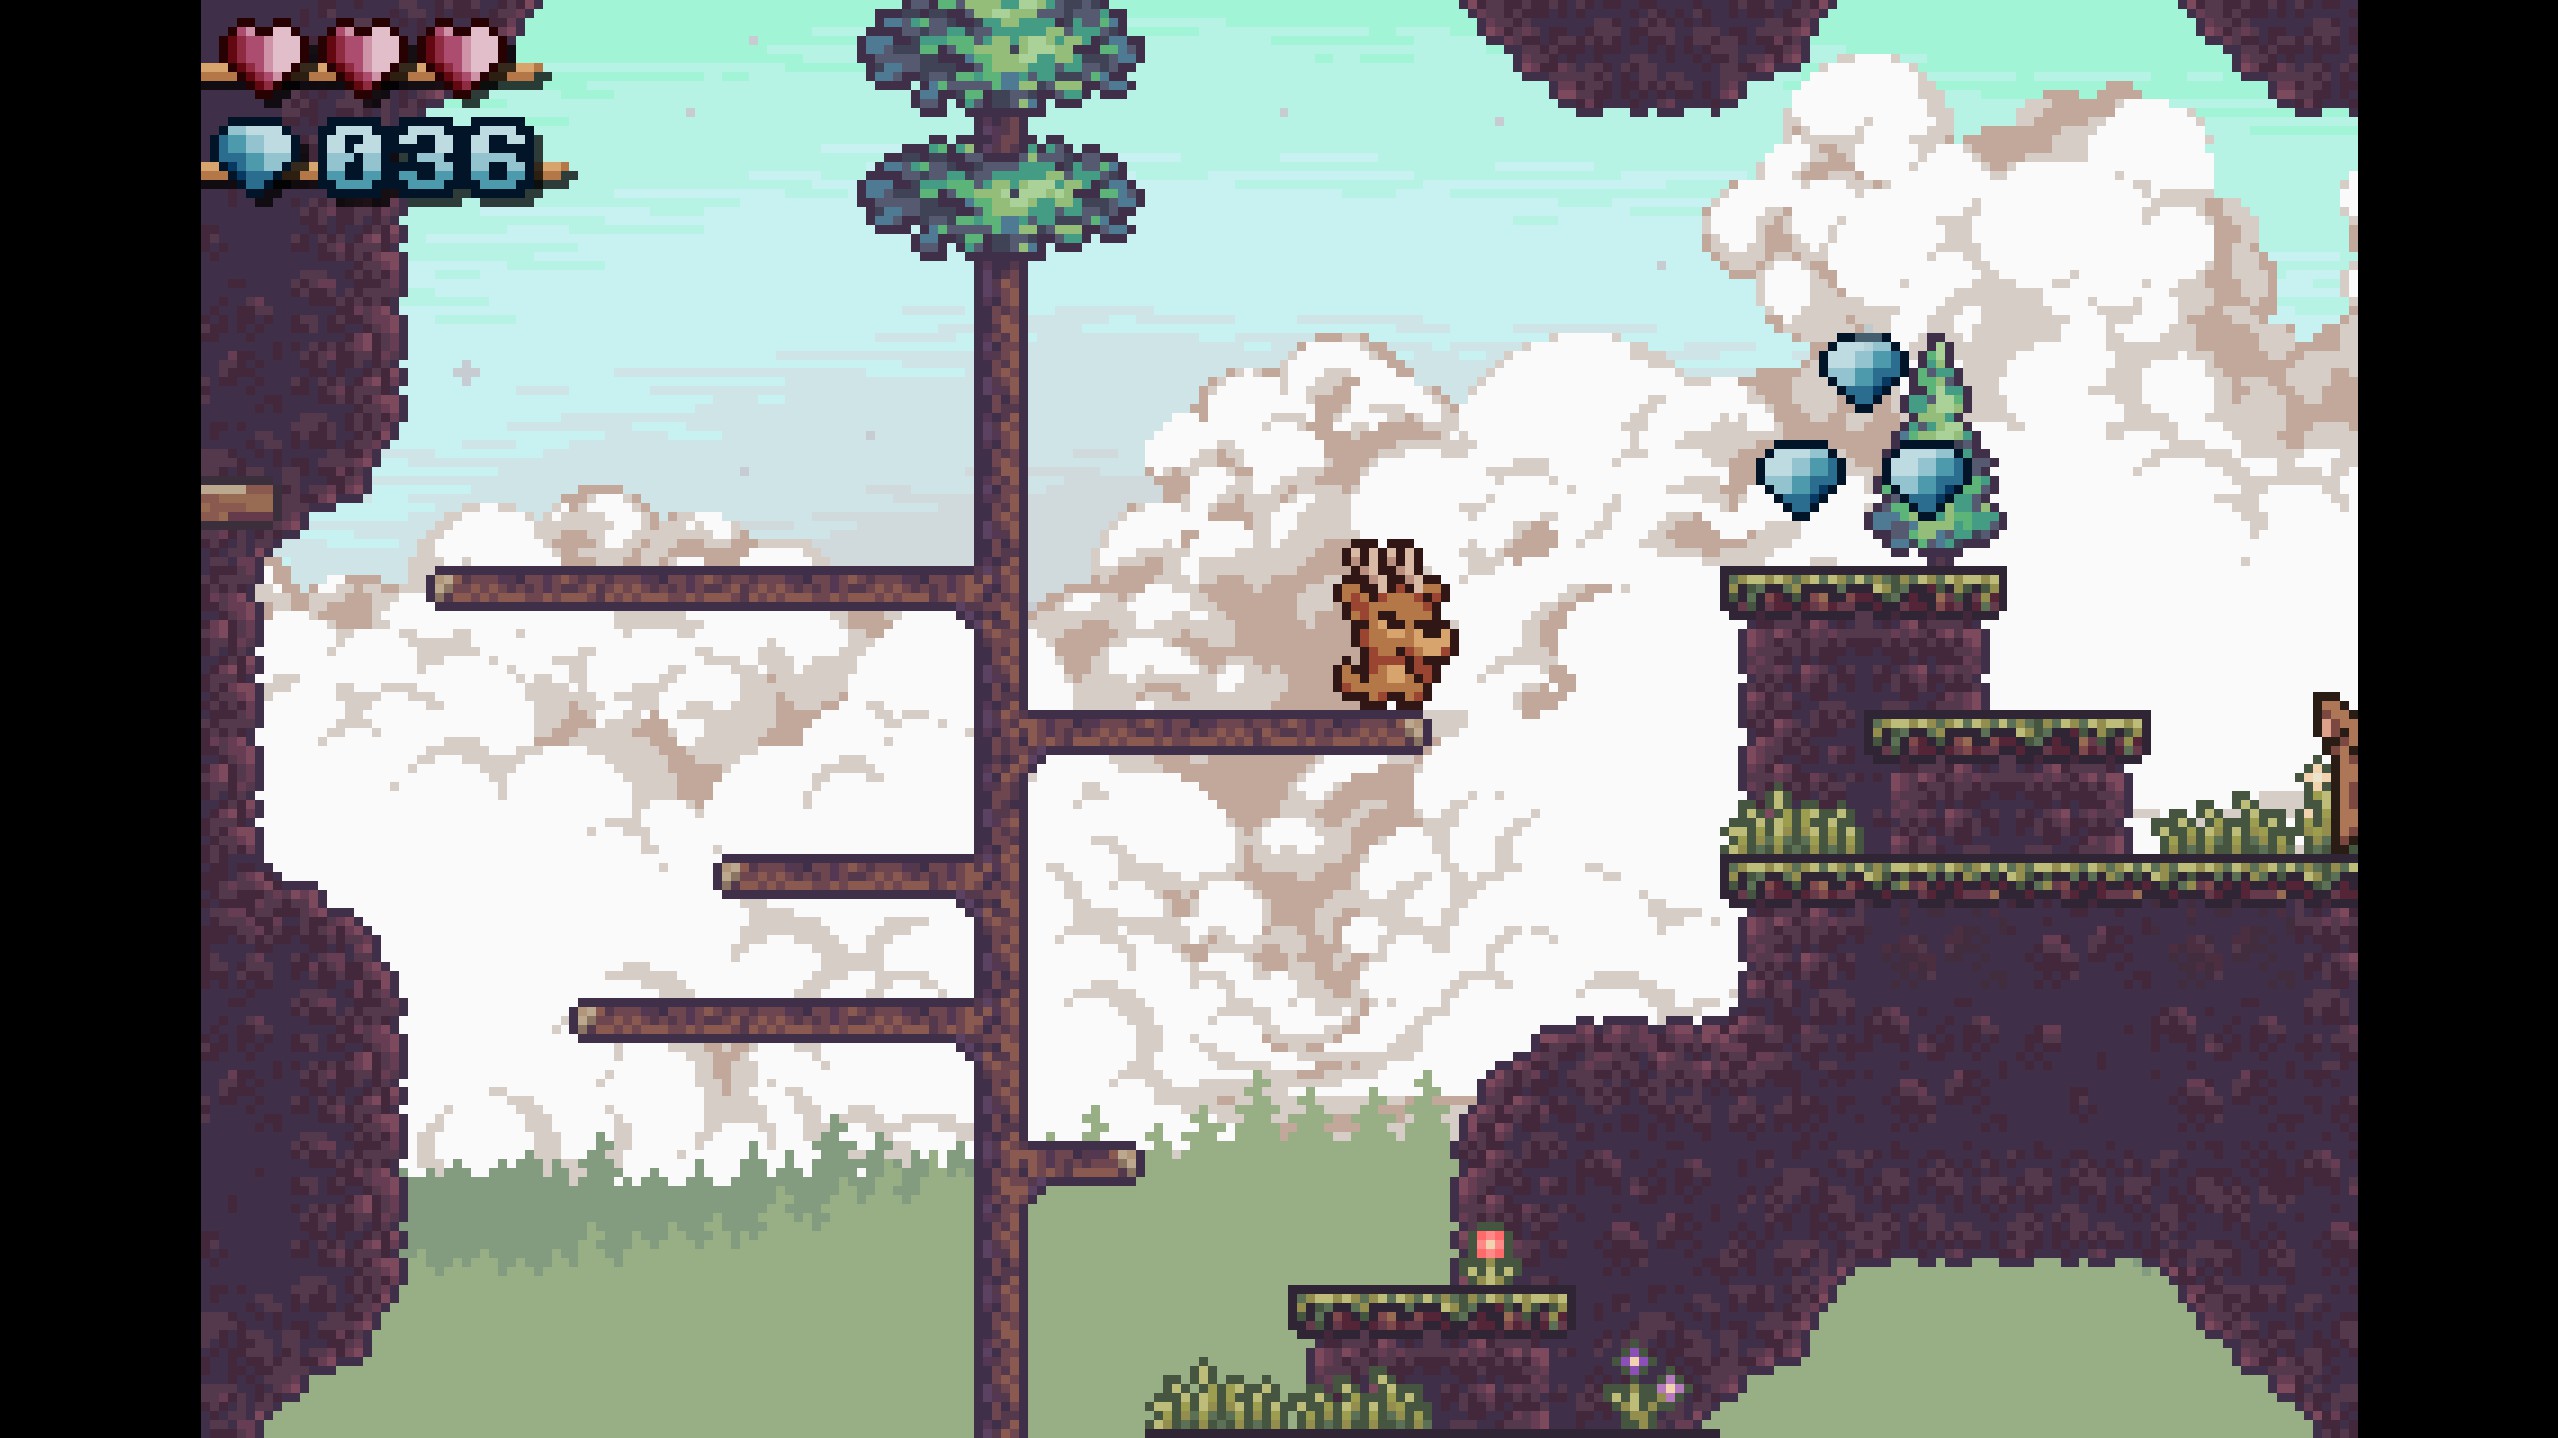
- Continue up the tree and jump onto the right platform to reach these gems.
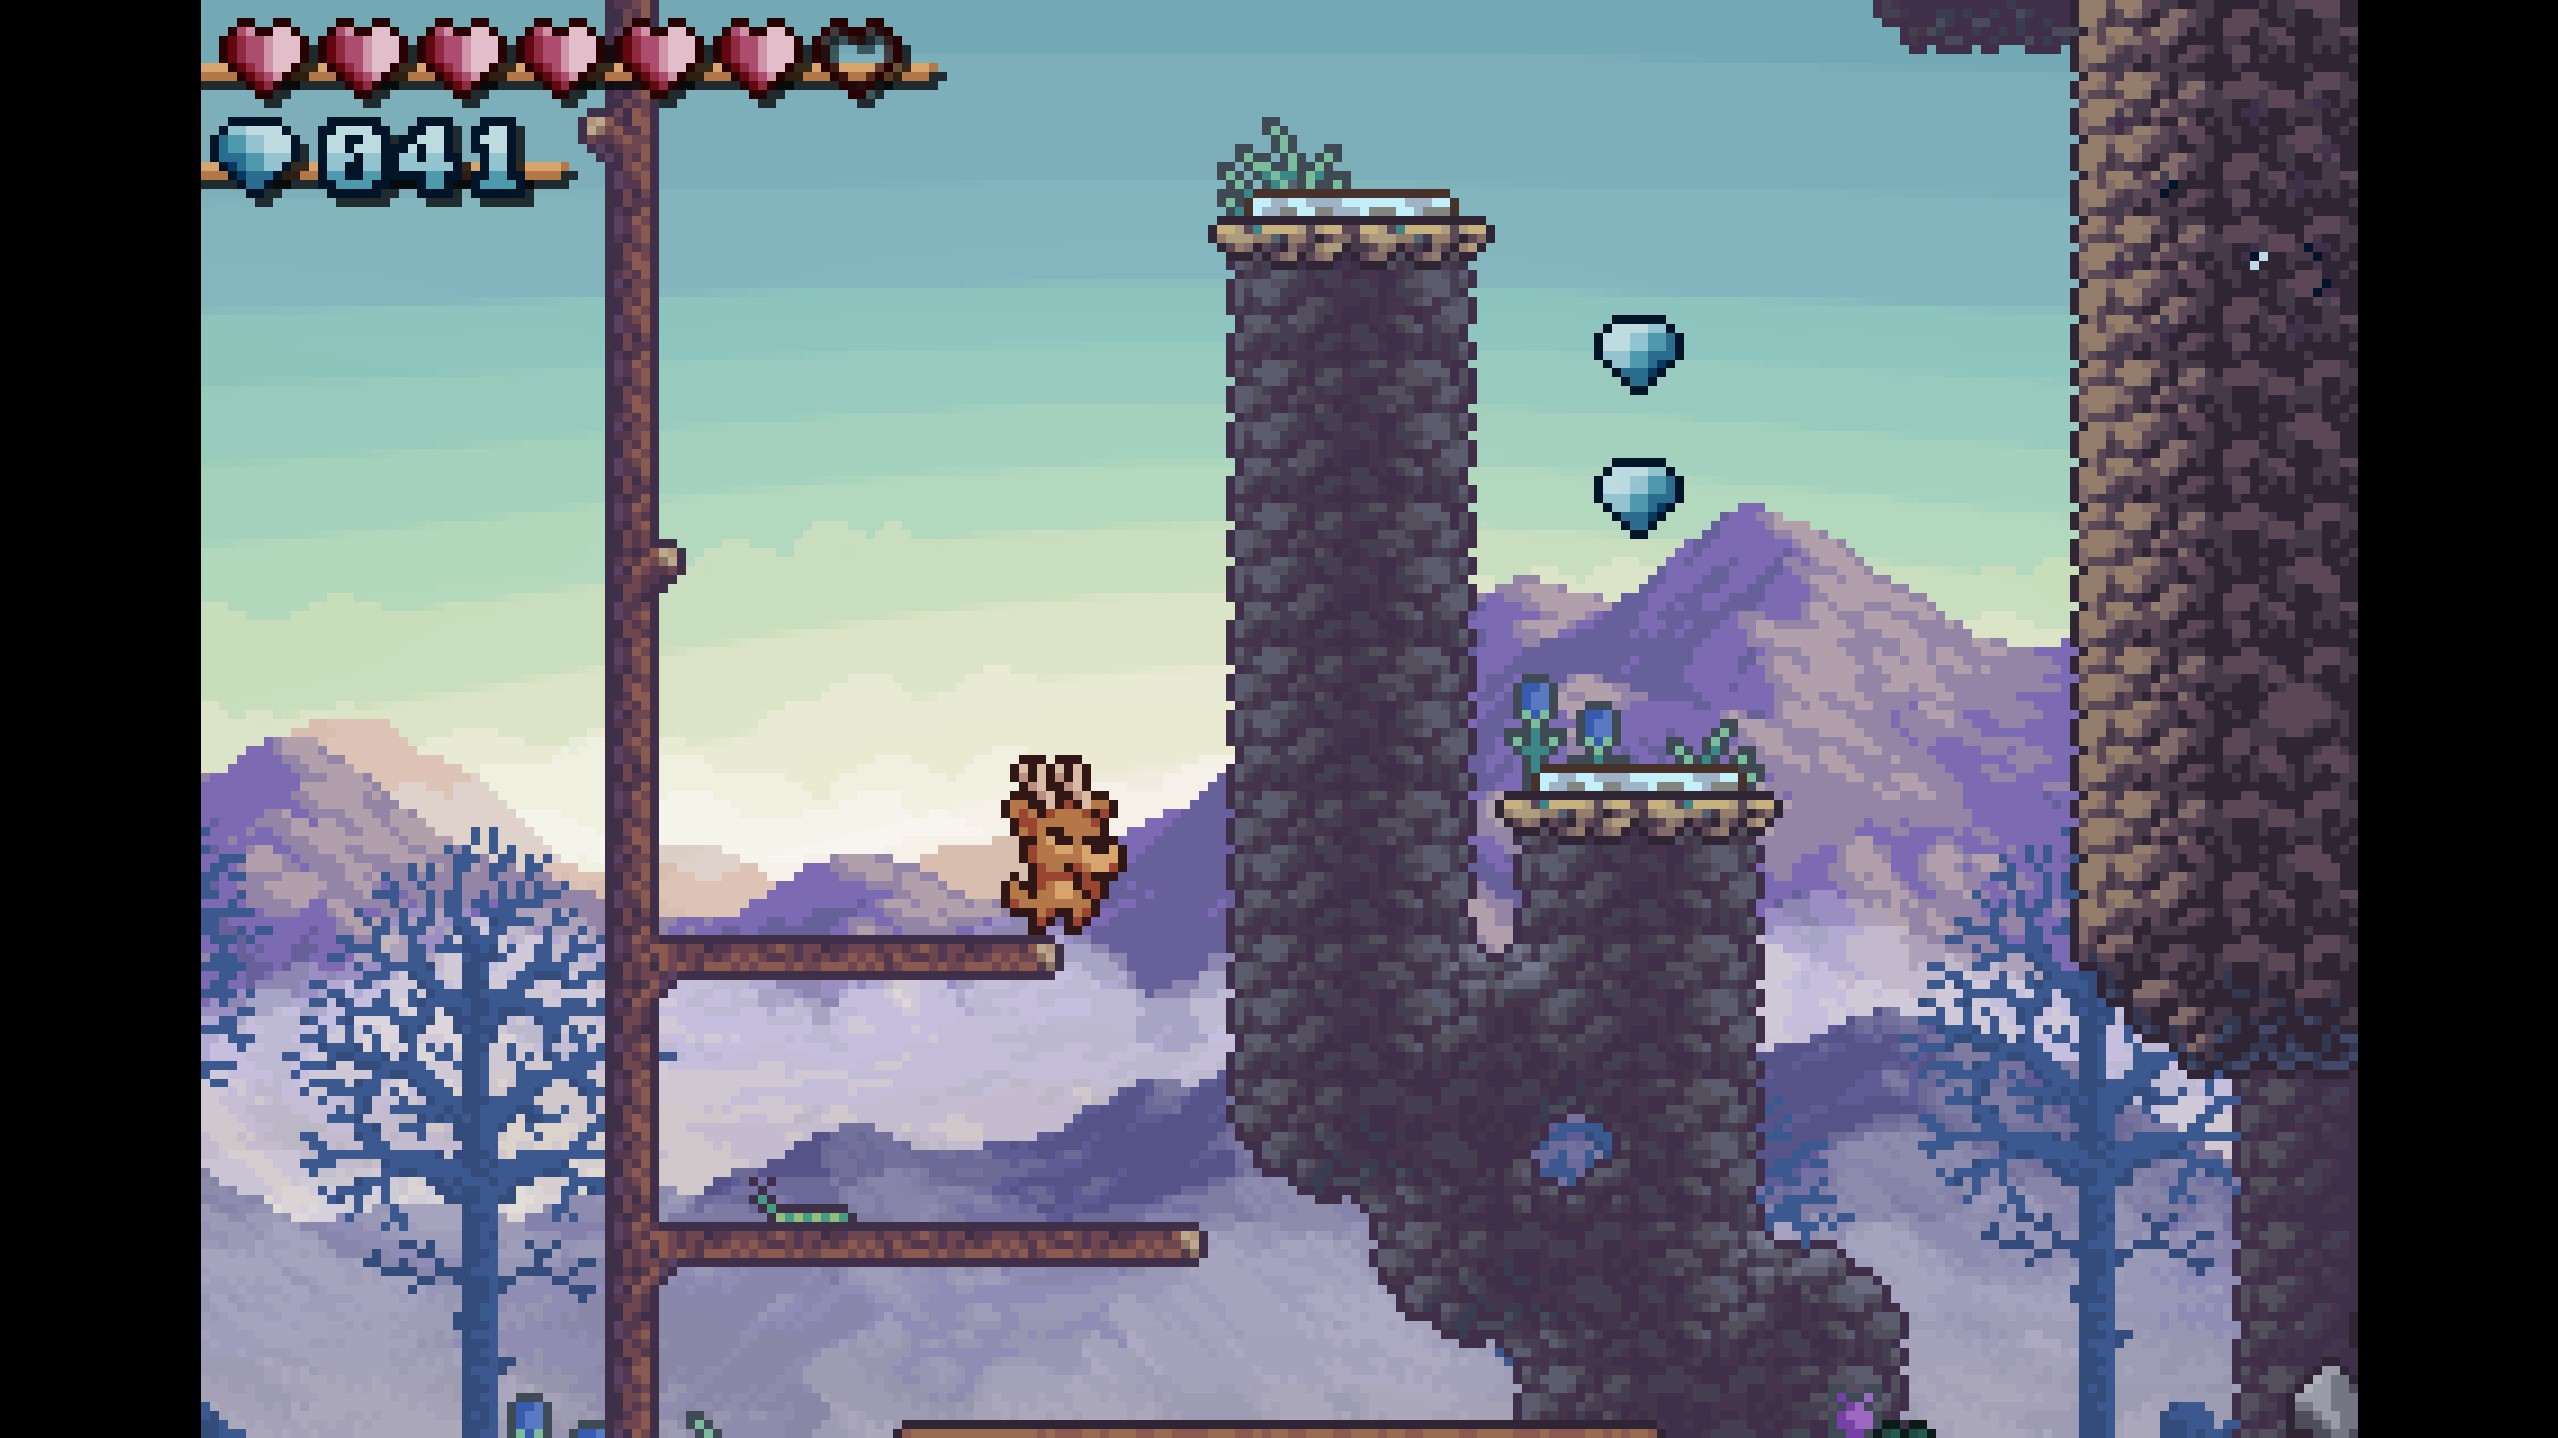
- Gems 40-48
- To the left of the tree are 3 moving platforms. Be patient and time your jumps to collect all of the gems!
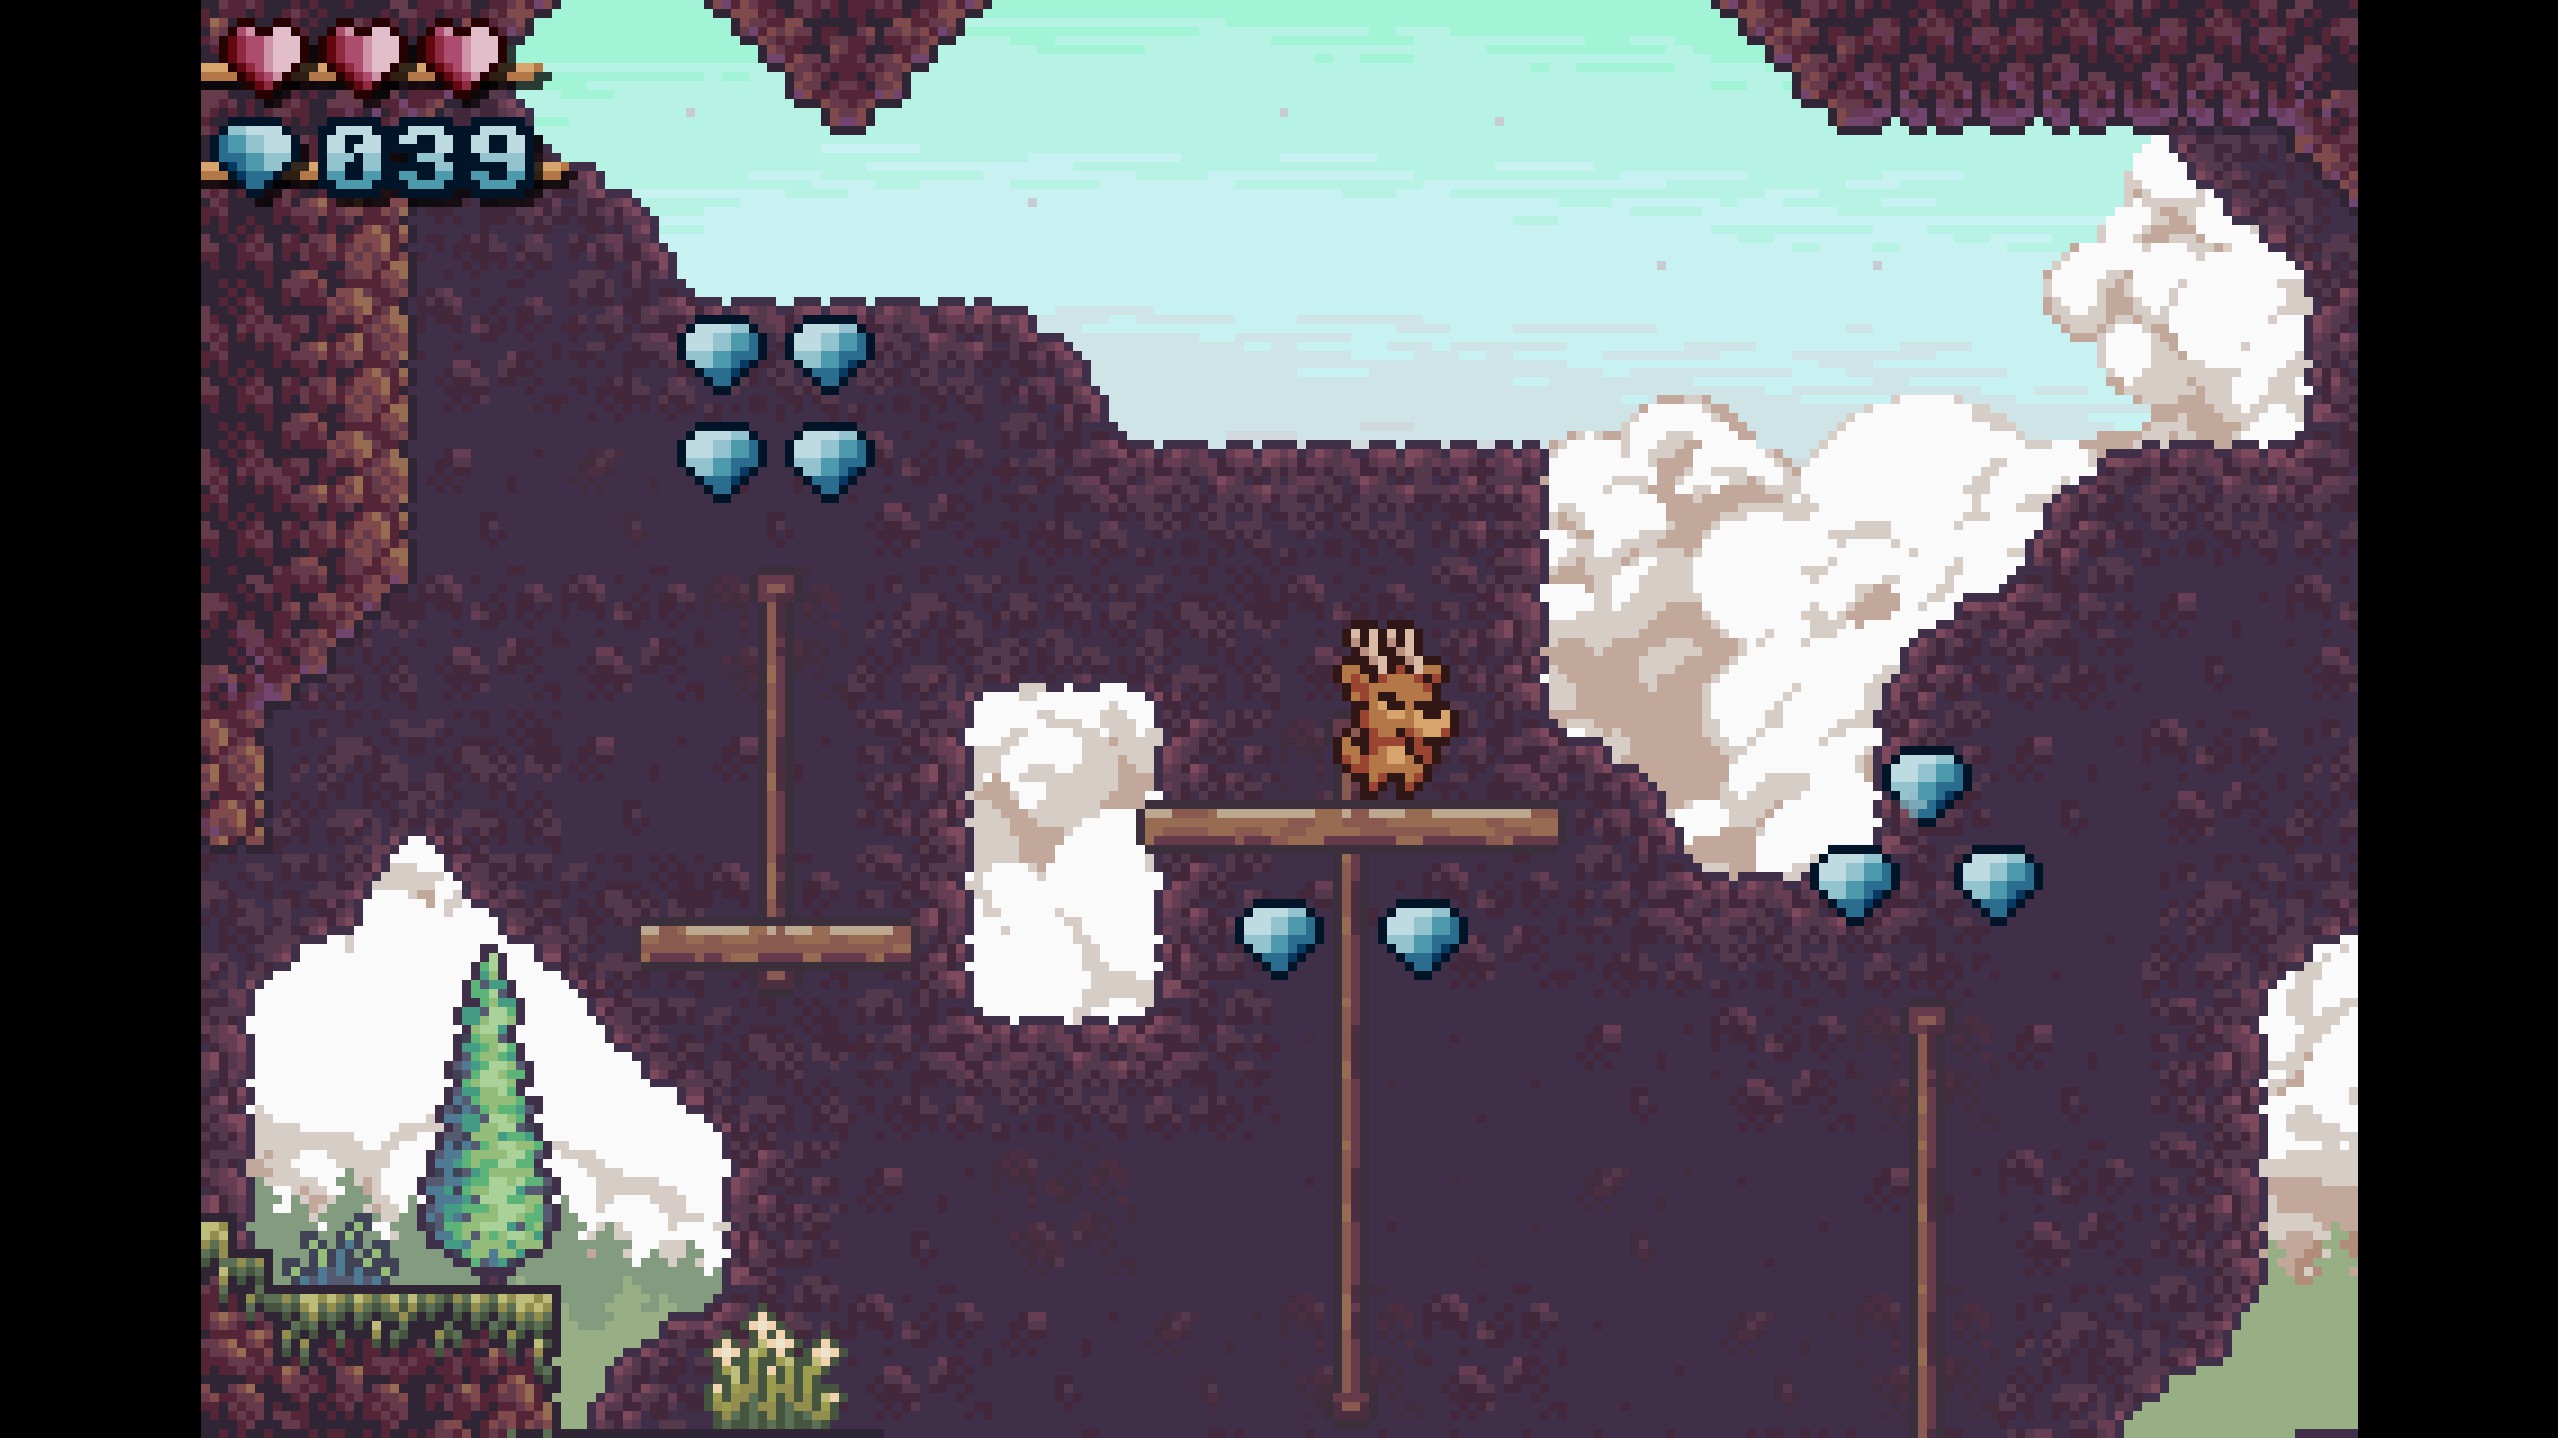
- To the left of the tree are 3 moving platforms. Be patient and time your jumps to collect all of the gems!
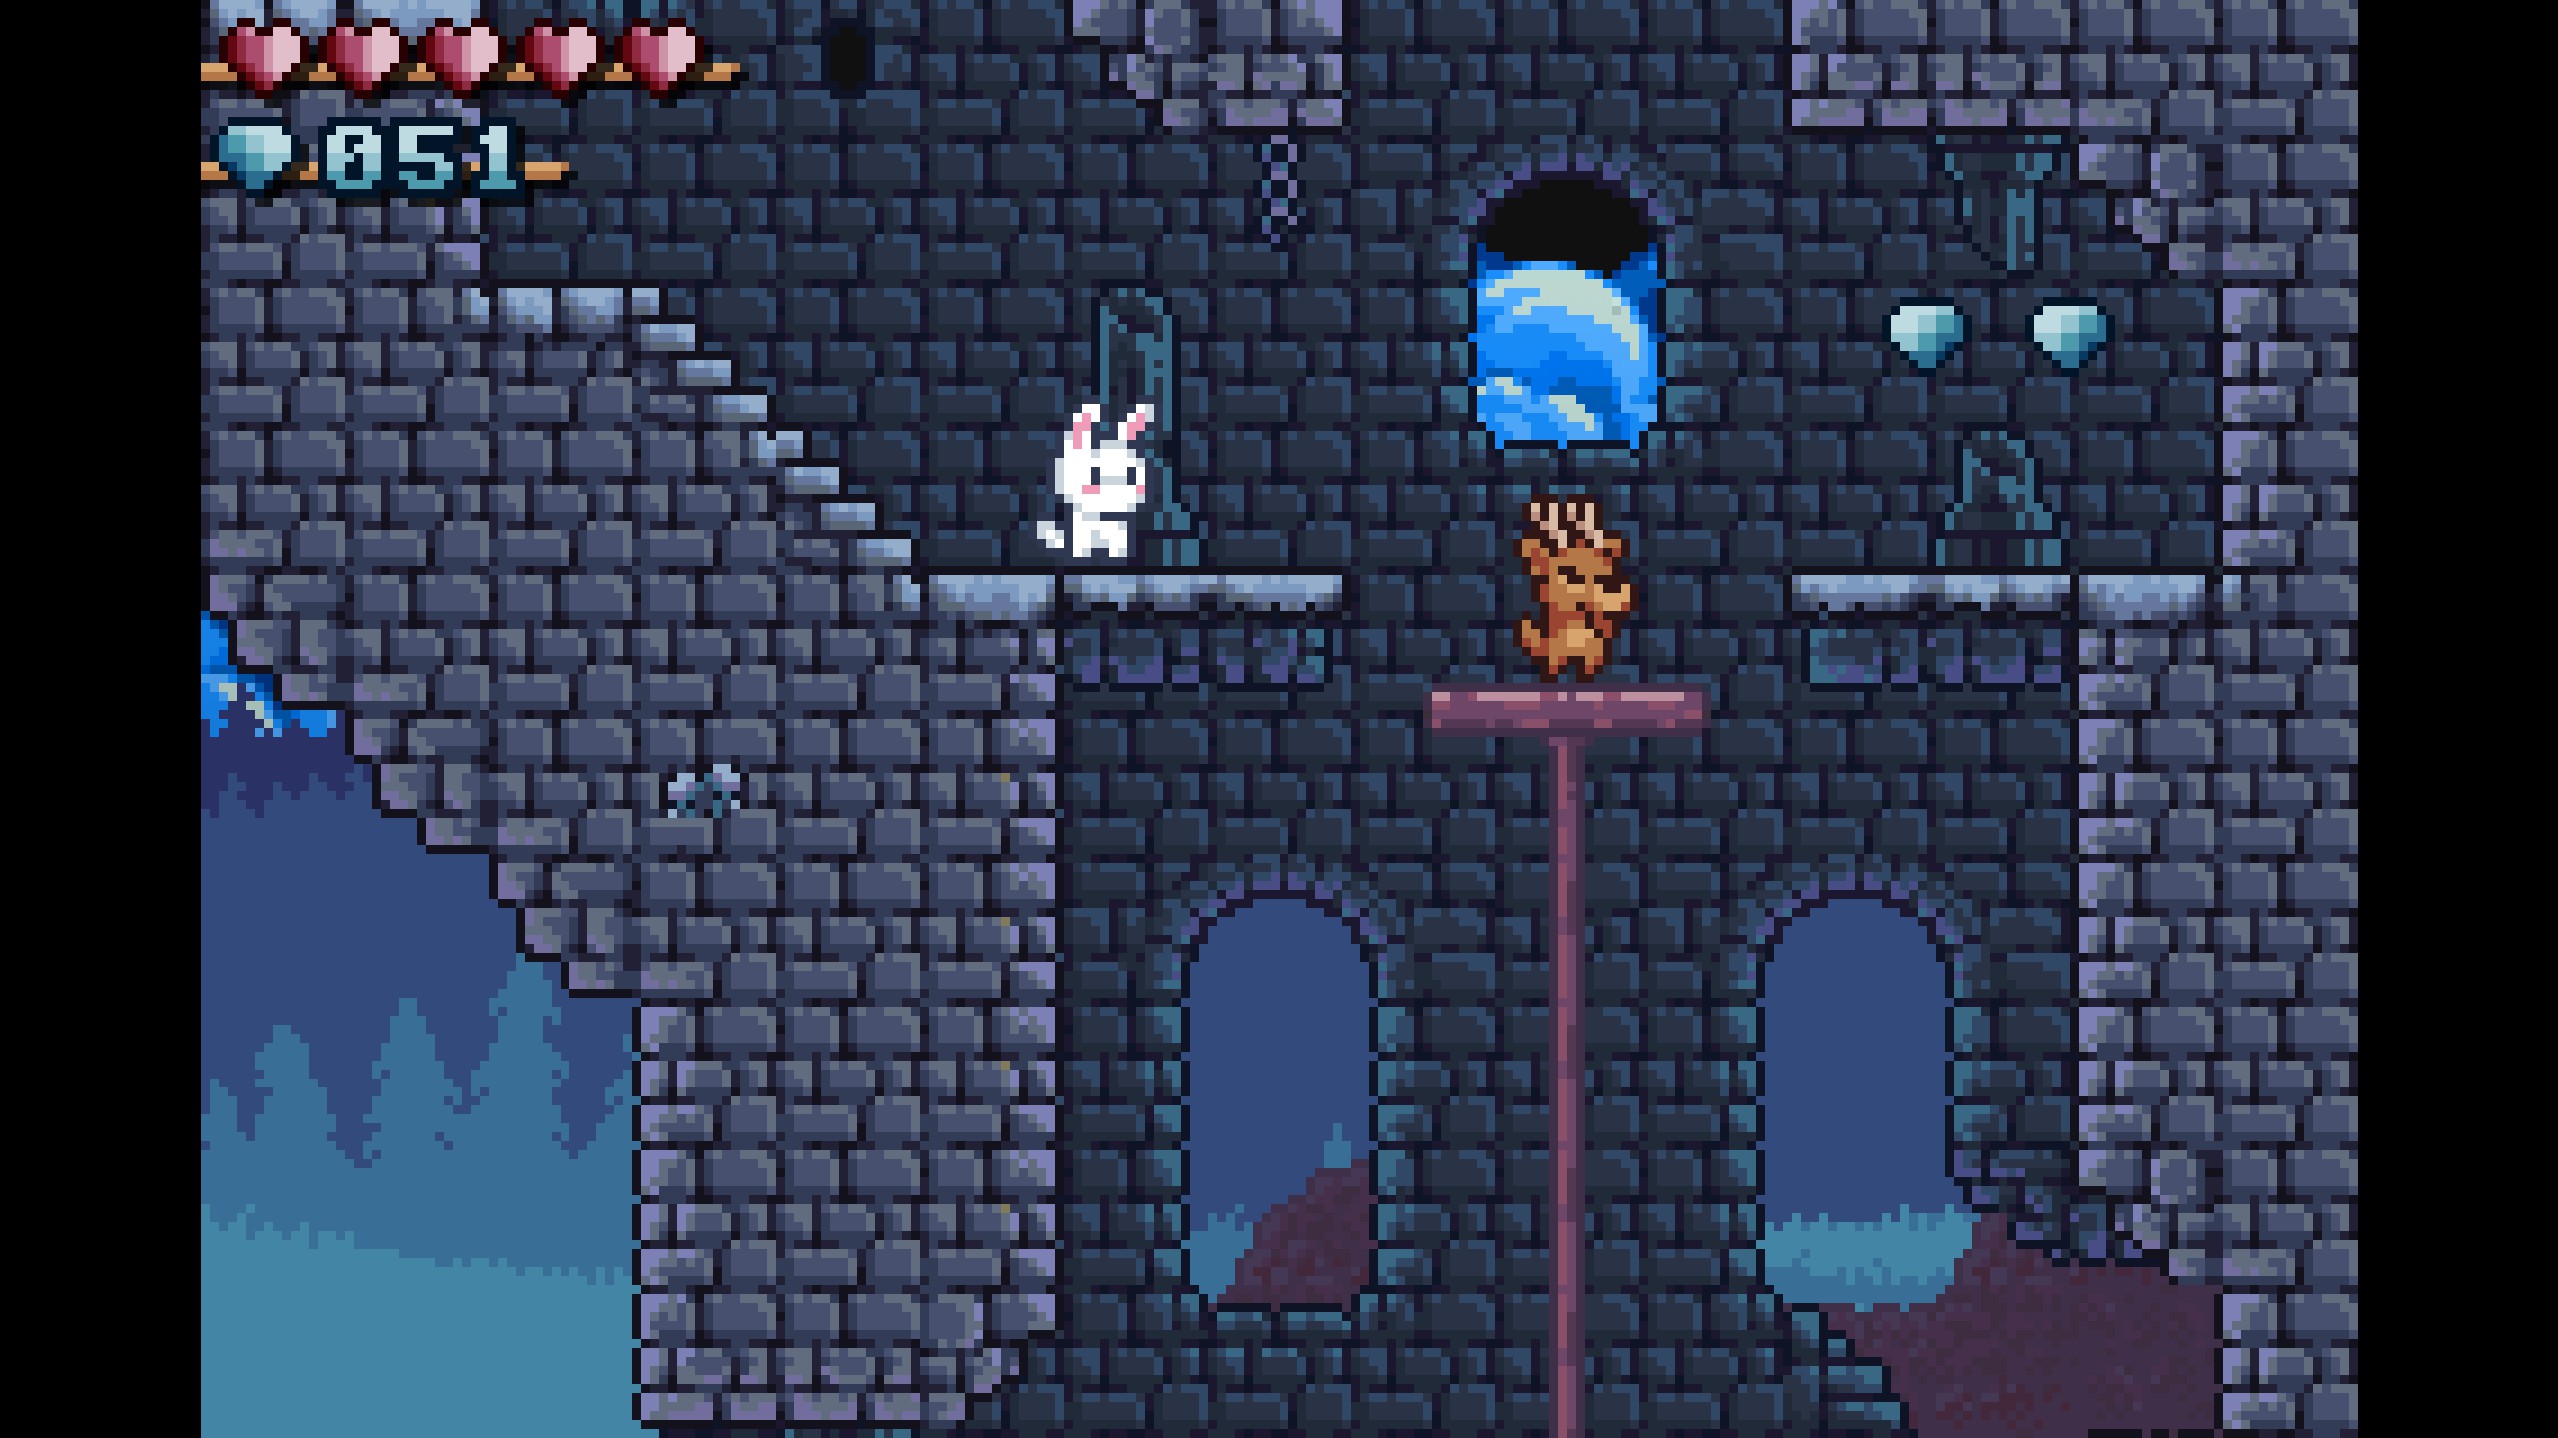
- Gems 49-50
- After the crossing moving platforms, you reach Emerald Vale's first checkpoint. To the left of it are these two gems!
- After the crossing moving platforms, you reach Emerald Vale's first checkpoint. To the left of it are these two gems!
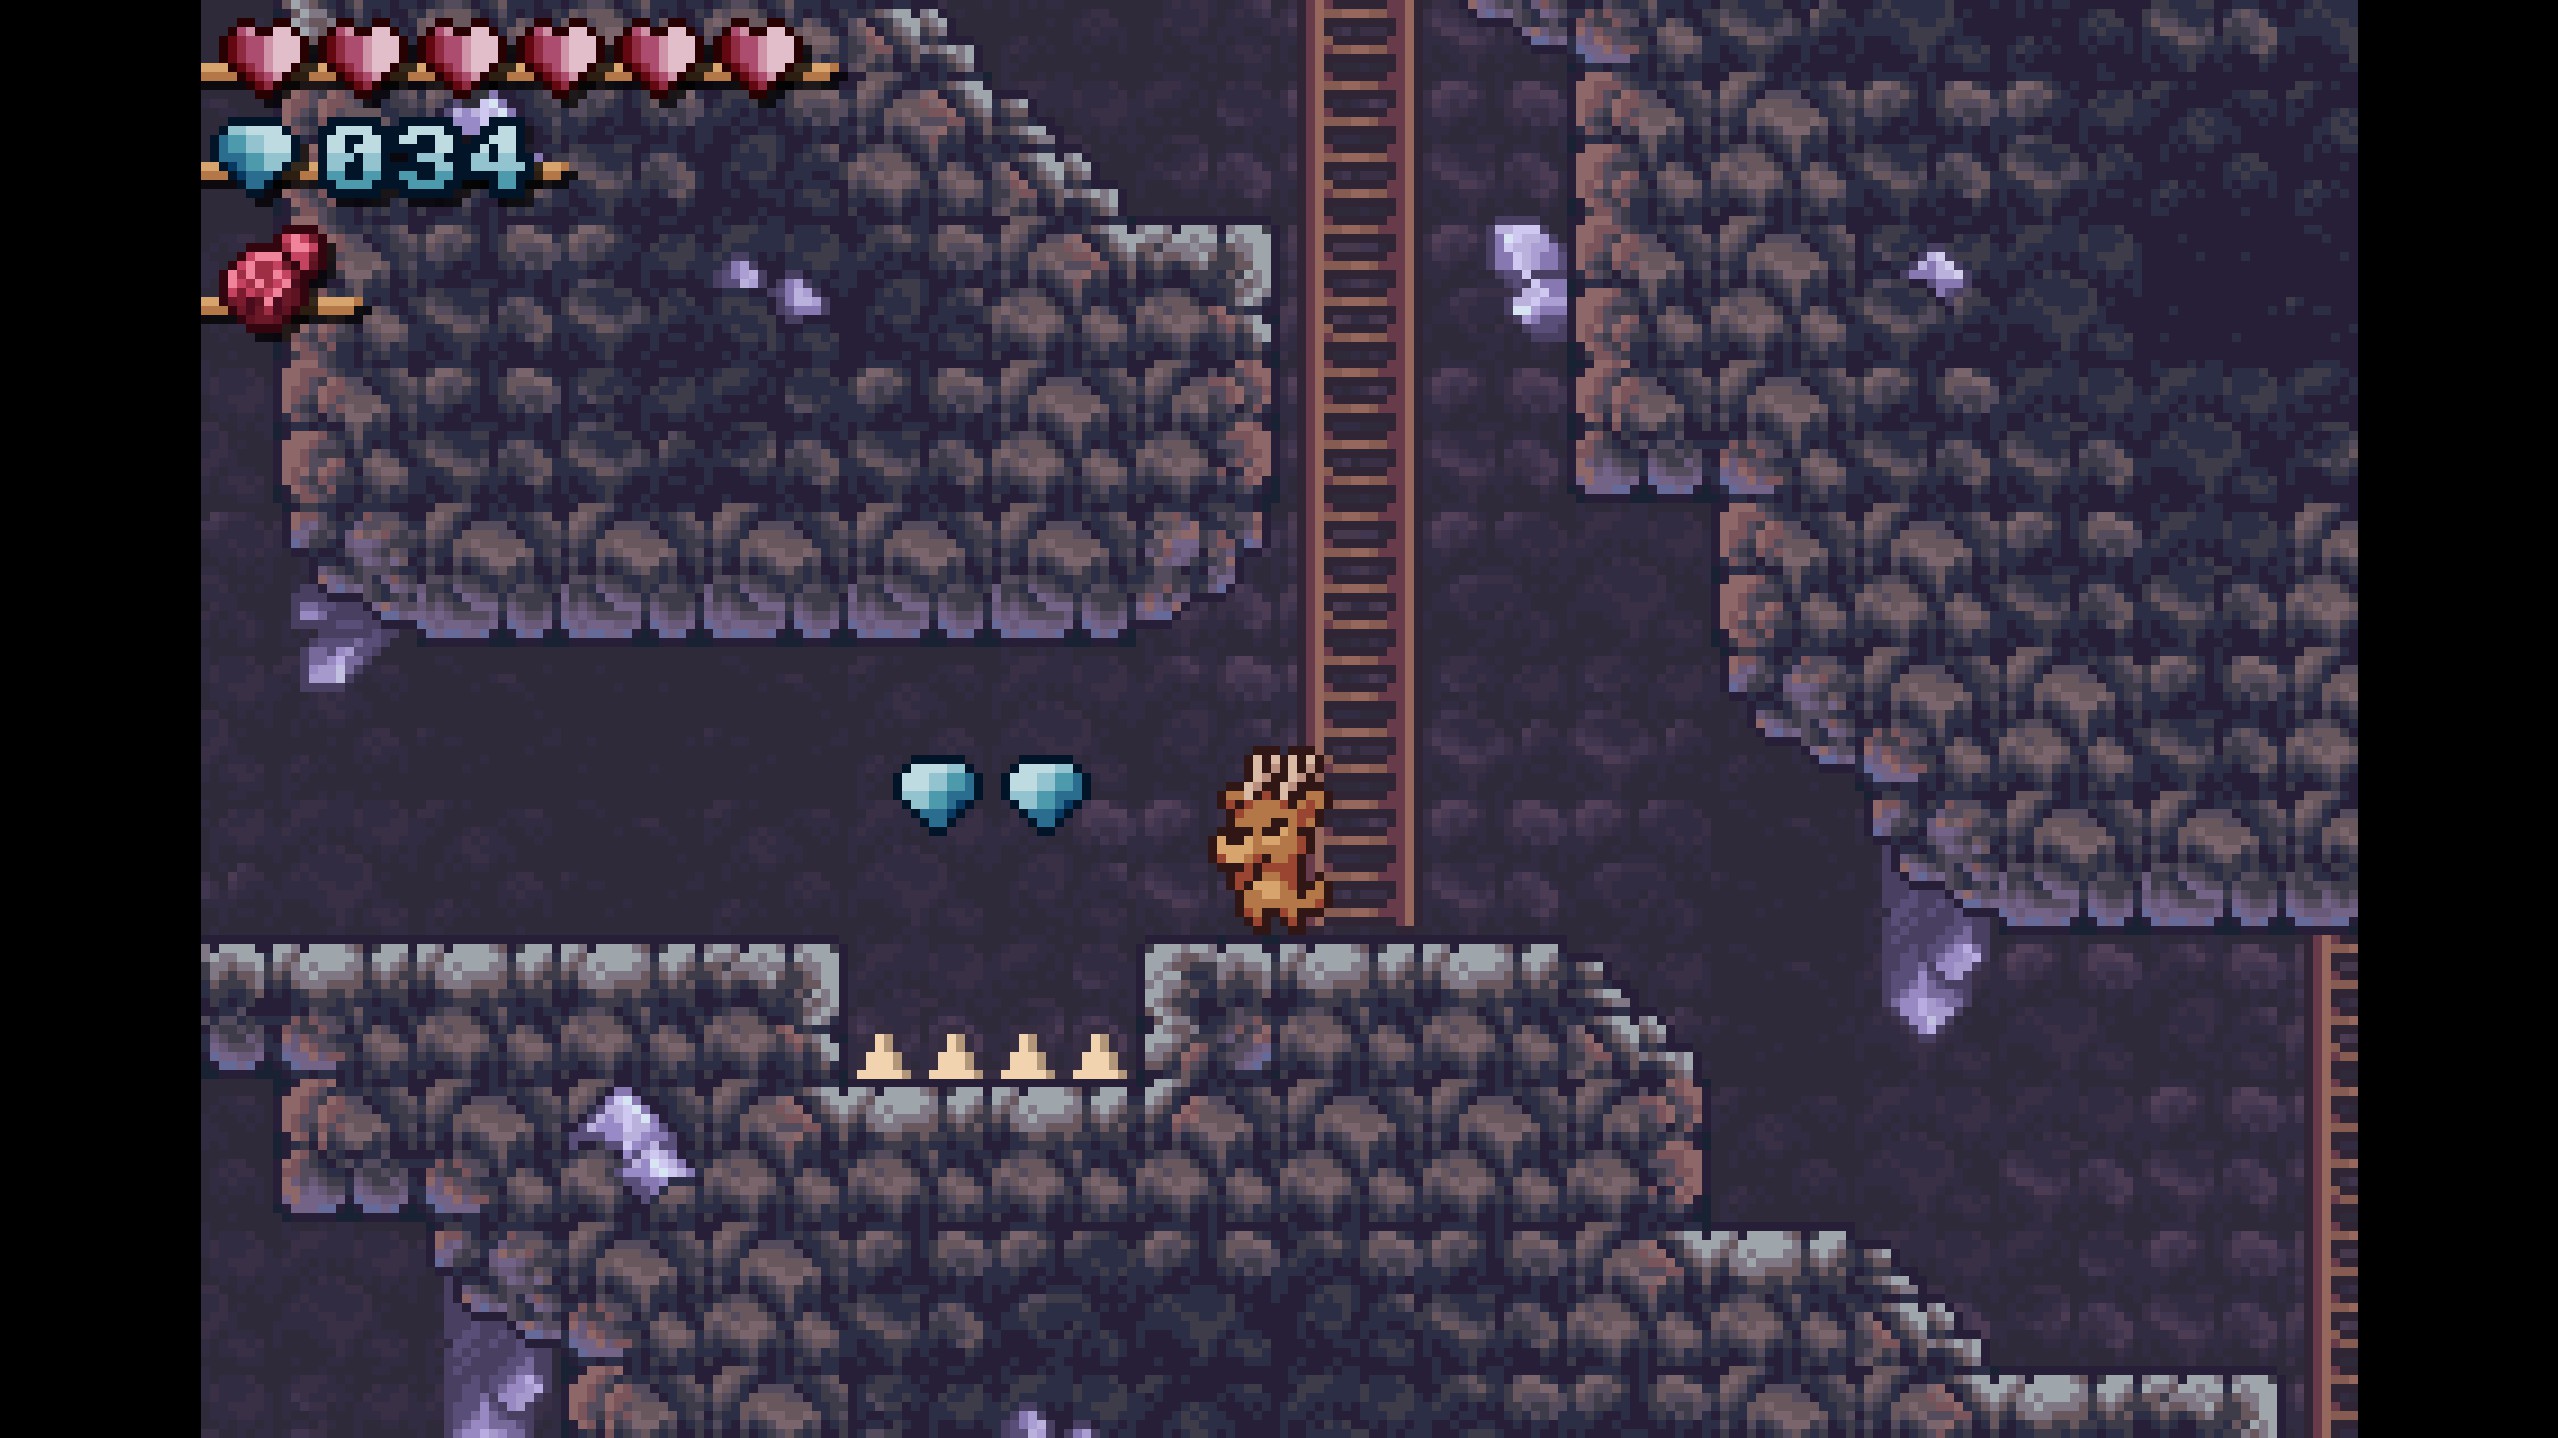
- Gems 51-52
- Continue past the checkpoint, climb up the ladder, defeat the red slime, and collect these two gems on the slope!
- Continue past the checkpoint, climb up the ladder, defeat the red slime, and collect these two gems on the slope!
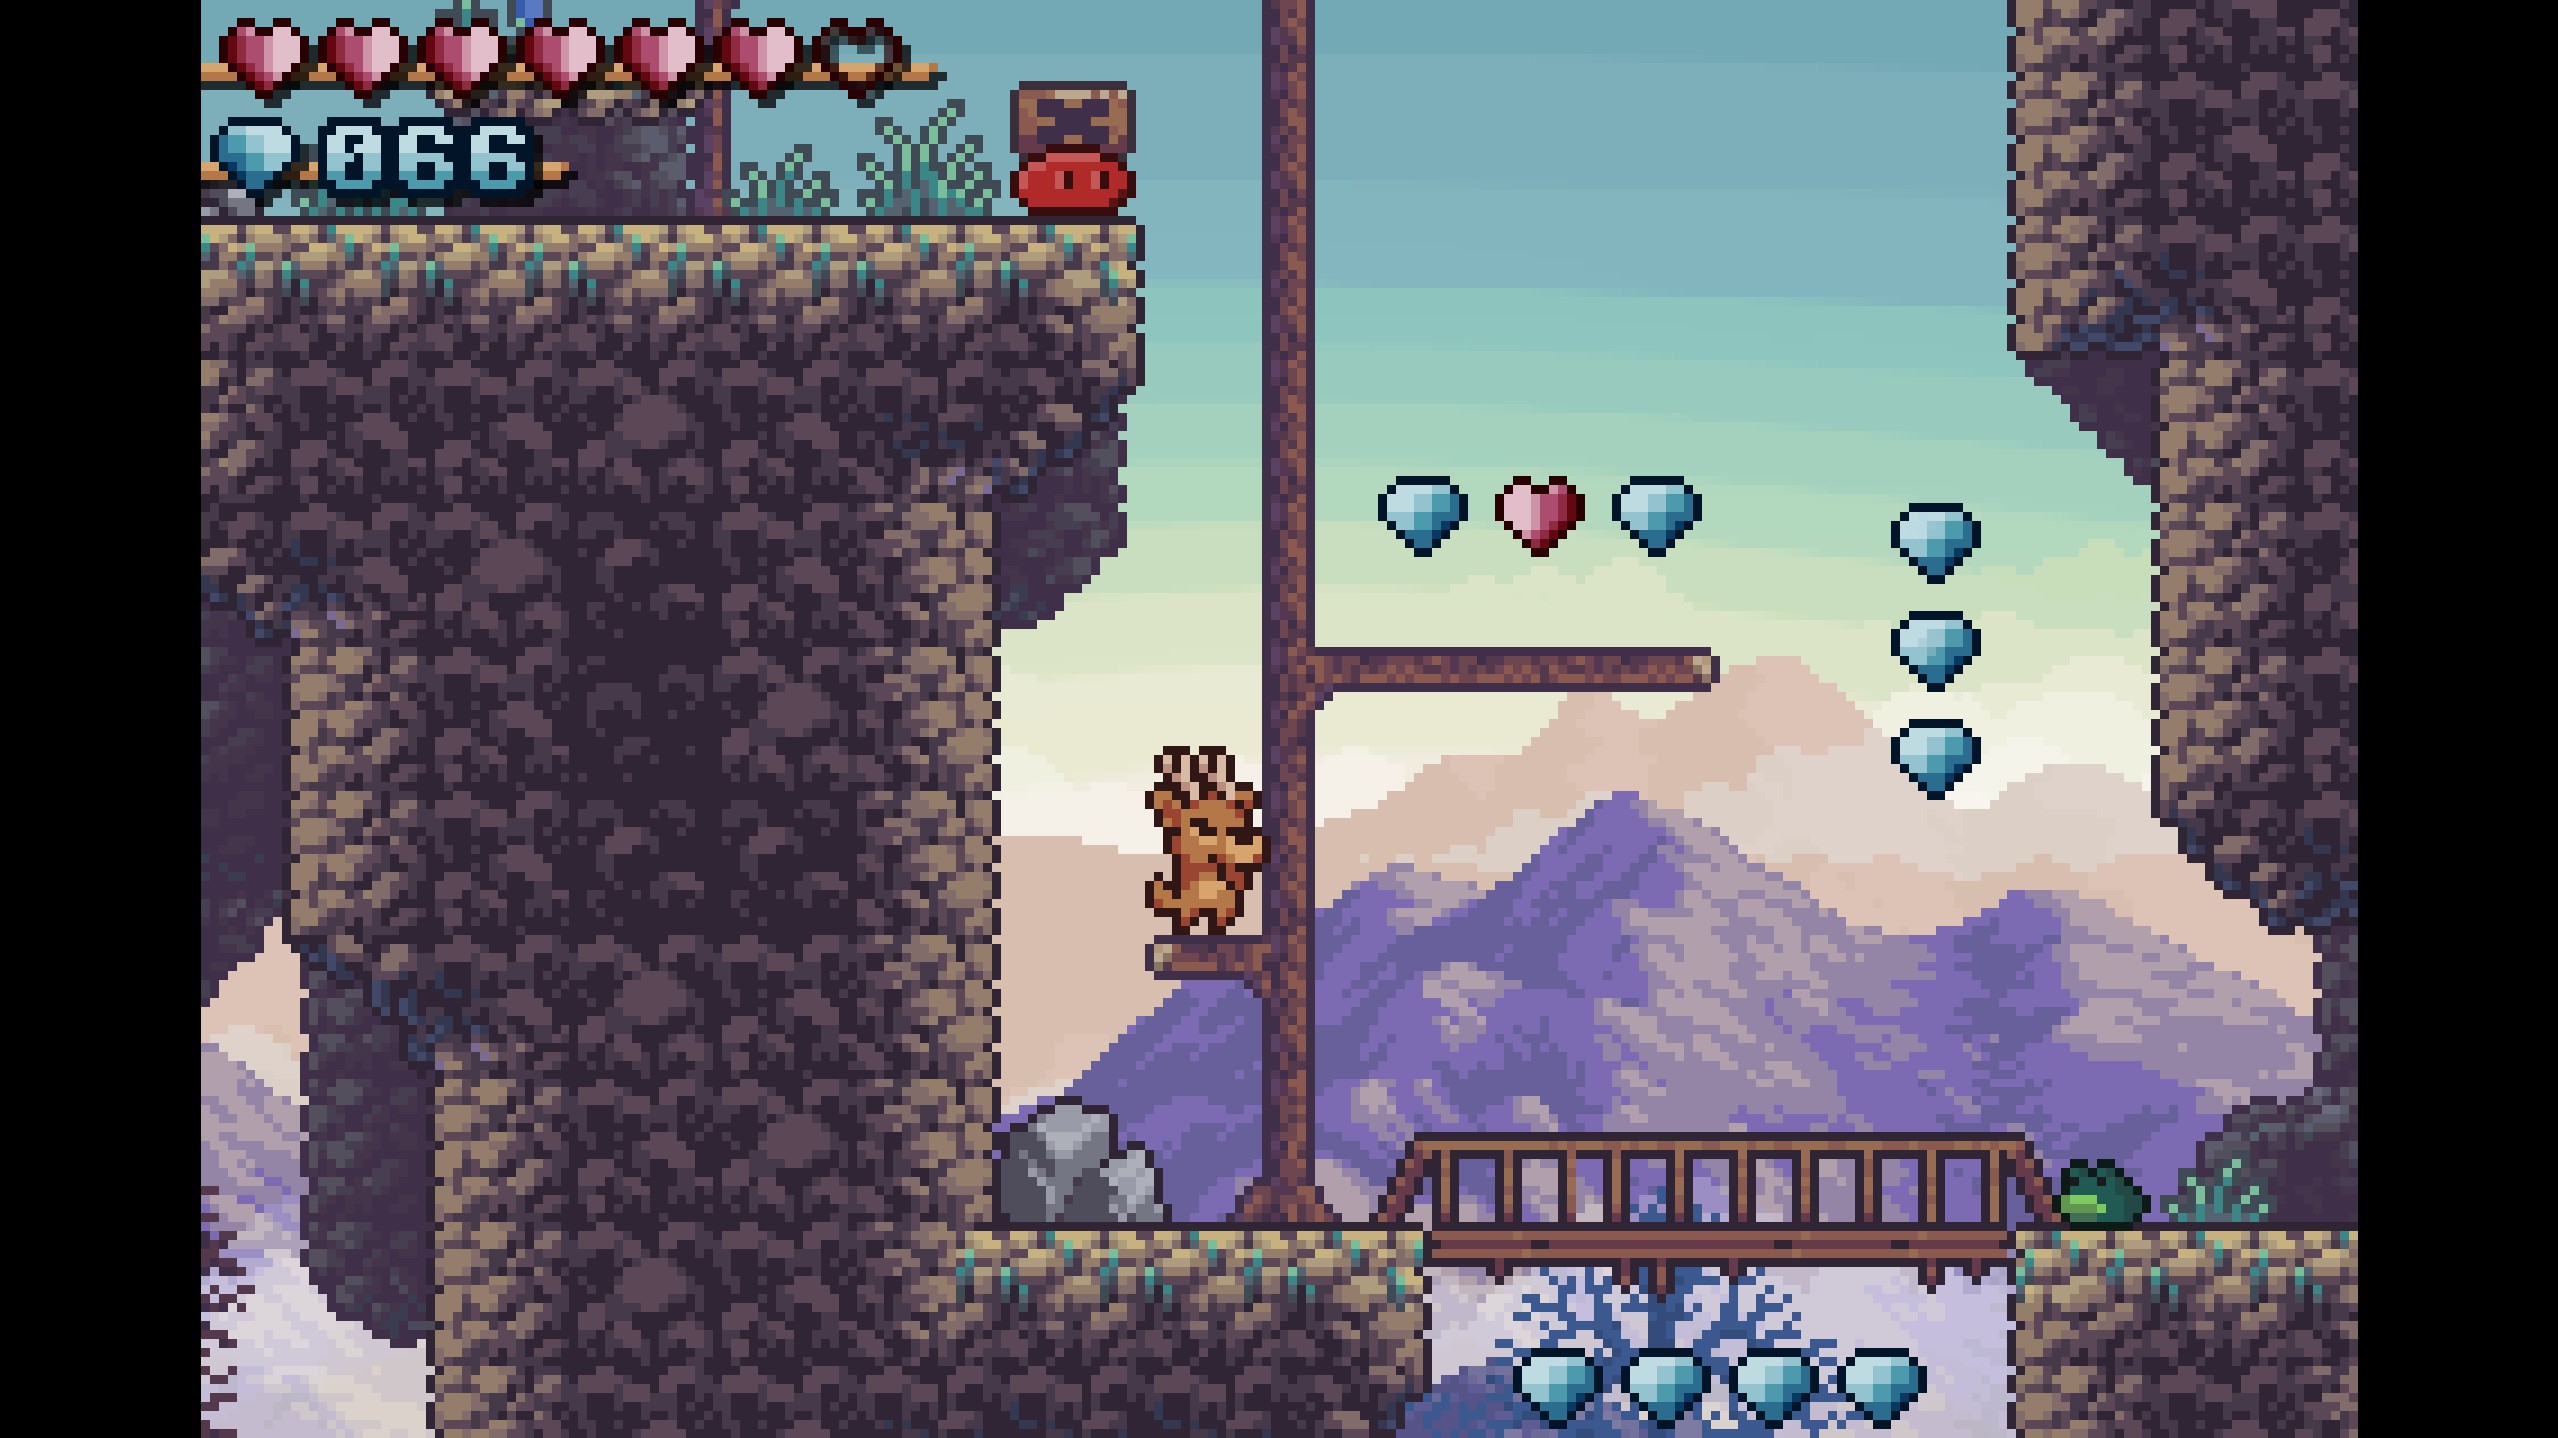
- Gems 53-56
- Continue to the right, dodging the frog. You'll pass some gems near a bridge on the way, but they cannot be reached yet. Eventually you'll come across an area with more moving platforms. Time your jumps to grab the gems!
- Continue to the right, dodging the frog. You'll pass some gems near a bridge on the way, but they cannot be reached yet. Eventually you'll come across an area with more moving platforms. Time your jumps to grab the gems!
- Gems 57-60
- After passing the moving platforms, climb up the ladder and take a leap of faith over to the left platform. You'll notice you can't jump high enough to reach the gems! Don't fret, just collect the jump shoes to your left, which increase your jump height. Then, walk back and jump up to reach the gems!
- After passing the moving platforms, climb up the ladder and take a leap of faith over to the left platform. You'll notice you can't jump high enough to reach the gems! Don't fret, just collect the jump shoes to your left, which increase your jump height. Then, walk back and jump up to reach the gems!
- Gems 61-62
- These gems are impossible to miss. Continue to the left after collecting the jump shoes and simply fall down to collect them!
- These gems are impossible to miss. Continue to the left after collecting the jump shoes and simply fall down to collect them!
- Gems 63-67
- These gems are also impossible to miss! Fall down to collect the first two, then collect the group of three (not pictured in the screenshot) waiting for you at the bottom.

- These gems are also impossible to miss! Fall down to collect the first two, then collect the group of three (not pictured in the screenshot) waiting for you at the bottom.
- Gems 68-69
- Continue to the left after falling down and you'll reach the bridge area you previously passed. With your new jump shoes, you can now jump high enough to reach the two gems on the tree branch!

- Continue to the left after falling down and you'll reach the bridge area you previously passed. With your new jump shoes, you can now jump high enough to reach the two gems on the tree branch!
- Gems 70-72
- Continue up the tree and jump over to the left cliff area. Jump onto the stone atop the semisolid platform to collect the gems!
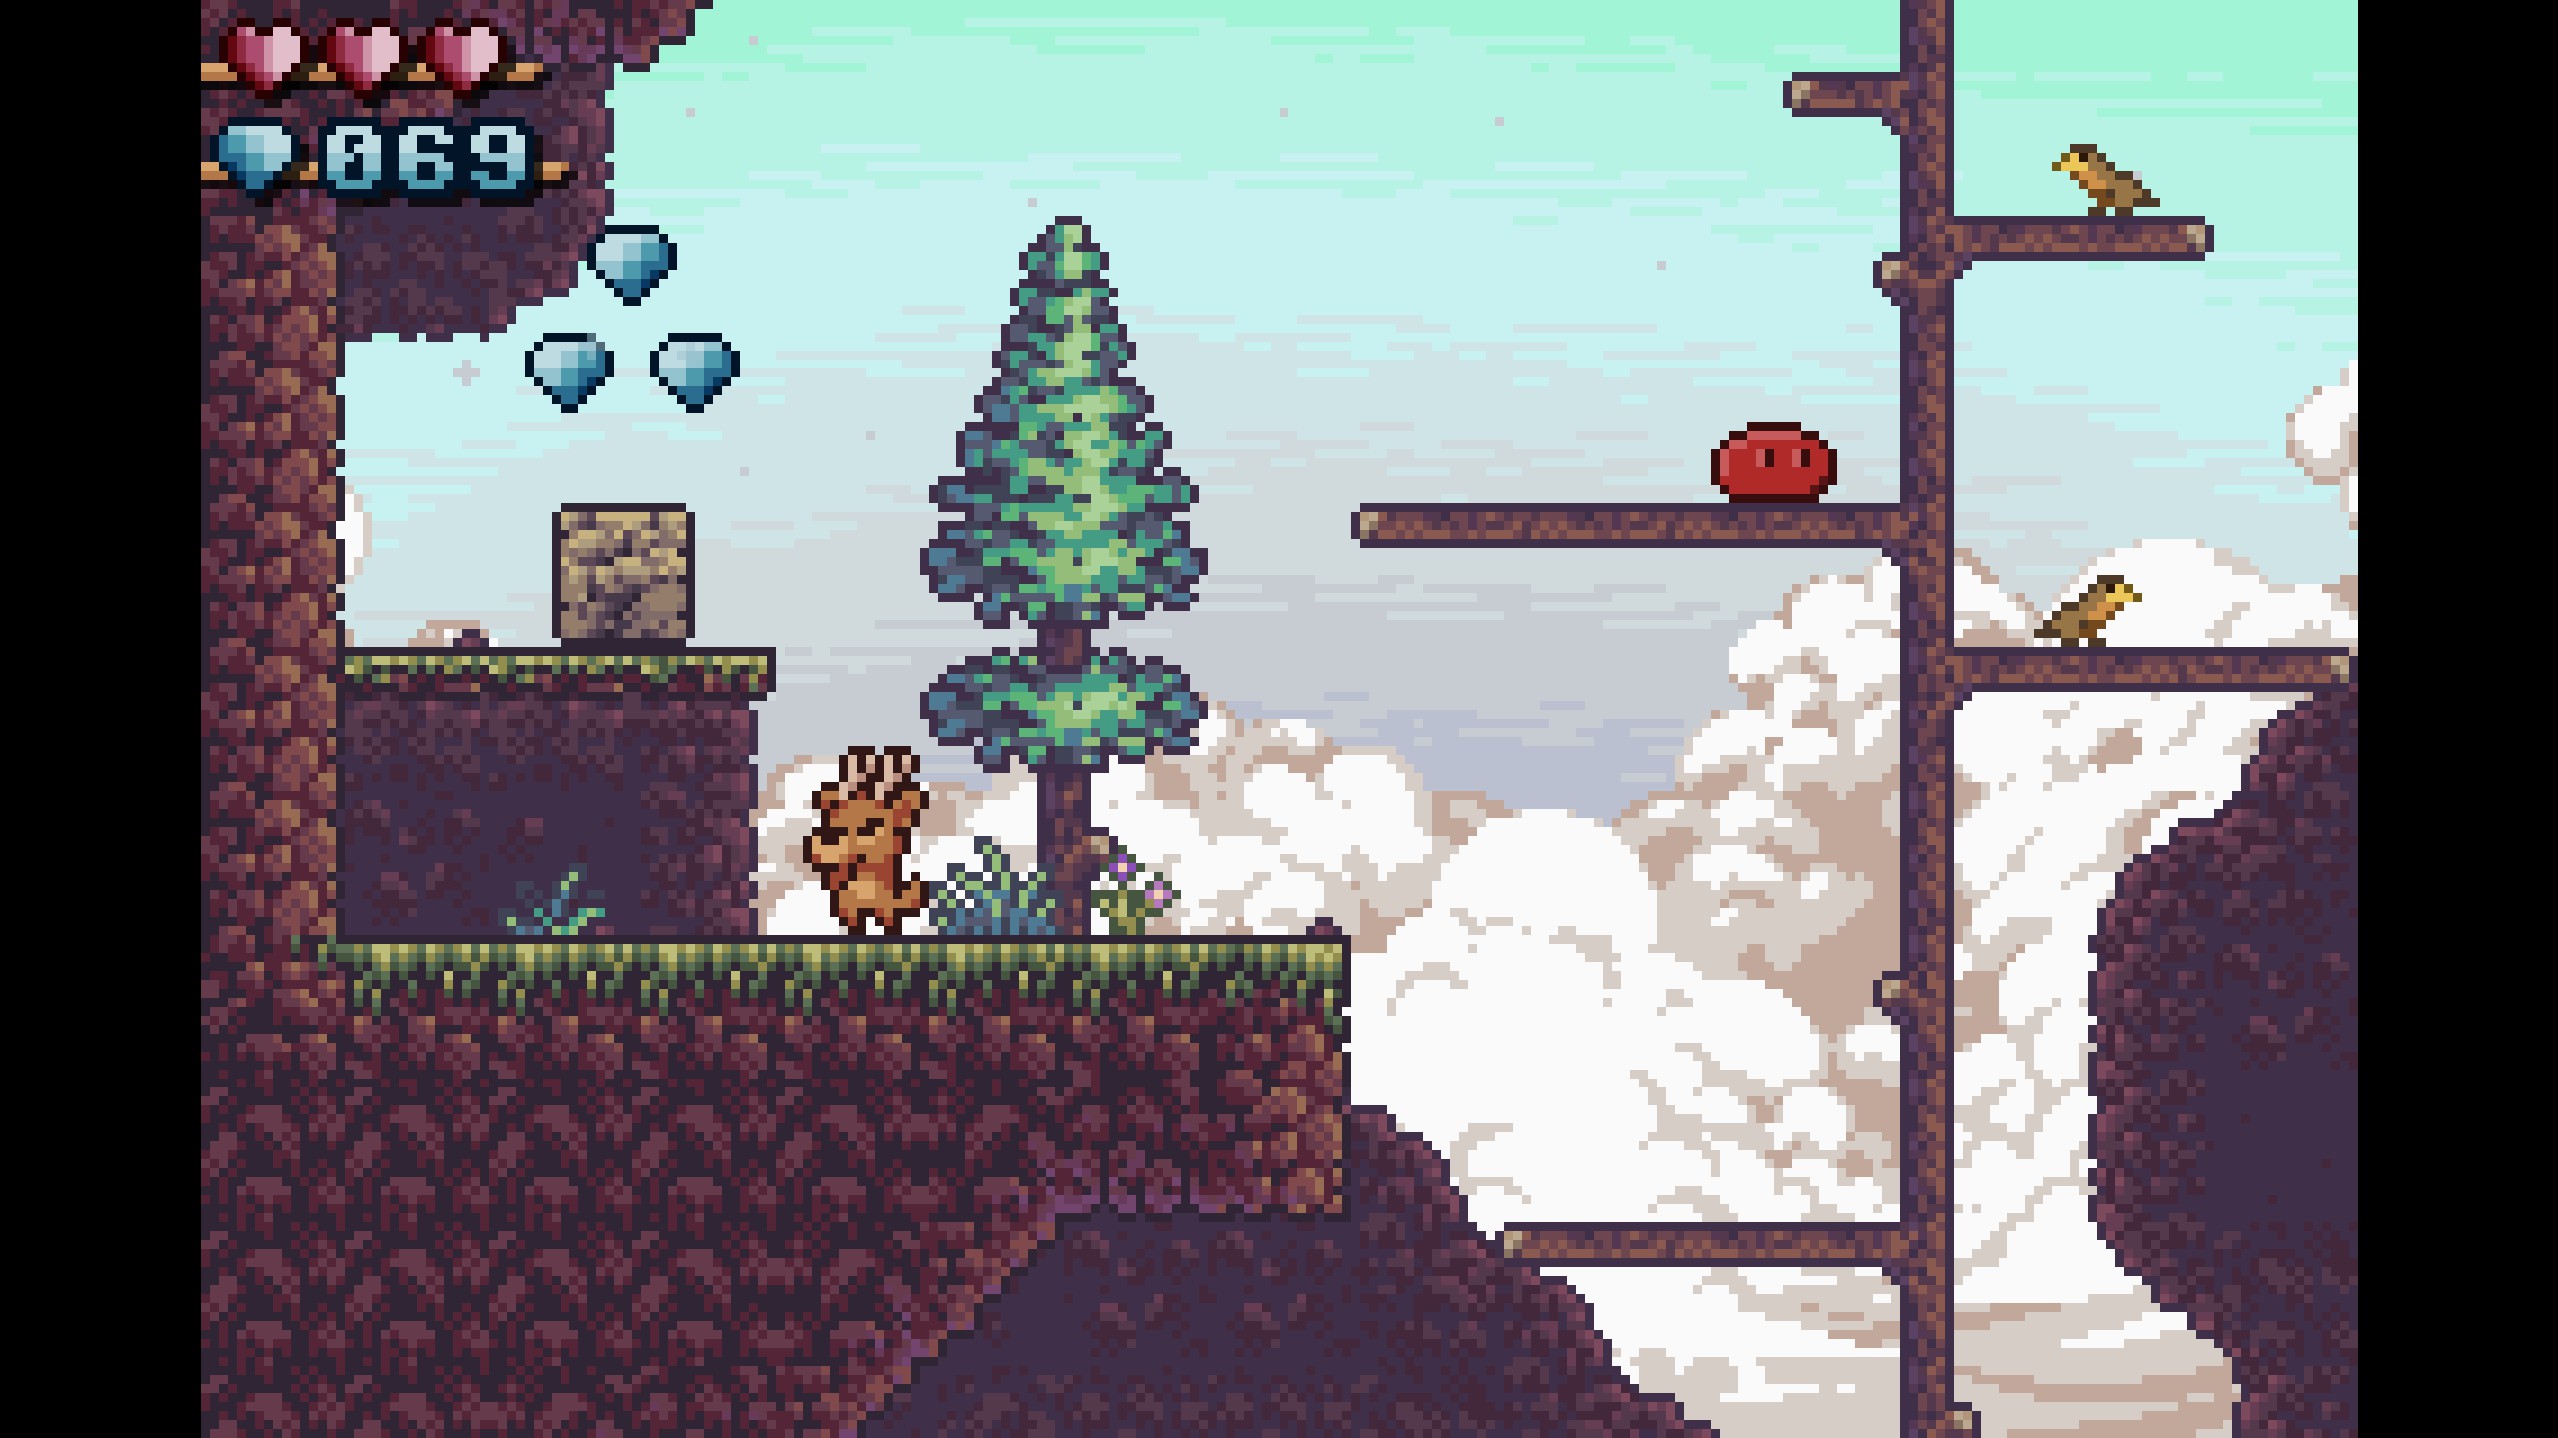
- Continue up the tree and jump over to the left cliff area. Jump onto the stone atop the semisolid platform to collect the gems!
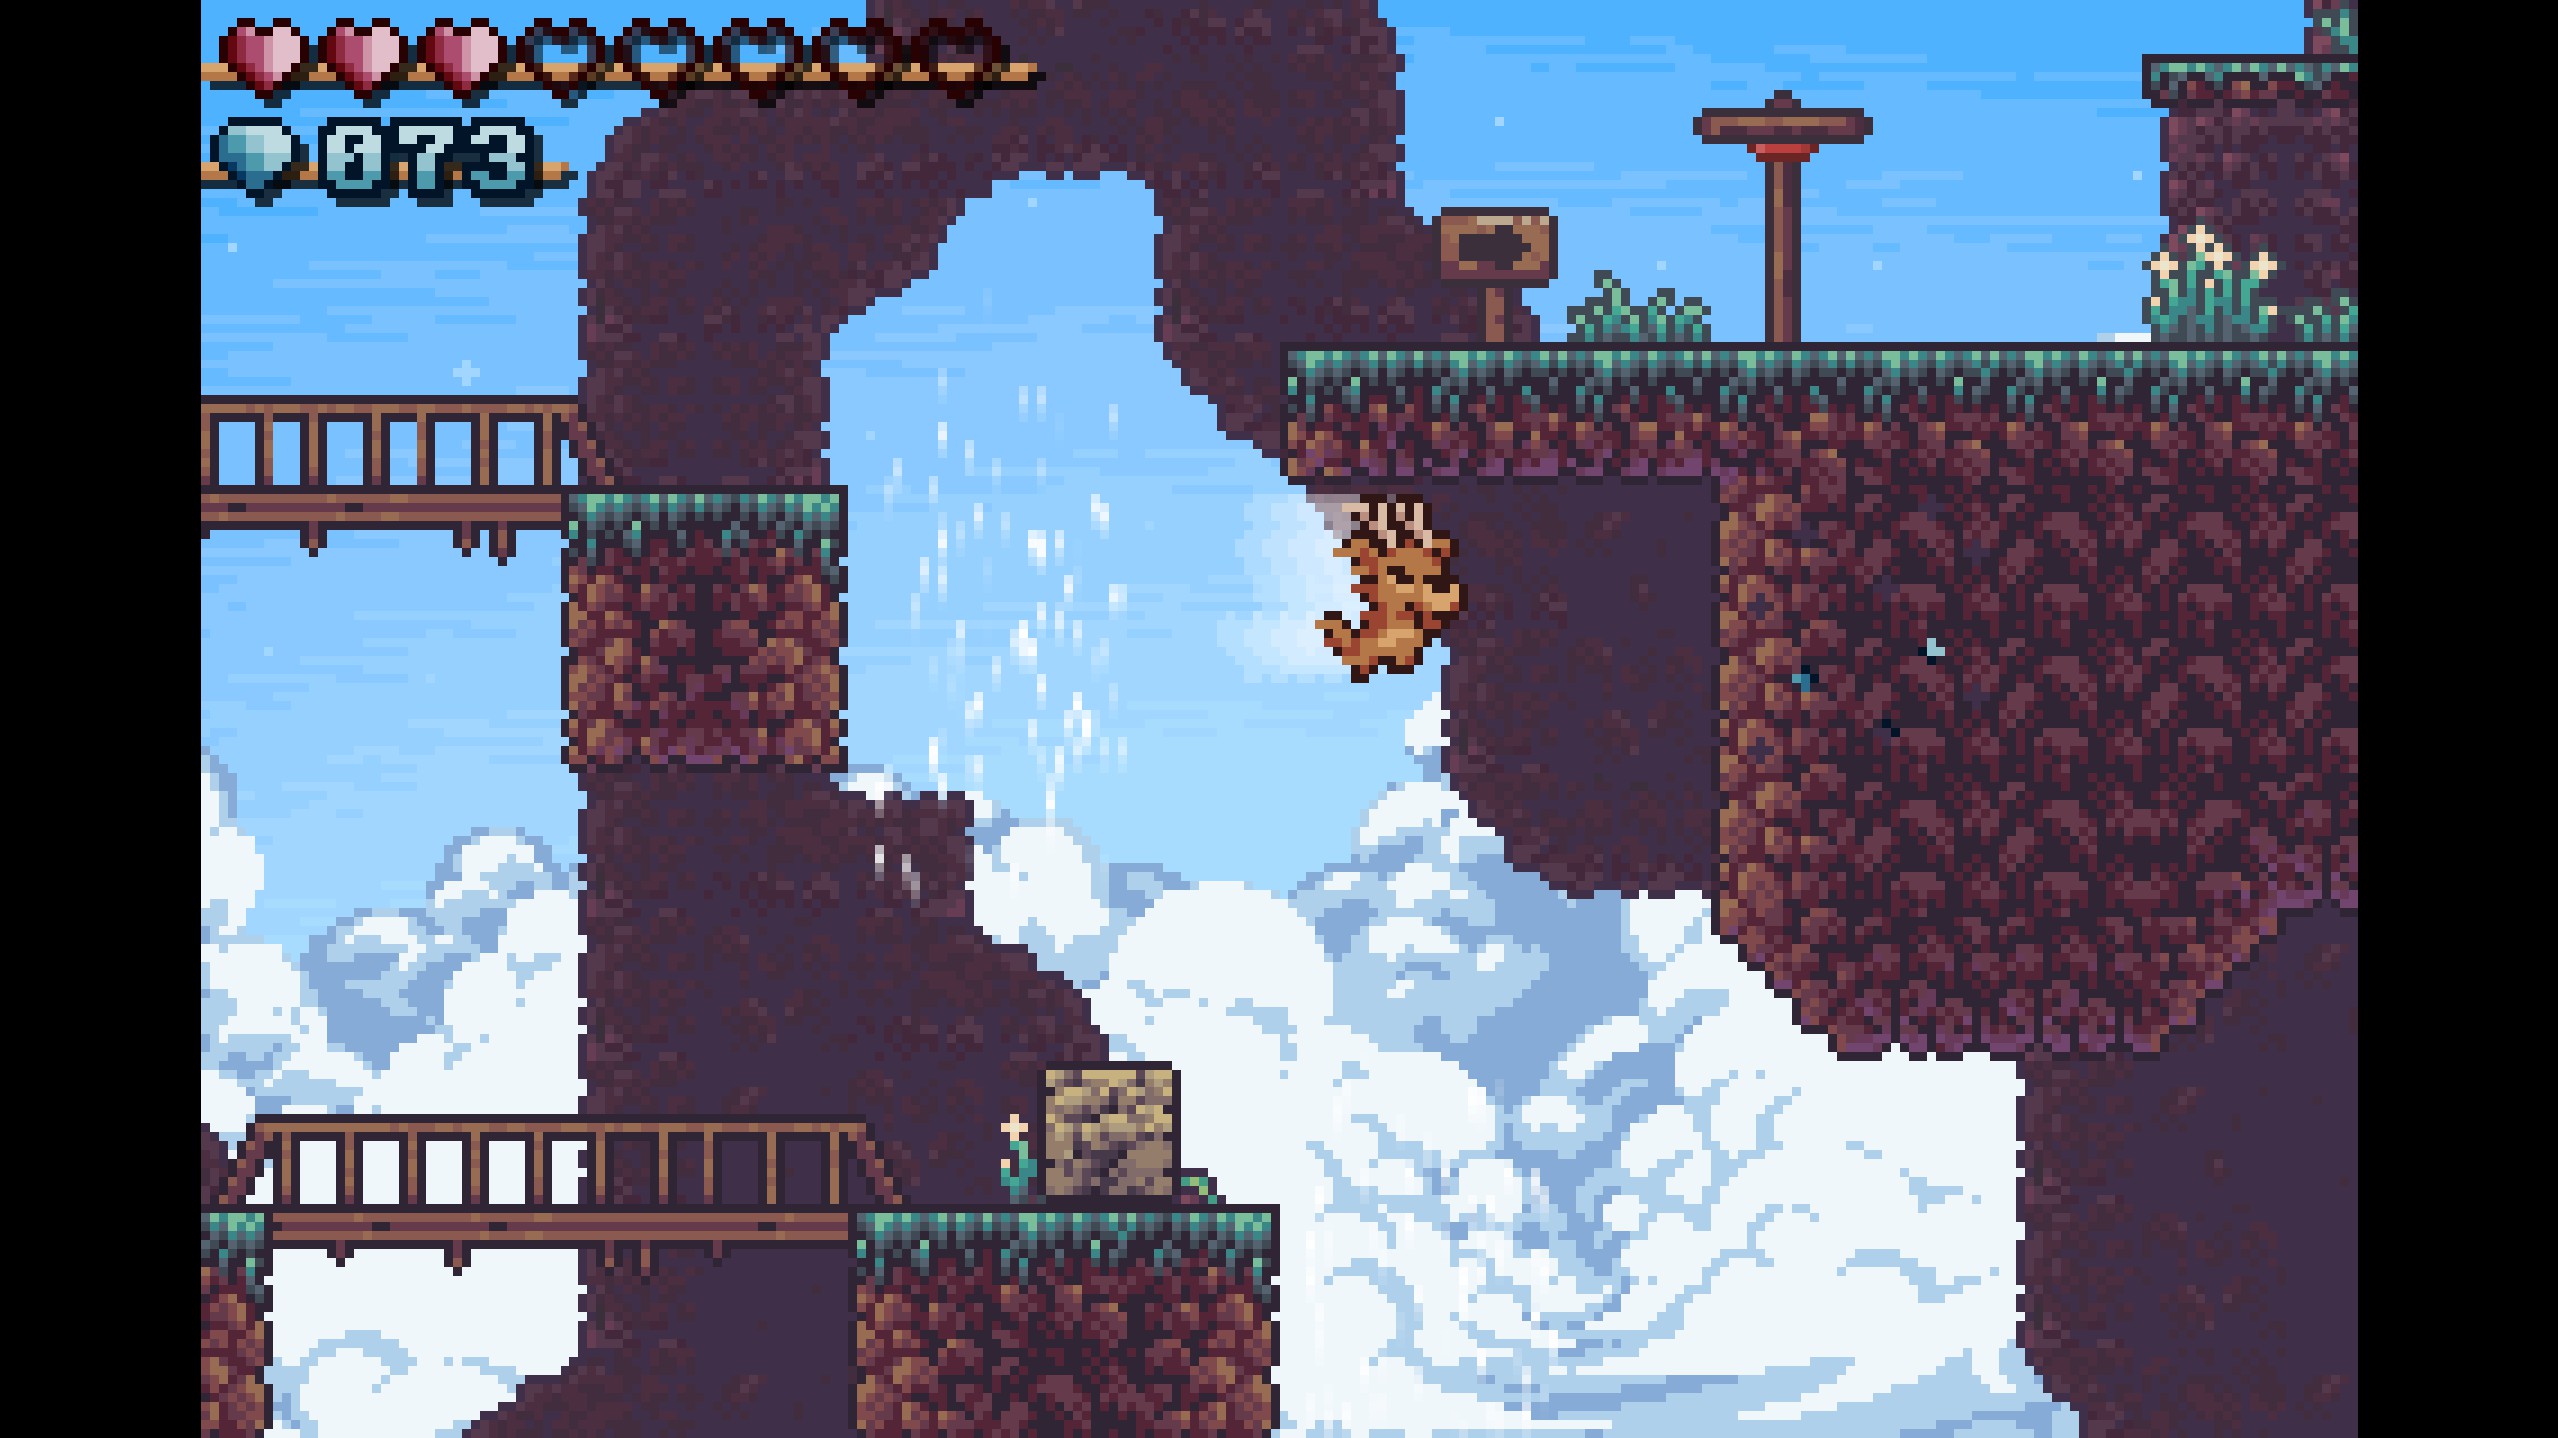
- Gems 73-76
- Push the stone down from the semisolid platform and position it below the high tree branch with the red slime. Jump off of the stone, using it as a platform, and continue up the tree to collect the gems!
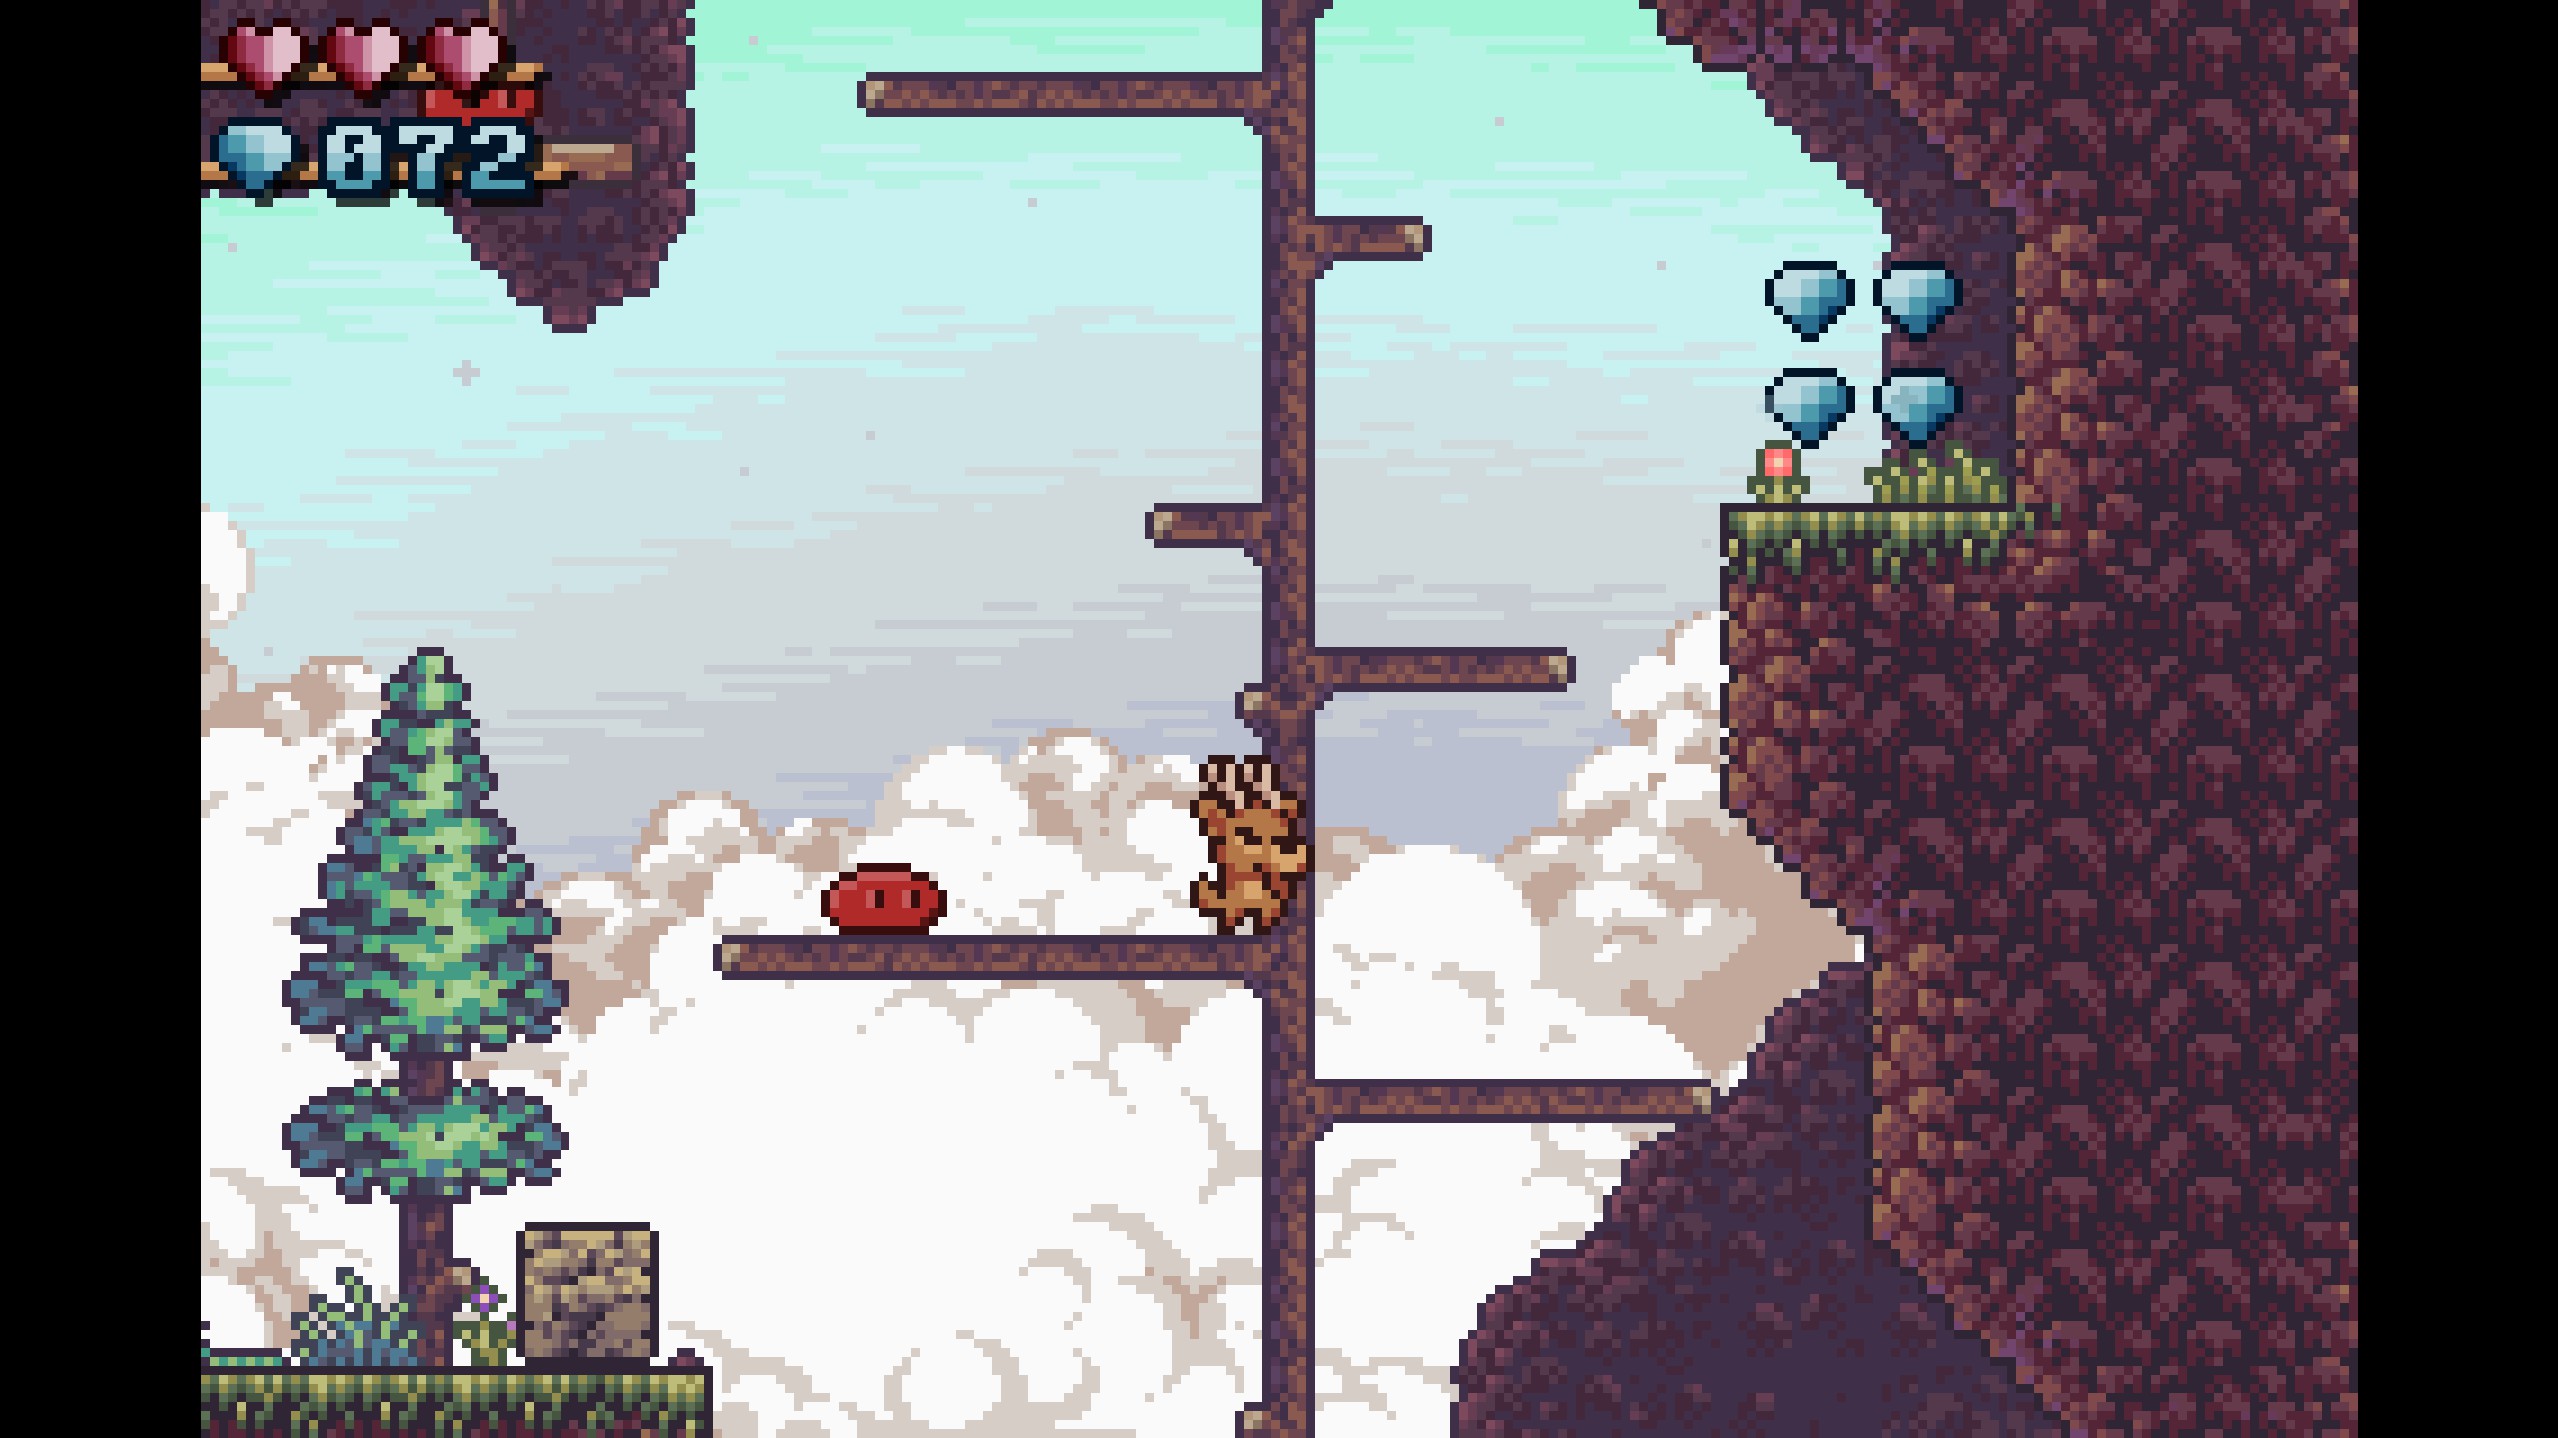
- Push the stone down from the semisolid platform and position it below the high tree branch with the red slime. Jump off of the stone, using it as a platform, and continue up the tree to collect the gems!
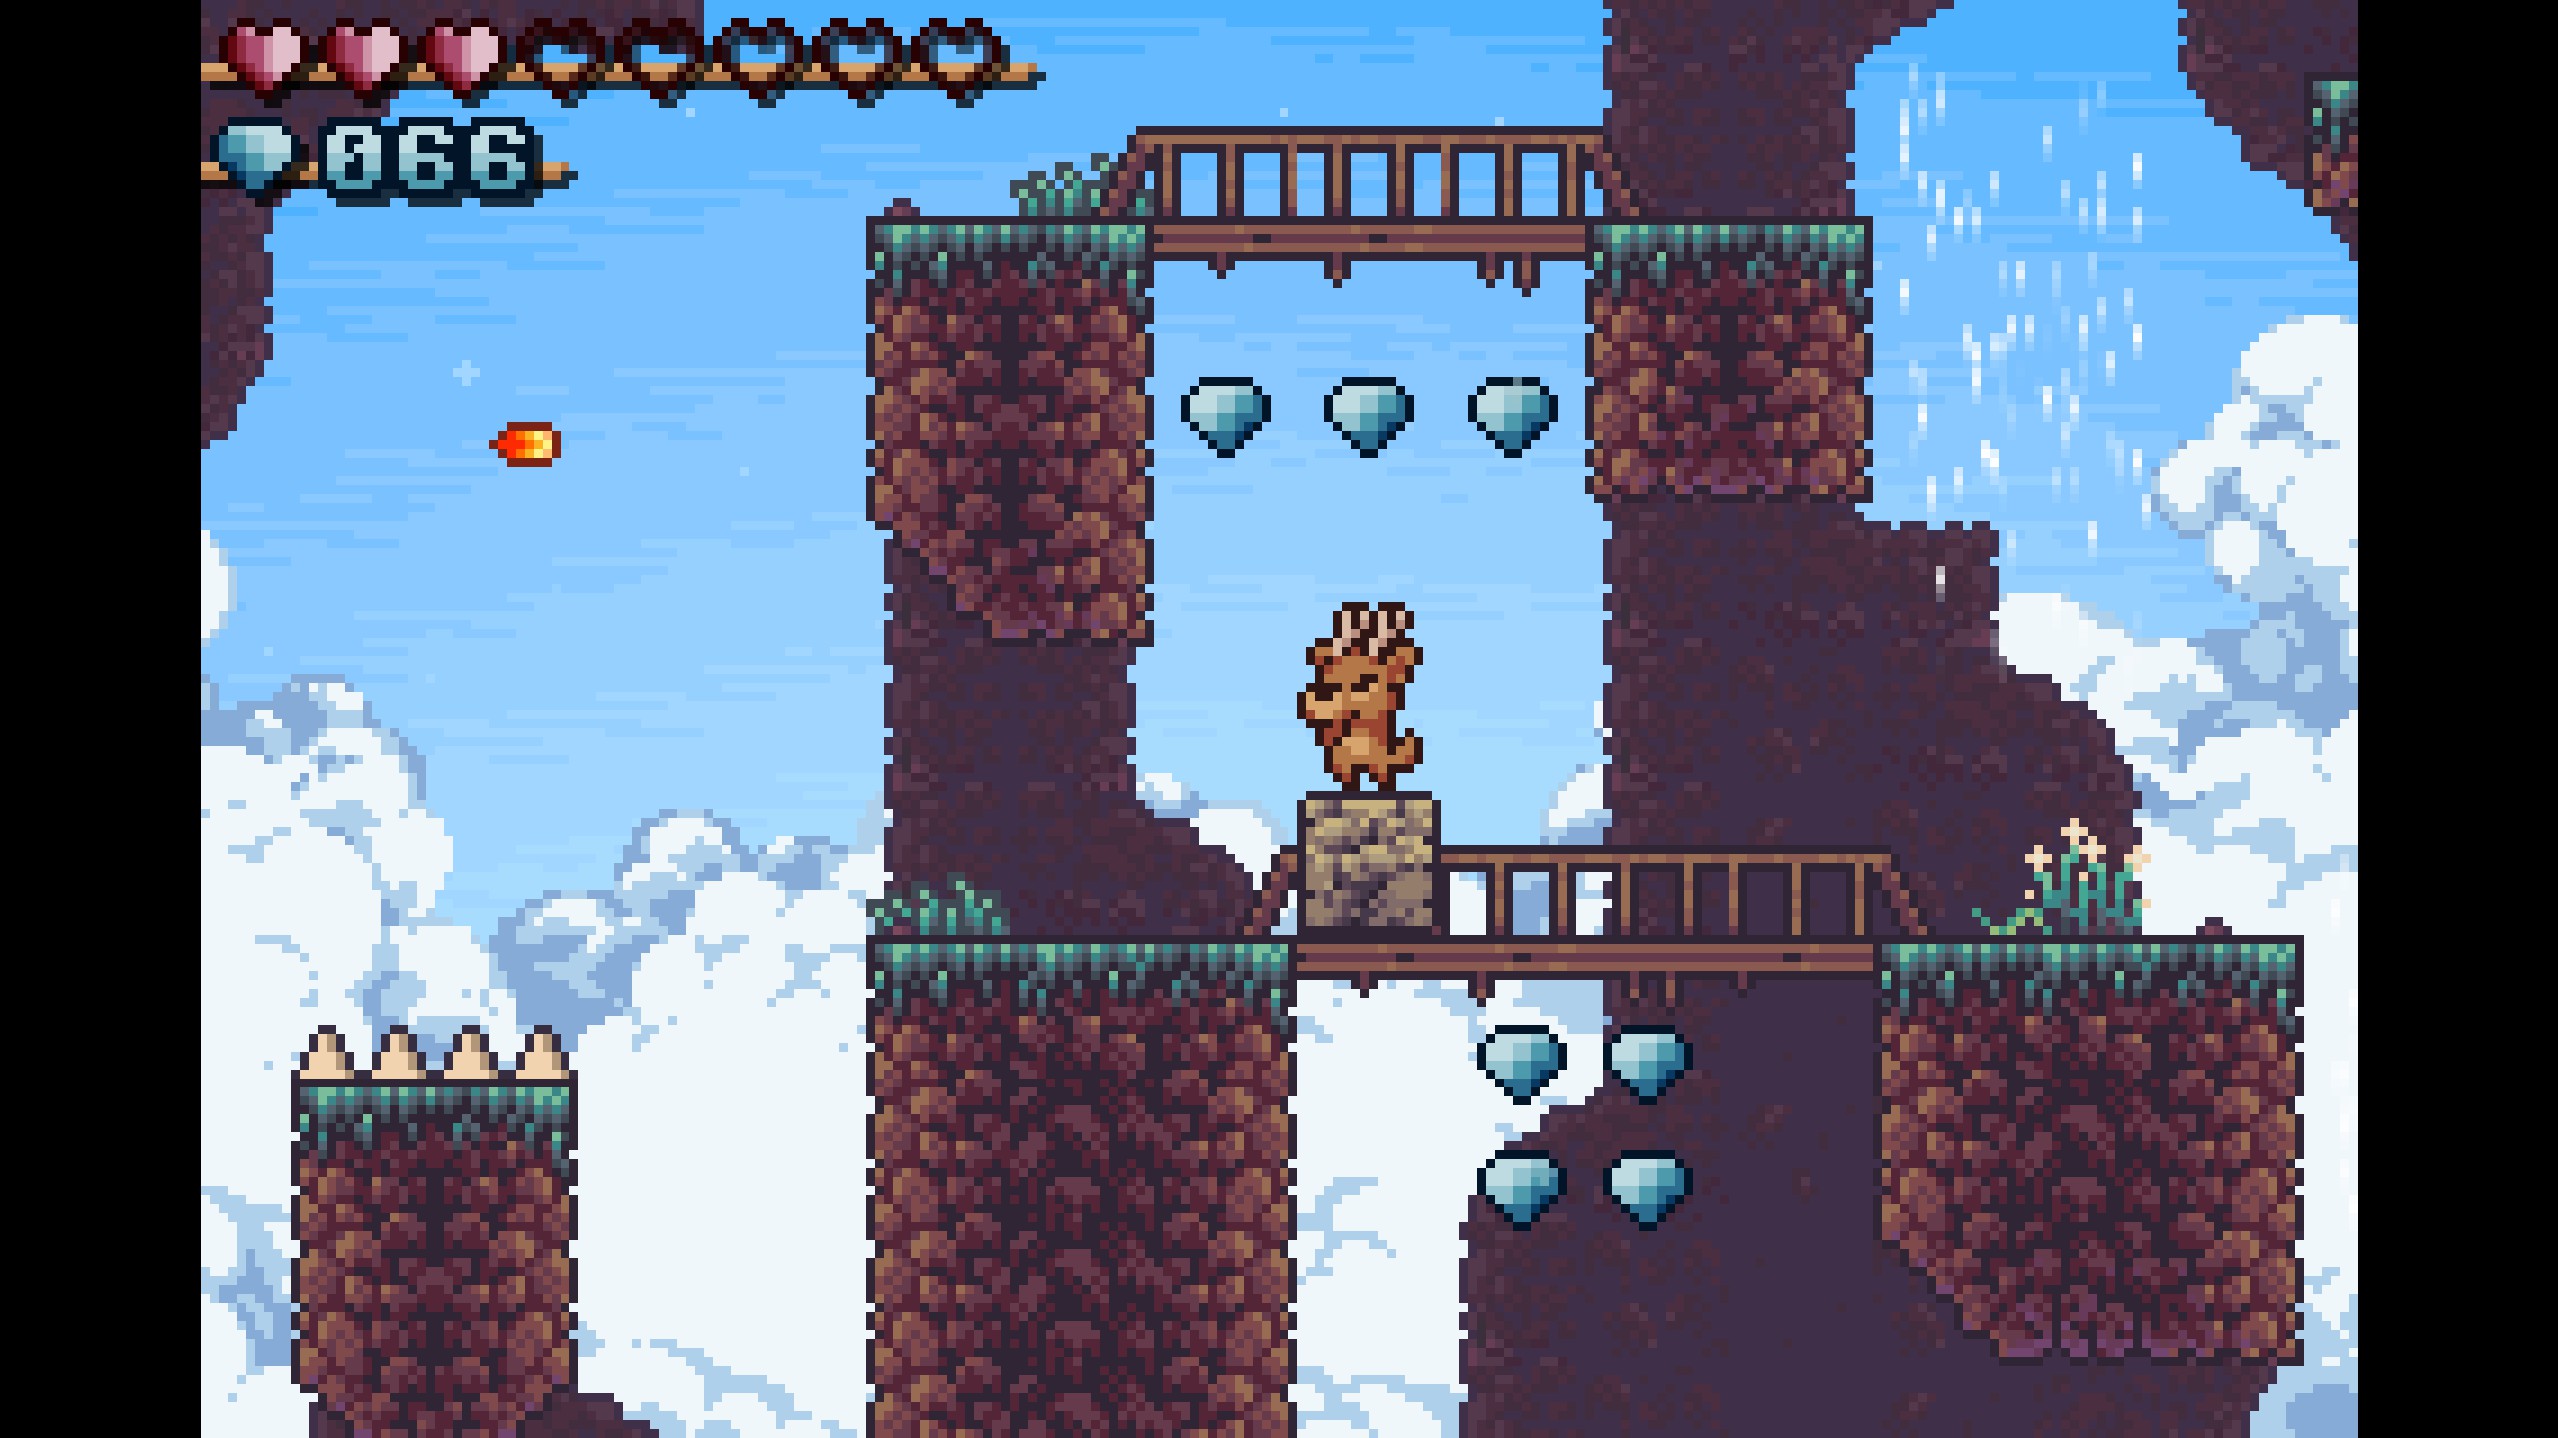
- Gems 77-83
- After reaching the top of the tree, you'll see an area with 3 moving platforms. Skillfully jump from one to the other to collect all the gems!
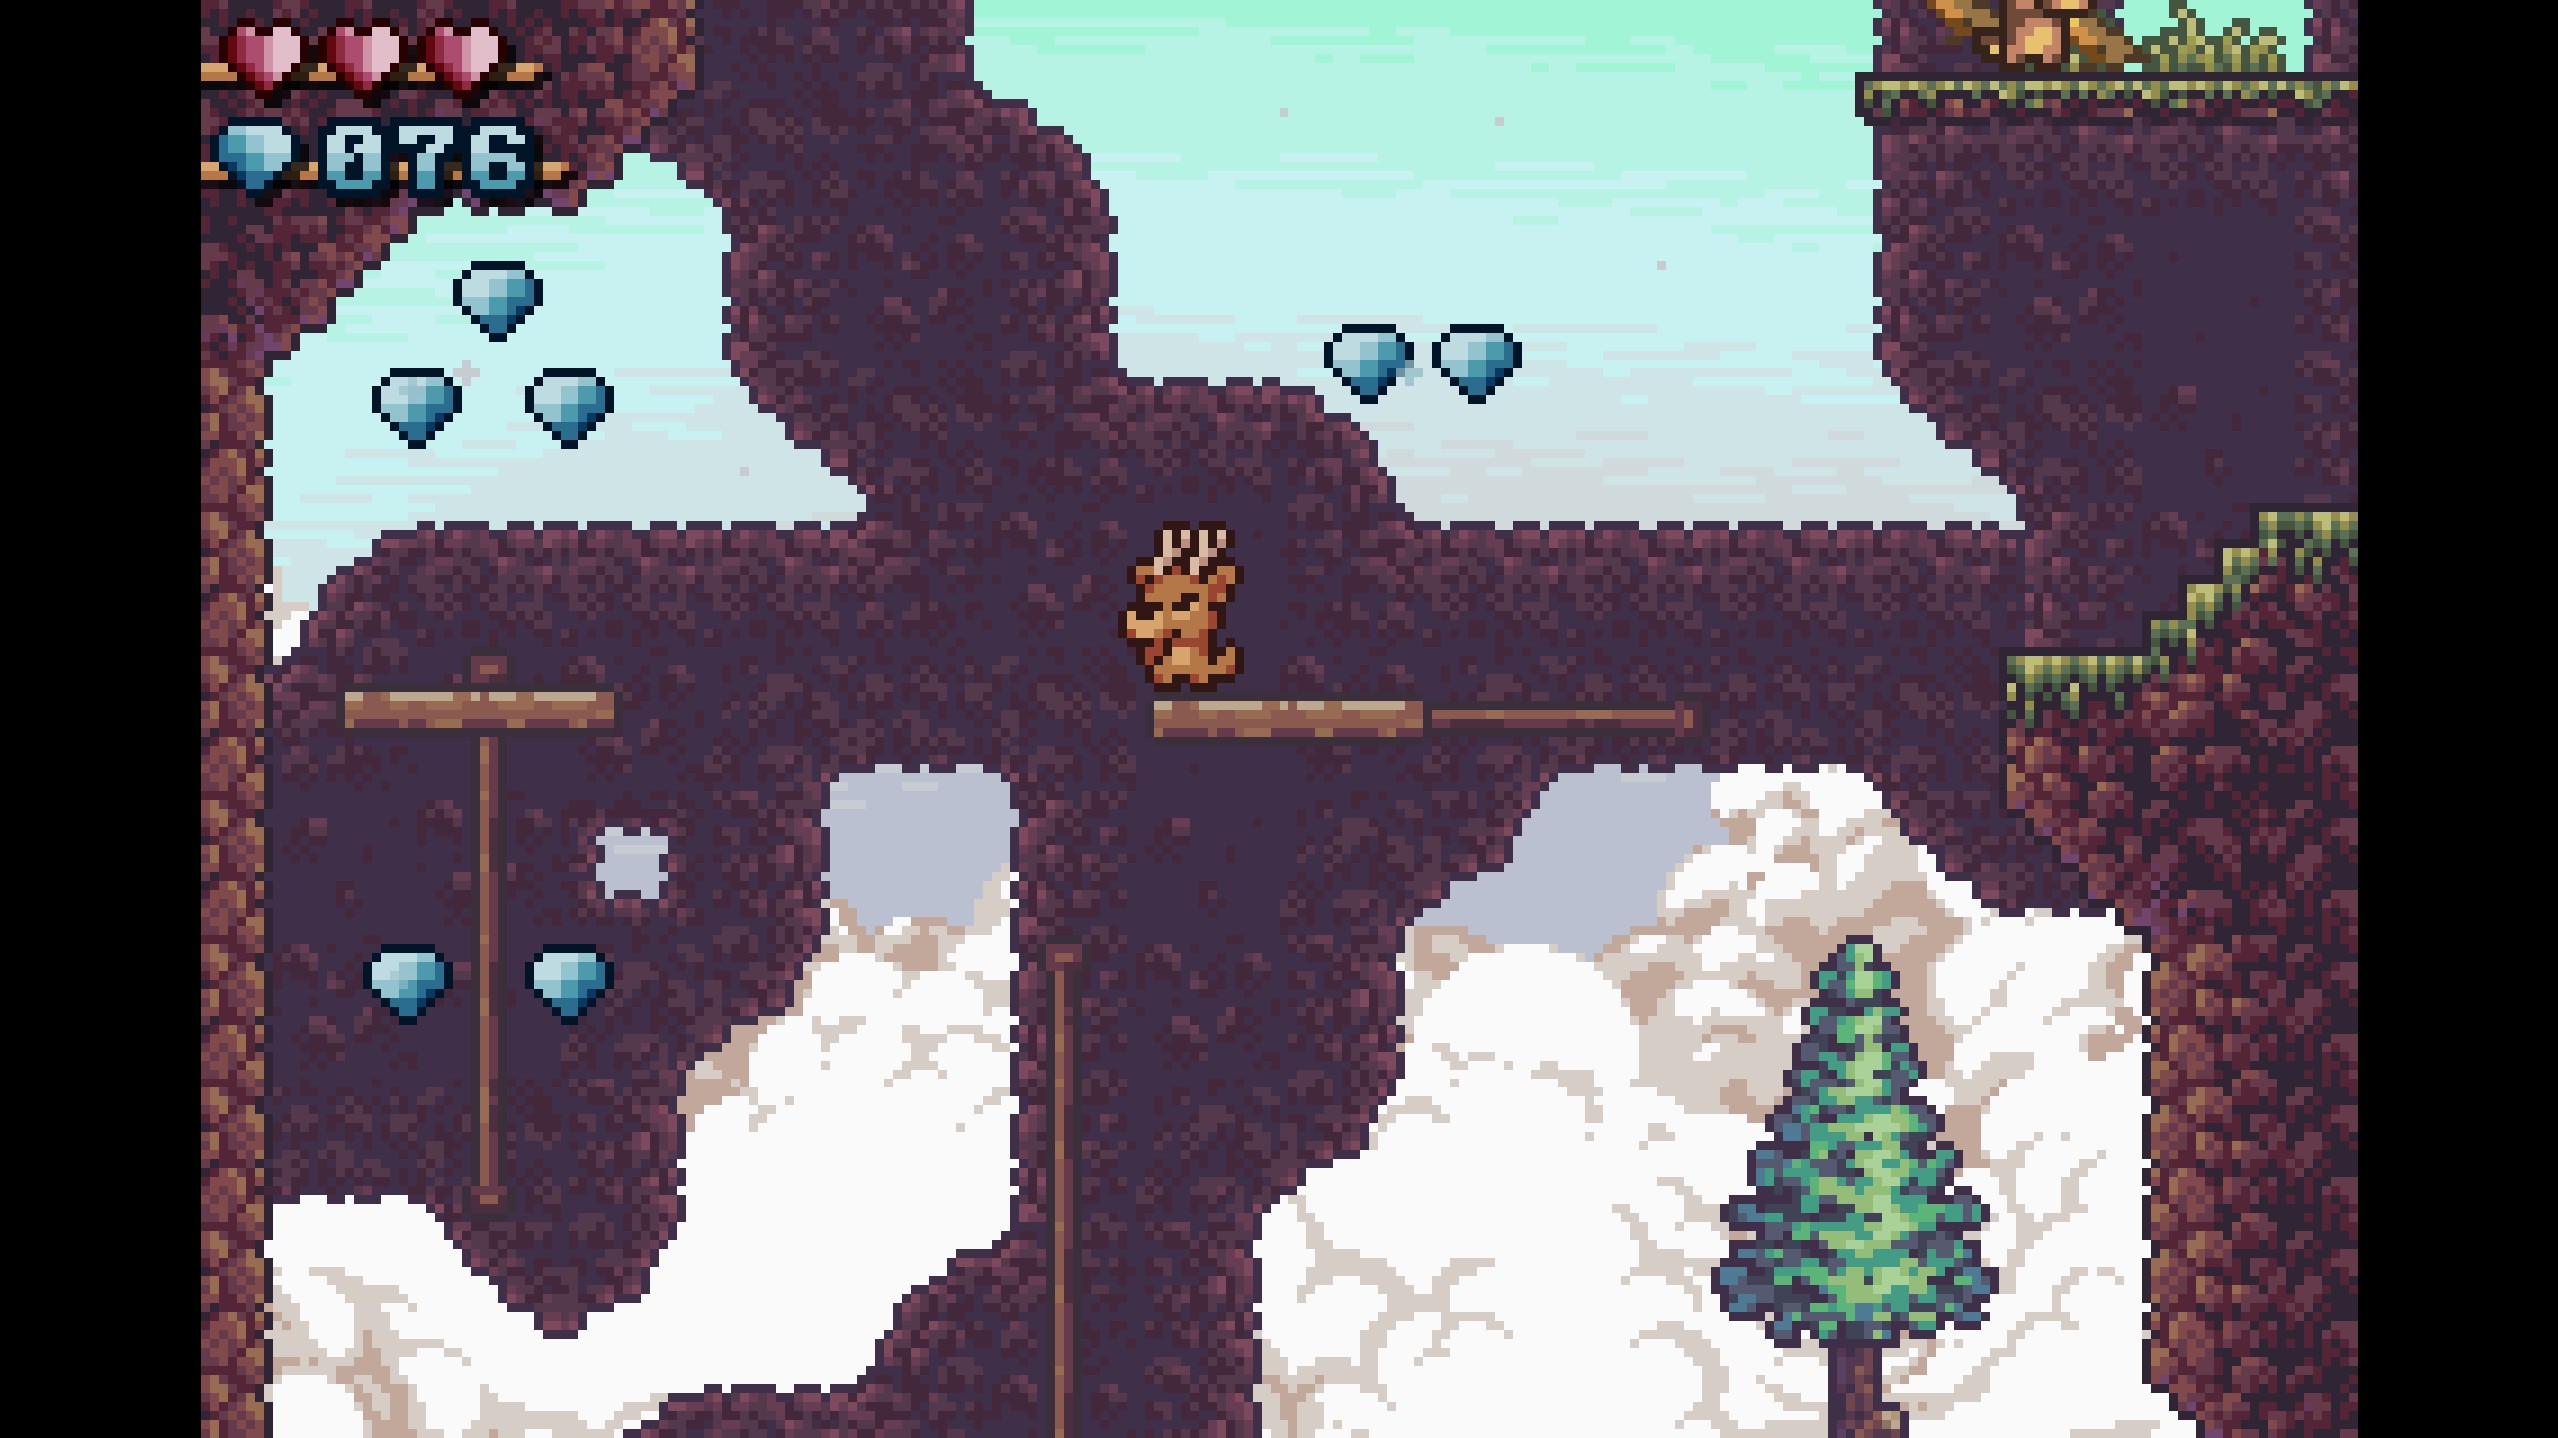
- After reaching the top of the tree, you'll see an area with 3 moving platforms. Skillfully jump from one to the other to collect all the gems!
- Gems 84-88
- After passing the moving platforms, climb up the ladder and continue to the right until you reach an area with two broken moving platforms. Drop down to collect the first three gems, flick the lever to fix the moving platforms, and then jump up the semisolid platforms to collect the other two gems!

- After passing the moving platforms, climb up the ladder and continue to the right until you reach an area with two broken moving platforms. Drop down to collect the first three gems, flick the lever to fix the moving platforms, and then jump up the semisolid platforms to collect the other two gems!
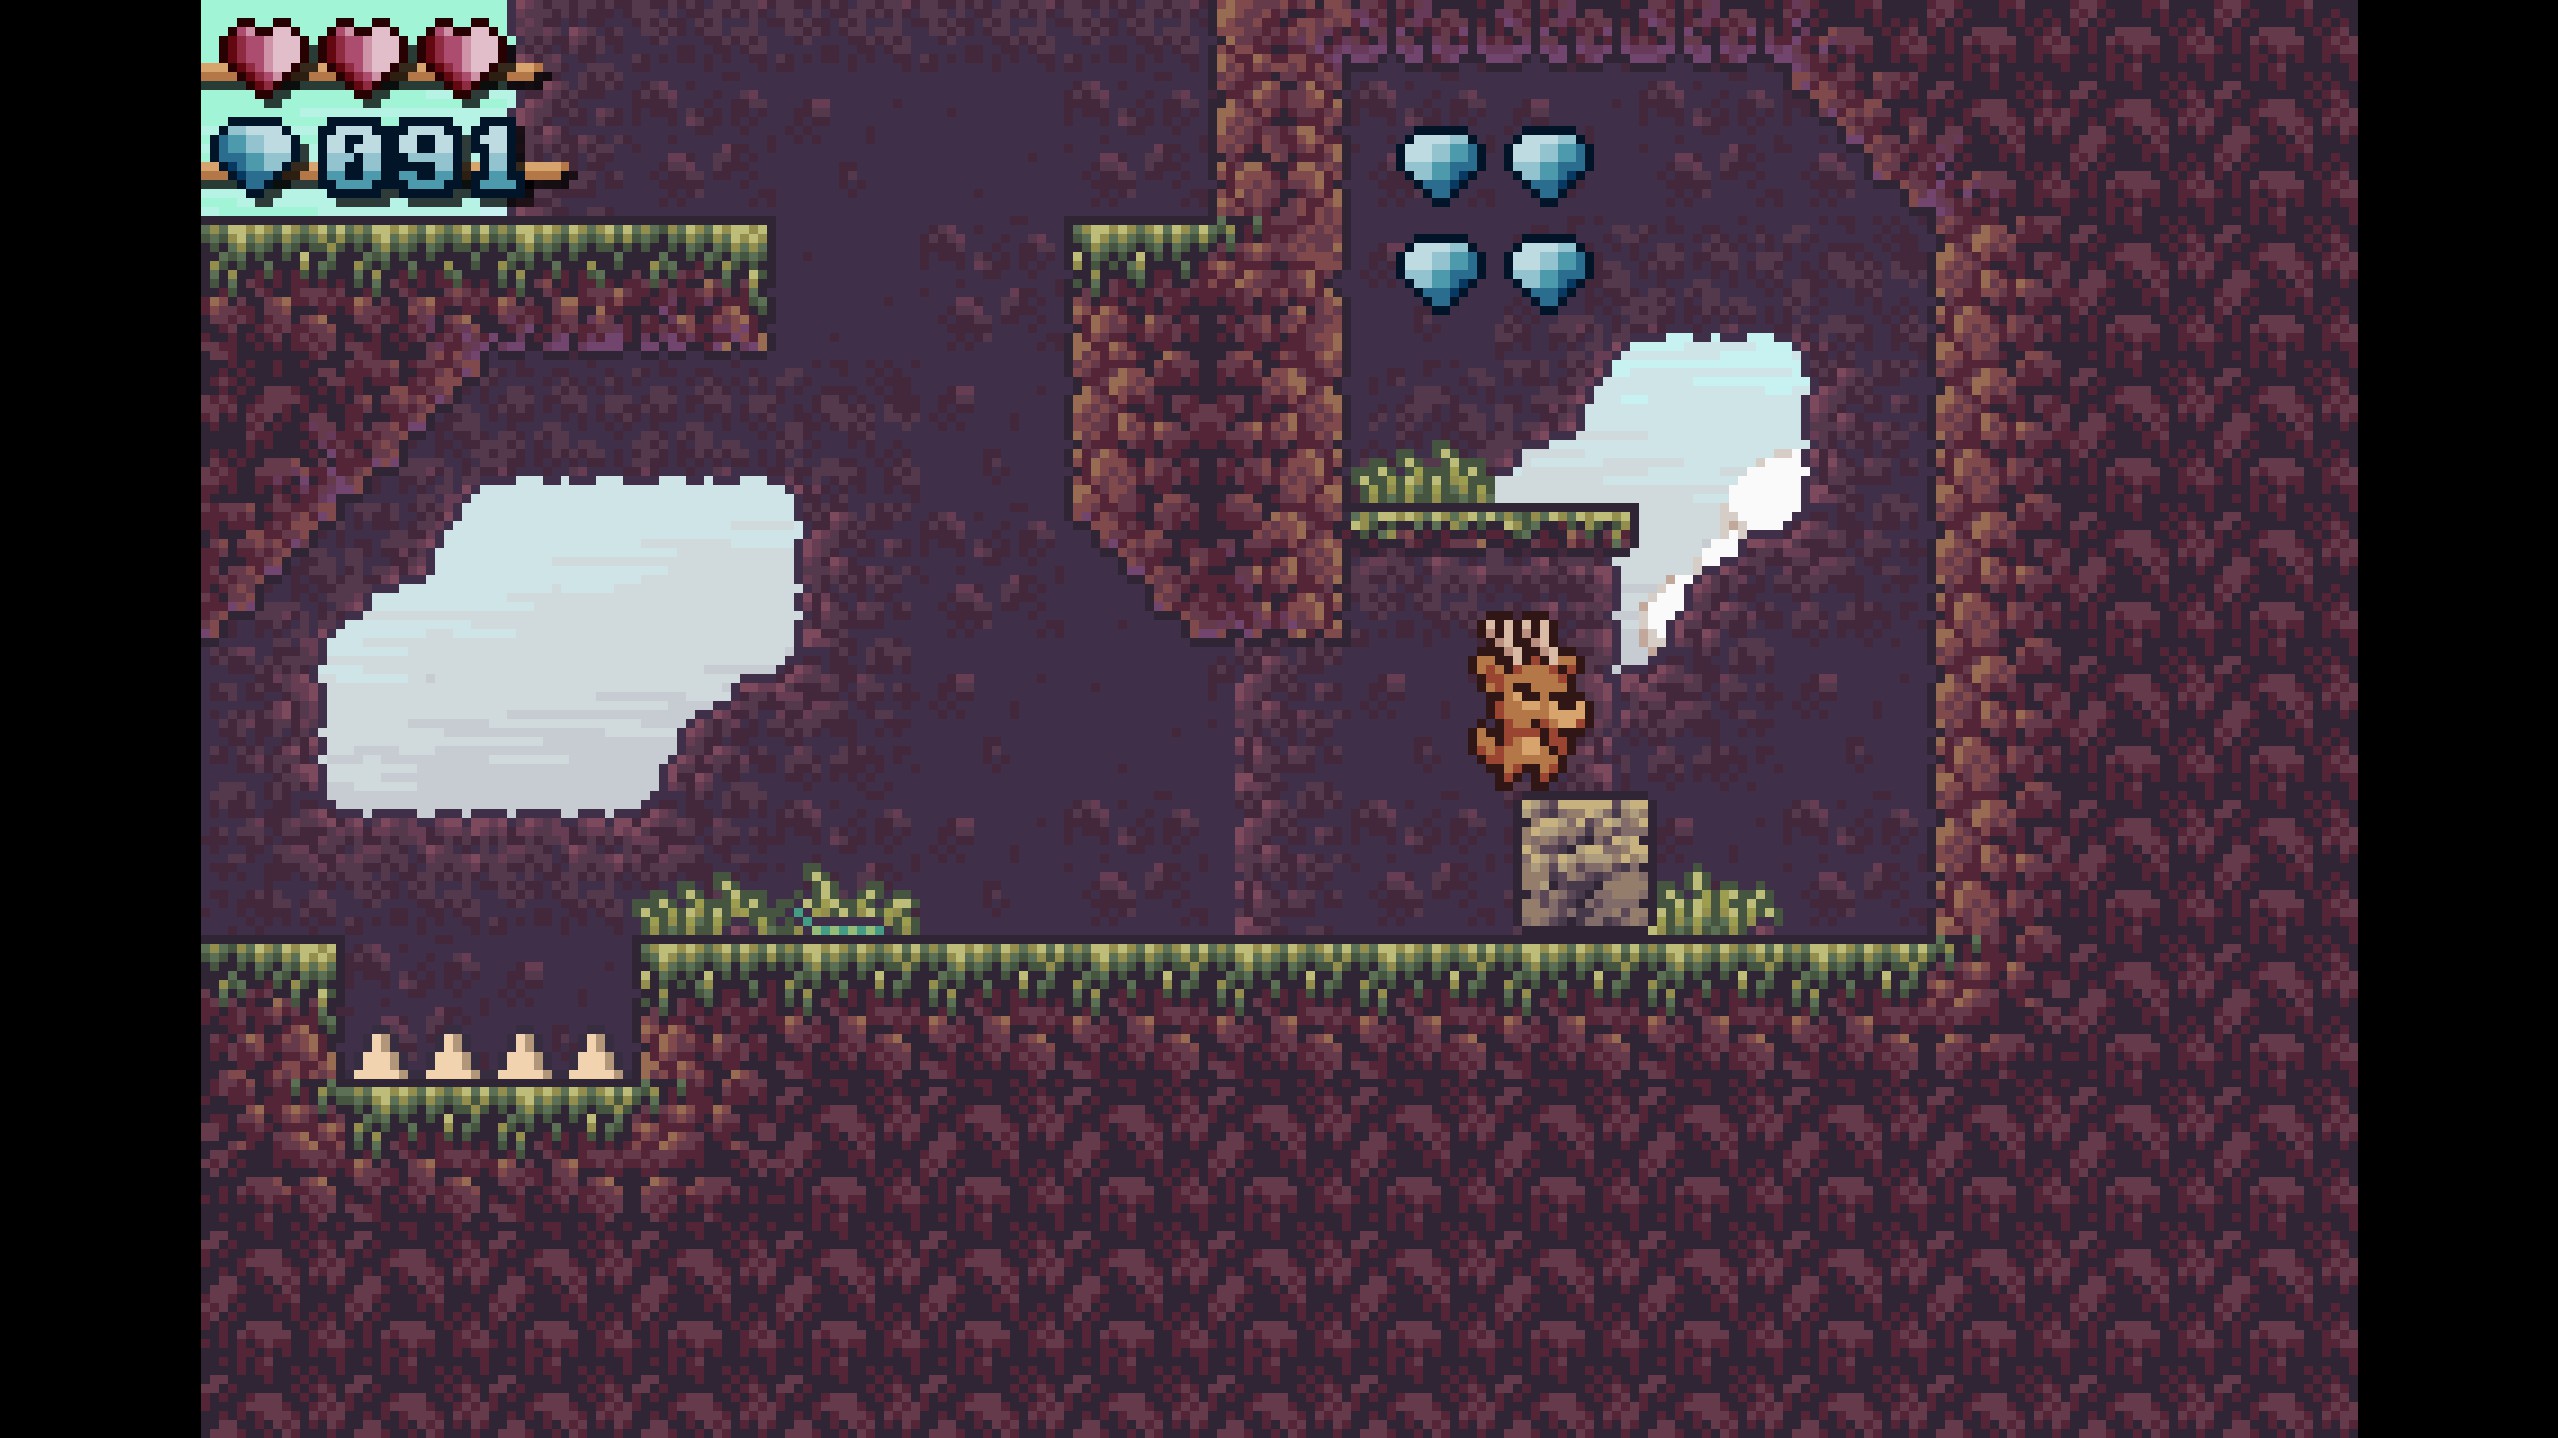
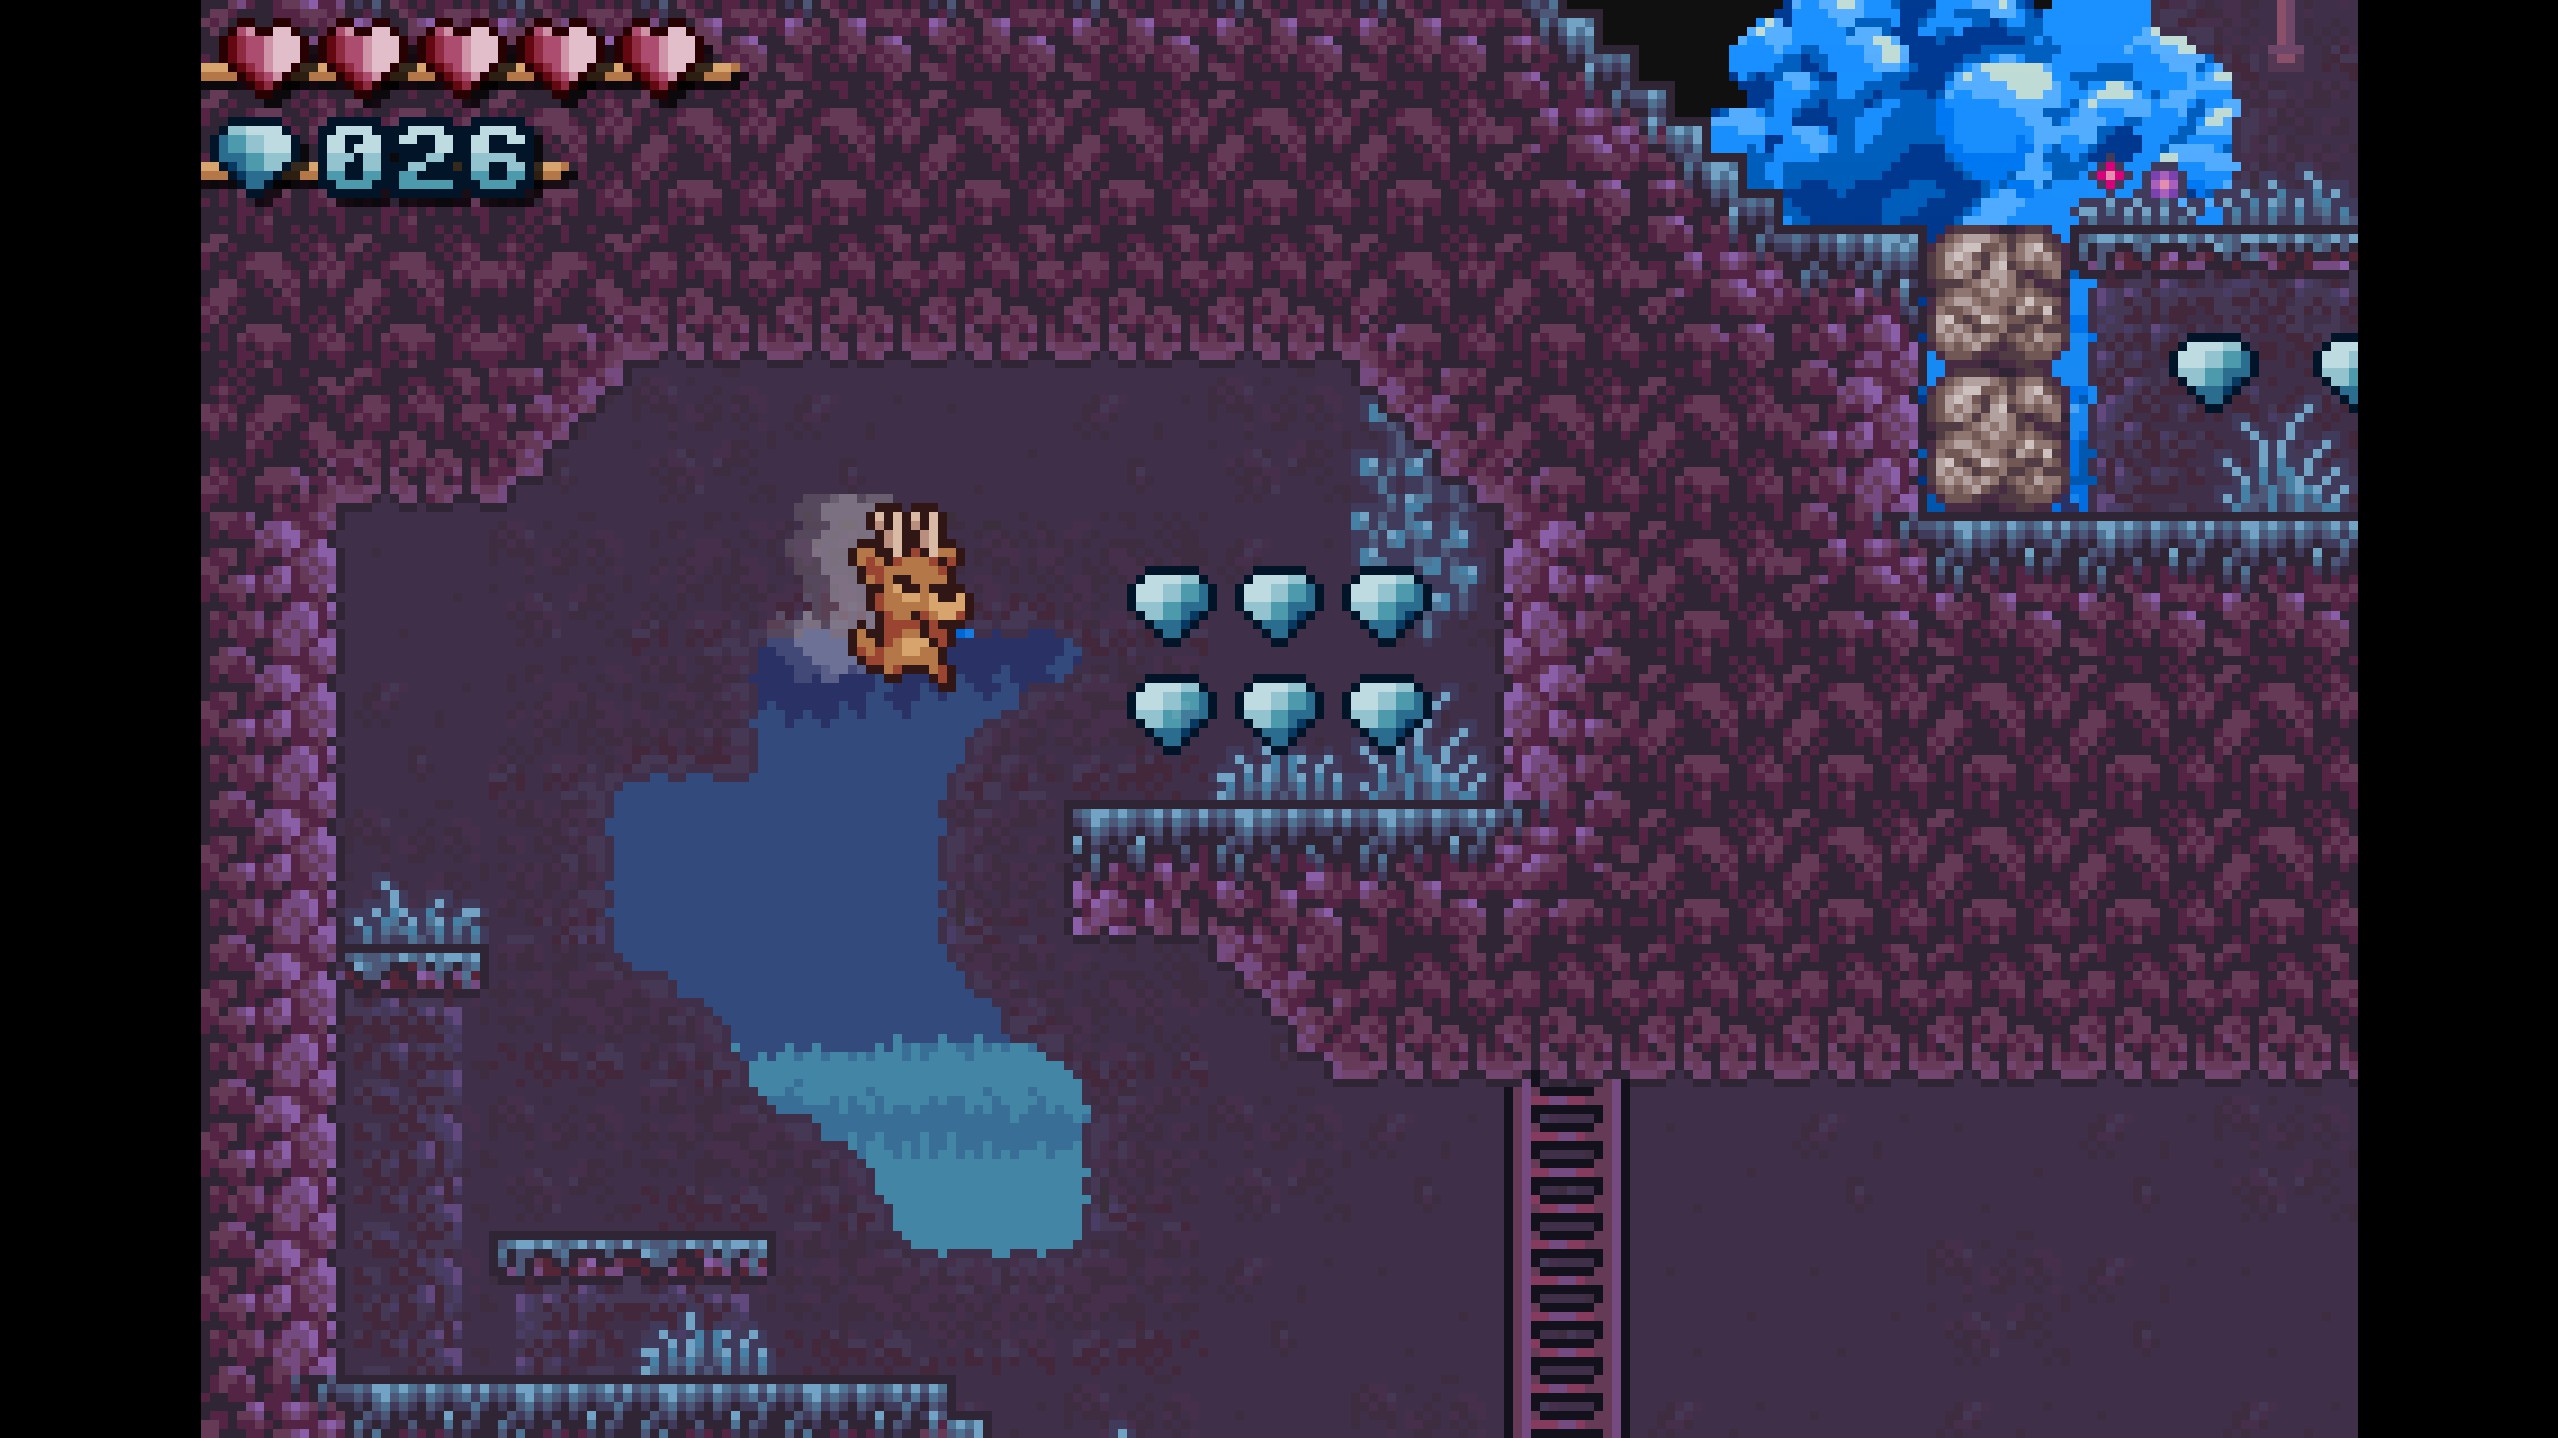
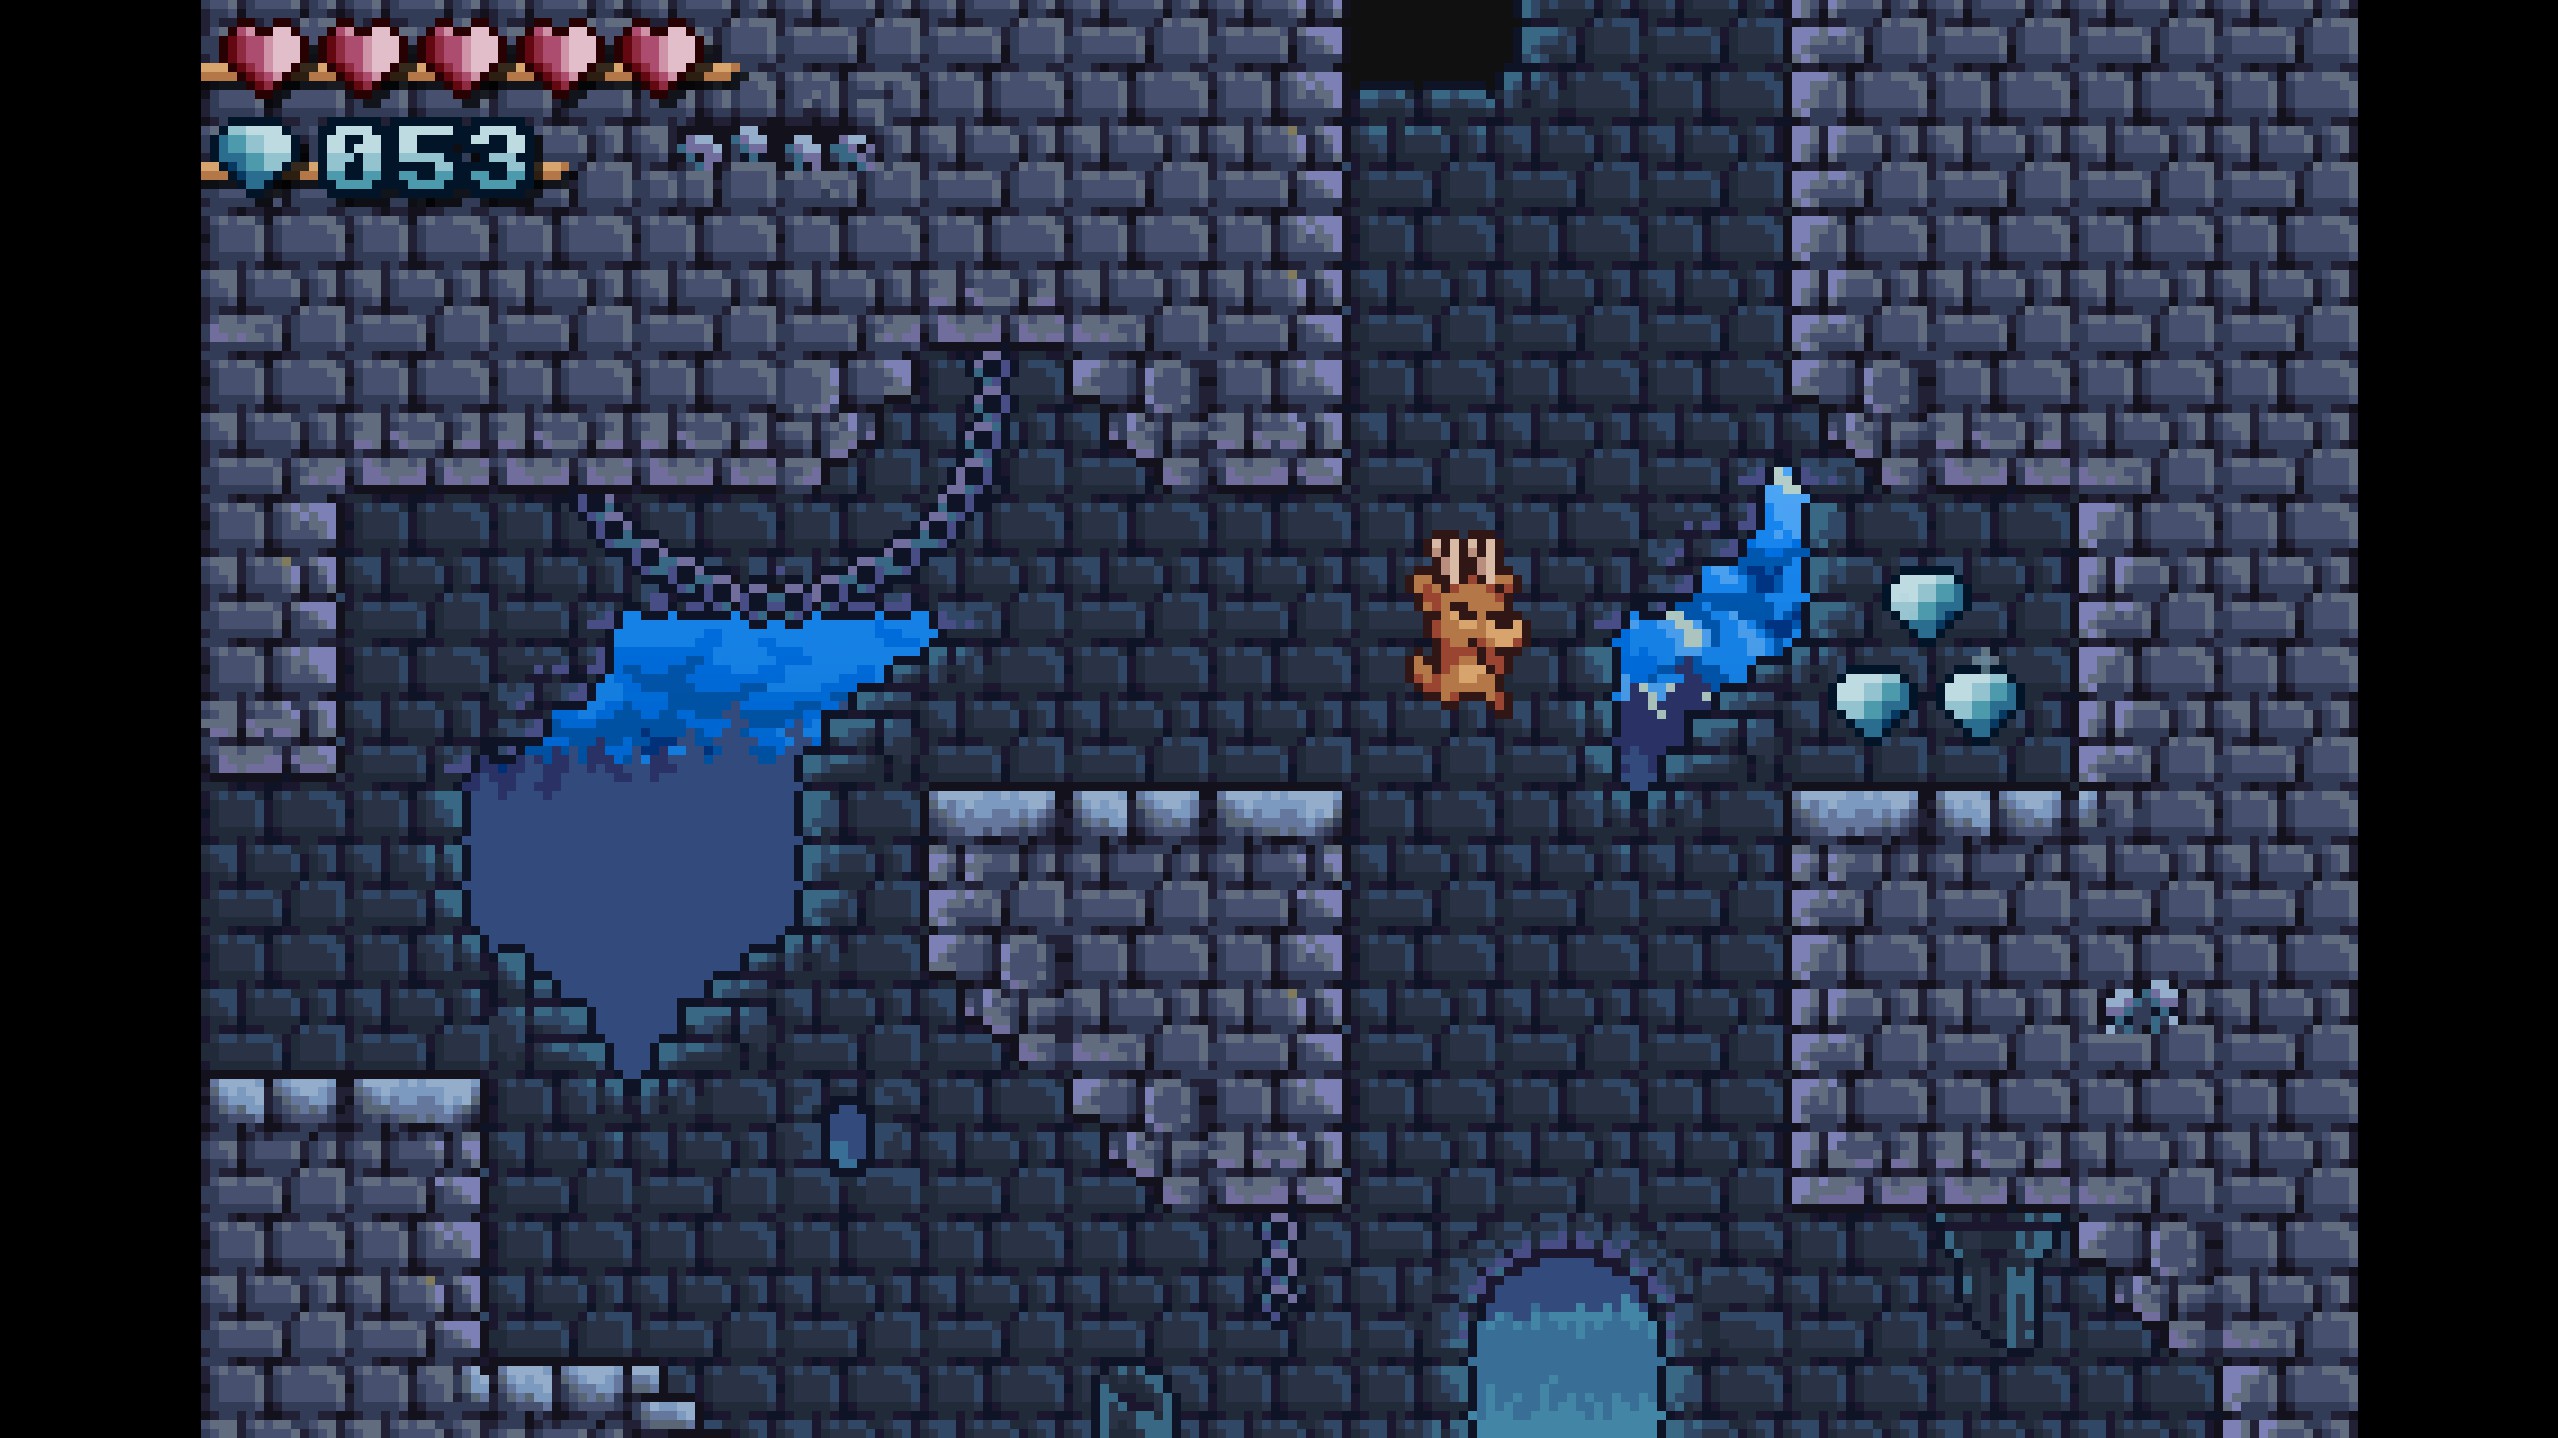
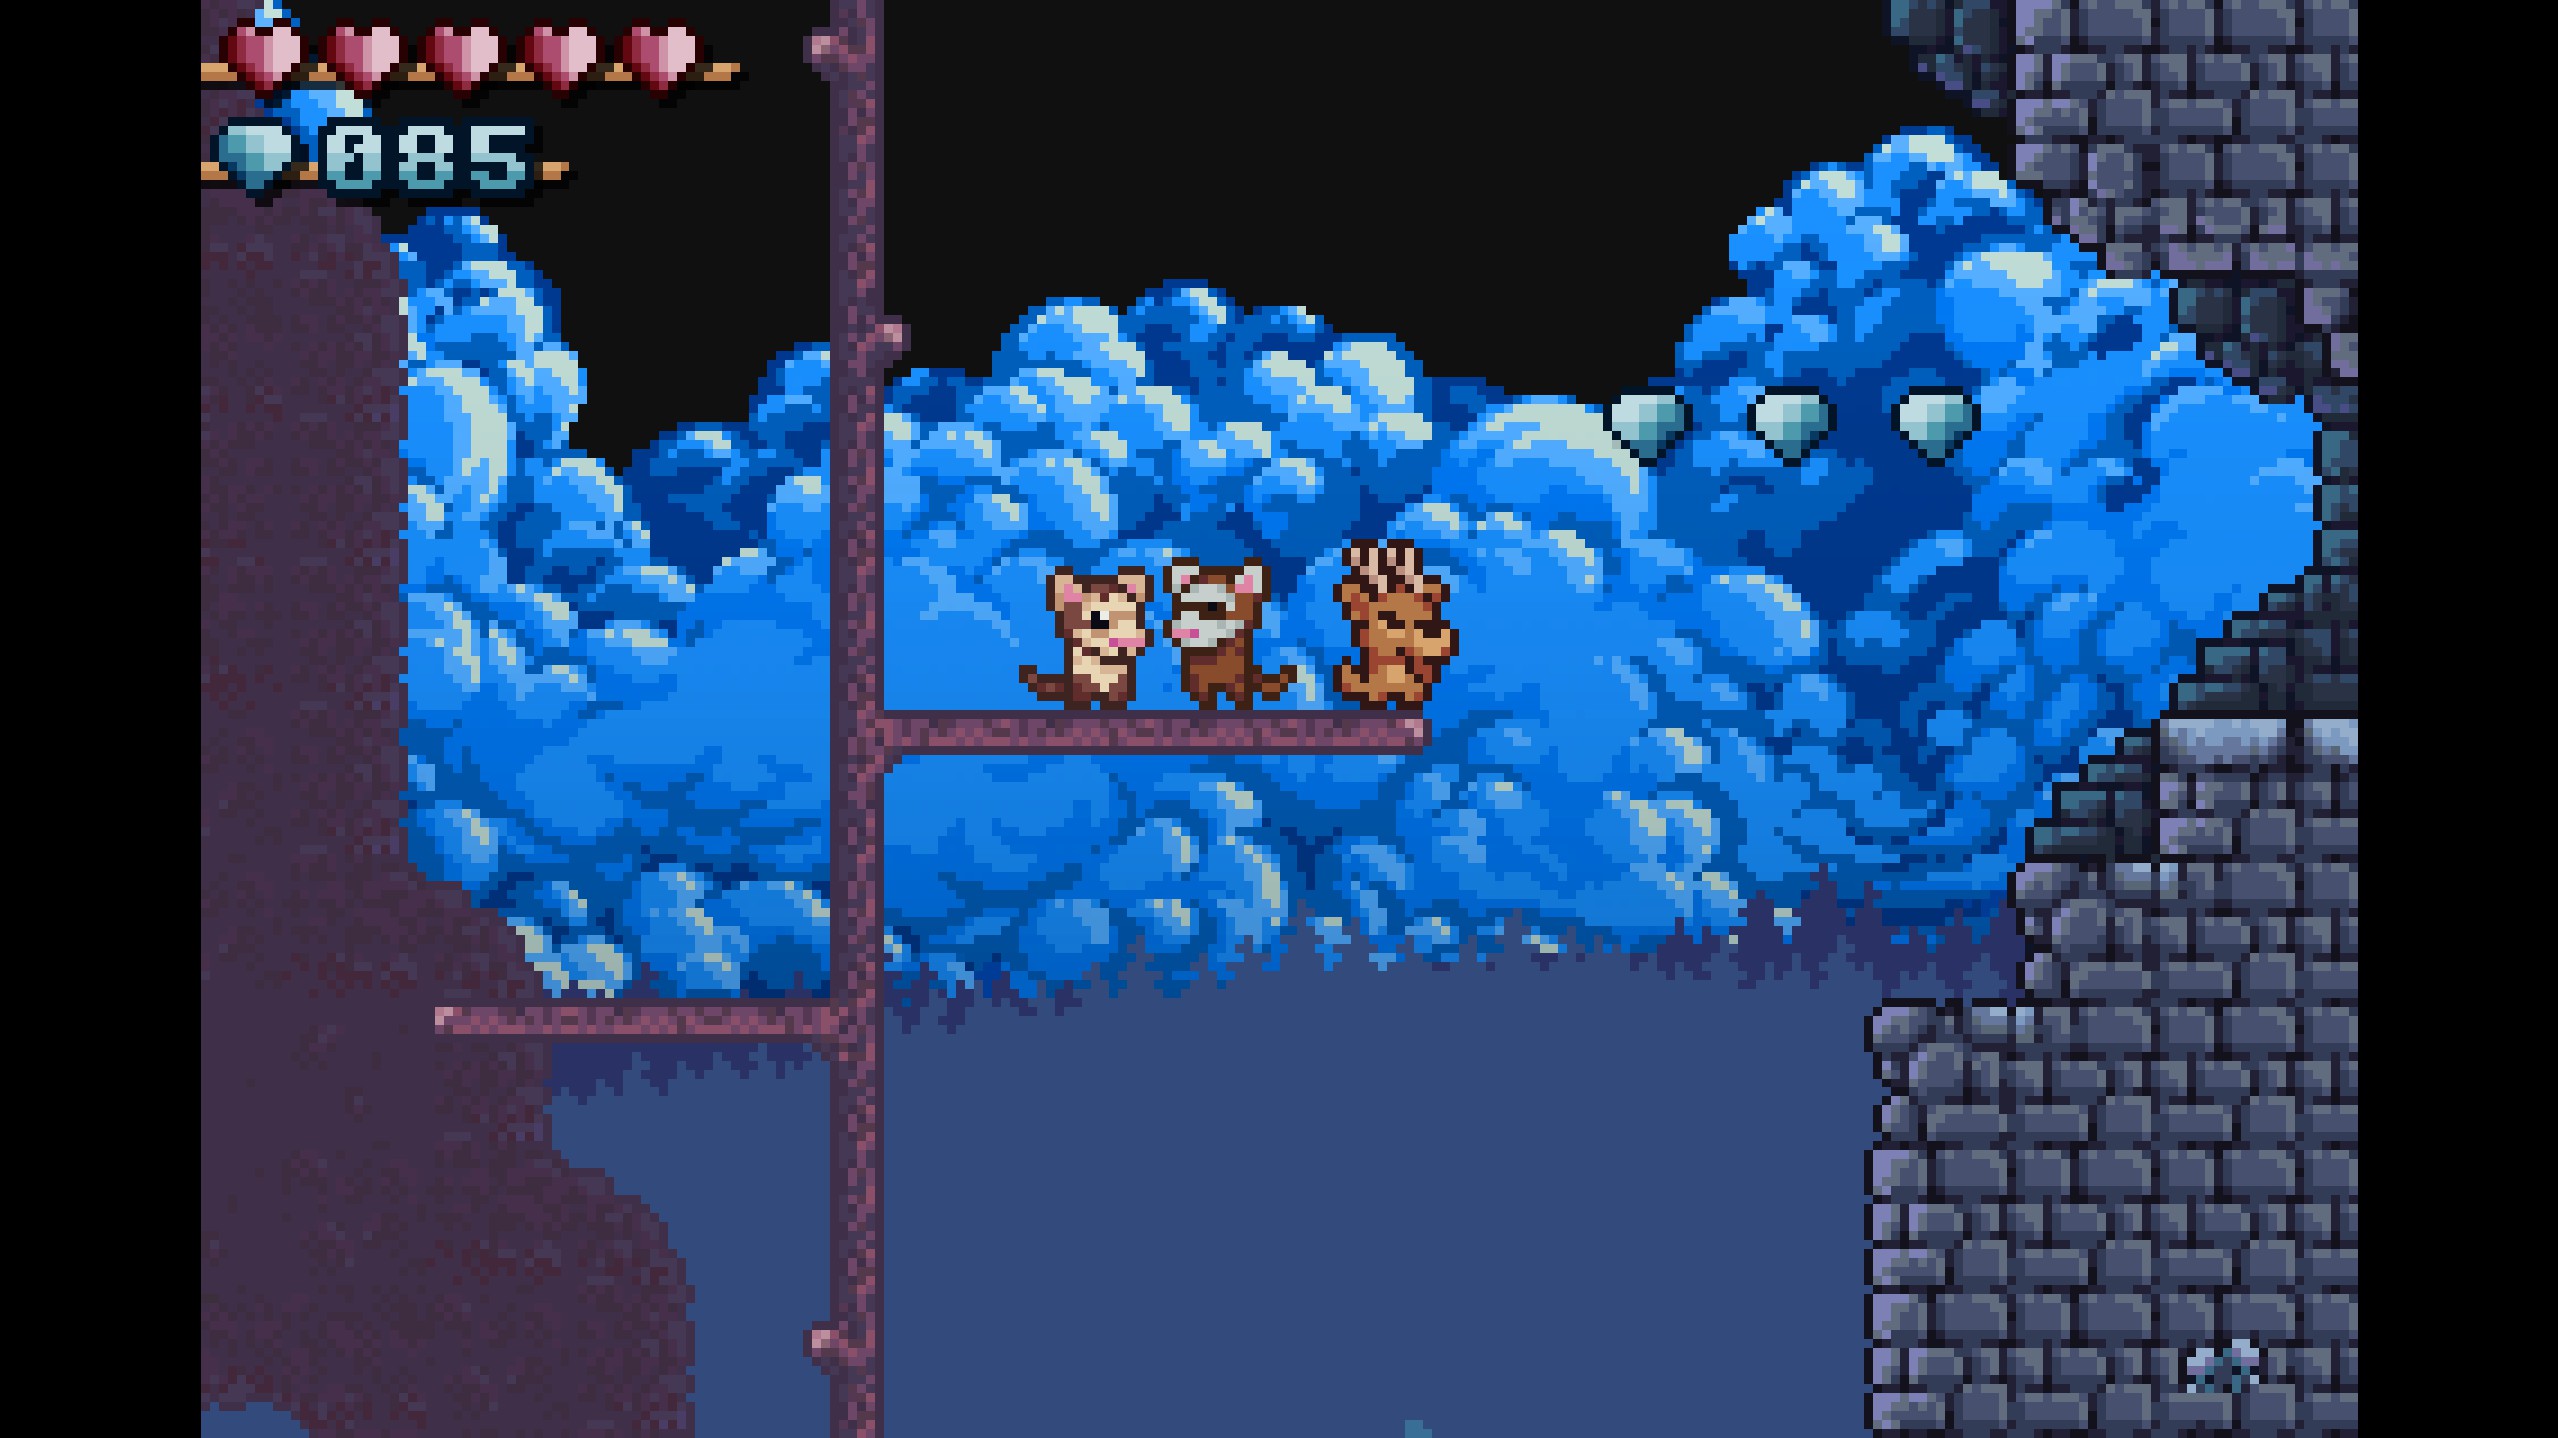
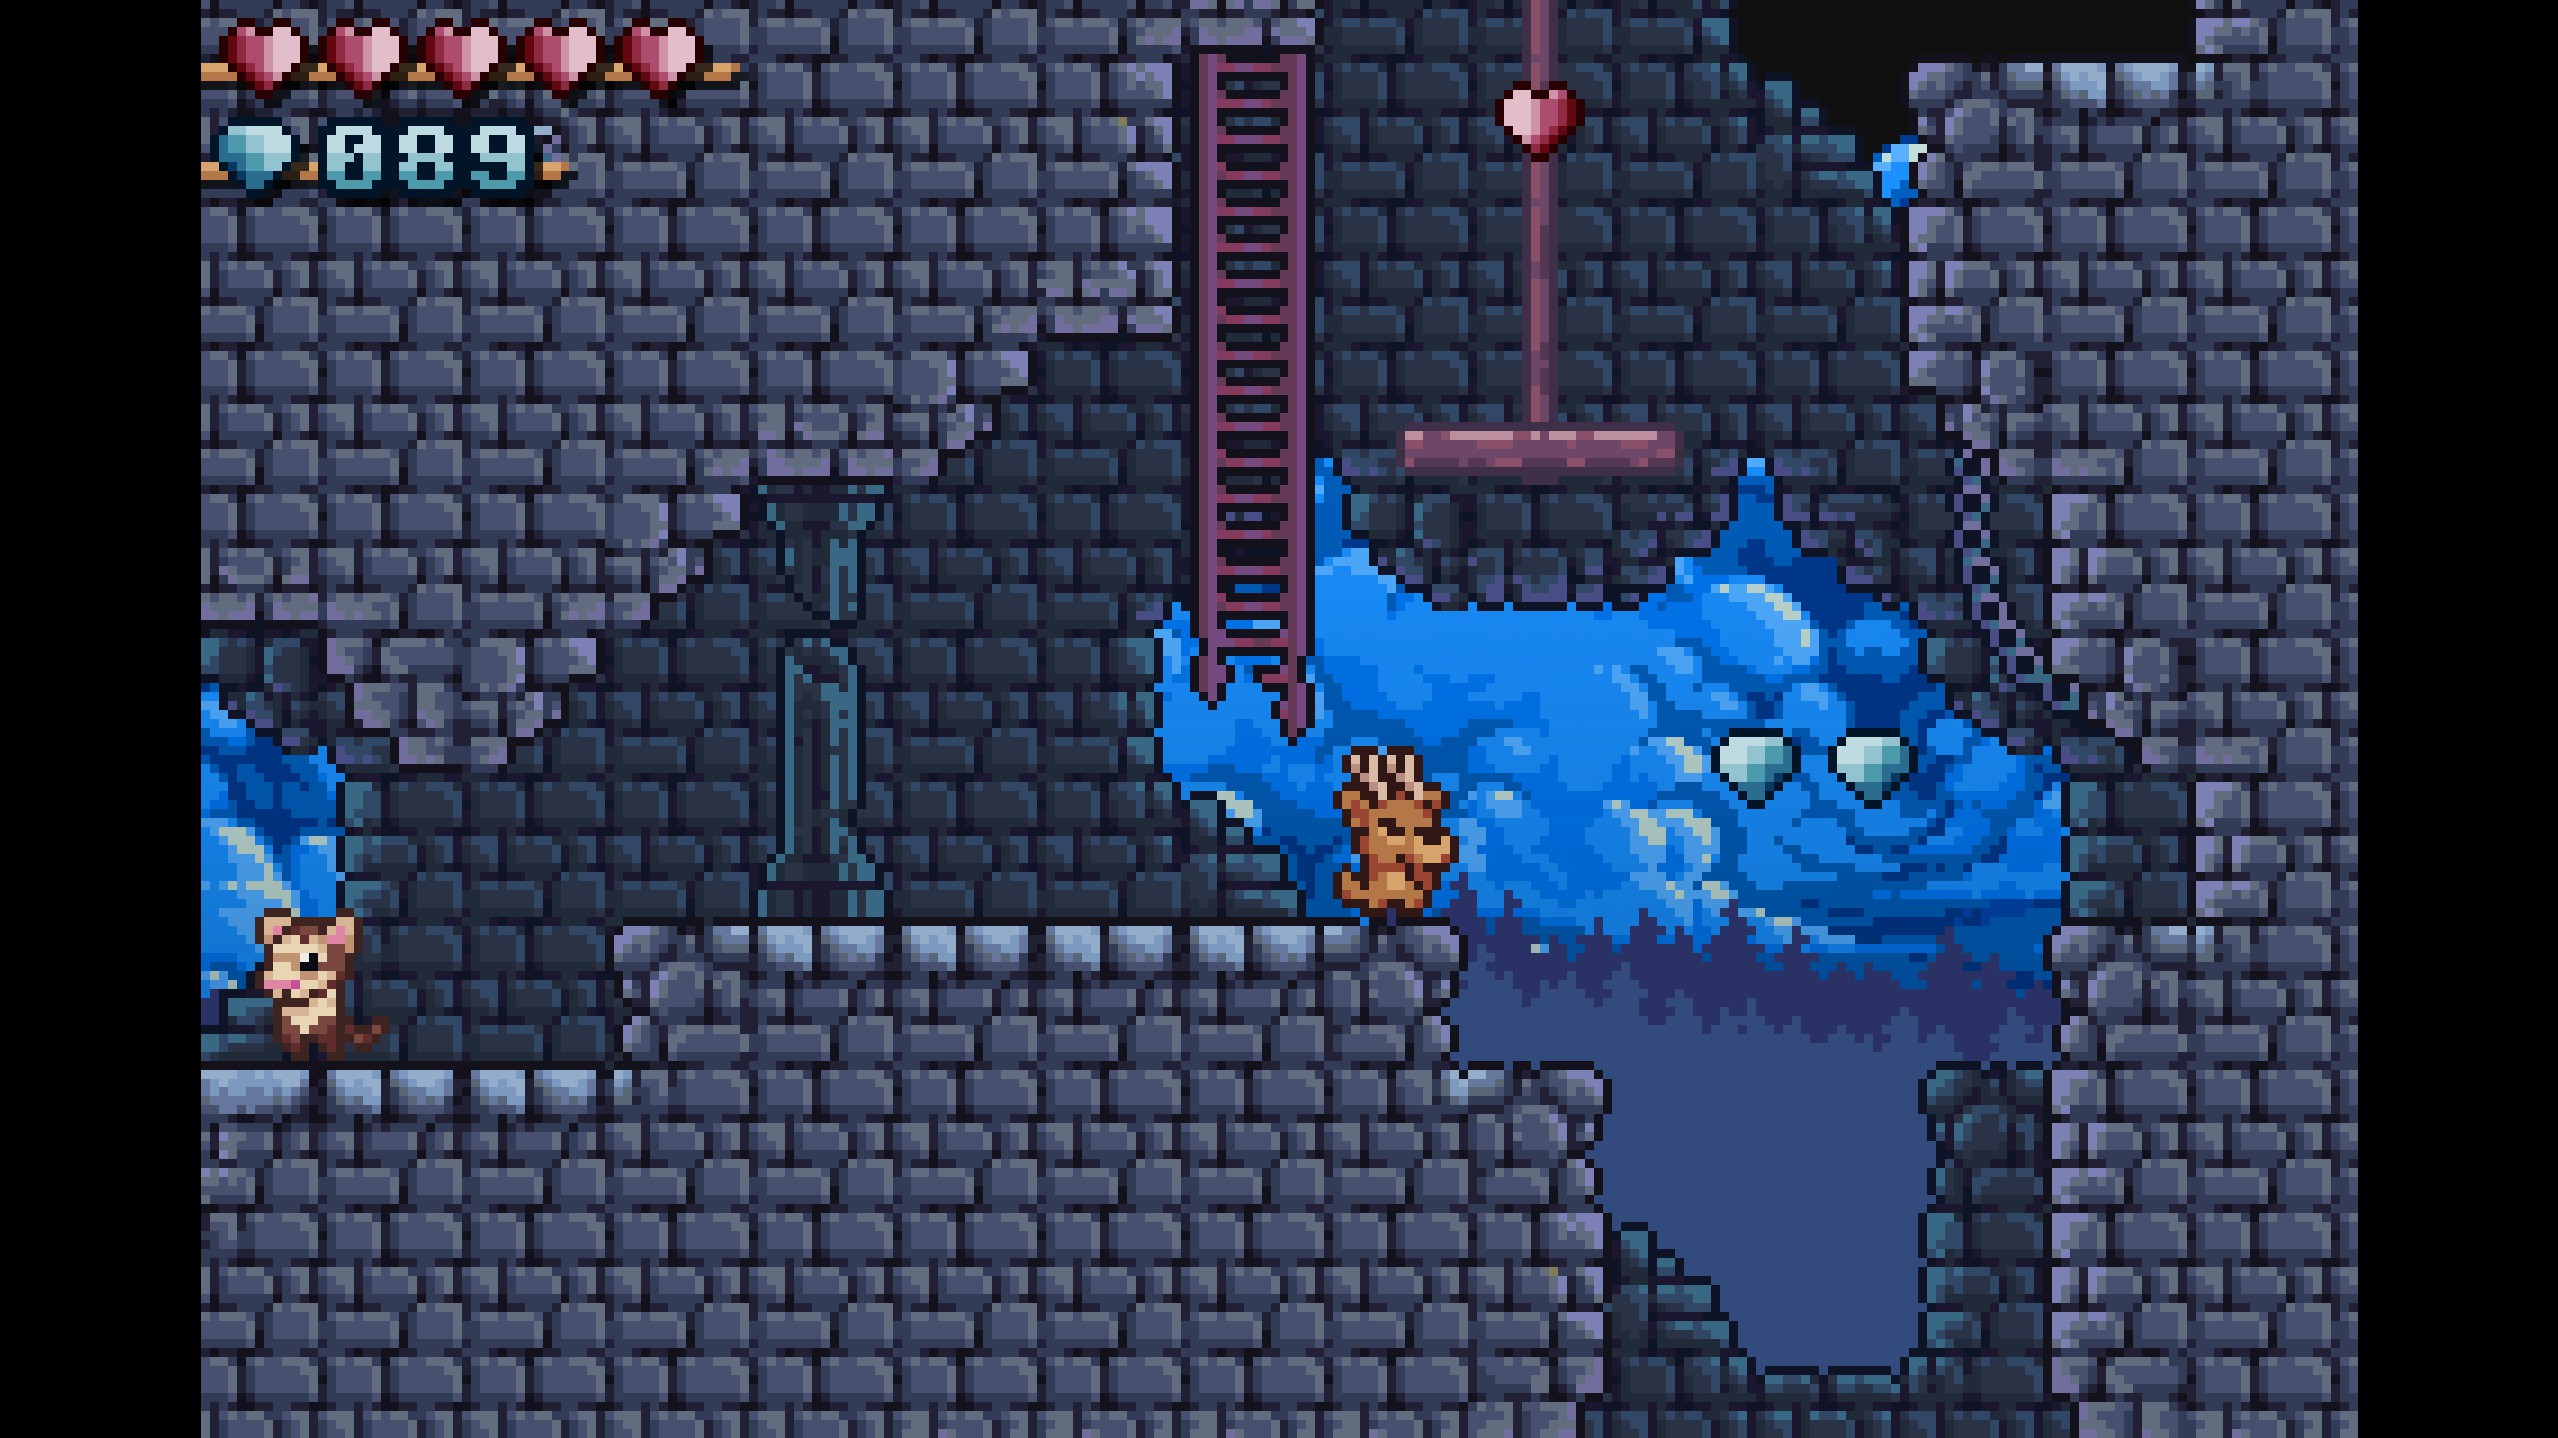
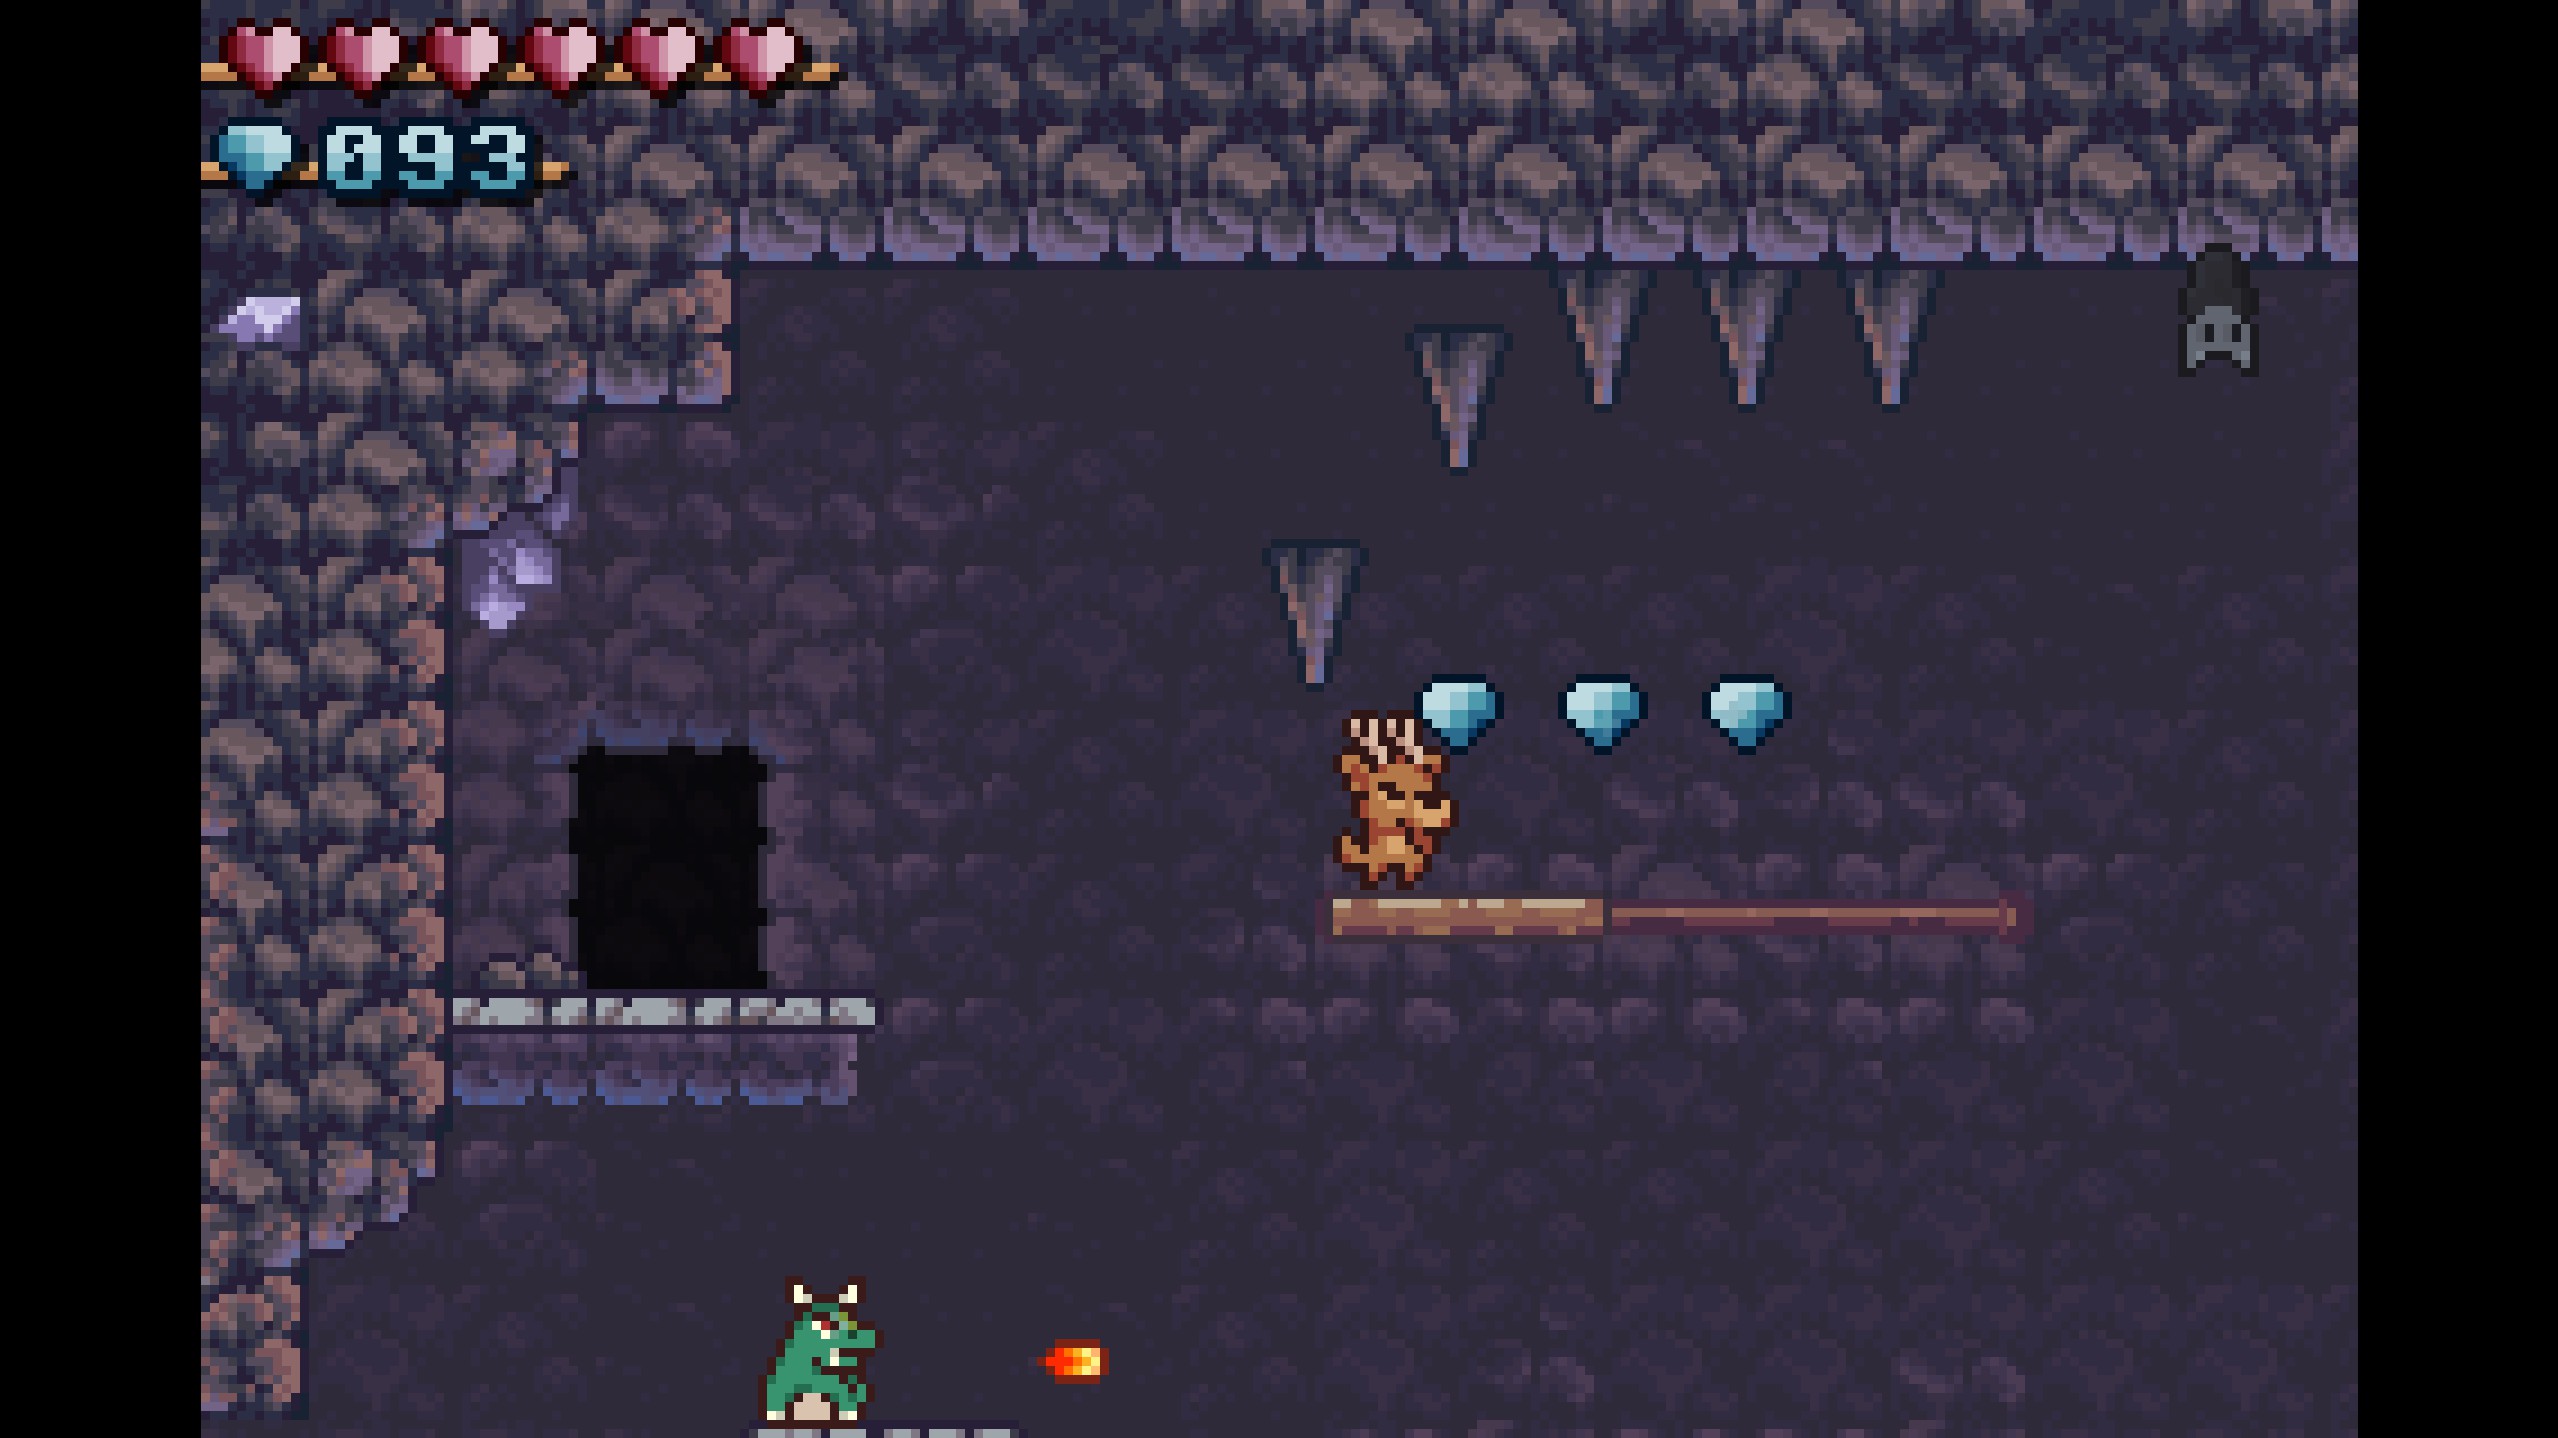
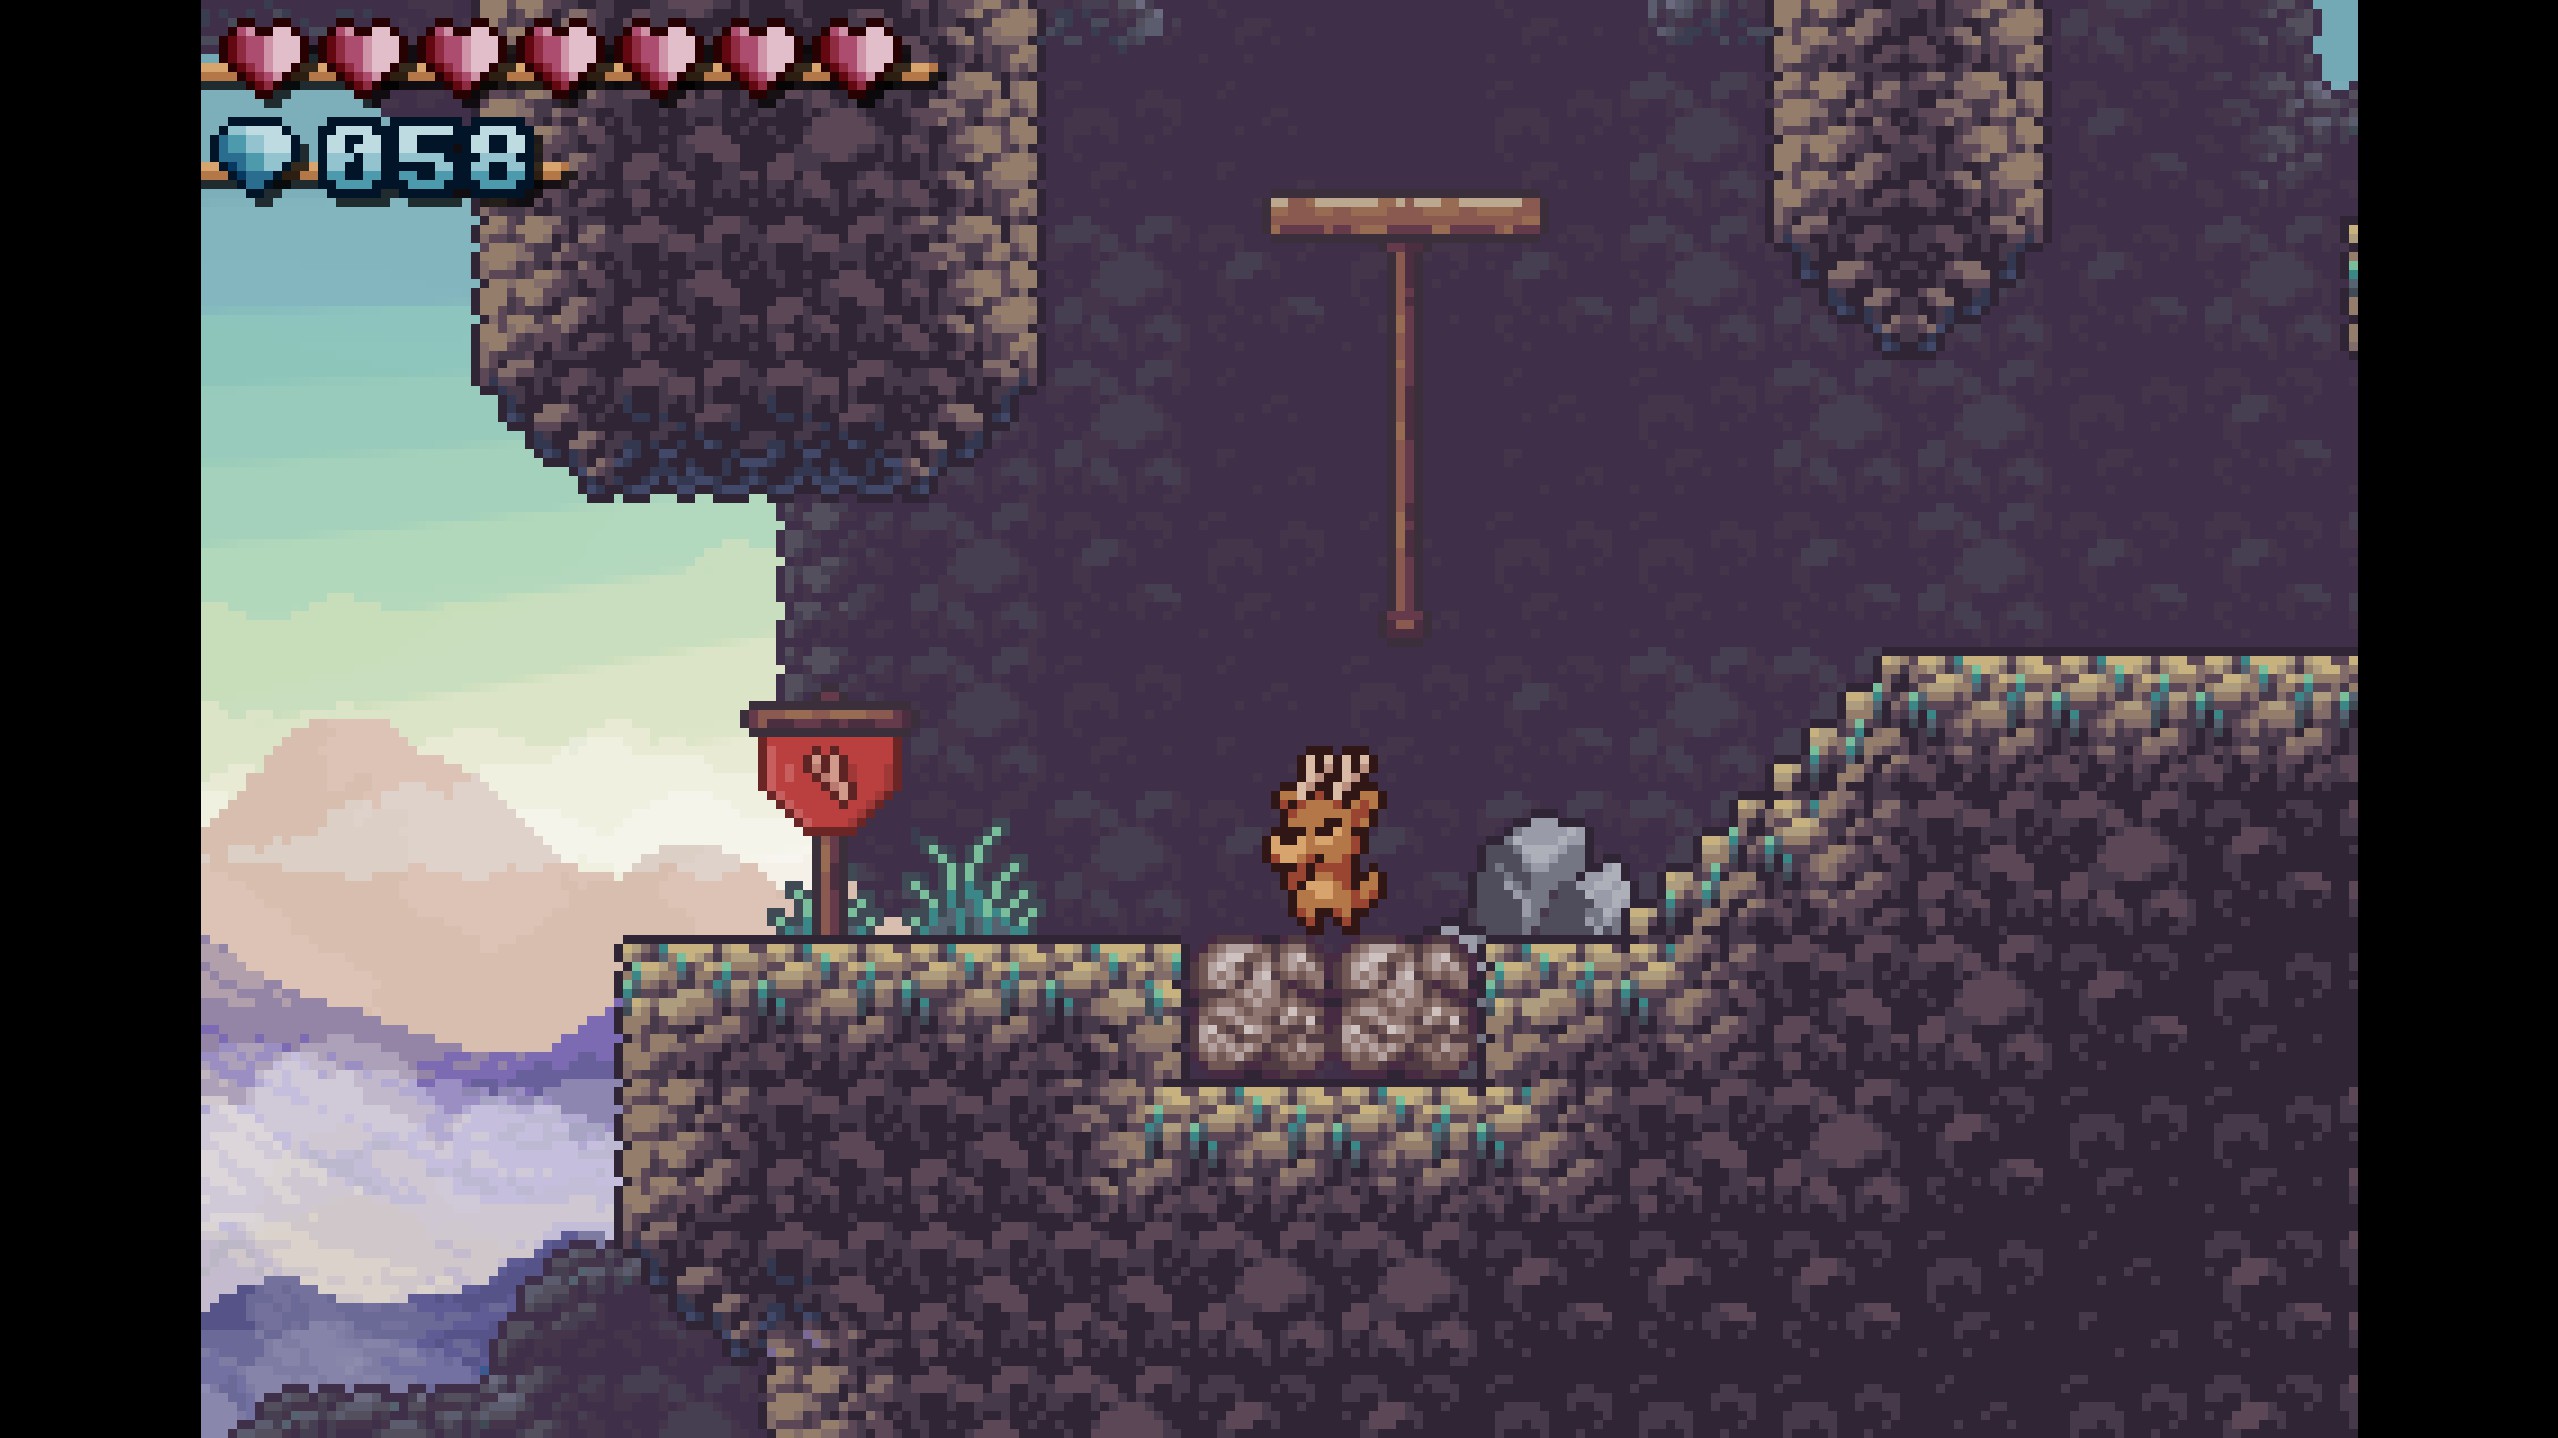
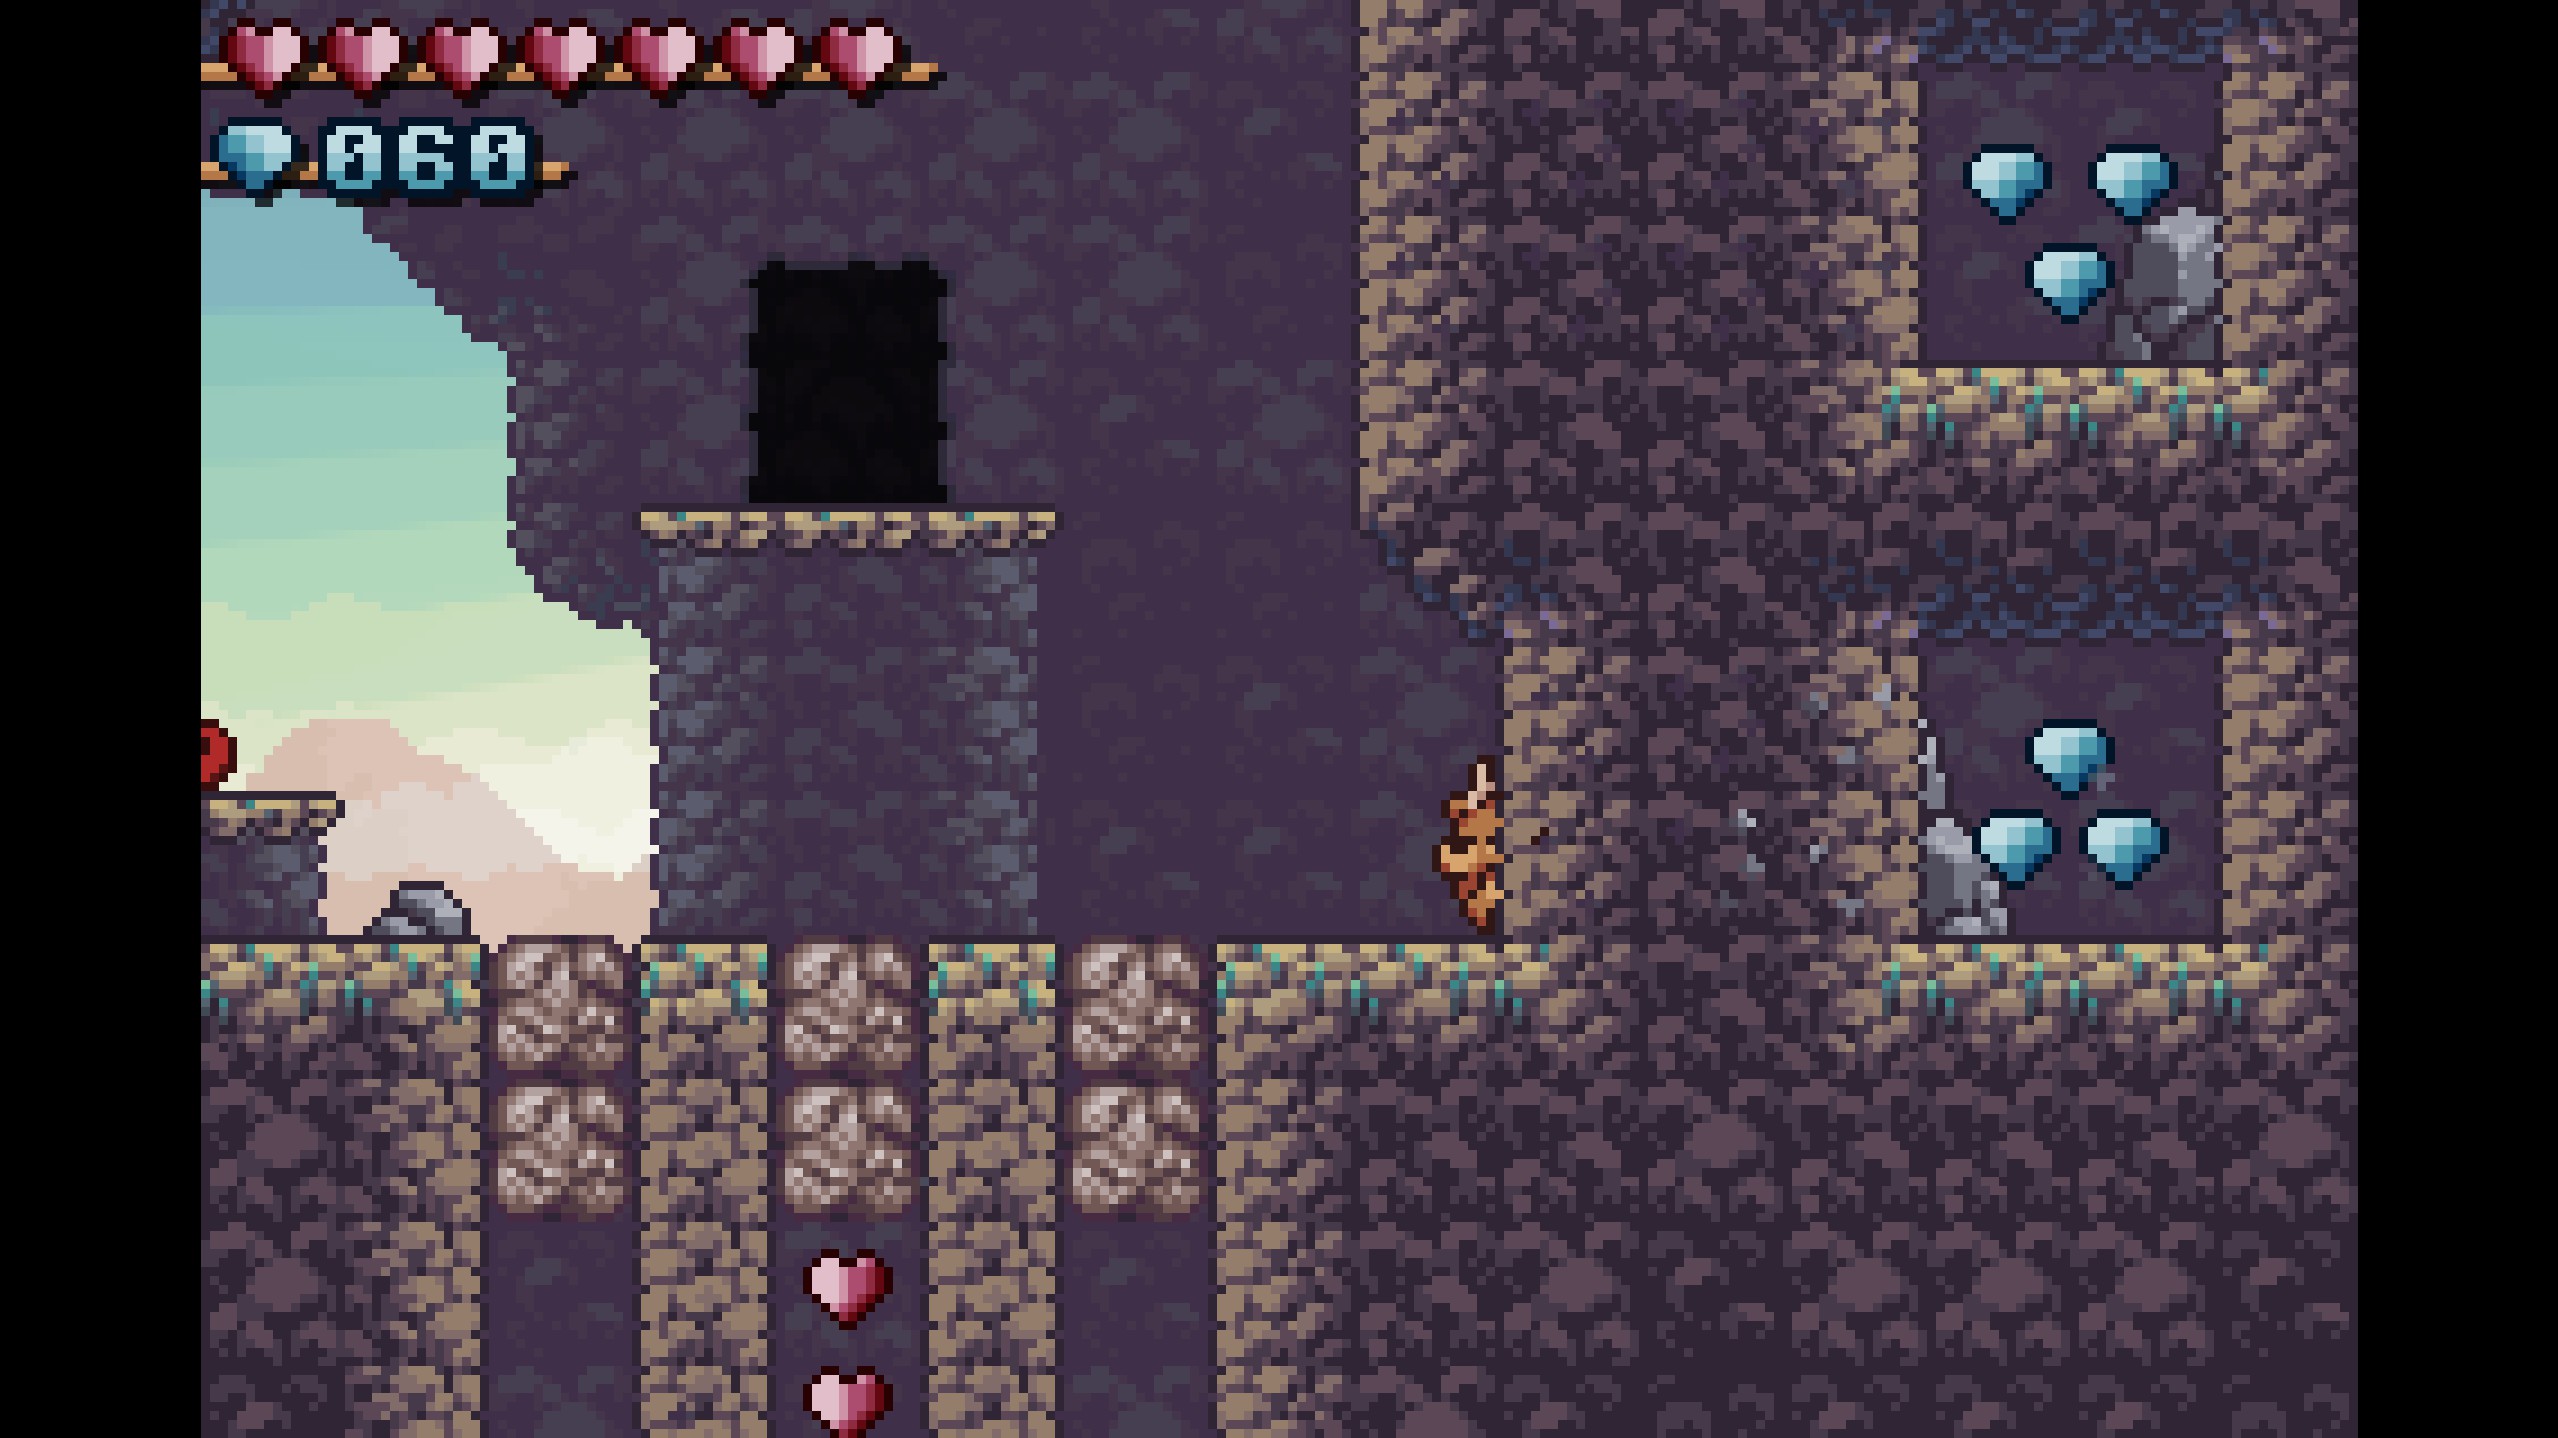
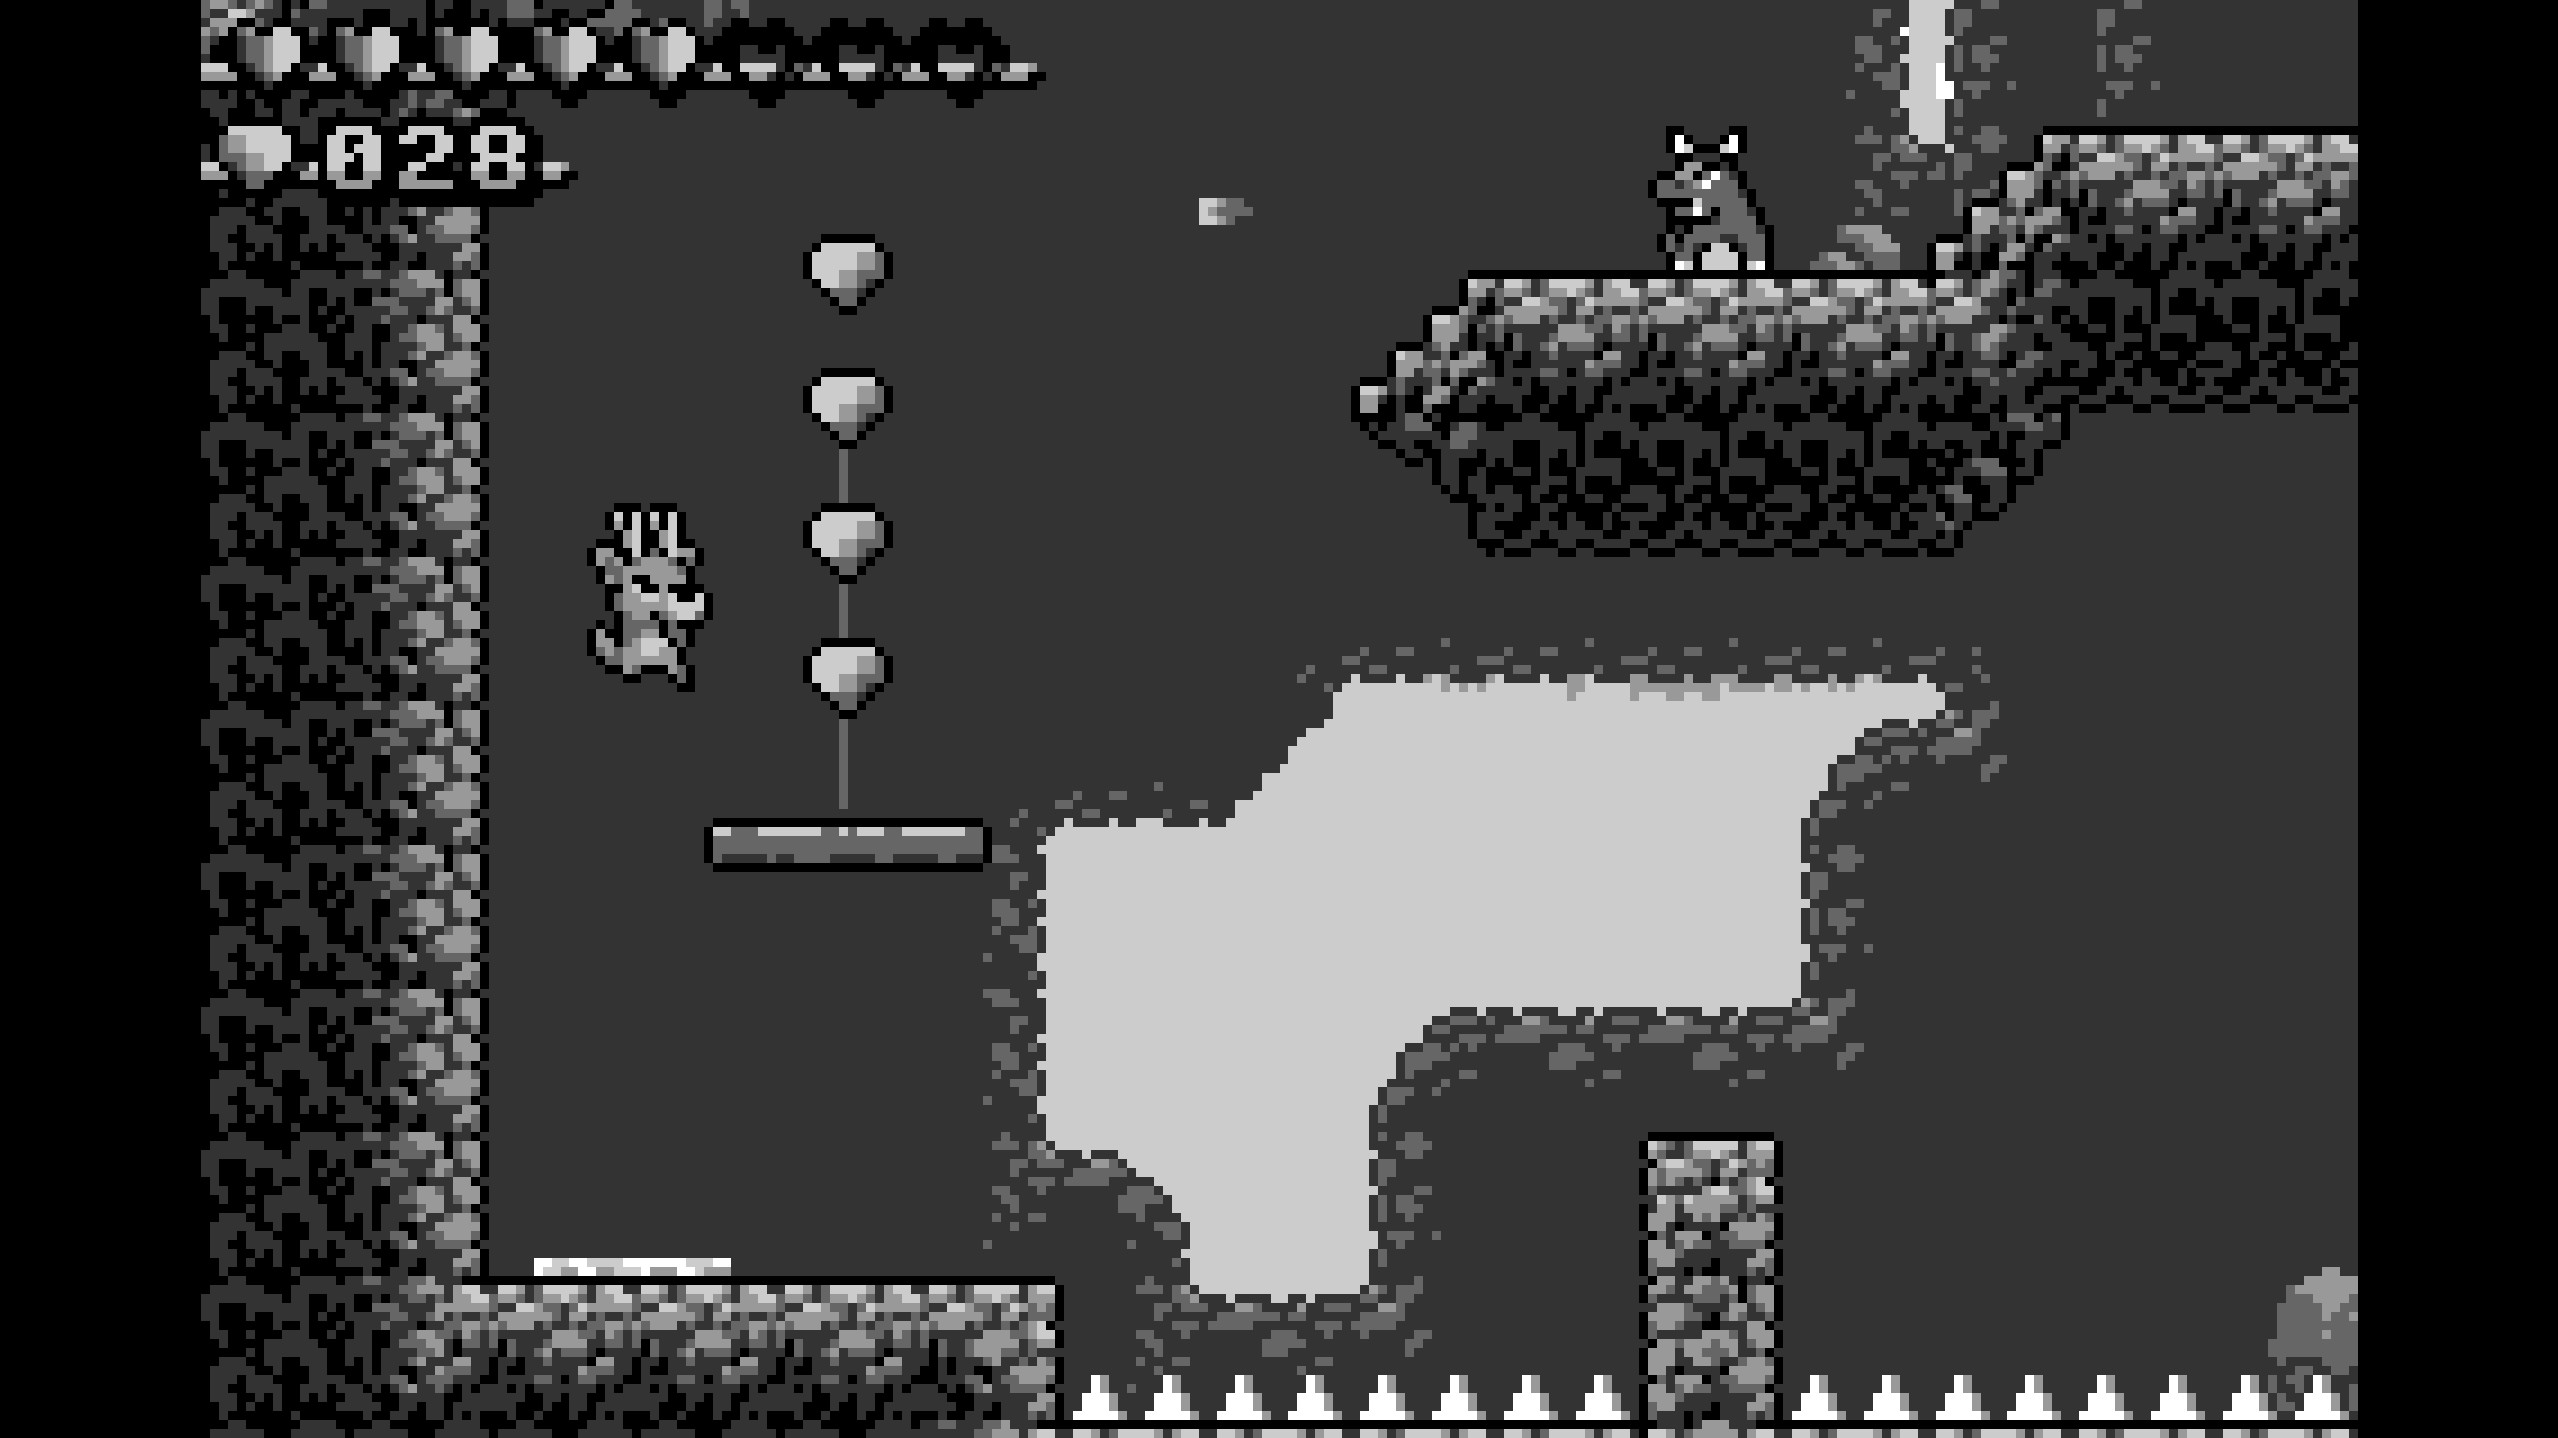
- Gems 89-91
- These gems are easy to miss! Instead of hopping on the moving platform, continue to the right past the stone and to reach an area with a red slime and the three gems.
- These gems are easy to miss! Instead of hopping on the moving platform, continue to the right past the stone and to reach an area with a red slime and the three gems.
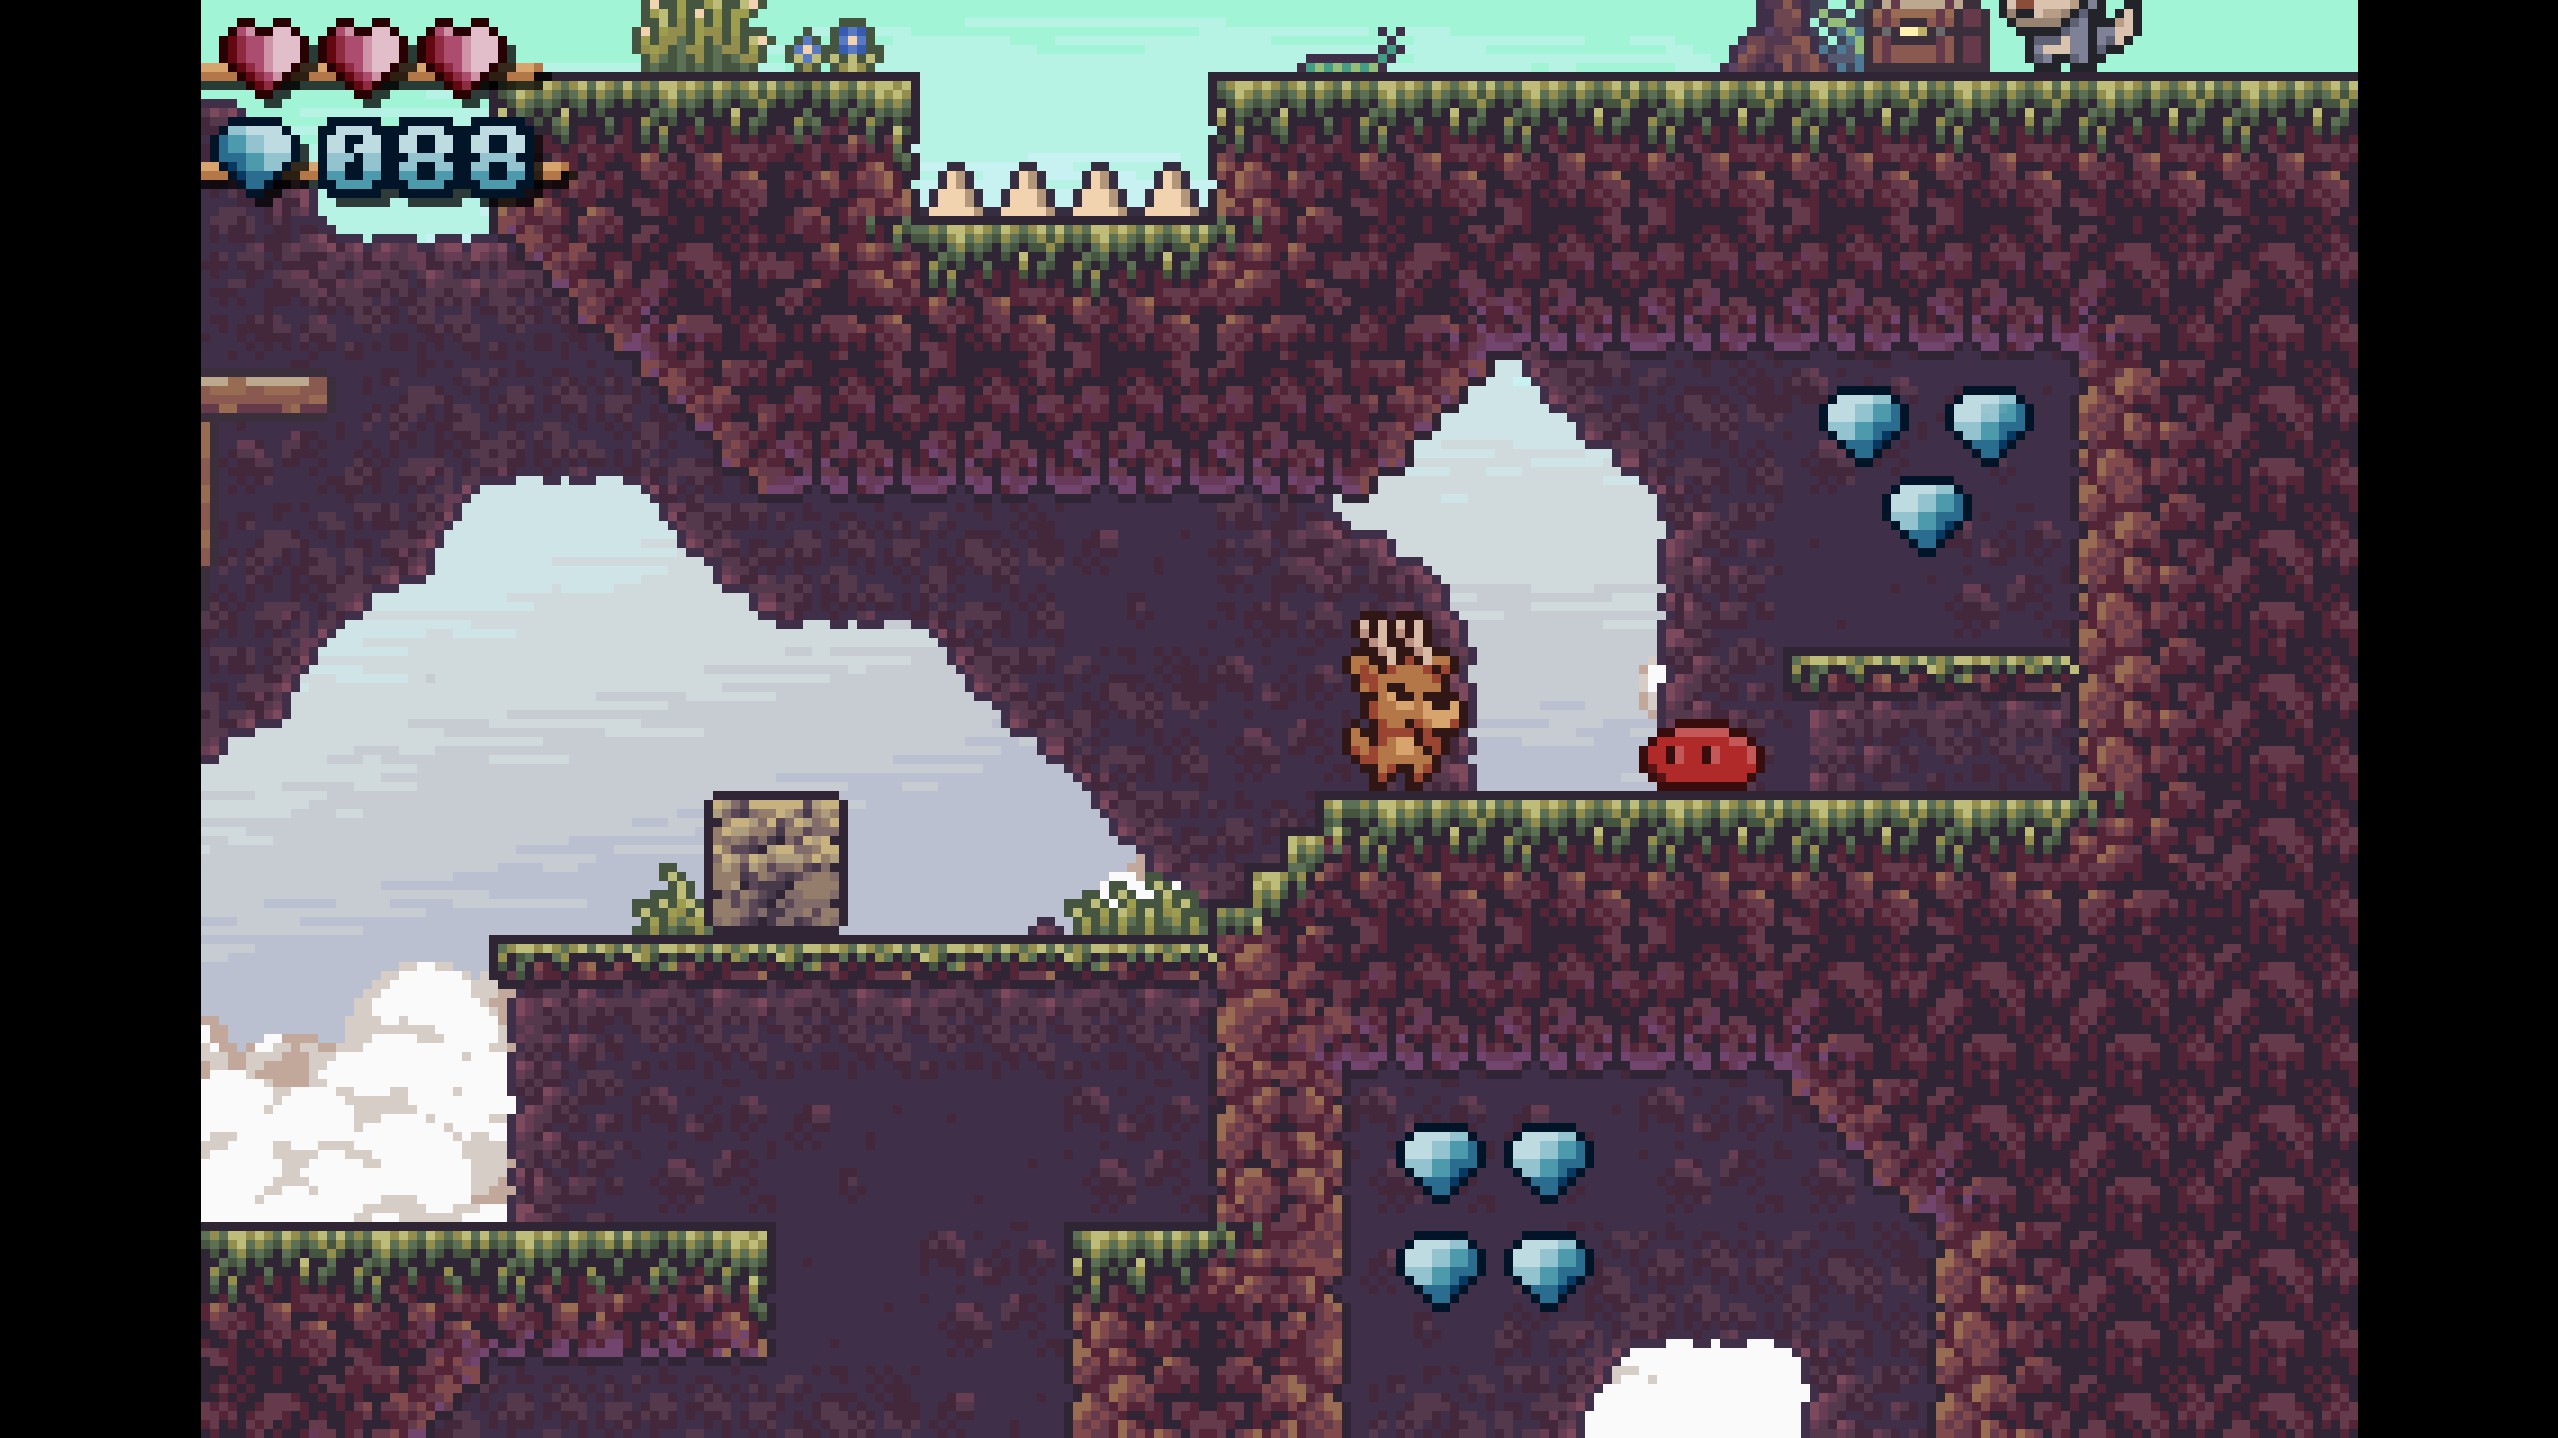
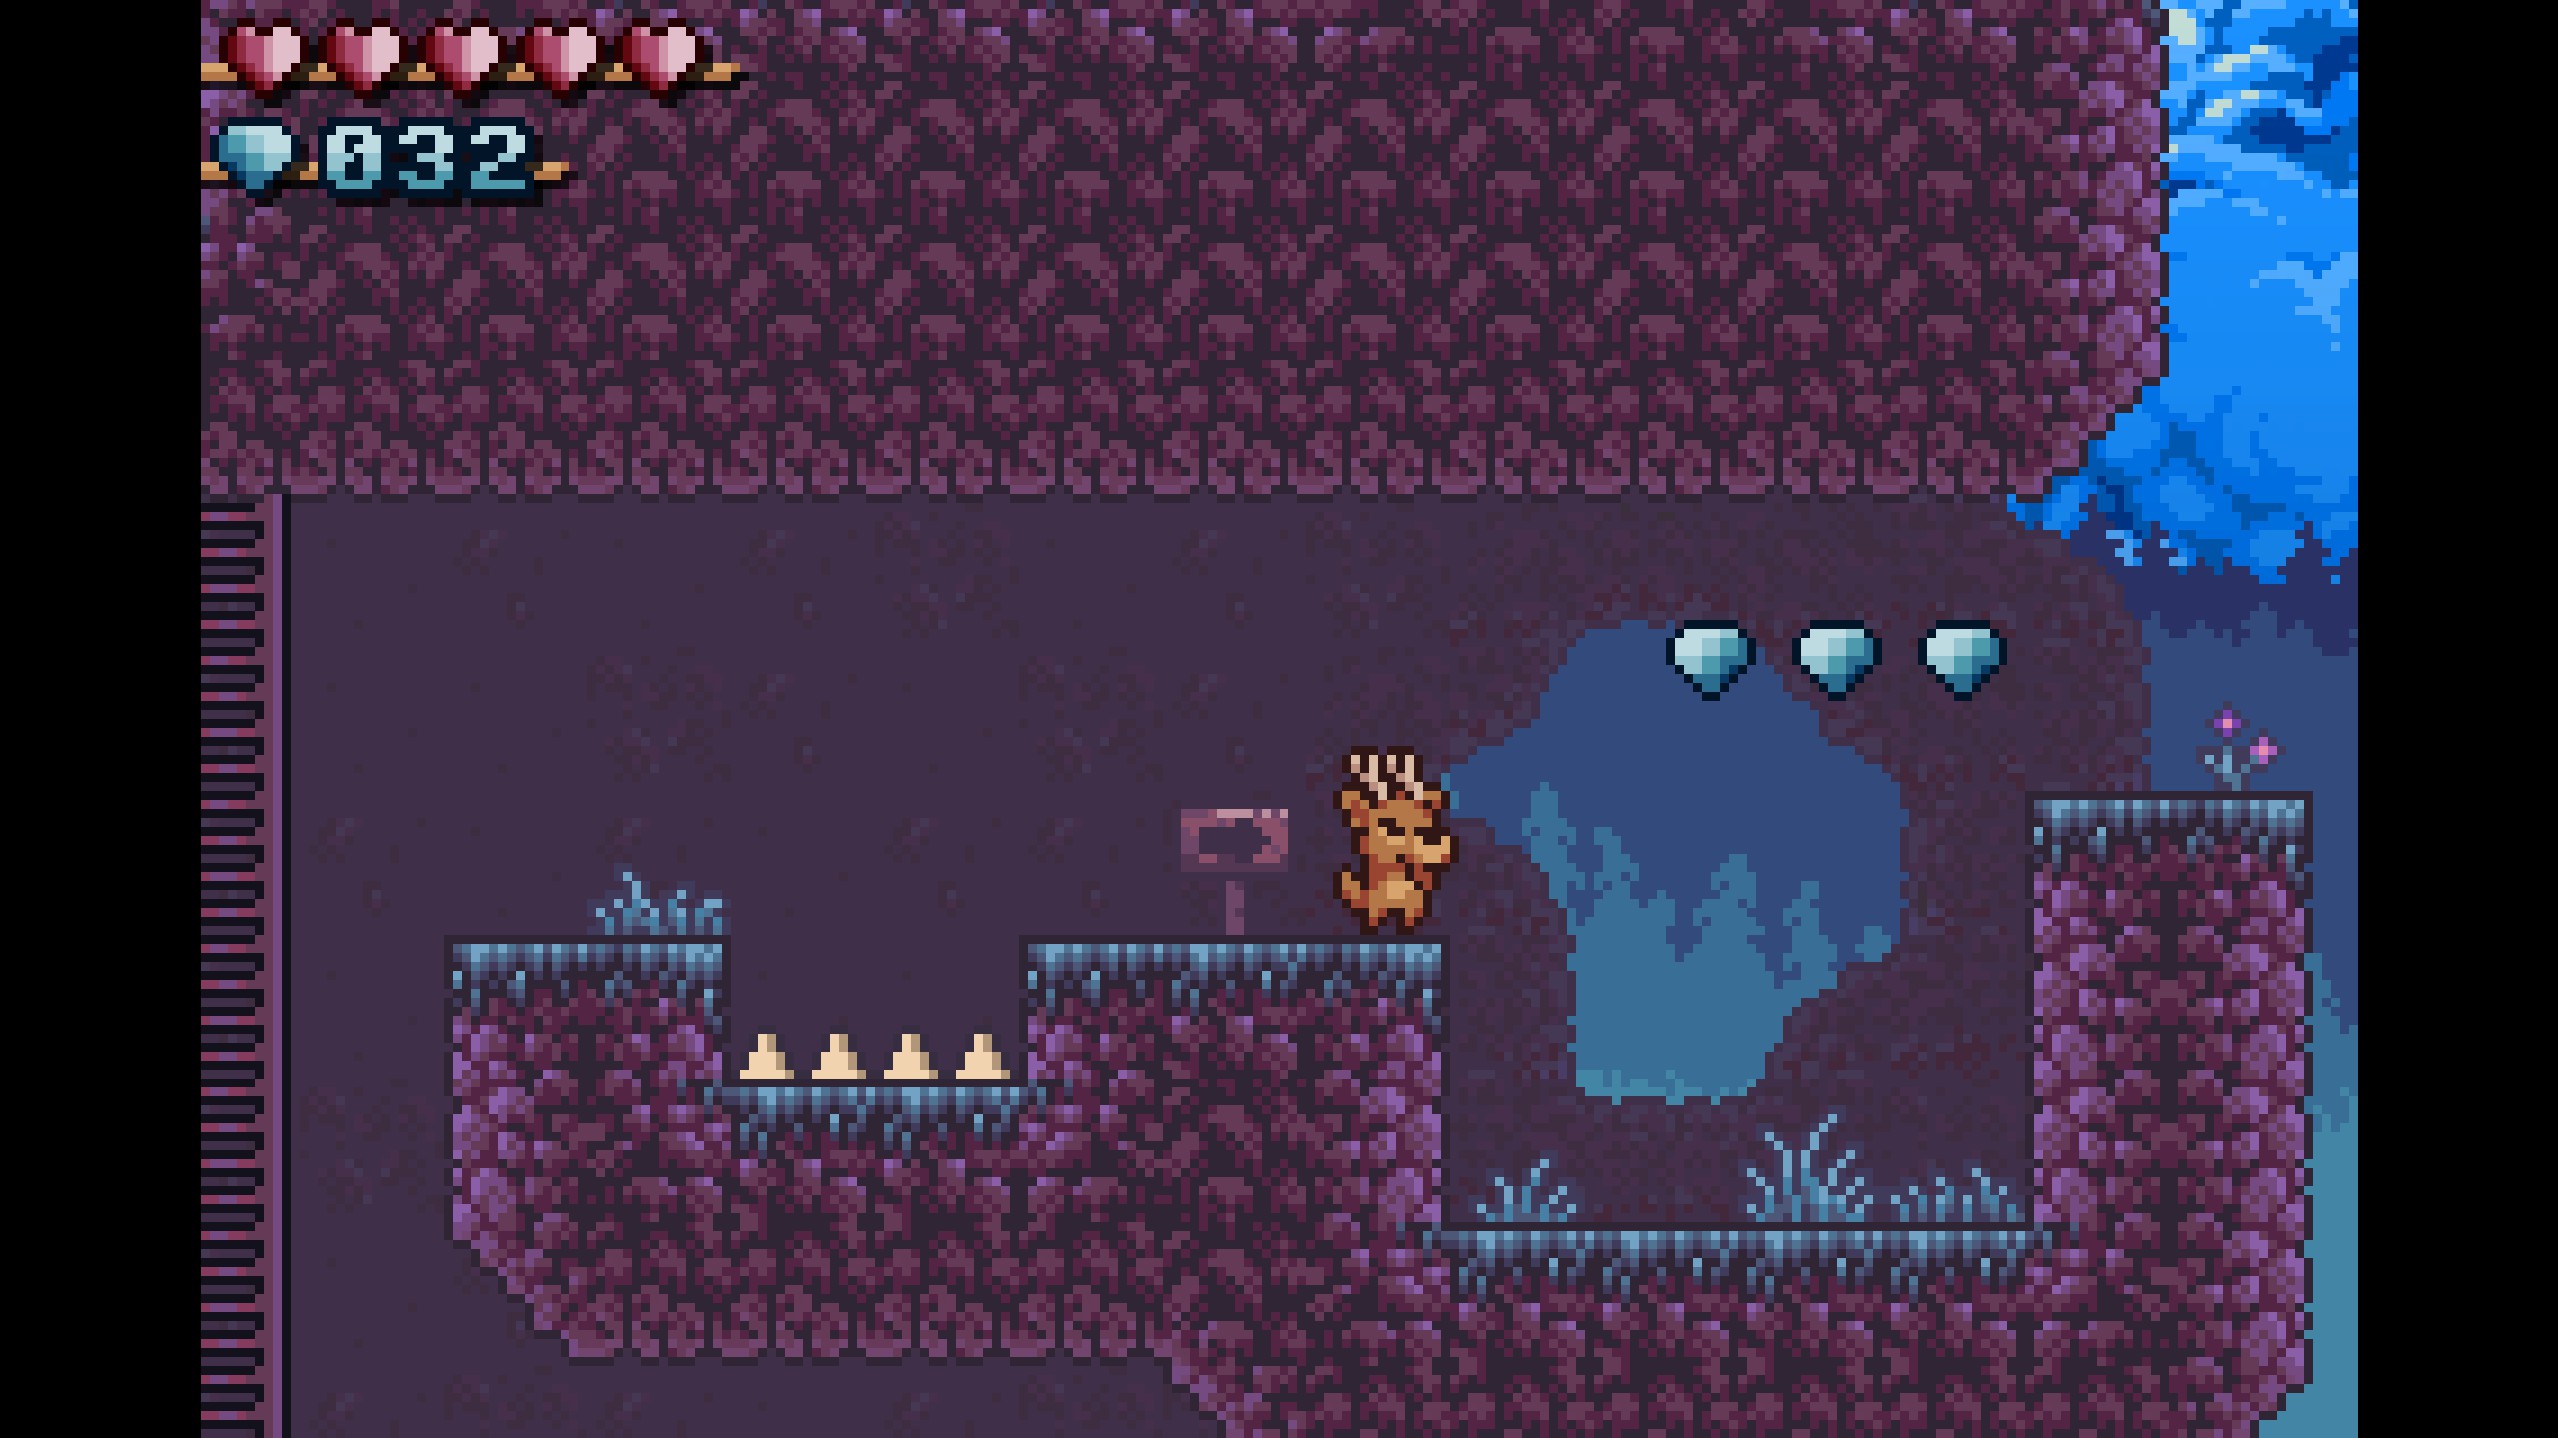
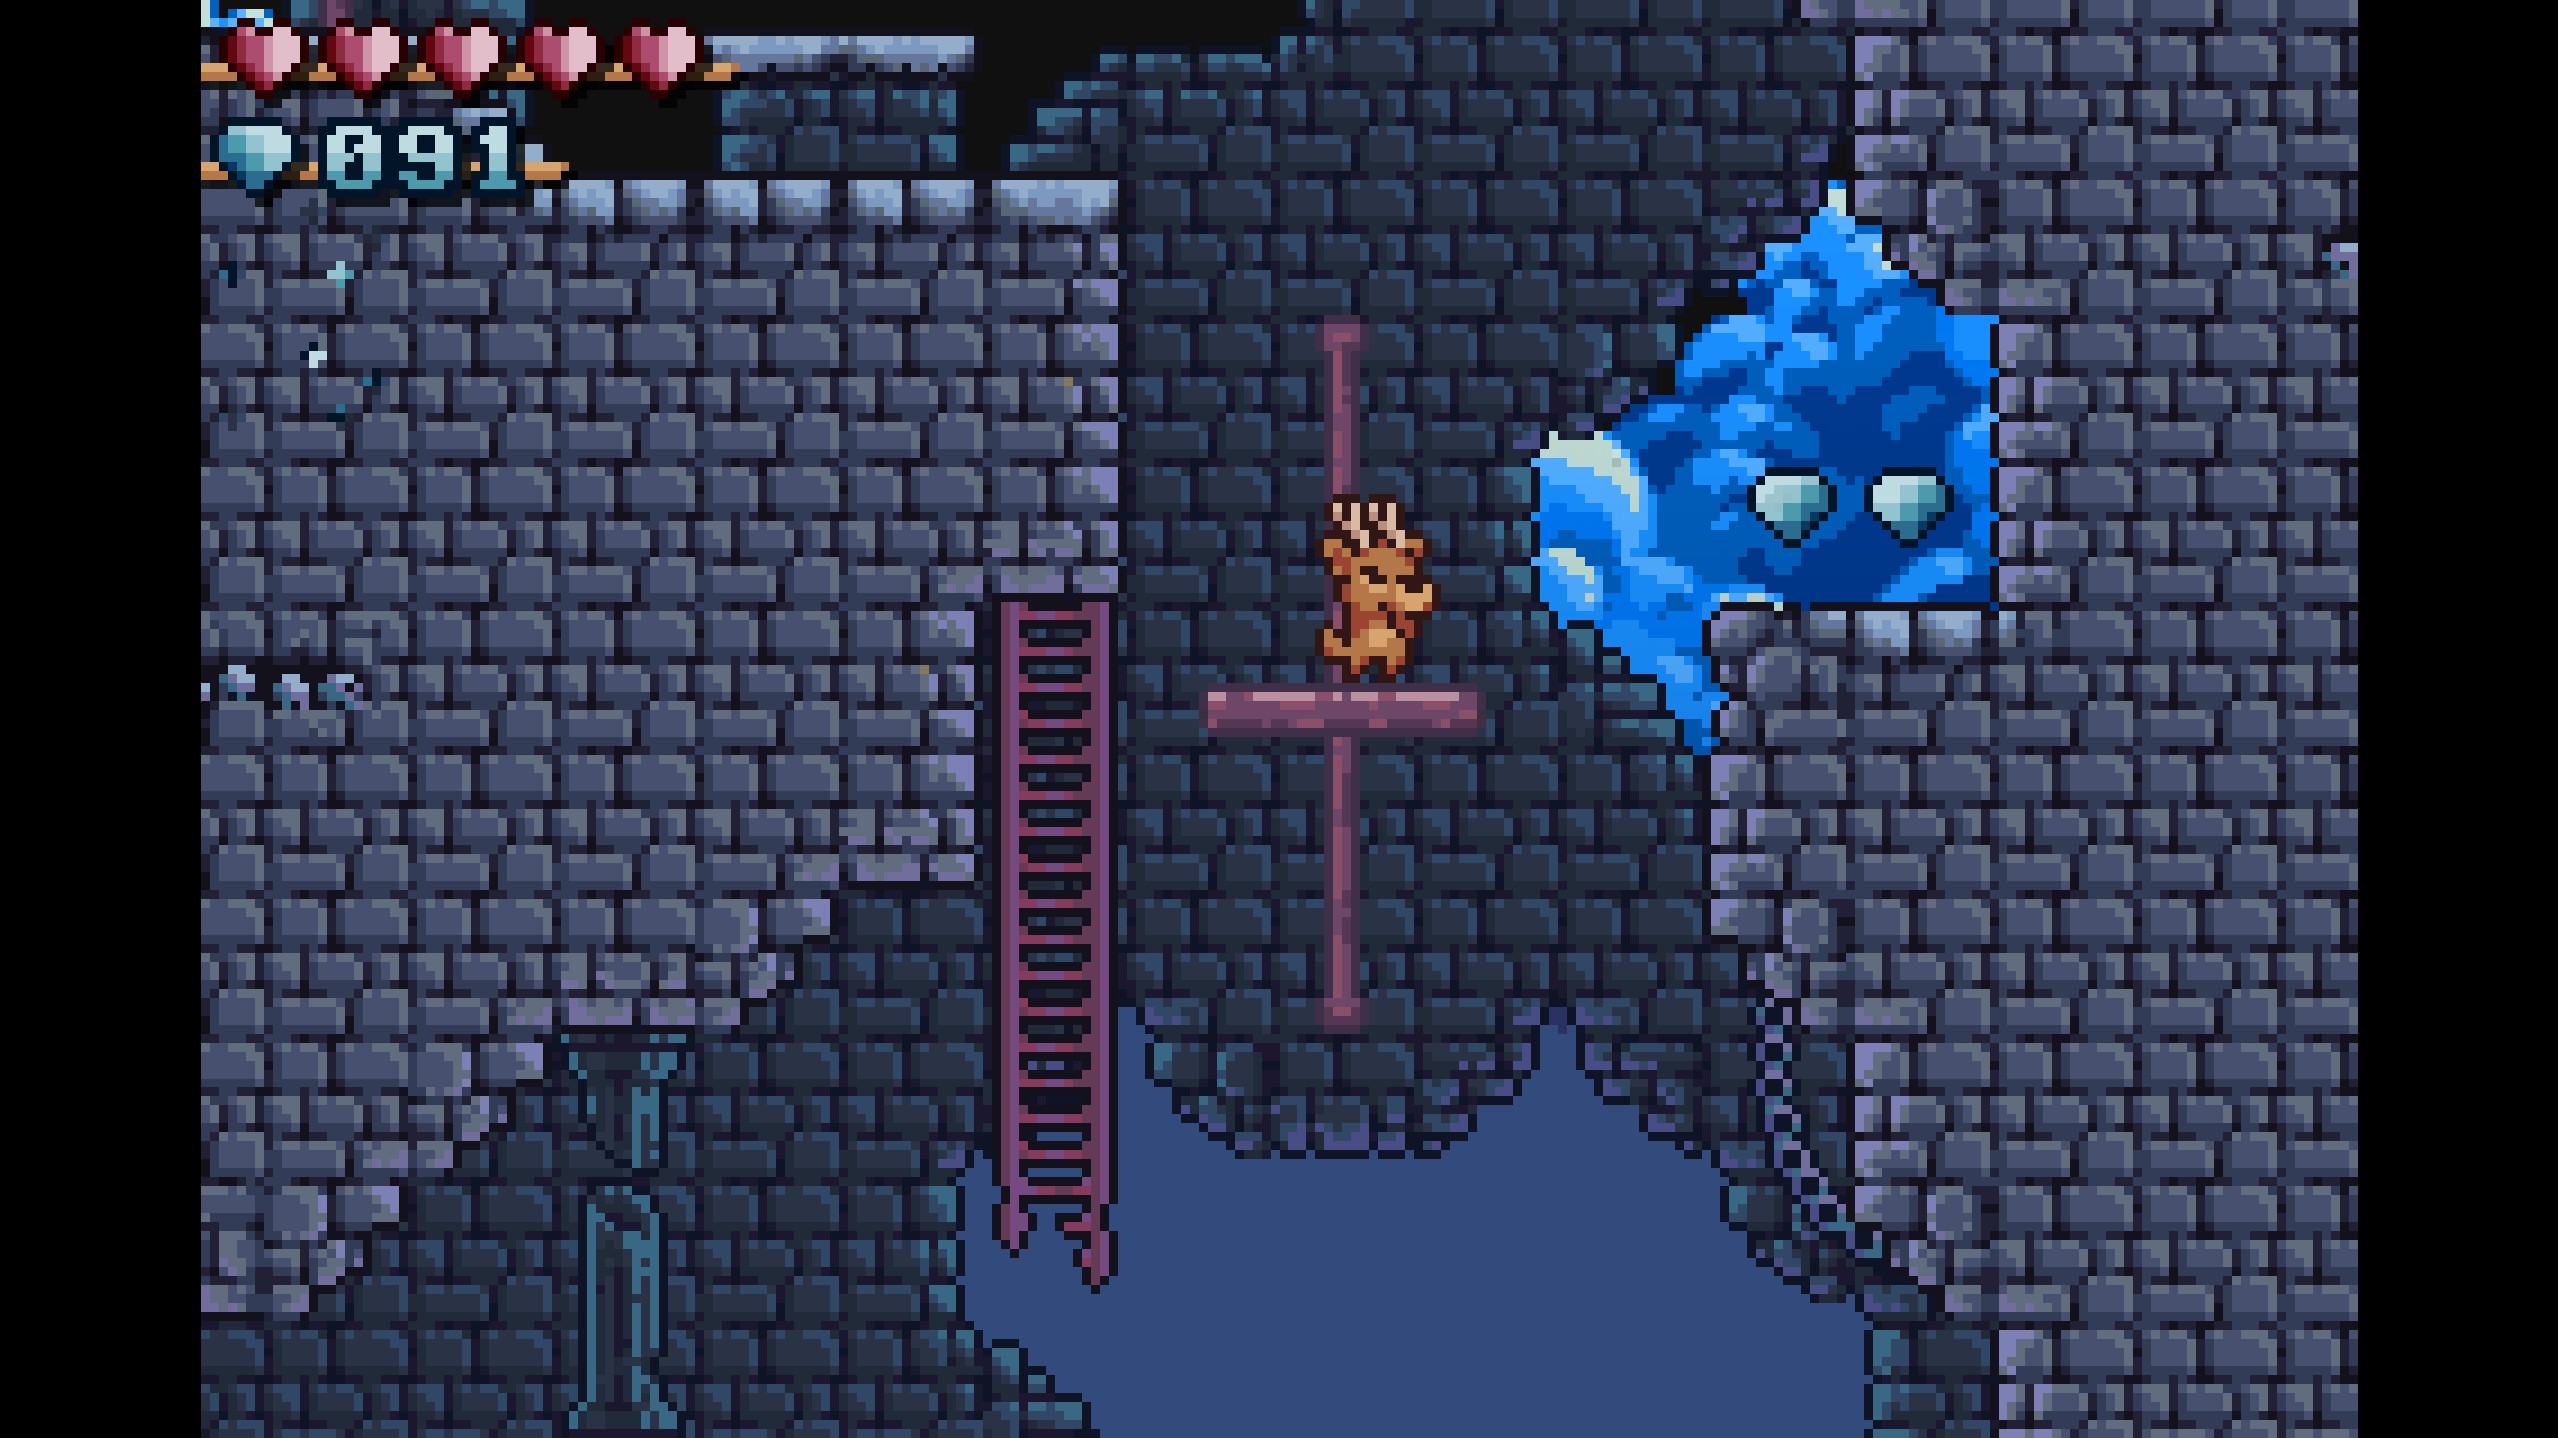
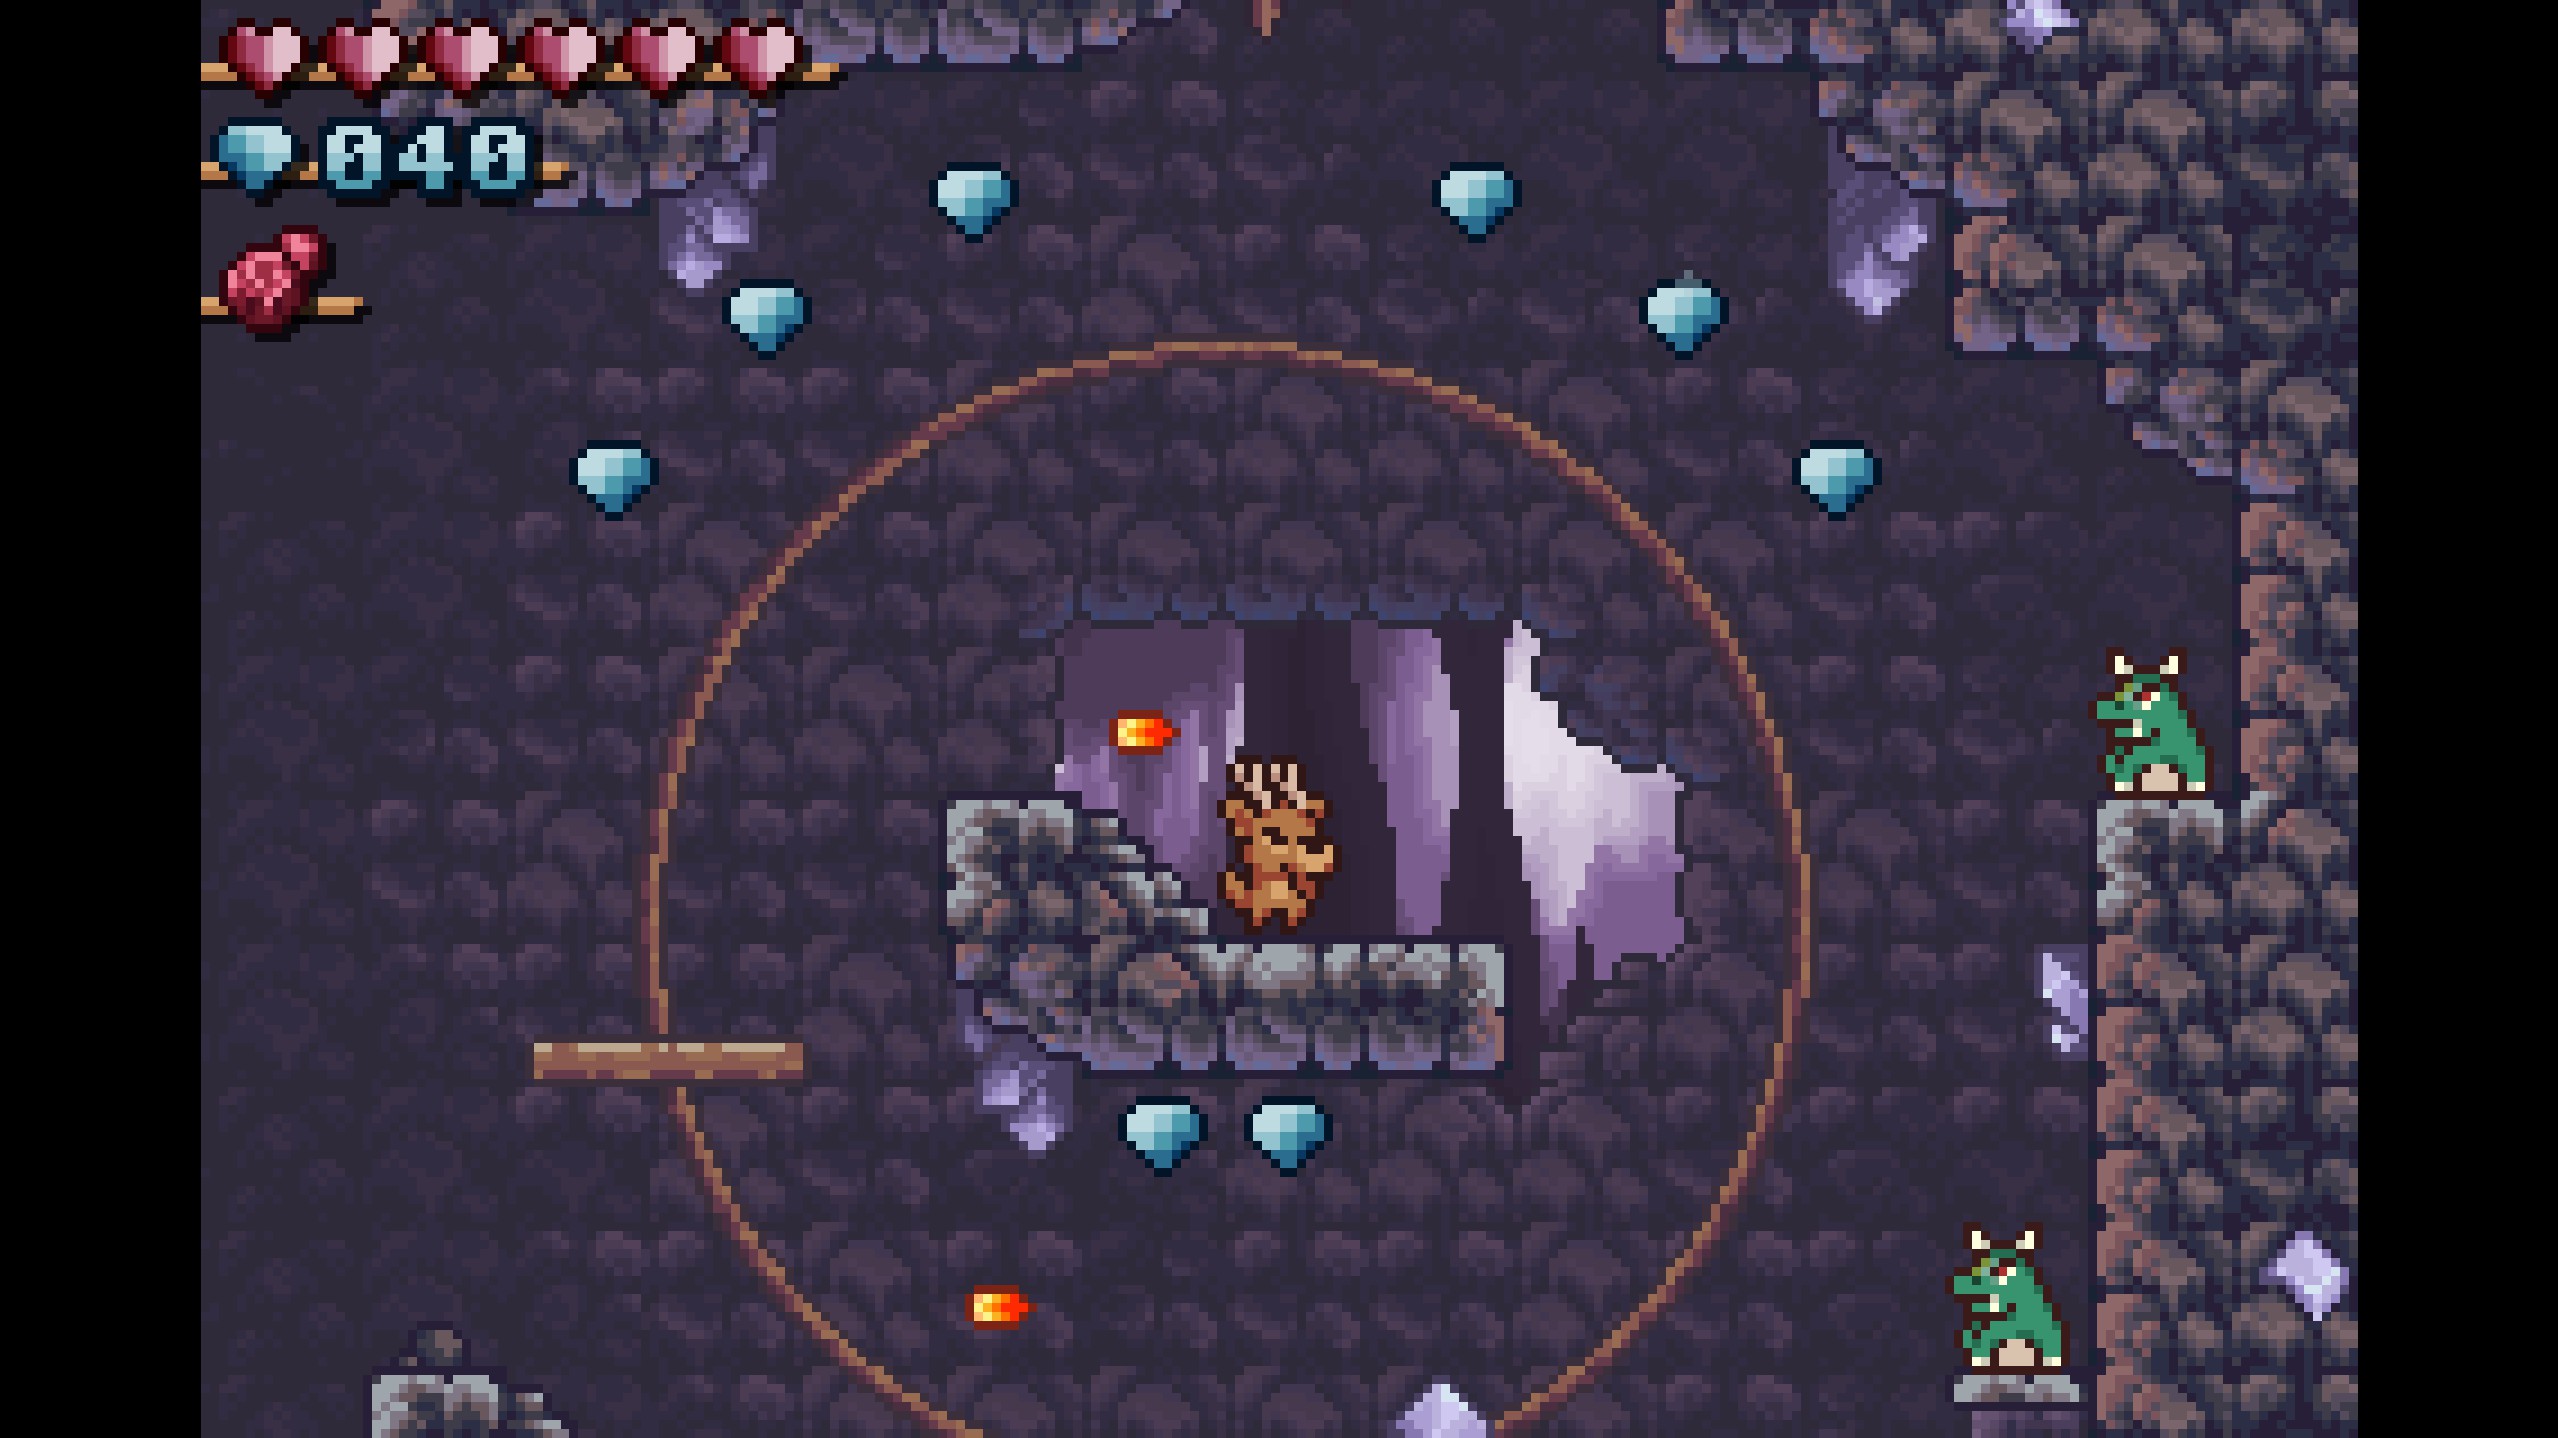
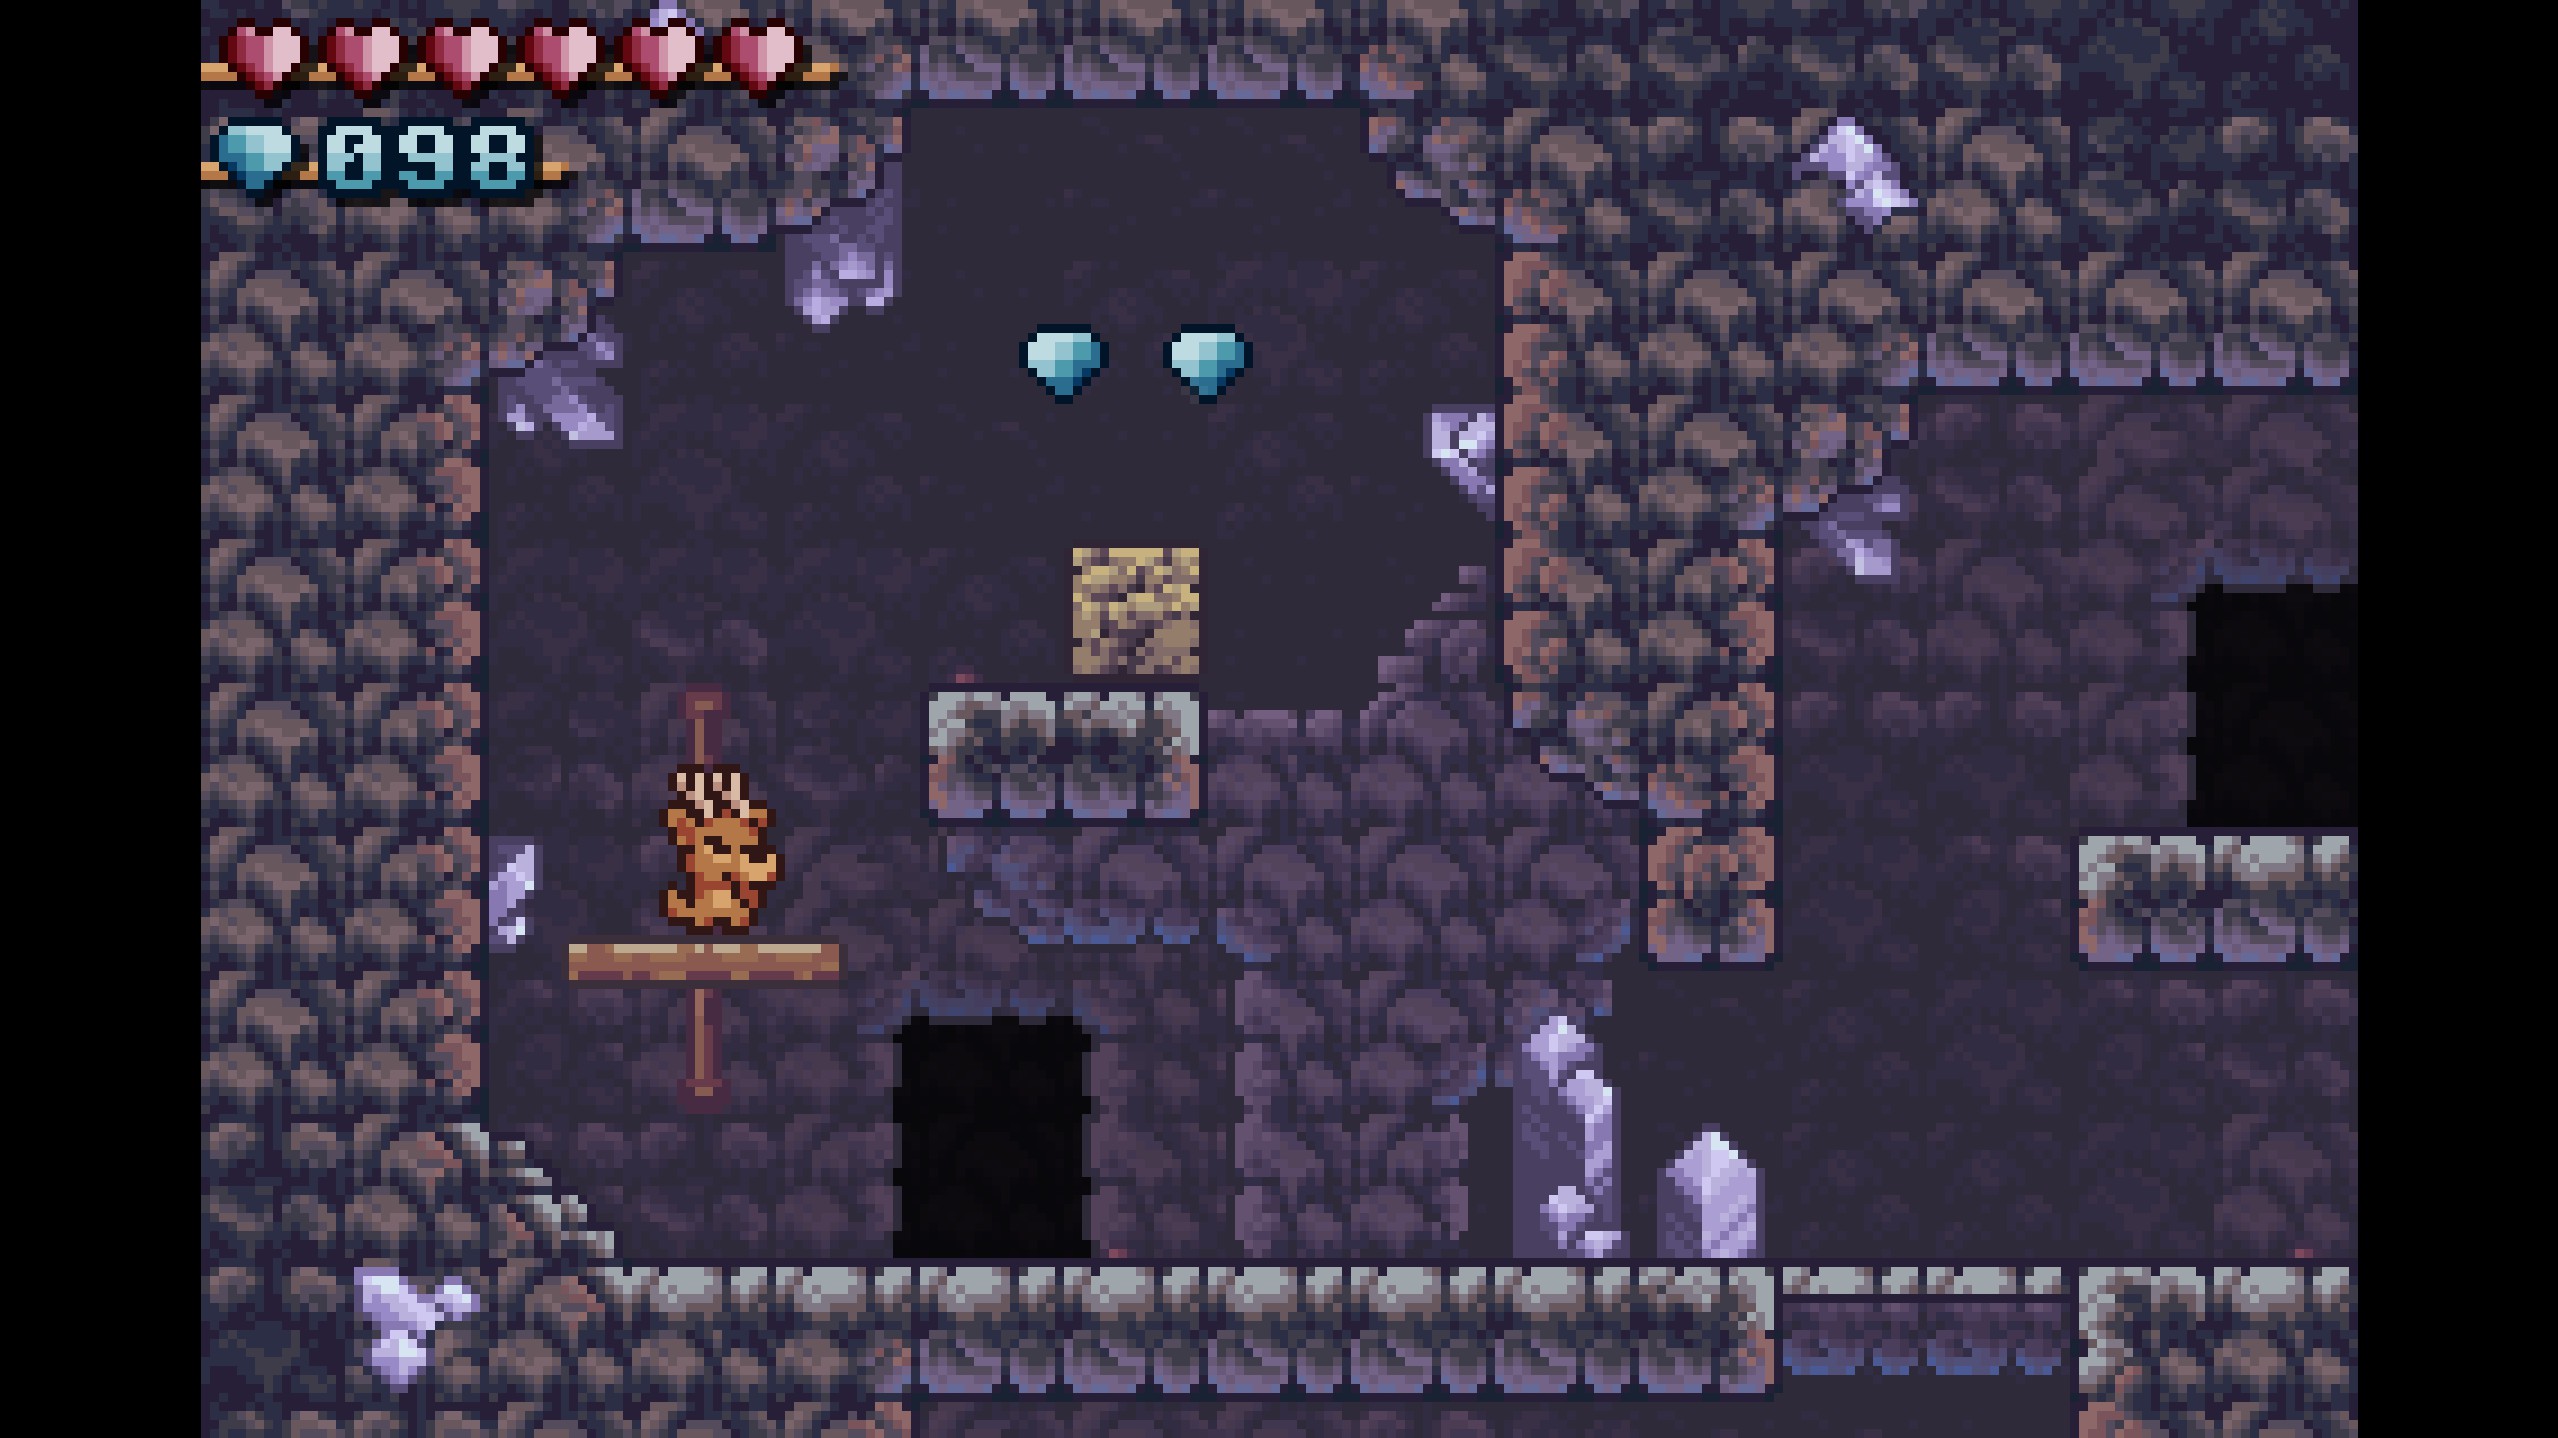
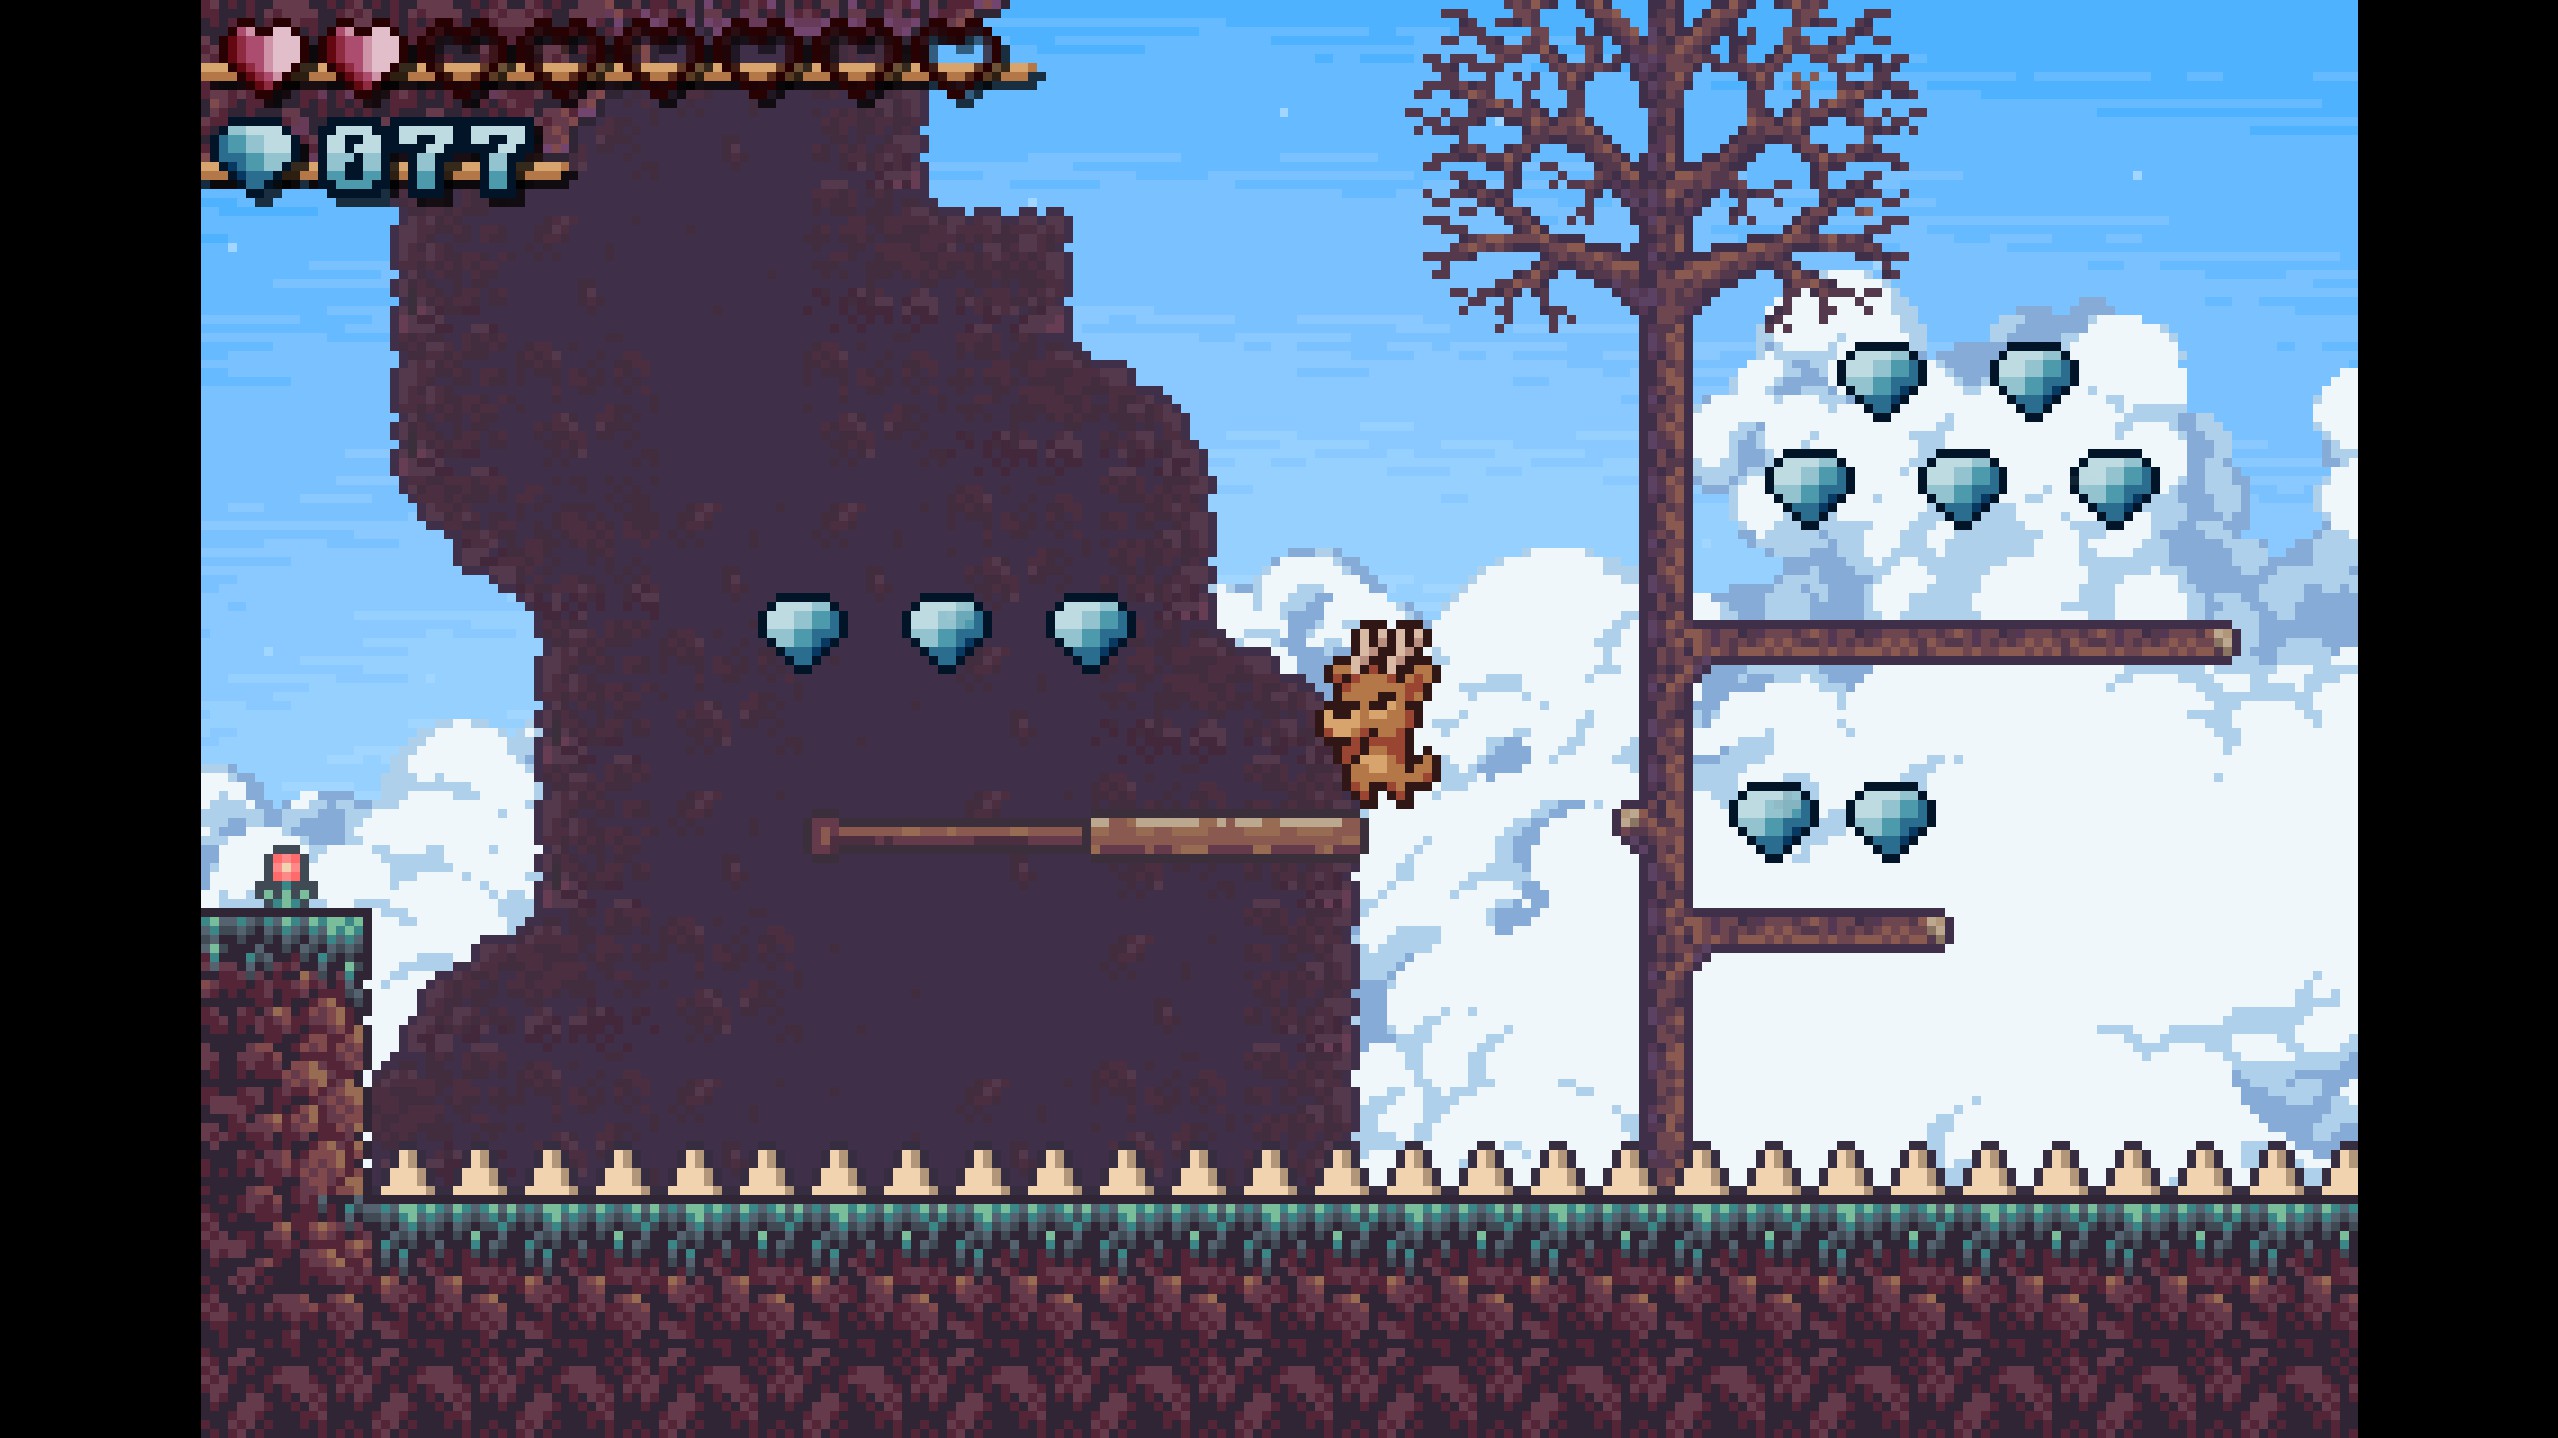
- Gems 92-95
- These are probably the trickiest gems in the Emerald Vale. First, push the stone off of the semisolid platform and down the hole with the lever. Then, push the stone over to the tall semisolid platform to the right. Jump off of the stone to collect the gems!
- These are probably the trickiest gems in the Emerald Vale. First, push the stone off of the semisolid platform and down the hole with the lever. Then, push the stone over to the tall semisolid platform to the right. Jump off of the stone to collect the gems!
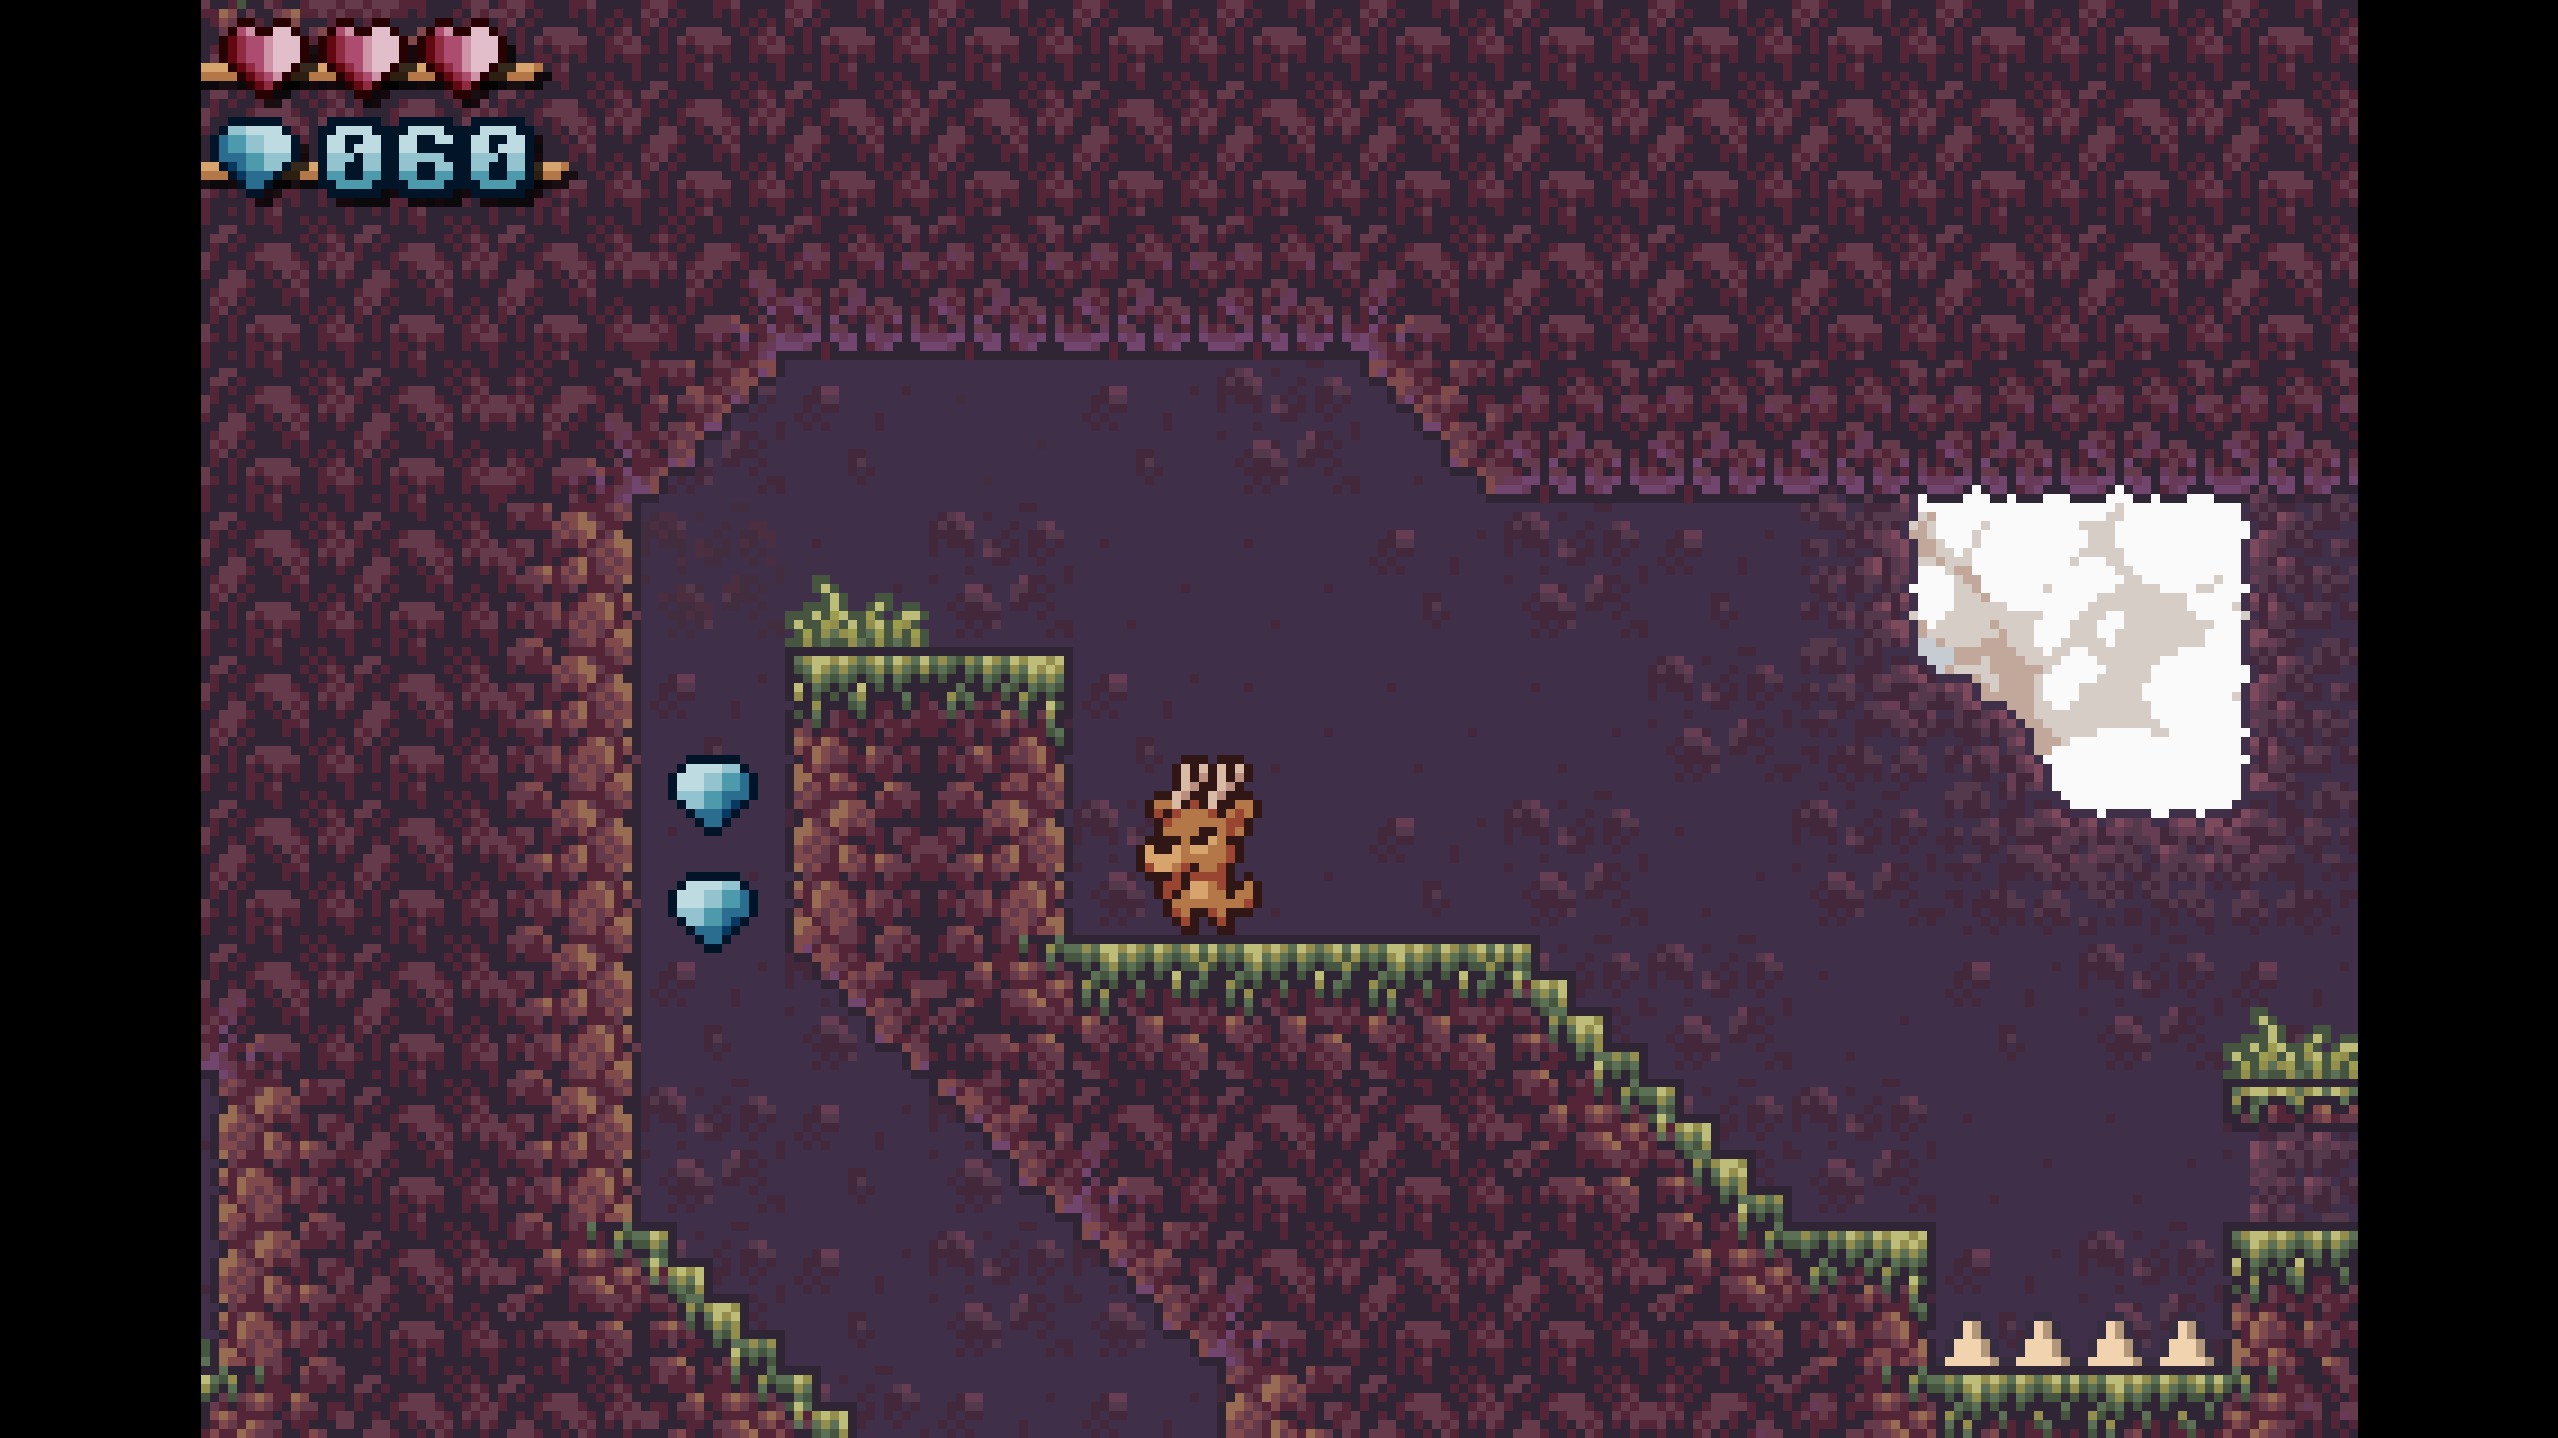
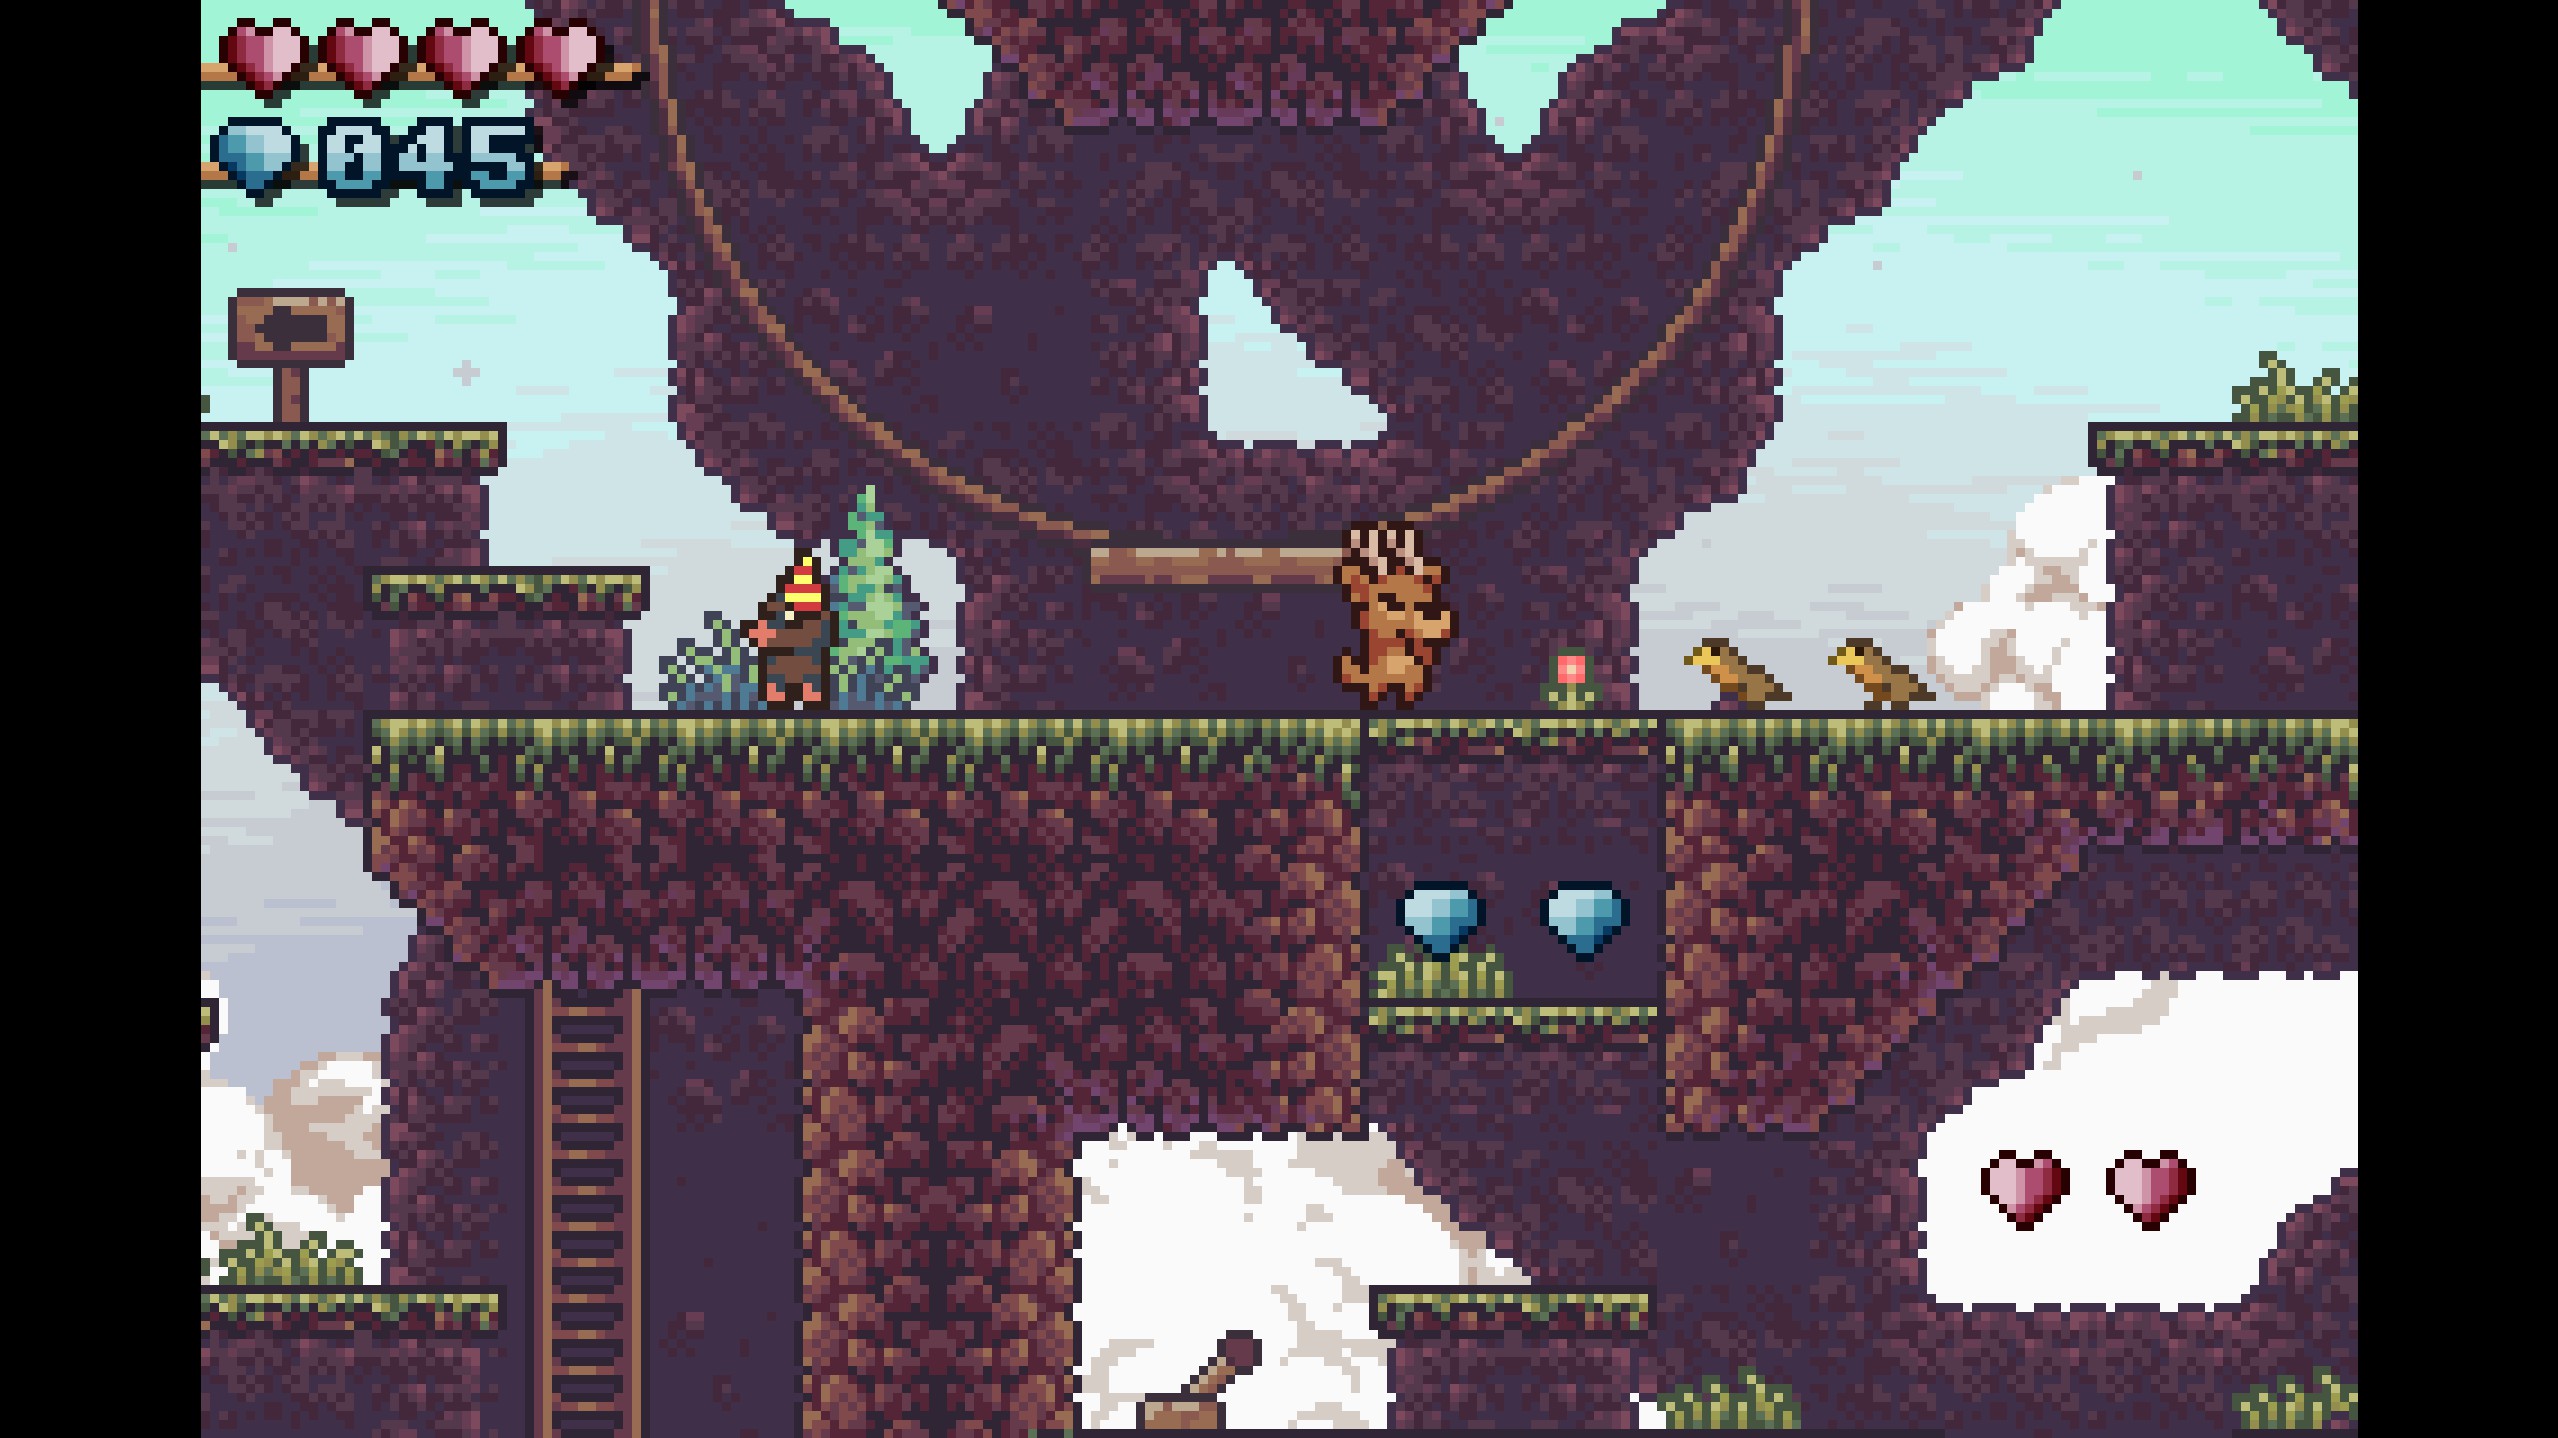
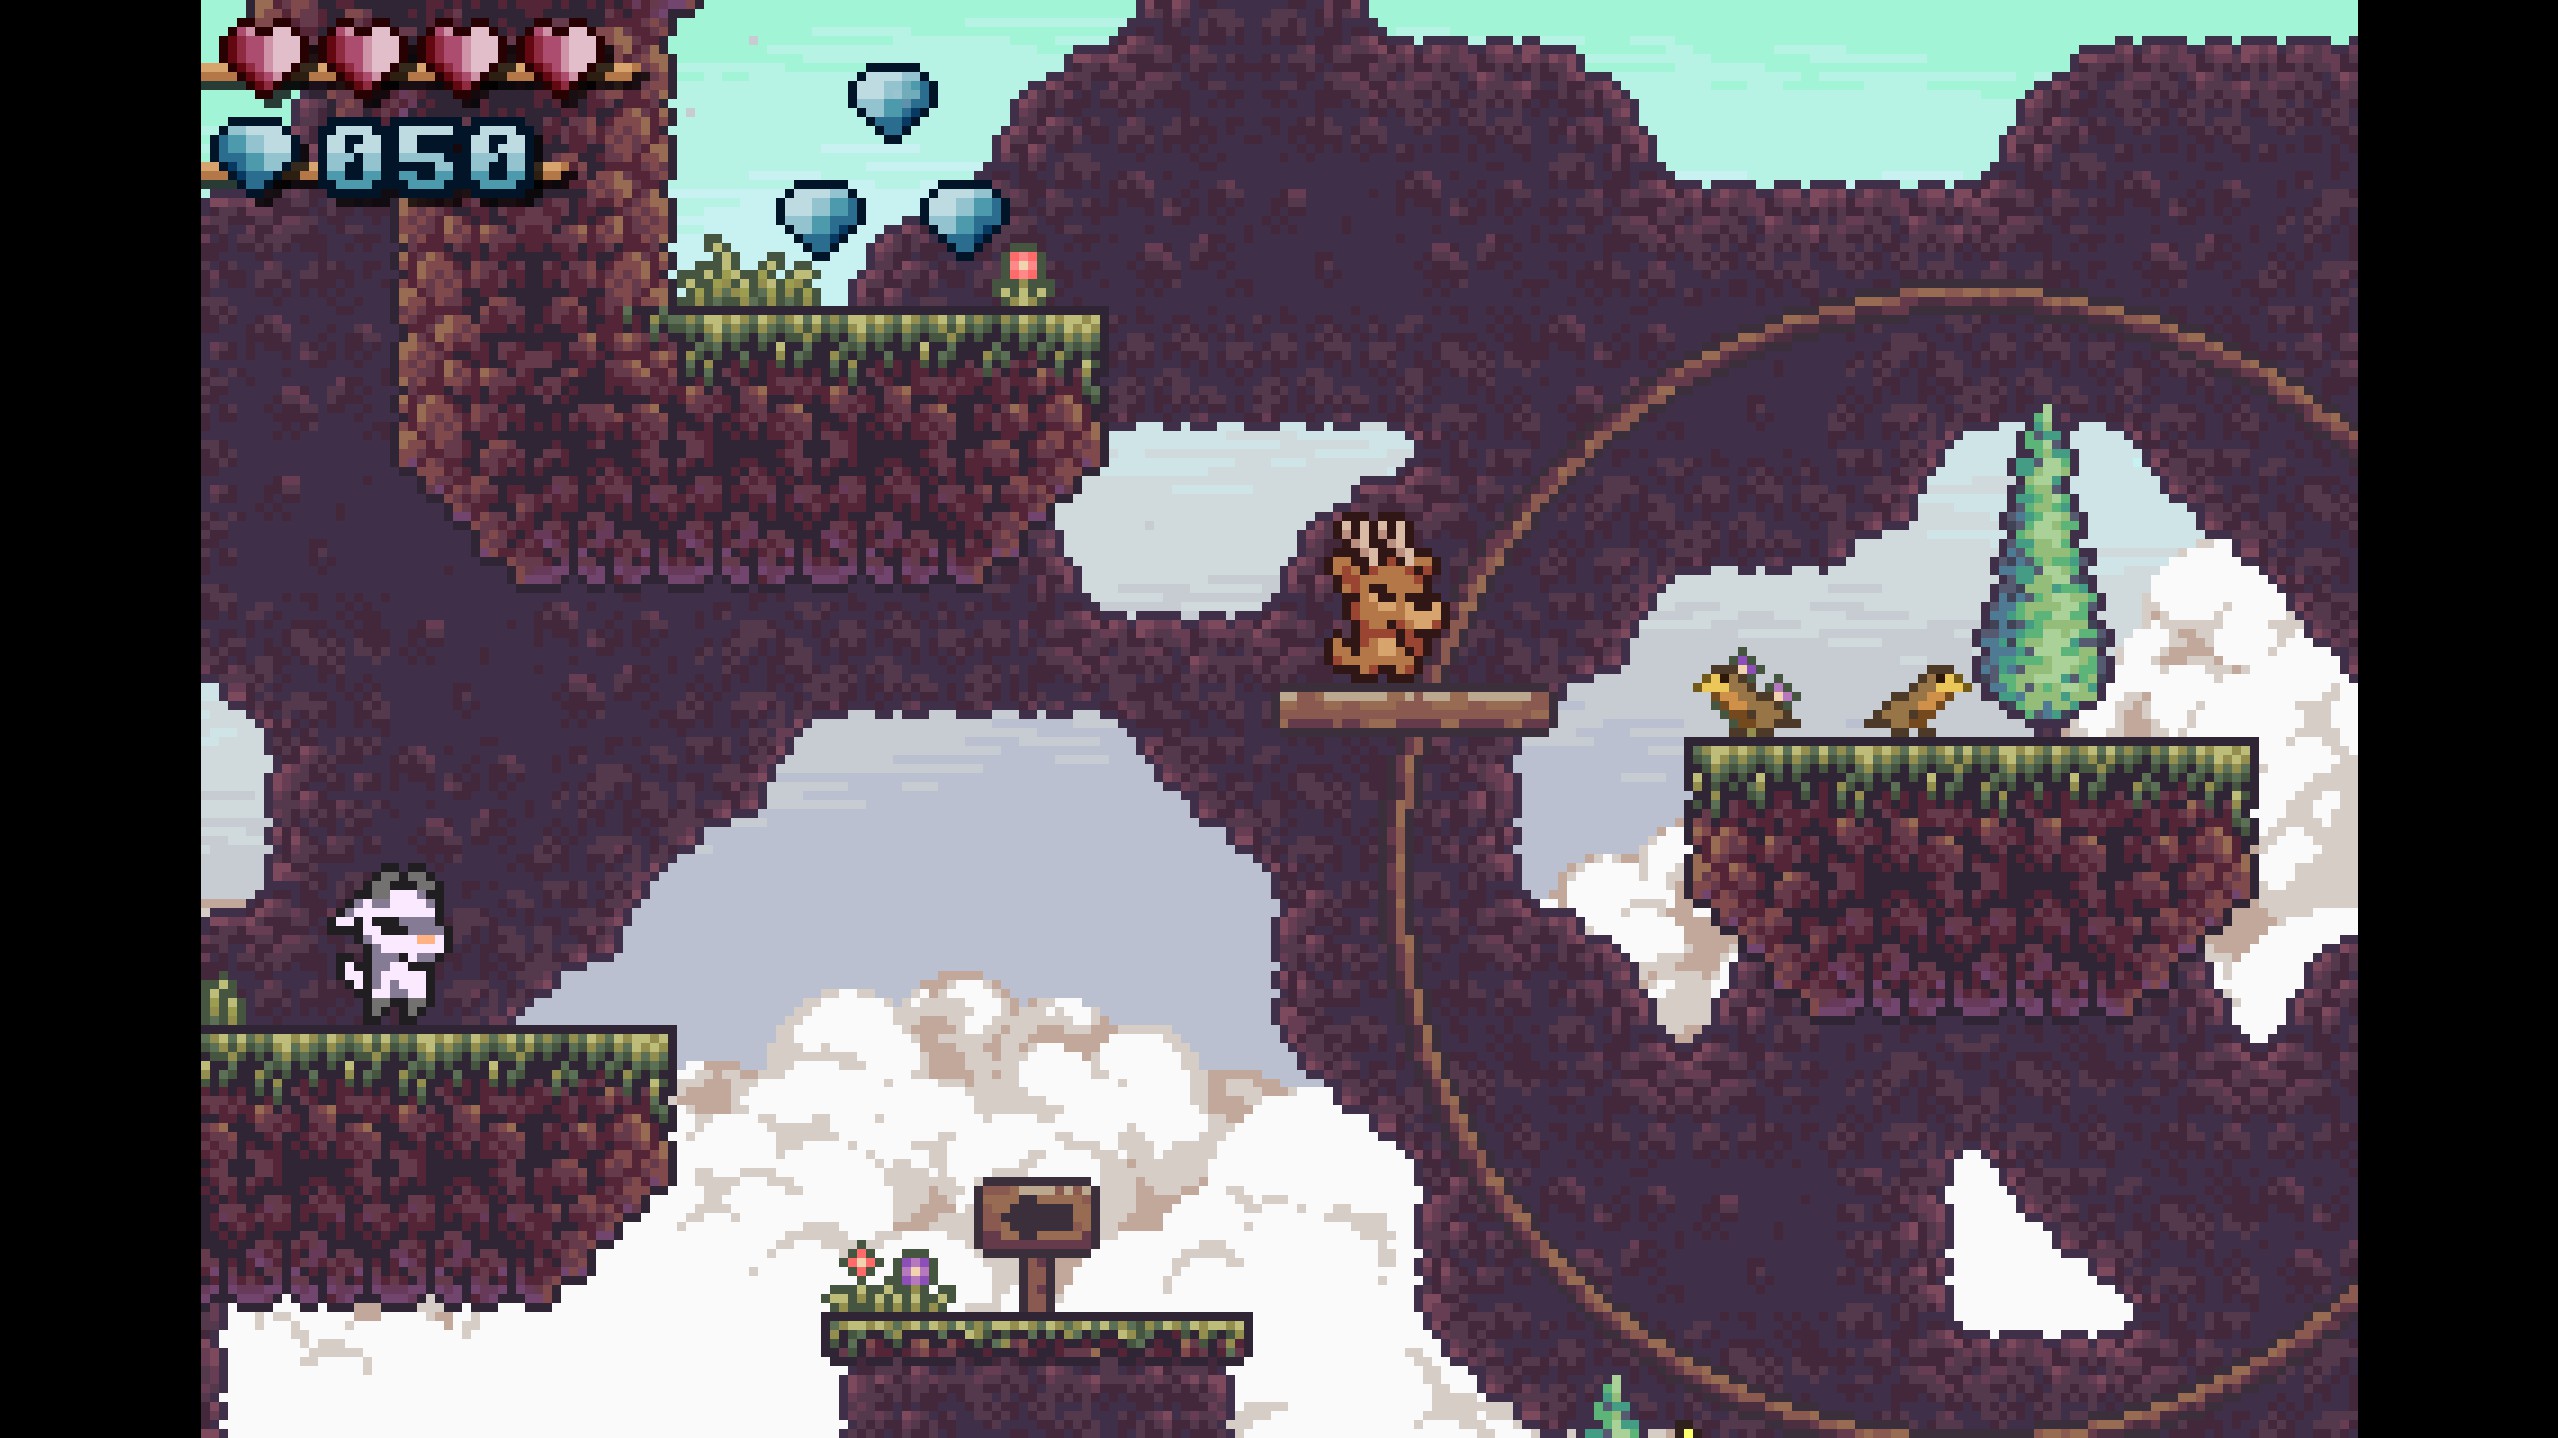
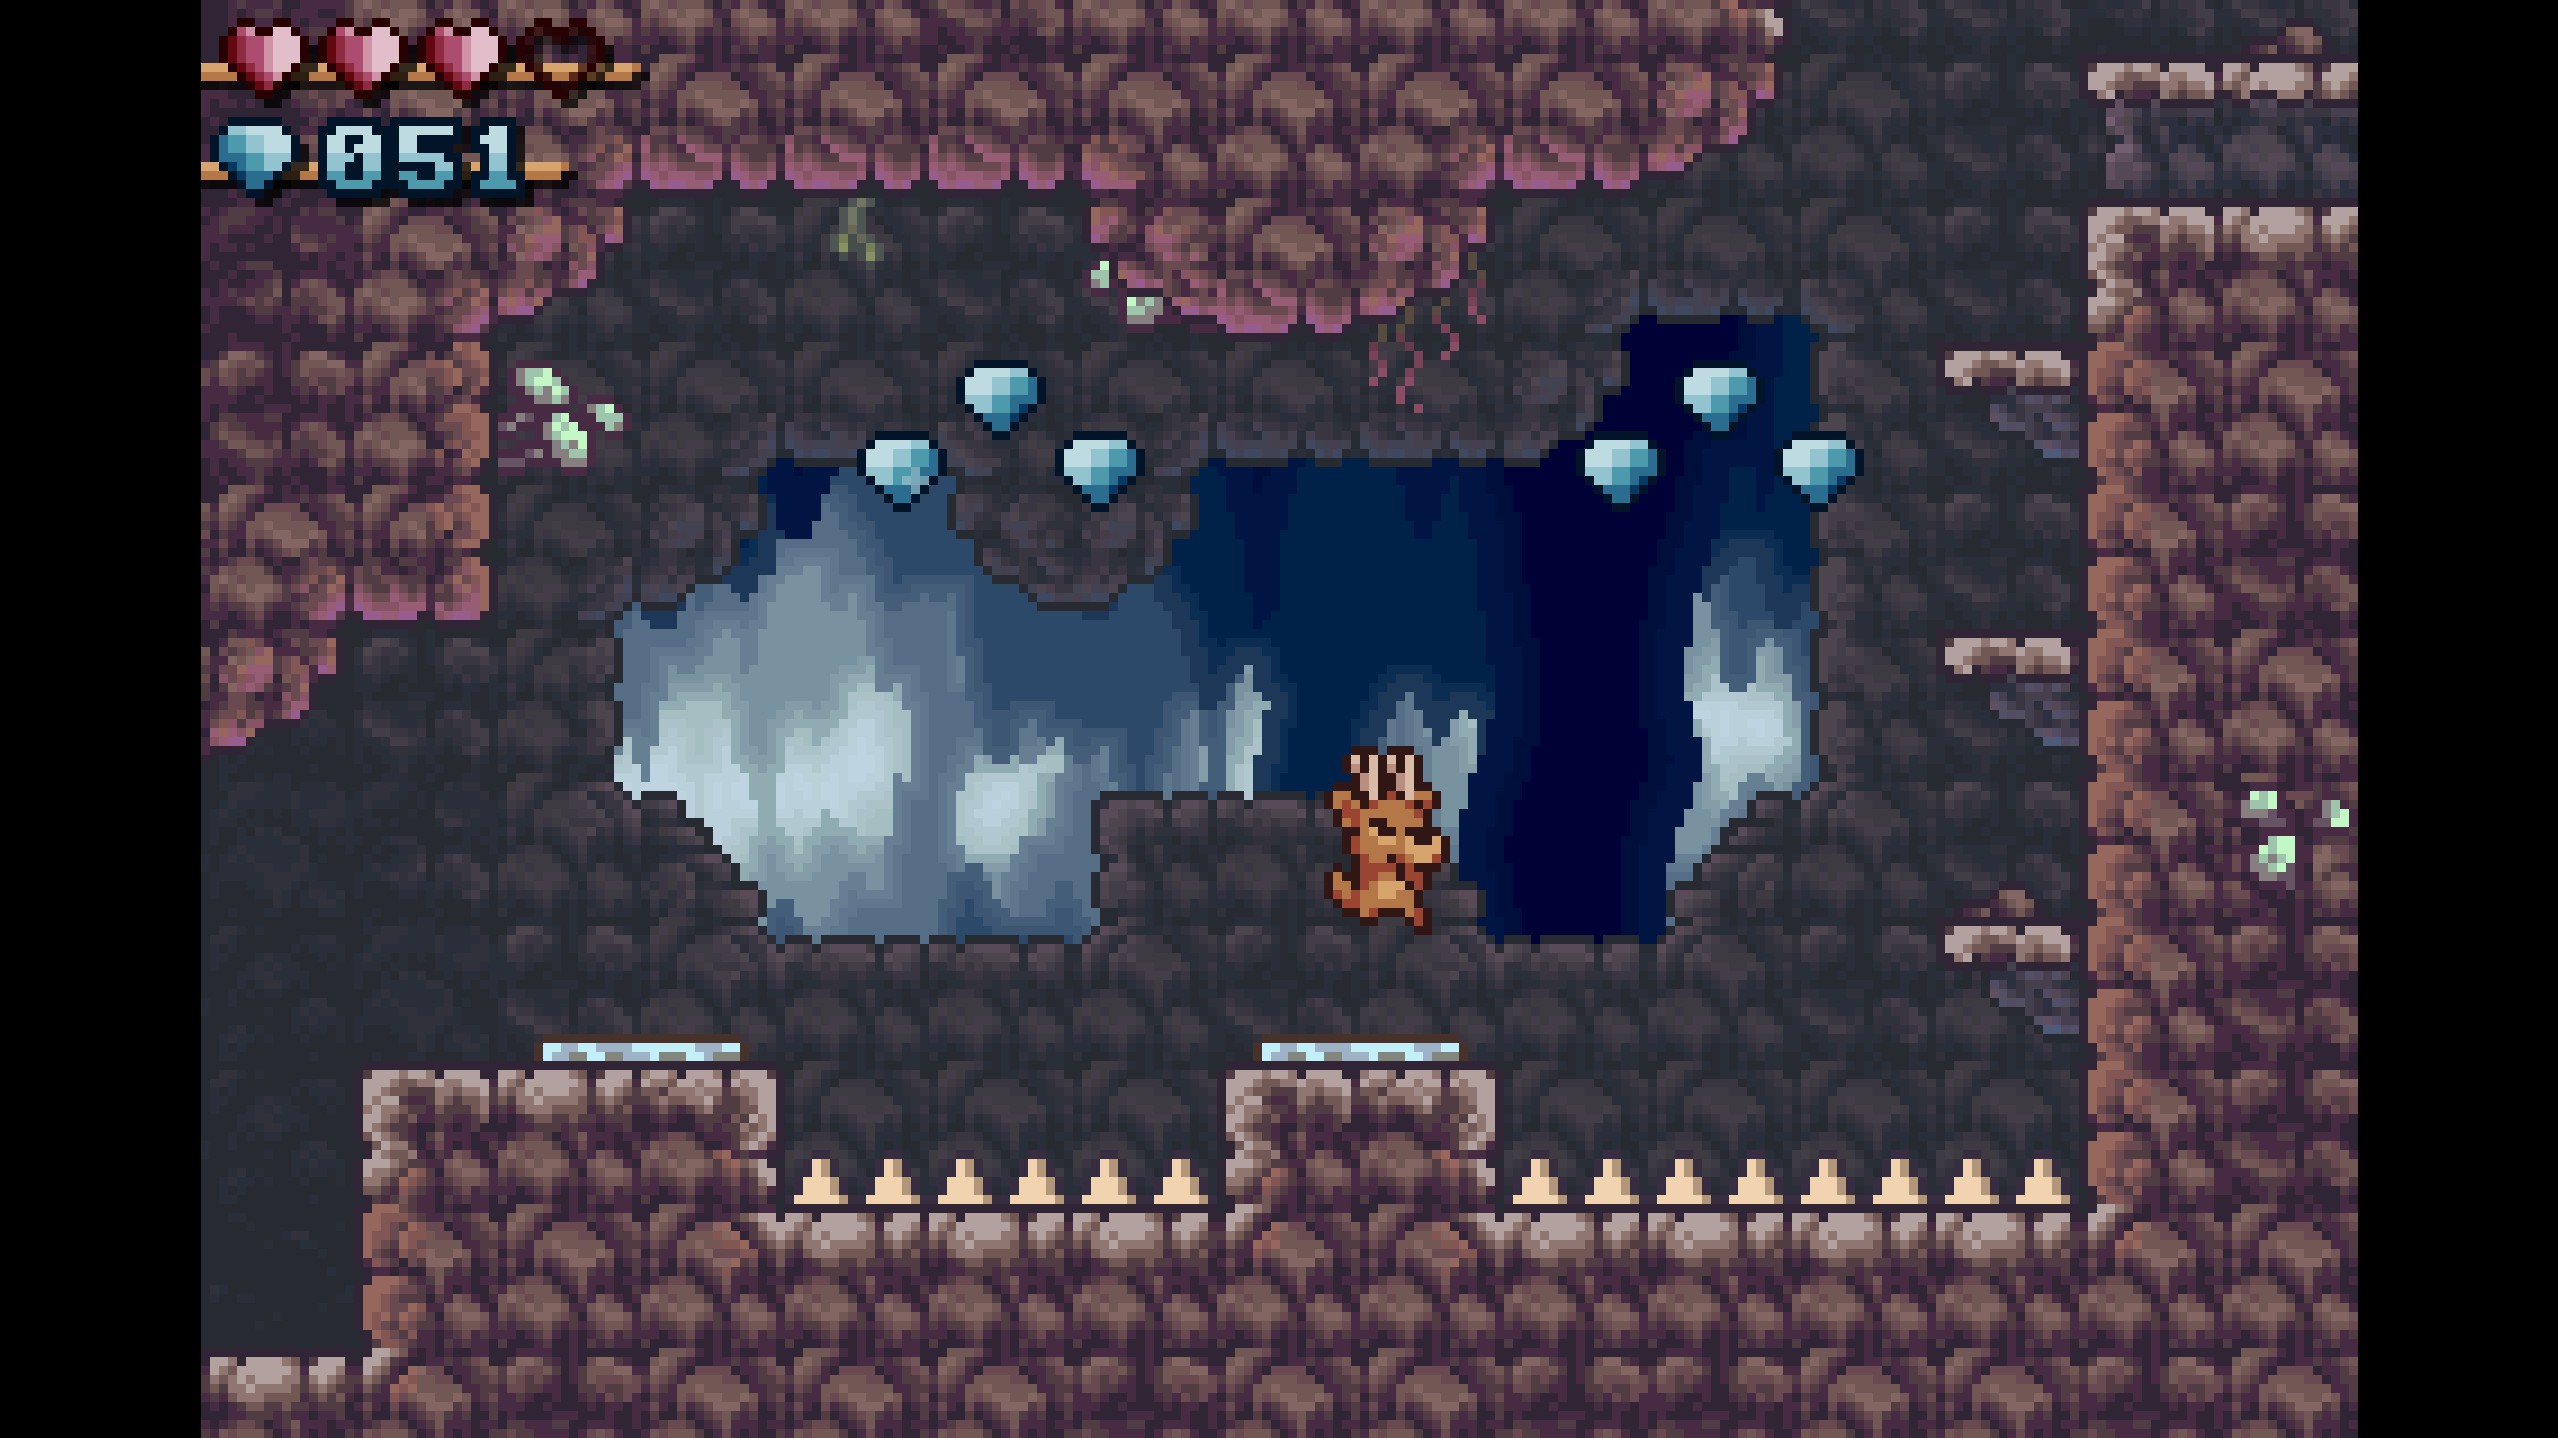
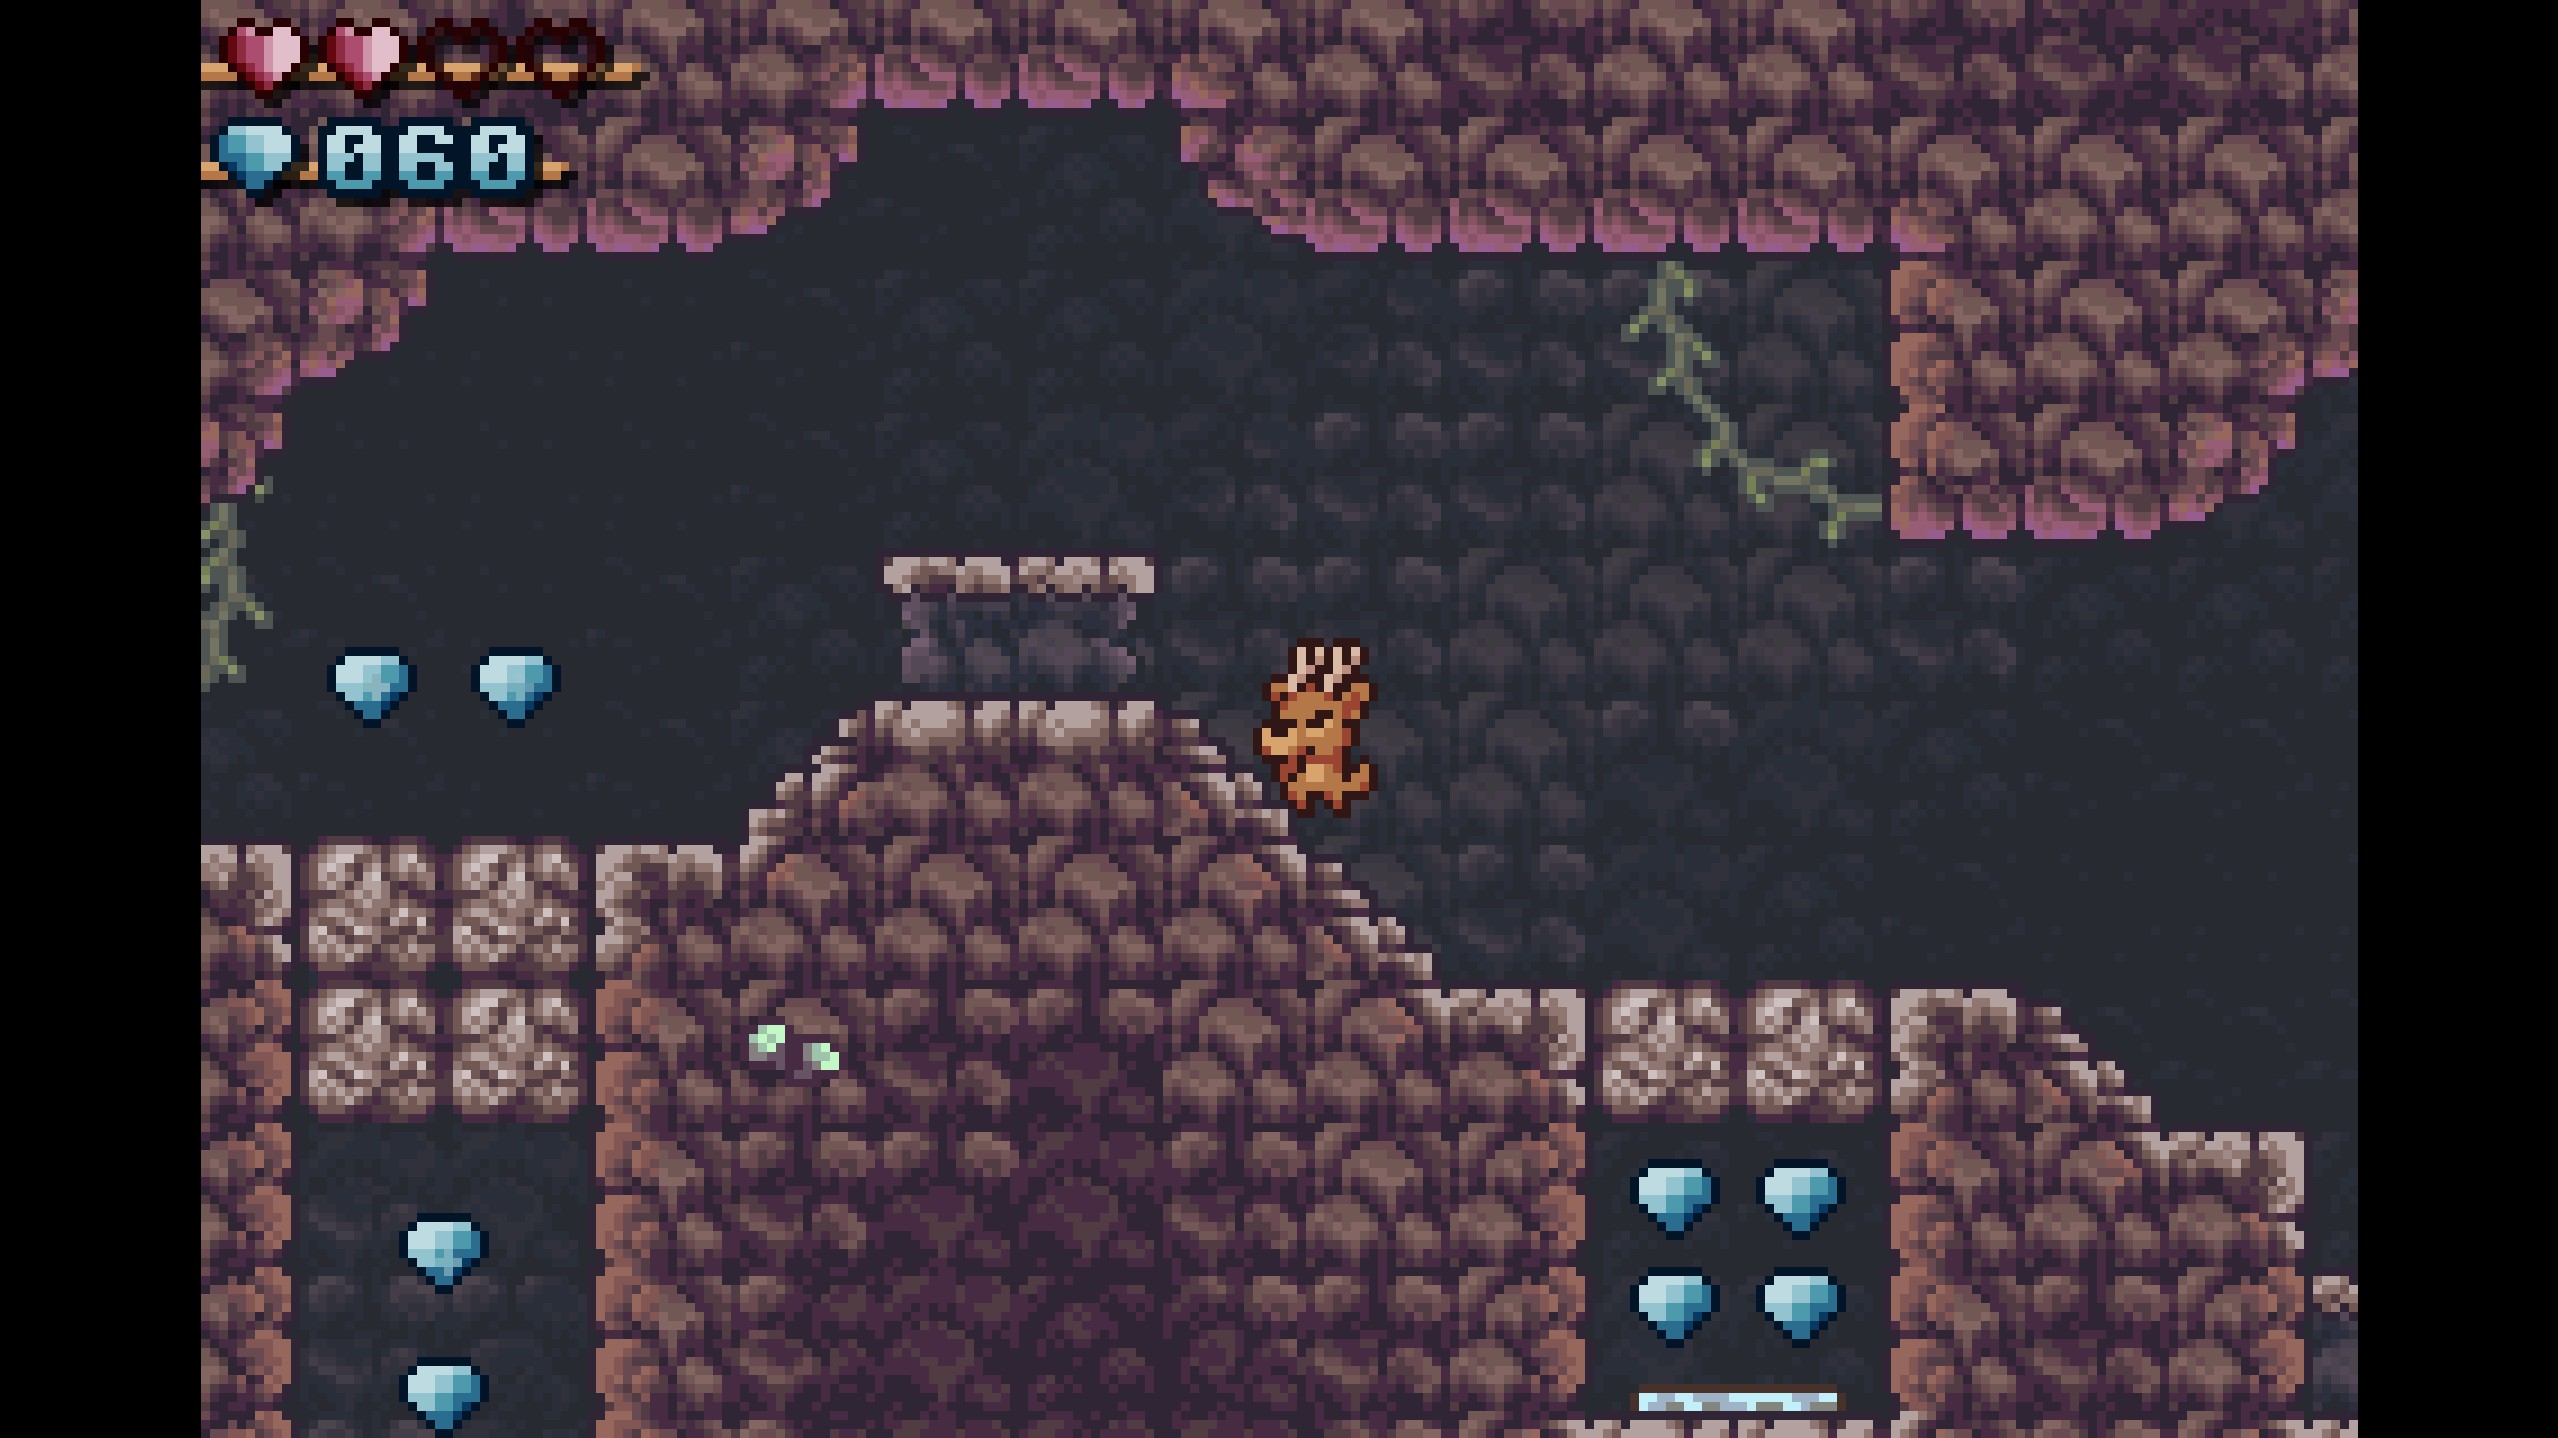
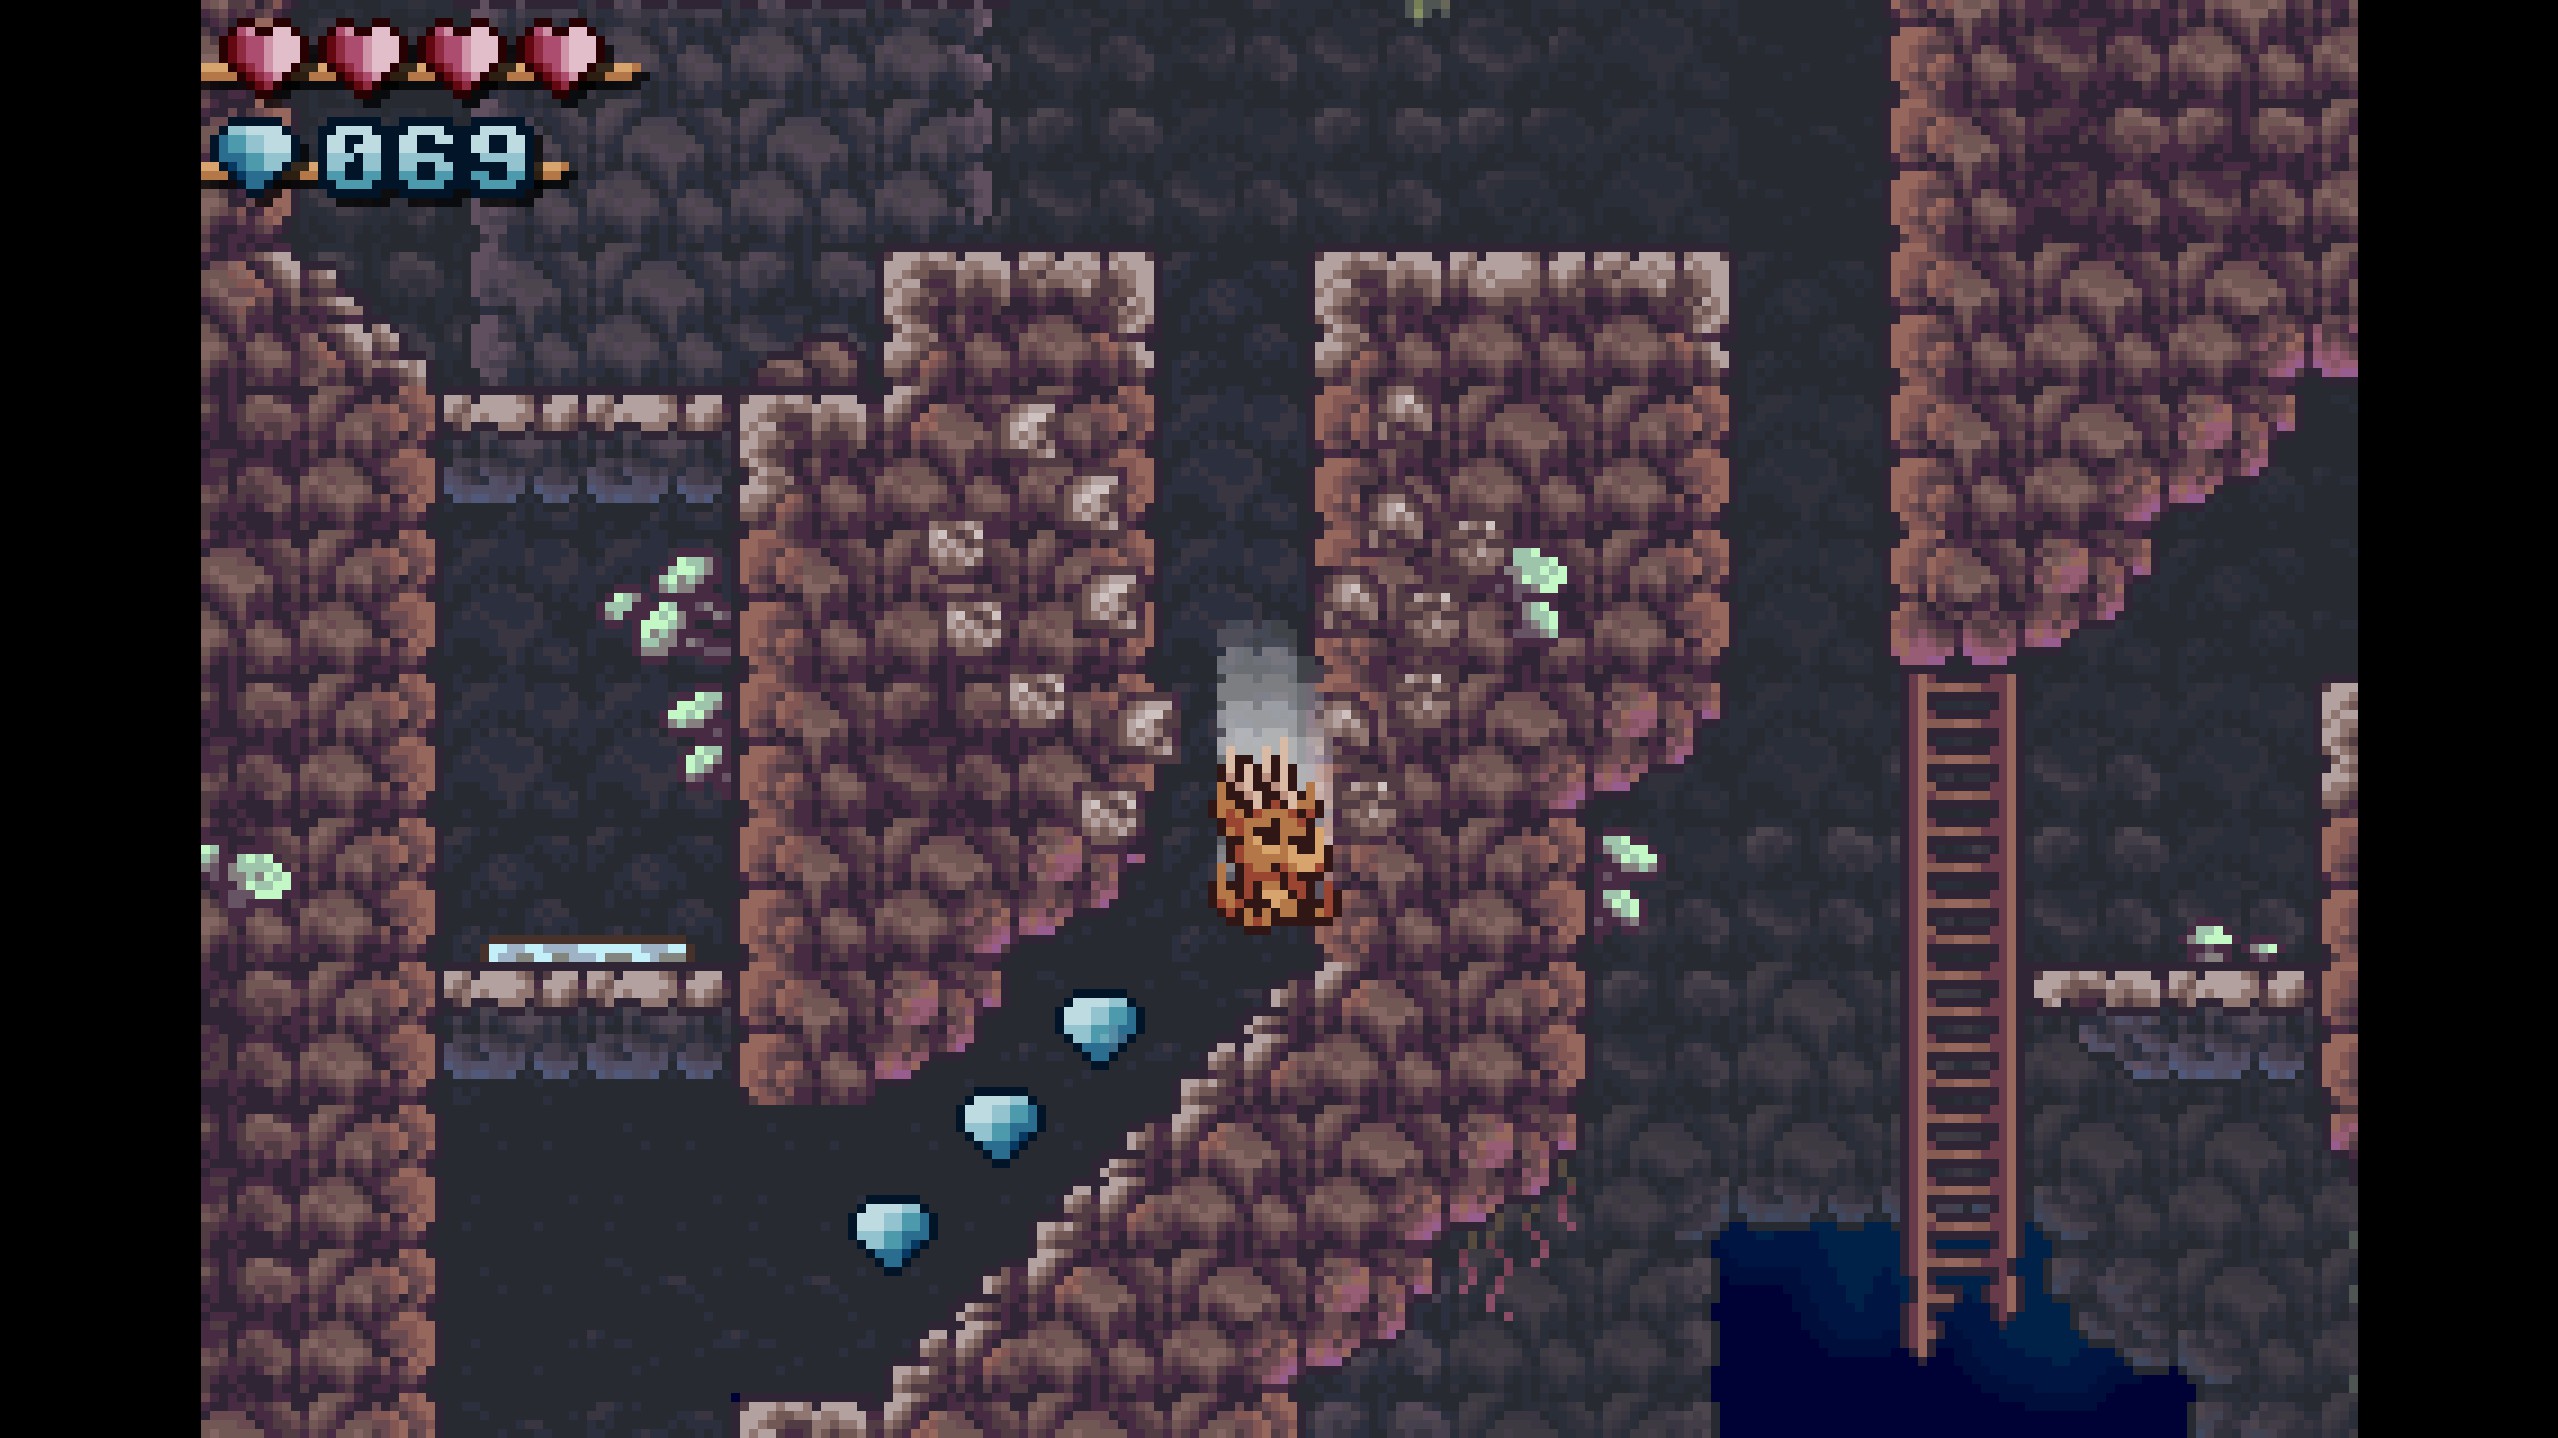
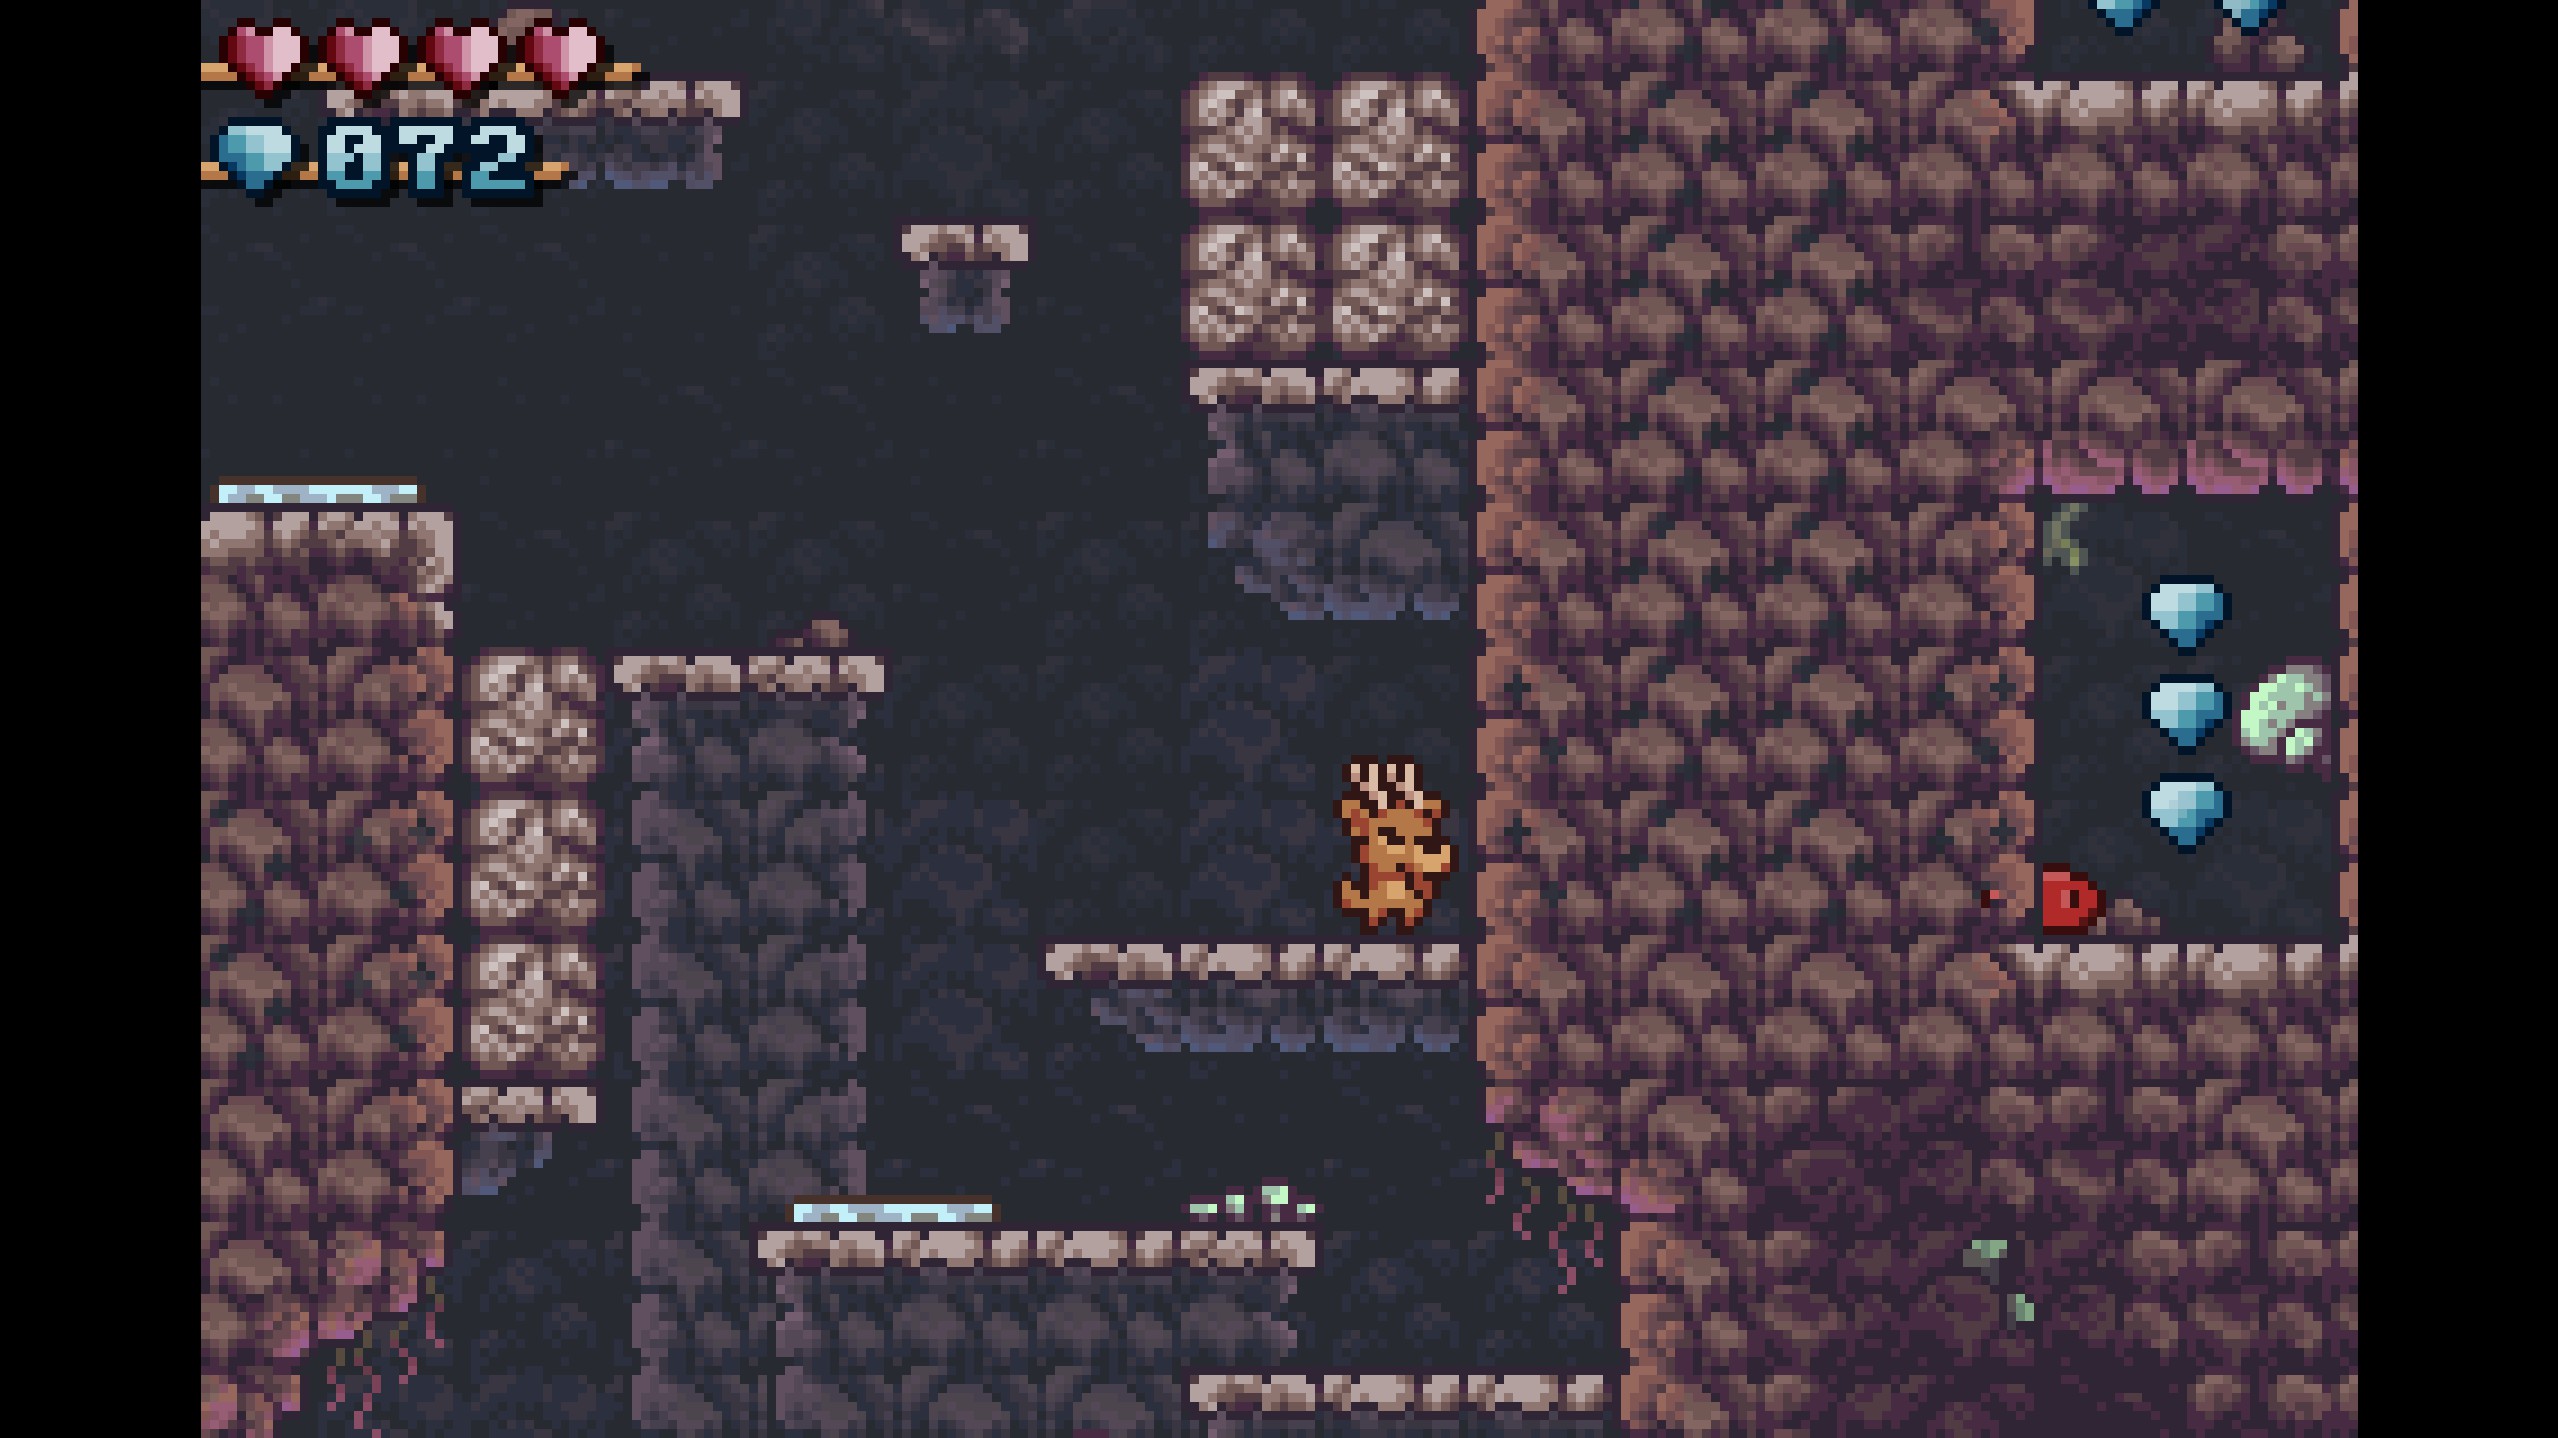
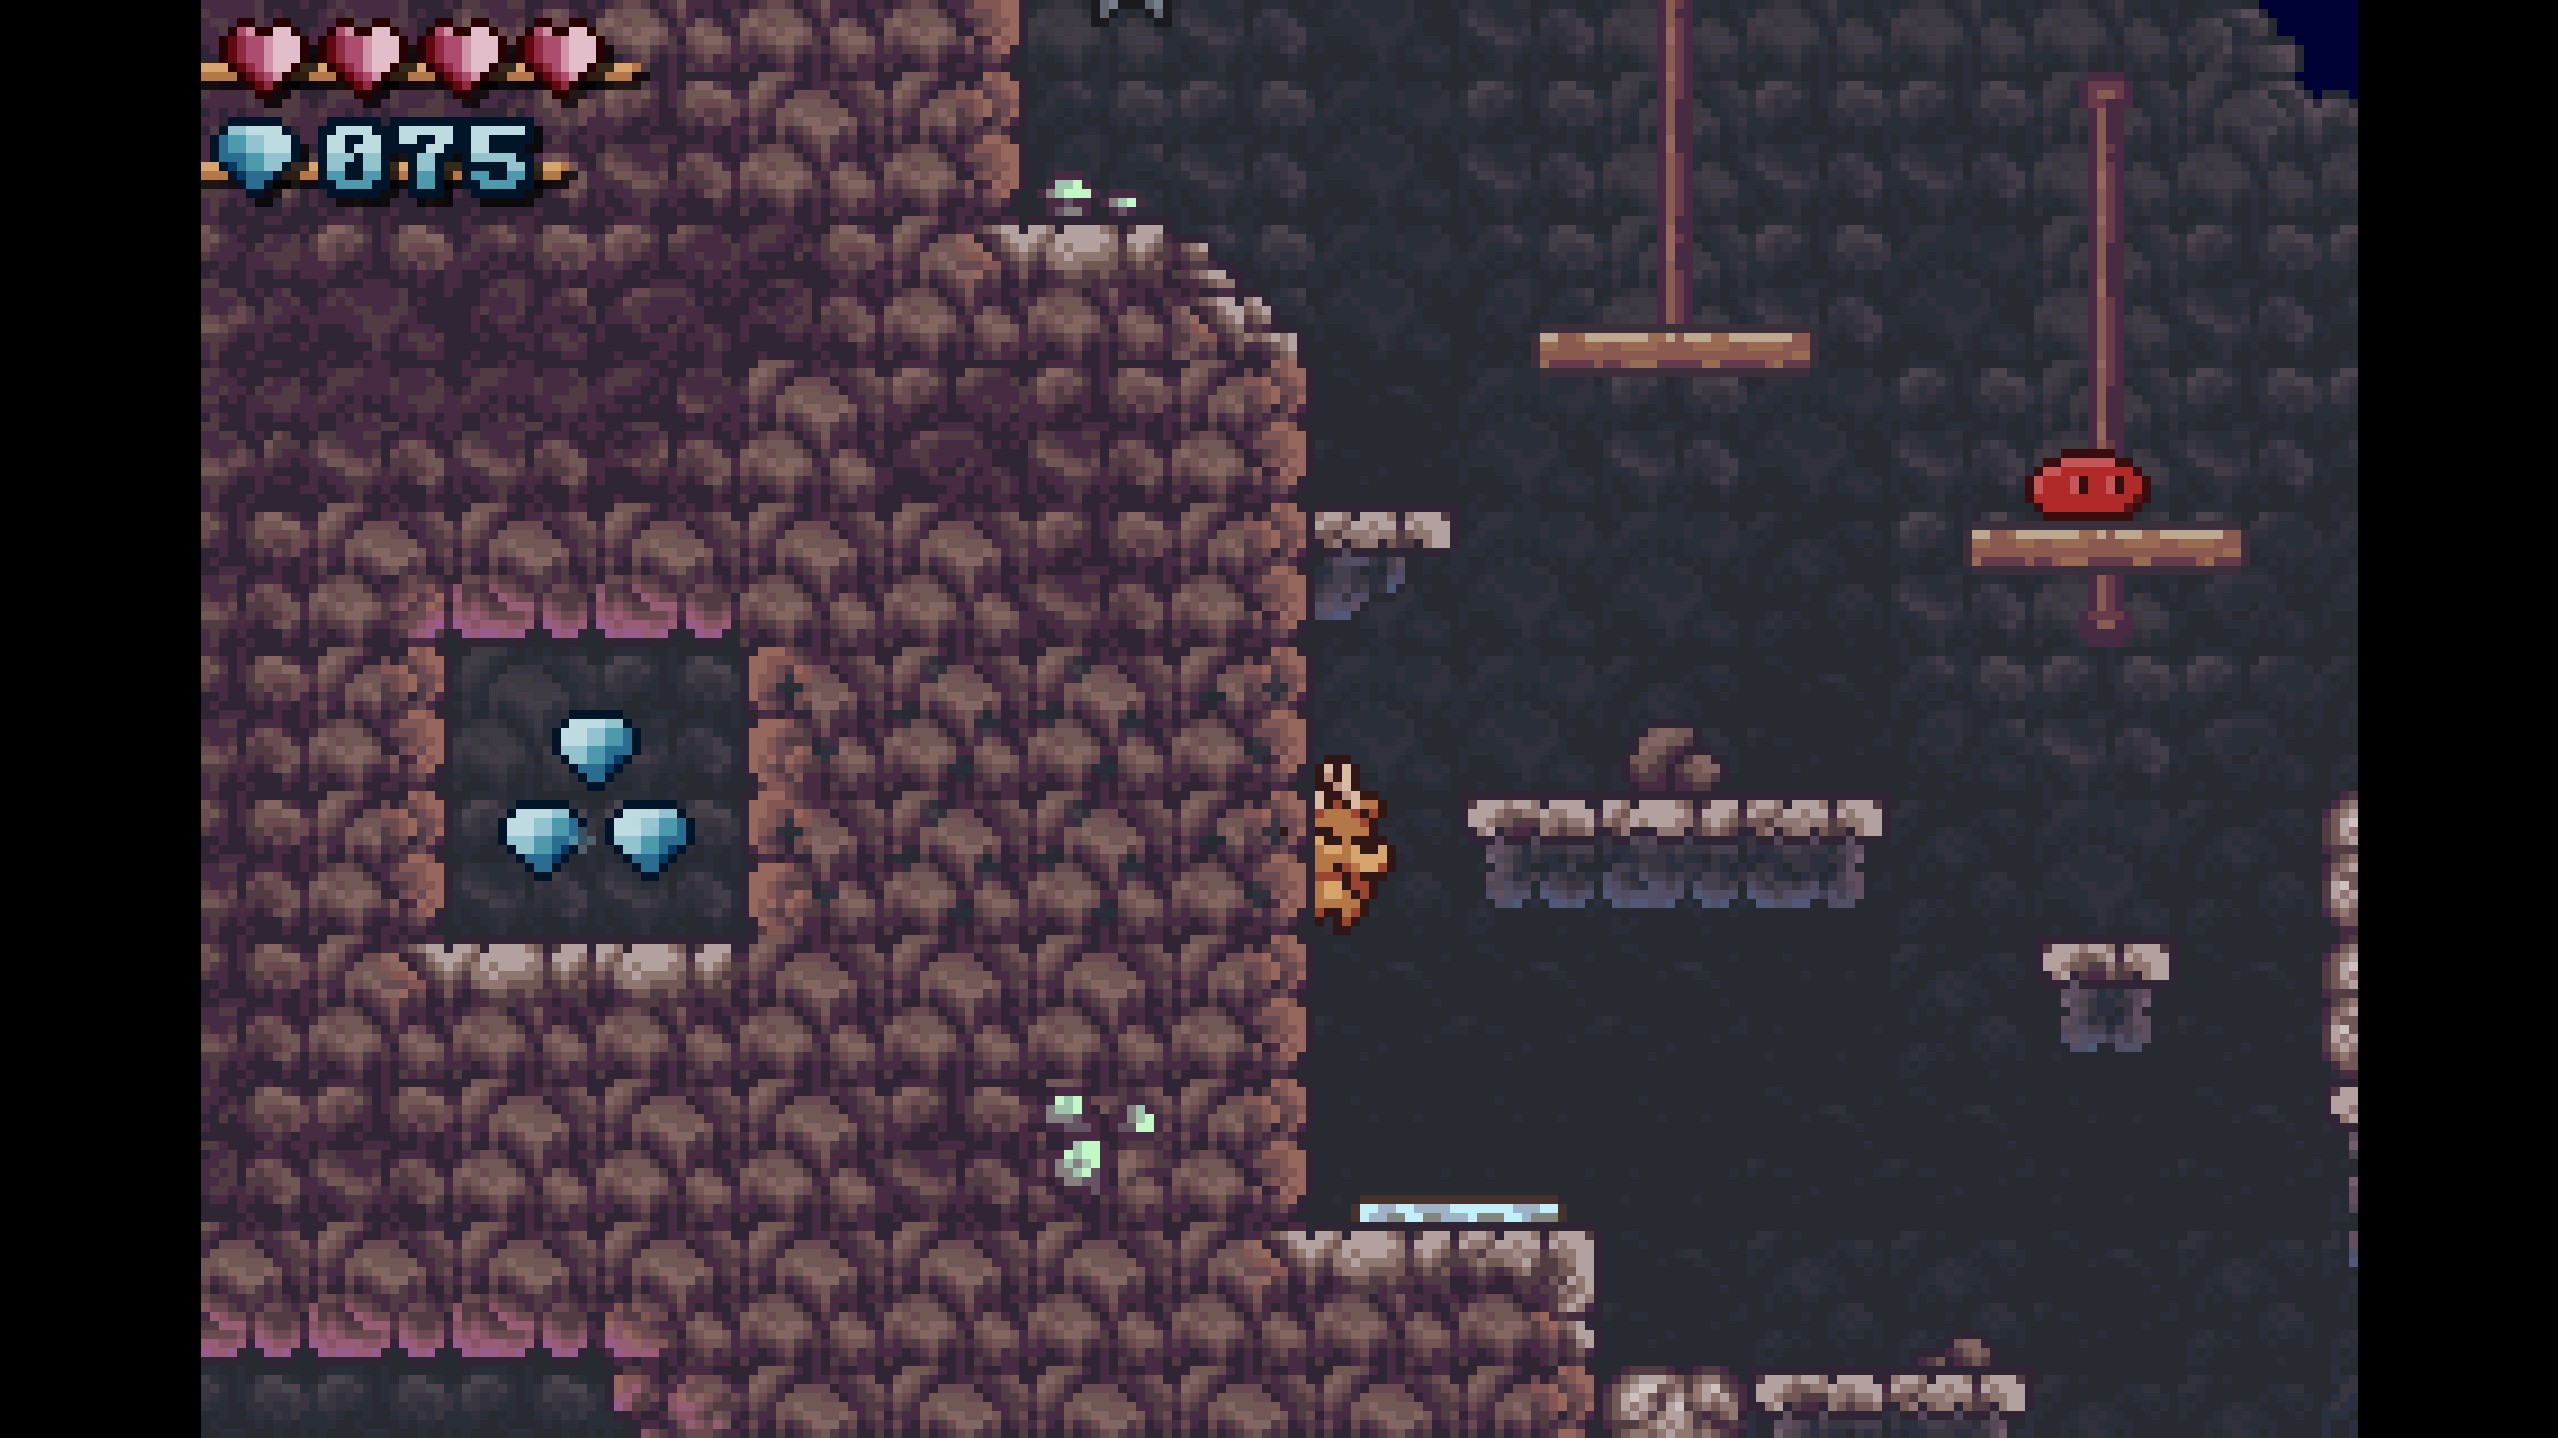
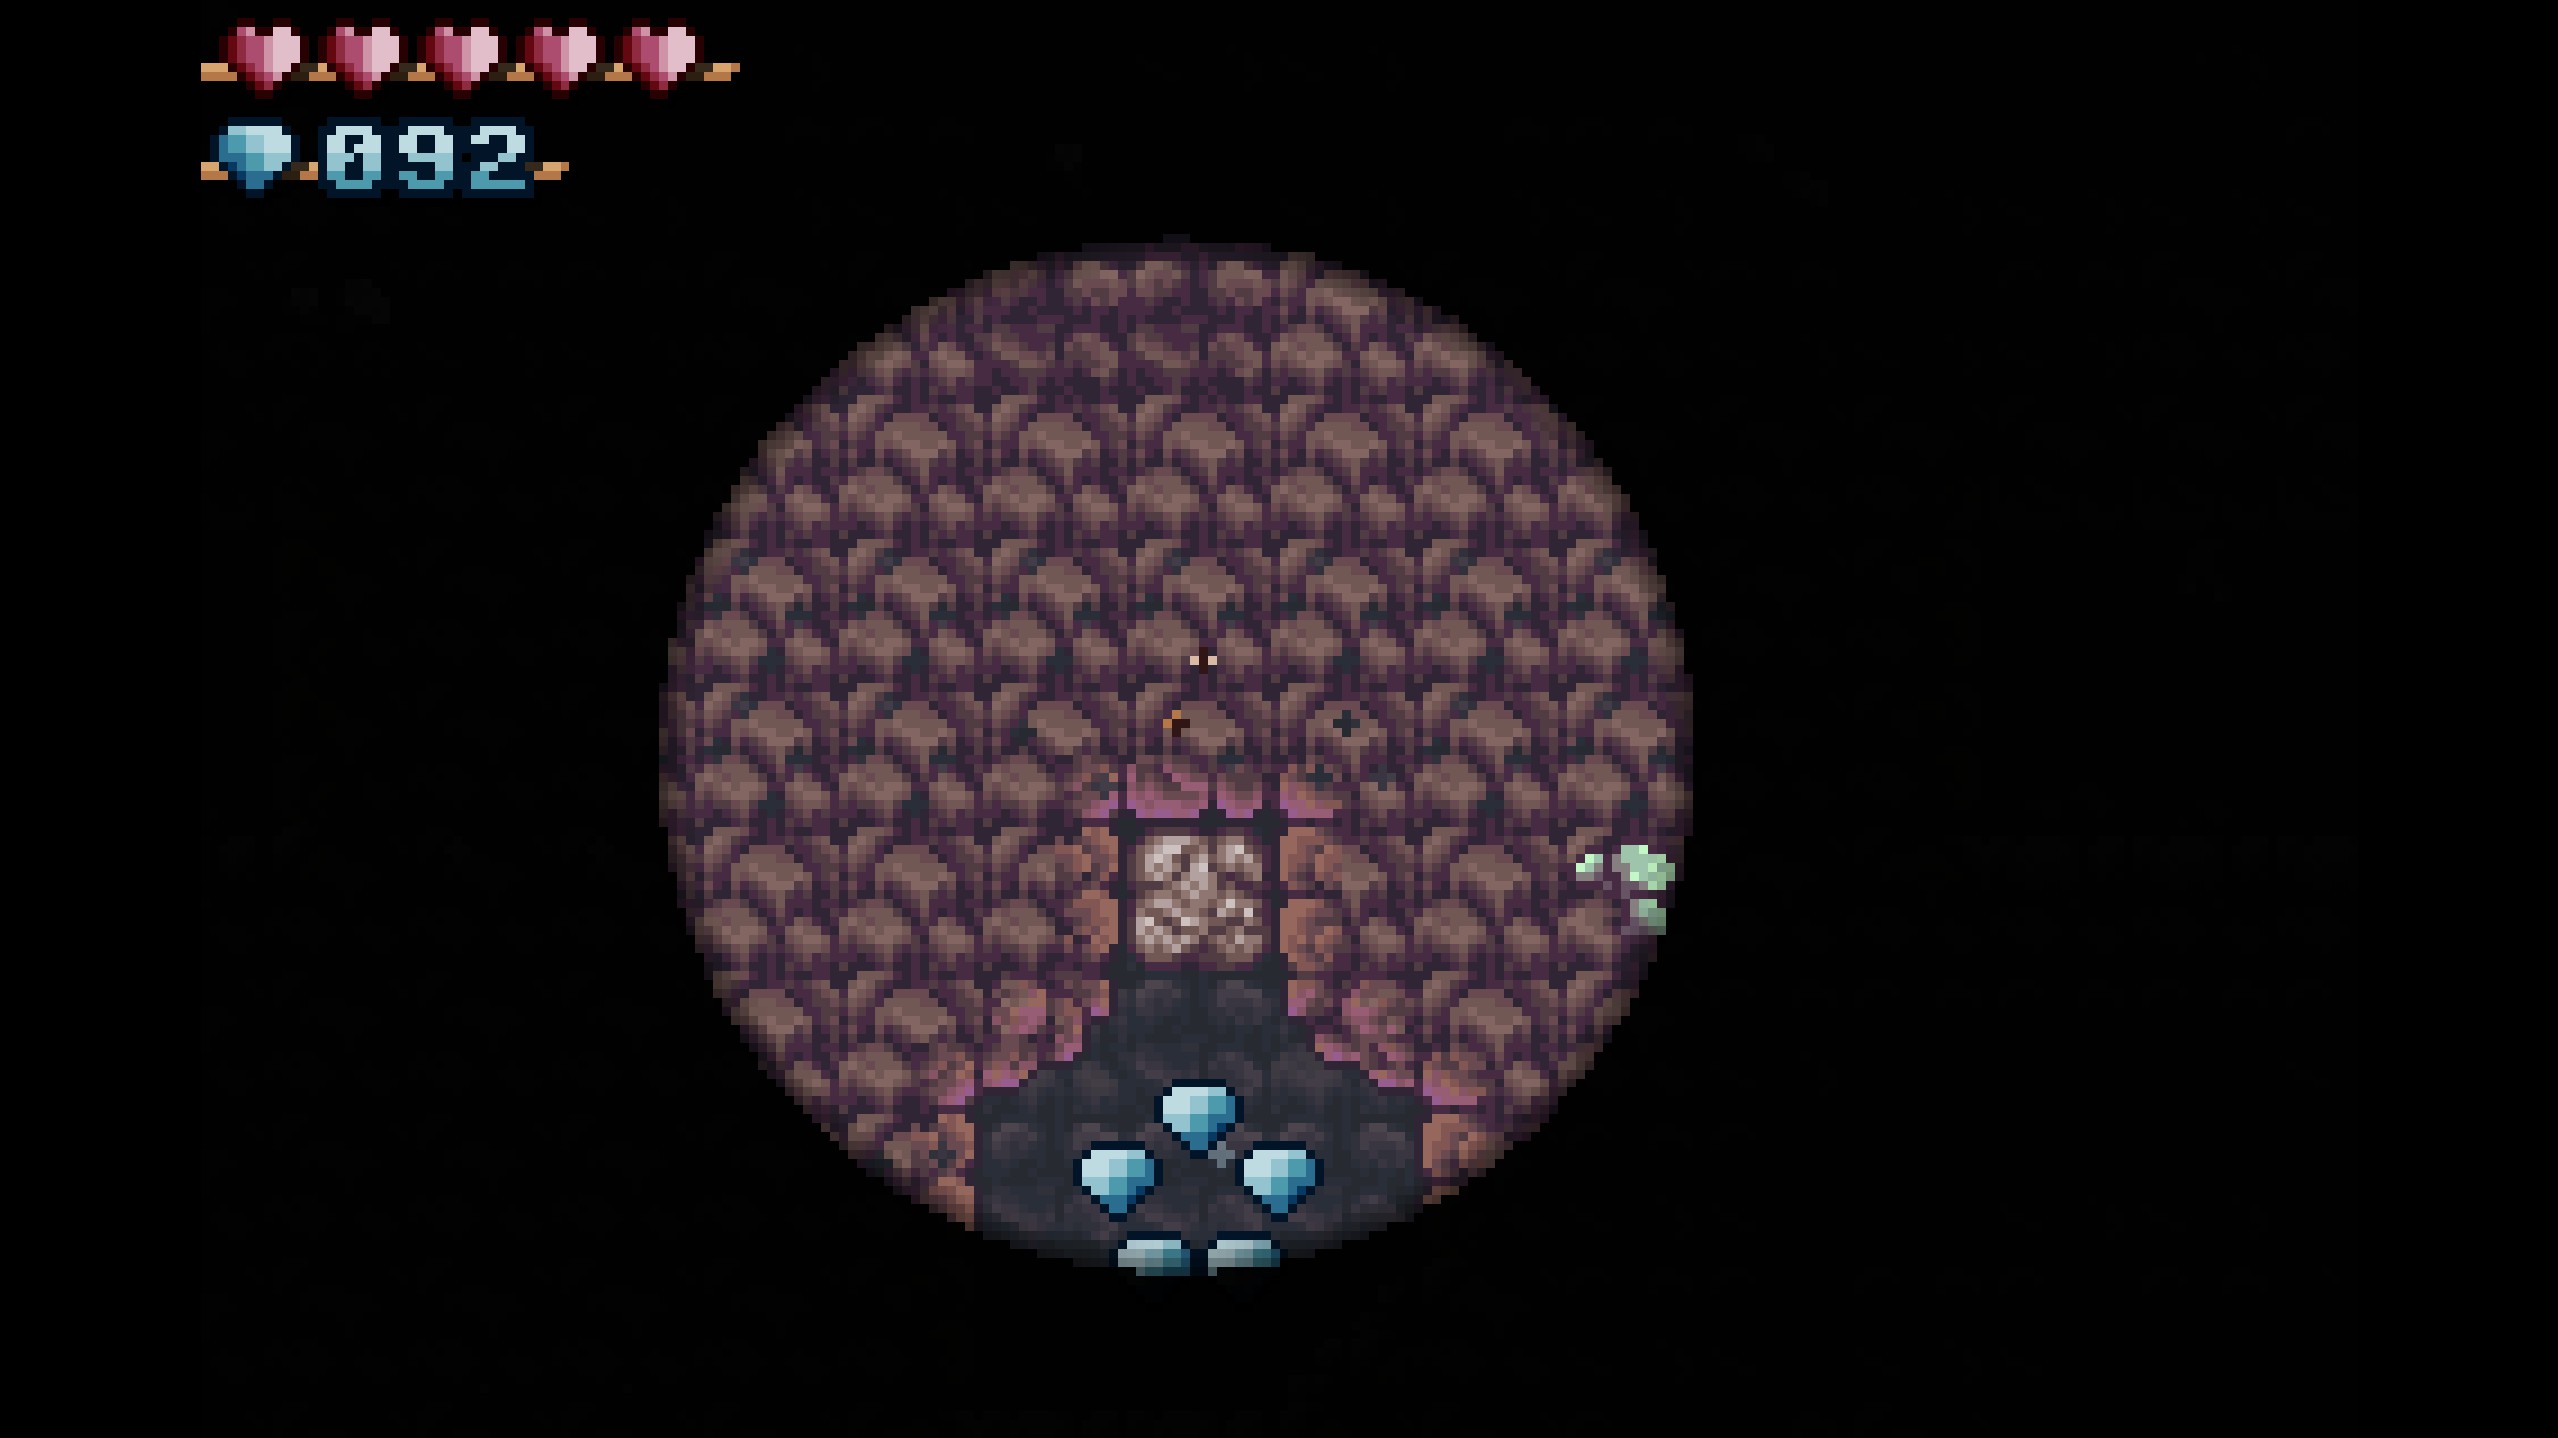
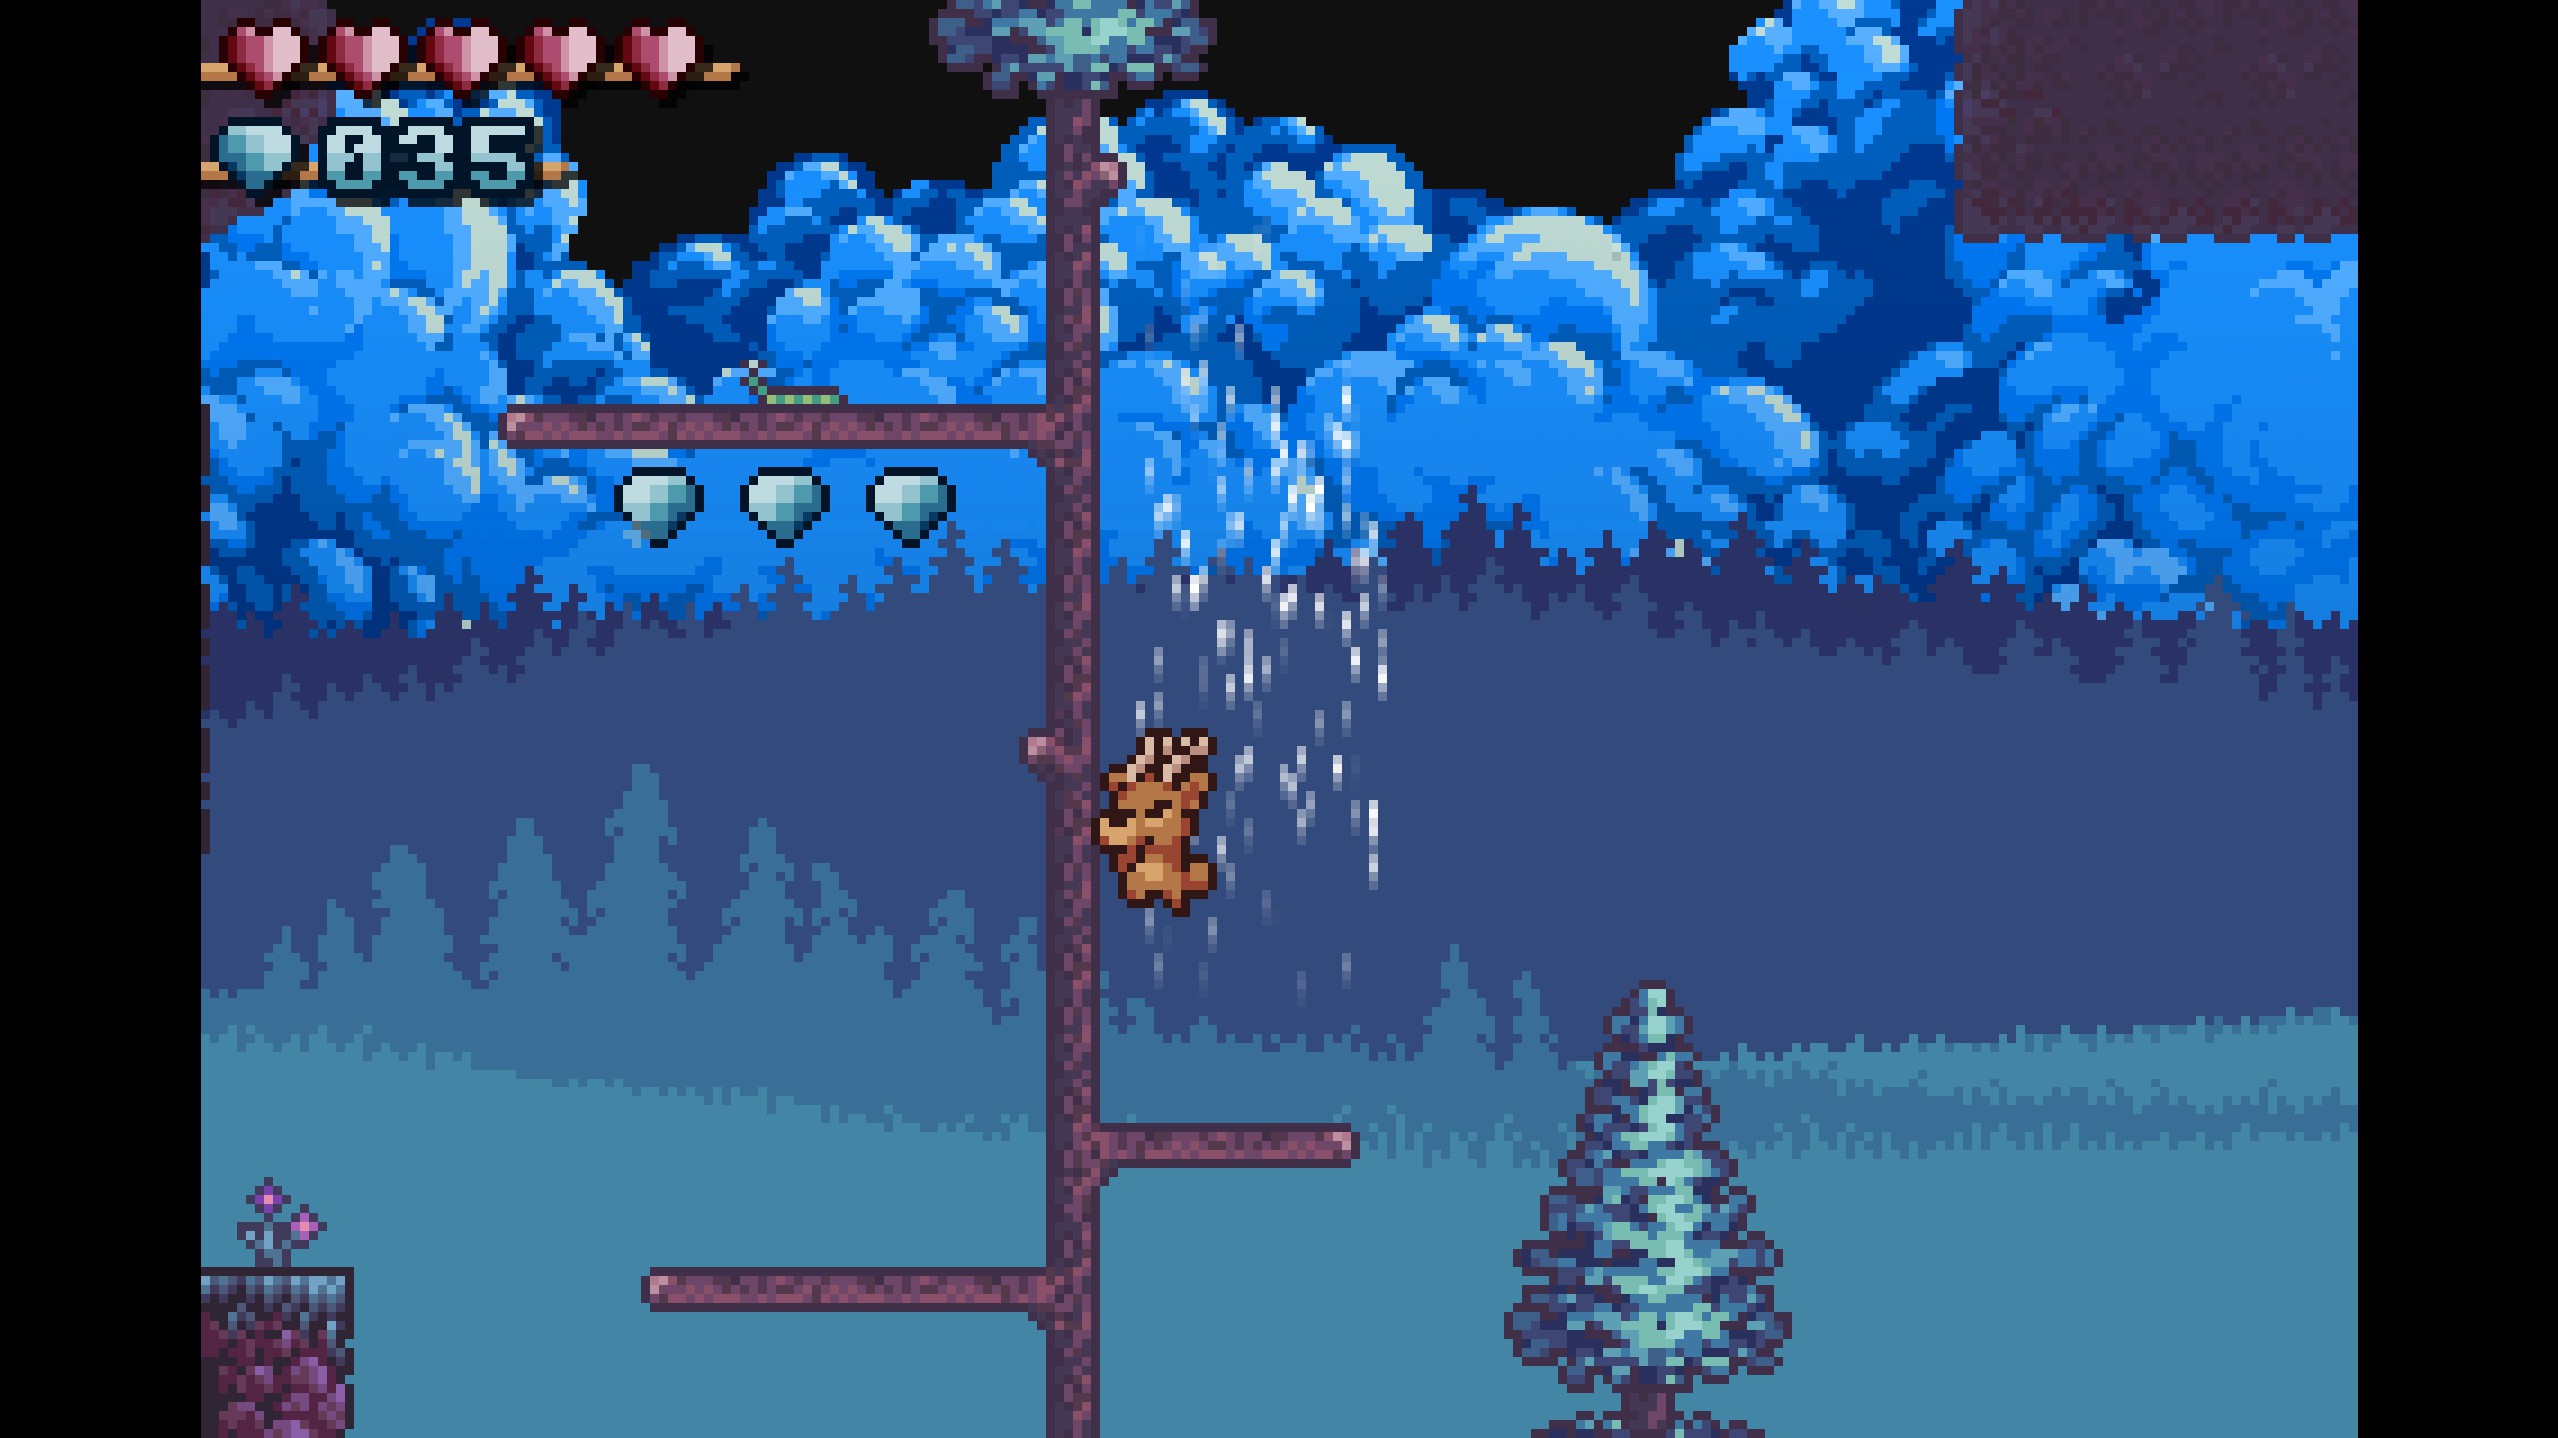
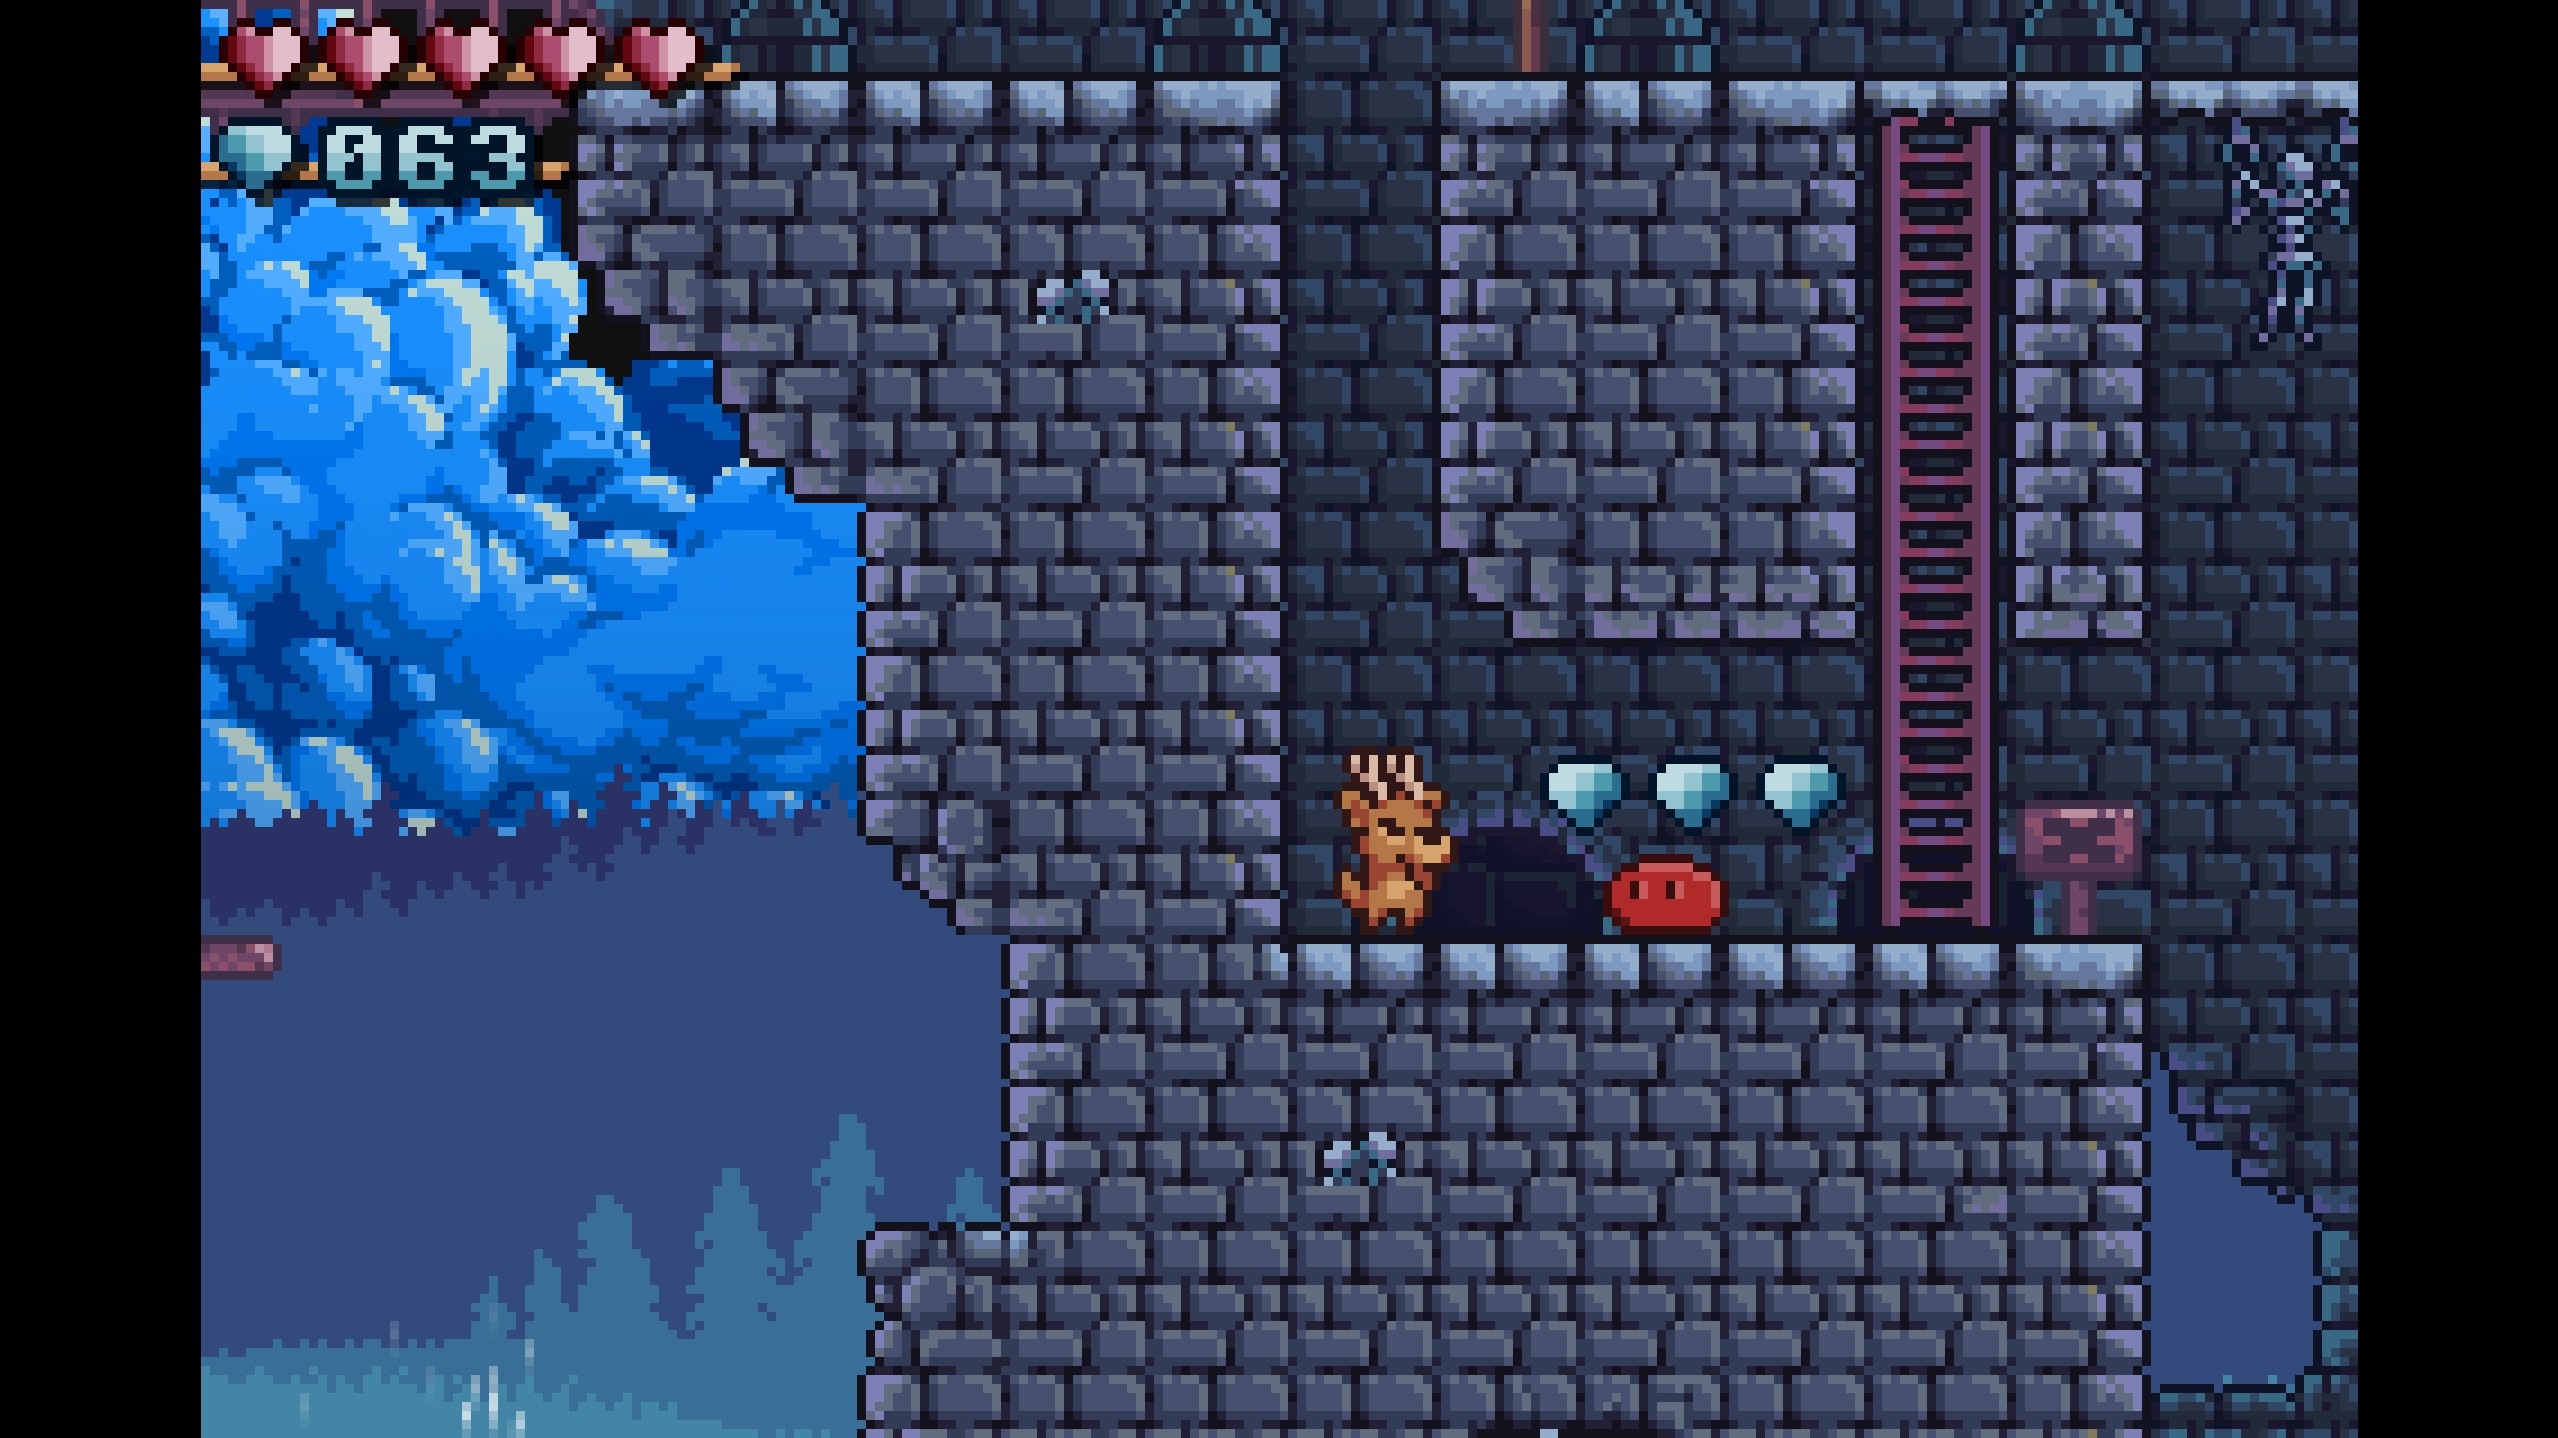
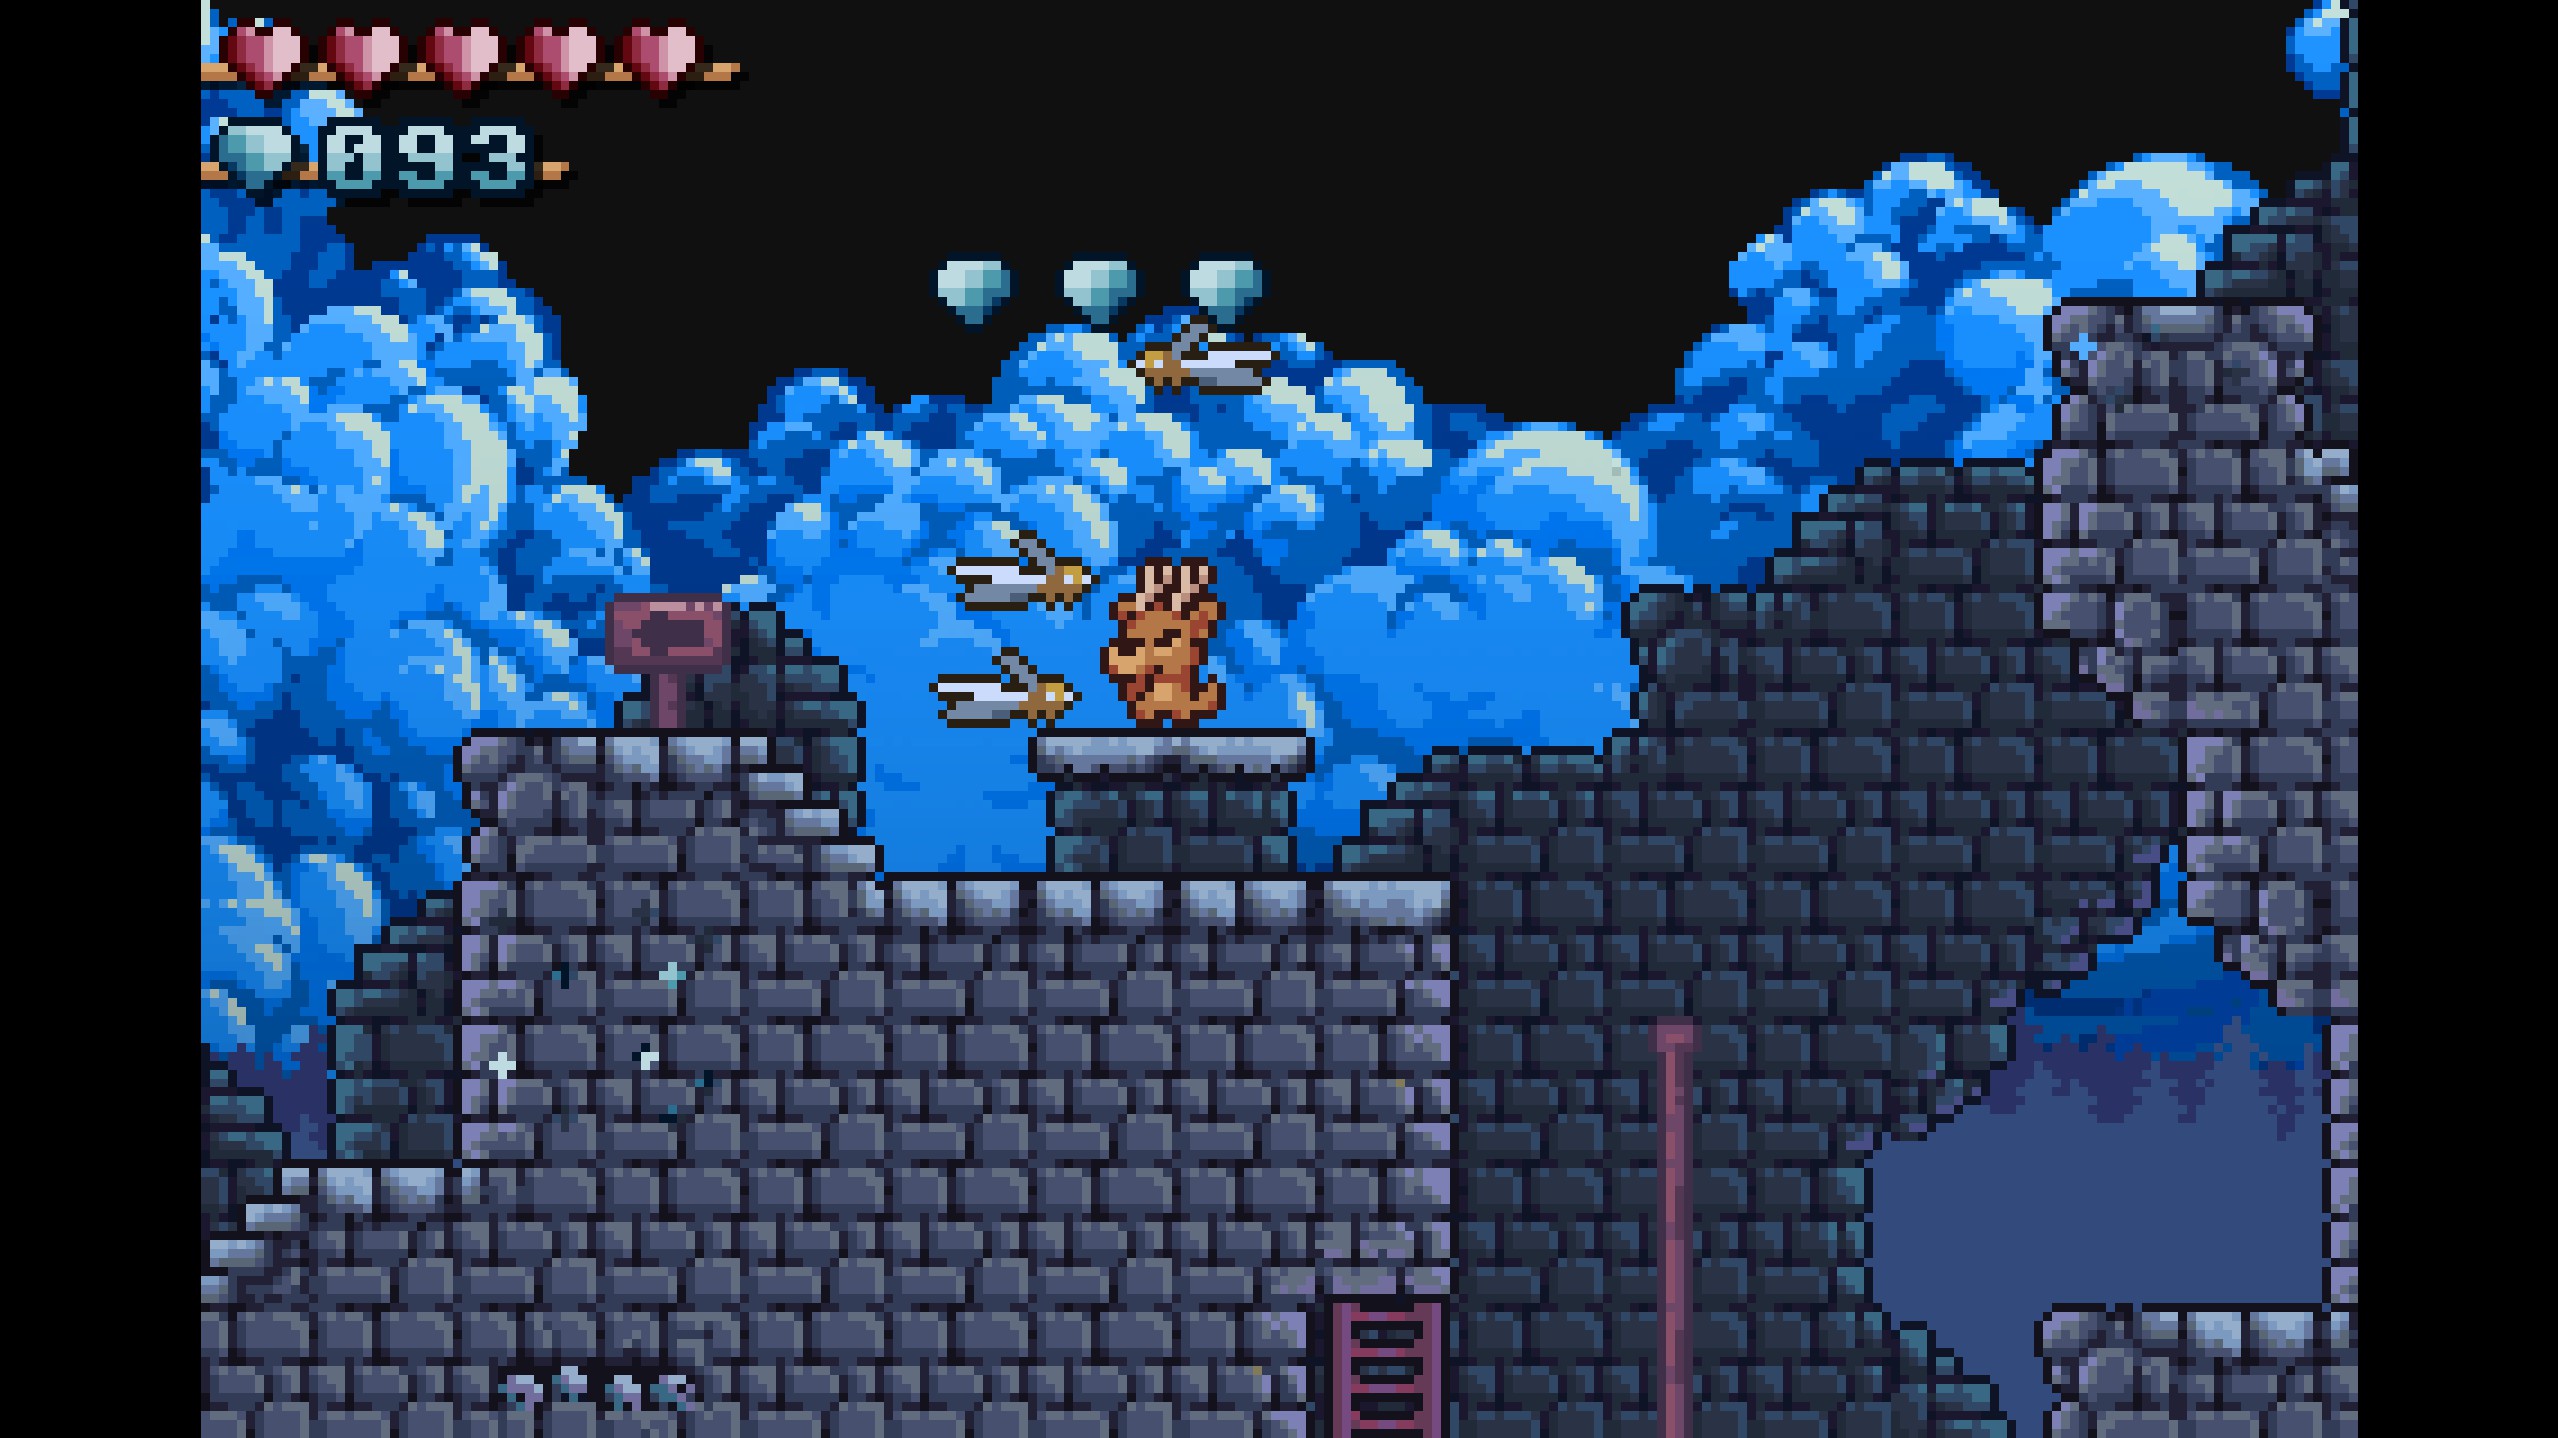
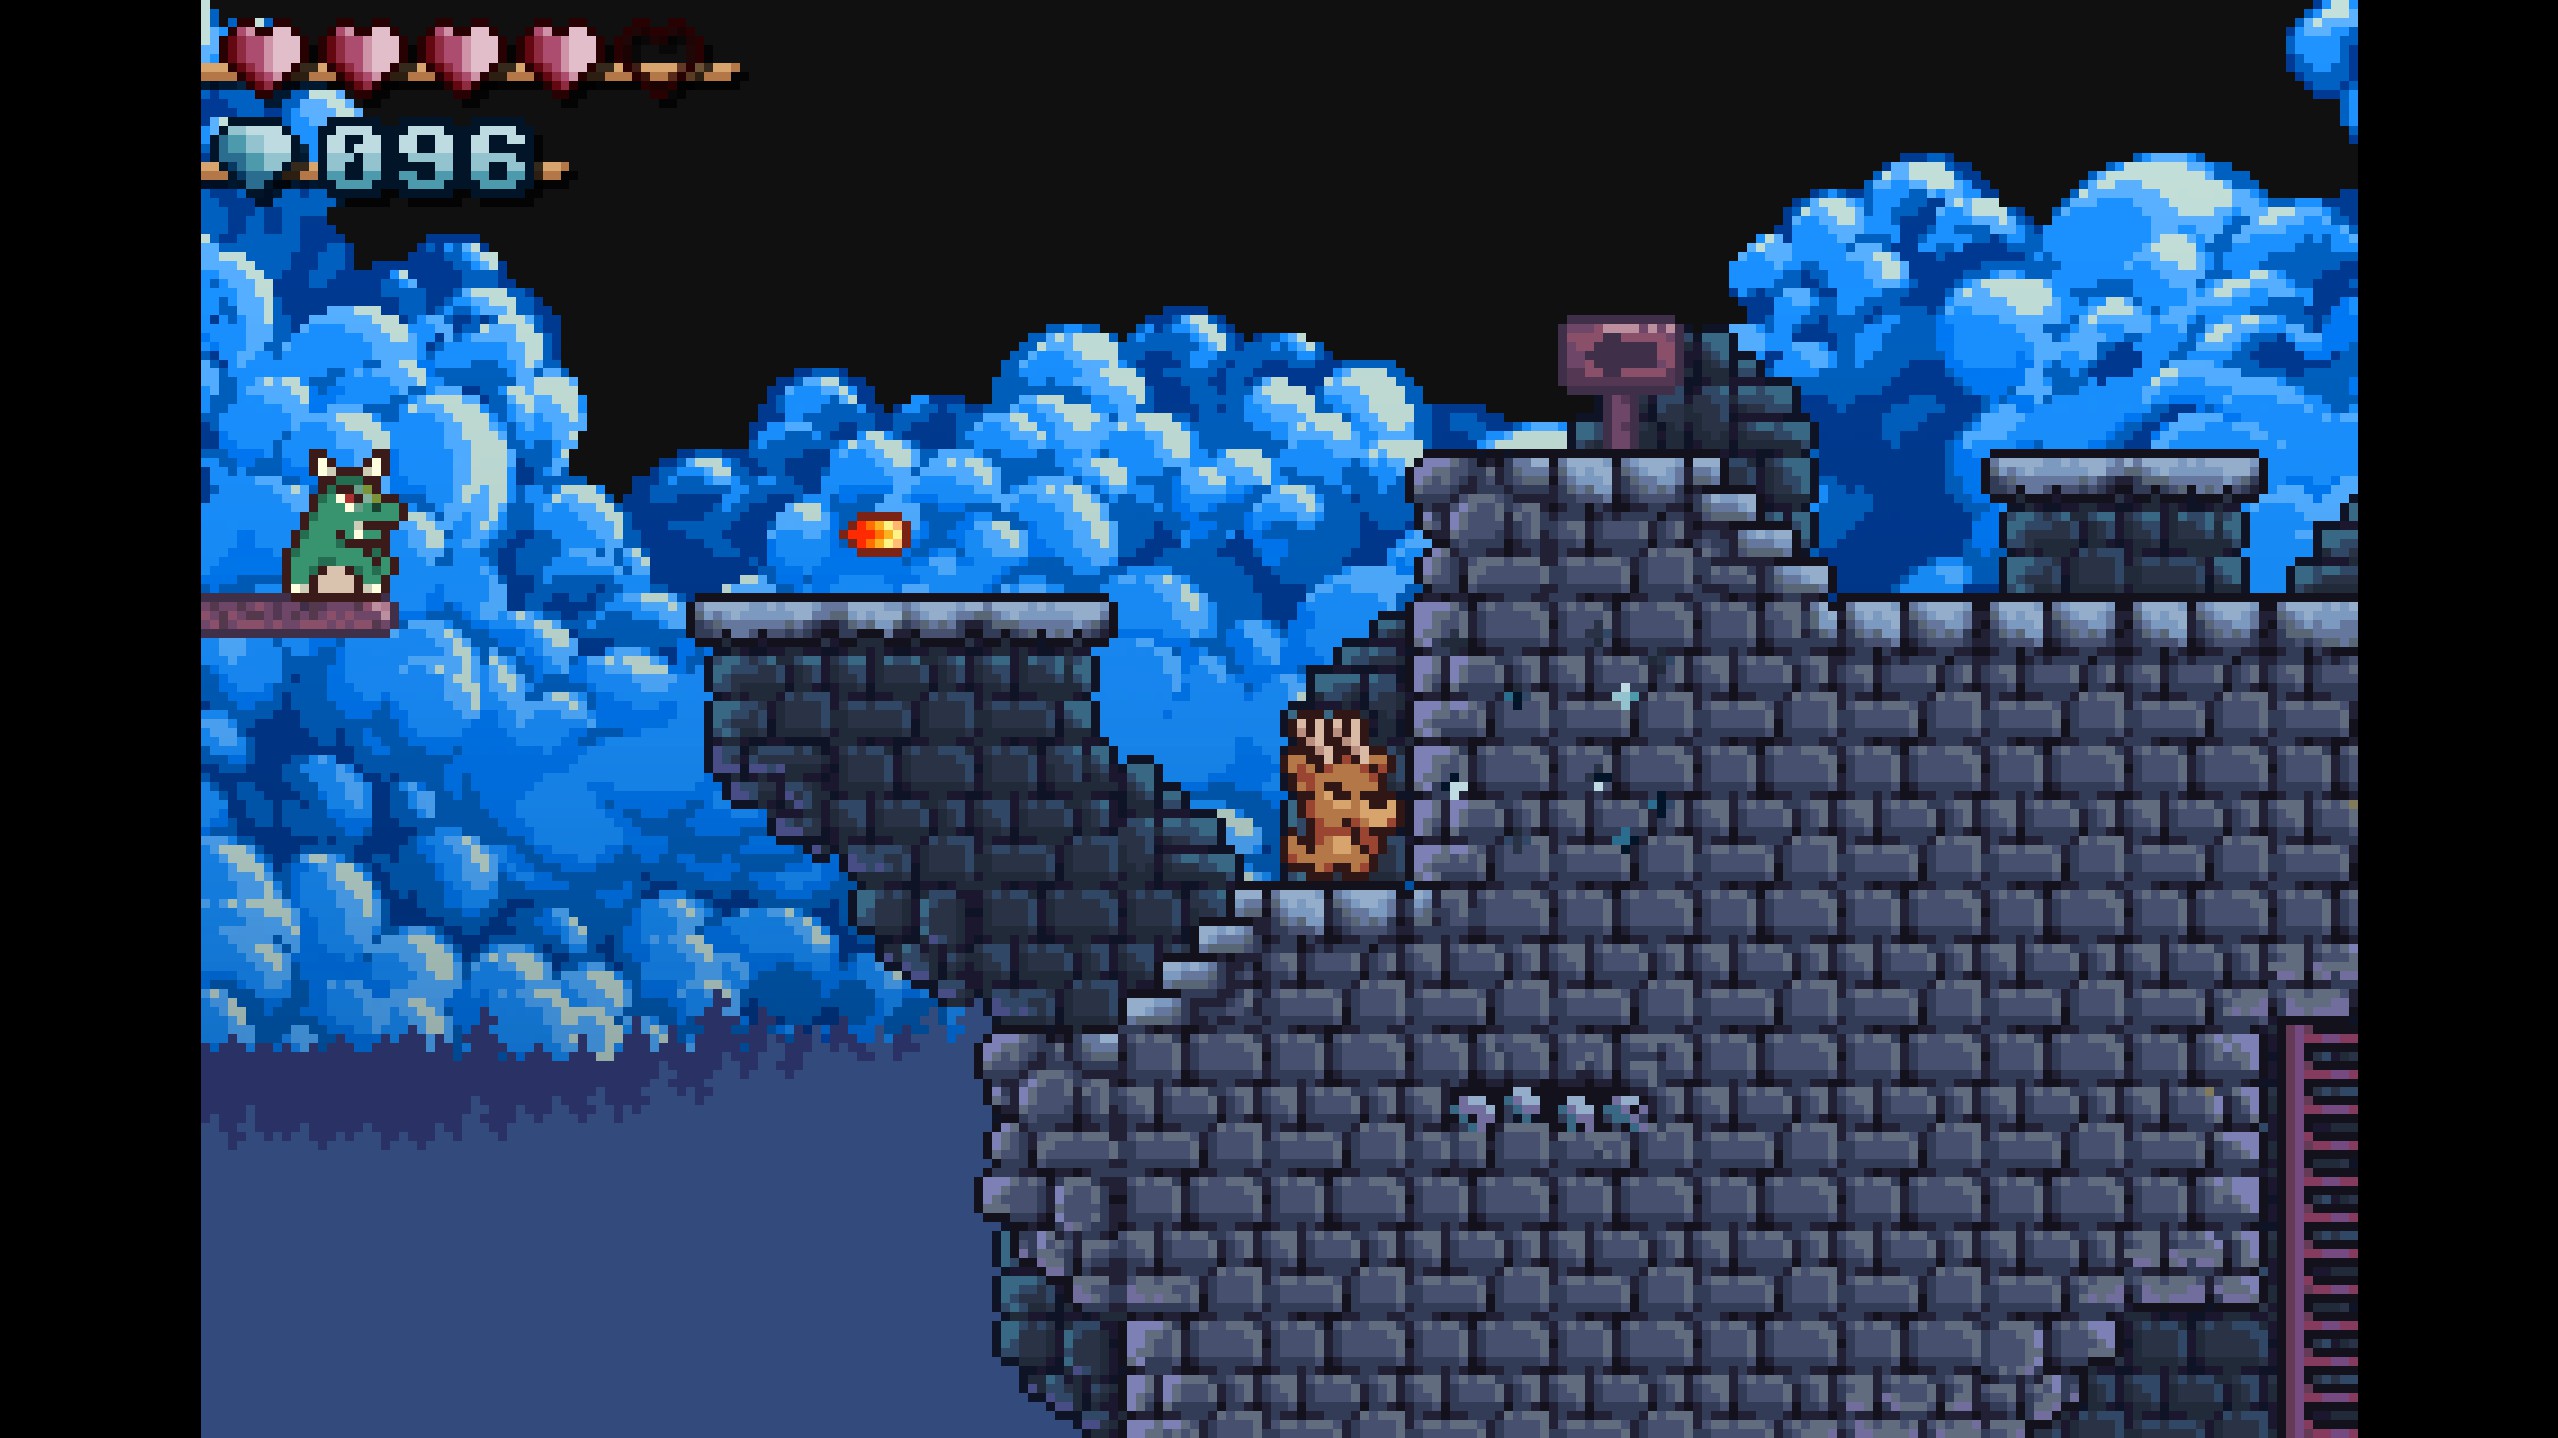
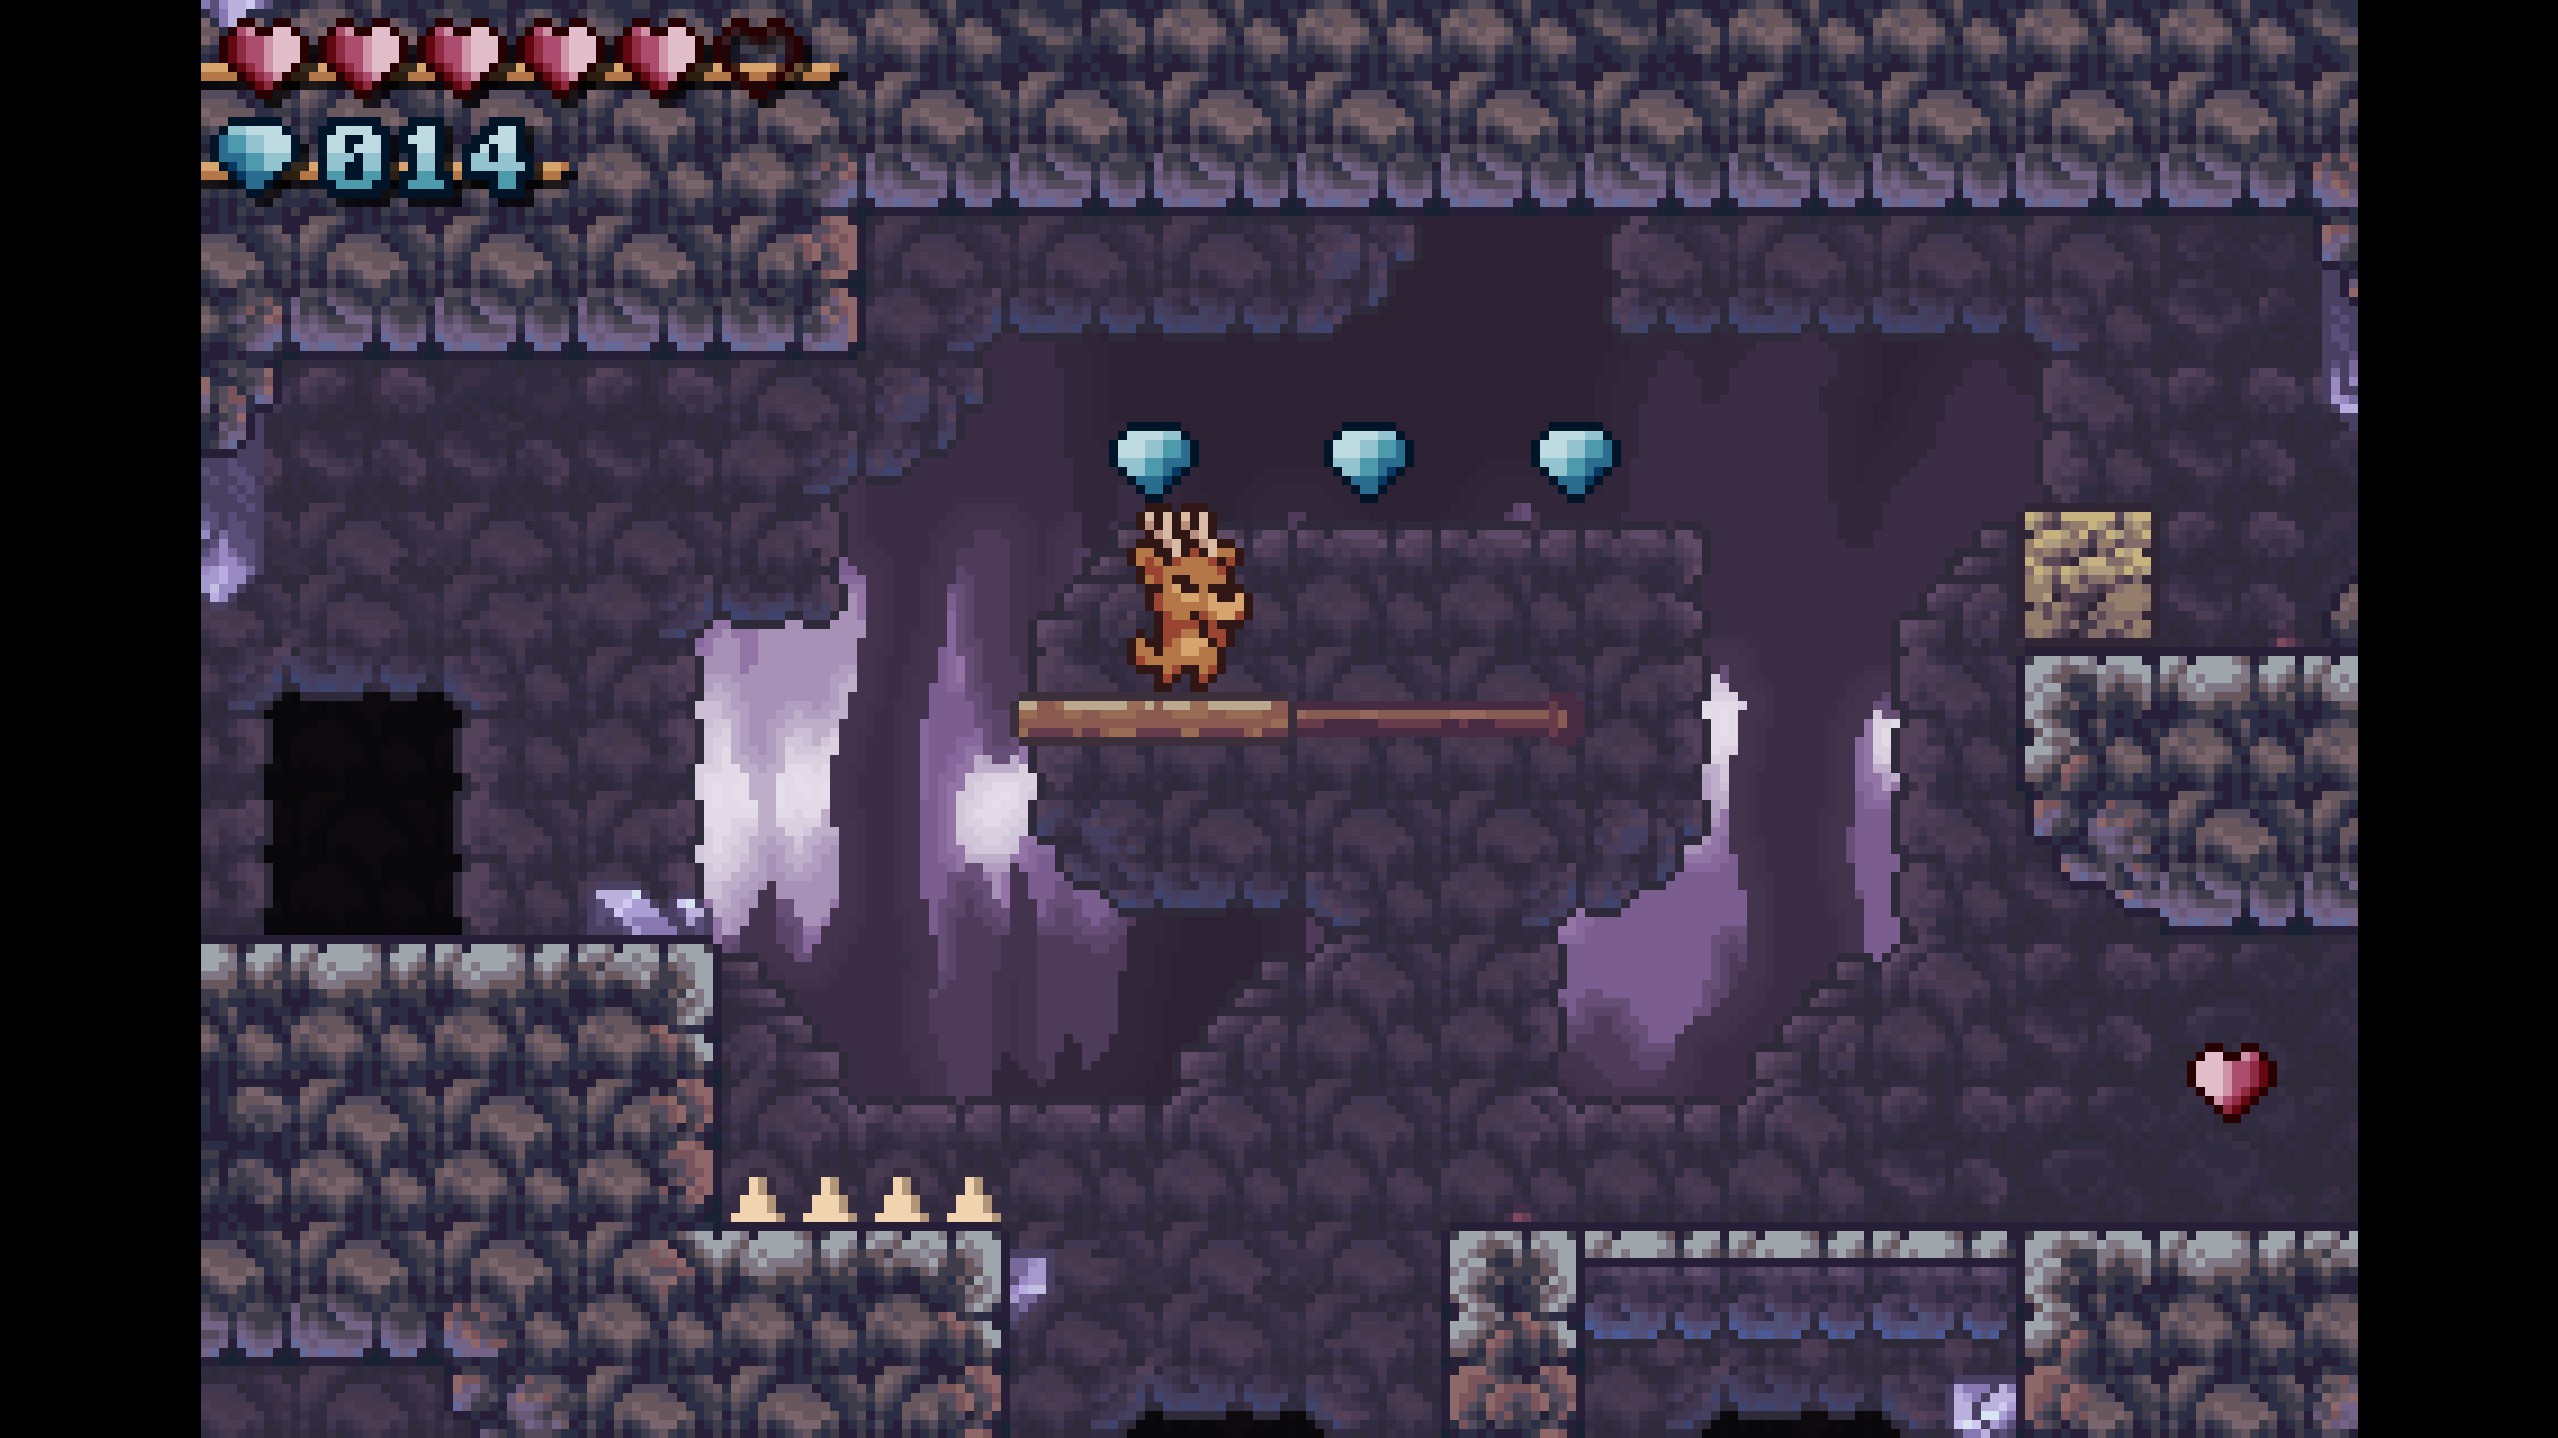
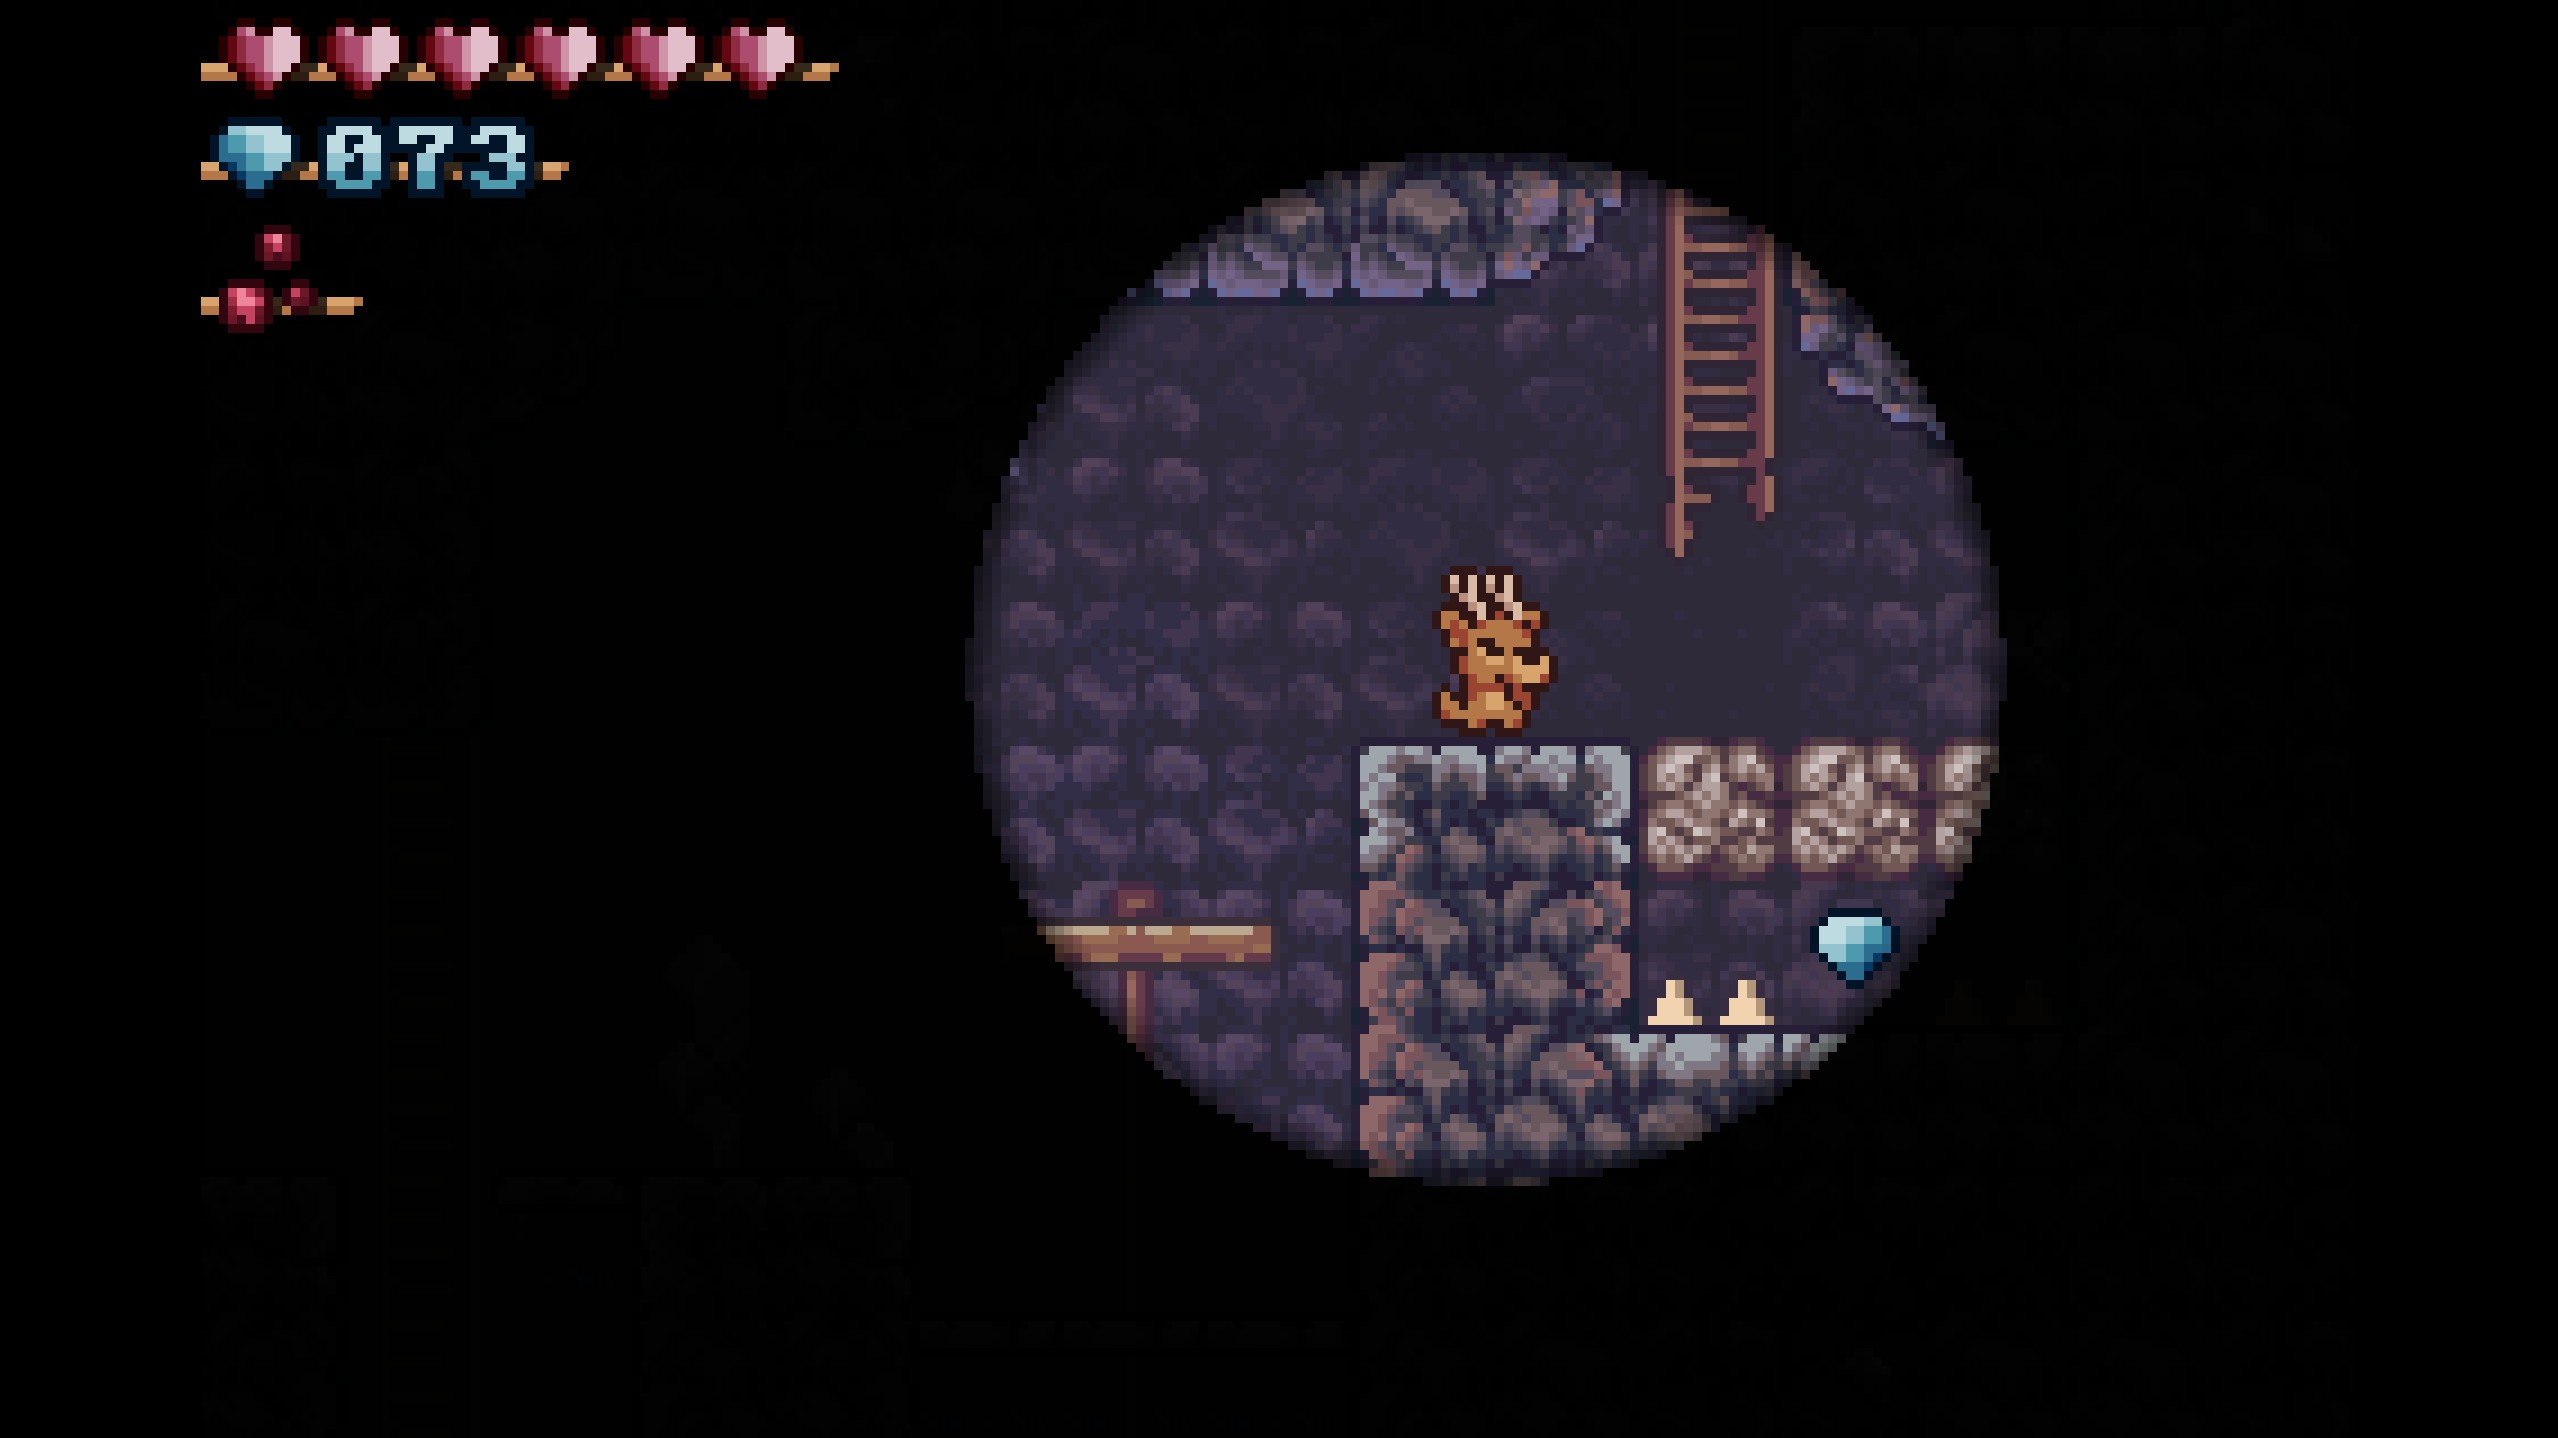
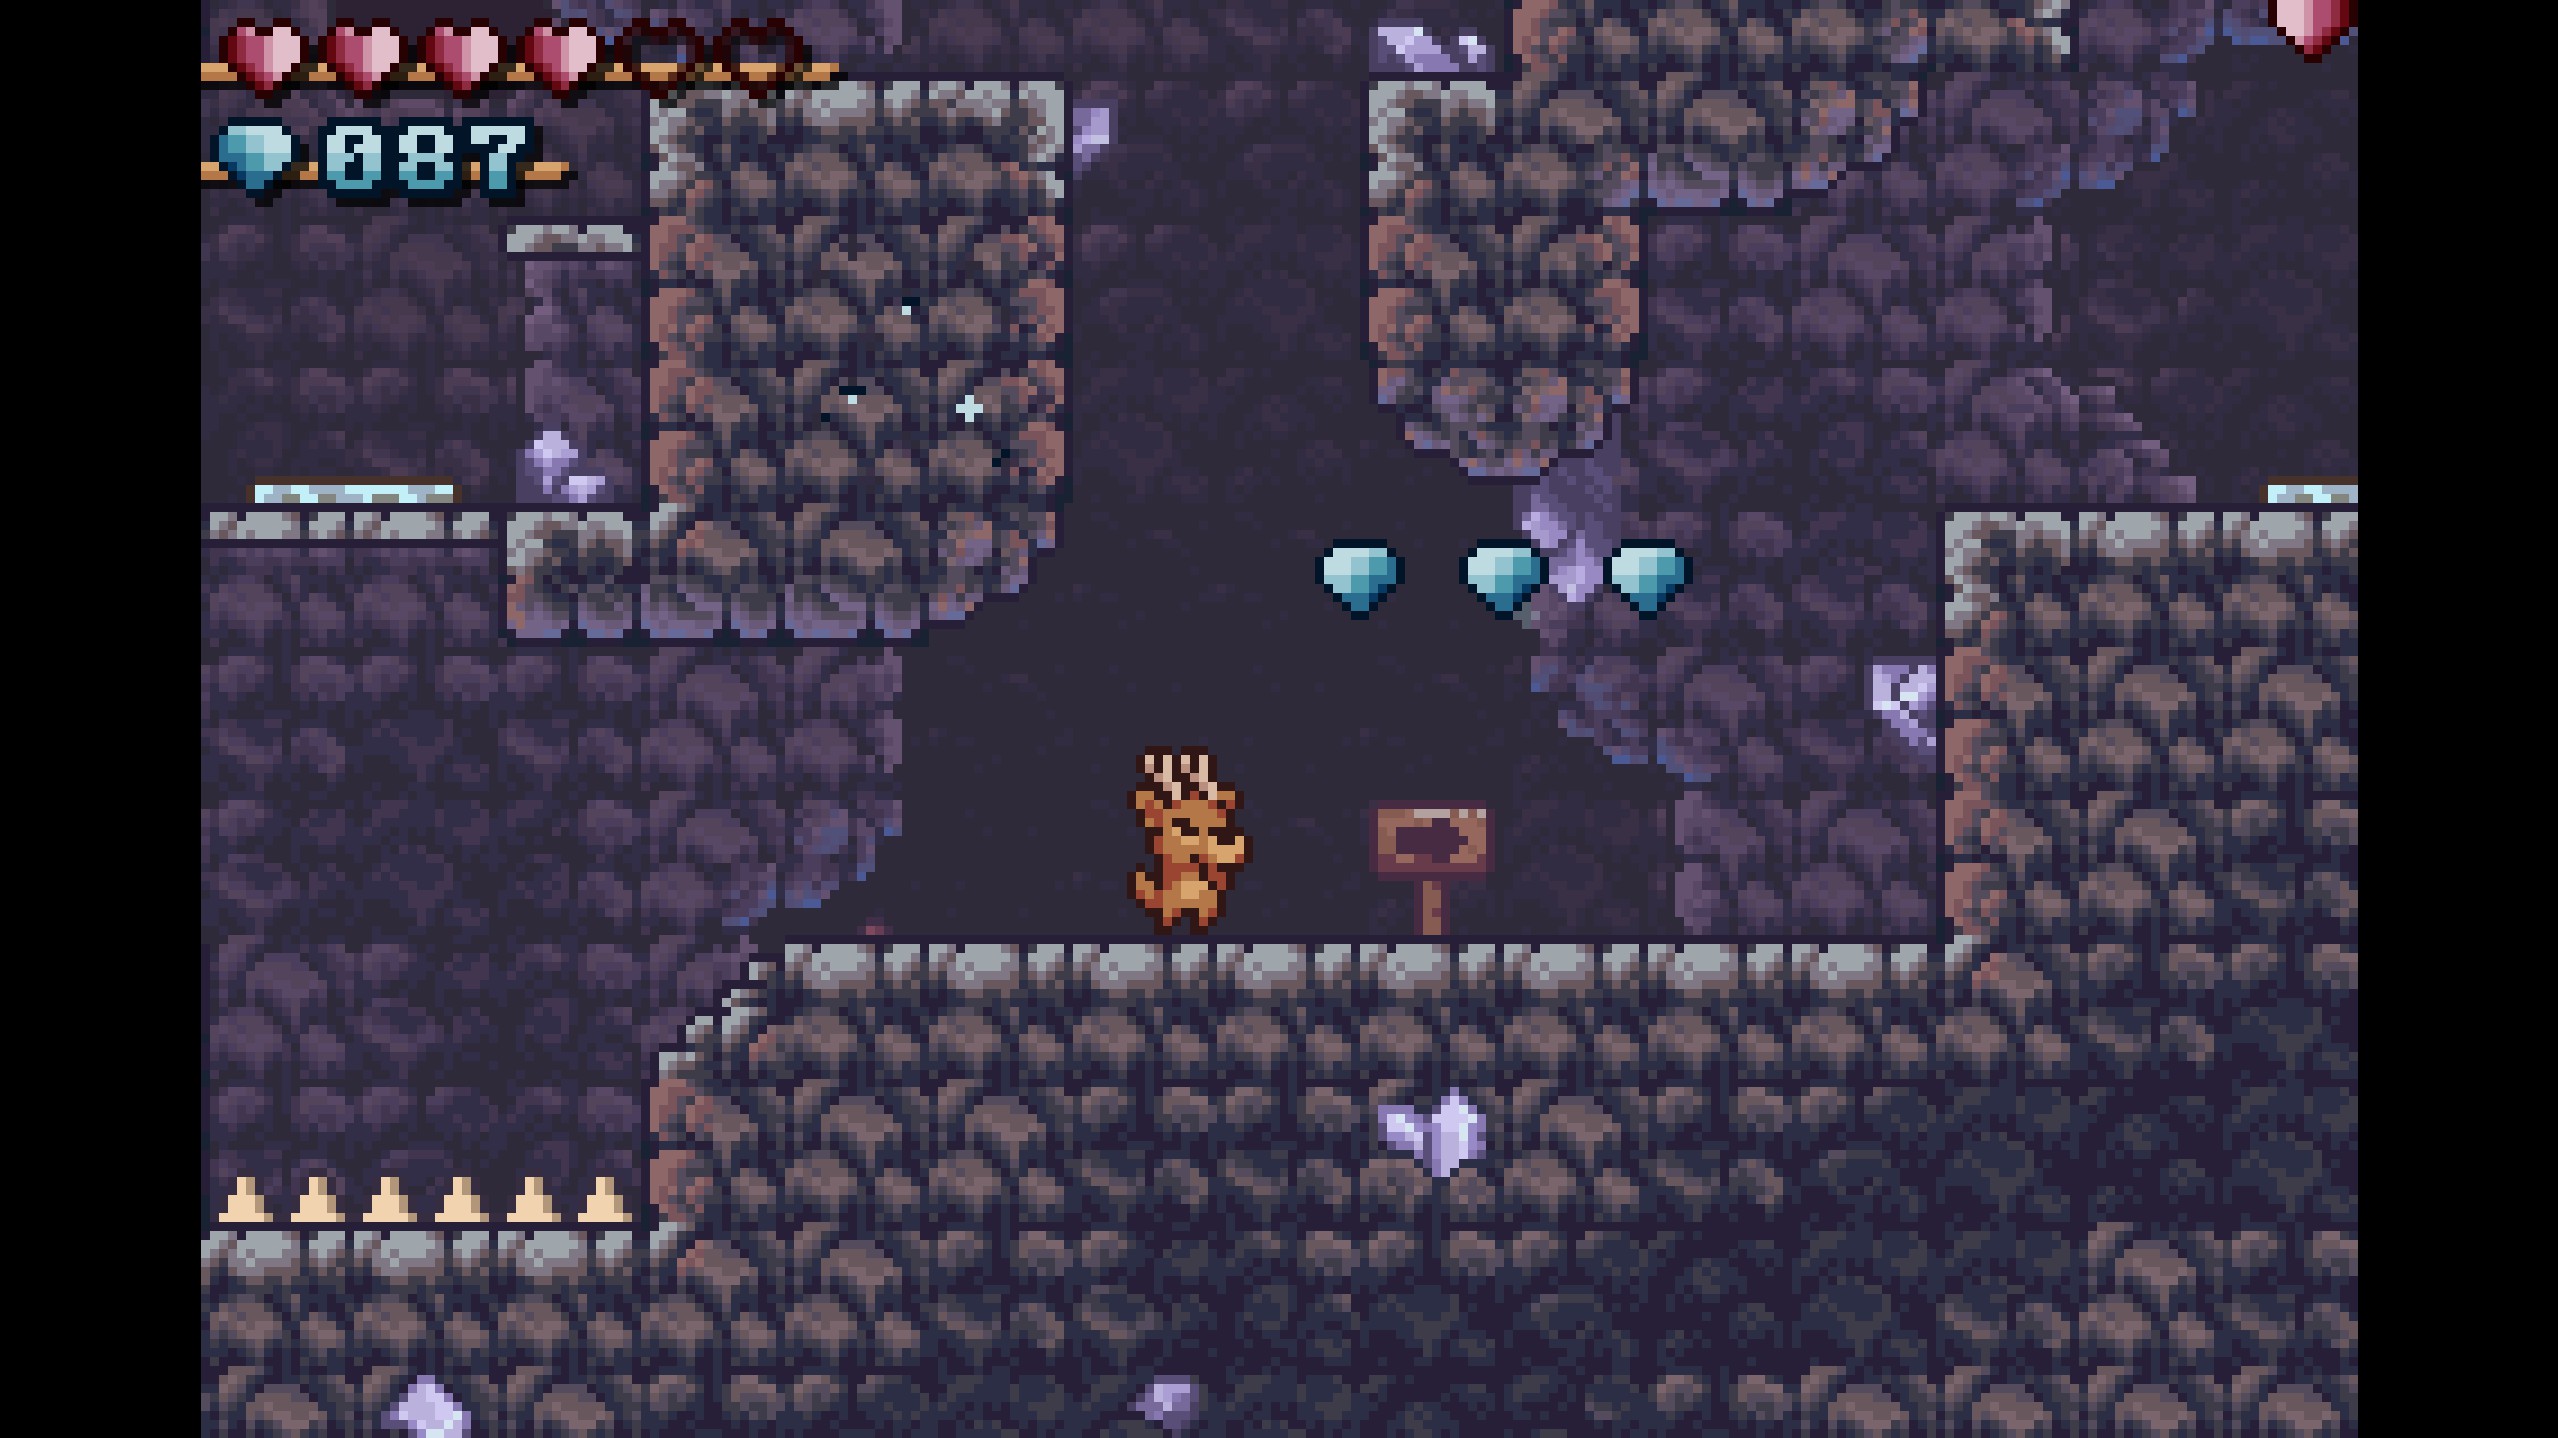
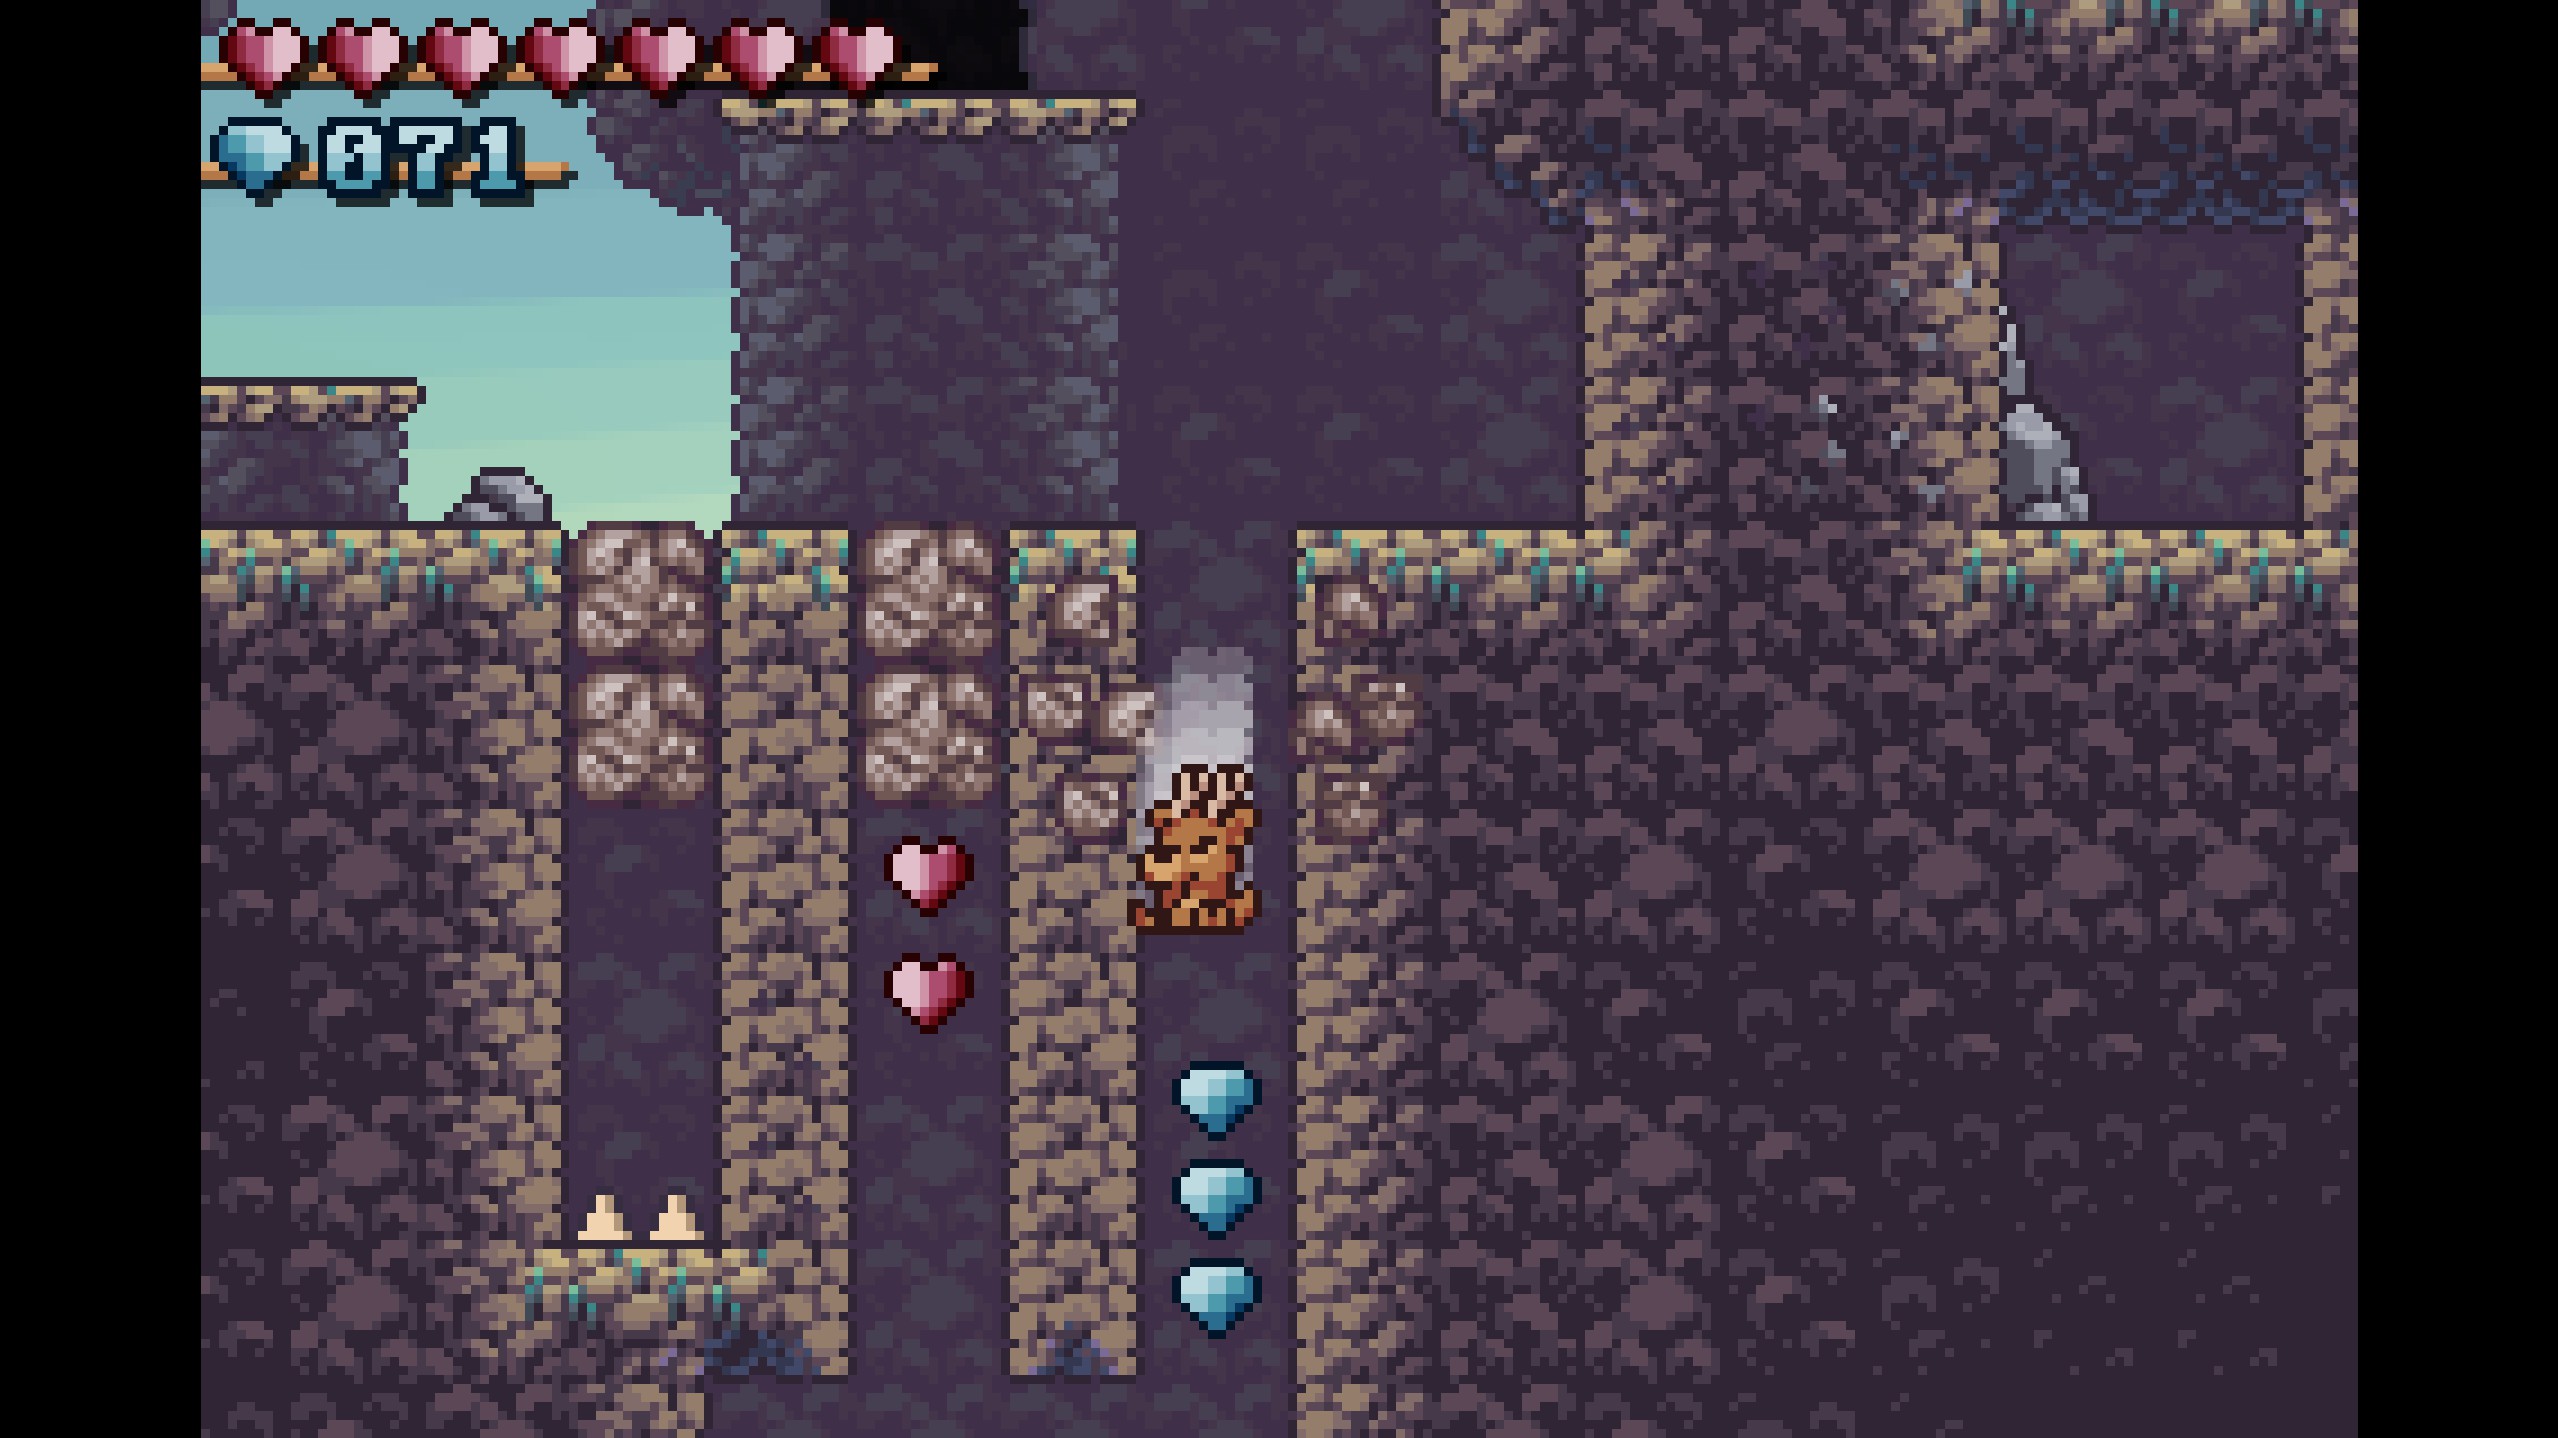
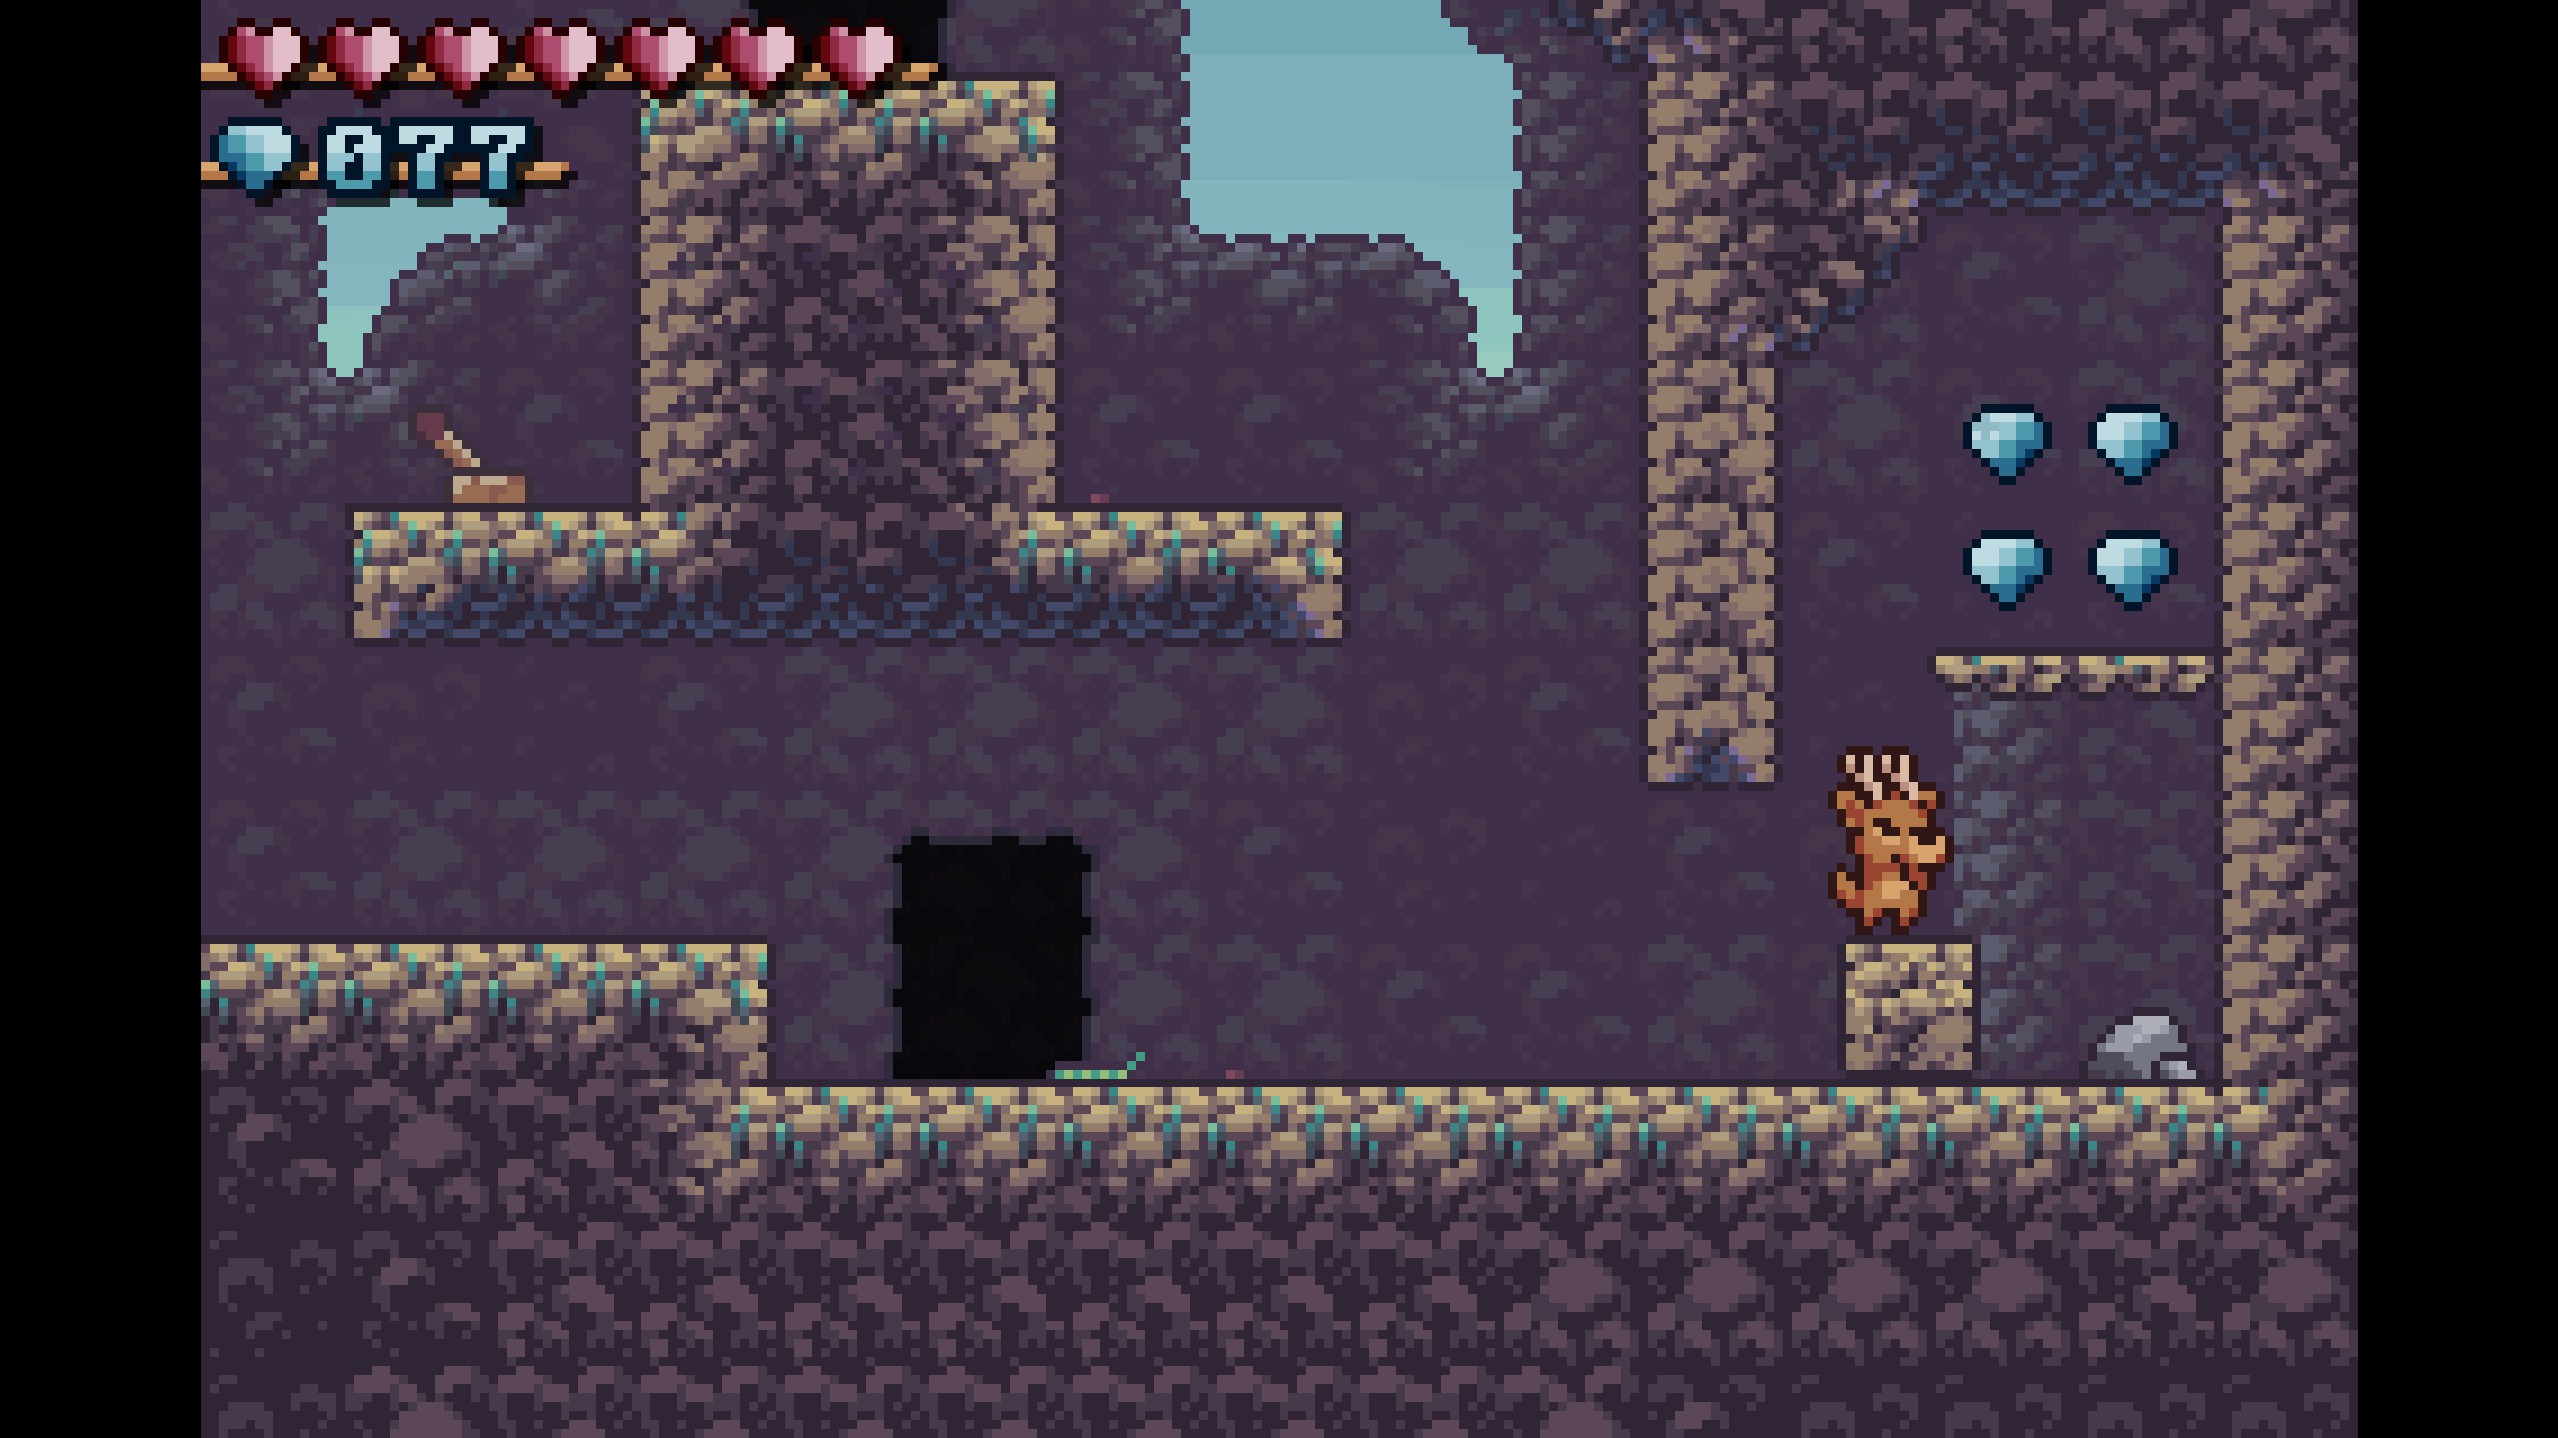
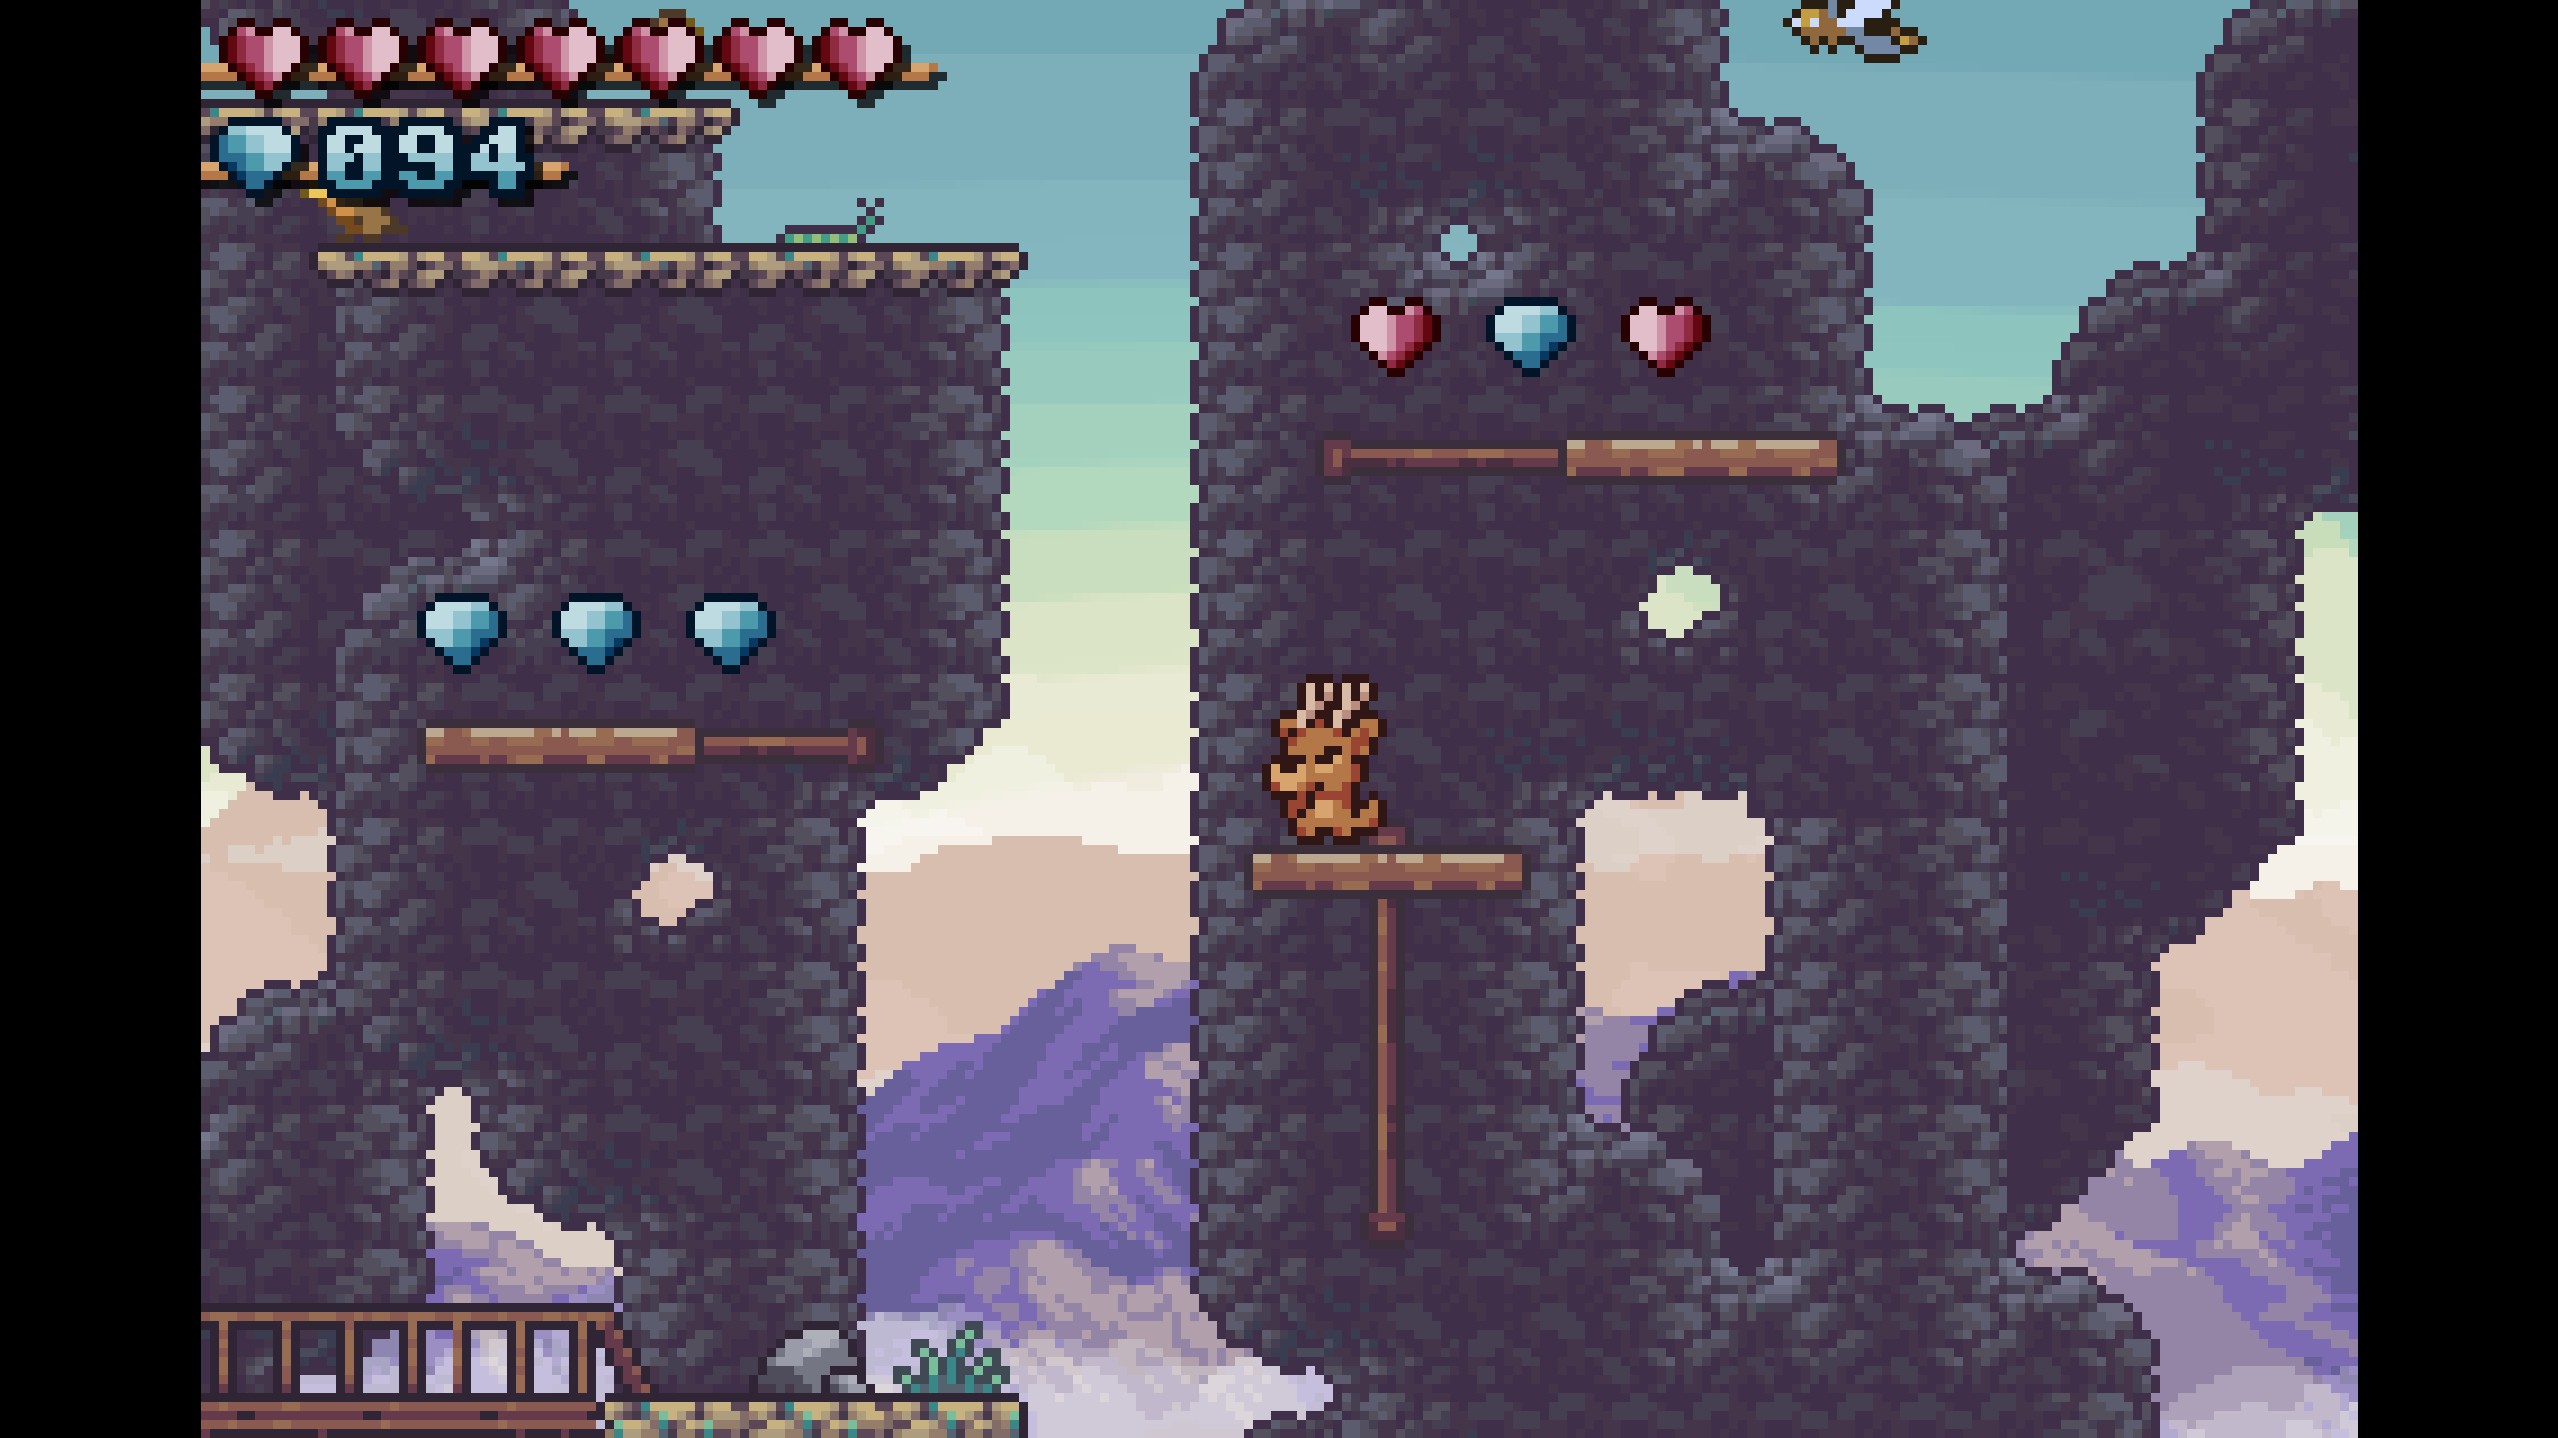
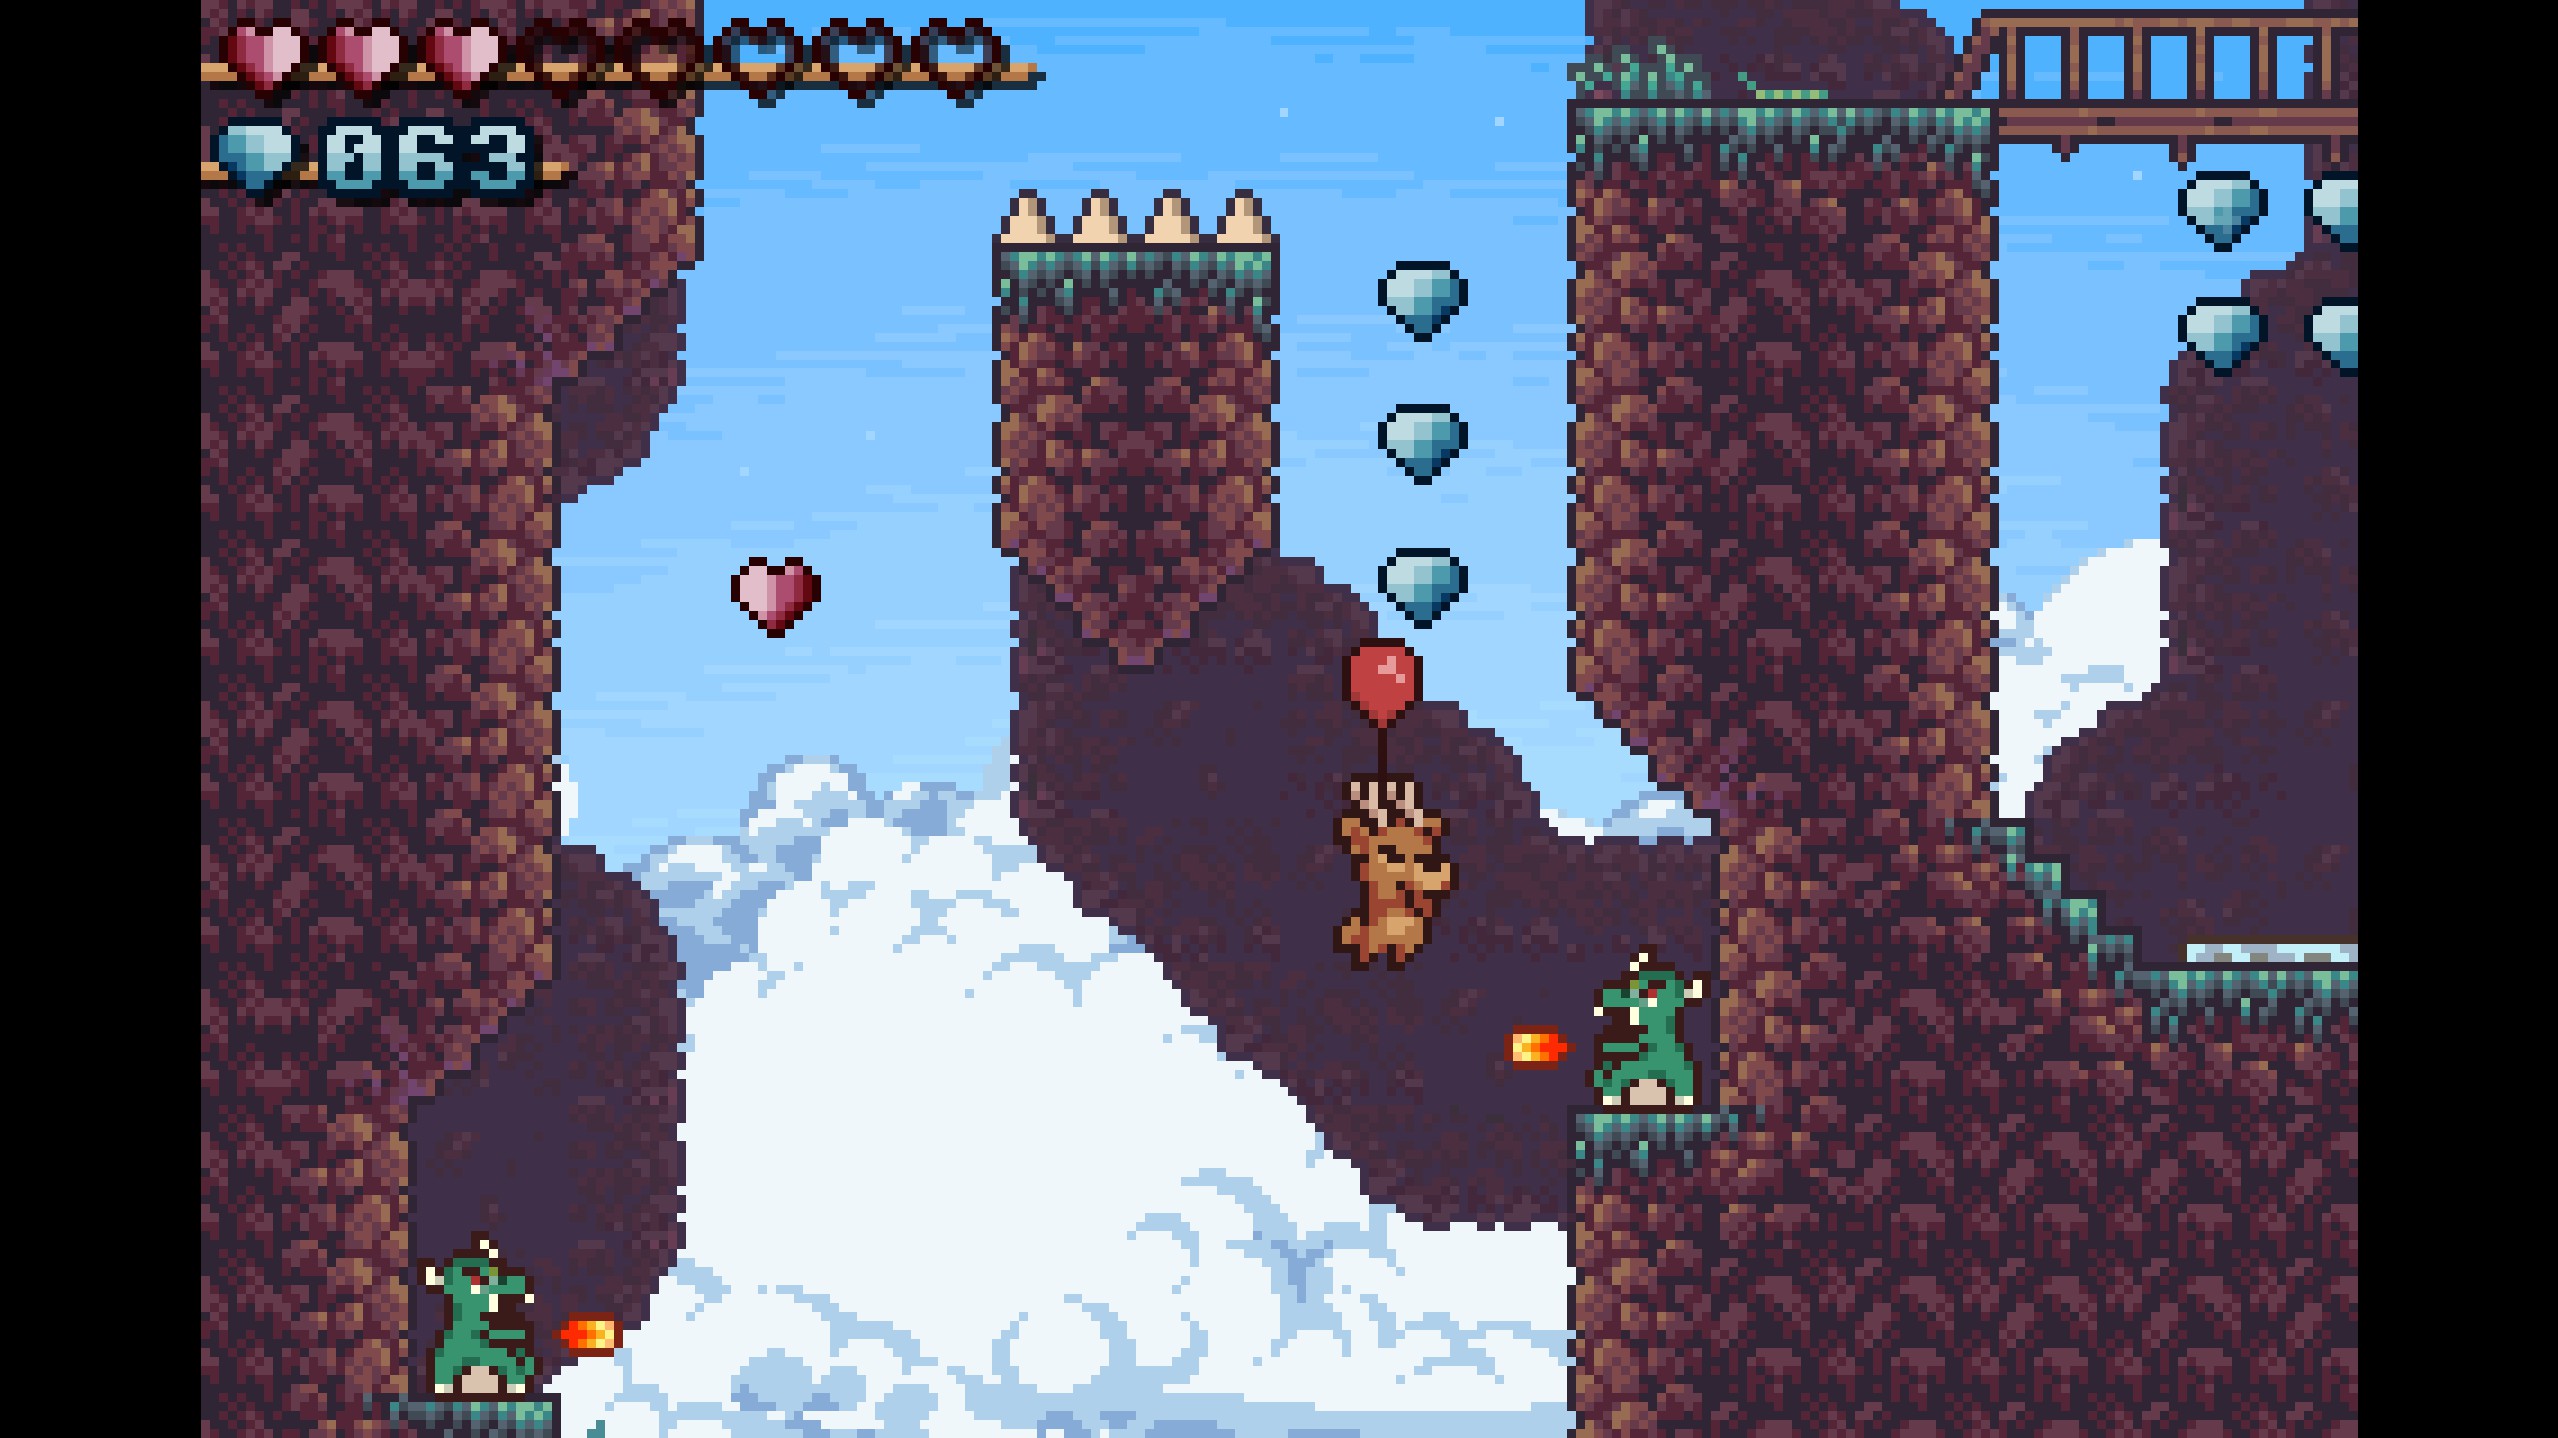
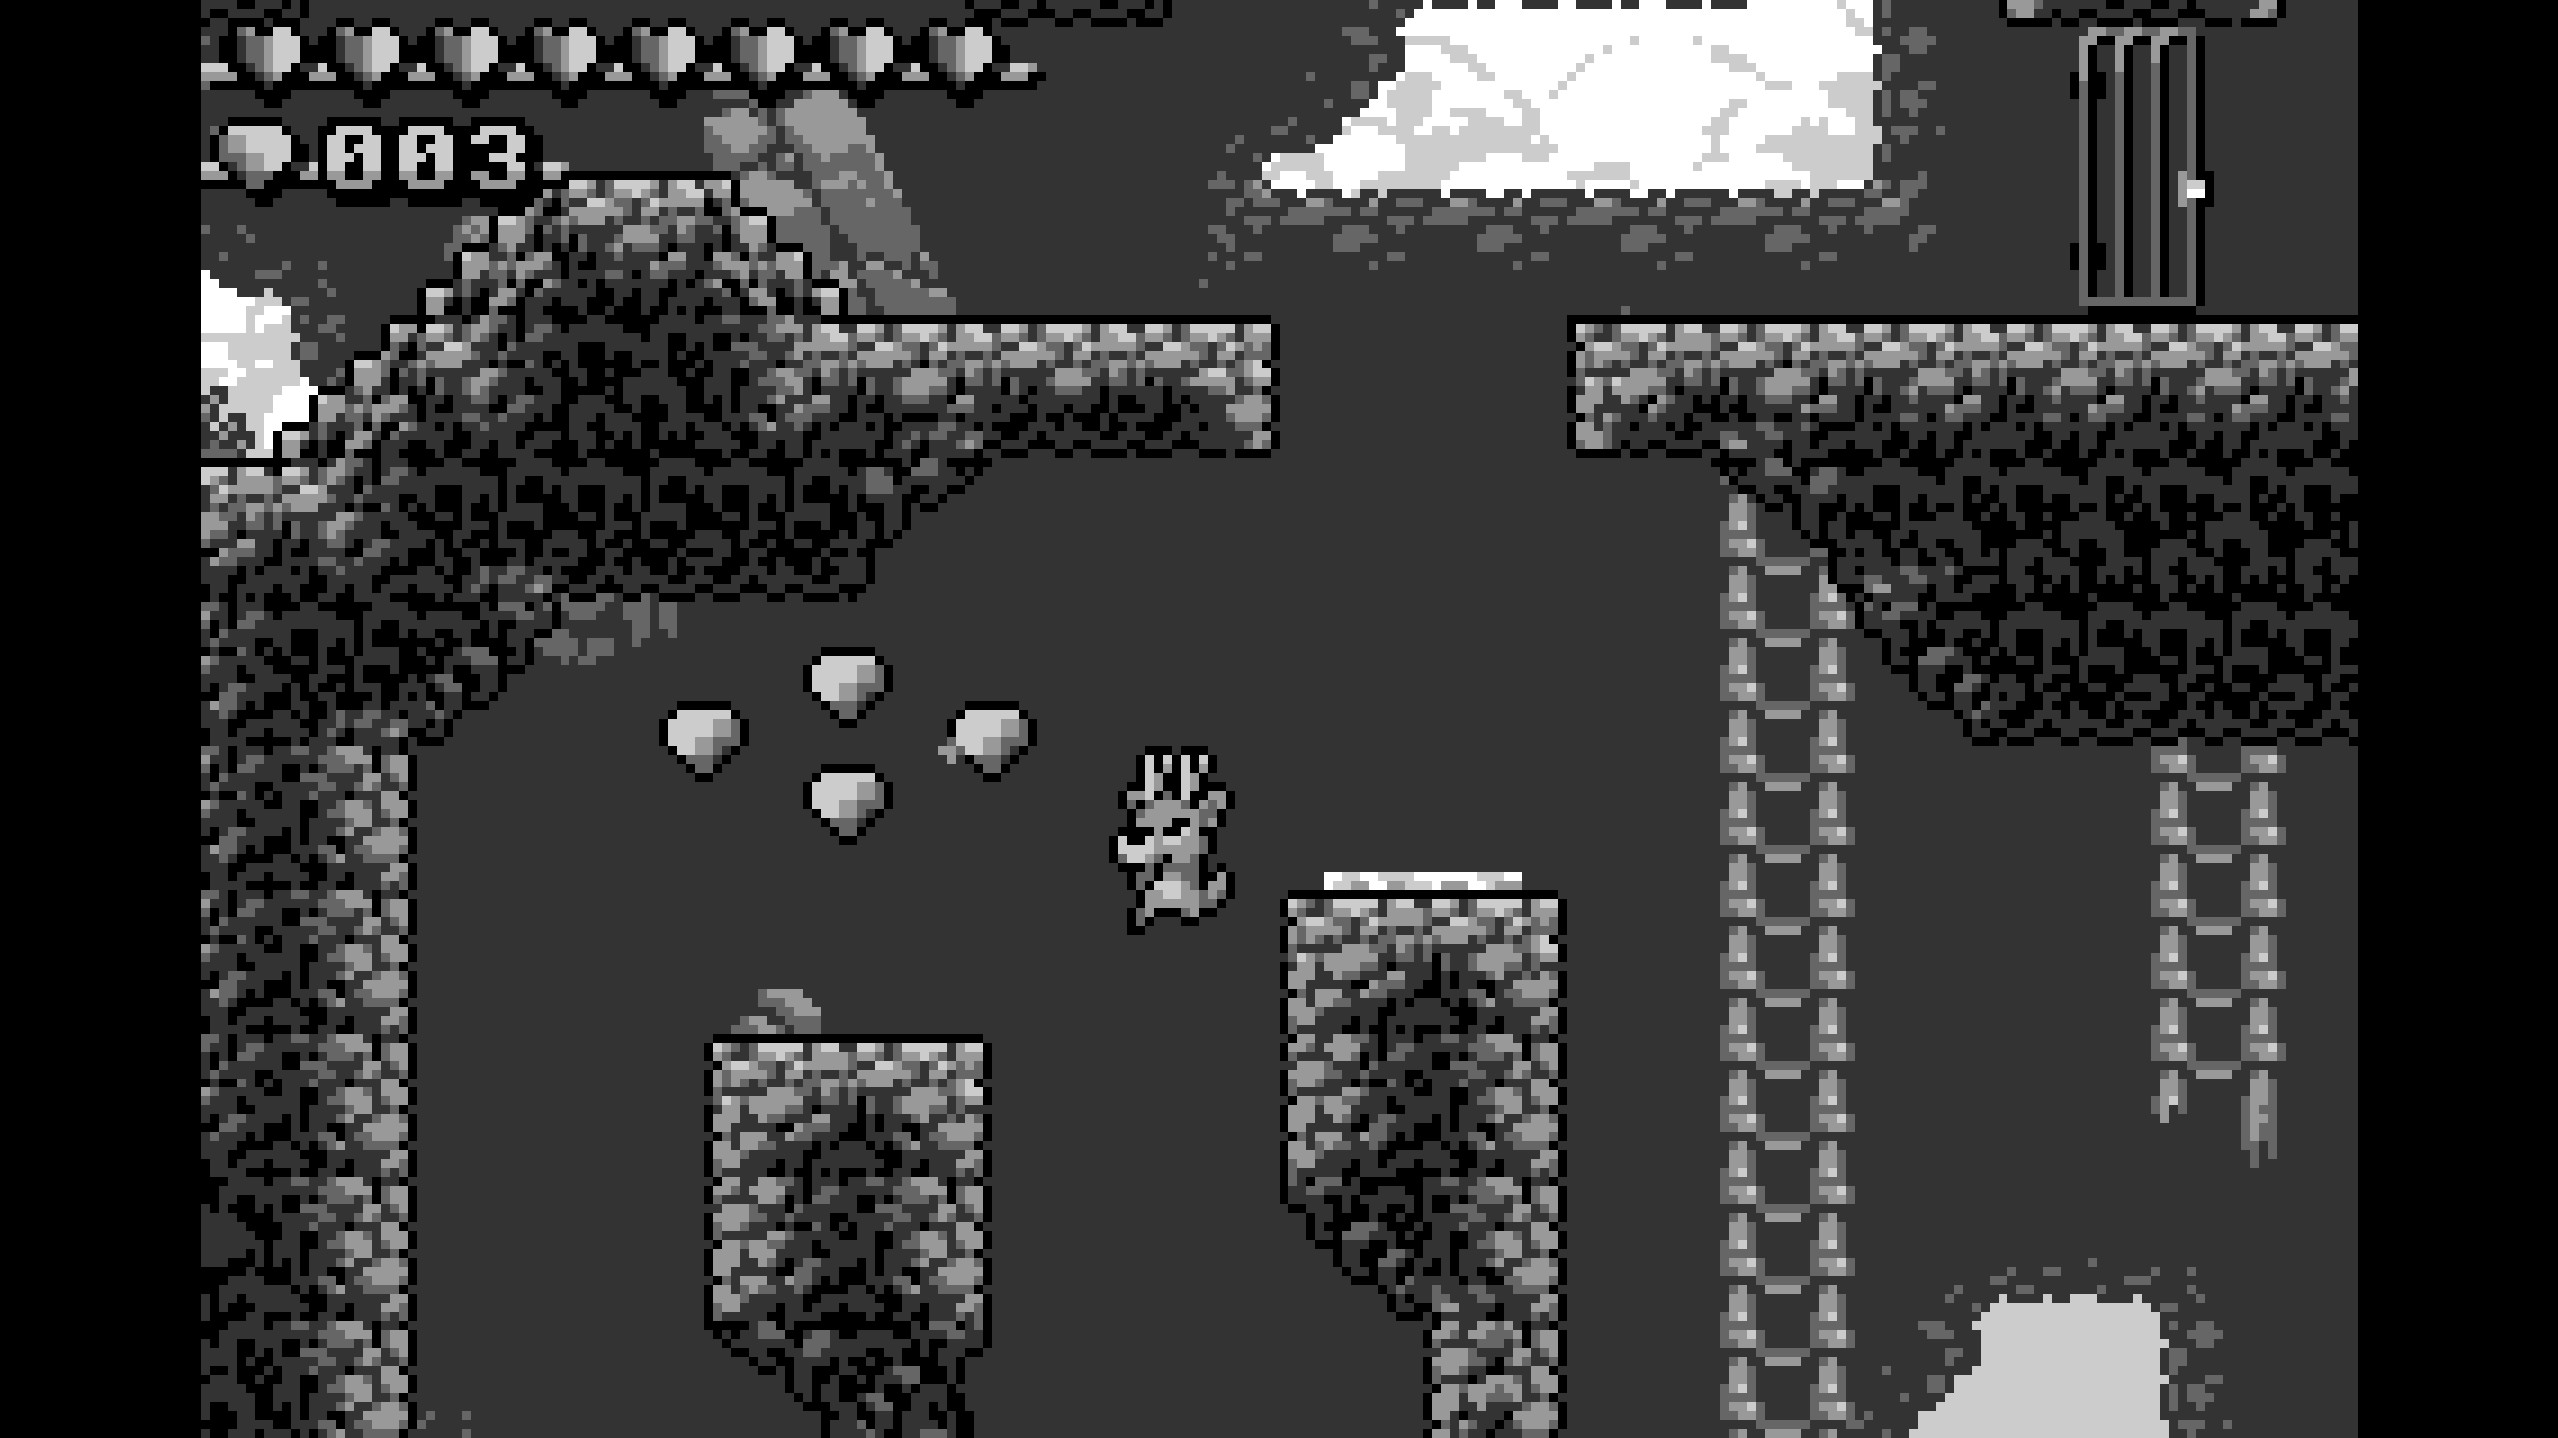
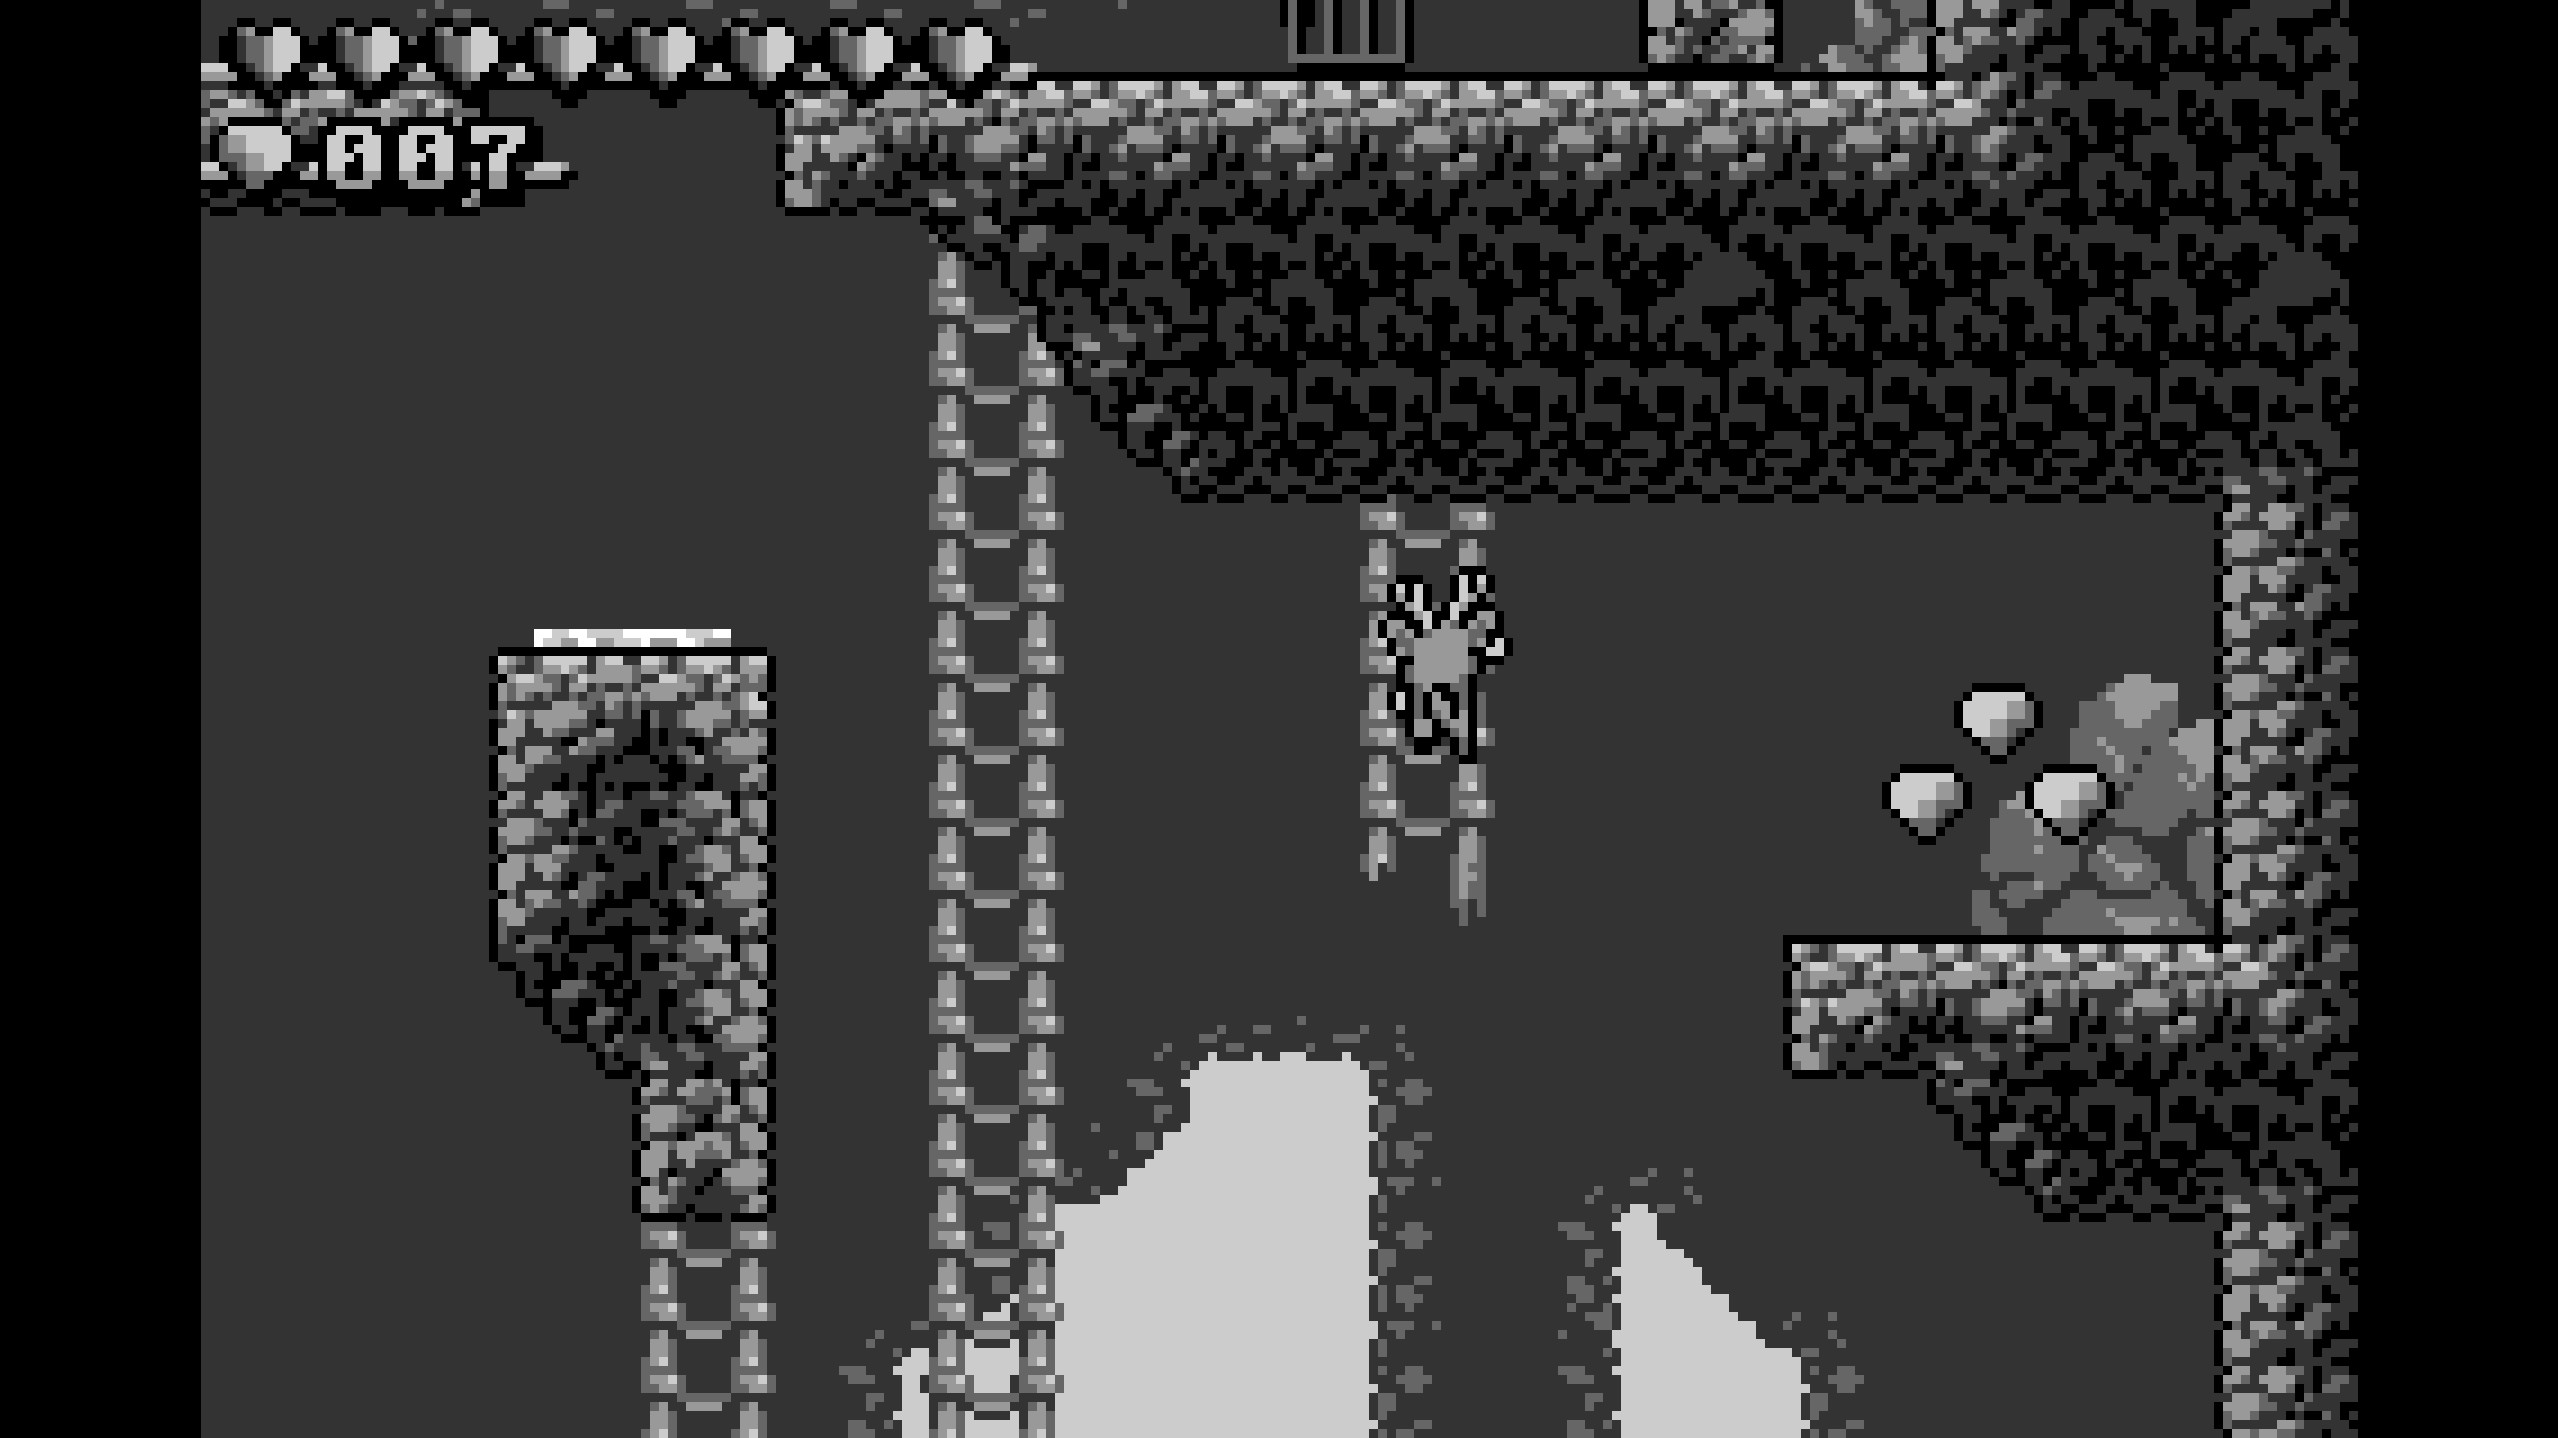
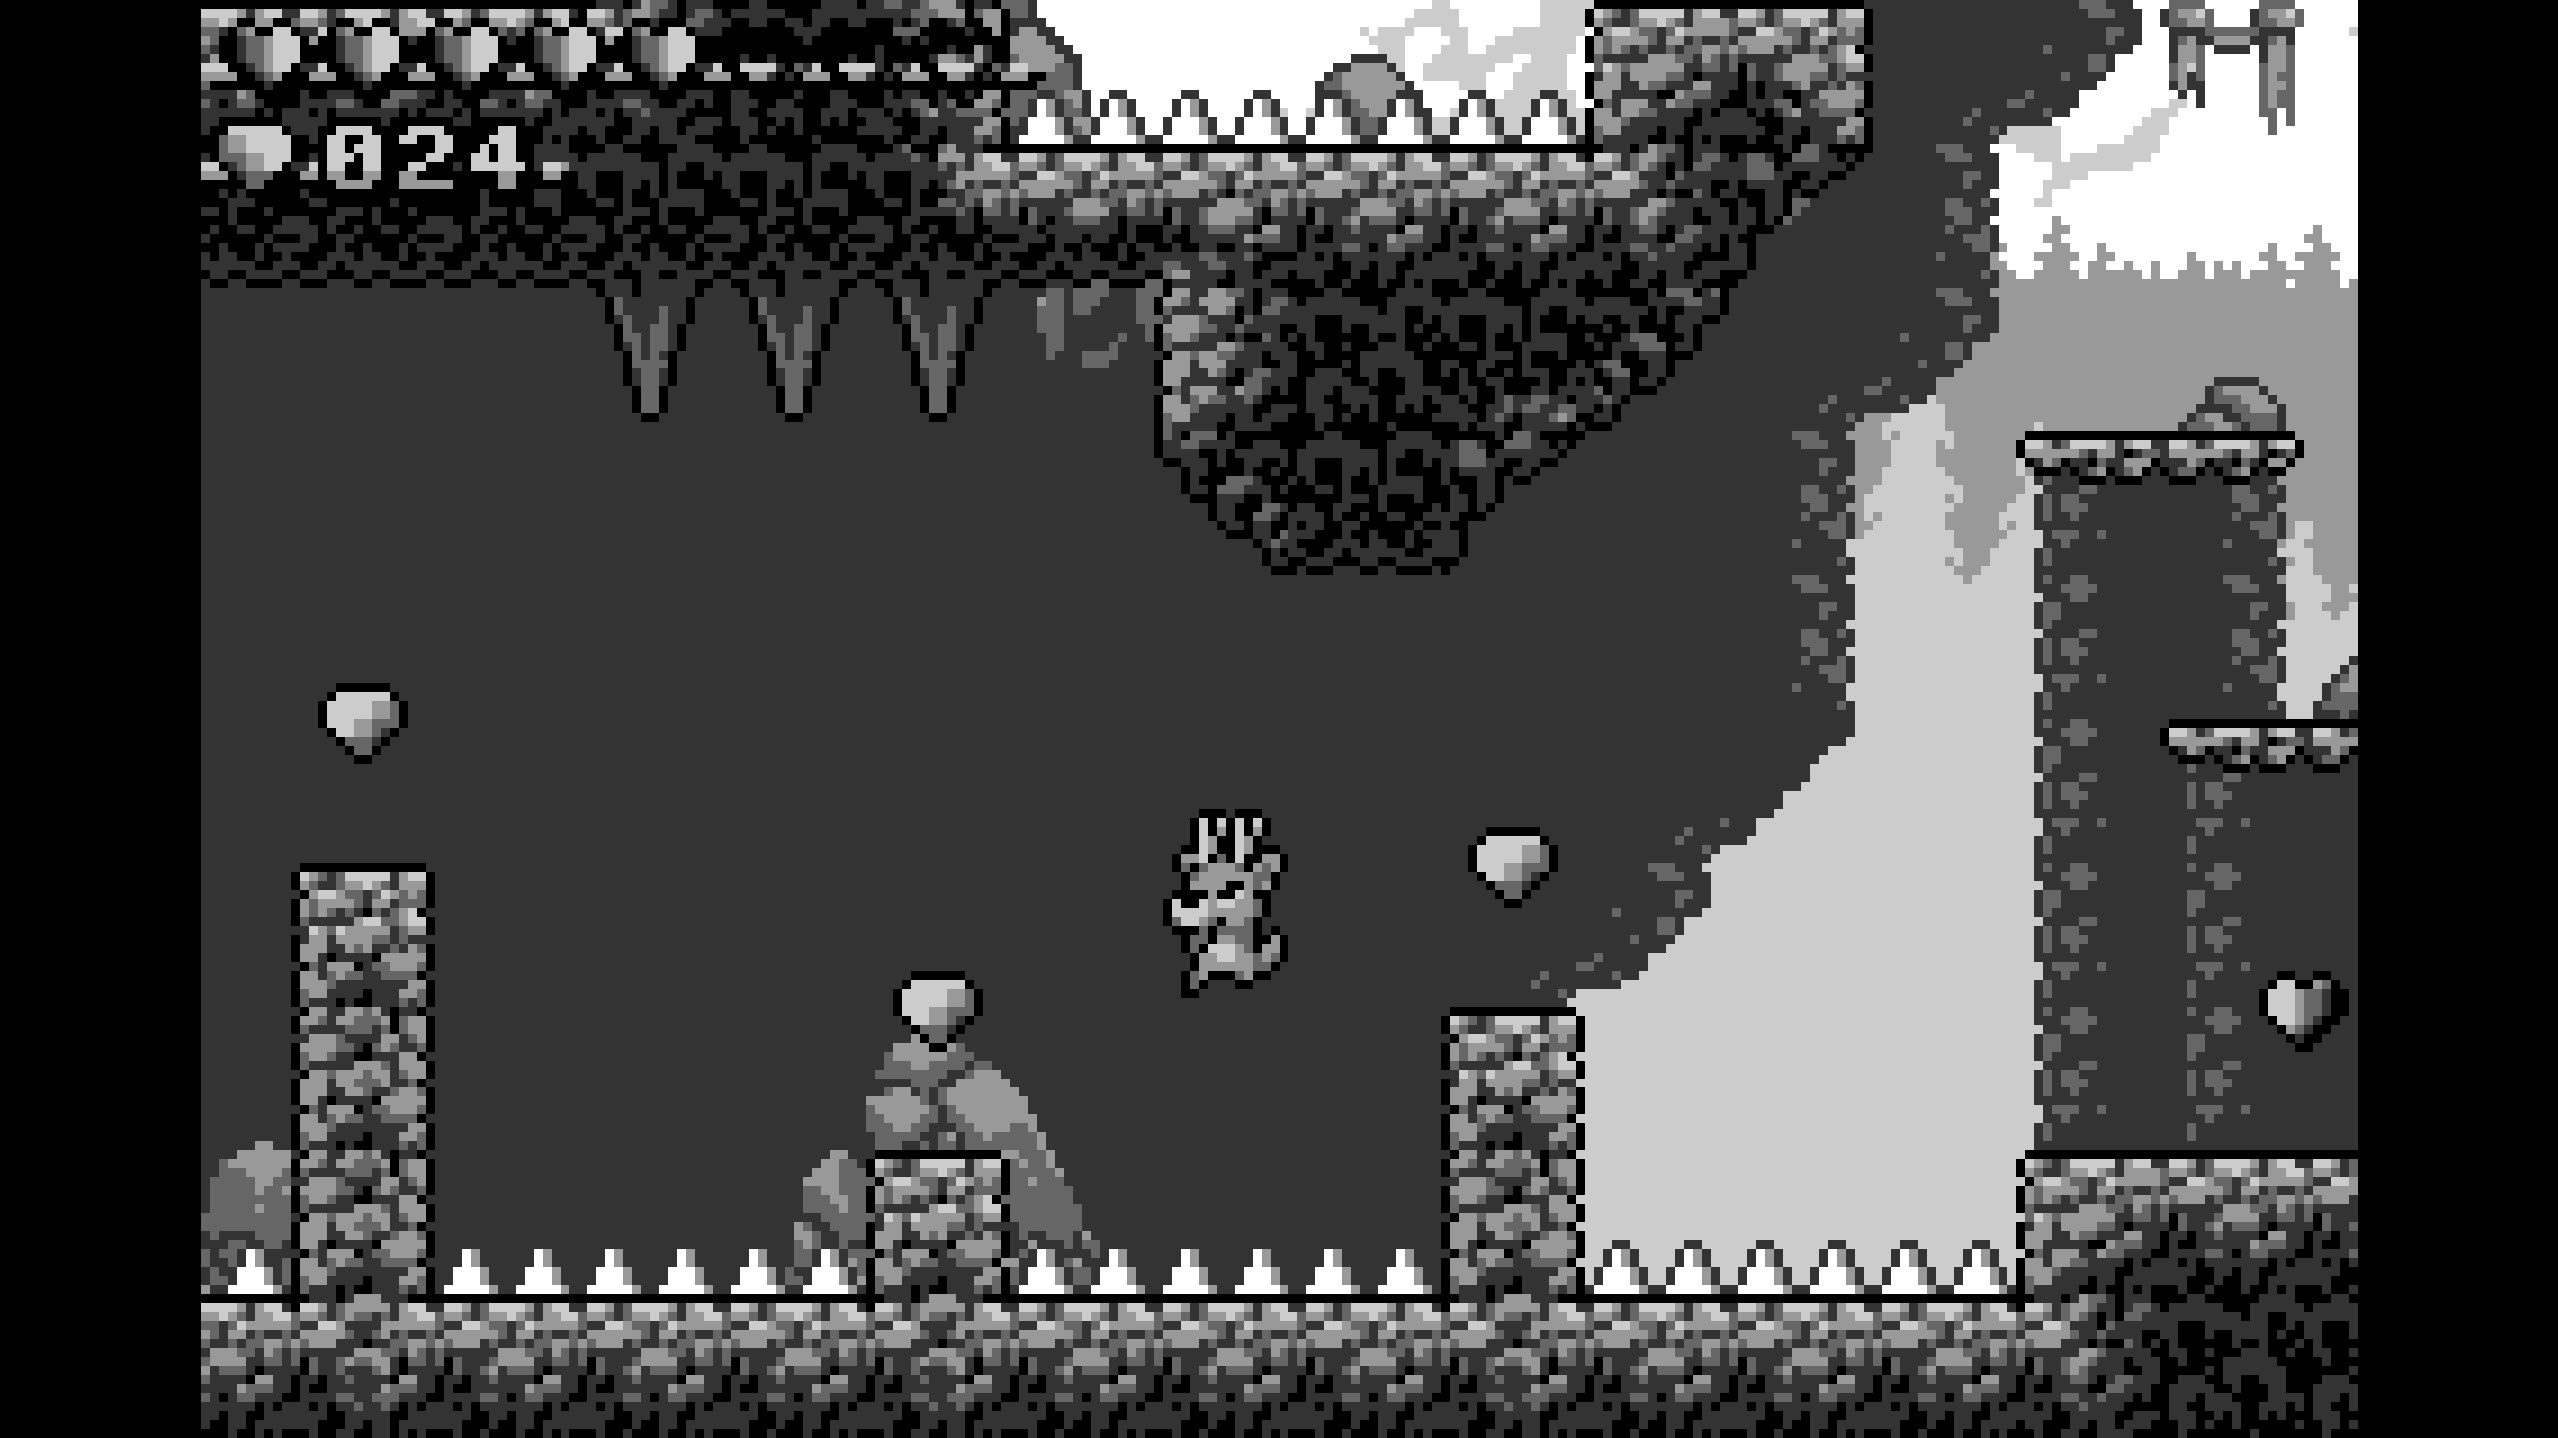
- Gems 96-100
- The final 5 gems can be easily obtained by jumping off of the moving platforms at the end of the stage. Congrats!
- The final 5 gems can be easily obtained by jumping off of the moving platforms at the end of the stage. Congrats!
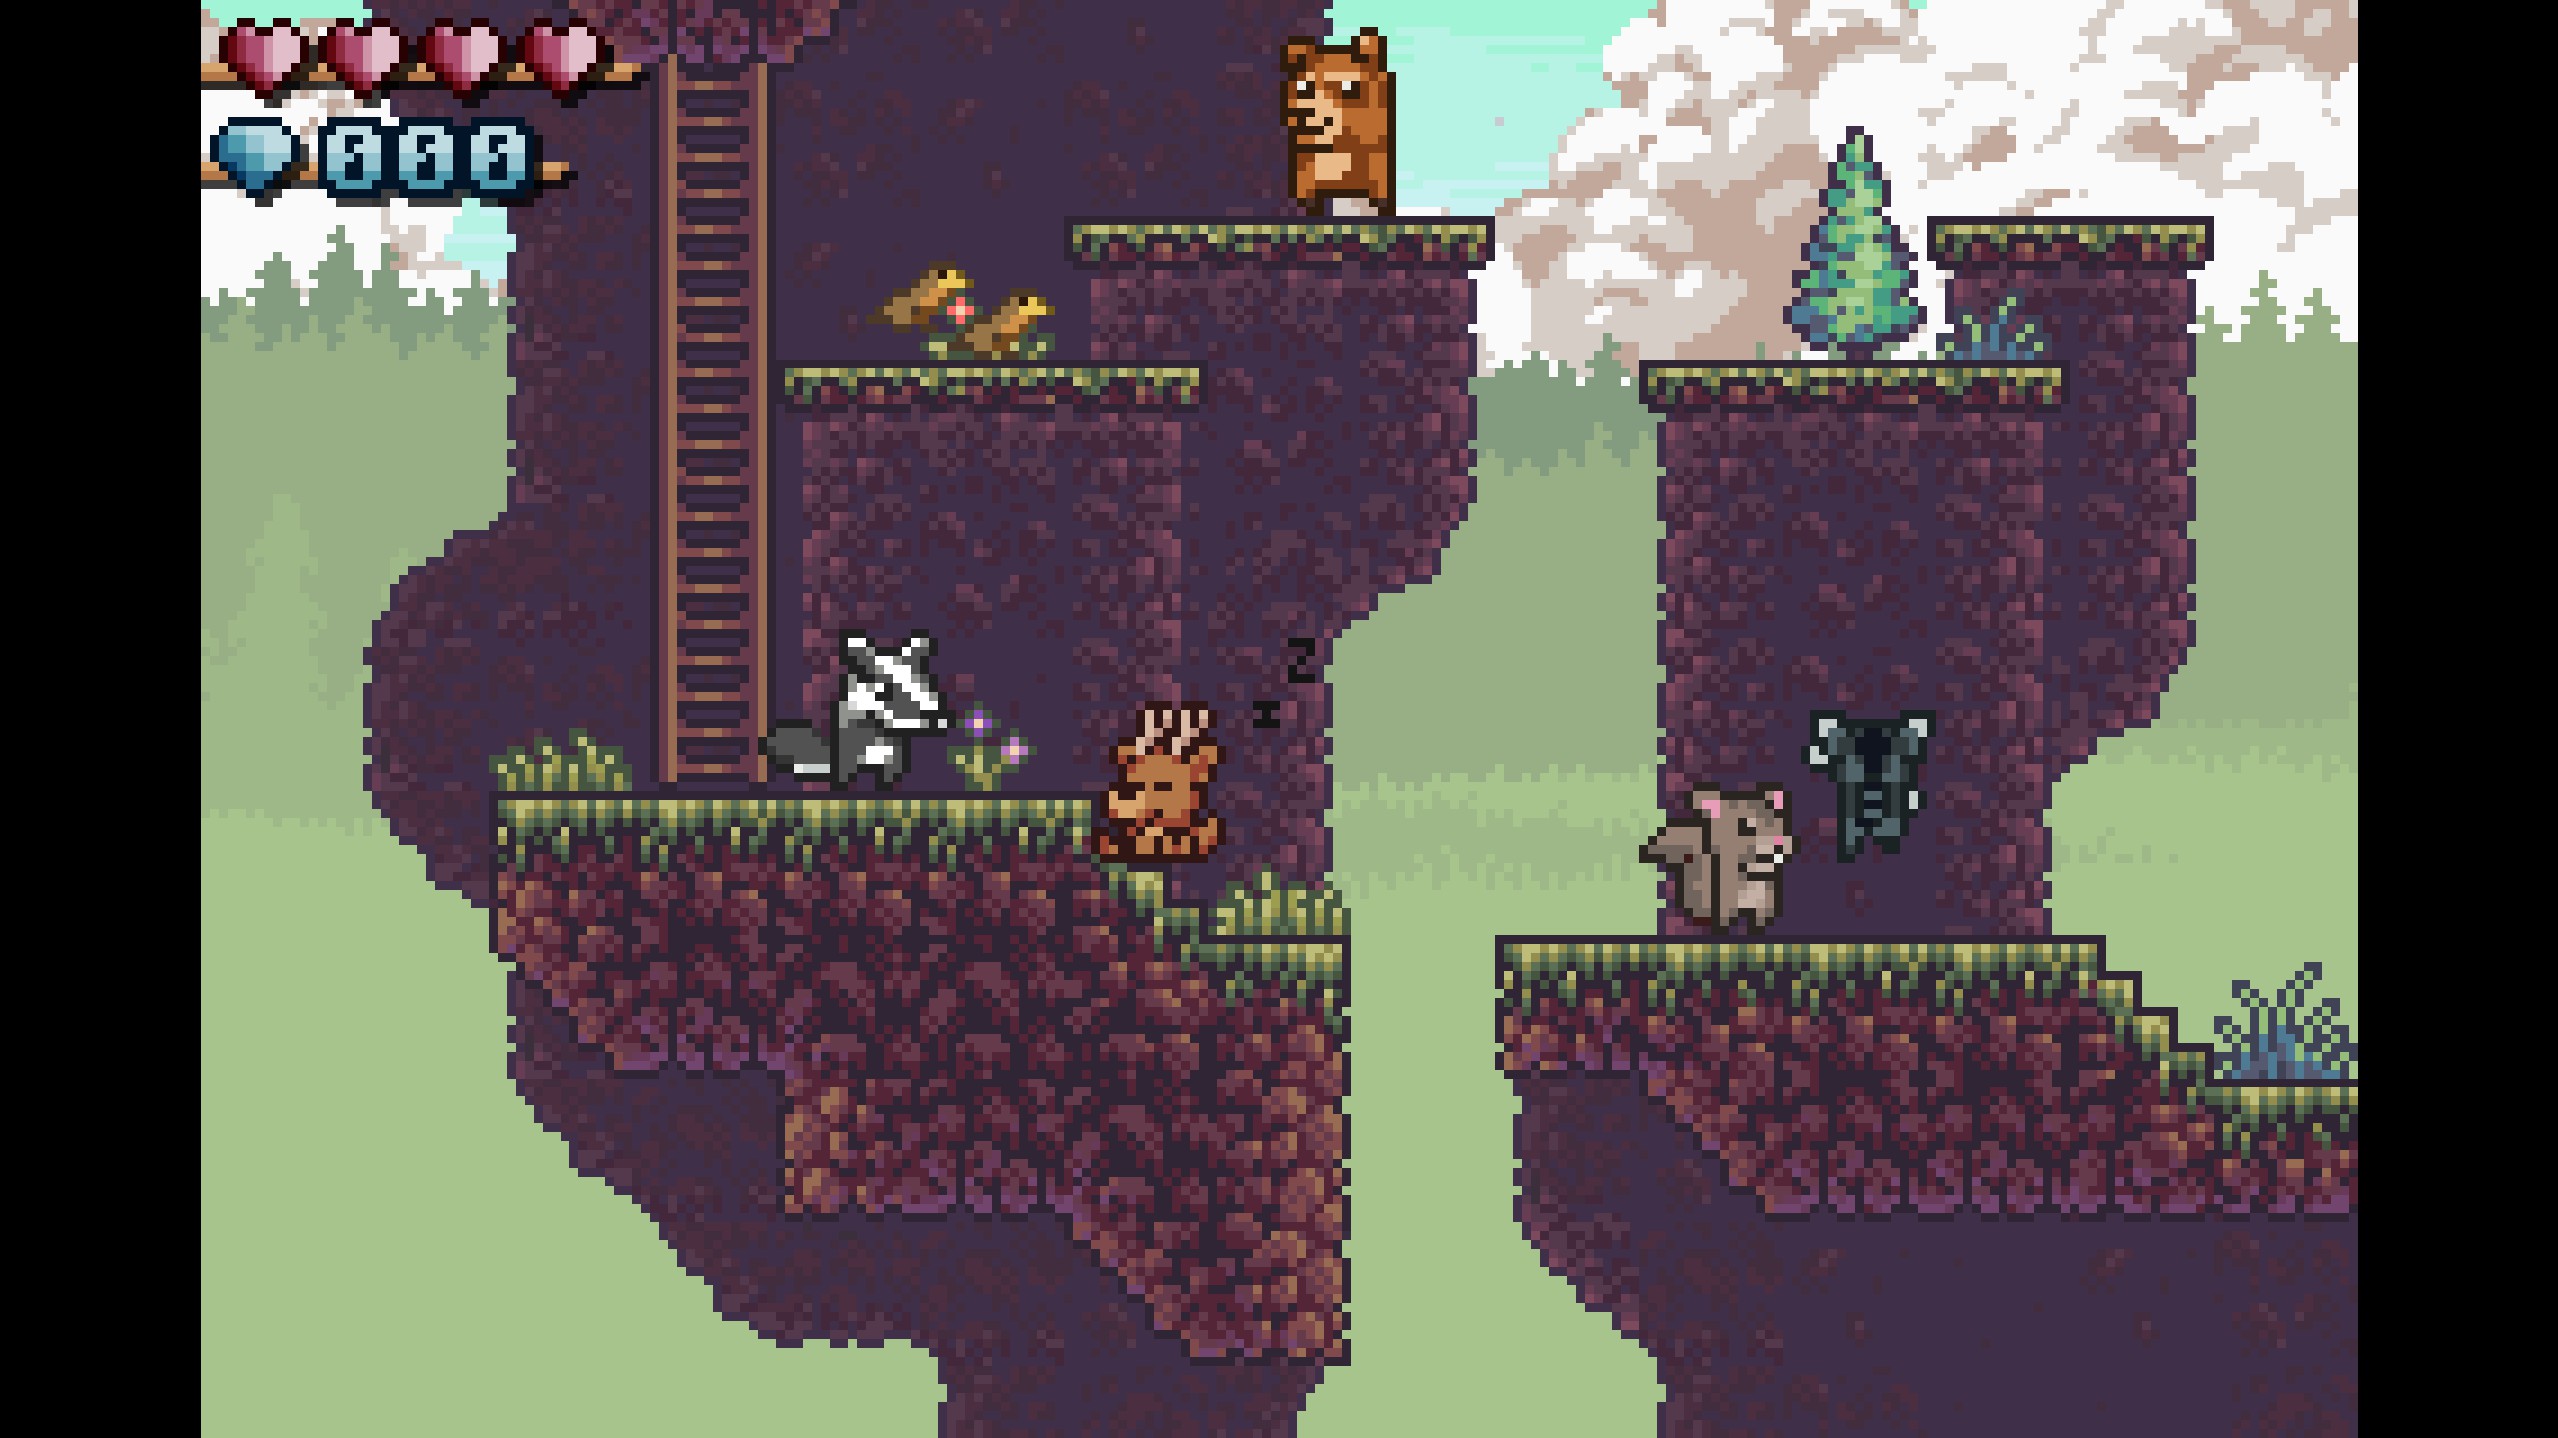
Bird Chaser Badge
The Bird Chaser badge is earned by scaring away every bird in Emerald Vale. This should be a pretty easy task if you just keep your eyes peeled while wandering around, but if you need help, the locations of all 30 birds are listed below.
- Birds 1-2
- The first two birds are found at the start of the stage, hanging out on the bridge.
- The first two birds are found at the start of the stage, hanging out on the bridge.
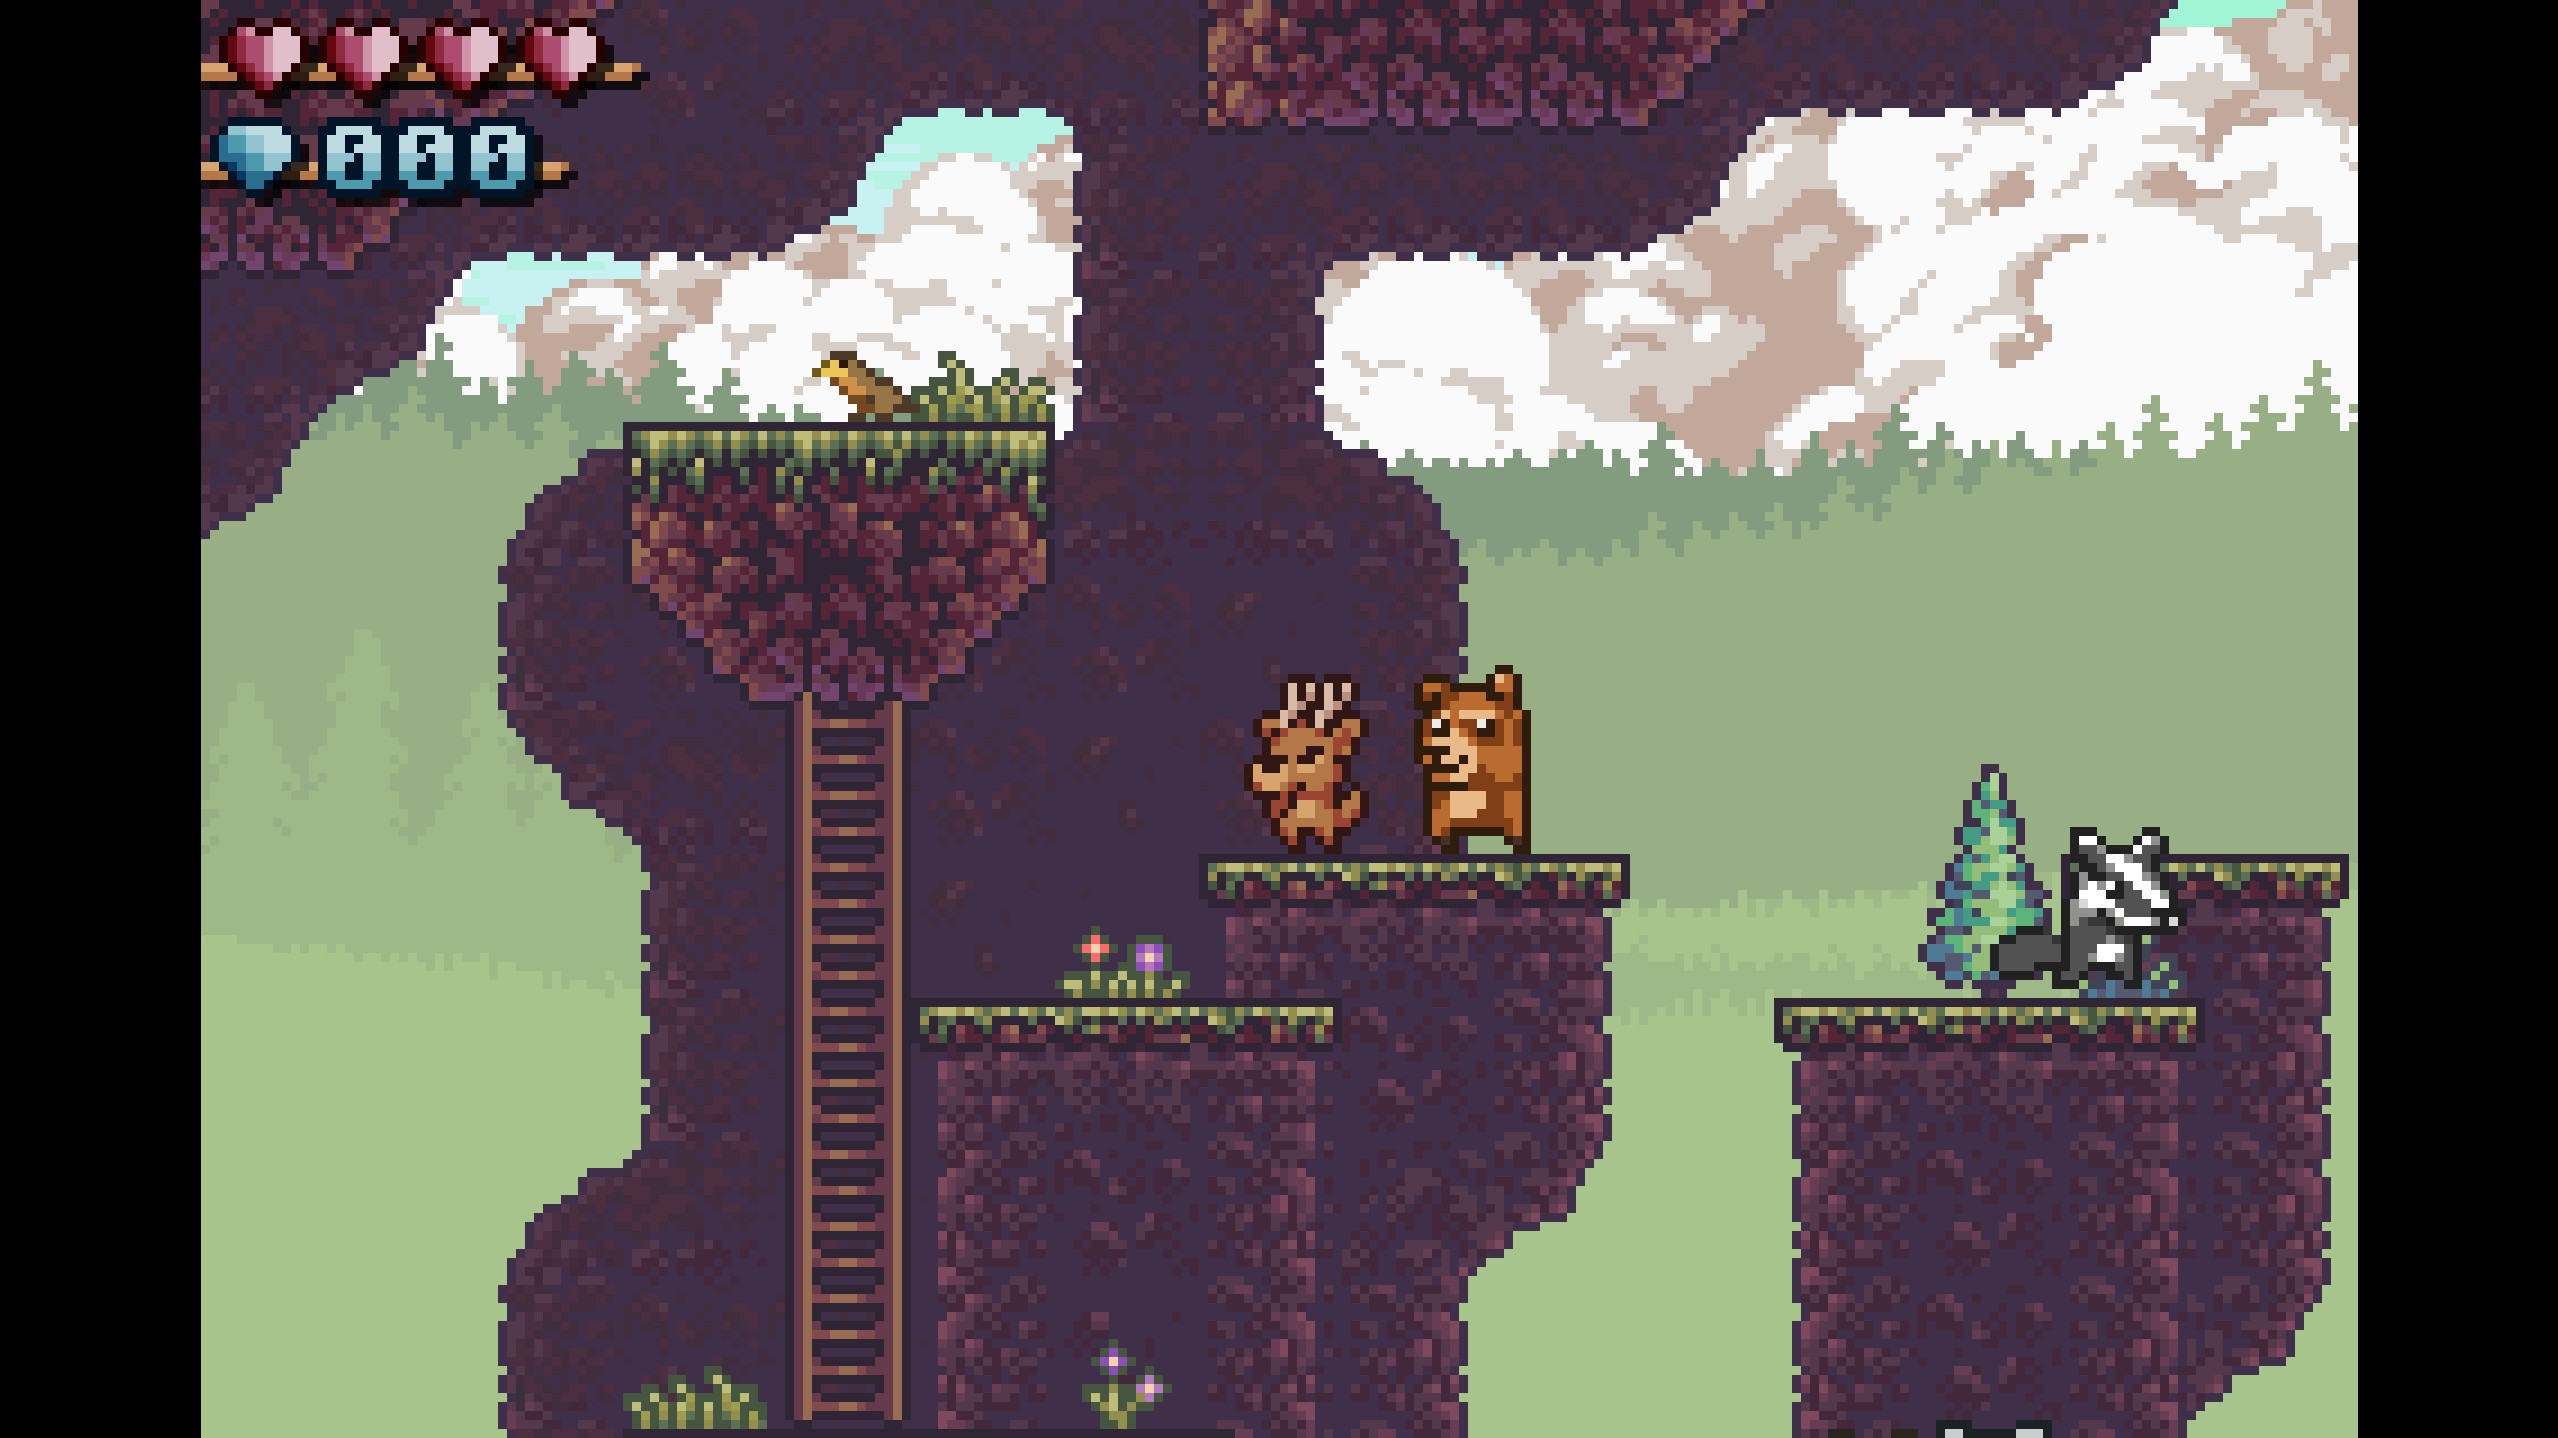
- Bird 3
- Continue through the stage. This bird is found on the bottom left tree branch on a floating landmass.
- Continue through the stage. This bird is found on the bottom left tree branch on a floating landmass.
- Bird 4
- This bird is found on the top left tree branch on the same tree as Bird 3.
- This bird is found on the top left tree branch on the same tree as Bird 3.
- Birds 5-6
- Continue through the stage. These two birds are found next to a ladder on a semisolid platform to the left of Bird 3 and 4's tree.
- Continue through the stage. These two birds are found next to a ladder on a semisolid platform to the left of Bird 3 and 4's tree.
- Bird 7
- Climb up the ladder from Birds 5 and 6 and you'll see a floating landmass with Bird 7 on top! You can't actually jump up there, so just jump up as high as you can when the bird wanders over to the right edge to scare it away.
- Climb up the ladder from Birds 5 and 6 and you'll see a floating landmass with Bird 7 on top! You can't actually jump up there, so just jump up as high as you can when the bird wanders over to the right edge to scare it away.
- Birds 8-9
- Continue through the stage until you reach the second bridge, where birds 8 and 9 hang out!
- Continue through the stage until you reach the second bridge, where birds 8 and 9 hang out!
- Bird 10
- This bird is found on the topmost branch of the tree to the left of the second bridge.
- This bird is found on the topmost branch of the tree to the left of the second bridge.
- Bird 11
- Continue through the stage until you reach the "staircase" of semisolid platforms. This bird is hanging out beneath them!
- Continue through the stage until you reach the "staircase" of semisolid platforms. This bird is hanging out beneath them!
- Birds 12-13
- Continue through the stage until you reach the first two red slimes. Defeat them and then scare away birds 12 and 13, who are near the heart powerup!
- Continue through the stage until you reach the first two red slimes. Defeat them and then scare away birds 12 and 13, who are near the heart powerup!
- Birds 14-15
- Continue through the stage until you reach the area with the tall tree and the stone. Simply push the stone off of the semisolid platform and the noise will scare away the birds!
- Continue through the stage until you reach the area with the tall tree and the stone. Simply push the stone off of the semisolid platform and the noise will scare away the birds!
- Bird 16
- This bird is found on the topmost branch of the tall tree from Birds 14 and 15.
- This bird is found on the topmost branch of the tall tree from Birds 14 and 15.
- Birds 17-18
- Continue through the stage, passing the checkpoint and reaching the bridge with the frog. Hanging out on the bridge are the two birds!
- Continue through the stage, passing the checkpoint and reaching the bridge with the frog. Hanging out on the bridge are the two birds!
- Birds 19-20
- These two birds are on the semisolid platforms to the right of the frog bridge.
- These two birds are on the semisolid platforms to the right of the frog bridge.
- Birds 21-22
- Continue through the stage. You can skip the area where you get the jump shoes if you already have them, since there aren't any birds over there. Jump high onto the tree branch left of the frog bridge and scare away the two birds who are hanging out on two upper right branches.
- Continue through the stage. You can skip the area where you get the jump shoes if you already have them, since there aren't any birds over there. Jump high onto the tree branch left of the frog bridge and scare away the two birds who are hanging out on two upper right branches.
- Birds 23-24
- Continue through the stage, passing the area with the three moving platforms. These two birds are hanging out near the young deer atop the ladder.
- Continue through the stage, passing the area with the three moving platforms. These two birds are hanging out near the young deer atop the ladder.
- Birds 25-26
- Continue over to the area with the two broken moving platforms. These two birds are hanging out near the mole with the party hat.
- Continue over to the area with the two broken moving platforms. These two birds are hanging out near the mole with the party hat.
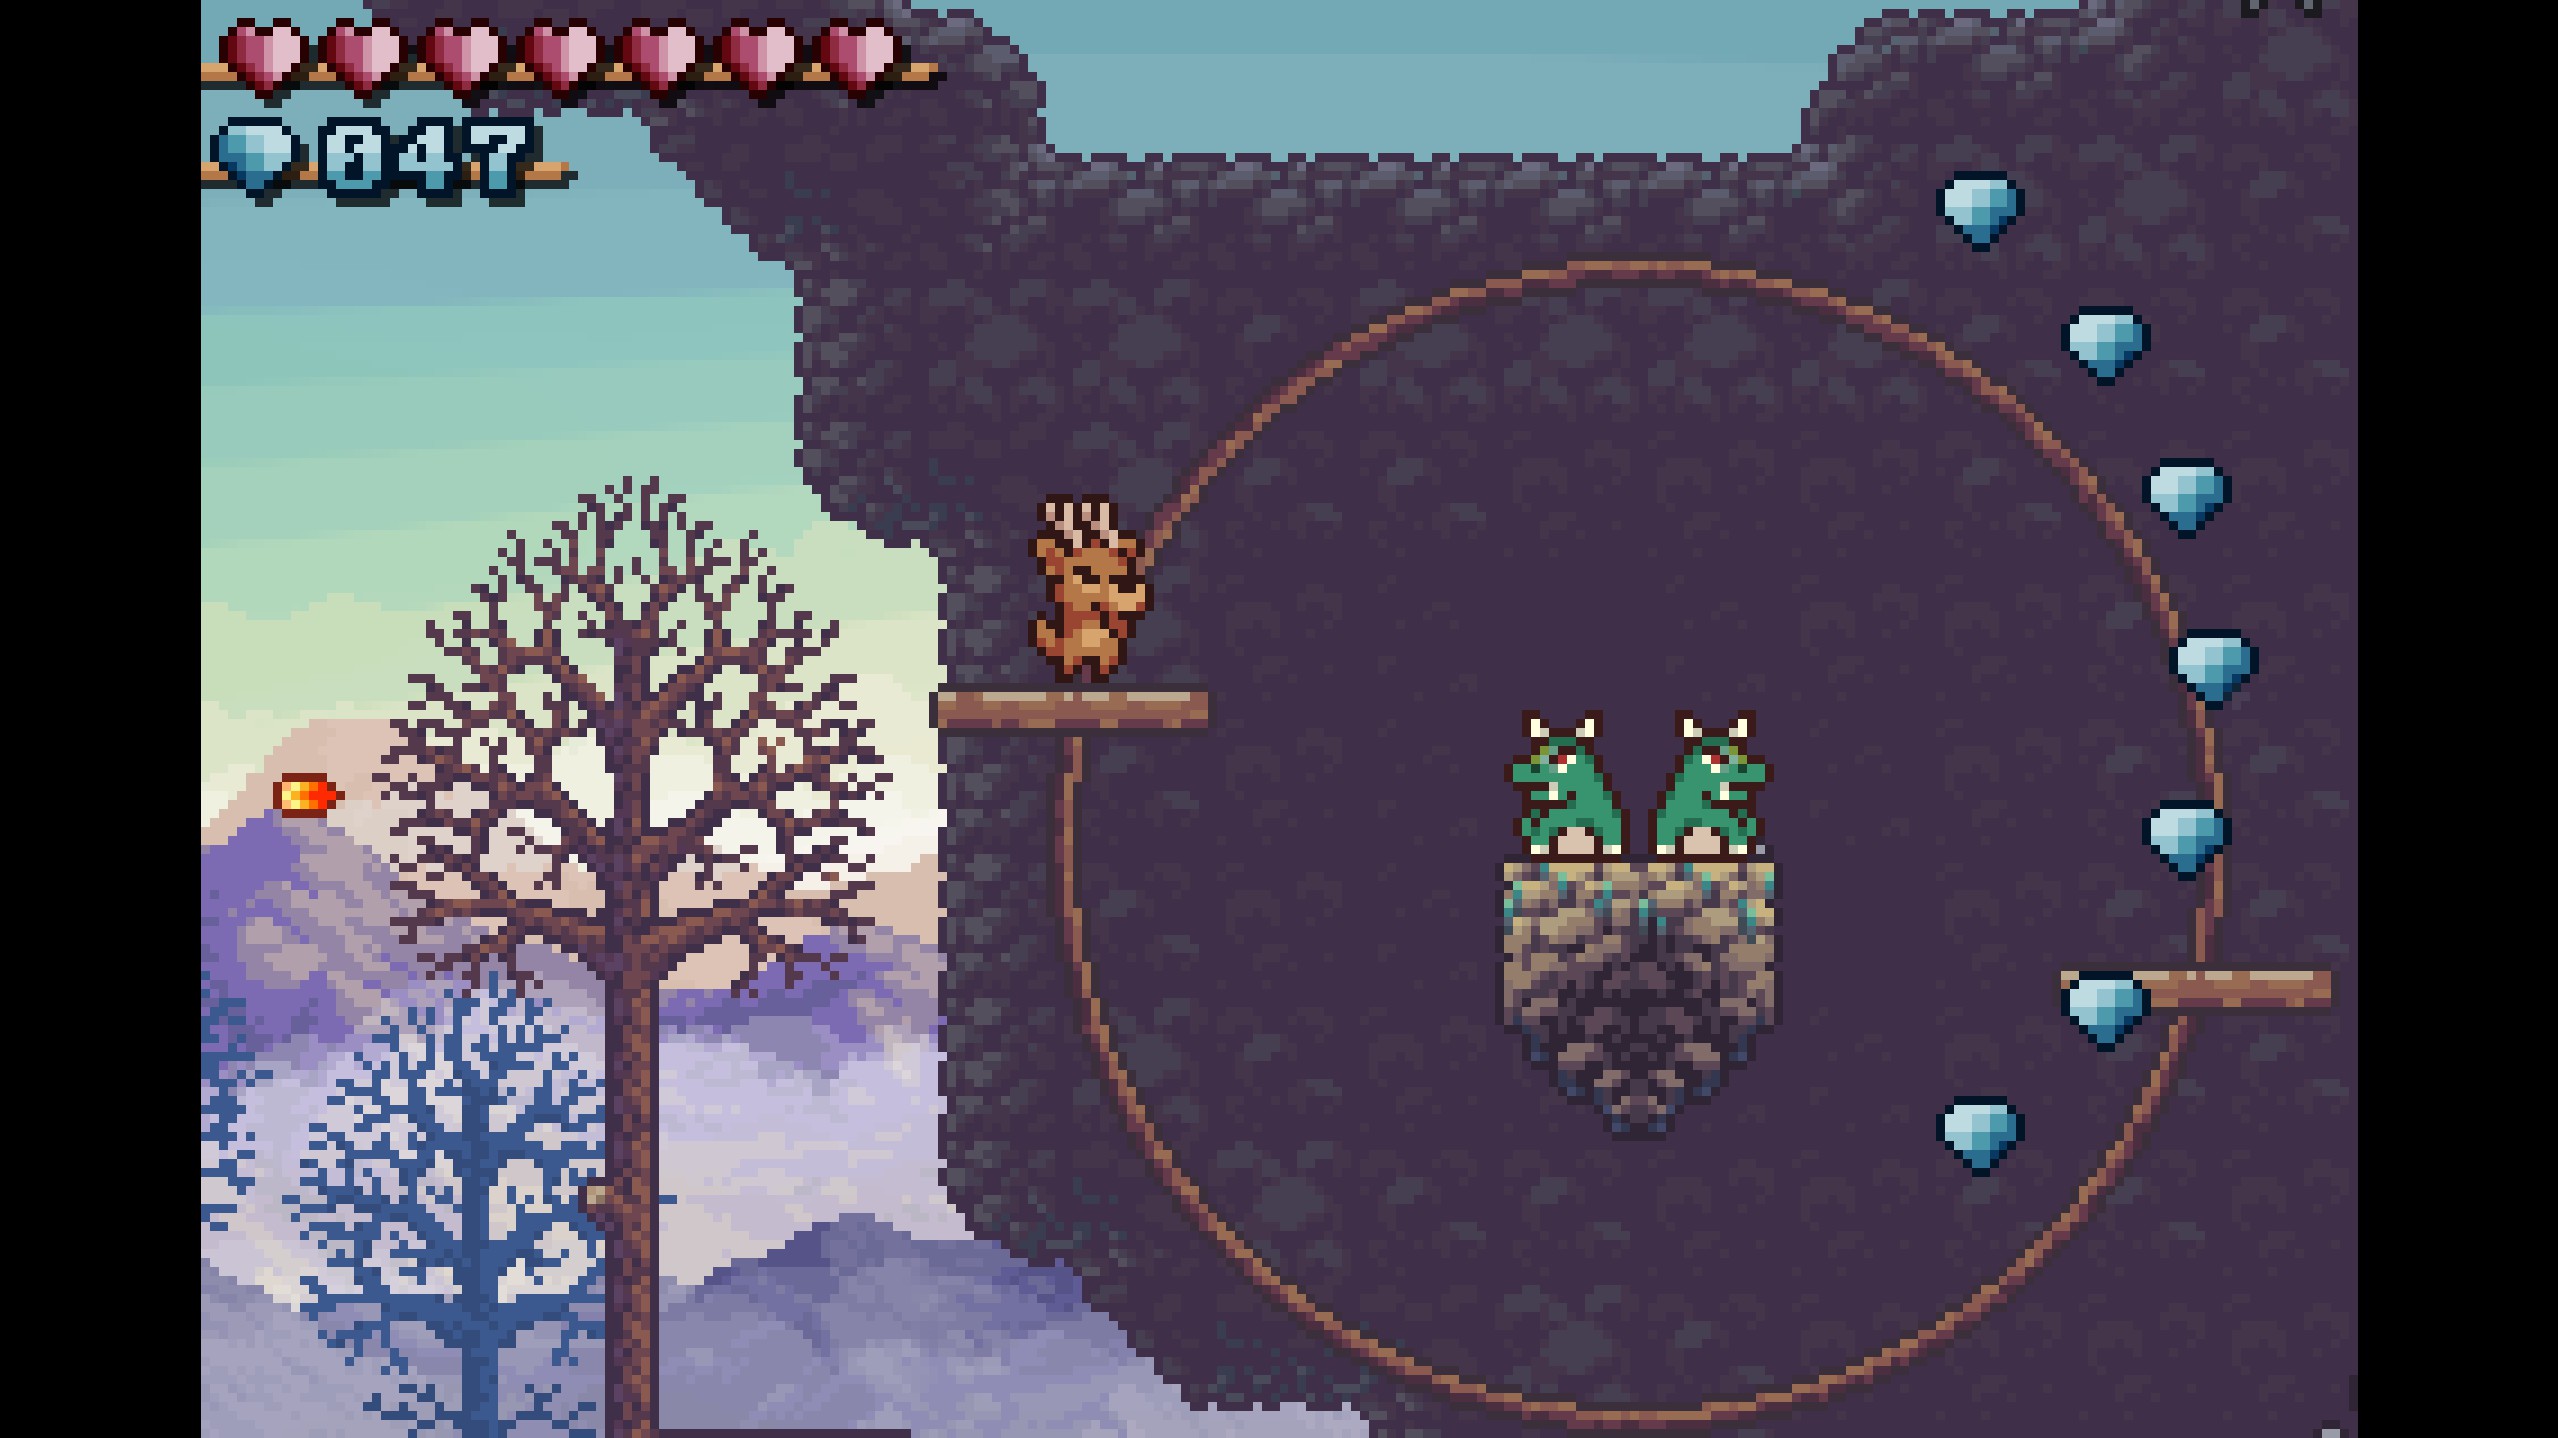
- Birds 27-28
- Flick the lever to fix the moving platforms and then hop on. Birds 27 and 28 are hanging out on the floating landmass that the platforms circle around.
- Flick the lever to fix the moving platforms and then hop on. Birds 27 and 28 are hanging out on the floating landmass that the platforms circle around.
- Birds 29-30
- The last two birds in Emerald Vale are hanging out on the apple tree to the right of the two moving platforms!
- The last two birds in Emerald Vale are hanging out on the apple tree to the right of the two moving platforms!
Pacifist Badge
The Pacifist Badge is earned by clearing Emerald Vale without defeating any enemies. Most of the enemies can easily be dodged by being patient and timing your jumps. However, this red slime on the moving platform was pretty annoying; there's barely any space on the platform for you to go without either stomping on the slime or being damaged by it yourself.
My strategy was to wait for the platform to start going back up after reaching the bottom of its track. Then, I jumped on the rightmost edge and quickly jumped from edge to edge while the platform went back up, before finally jumping onto the sideways moving platform.

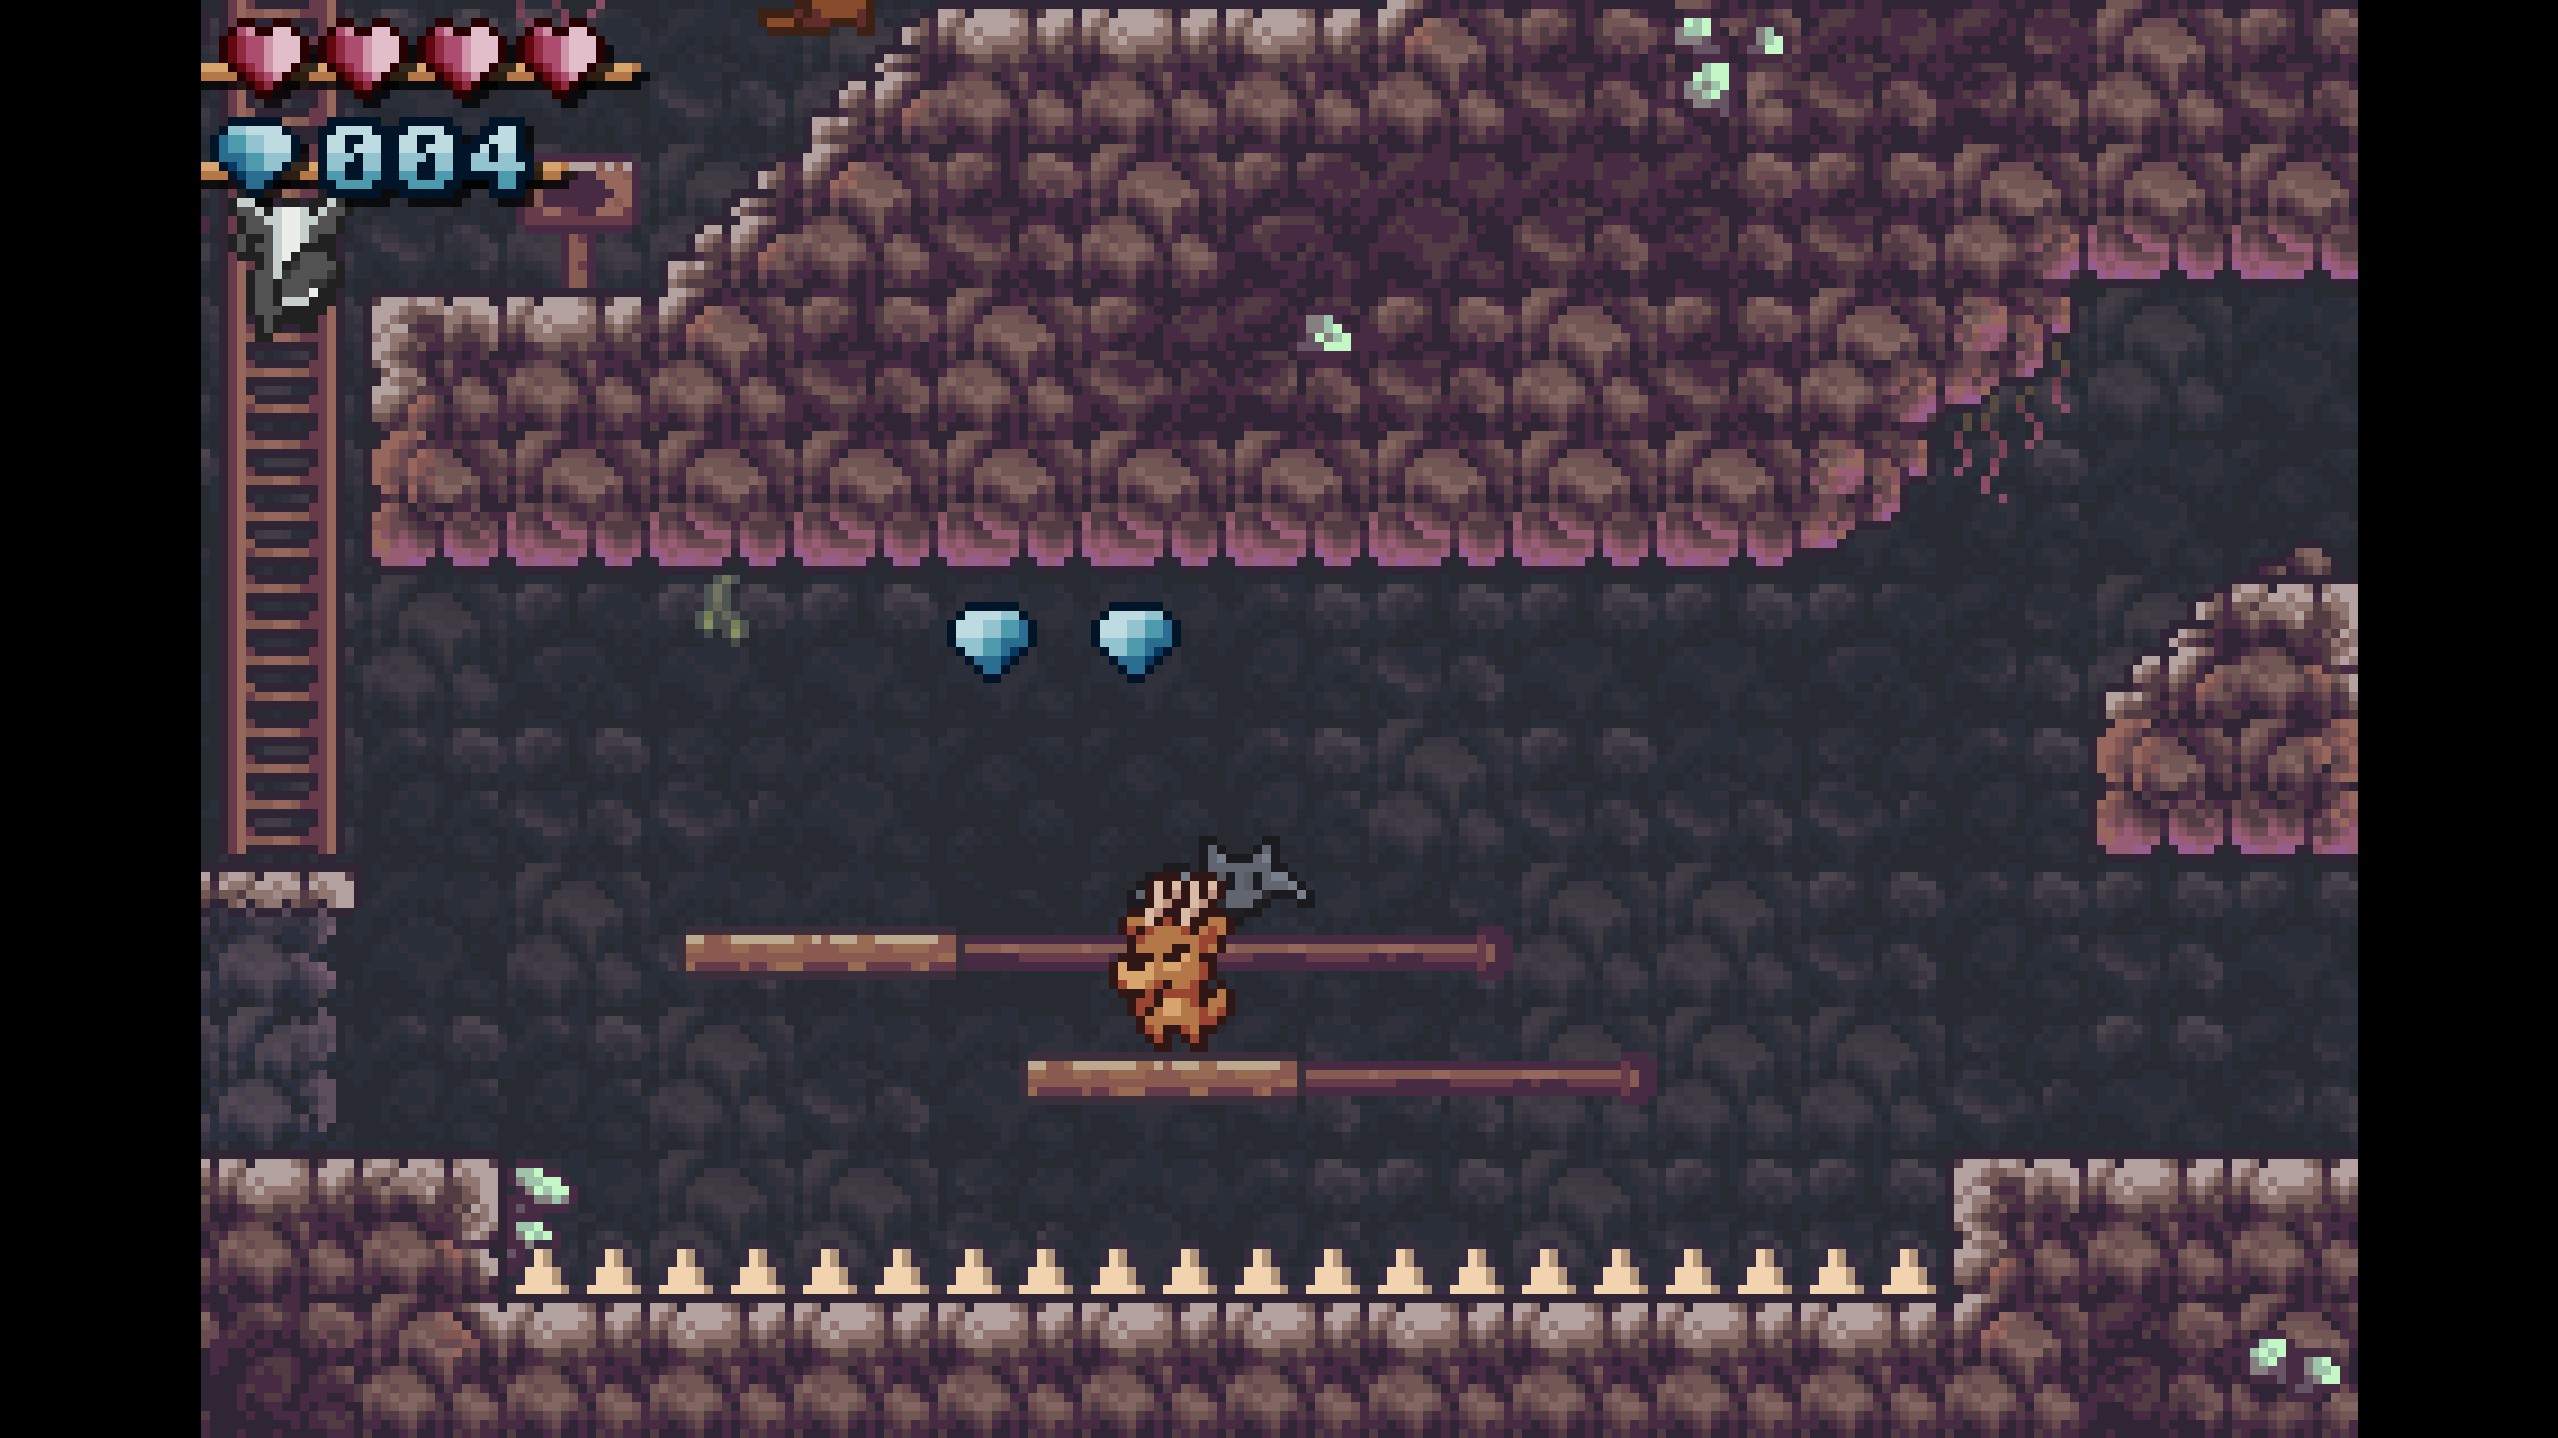
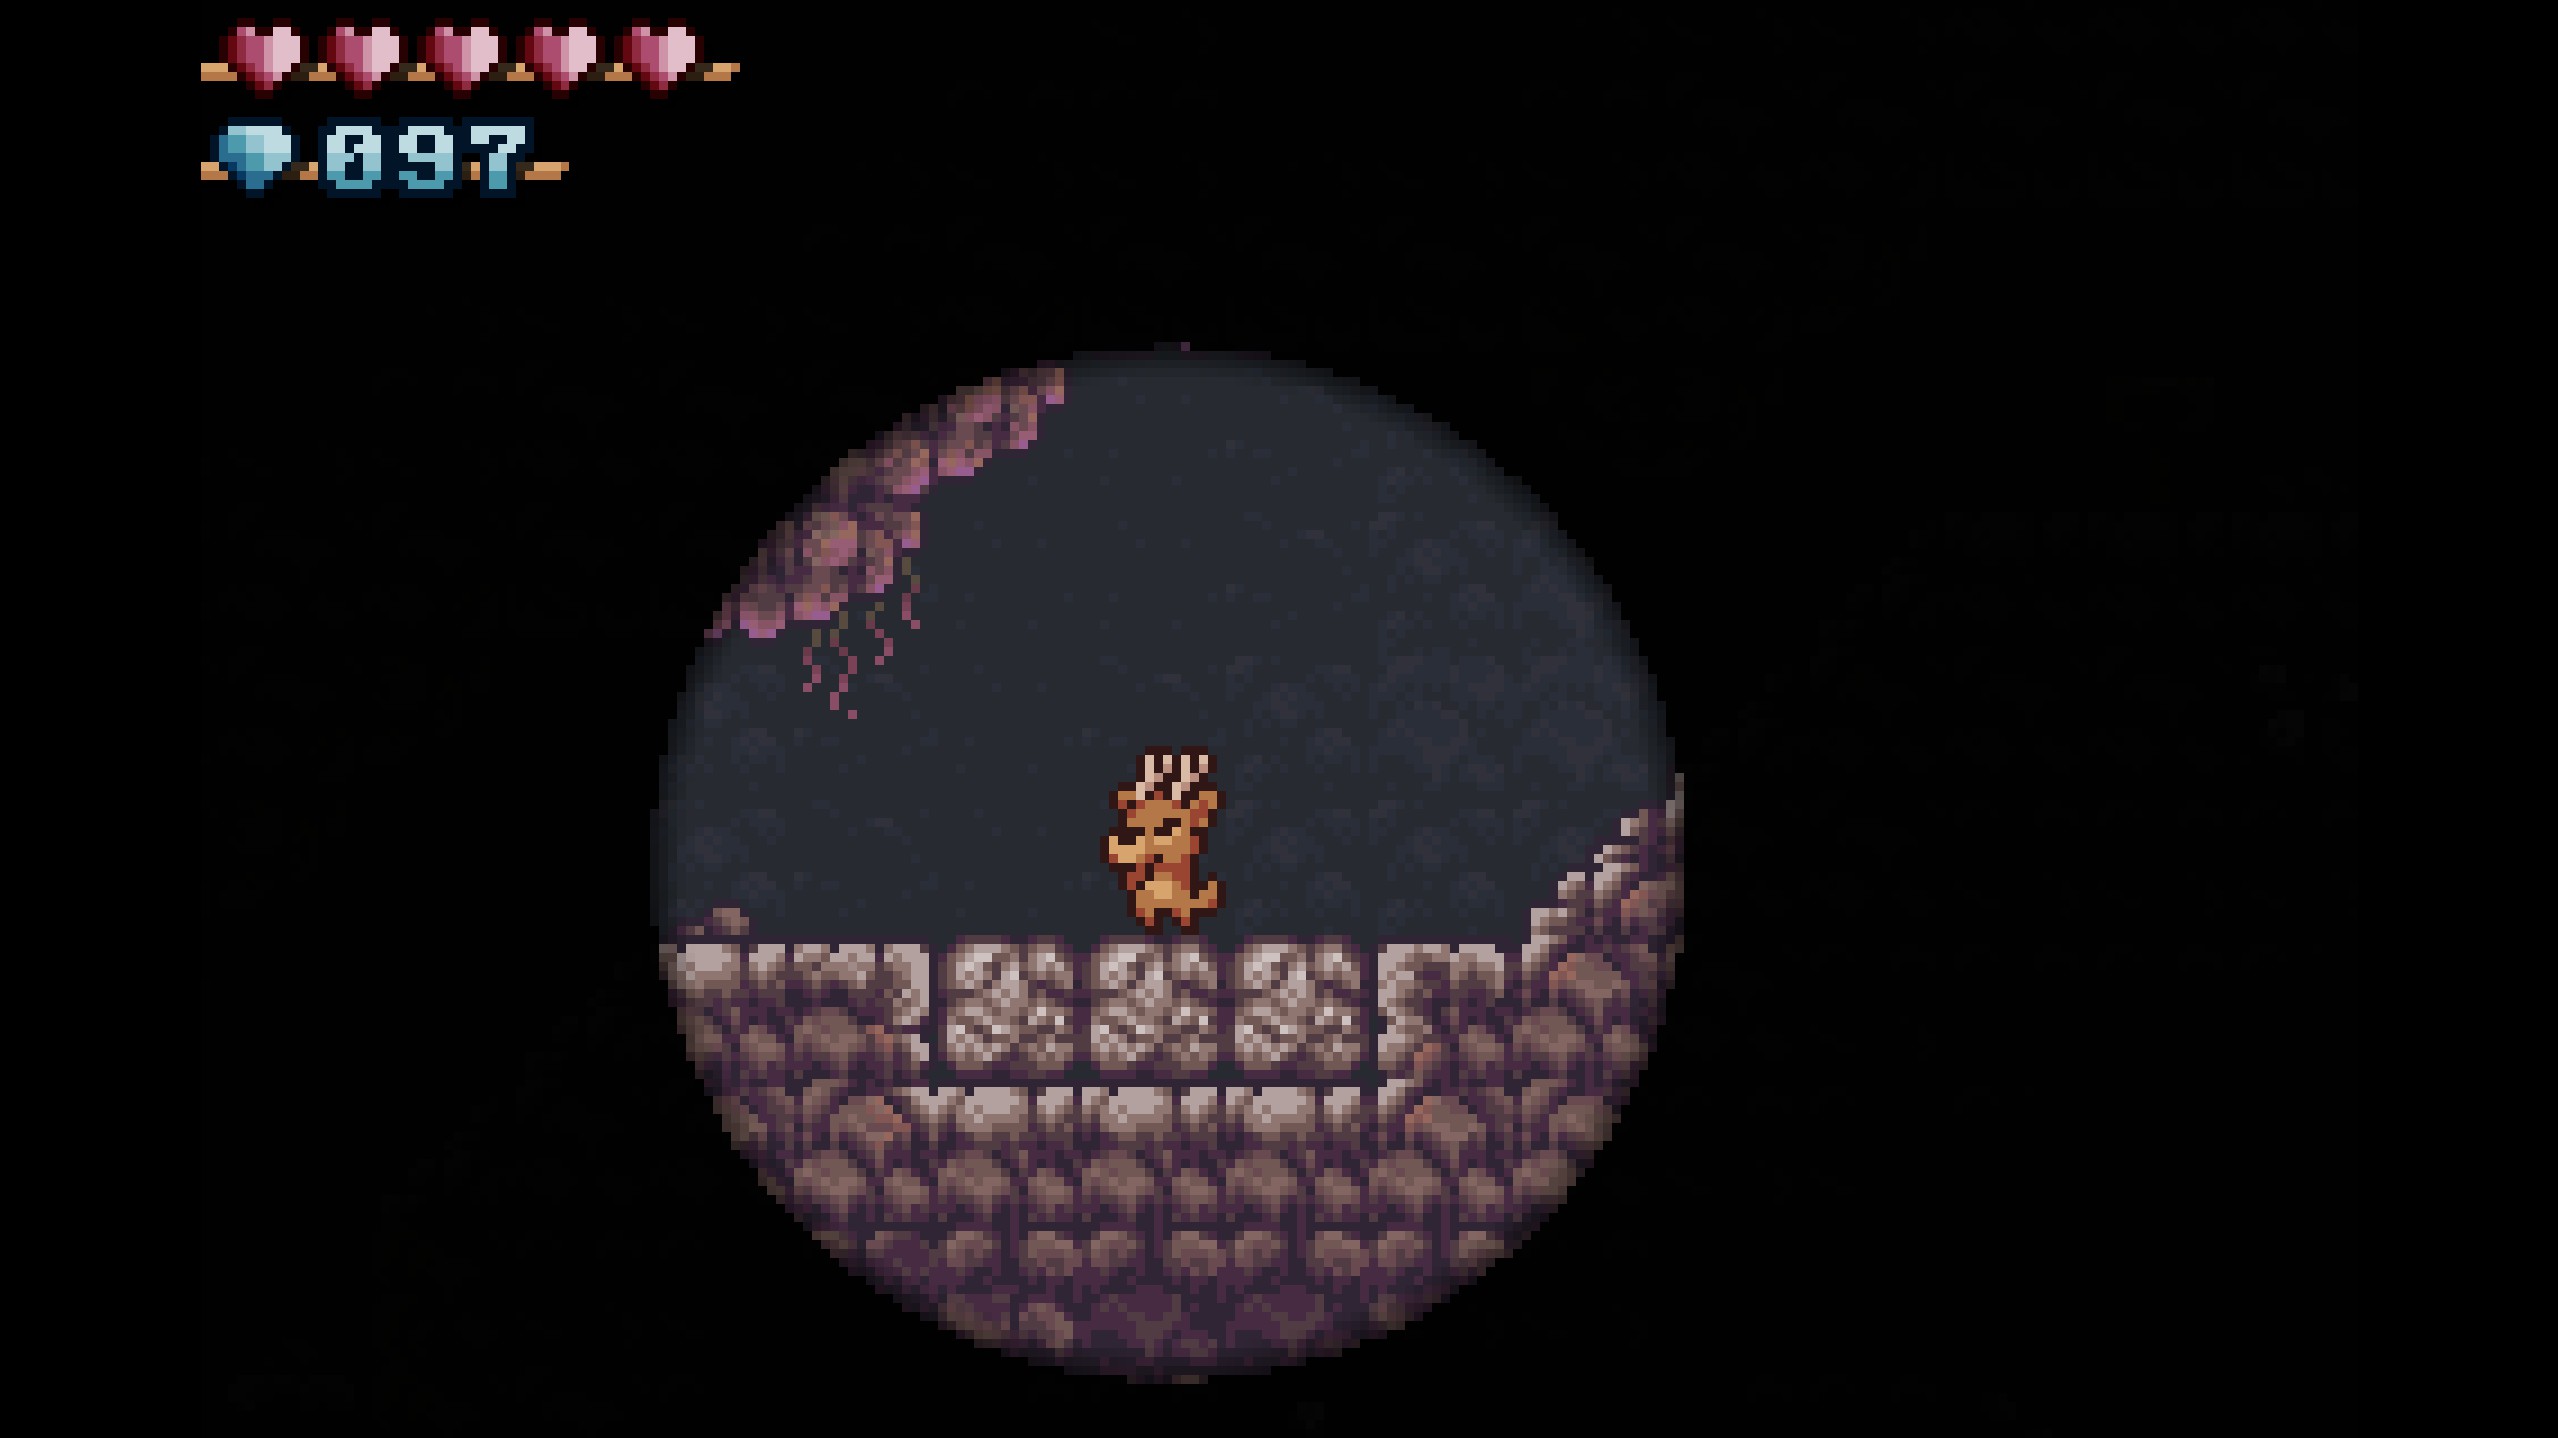
Fungus Grotto
Fungus Grotto is the second stage in Ronny's Climb! It takes place in an underground cave filled with rocks, spikes, bats, and DARKNESS...

Gems
- Gems 1-4
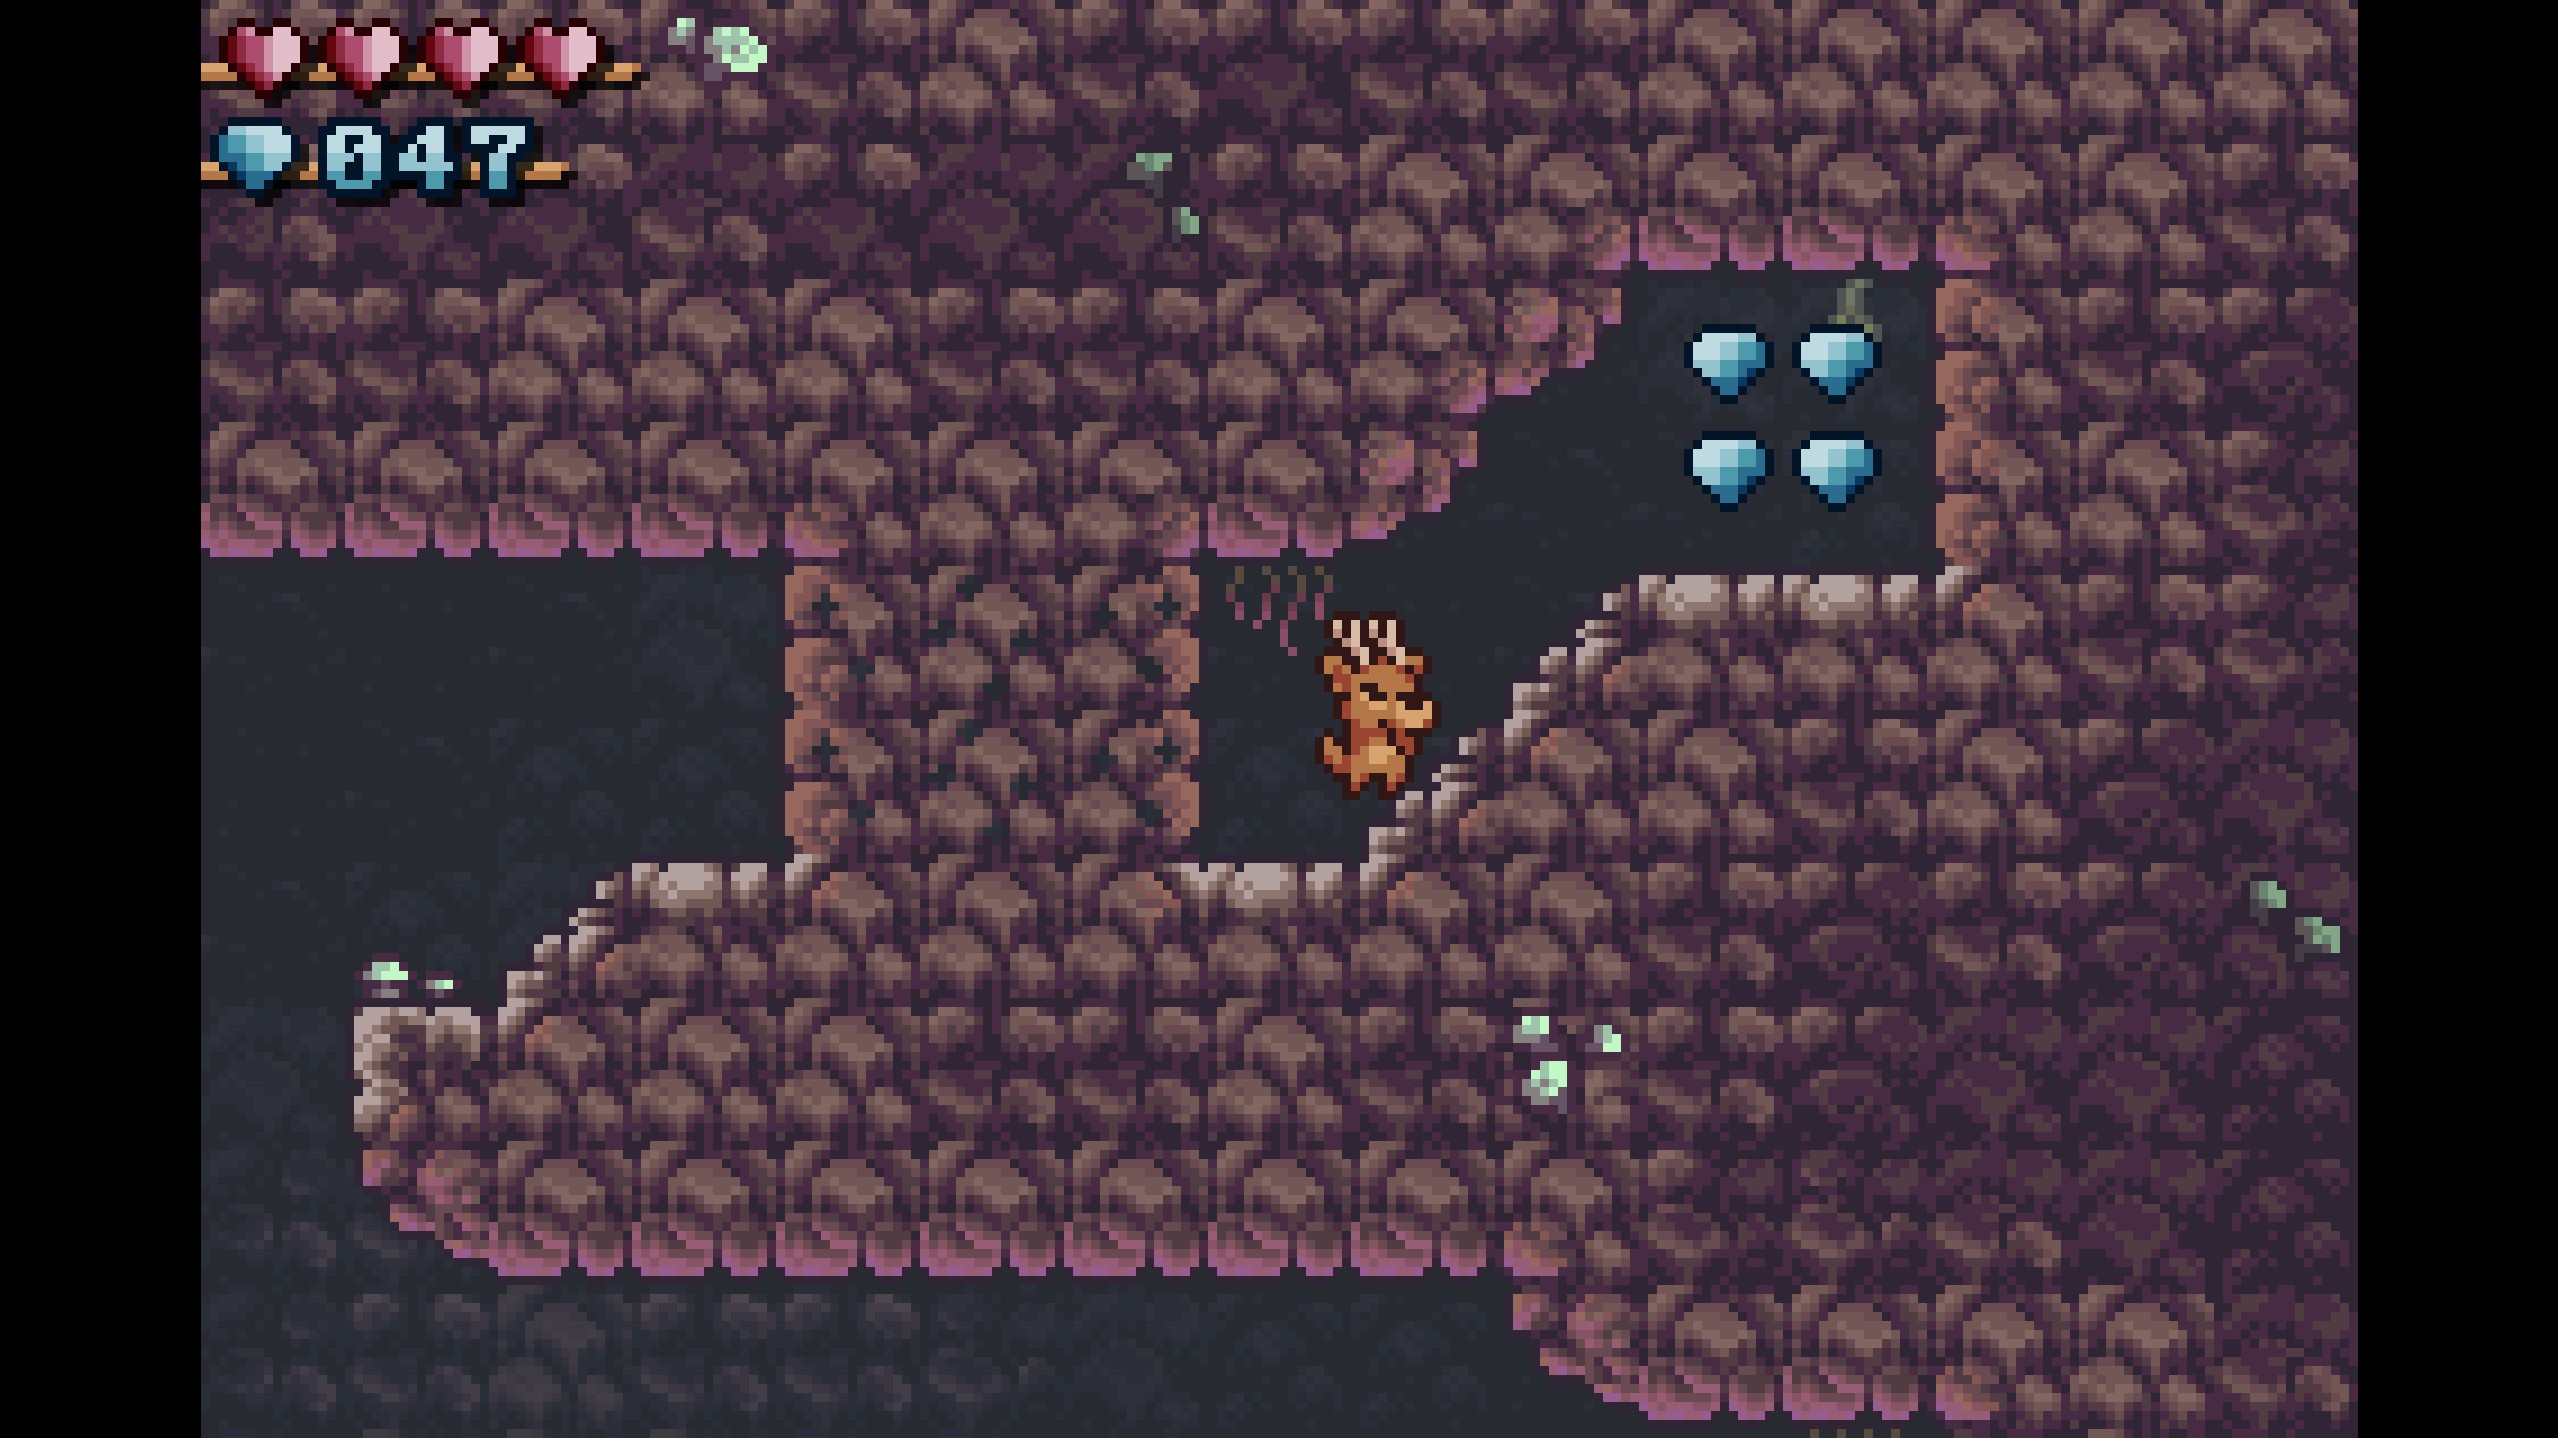
- The first four gems of Fungus Grotto are found atop a floating landmass of rock. Jump up from under the semisolid platforms to collect the gems!

- The first four gems of Fungus Grotto are found atop a floating landmass of rock. Jump up from under the semisolid platforms to collect the gems!
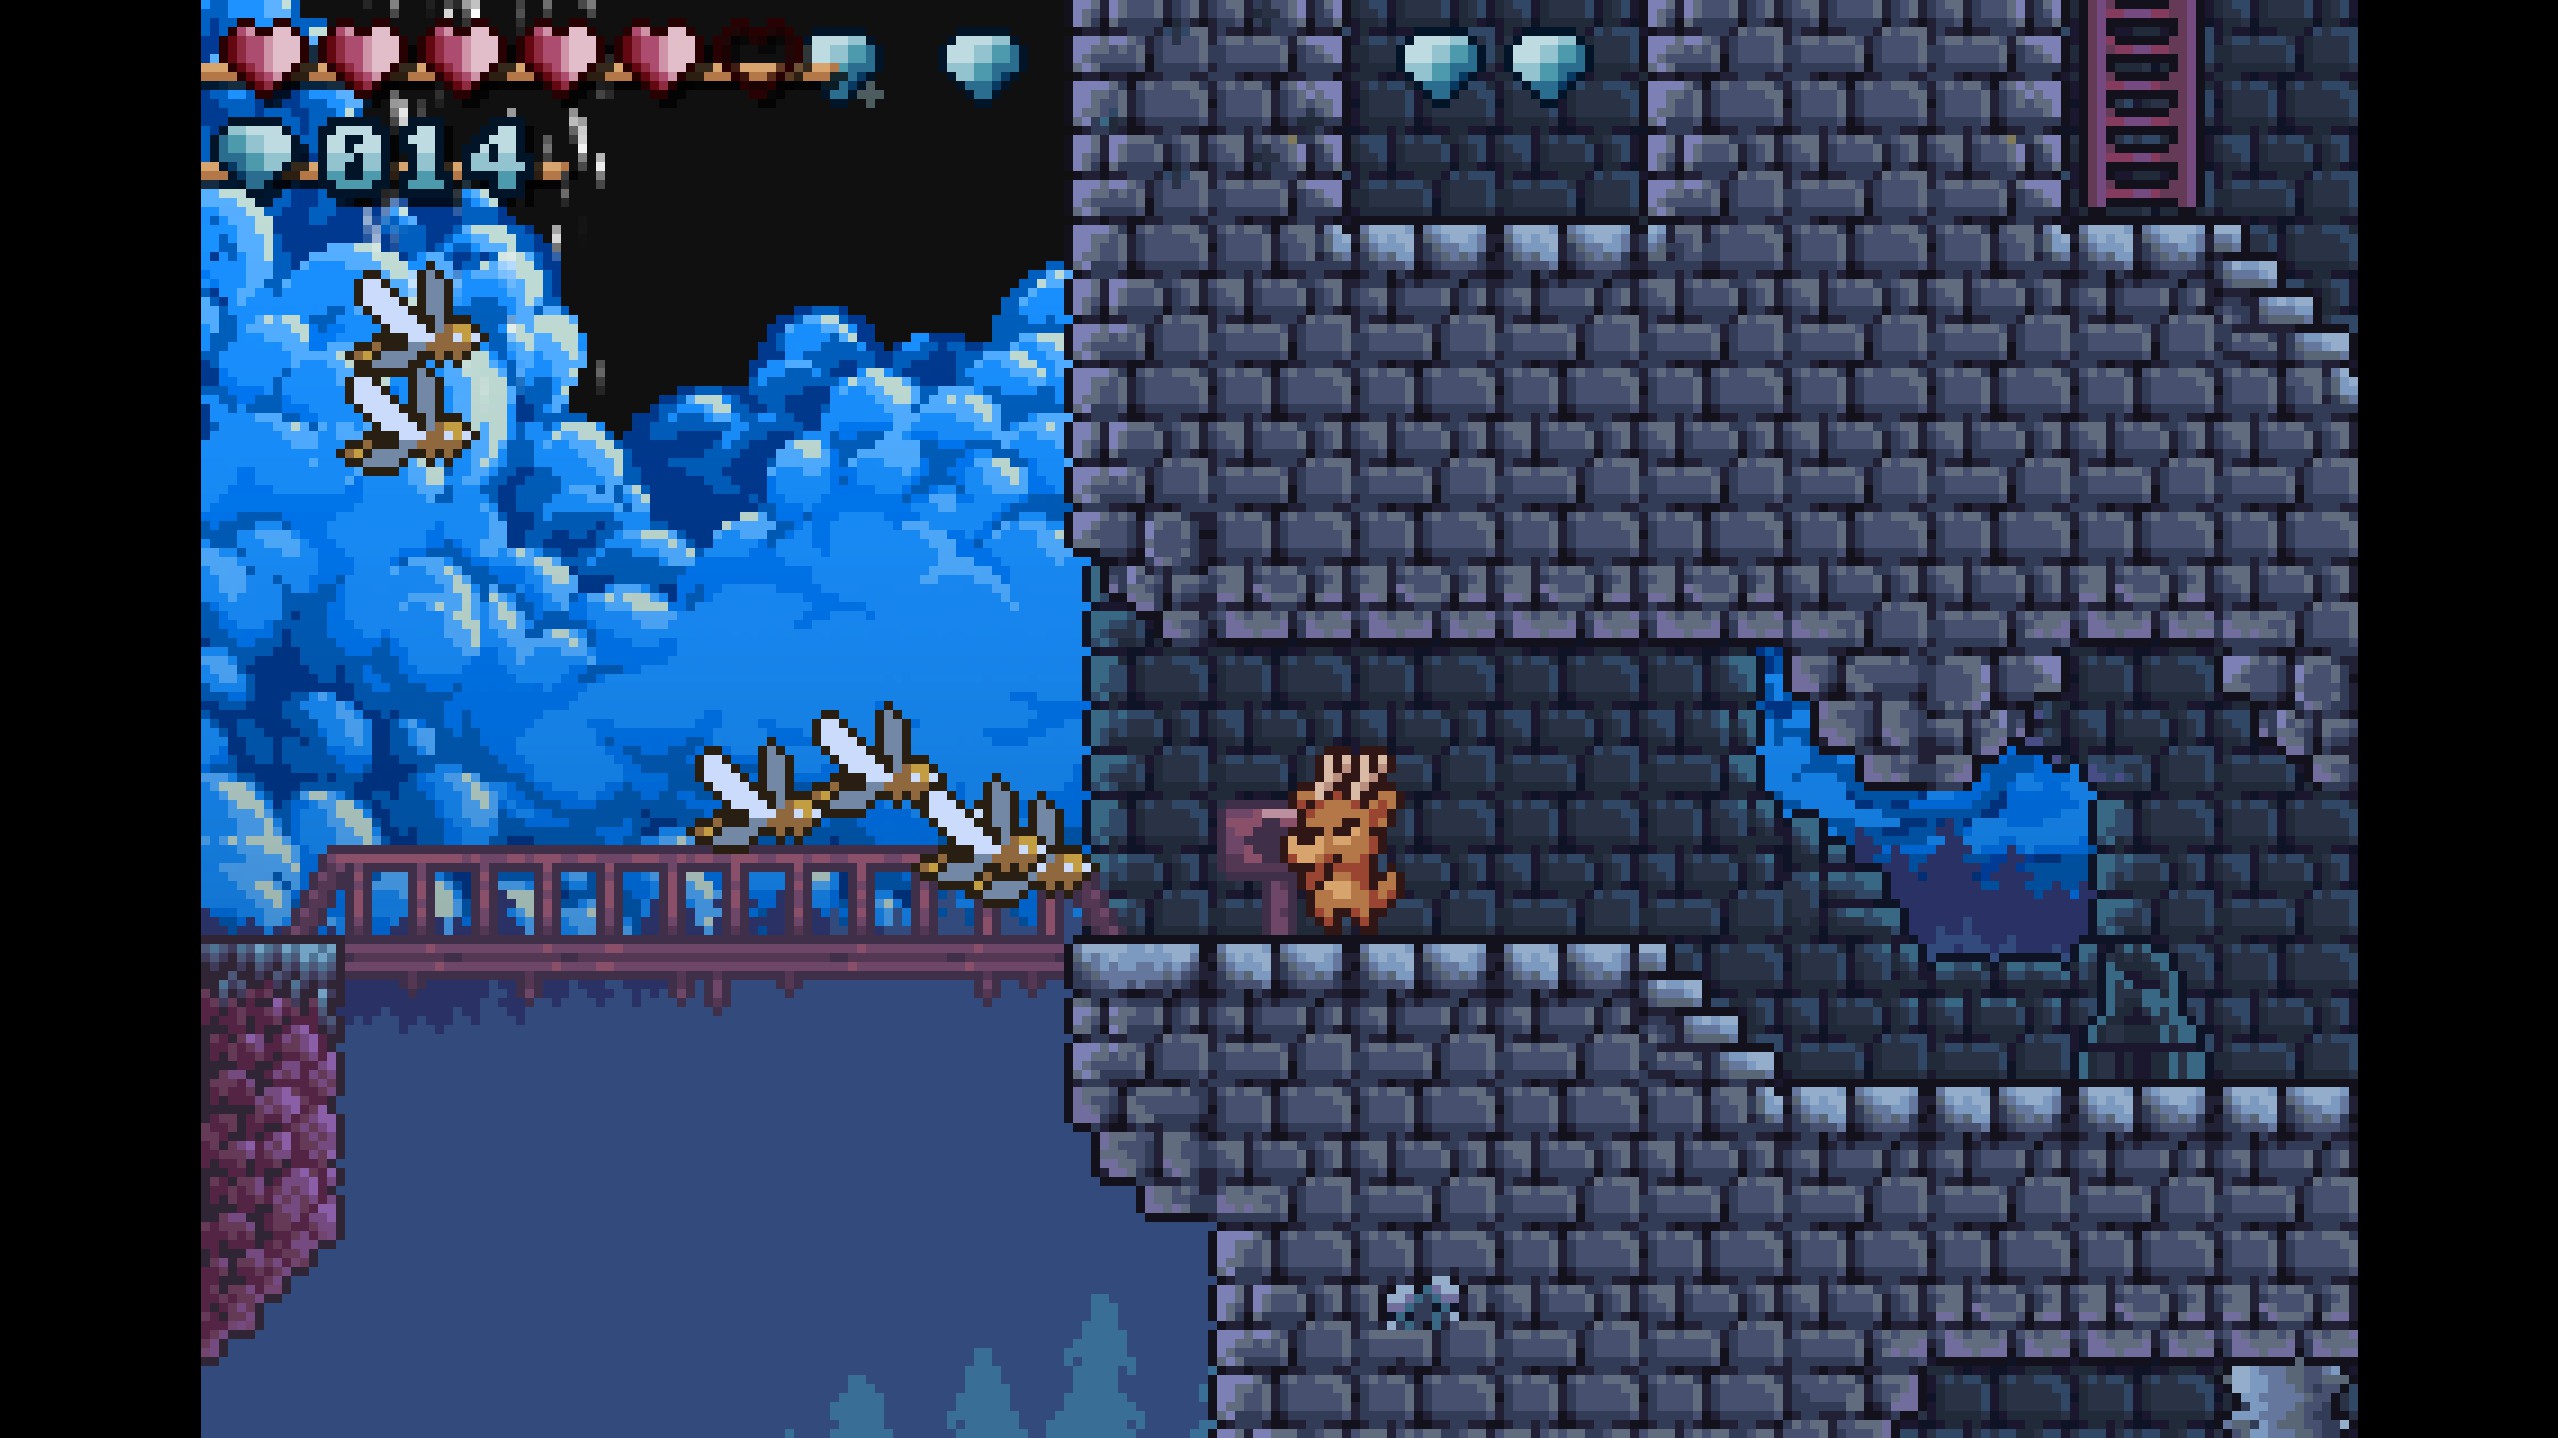
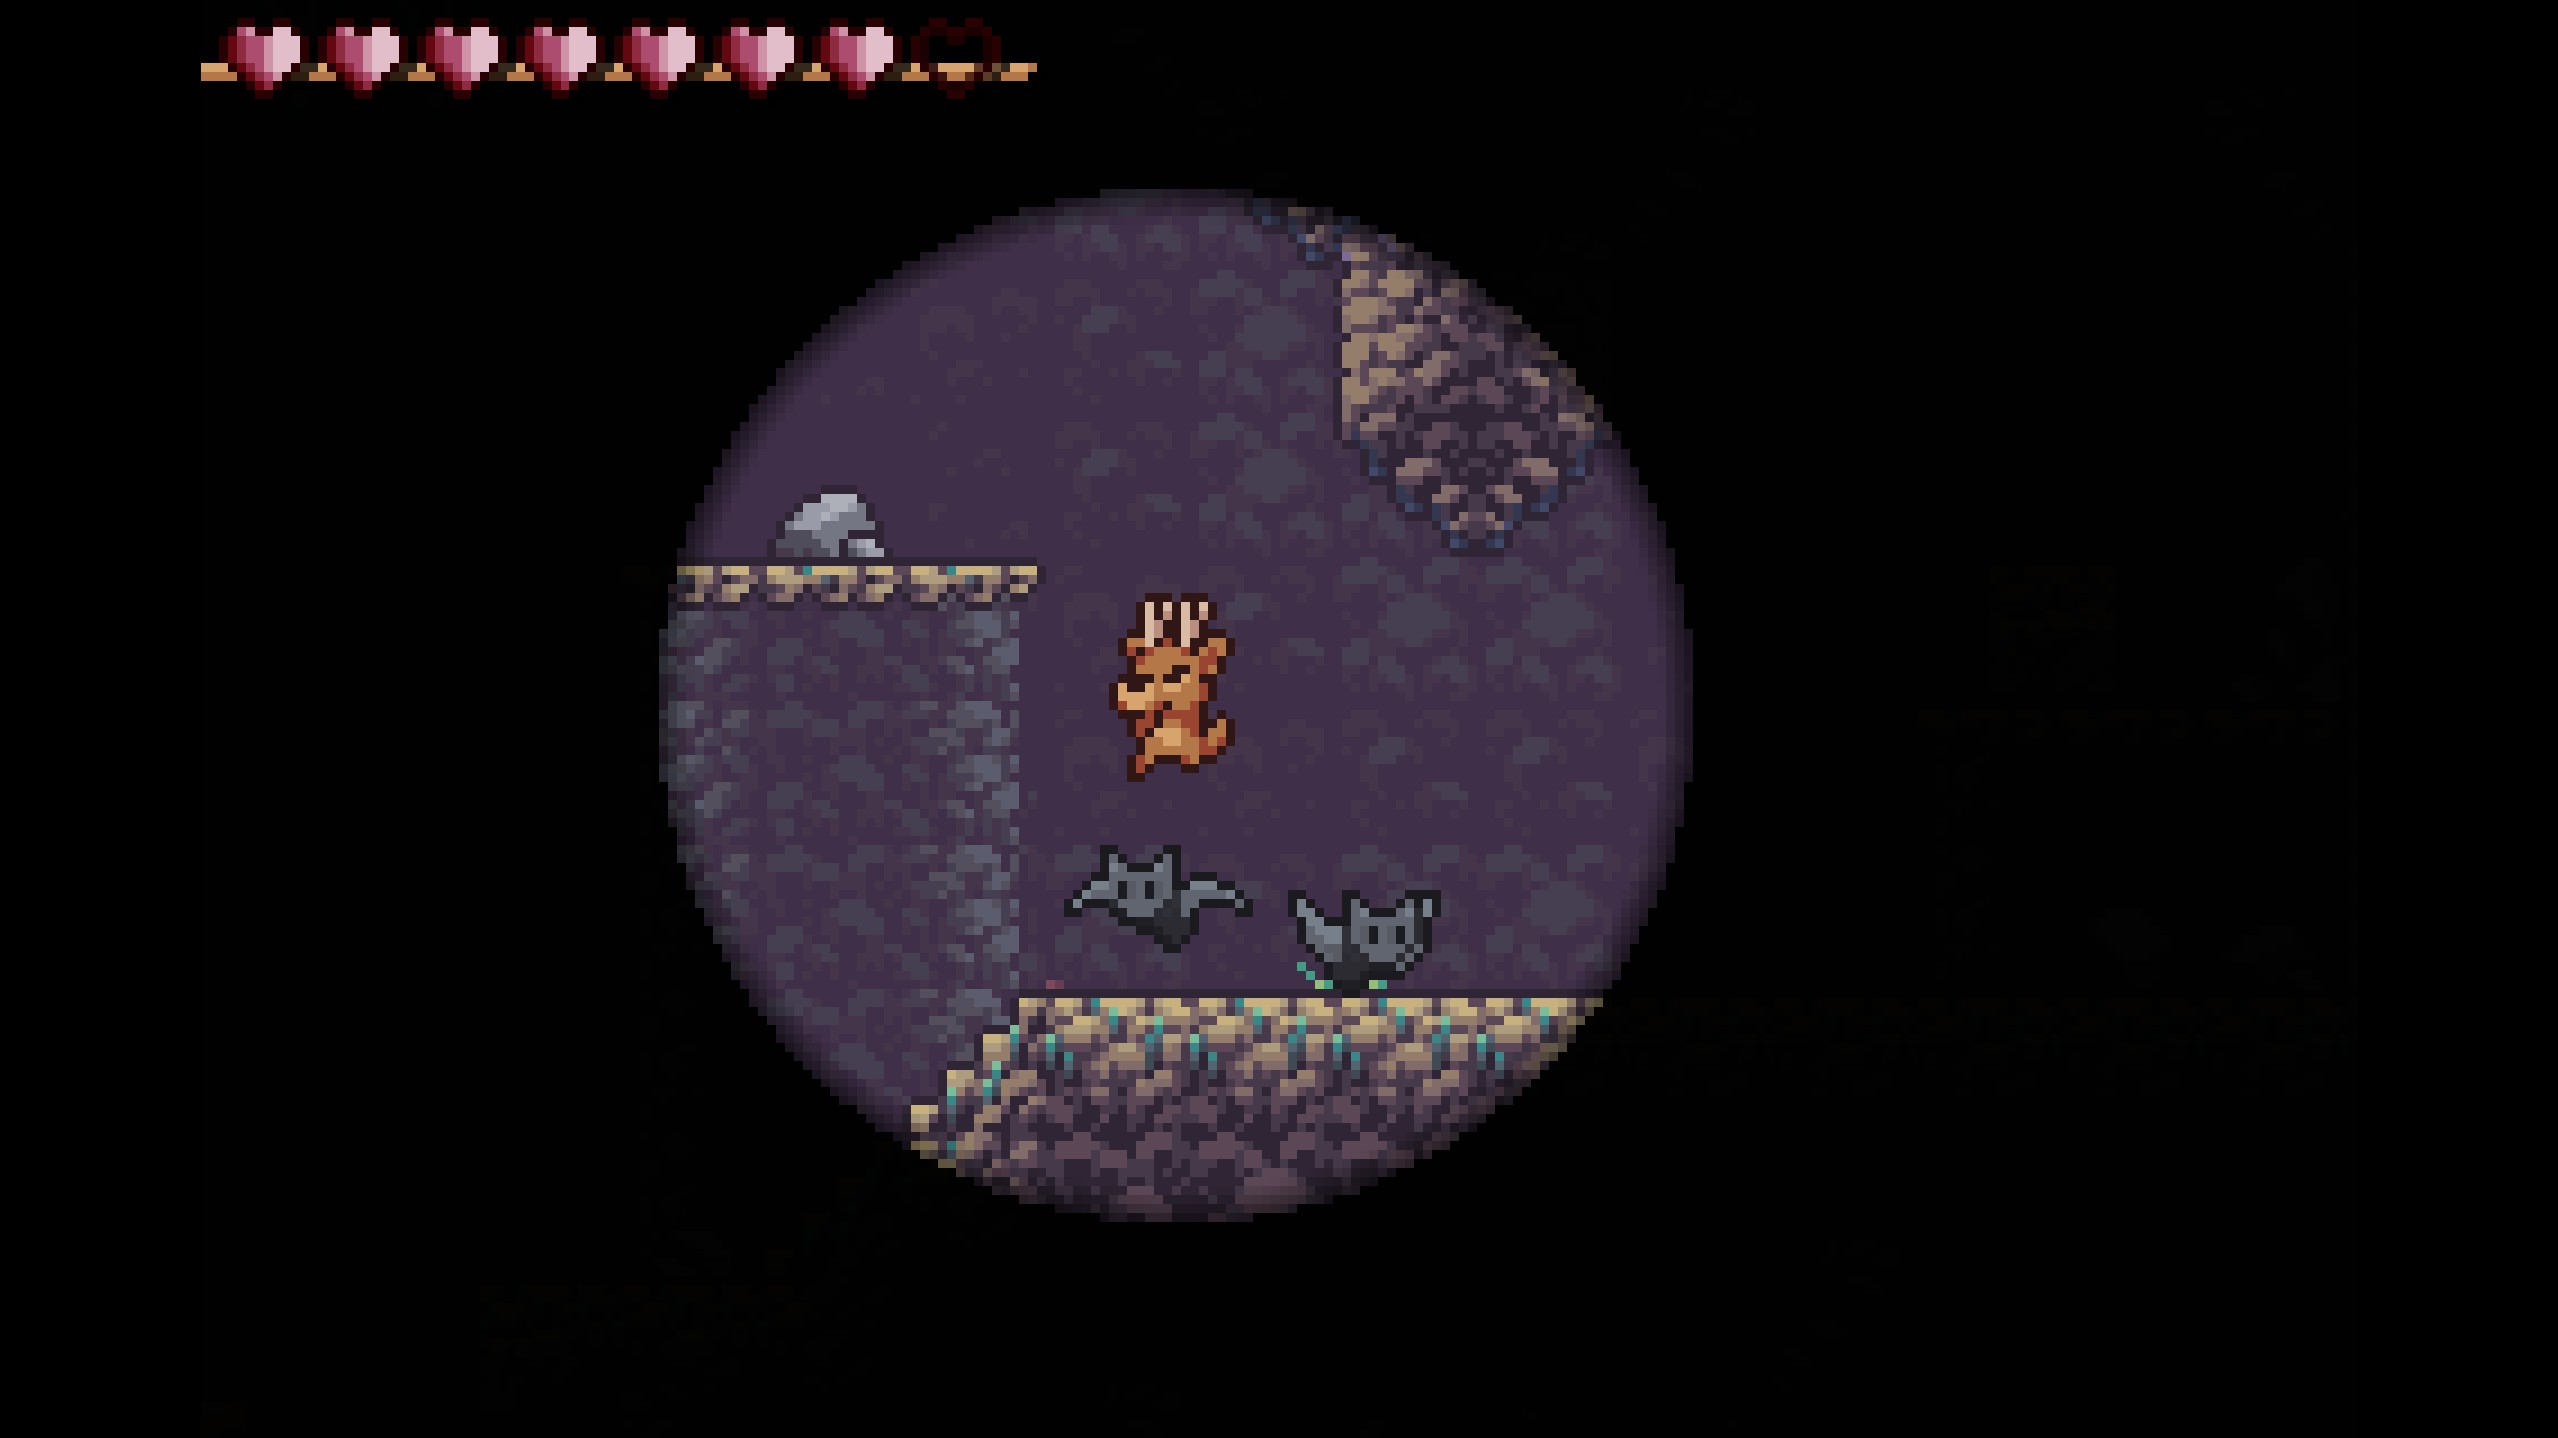
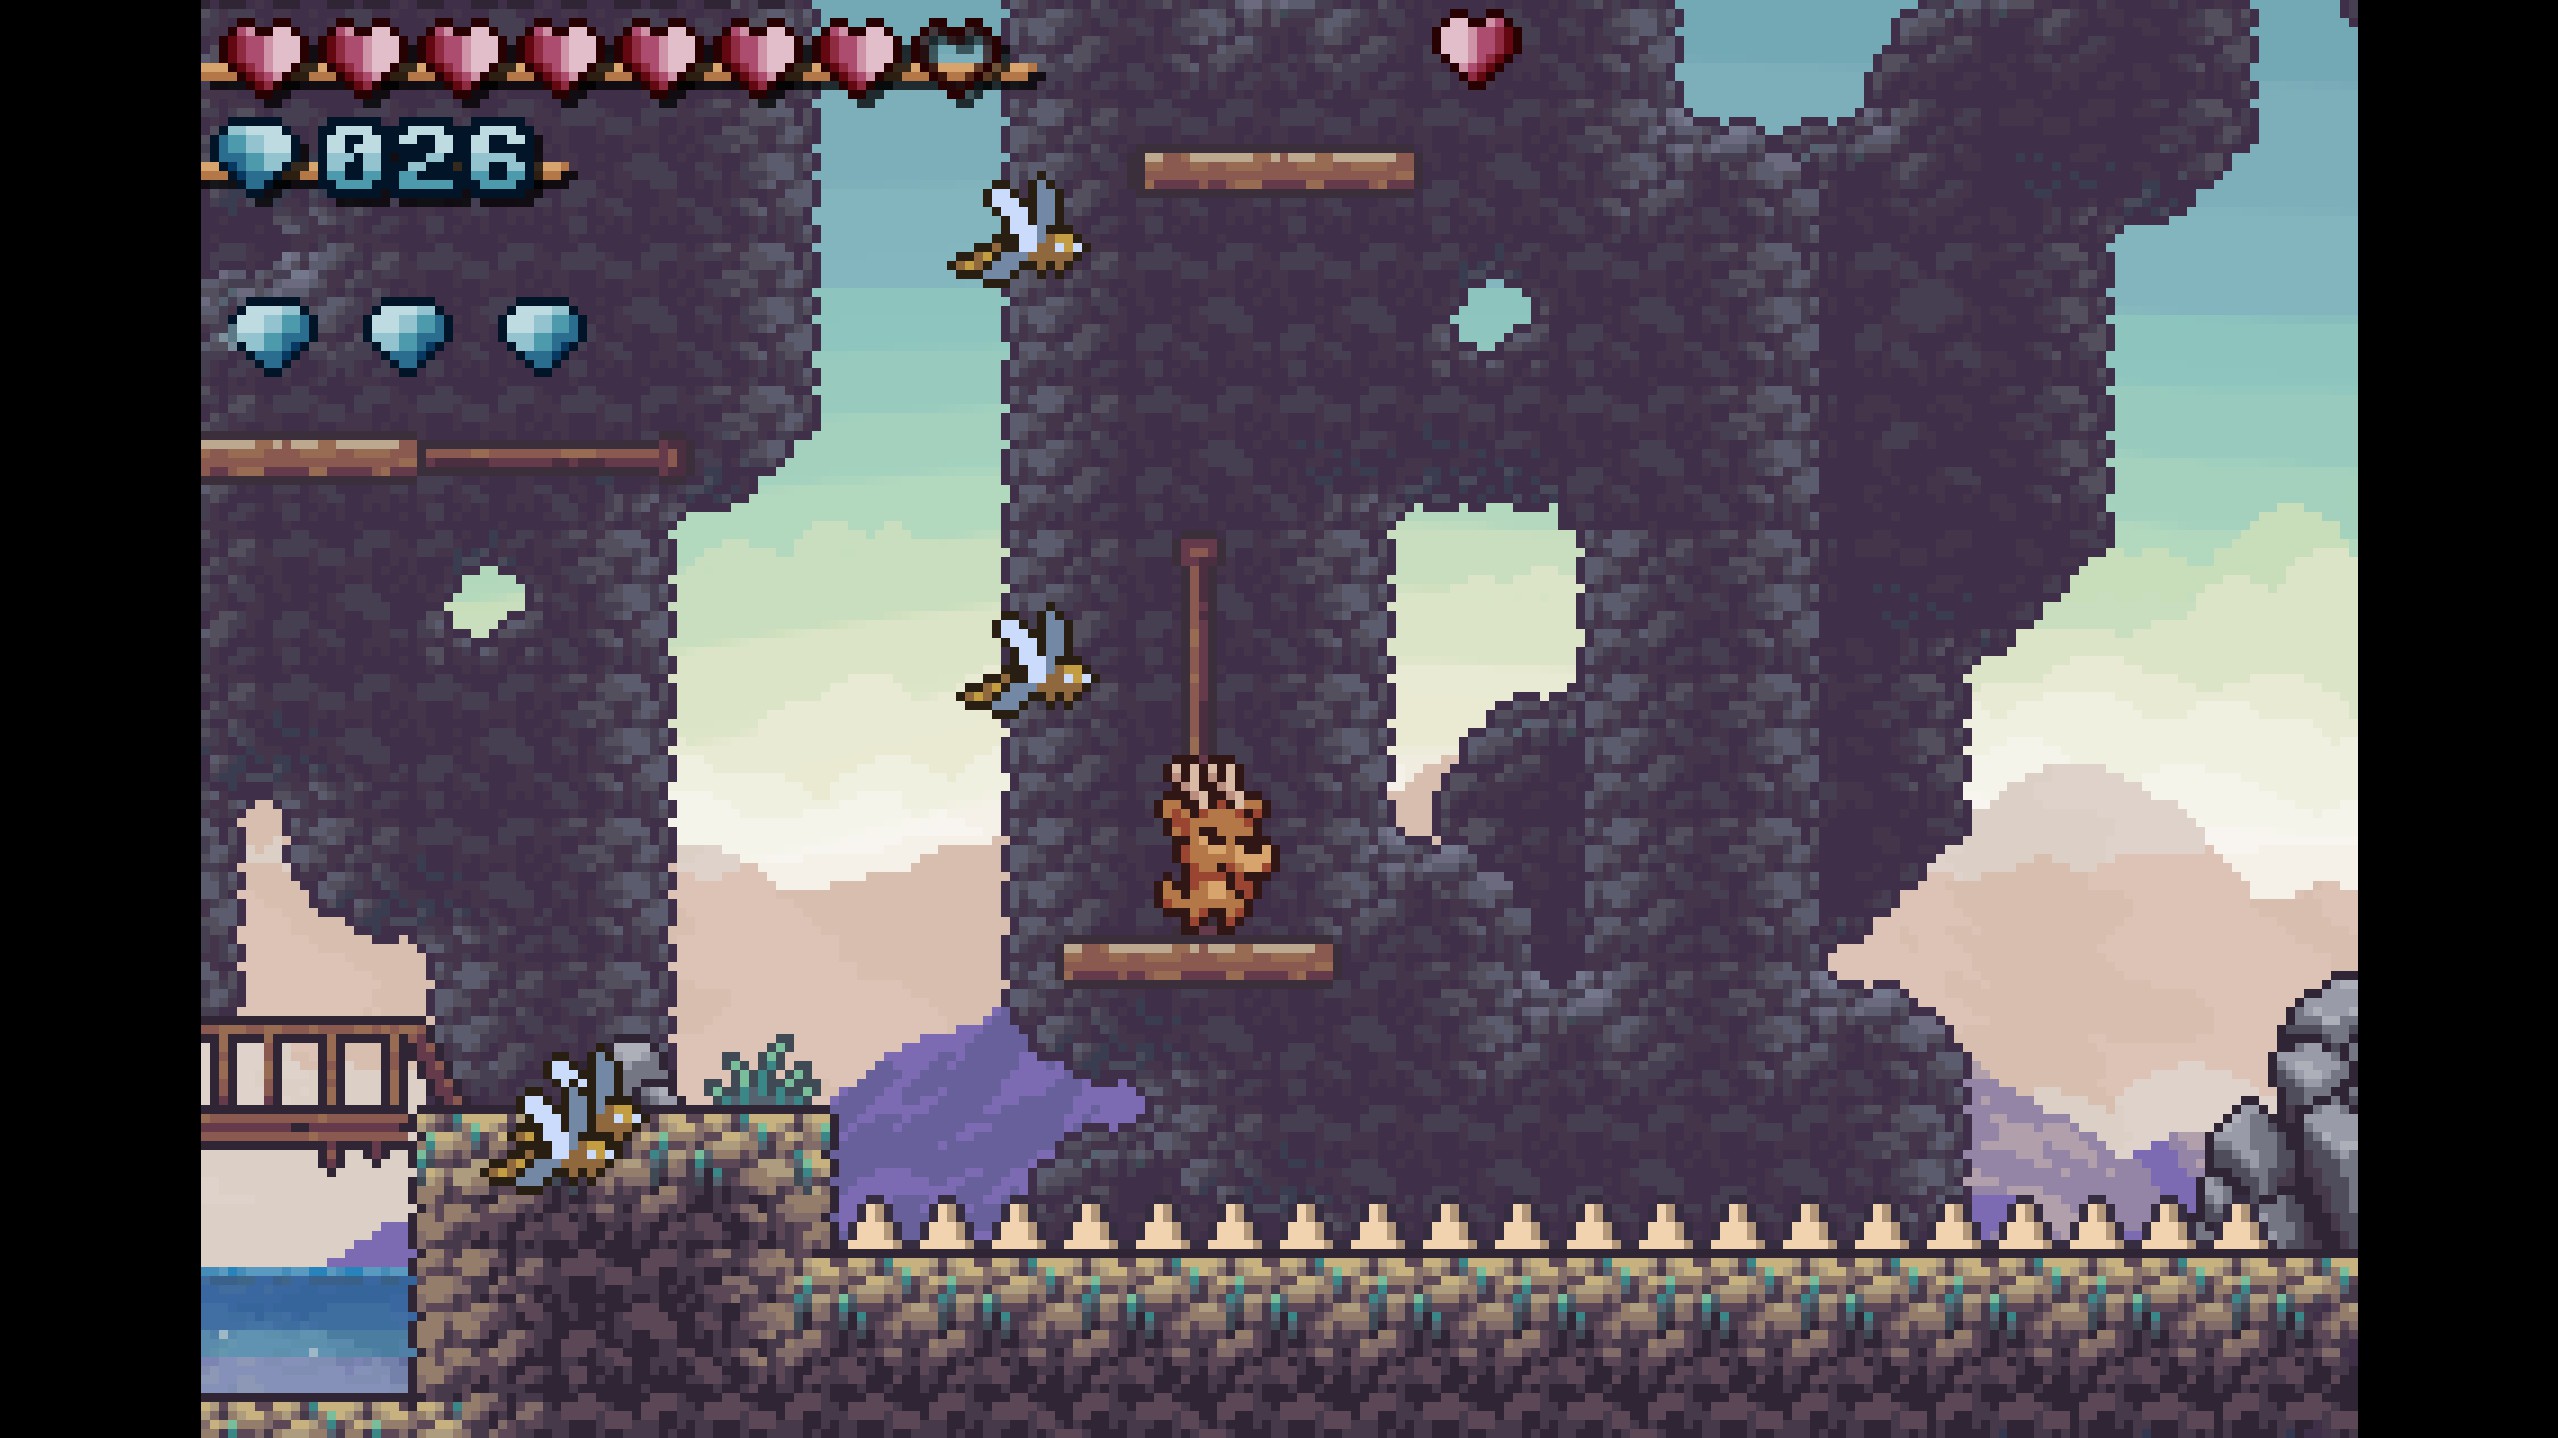
- Gems 5-6
- These gems are found floating above two moving platforms to the left of the floating landmass. Be sure to dodge the bat!
- These gems are found floating above two moving platforms to the left of the floating landmass. Be sure to dodge the bat!
- Gems 7-9
- Continue through the stage until you reach the area with the cat and rabbit. There, you'll see the three gems, but they aren't collectable yet. Jump up to the platform right of the rabbit and push down the stone to where the gems are. Now you can use it as a platform to reach them!
- Continue through the stage until you reach the area with the cat and rabbit. There, you'll see the three gems, but they aren't collectable yet. Jump up to the platform right of the rabbit and push down the stone to where the gems are. Now you can use it as a platform to reach them!
- Gems 10-13
- Hop on the leftmost moving platform near the cat and rabbit, ride it up, and jump off to the left opening. There, you'll find the four gems!
- Hop on the leftmost moving platform near the cat and rabbit, ride it up, and jump off to the left opening. There, you'll find the four gems!
- Gems 14-16
- First, fix the rightmost moving platform by heading to the opening that's up and to the right of the rabbit and flicking the lever. Ride the platform up and jump off to the left to collect the gems! Be sure to get the key, too!
- First, fix the rightmost moving platform by heading to the opening that's up and to the right of the rabbit and flicking the lever. Ride the platform up and jump off to the left to collect the gems! Be sure to get the key, too!
- Gems 17-20
- Ride the rightmost moving platform up, but jump off to the right opening. Vault over some spikes and the gems are yours!
- Ride the rightmost moving platform up, but jump off to the right opening. Vault over some spikes and the gems are yours!
- Gems 21-28
- Use your key to open the locked door beside the badger, and continue past the checkpoint. The gems are found near the first jump mushrooms you encounter!
- Use your key to open the locked door beside the badger, and continue past the checkpoint. The gems are found near the first jump mushrooms you encounter!
- Gems 29-30
- Continue past the leopard and you'll reach the dark part of Fungus Grotto. Floating there are the two gems.
- Continue past the leopard and you'll reach the dark part of Fungus Grotto. Floating there are the two gems.
- Gems 31-32
- Continue through the dark part and collect these two gems atop a semisolid platform.
- Continue through the dark part and collect these two gems atop a semisolid platform.
- Gems 33-34
- Continue through the stage and you'll reach an area with moving platforms and light sprites. Nab these two gems atop a semisolid platform!
- Continue through the stage and you'll reach an area with moving platforms and light sprites. Nab these two gems atop a semisolid platform!
- Gems 35-38
- Jump up some semisolid platforms and head to this opening, to the right, where the gems are.
- Jump up some semisolid platforms and head to this opening, to the right, where the gems are.
- Gems 39-41
- Carefully jump back down to the two moving platforms and climb up the ladder to the left. Collect the light sprite to see better and nab the gems atop another moving platform!
- Carefully jump back down to the two moving platforms and climb up the ladder to the left. Collect the light sprite to see better and nab the gems atop another moving platform!
- Gems 42-45
- Hop off the moving platform and head right. You'll reach an area with more jump mushrooms, semisolid platforms, and a stone. Ignore the stone for now and jump up to the tallest platform and then into the opening to the left, where the four gems are.
- Hop off the moving platform and head right. You'll reach an area with more jump mushrooms, semisolid platforms, and a stone. Ignore the stone for now and jump up to the tallest platform and then into the opening to the left, where the four gems are.
- Gems 46-47
- Now, push the stone off of the semisolid platform and move it to the right. There, you'll see the gems and can jump off of the stone to reach them.
- Now, push the stone off of the semisolid platform and move it to the right. There, you'll see the gems and can jump off of the stone to reach them.
- Gems 48-51
- Continue upwards through the stage and pass the second checkpoint, where the darkness begins to fade! Jump over to the right opening beside the badger and walk through the fake wall to grab the gems.
- Continue upwards through the stage and pass the second checkpoint, where the darkness begins to fade! Jump over to the right opening beside the badger and walk through the fake wall to grab the gems.
- Gems 52-57
- Continue upwards and collect these easy gems with the jump mushrooms.
- Continue upwards and collect these easy gems with the jump mushrooms.
- Gems 58-60
- Continue upwards and collect these easy gems beside a red slime.

- Continue upwards and collect these easy gems beside a red slime.
- Gems 61-69
- Head over to the left and collect the ground pound belt atop a semisolid platform. Then, you can easily collect all 9 gems (one is offscreen) by ground pounding through the breakable rocks.
- Head over to the left and collect the ground pound belt atop a semisolid platform. Then, you can easily collect all 9 gems (one is offscreen) by ground pounding through the breakable rocks.
- Gems 70-72
- Head back down and ground pound through the breakable rocks beside the second checkpoint. Use the jump mushroom chain to the left to go up high, then ground pound through the four breakable rocks at the top to reach the gems.
- Head back down and ground pound through the breakable rocks beside the second checkpoint. Use the jump mushroom chain to the left to go up high, then ground pound through the four breakable rocks at the top to reach the gems.
- Gems 73-75
- Continue through the stage to reach an area with more jump mushrooms and breakable rocks. Walk through the fake wall to the right to grab the gems.
- Continue through the stage to reach an area with more jump mushrooms and breakable rocks. Walk through the fake wall to the right to grab the gems.
- Gems 76-78
- Continue up through the stage and walk through the fake wall to the left to grab the gems.
- Continue up through the stage and walk through the fake wall to the left to grab the gems.
- Gems 79-82
- Ground pound through the three breakable rocks beside the jump mushroom and walk through the fake wall to the left to grab the gems.
- Ground pound through the three breakable rocks beside the jump mushroom and walk through the fake wall to the left to grab the gems.
- Gems 83-86
- Ground pound through these four breakable rocks; they contain the gems inside! This was a very sneaky move by the developer, I missed them the first time around and had to replay the stage...

- Ground pound through these four breakable rocks; they contain the gems inside! This was a very sneaky move by the developer, I missed them the first time around and had to replay the stage...
- Gems 87-88
- Continue up through the stage using the moving platforms and climb the ladder to the right to grab the gems.
- Continue up through the stage using the moving platforms and climb the ladder to the right to grab the gems.
- Gems 89-92
- Walk through and fall down a very sneaky fake wall to the right of the ladder to grab the gems.
- Walk through and fall down a very sneaky fake wall to the right of the ladder to grab the gems.
- Gems 93-97
- Continue left using the moving platforms and the darkness will return. Not to fear! Ground pound through the breakable rock at the start of this section to collect five gems.
- Continue left using the moving platforms and the darkness will return. Not to fear! Ground pound through the breakable rock at the start of this section to collect five gems.
- Gems 97-100
- Continue through the dark section until you reach these three sneaky breakable rocks. Ground pound them to collect the final three gems of Fungus Grotto. Congrats!
- Continue through the dark section until you reach these three sneaky breakable rocks. Ground pound them to collect the final three gems of Fungus Grotto. Congrats!
Nyctophile Badge
The Nyctophile Badge is earned by passing the first dark section in Fungus Grotto without using a light sprite. This badge is very straightforward, just jump over/under any light sprites you encounter so you don't accidentally activate them! You automatically get the badge after passing the dark section, so no need to even beat the entire level!
A Perfect Run Badge
The Perfect Run Badge is earned by clearing Fungus Grotto without taking any damage. This would be a pretty straightforward badge if it weren't for the bats. My strategy for dealing with them is to play it safe and immediately run in the opposite direction once one's been activated. After a few seconds of waiting, it'll have flied off screen and you can continue making your way through the stage.
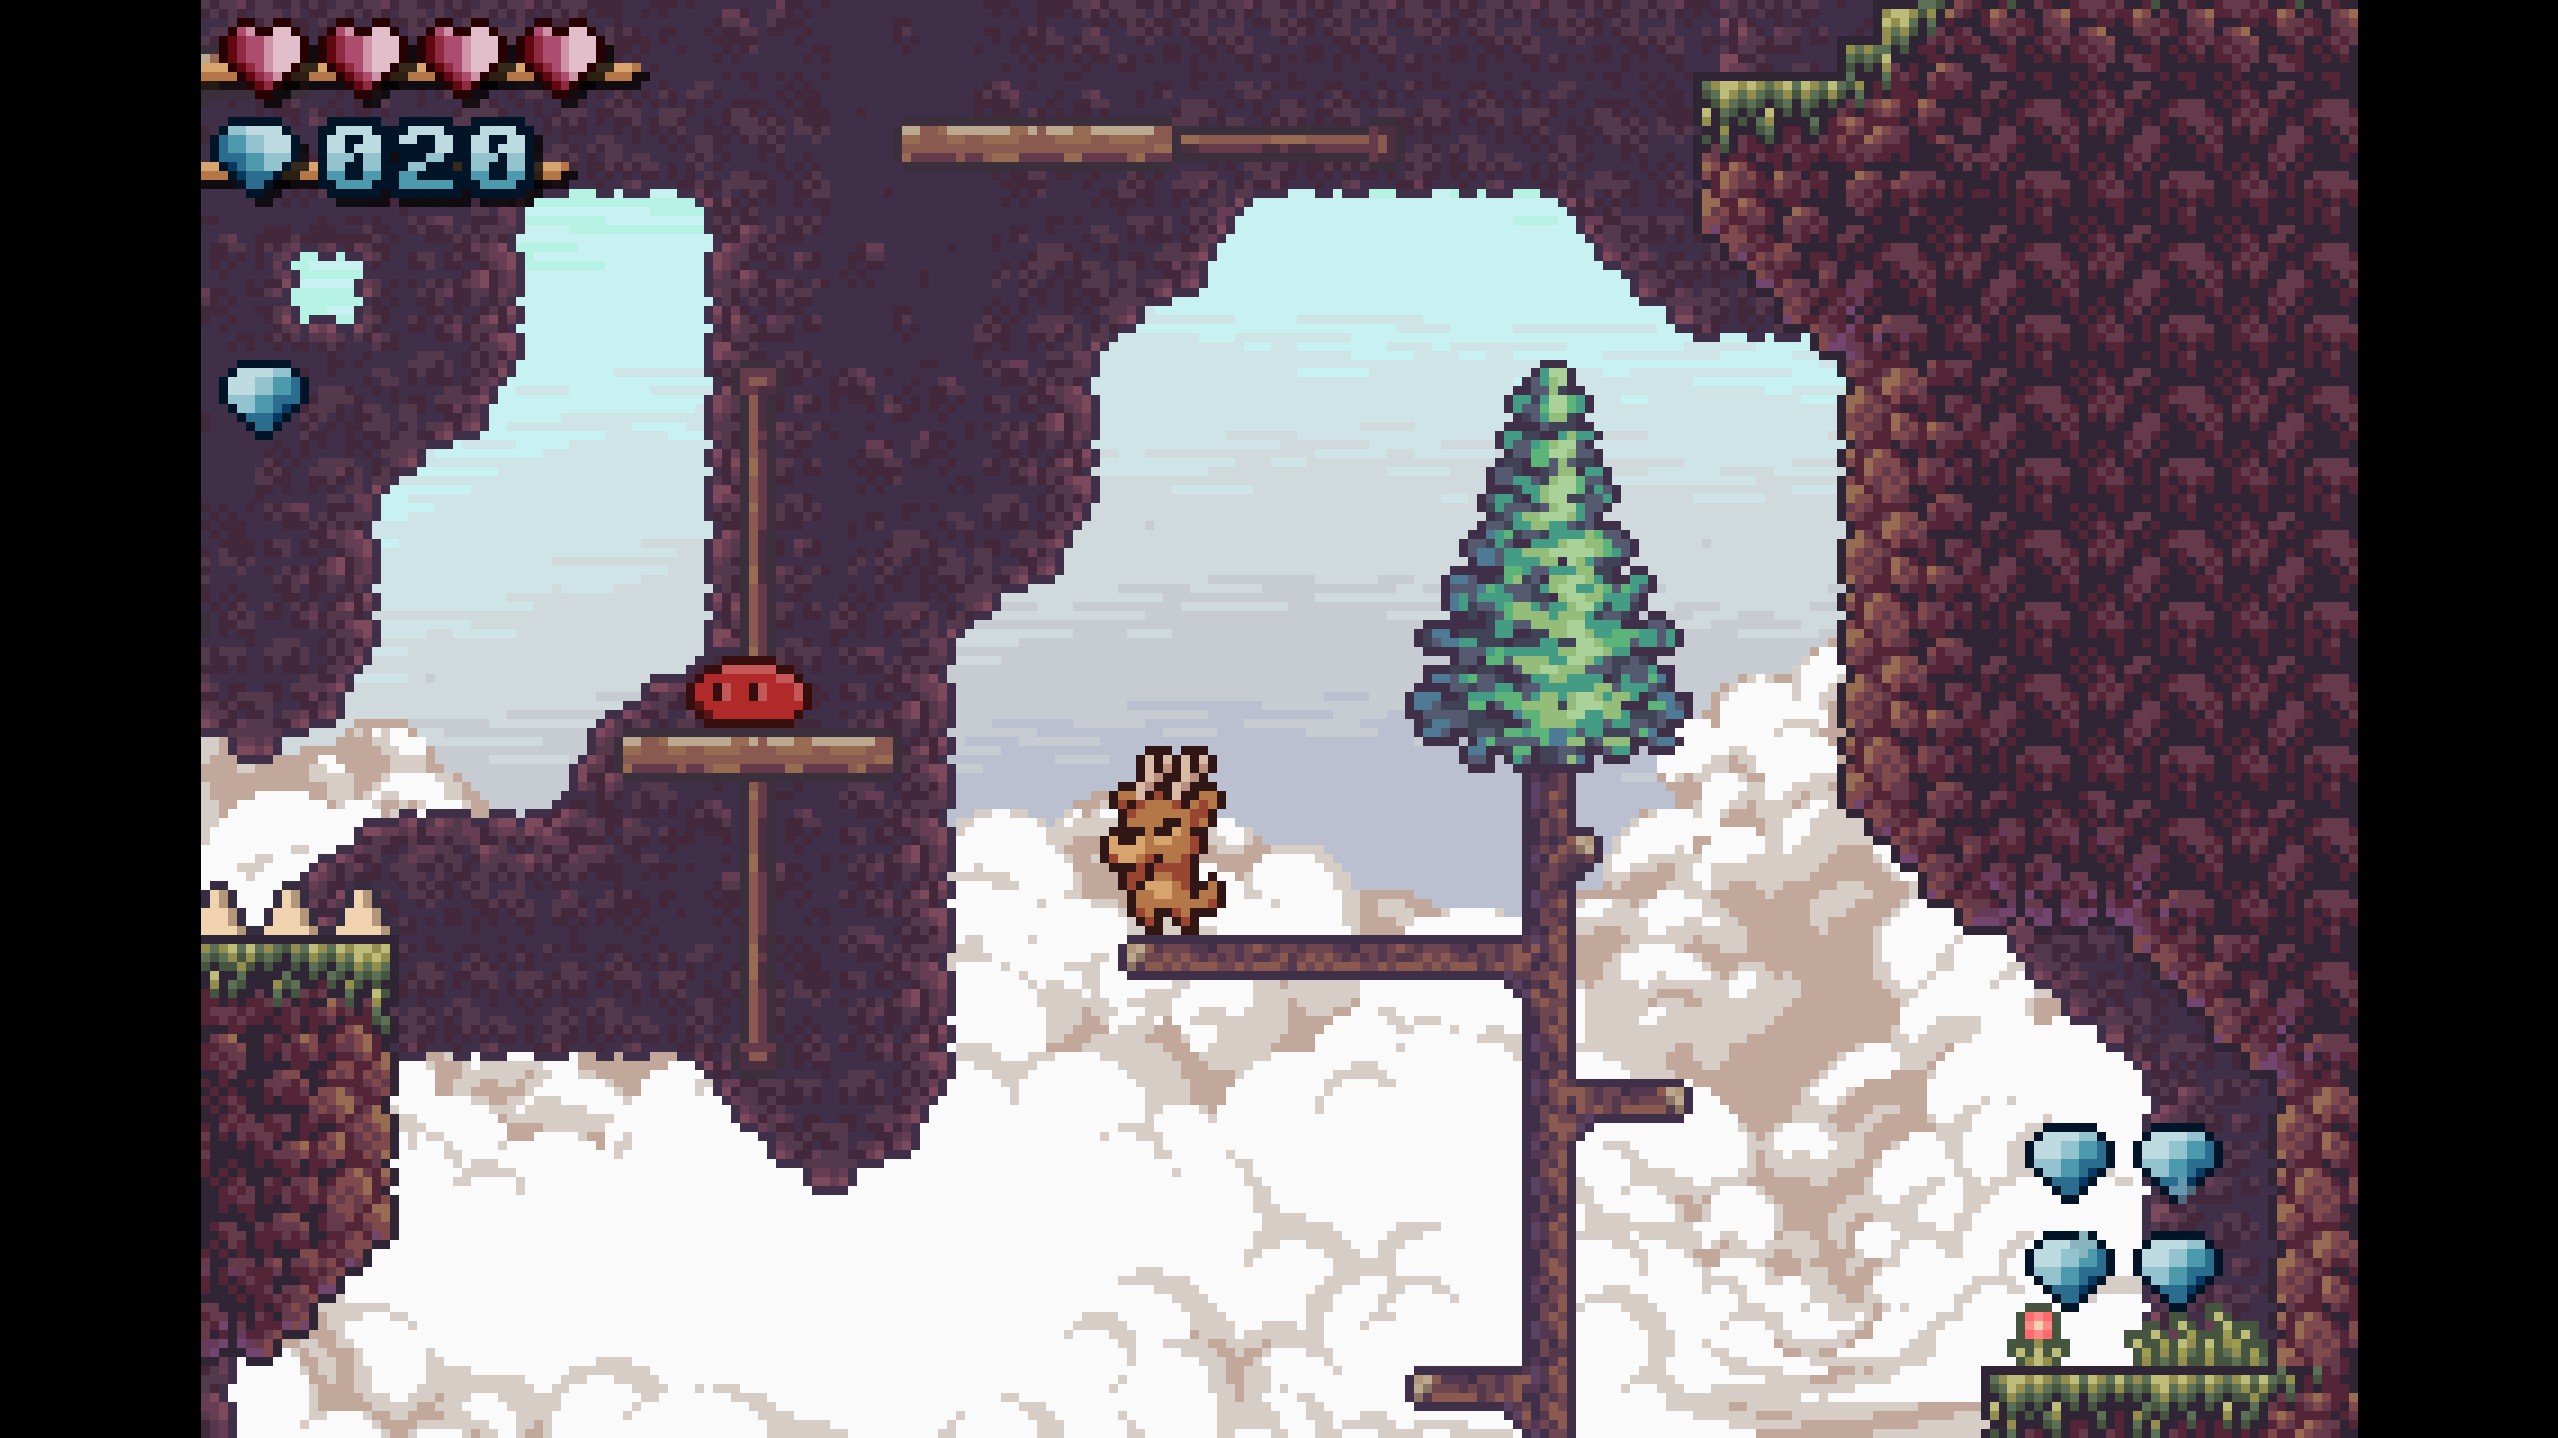
Treetop Trails
Treetop Trails is the third stage in Ronny's Climb! It takes place in at nighttime, with calm, relaxing music, fireflies, and a giant castle looming above.
Gems
- Gems 1-2
- Head up the first wind draft to collect these easy gems, floating atop a tree branch to the left.
- Head up the first wind draft to collect these easy gems, floating atop a tree branch to the left.
- Gems 3-6
- Jump off of the left branch of the tree to reach this somewhat hidden floating landmass with the gems!
- Jump off of the left branch of the tree to reach this somewhat hidden floating landmass with the gems!
- Gems 7-9
- Continue right through the stage and you'll reach this opening with three easy gems!
- Continue right through the stage and you'll reach this opening with three easy gems!
- Gems 10-12
- Continue through the stage and you'll spot these gems floating above the moving platform. Be sure to dodge the dragonfly!
- Continue through the stage and you'll spot these gems floating above the moving platform. Be sure to dodge the dragonfly!
- Gems 13-15
- Continue through the stage until you reach the first checkpoint. Head left and ride up the moving platform. Dodge the red slimes and walk through the fake wall to the right to collect the gems!

- Continue through the stage until you reach the first checkpoint. Head left and ride up the moving platform. Dodge the red slimes and walk through the fake wall to the right to collect the gems!
- Gems 16-19
- Climb up the left ladder. Easily collect the first two gems, then push down the stone and use it as a platform to reach the other two gems to the right.
- Climb up the left ladder. Easily collect the first two gems, then push down the stone and use it as a platform to reach the other two gems to the right.
- Gems 20-21
- Scare away the Nightwing bird to the right of gems 16-19 and grab the feather it leaves behind. Then, head back down and ground pound through these breakable rocks that contain the gems.
- Scare away the Nightwing bird to the right of gems 16-19 and grab the feather it leaves behind. Then, head back down and ground pound through these breakable rocks that contain the gems.
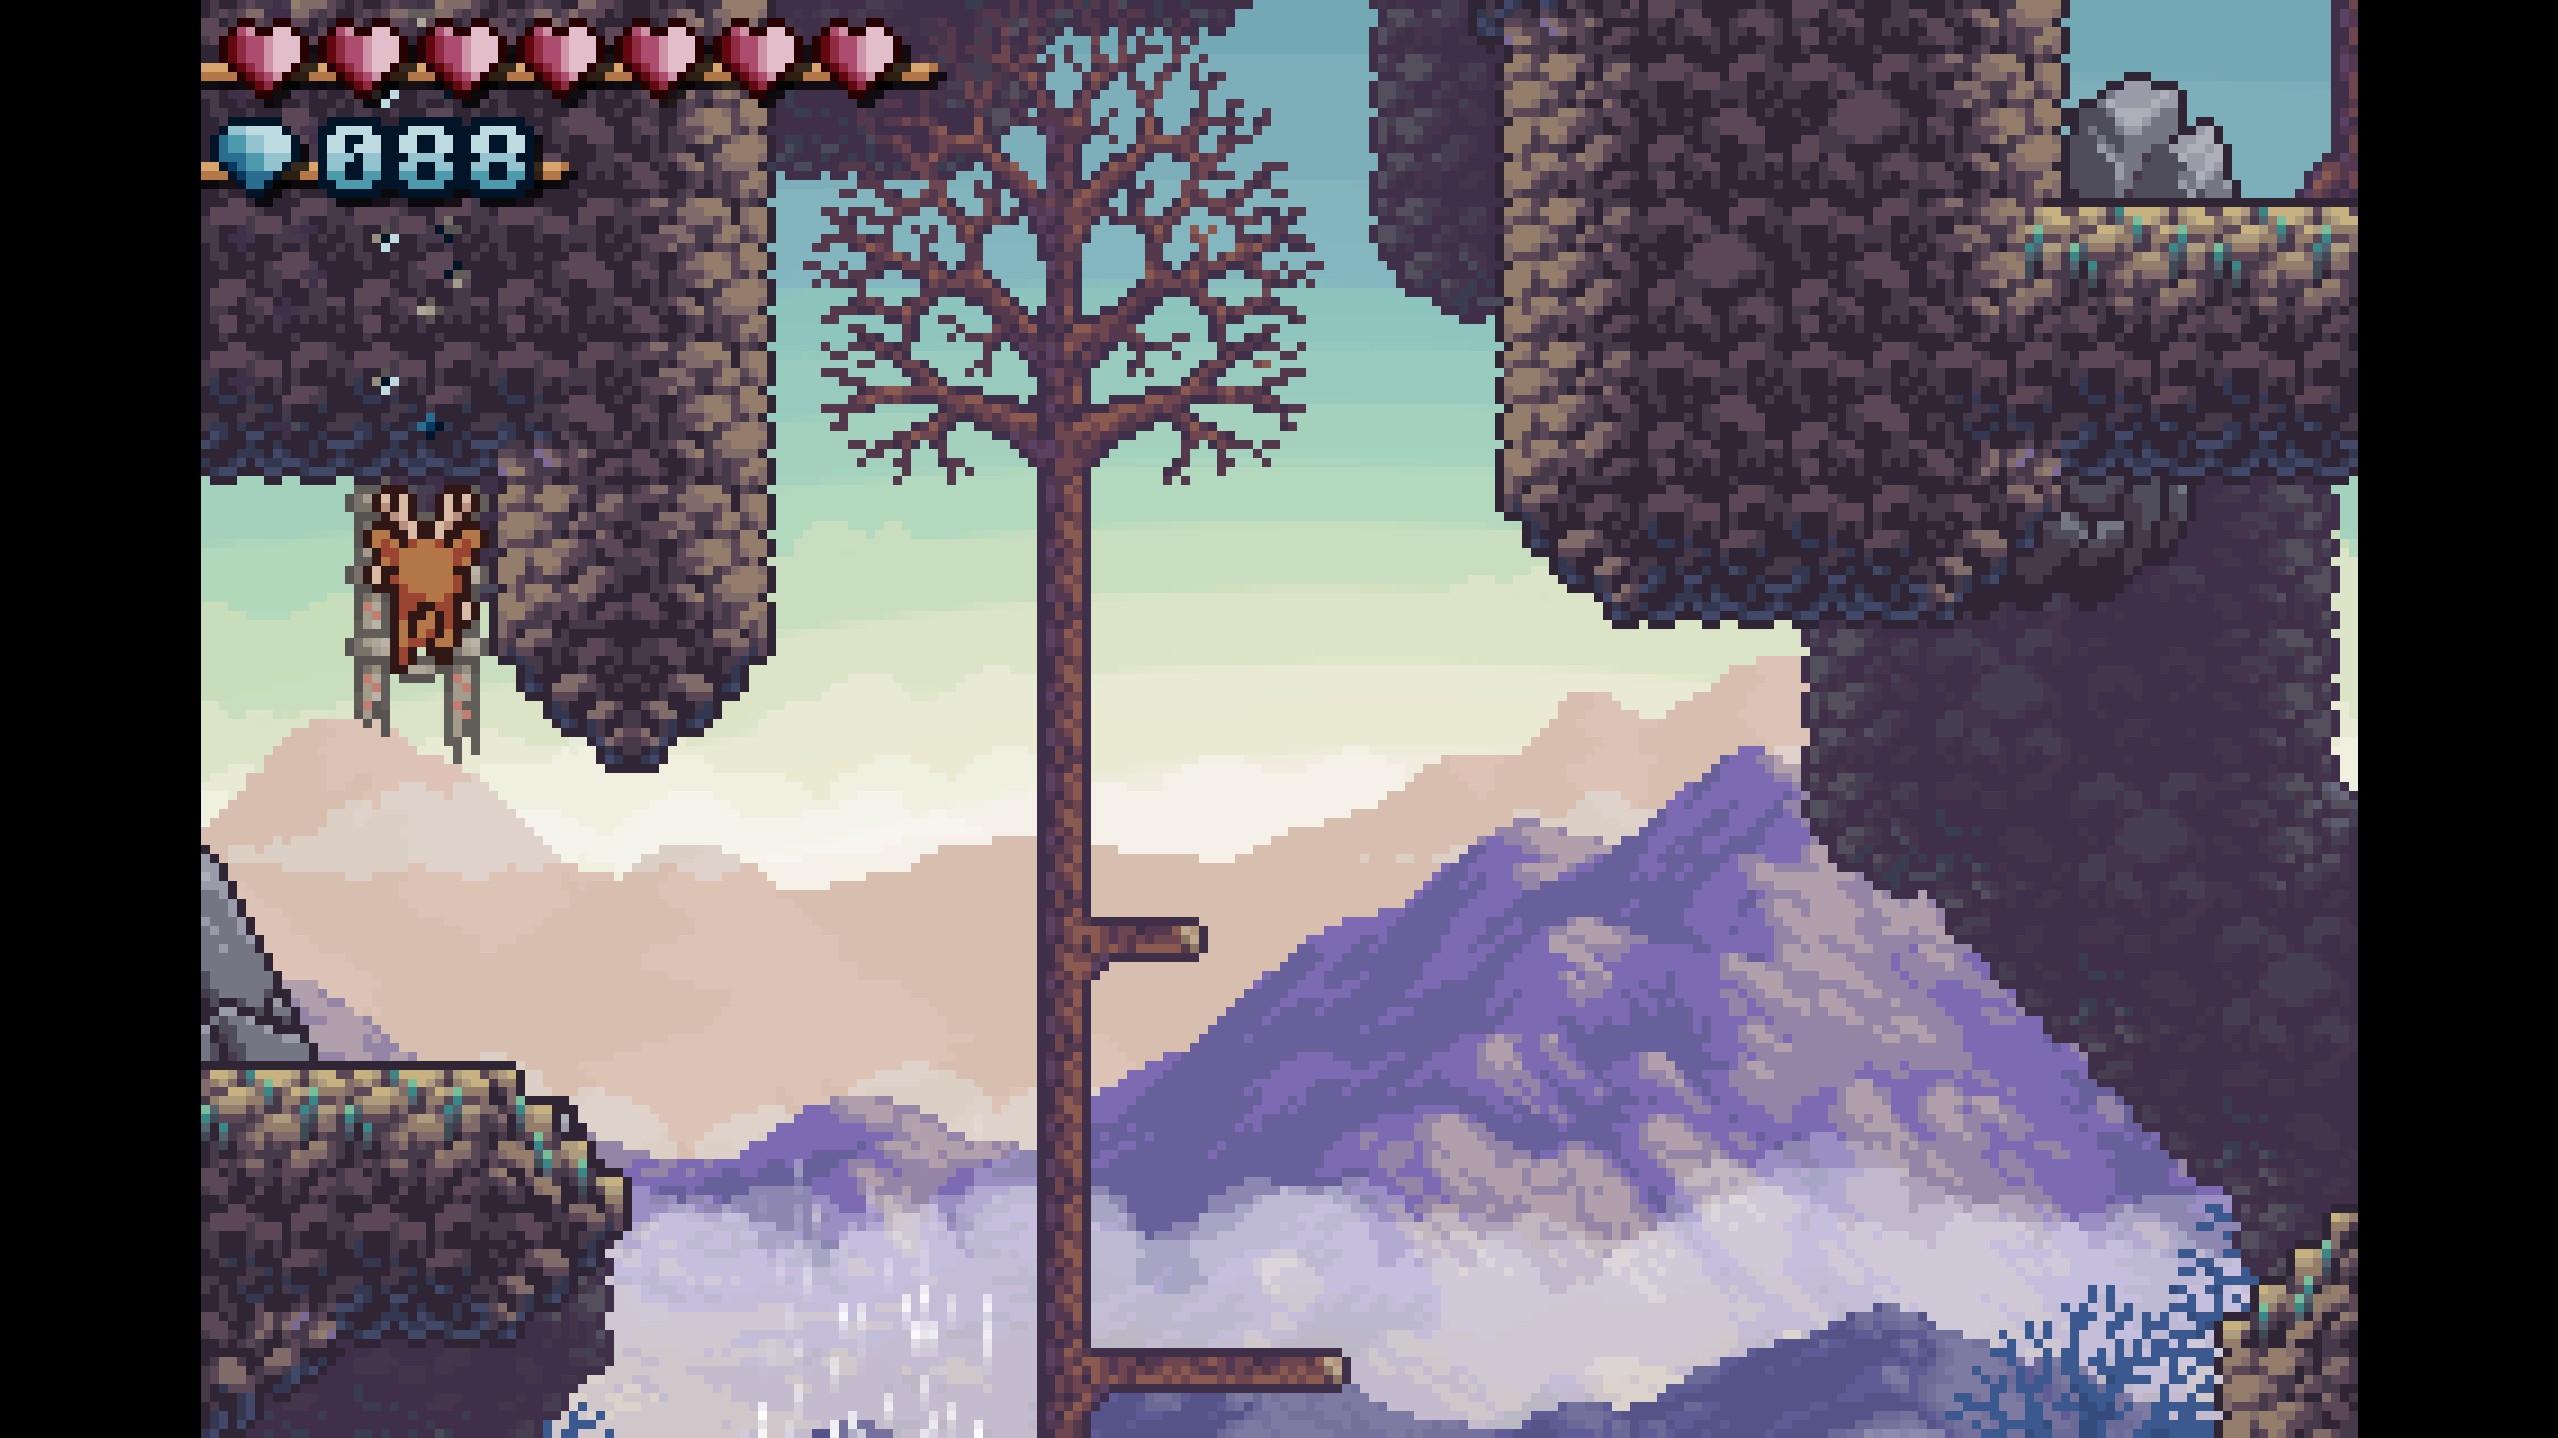
- Gems 22-24
- Backtrack and head right through the first checkpoint. Climb up the tree and dodge the dragon's fire to collect the gems!
- Backtrack and head right through the first checkpoint. Climb up the tree and dodge the dragon's fire to collect the gems!
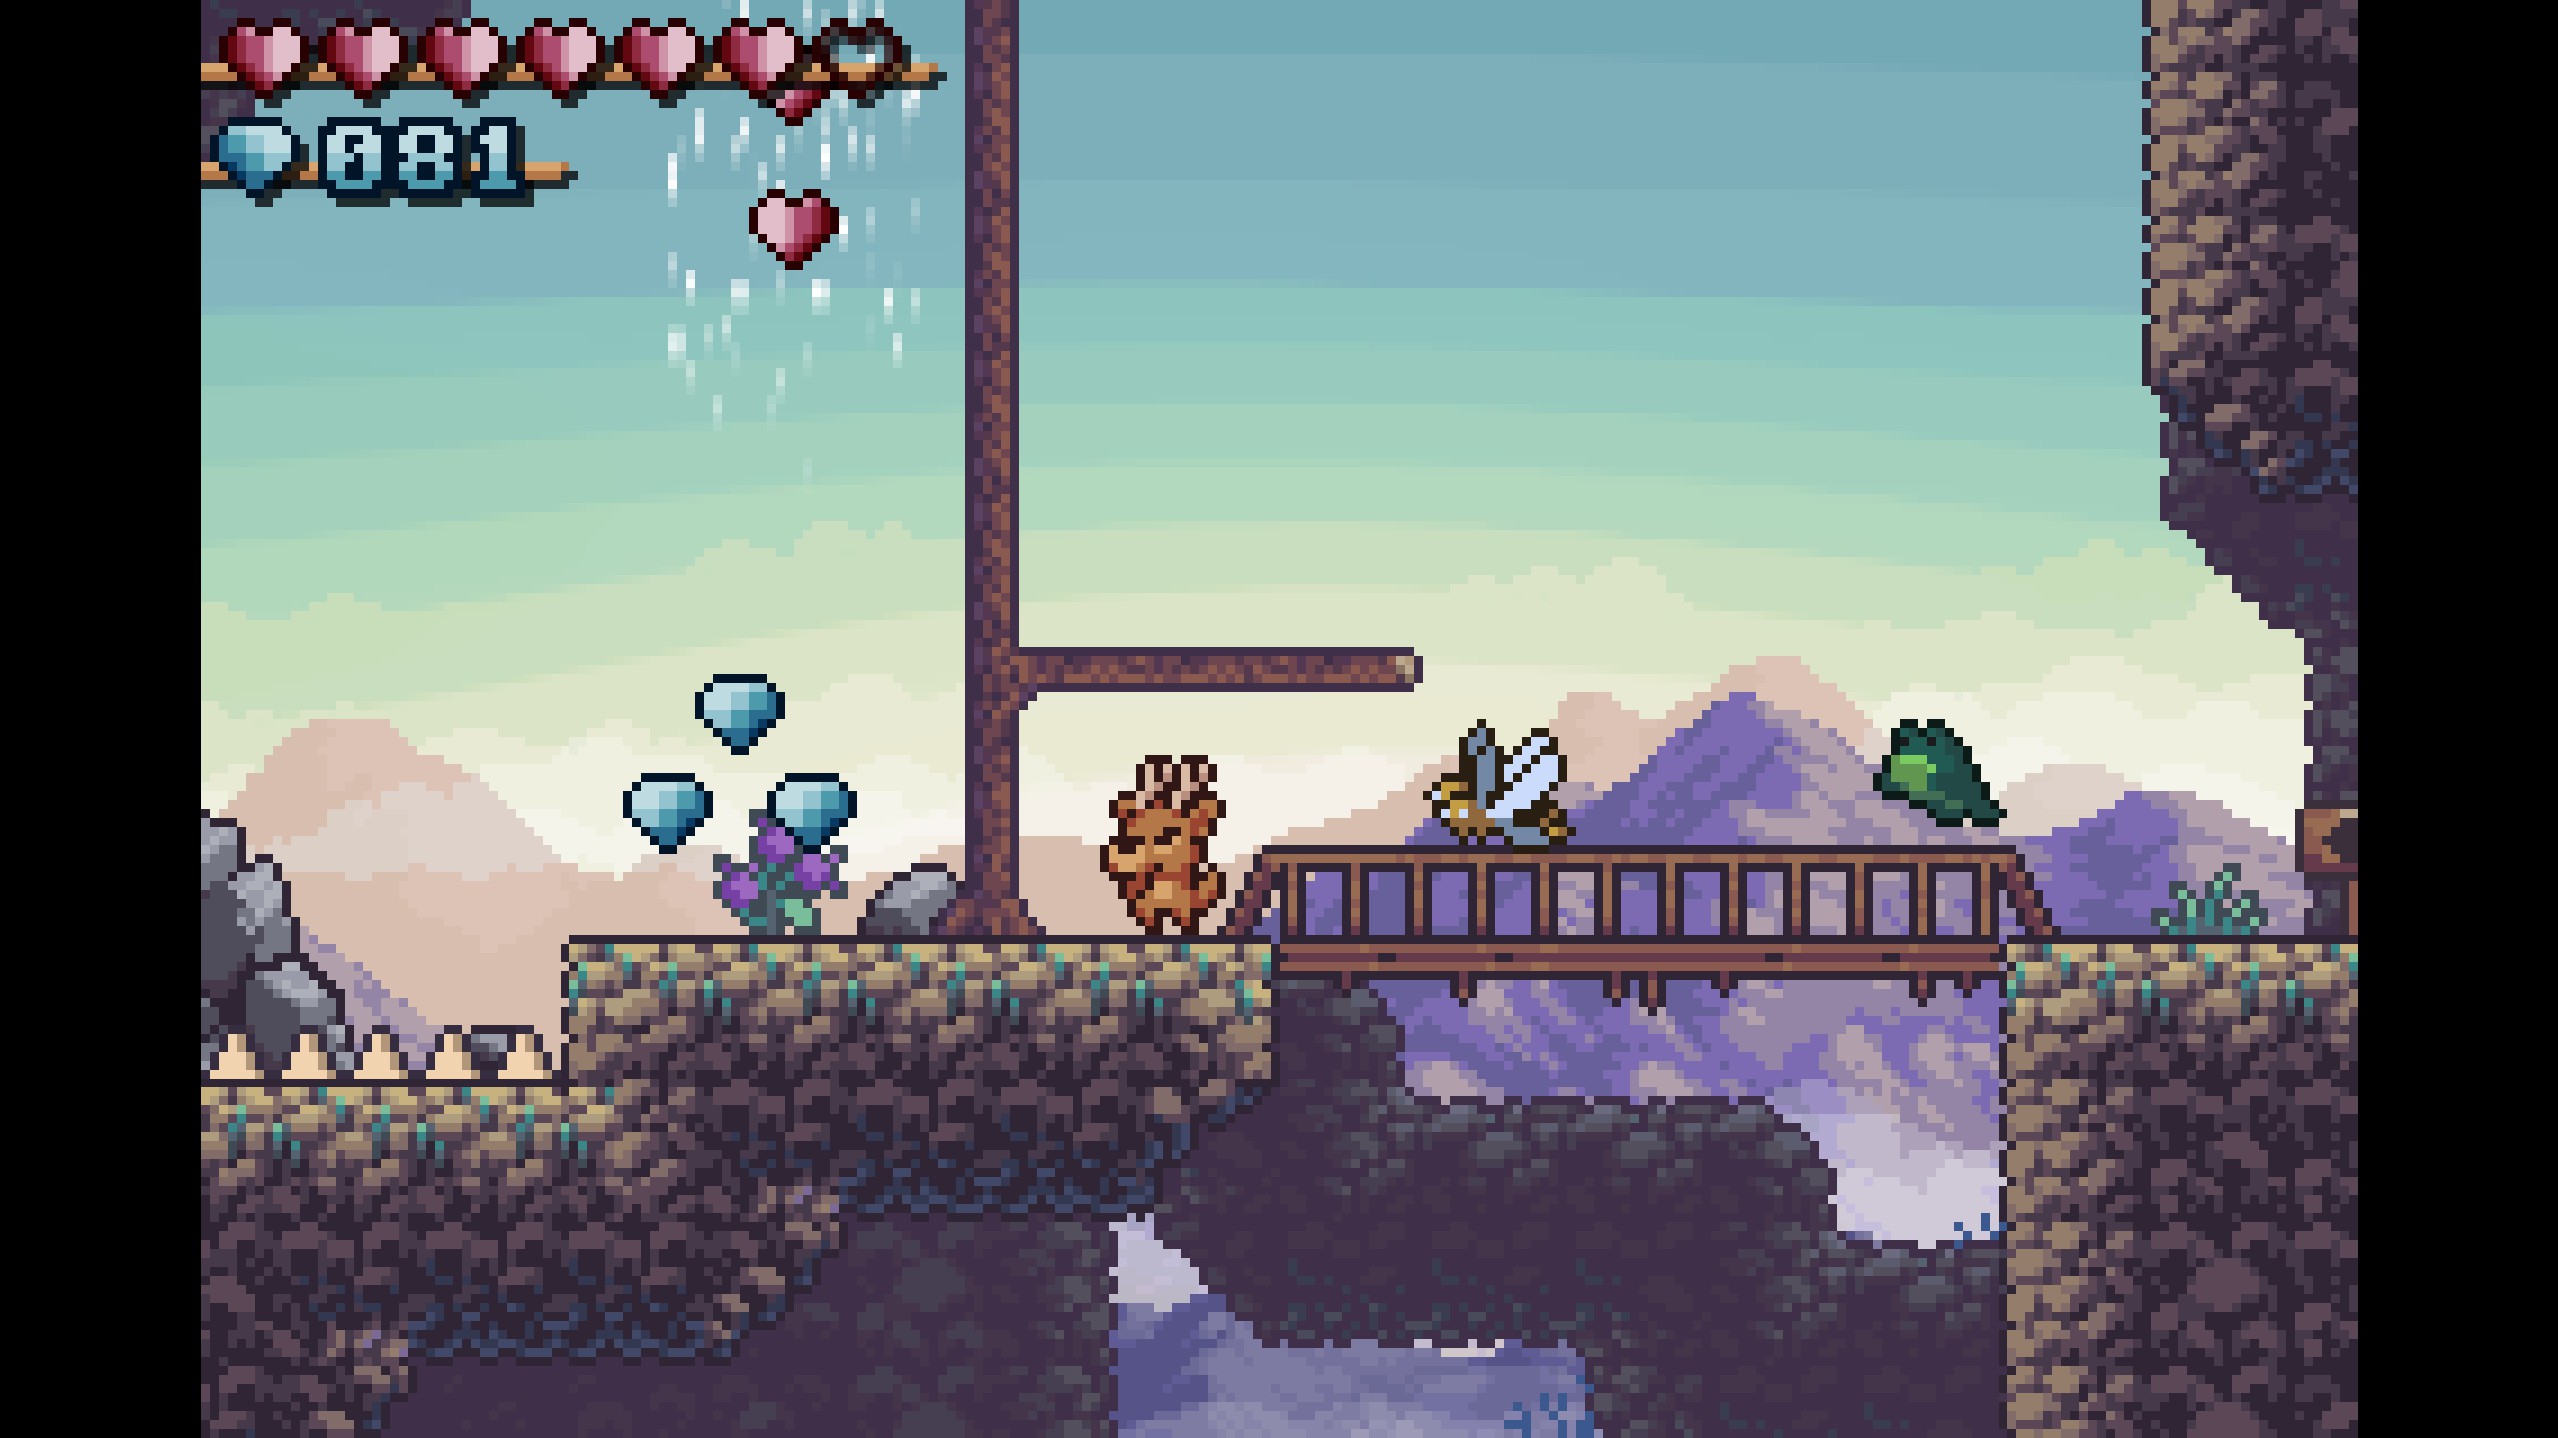
- Gems 25-26
- Continue right through the stage and collect these easy gems beside the rabbit on the bridge!
- Continue right through the stage and collect these easy gems beside the rabbit on the bridge!
- Gems 27-32
- Put the Nightwing feather on the shrine to the right of the rabbit and ride up the wind draft it creates to collect the dash cape! Then, backtrack through the level again, heading left past the first checkpoint and climbing up the ladder near where you first encountered the Nightwing bird. You'll see the gems in an opening to the left. Use your new dash ability to reach them!
- Put the Nightwing feather on the shrine to the right of the rabbit and ride up the wind draft it creates to collect the dash cape! Then, backtrack through the level again, heading left past the first checkpoint and climbing up the ladder near where you first encountered the Nightwing bird. You'll see the gems in an opening to the left. Use your new dash ability to reach them!
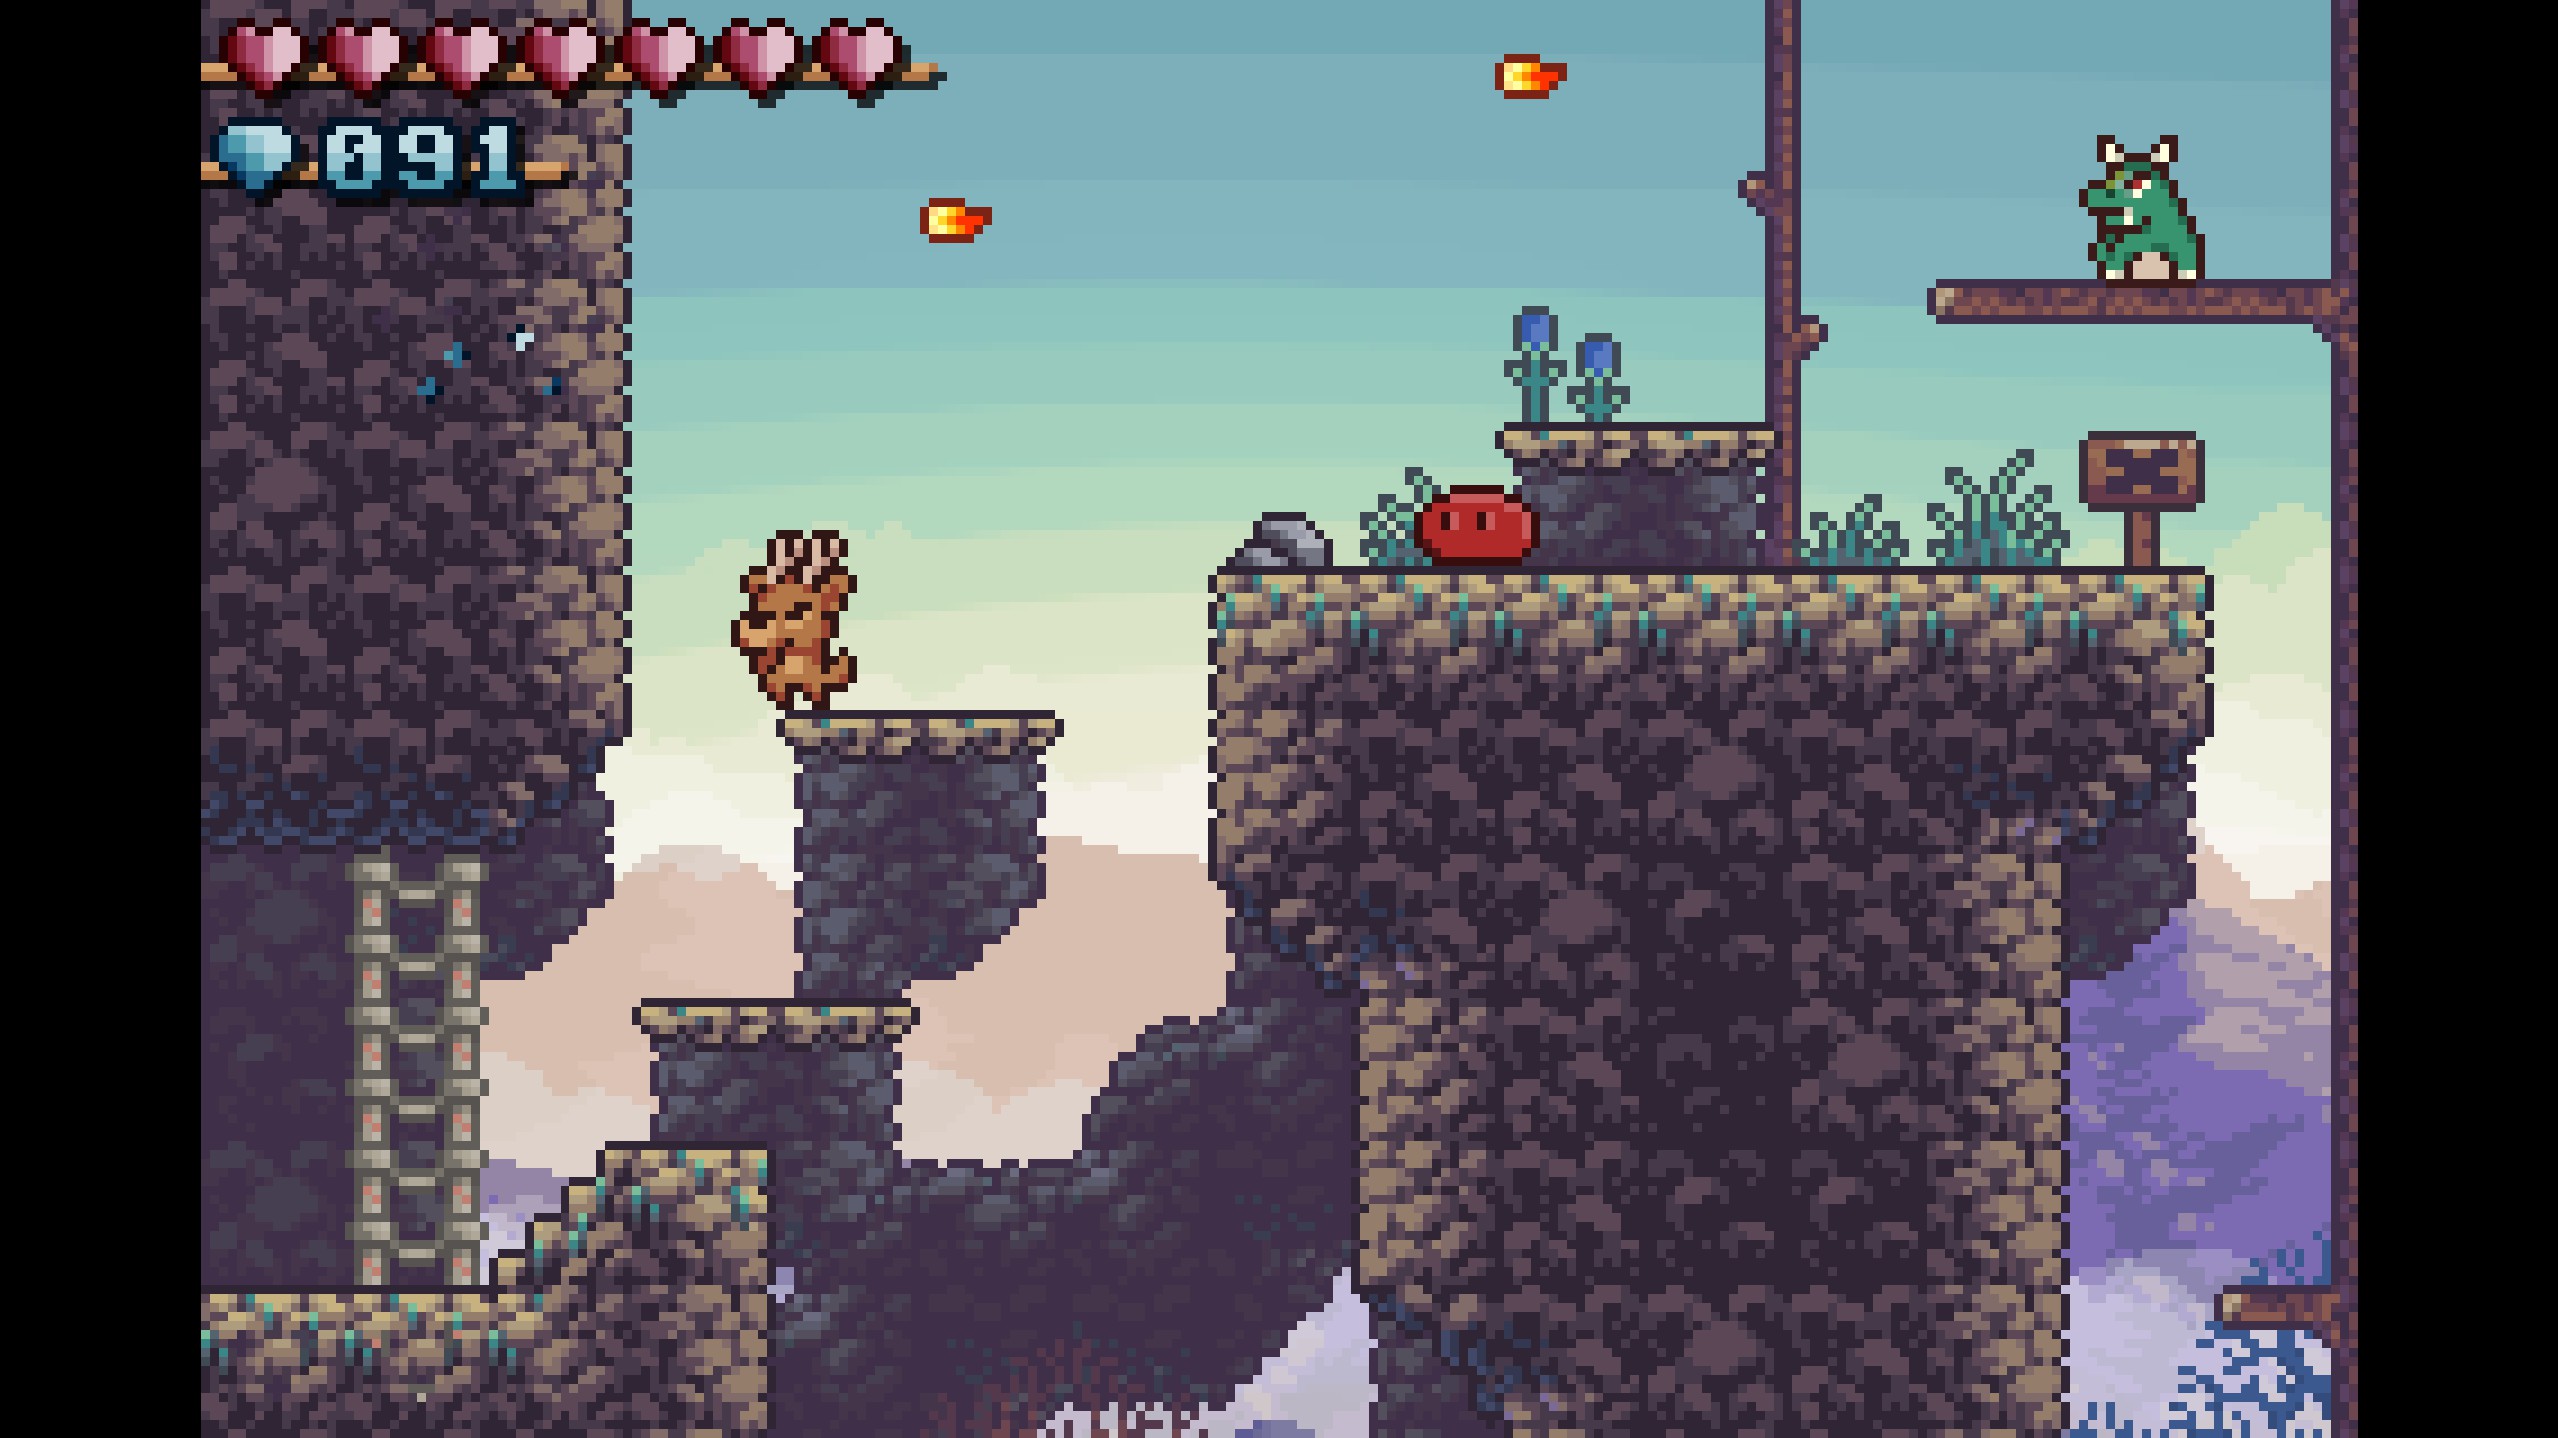
- Gems 33-35
- Continue right through the stage. Jump over some spikes and dash over a gap to collect these easy gems!
- Continue right through the stage. Jump over some spikes and dash over a gap to collect these easy gems!
- Gems 36-38
- Continue to the right and skillfully use the wind draft in tandem with your dash ability to collect the gems!
- Continue to the right and skillfully use the wind draft in tandem with your dash ability to collect the gems!
- Gems 39-40
- Continue through the stage and ground pound through these breakable rocks to reach two more easy gems!
- Continue through the stage and ground pound through these breakable rocks to reach two more easy gems!
- Gems 41-43
- Defeat the dragon on the moving platform. Ride it up and jump onto the tree branch to the left. Dash from cliff to cliff to collect the gems!
- Defeat the dragon on the moving platform. Ride it up and jump onto the tree branch to the left. Dash from cliff to cliff to collect the gems!
- Gems 44-48
- Continue up the tree from gems 41-43 and push the stone you find there all the way down to the base of the tree. Move it to the left and then use it as a platform to reach the gems!
- Continue up the tree from gems 41-43 and push the stone you find there all the way down to the base of the tree. Move it to the left and then use it as a platform to reach the gems!
- Gems 49-51
- Go back to the moving platform that the dragon was on and jump off to the right, where the second checkpoint is! Skillfully dash to the left from there to collect the gems!
- Go back to the moving platform that the dragon was on and jump off to the right, where the second checkpoint is! Skillfully dash to the left from there to collect the gems!
- Gems 52-53
- Enter the castle and ride up the moving platform to collect these easy gems!
- Enter the castle and ride up the moving platform to collect these easy gems!
- Gems 54-56
- Head up the stairs and dash onto the floating stone platform. From there, you can dash again to the right to collect the gems!
- Head up the stairs and dash onto the floating stone platform. From there, you can dash again to the right to collect the gems!
- Gems 57-60
- Exit the castle to the left and ride up the air draft. Dash into the opening to the right and then dash onto the tree branch to the left to collect the gems!
- Exit the castle to the left and ride up the air draft. Dash into the opening to the right and then dash onto the tree branch to the left to collect the gems!
- Gems 61-63
- Continue to the left and dash off the short tree branch to collect the gems!
- Continue to the left and dash off the short tree branch to collect the gems!
- Gems 64-66
- Climb up the hanging ladder and re-enter the castle, where the third checkpoint is! Ground pound through the breakable rocks to reach the gems.
- Climb up the hanging ladder and re-enter the castle, where the third checkpoint is! Ground pound through the breakable rocks to reach the gems.
- Gems 67-71
- Continue up the ladder and onto the floor with the skewers. Head to the left, skillfully dodging them, and dash off of the stone platform to reach the gems!

- Continue up the ladder and onto the floor with the skewers. Head to the left, skillfully dodging them, and dash off of the stone platform to reach the gems!
- Gems 72-74
- Go back to the ladder and climb up to the floor above the skewers. From there, you can easily collect the gems!
- Go back to the ladder and climb up to the floor above the skewers. From there, you can easily collect the gems!
- Gems 75-78
- Go back to the ladder and climb up to the top floor. Dodge another skewer and some red slimes to nab the gems!
- Go back to the ladder and climb up to the top floor. Dodge another skewer and some red slimes to nab the gems!
- Gems 79-82
- Go back to the floor above the skewers and head left. Use the wind draft and dash to the right to collect two gems plus two more behind a fake wall!
- Go back to the floor above the skewers and head left. Use the wind draft and dash to the right to collect two gems plus two more behind a fake wall!
- Gems 83-85
- Continue left and dash over a bed of spikes to collect the gems!

- Continue left and dash over a bed of spikes to collect the gems!
- Gems 86-89
- Climb up the trees and dash back into the castle to collect the gems! Though there's only three gems in the screenshot, the rightmost gem actually adds two gems to your counter, for a total of four. Perhaps this is a bug? (update: the developer has since separated the gems after I reported the bug!)
- Climb up the trees and dash back into the castle to collect the gems! Though there's only three gems in the screenshot, the rightmost gem actually adds two gems to your counter, for a total of four. Perhaps this is a bug? (update: the developer has since separated the gems after I reported the bug!)
- Gems 90-91
- Collect these two easy gems after re-entering the castle again!
- Collect these two easy gems after re-entering the castle again!
- Gems 92-93
- Ride up the moving platform and collect two more easy gems!
- Ride up the moving platform and collect two more easy gems!
- Gems 94-96
- Jump off the moving platform, defeat the dragonflies, and collect three more easy gems!
- Jump off the moving platform, defeat the dragonflies, and collect three more easy gems!
- Gems 97-100
- The final gems in Treetop Trails are hiding in this fake wall to the right!
- The final gems in Treetop Trails are hiding in this fake wall to the right!
Buzz Off Badge
The Buzz Off Badge is earned by killing 5 dragonflies in under 3 seconds. Though this task may seem daunting at first, it's actually not that bad! My strategy was to progress through the entire stage normally, albeit without killing any dragonflies, until I passed the third checkpoint and emerged from the castle. There are two dragonflies that spawn right there outside of the castle near the wind draft and four dragonflies that spawn earlier on in the stage, for a total of six!
Since dragonflies never stop chasing you once you've entered their radius, just be patient and wait for the four from earlier to catch up with the two outside of the castle, and stop 'em all in rapid succession!
Lunar Bond Badge
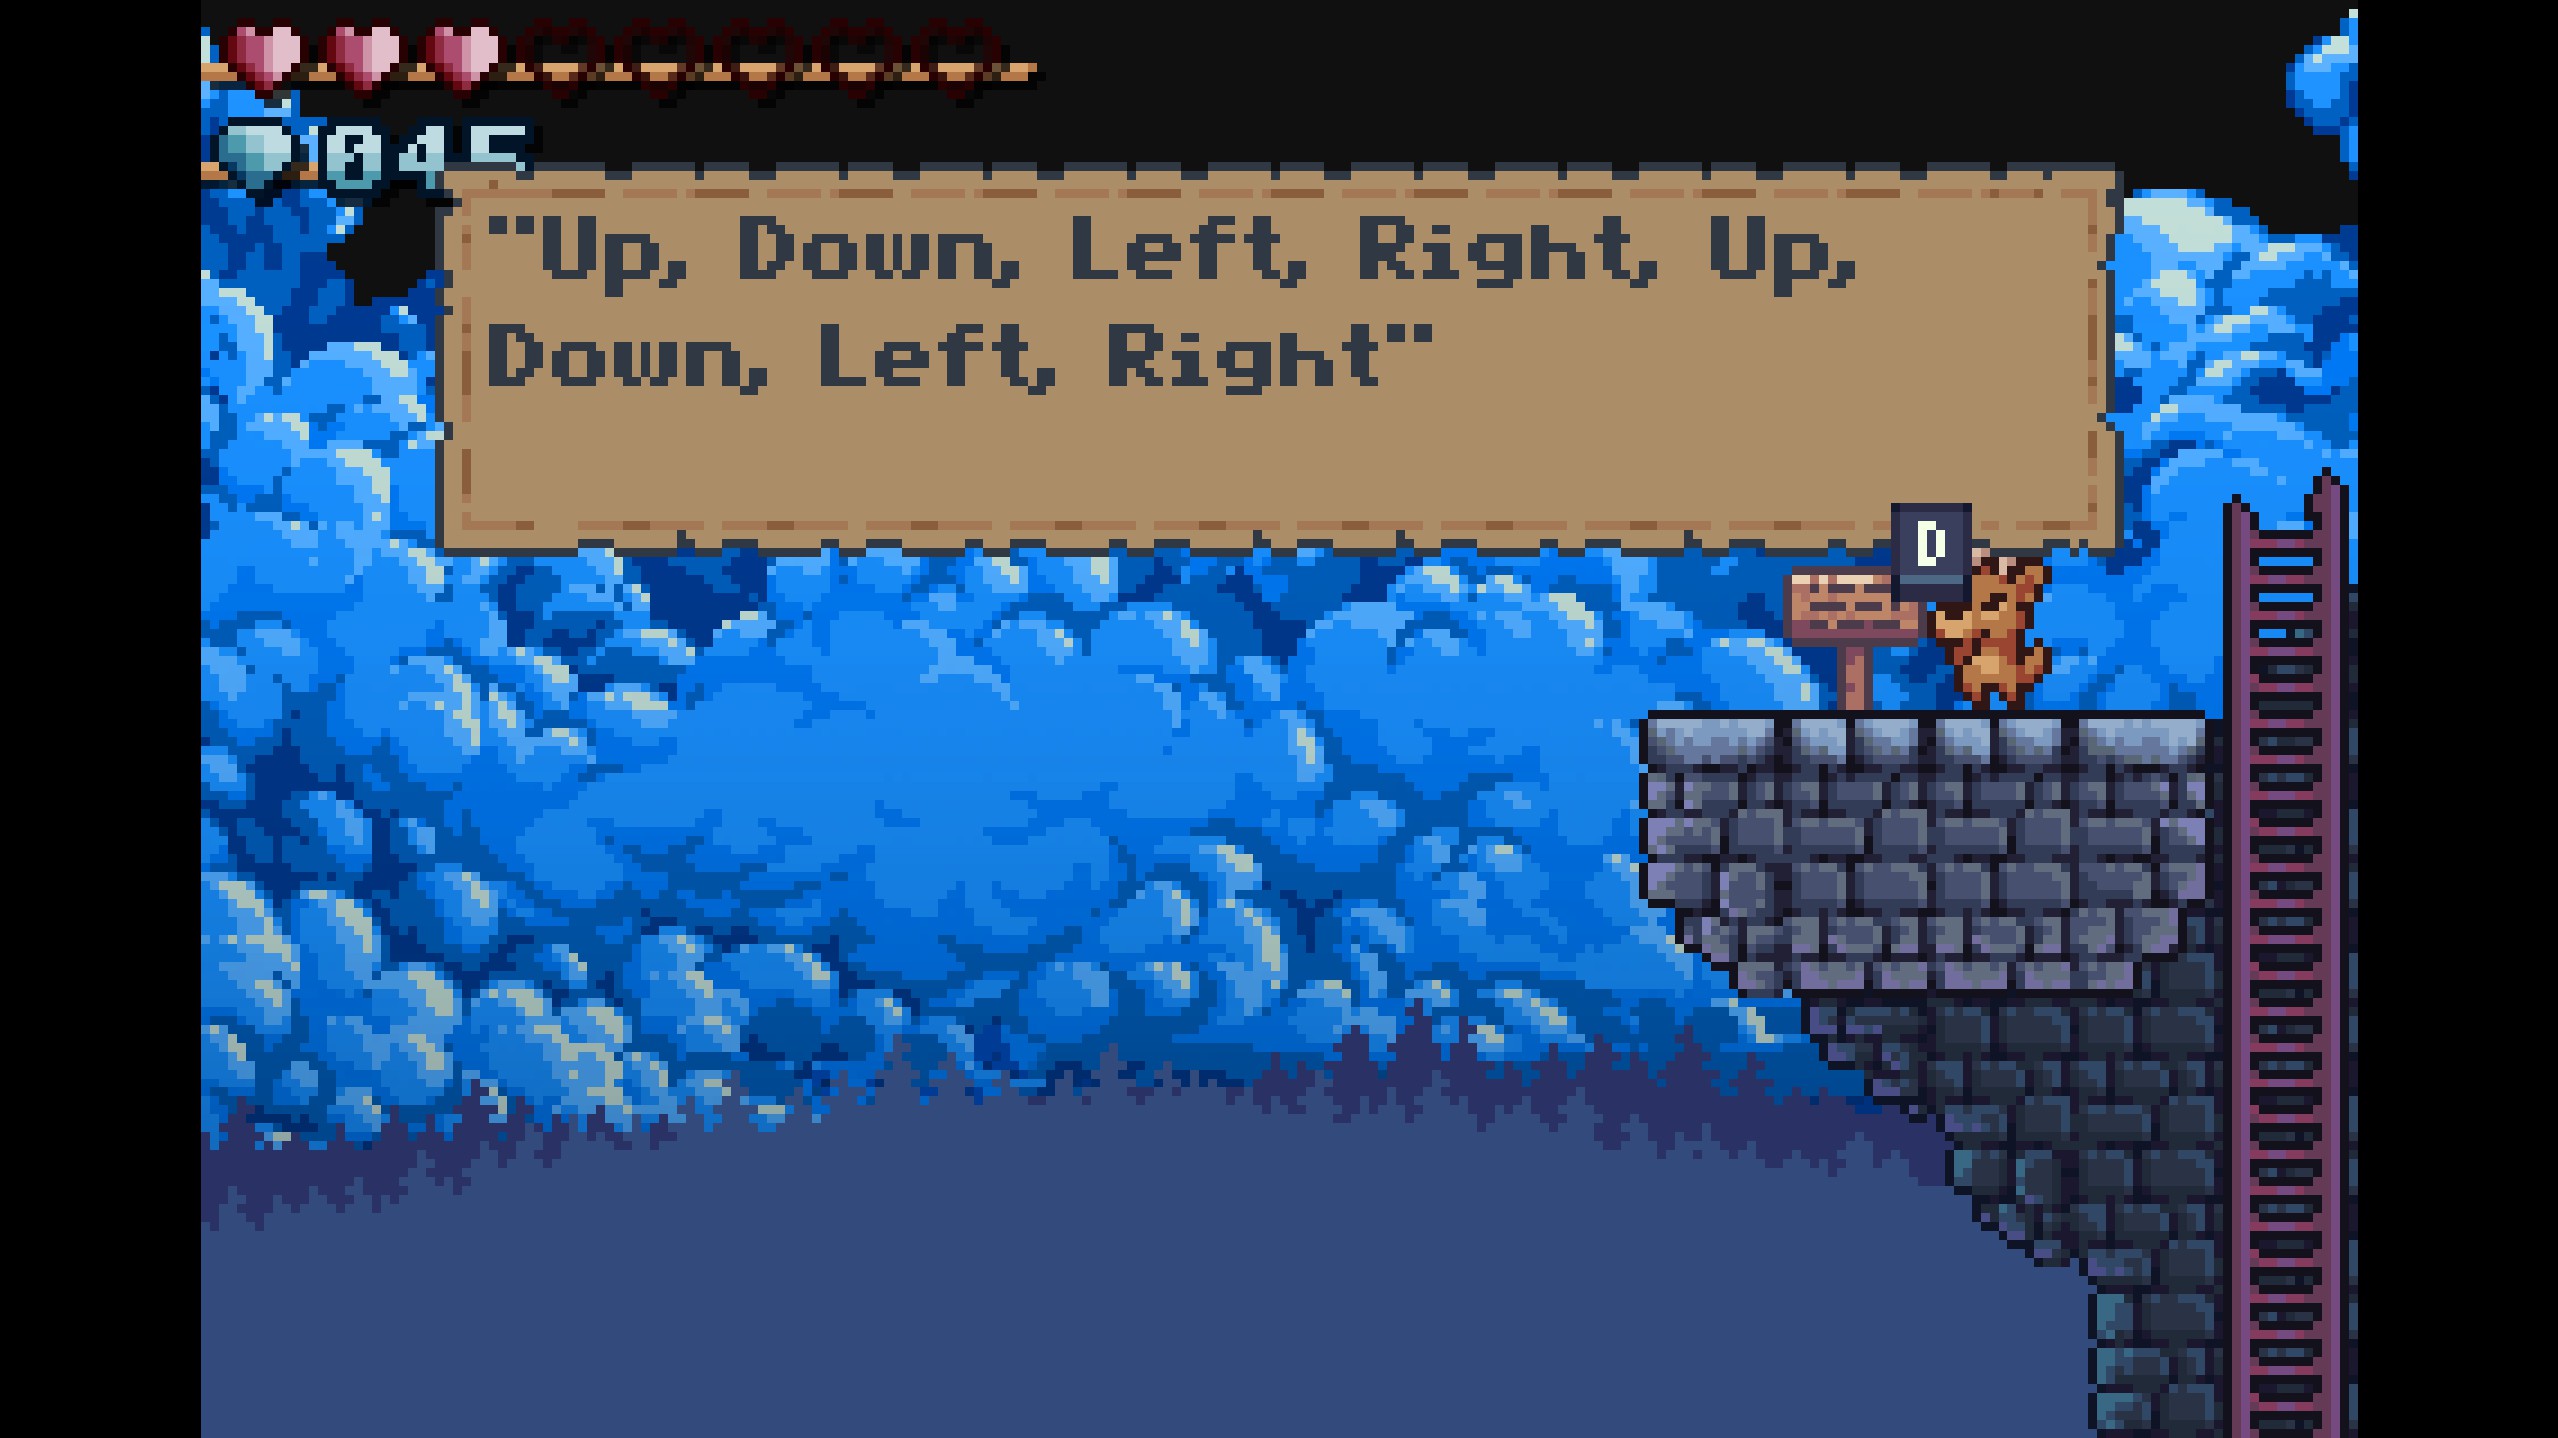
The Lunar Bond Badge is earned by finding the moon stone hidden in Treetop Trails and placing it in its socket.
To find the moon stone, progress through the stage normally, passing the first and second checkpoints. Once you reach the third checkpoint in the castle, climb up the ladder and head onto the floor with the skewers. Continue left and dash over the gap to reach an area with 5 gems. Collect them and then walk left, passing through a fake wall. There you will find the moon stone!
After collecting the moon stone, jump down all the way back to the start of the stage. From there, head right, ignoring the trees and the wind draft. Eventually you will reach a small dirt slope with a fake wall to the right. Then, simply walk through the fake wall and place the moon stone in the socket!
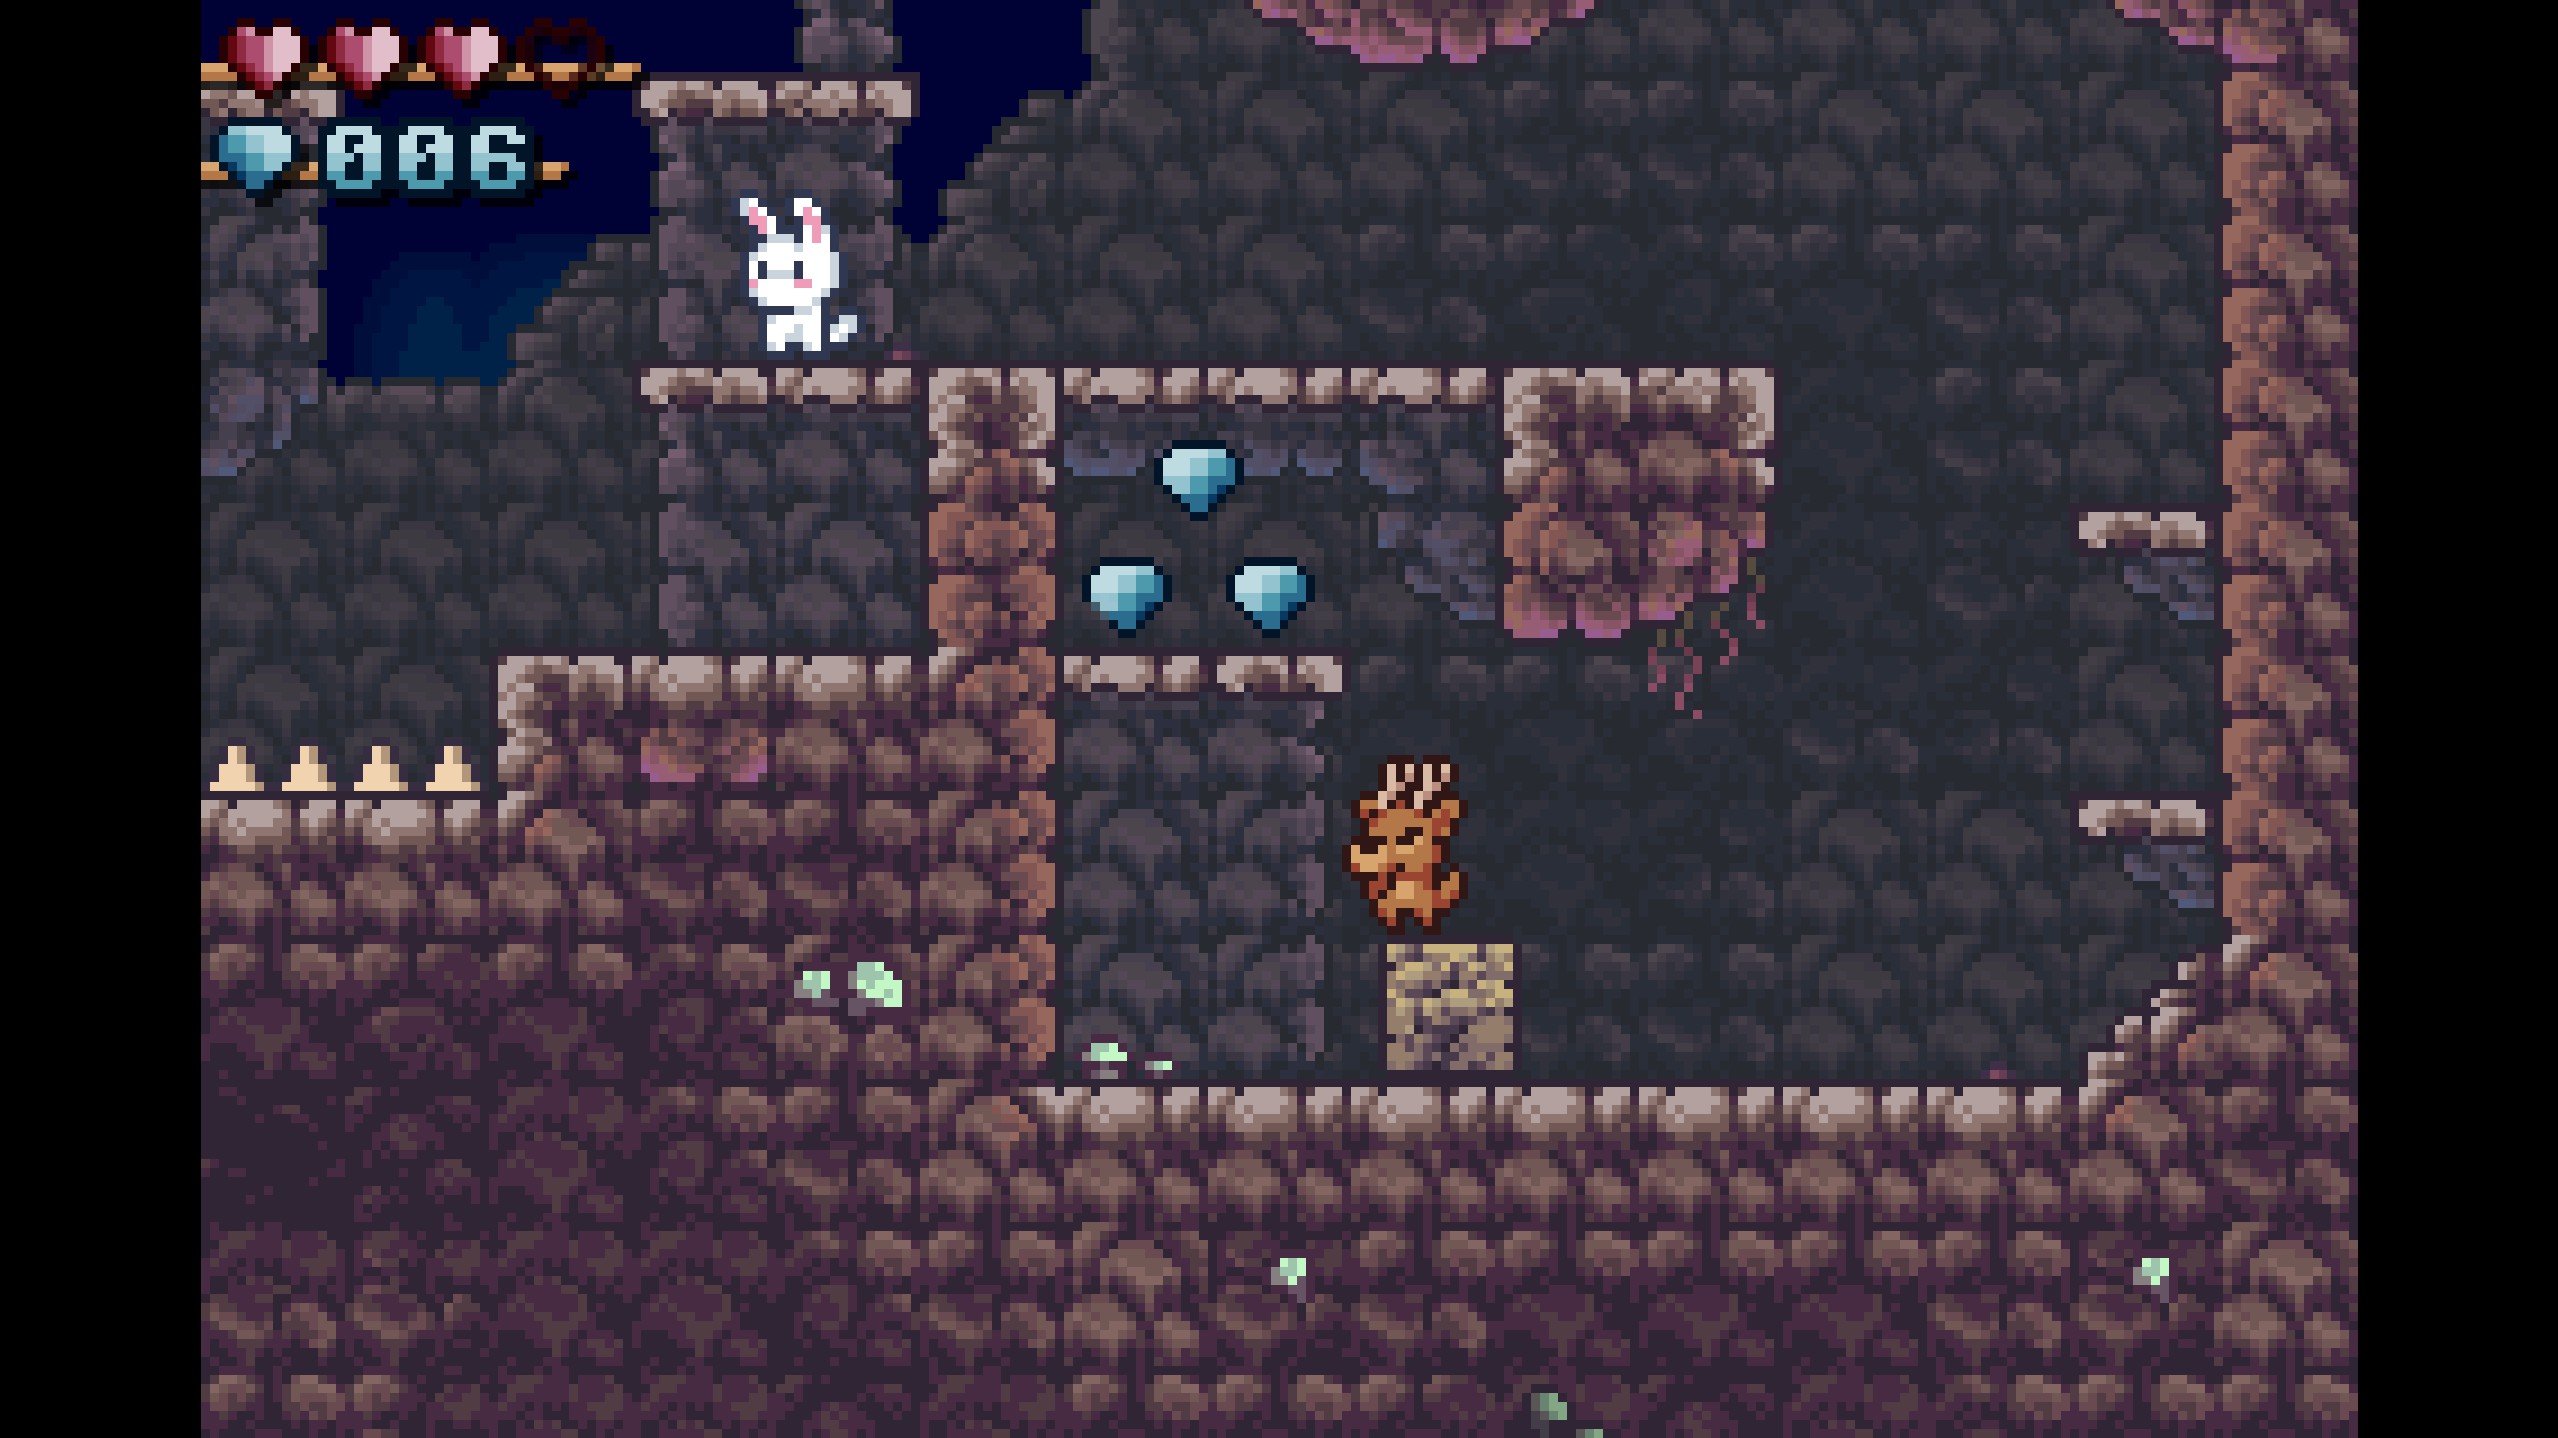
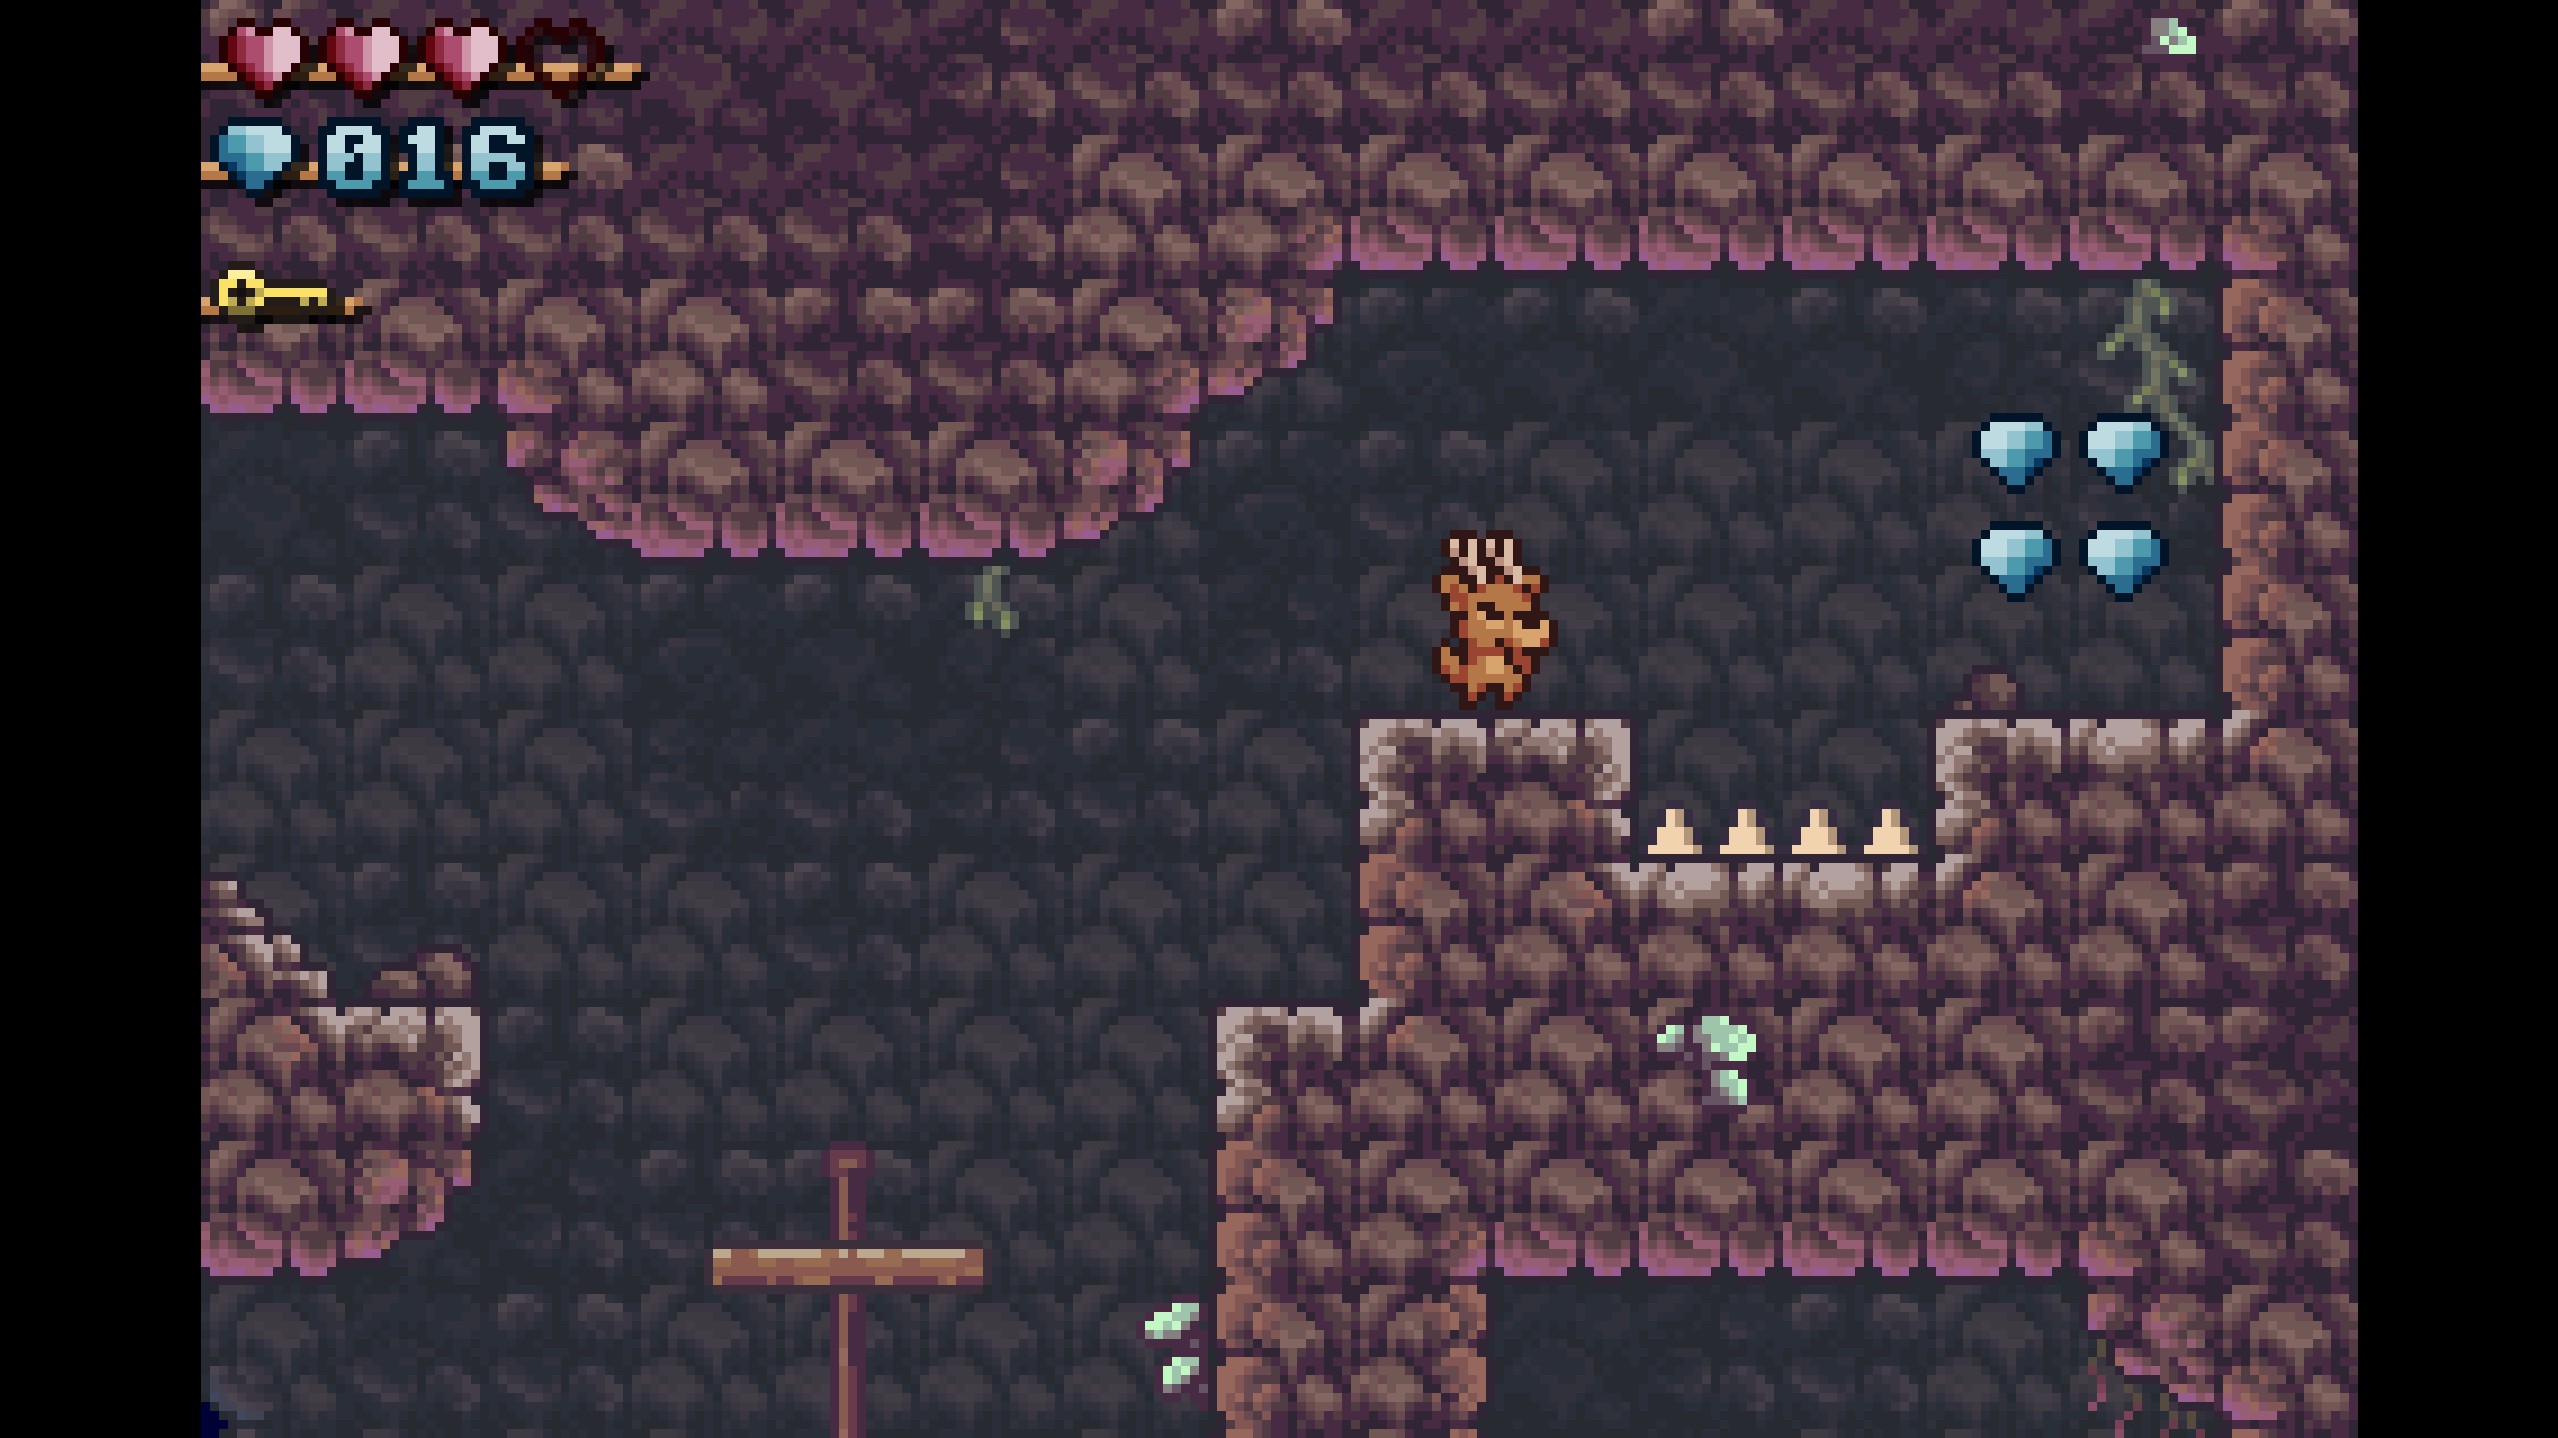
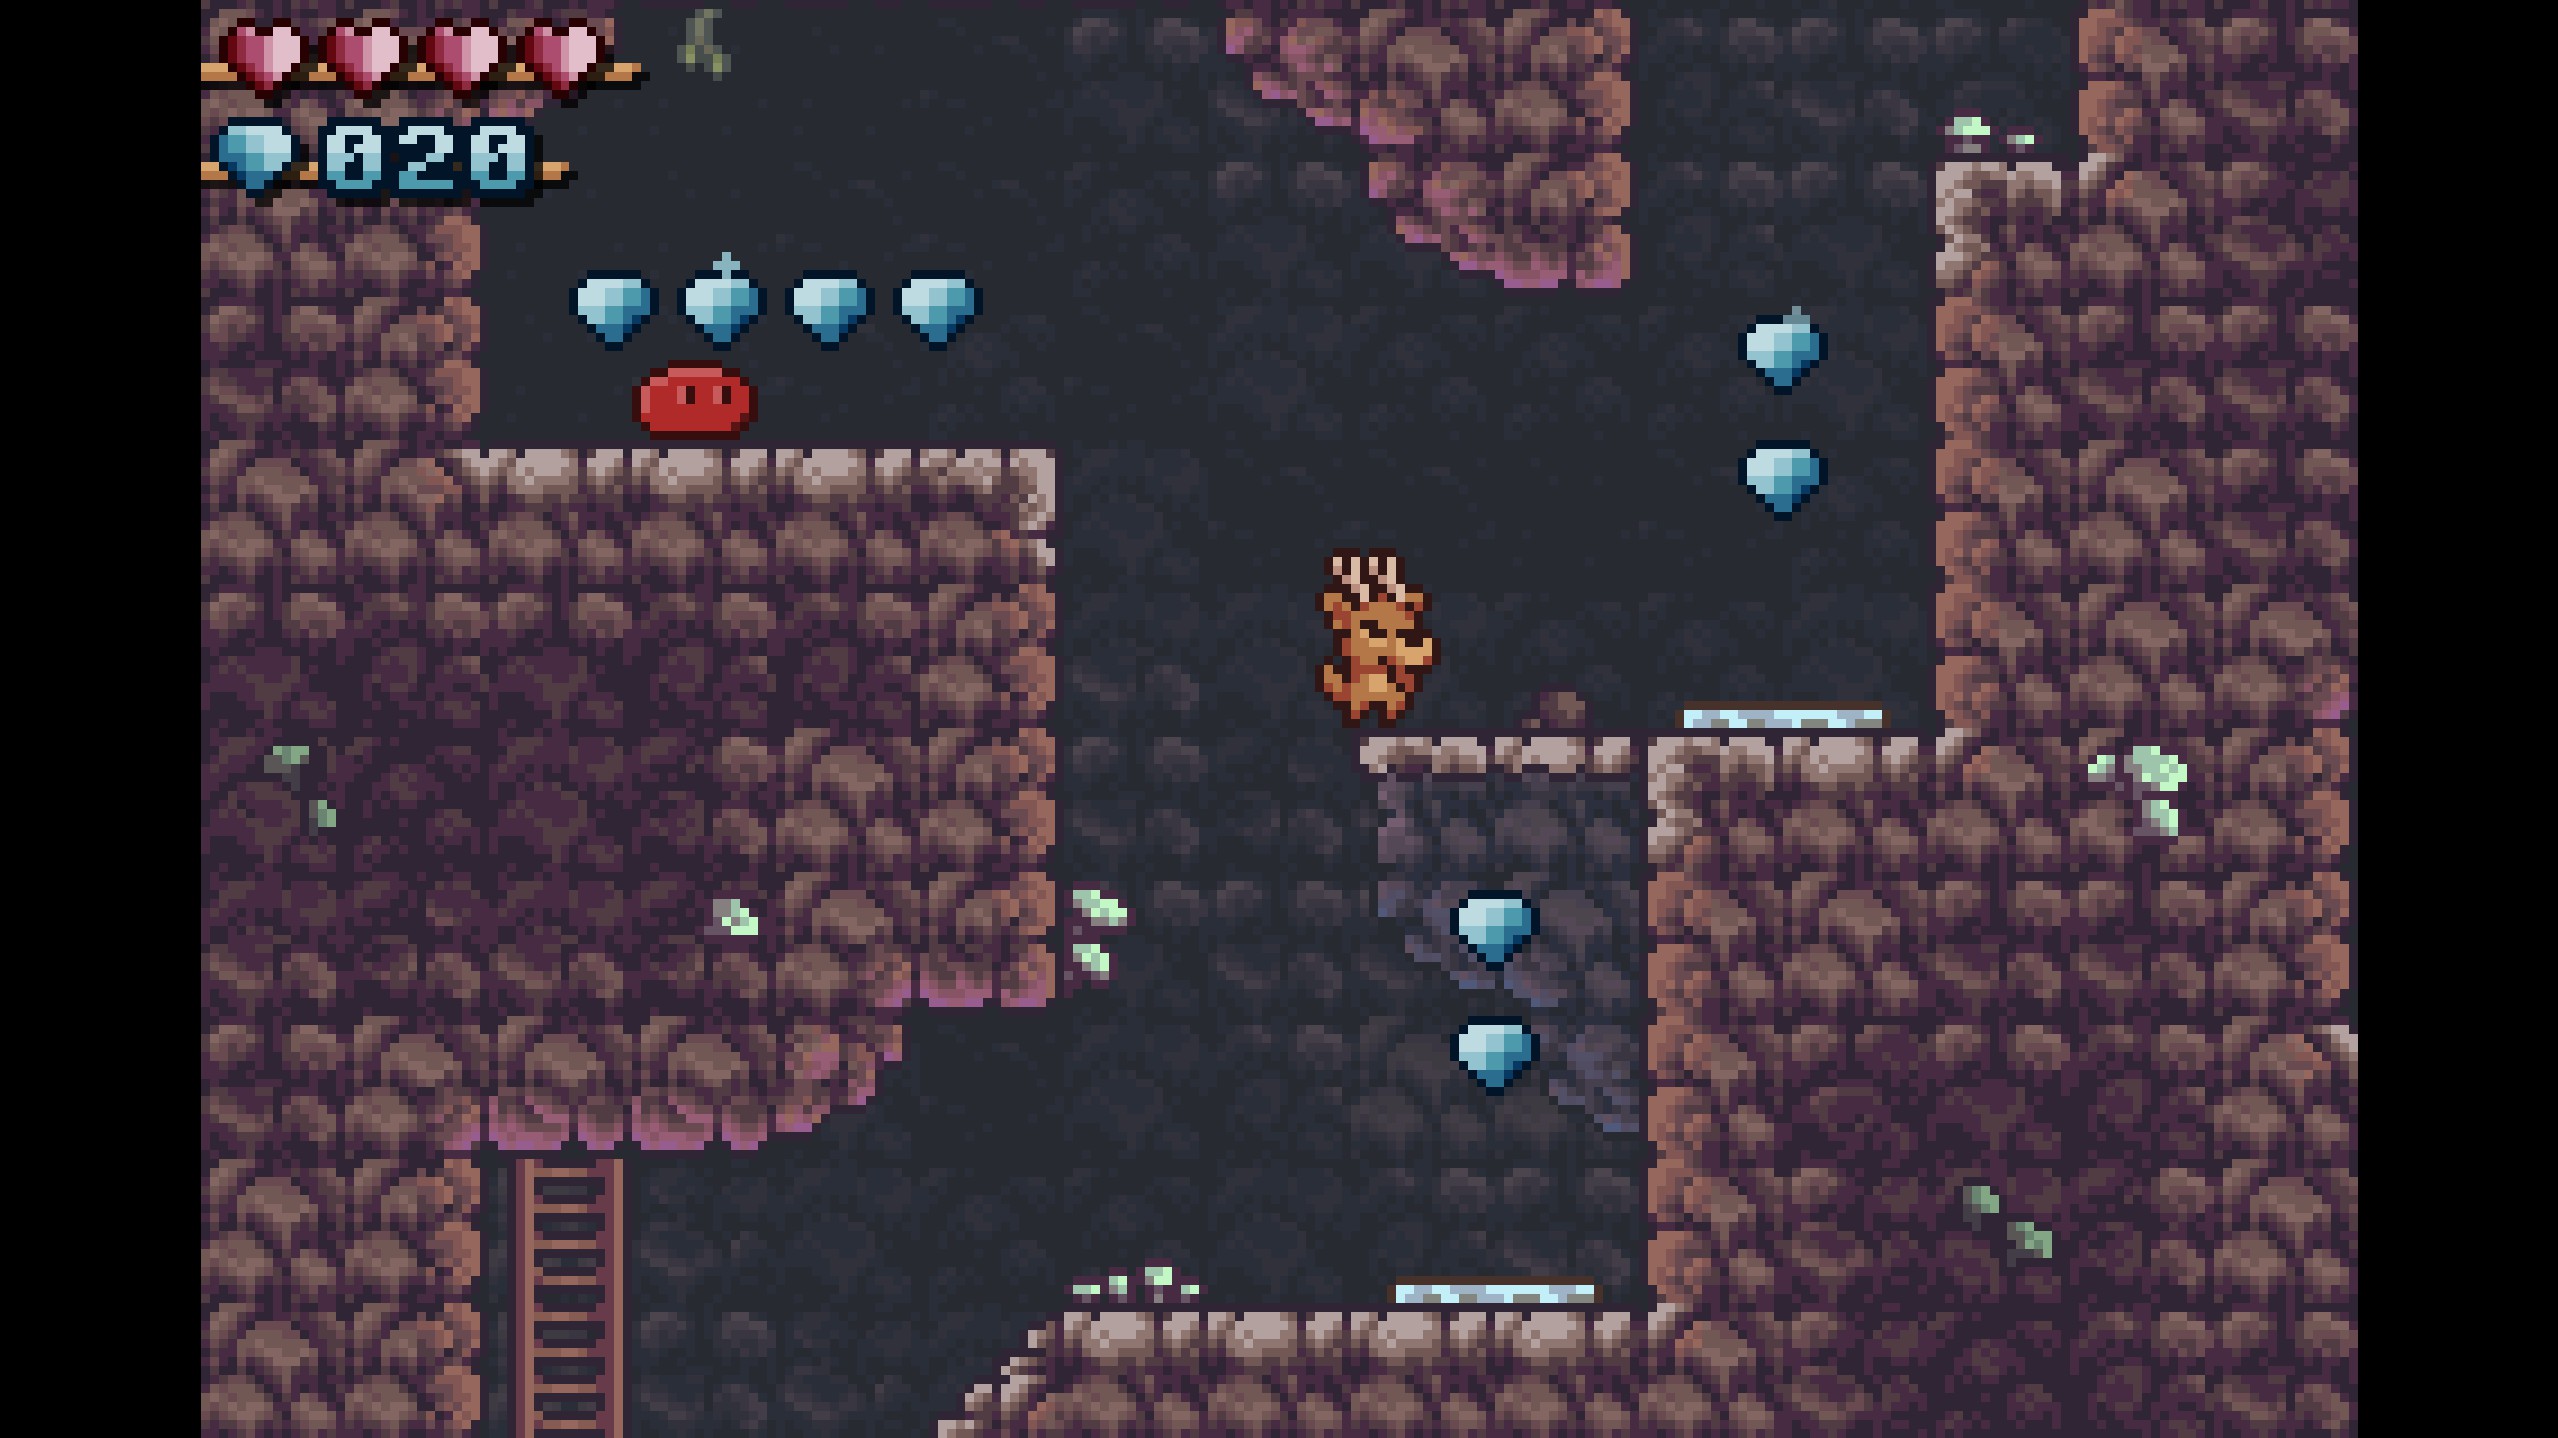
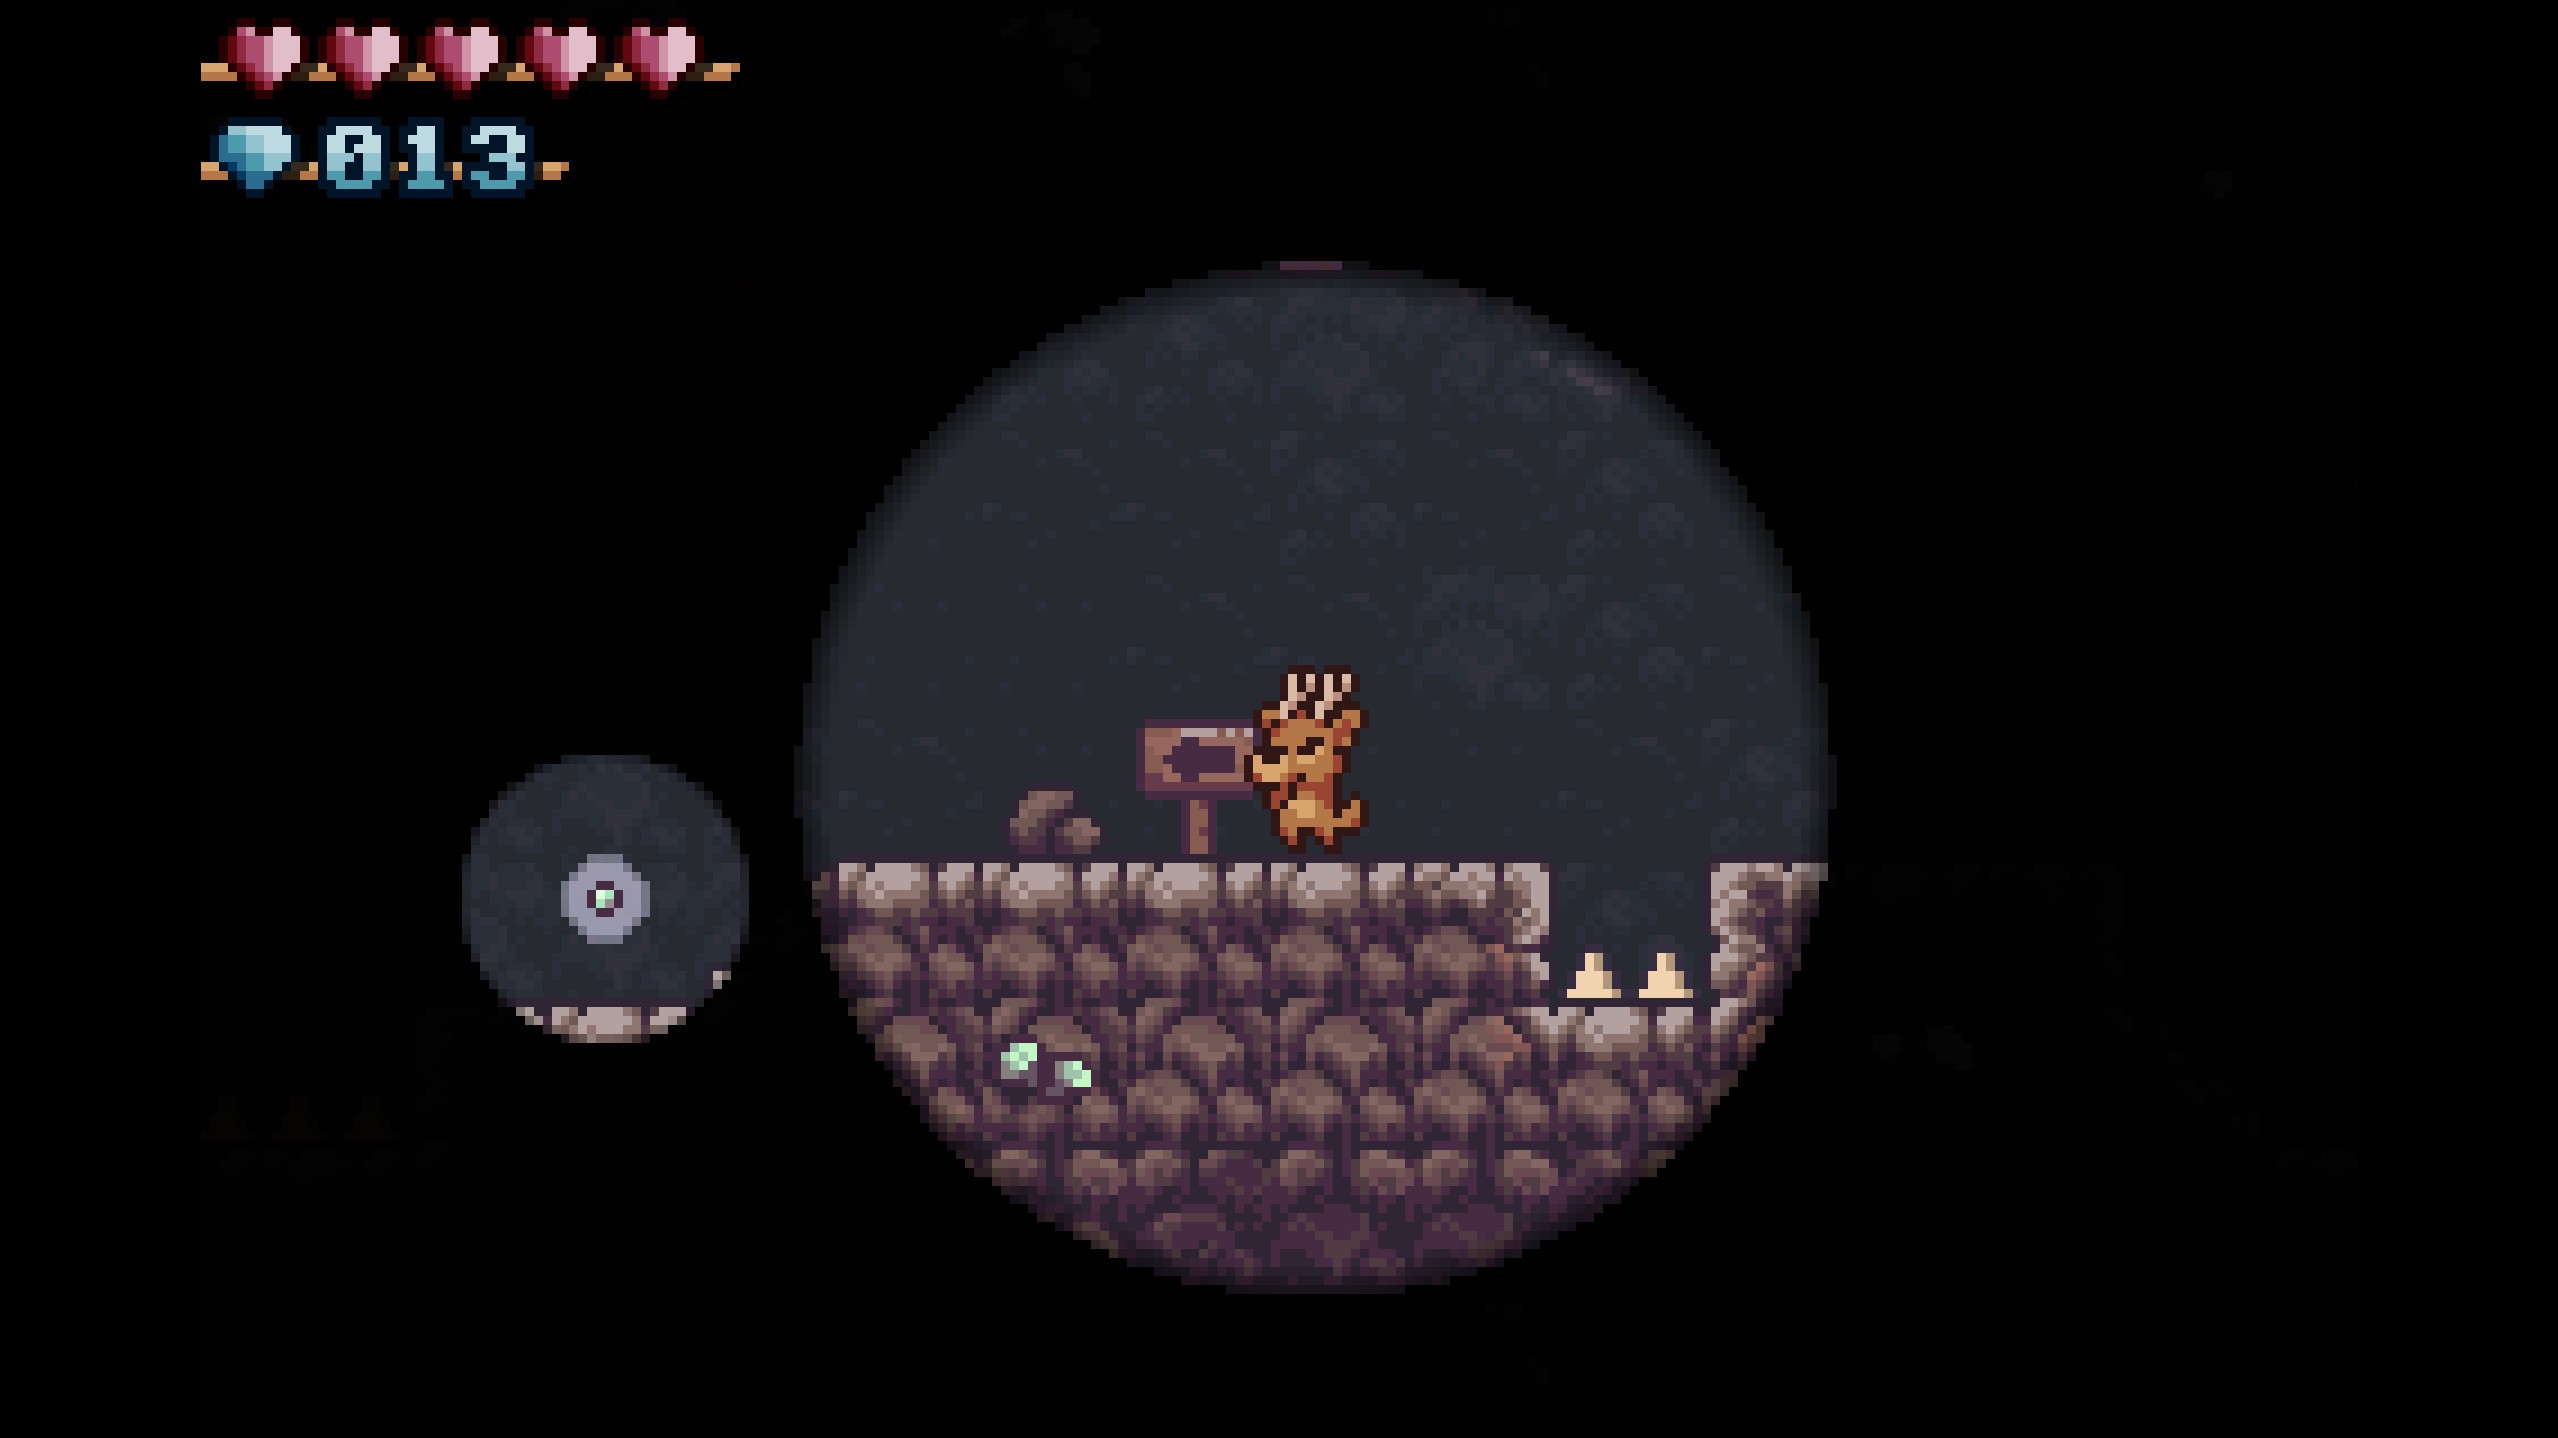
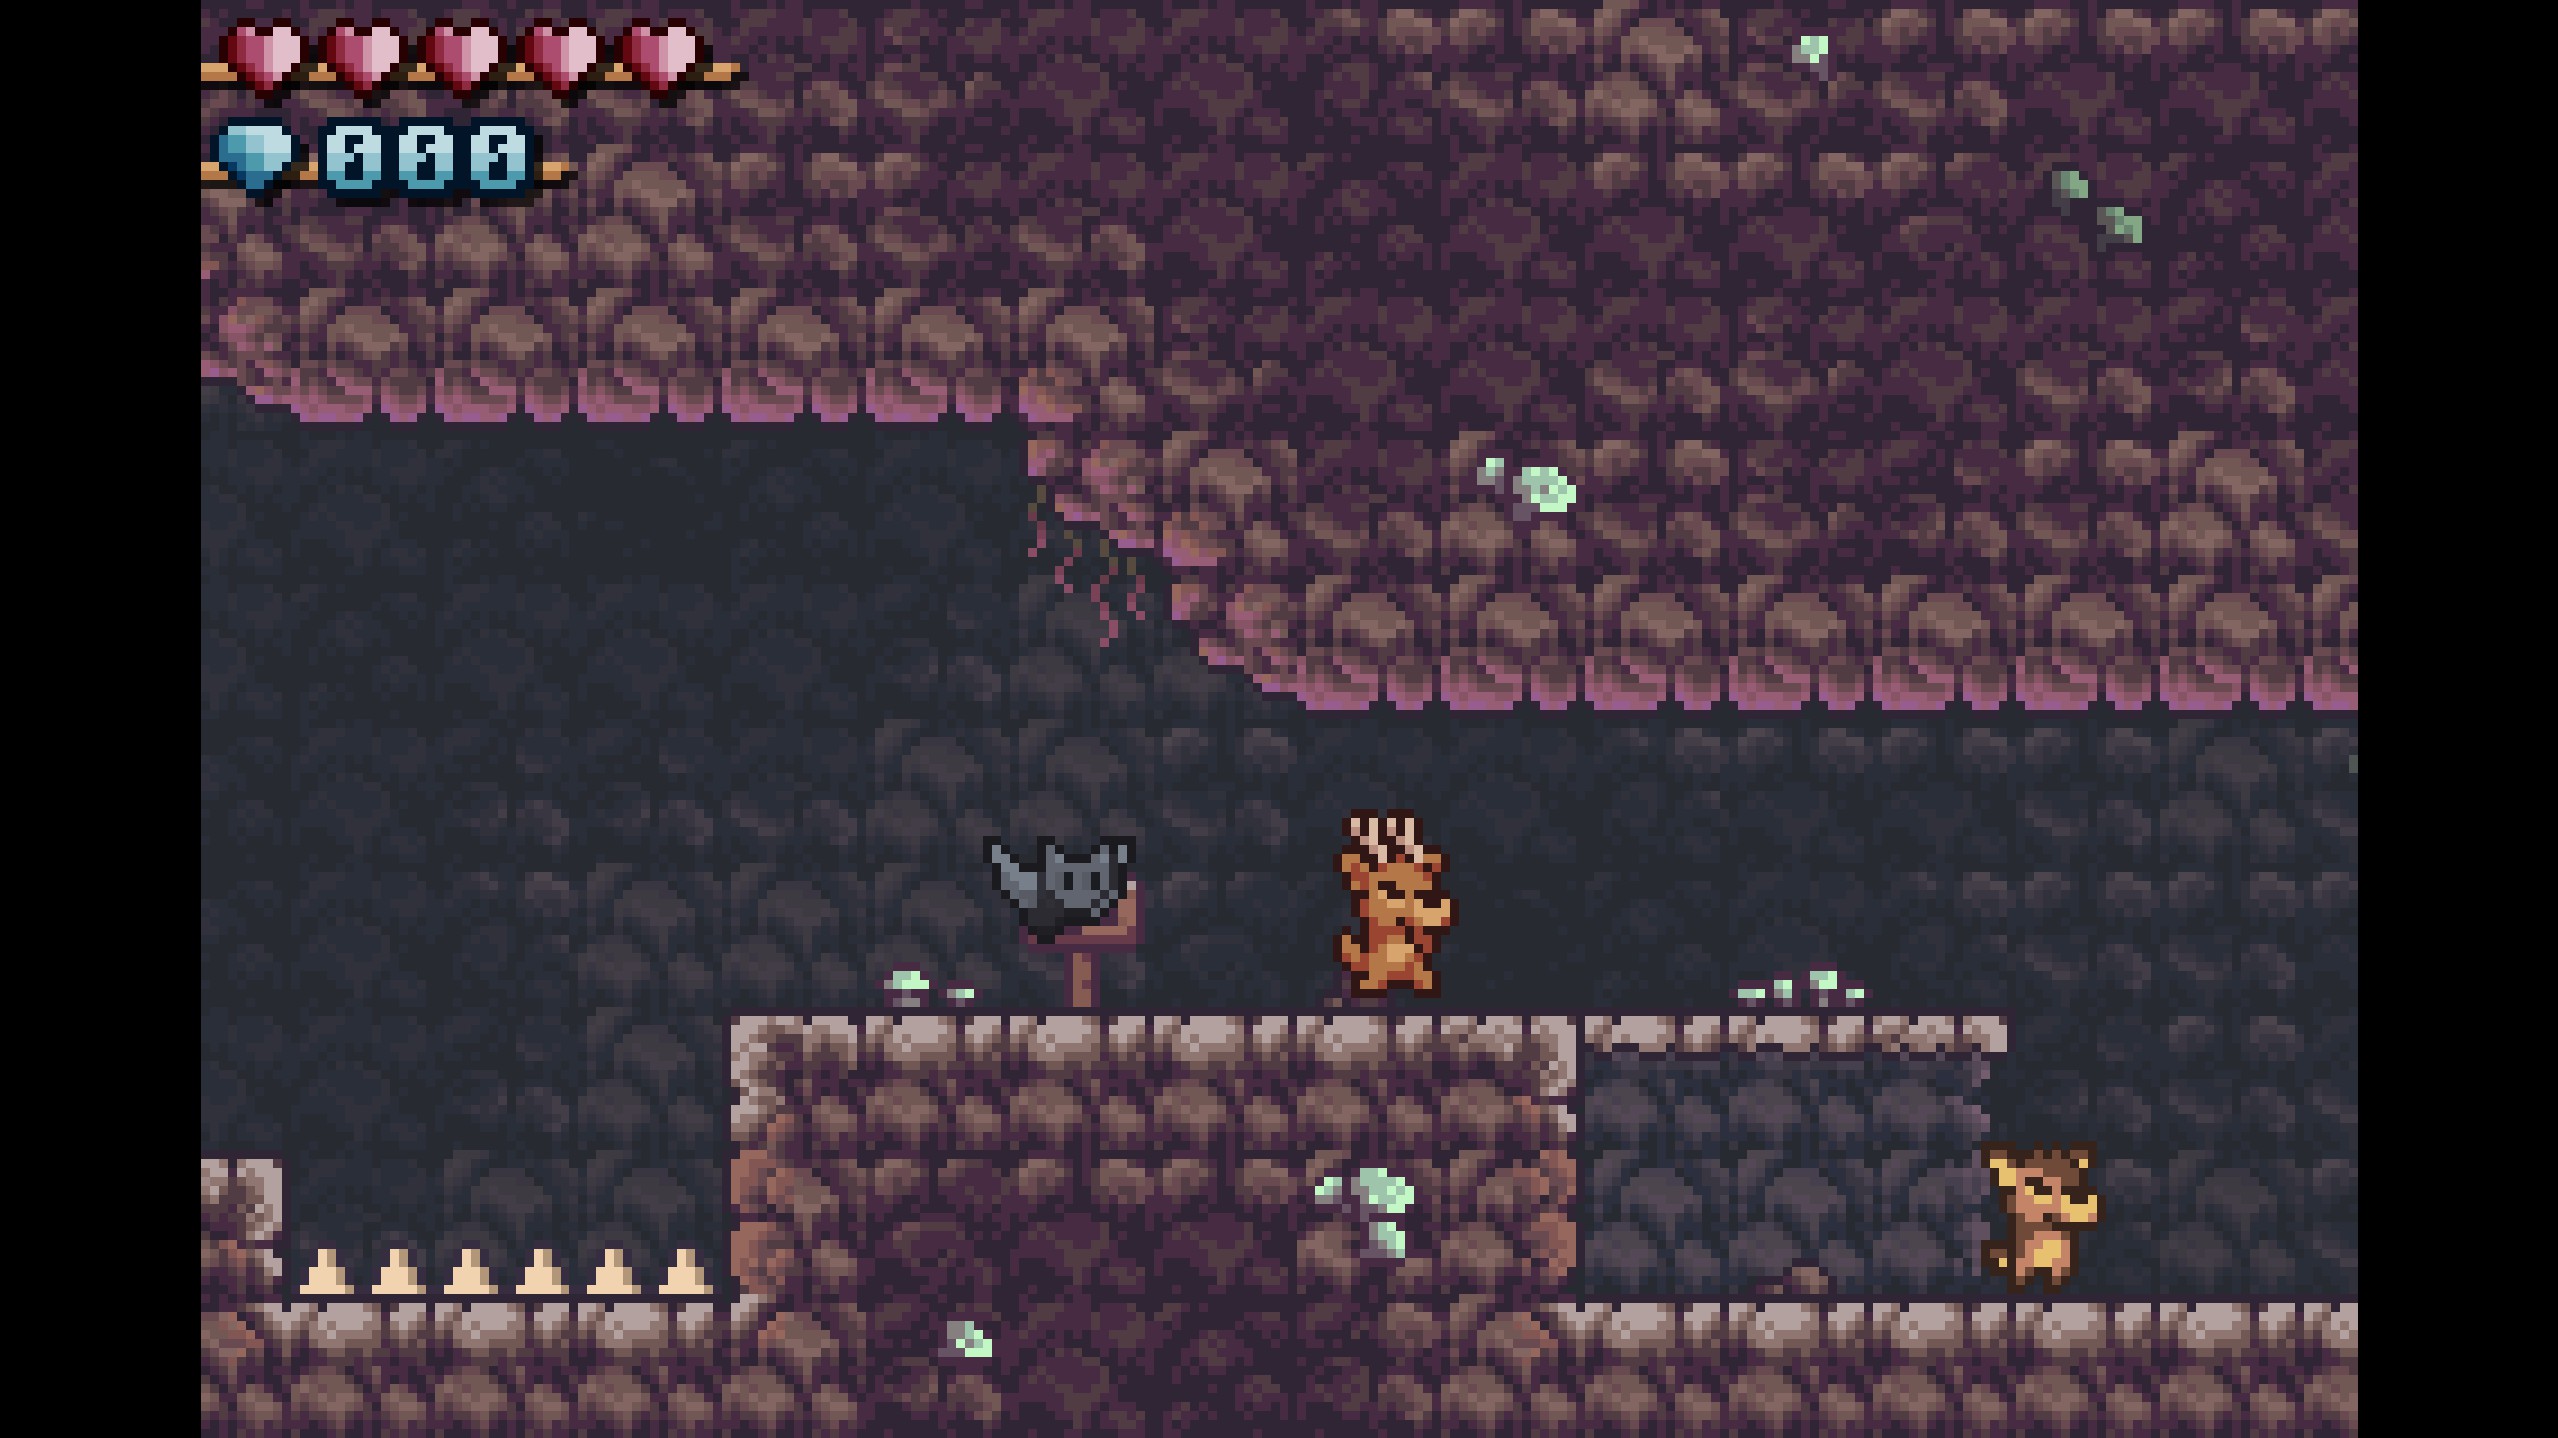
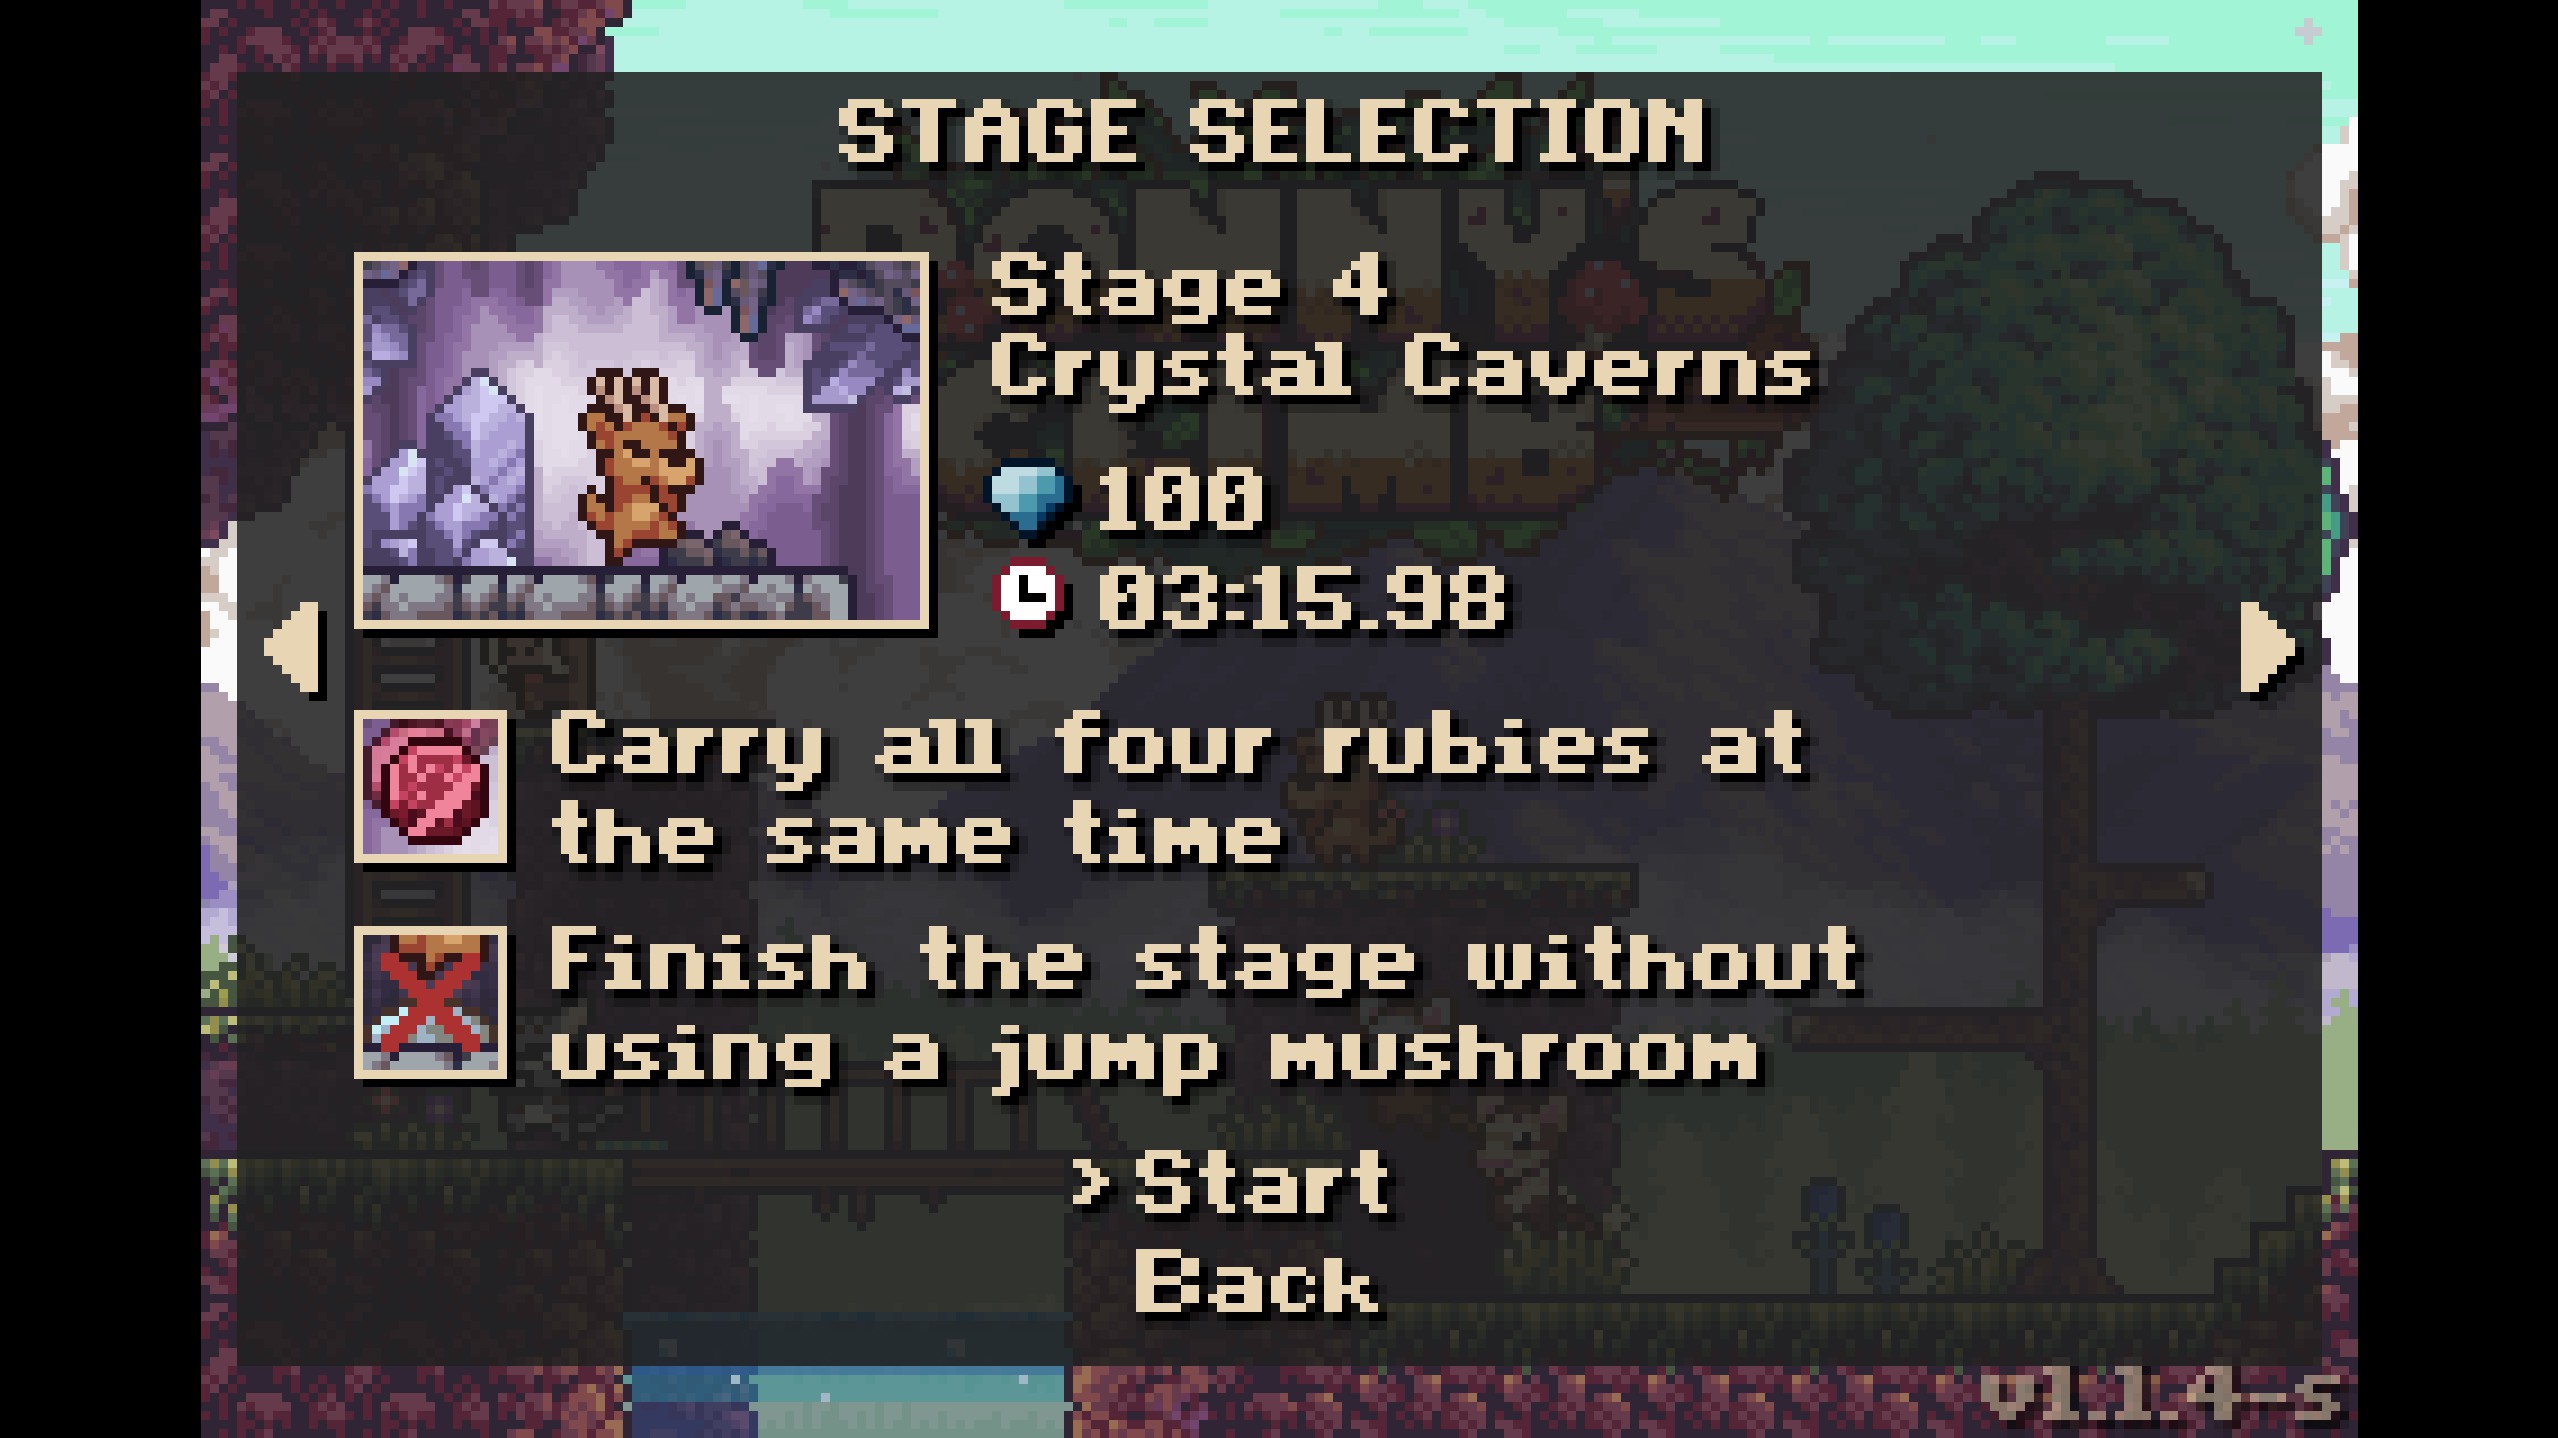
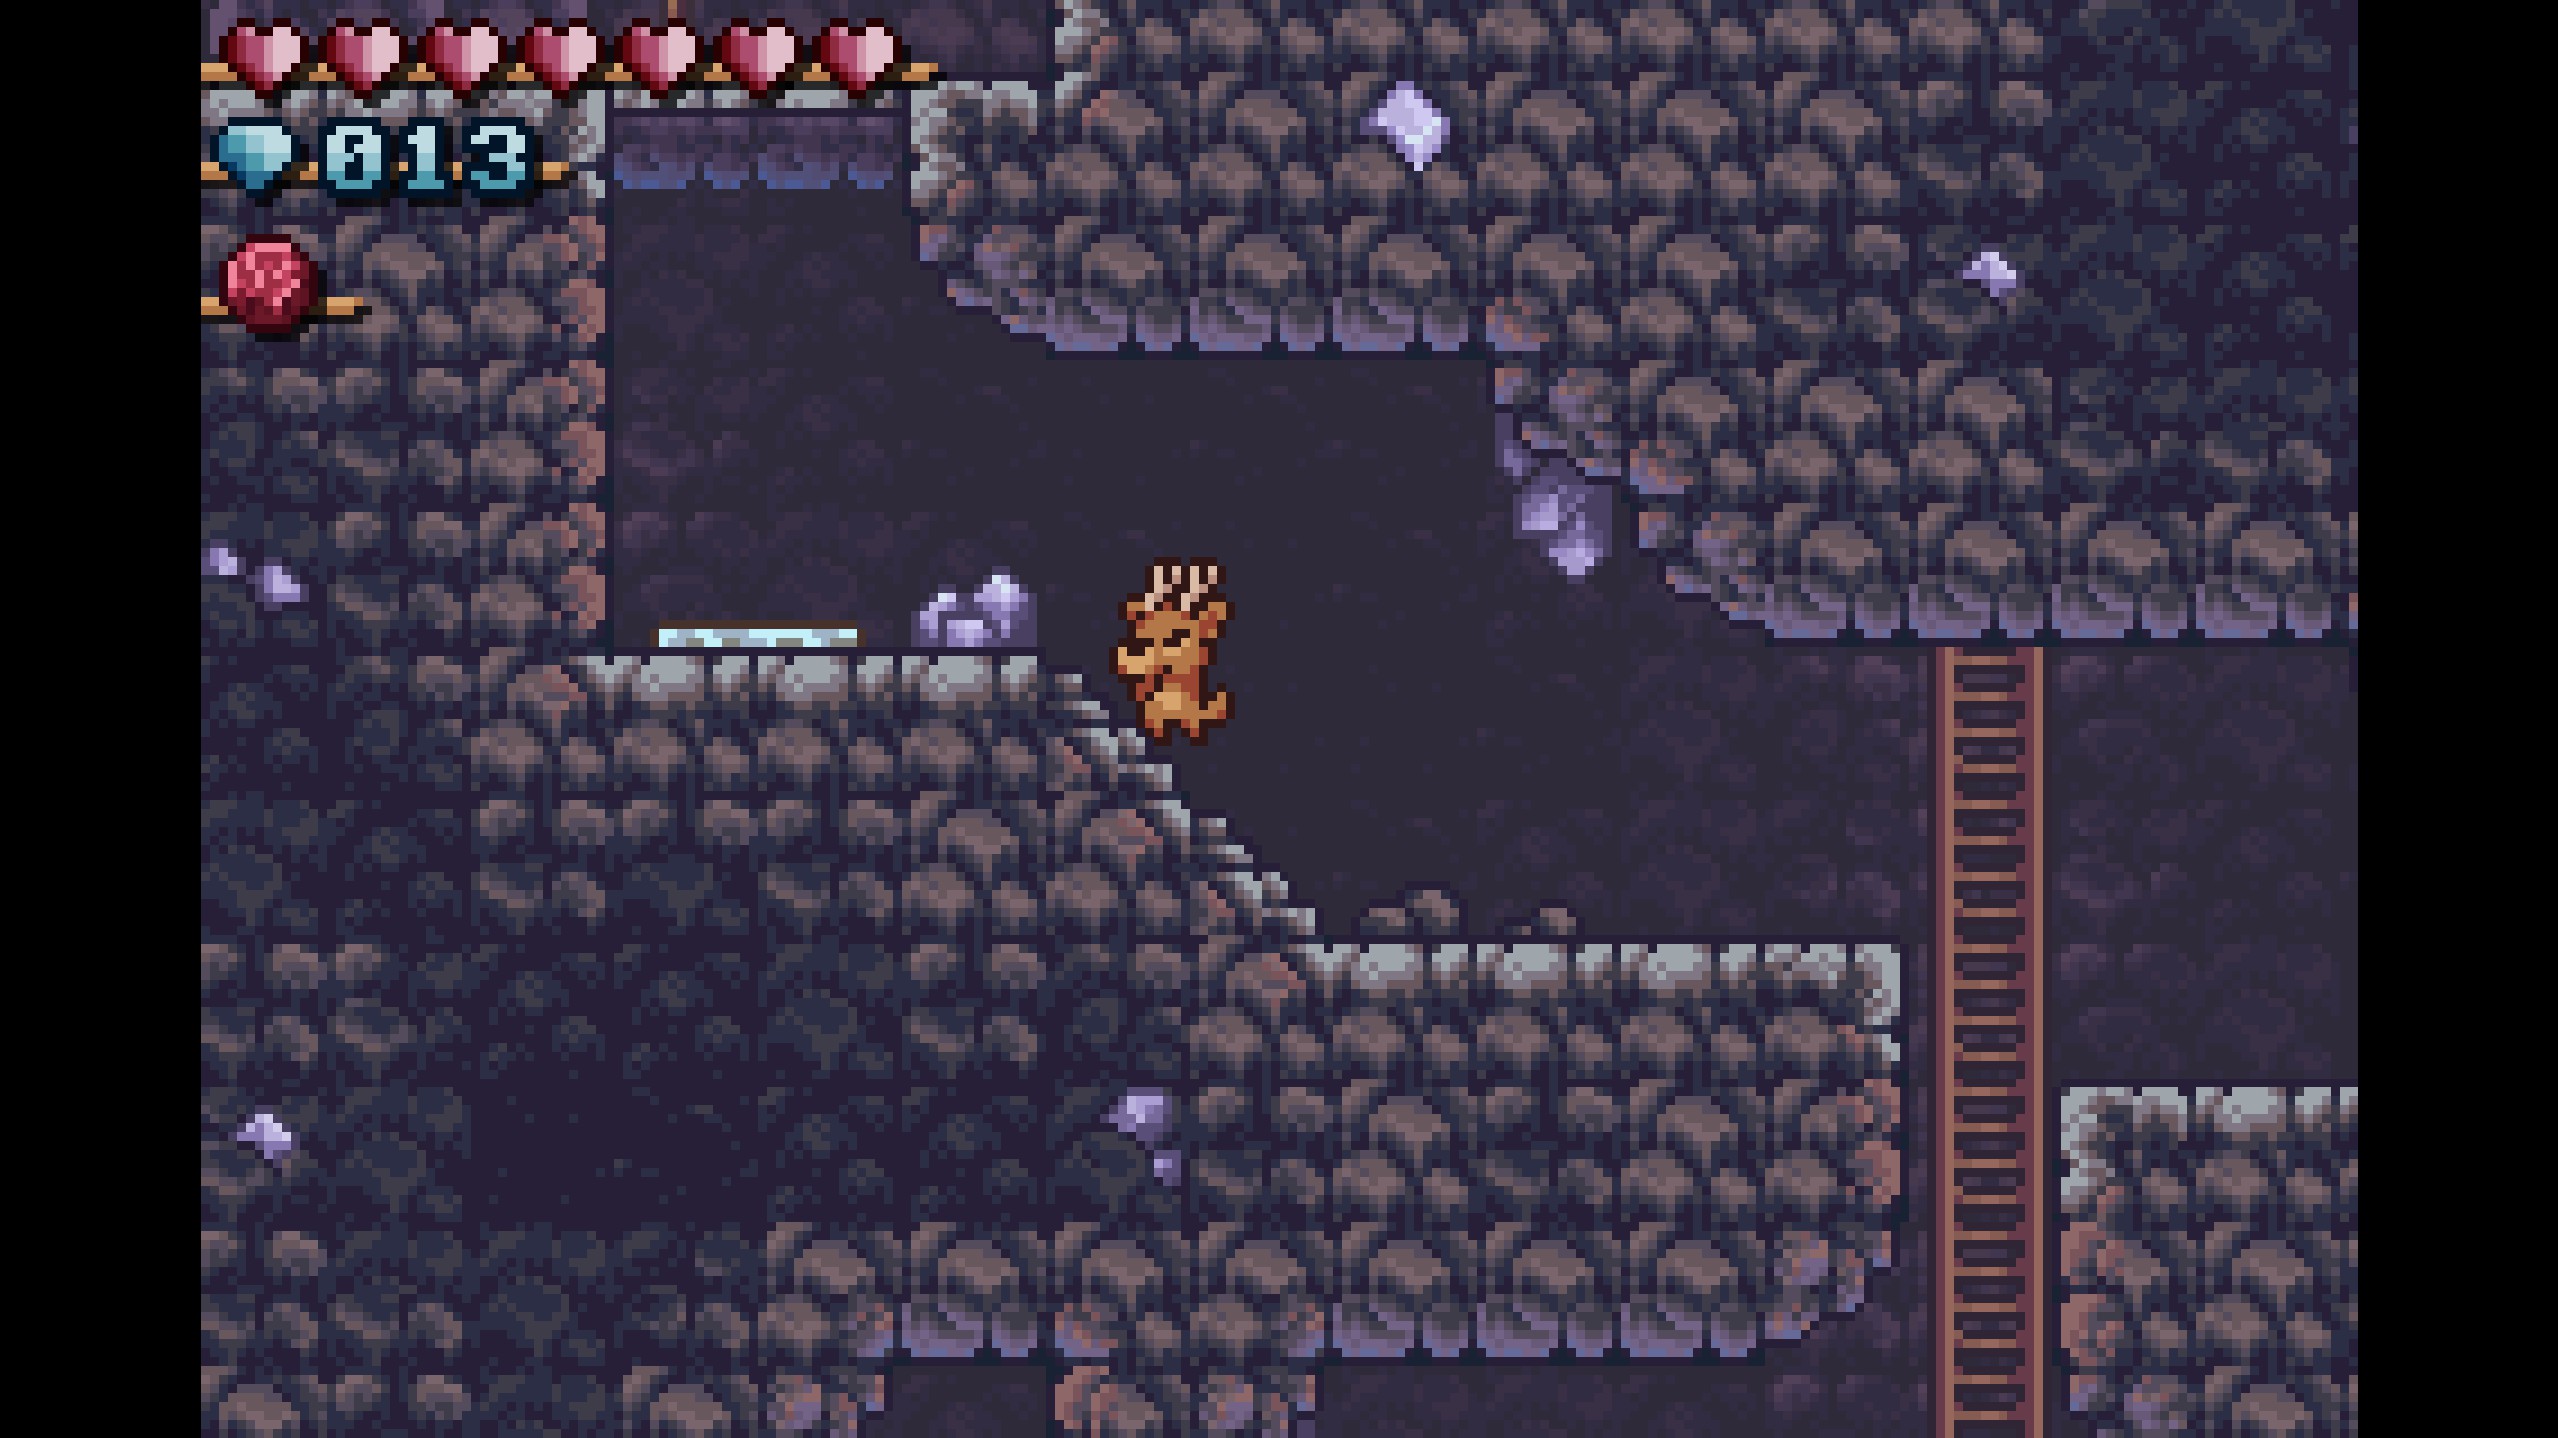
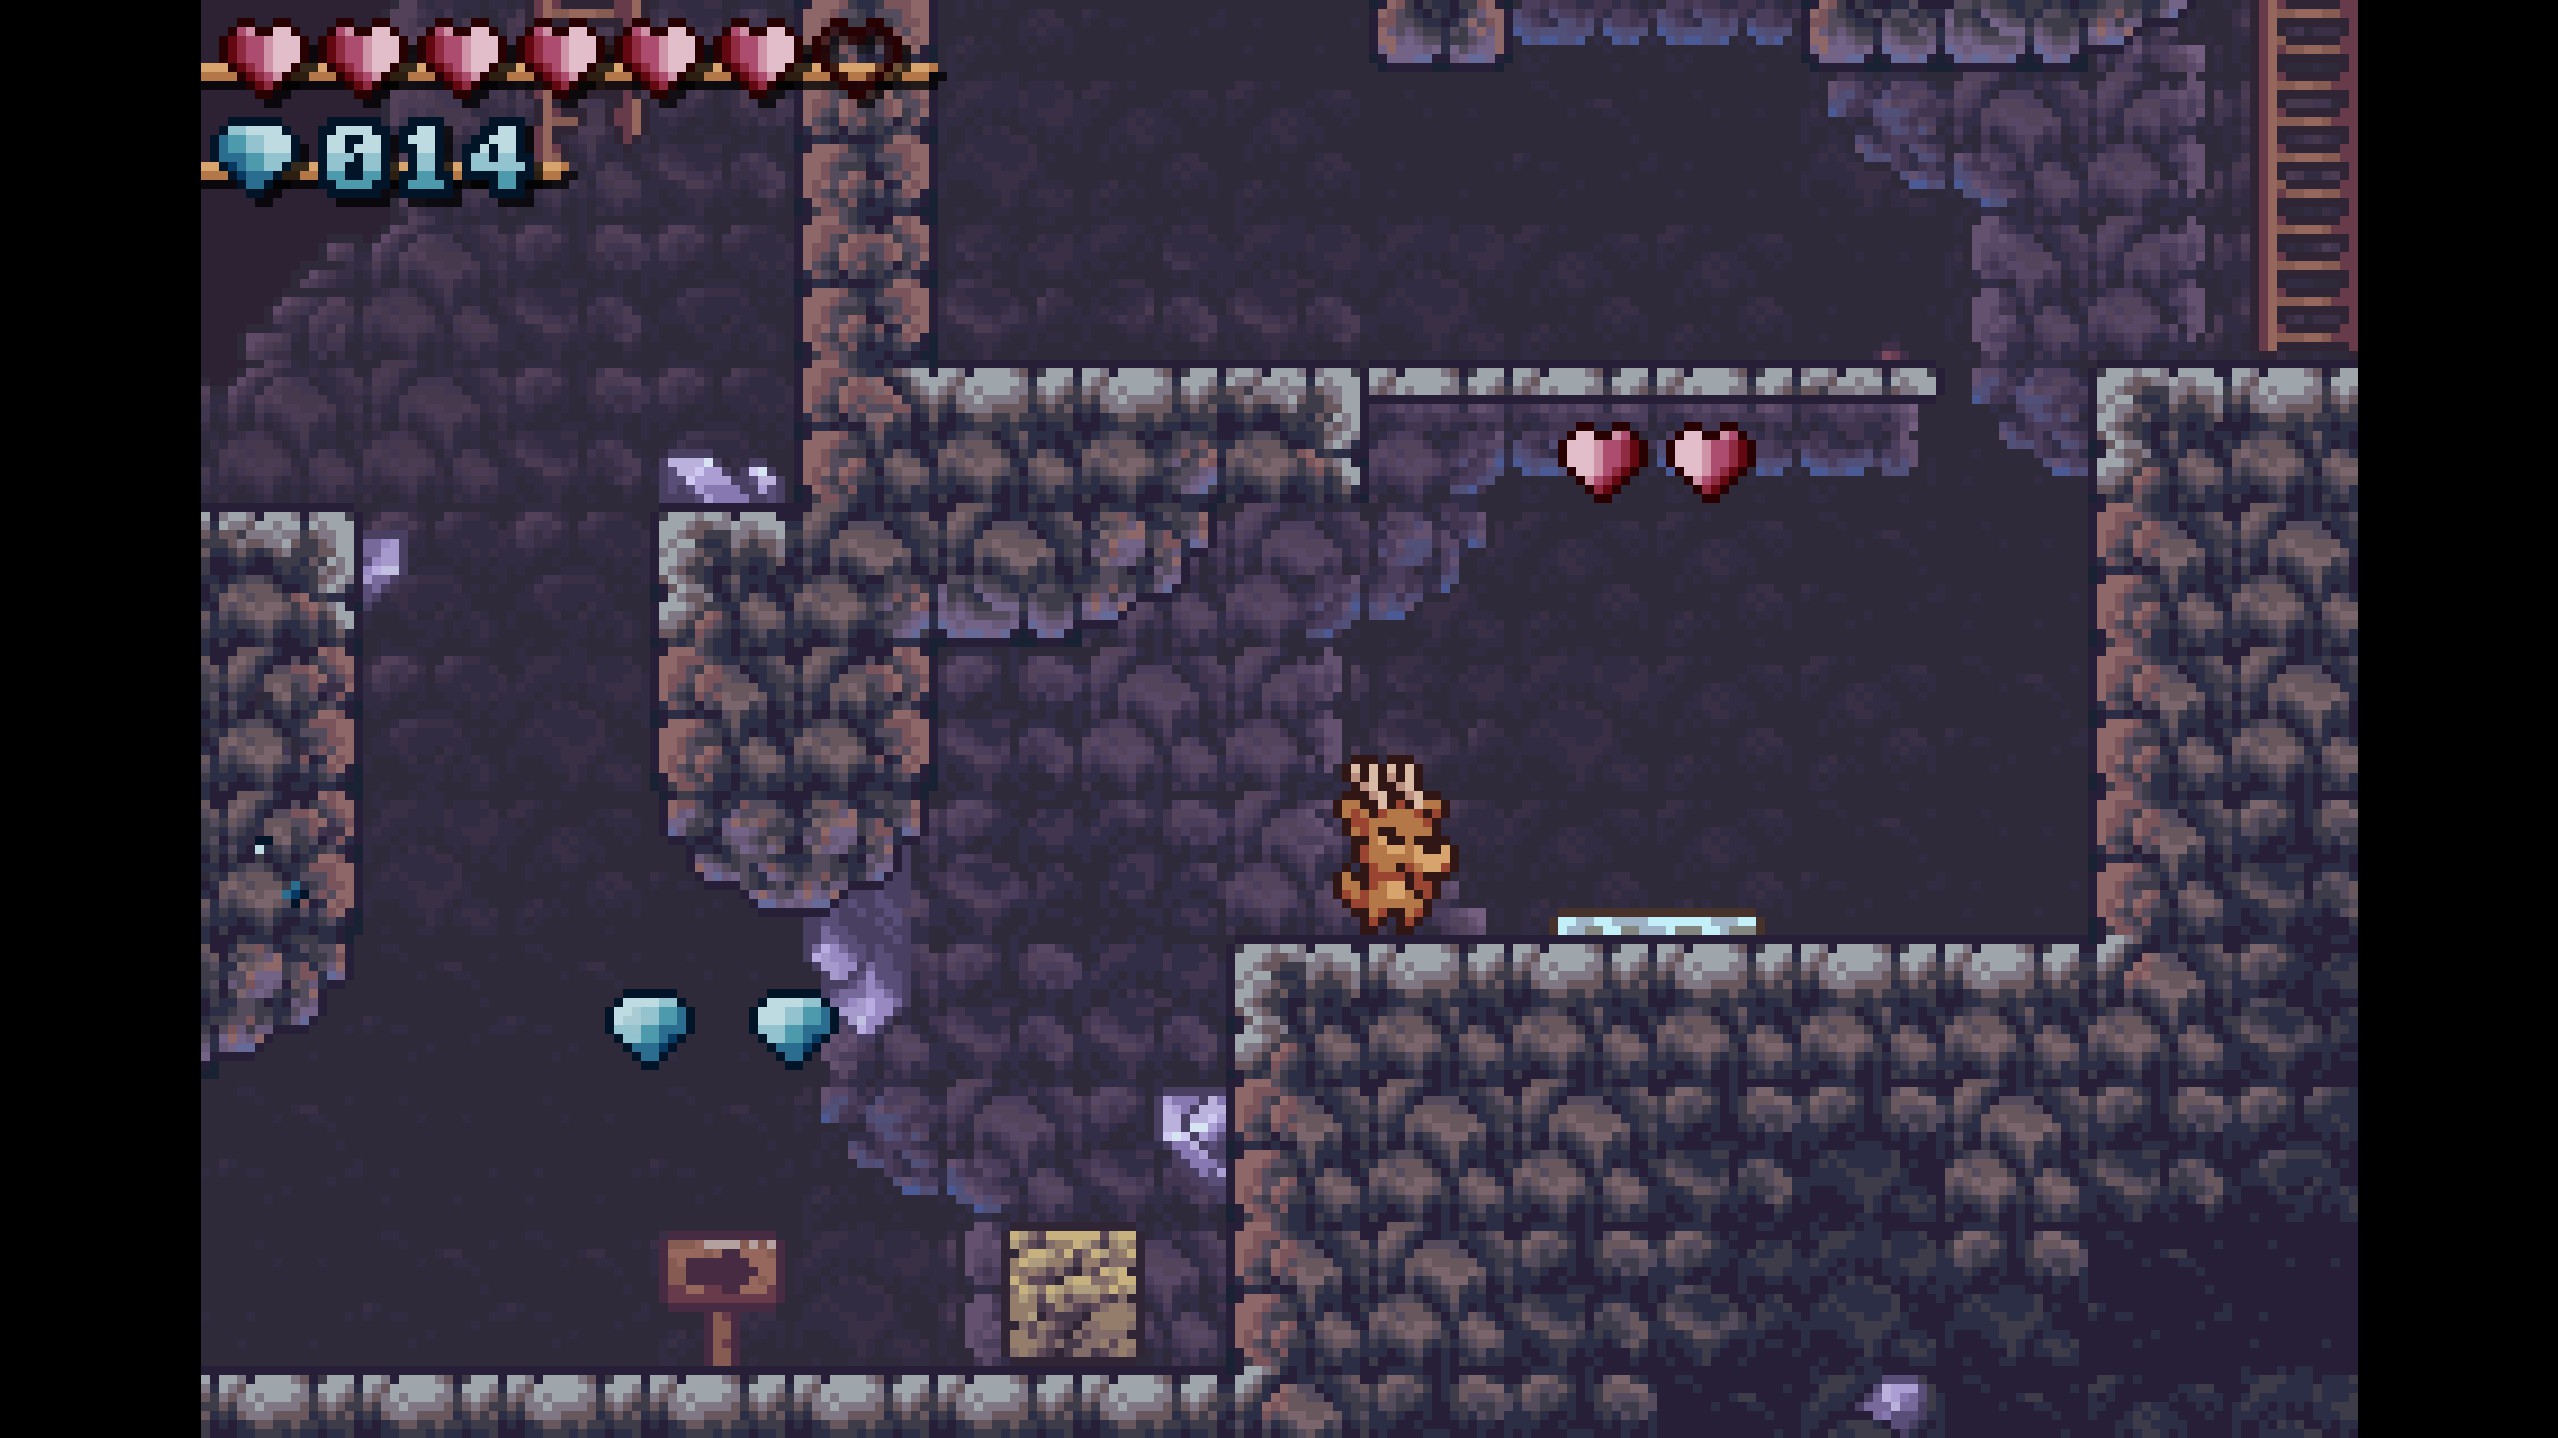
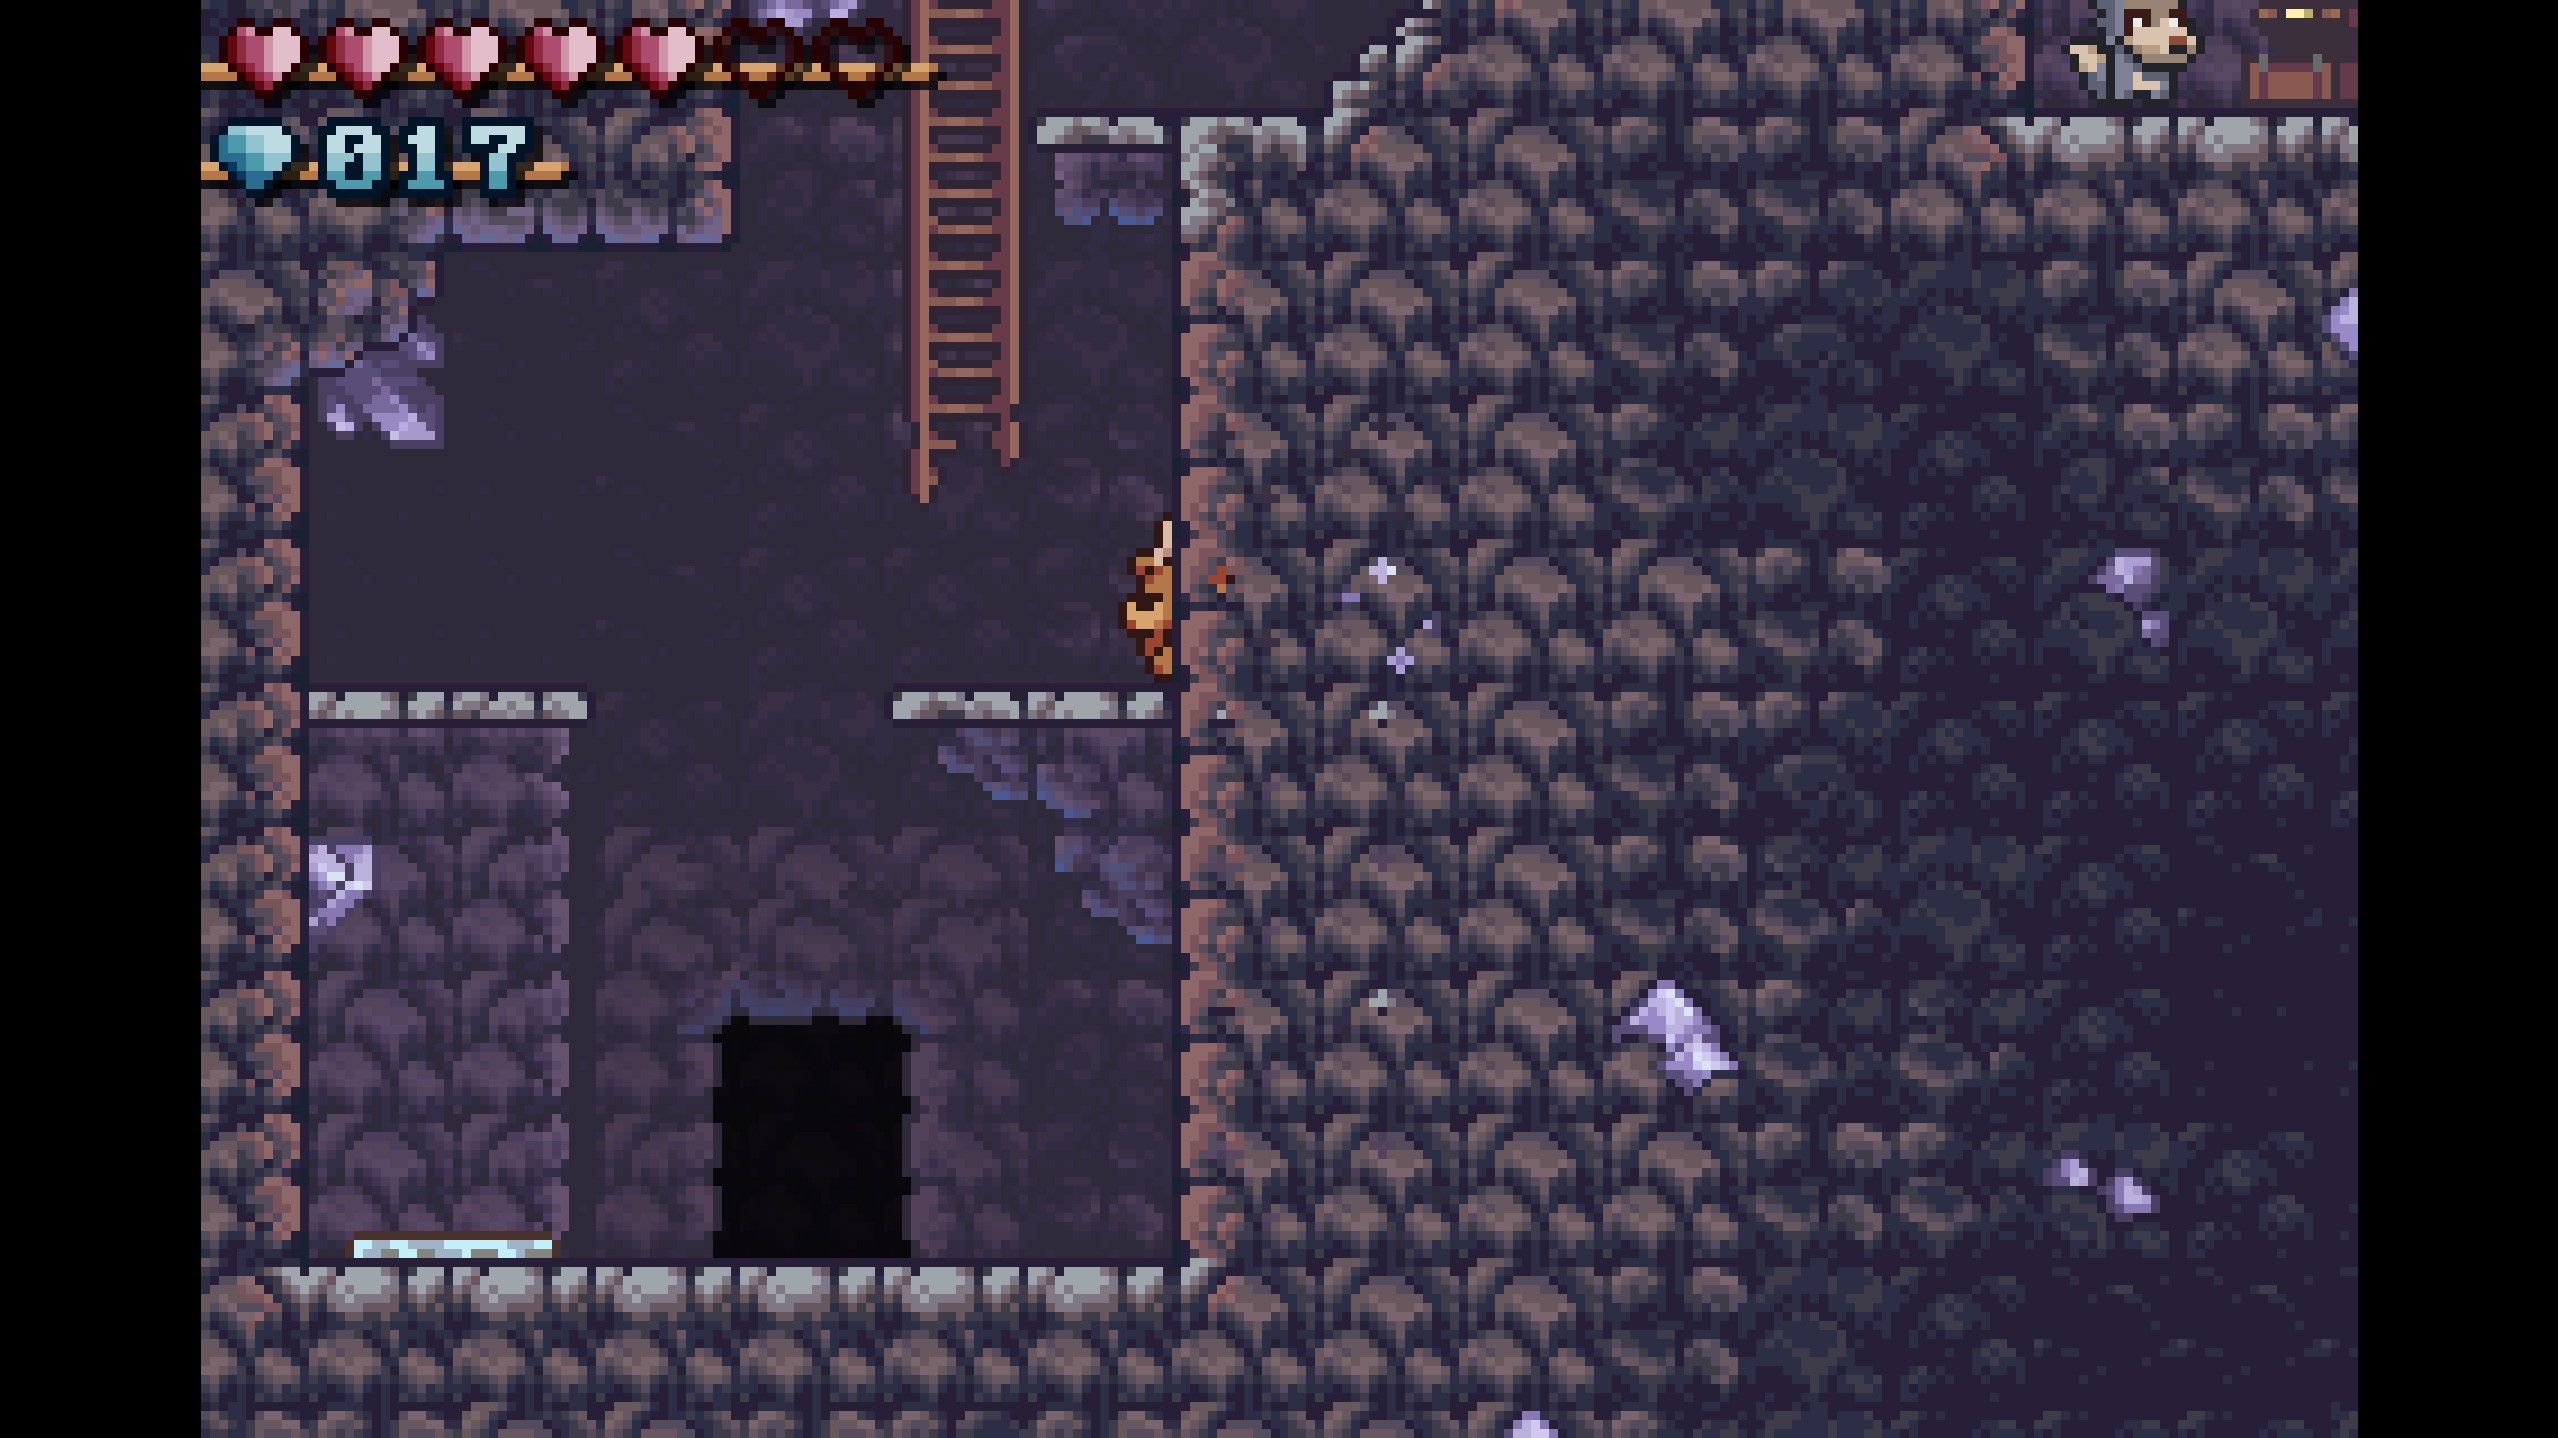
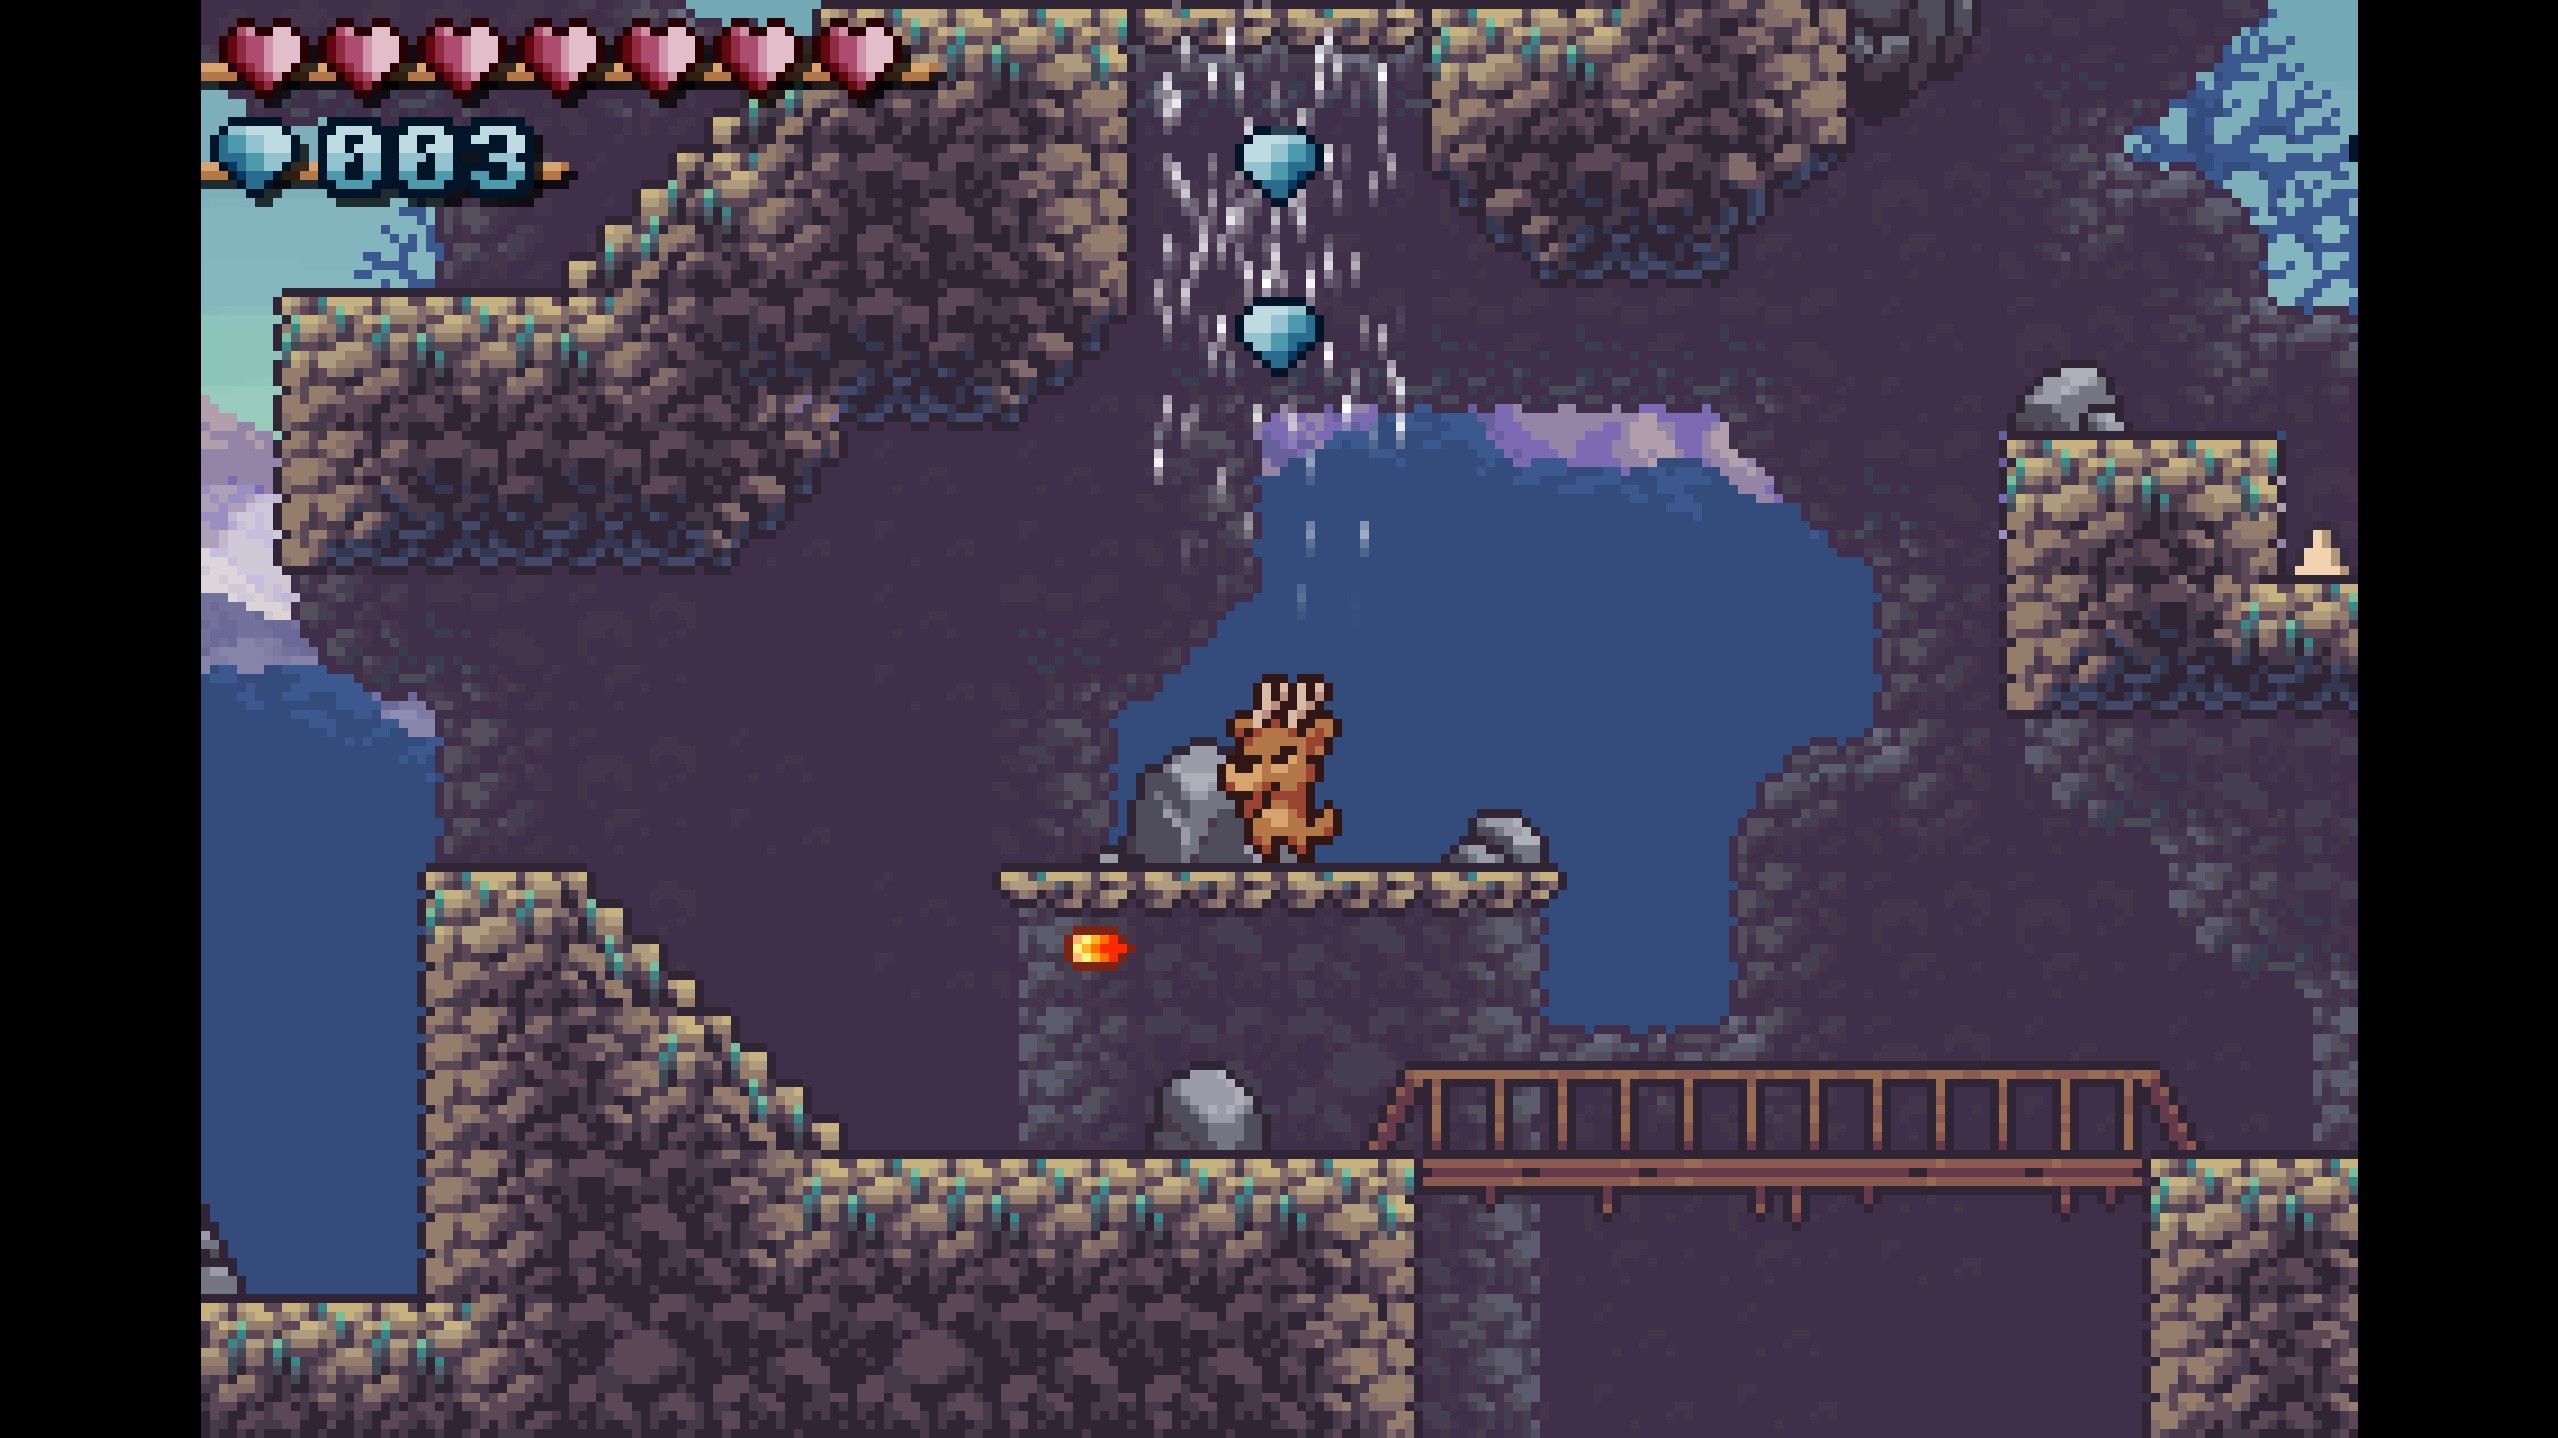
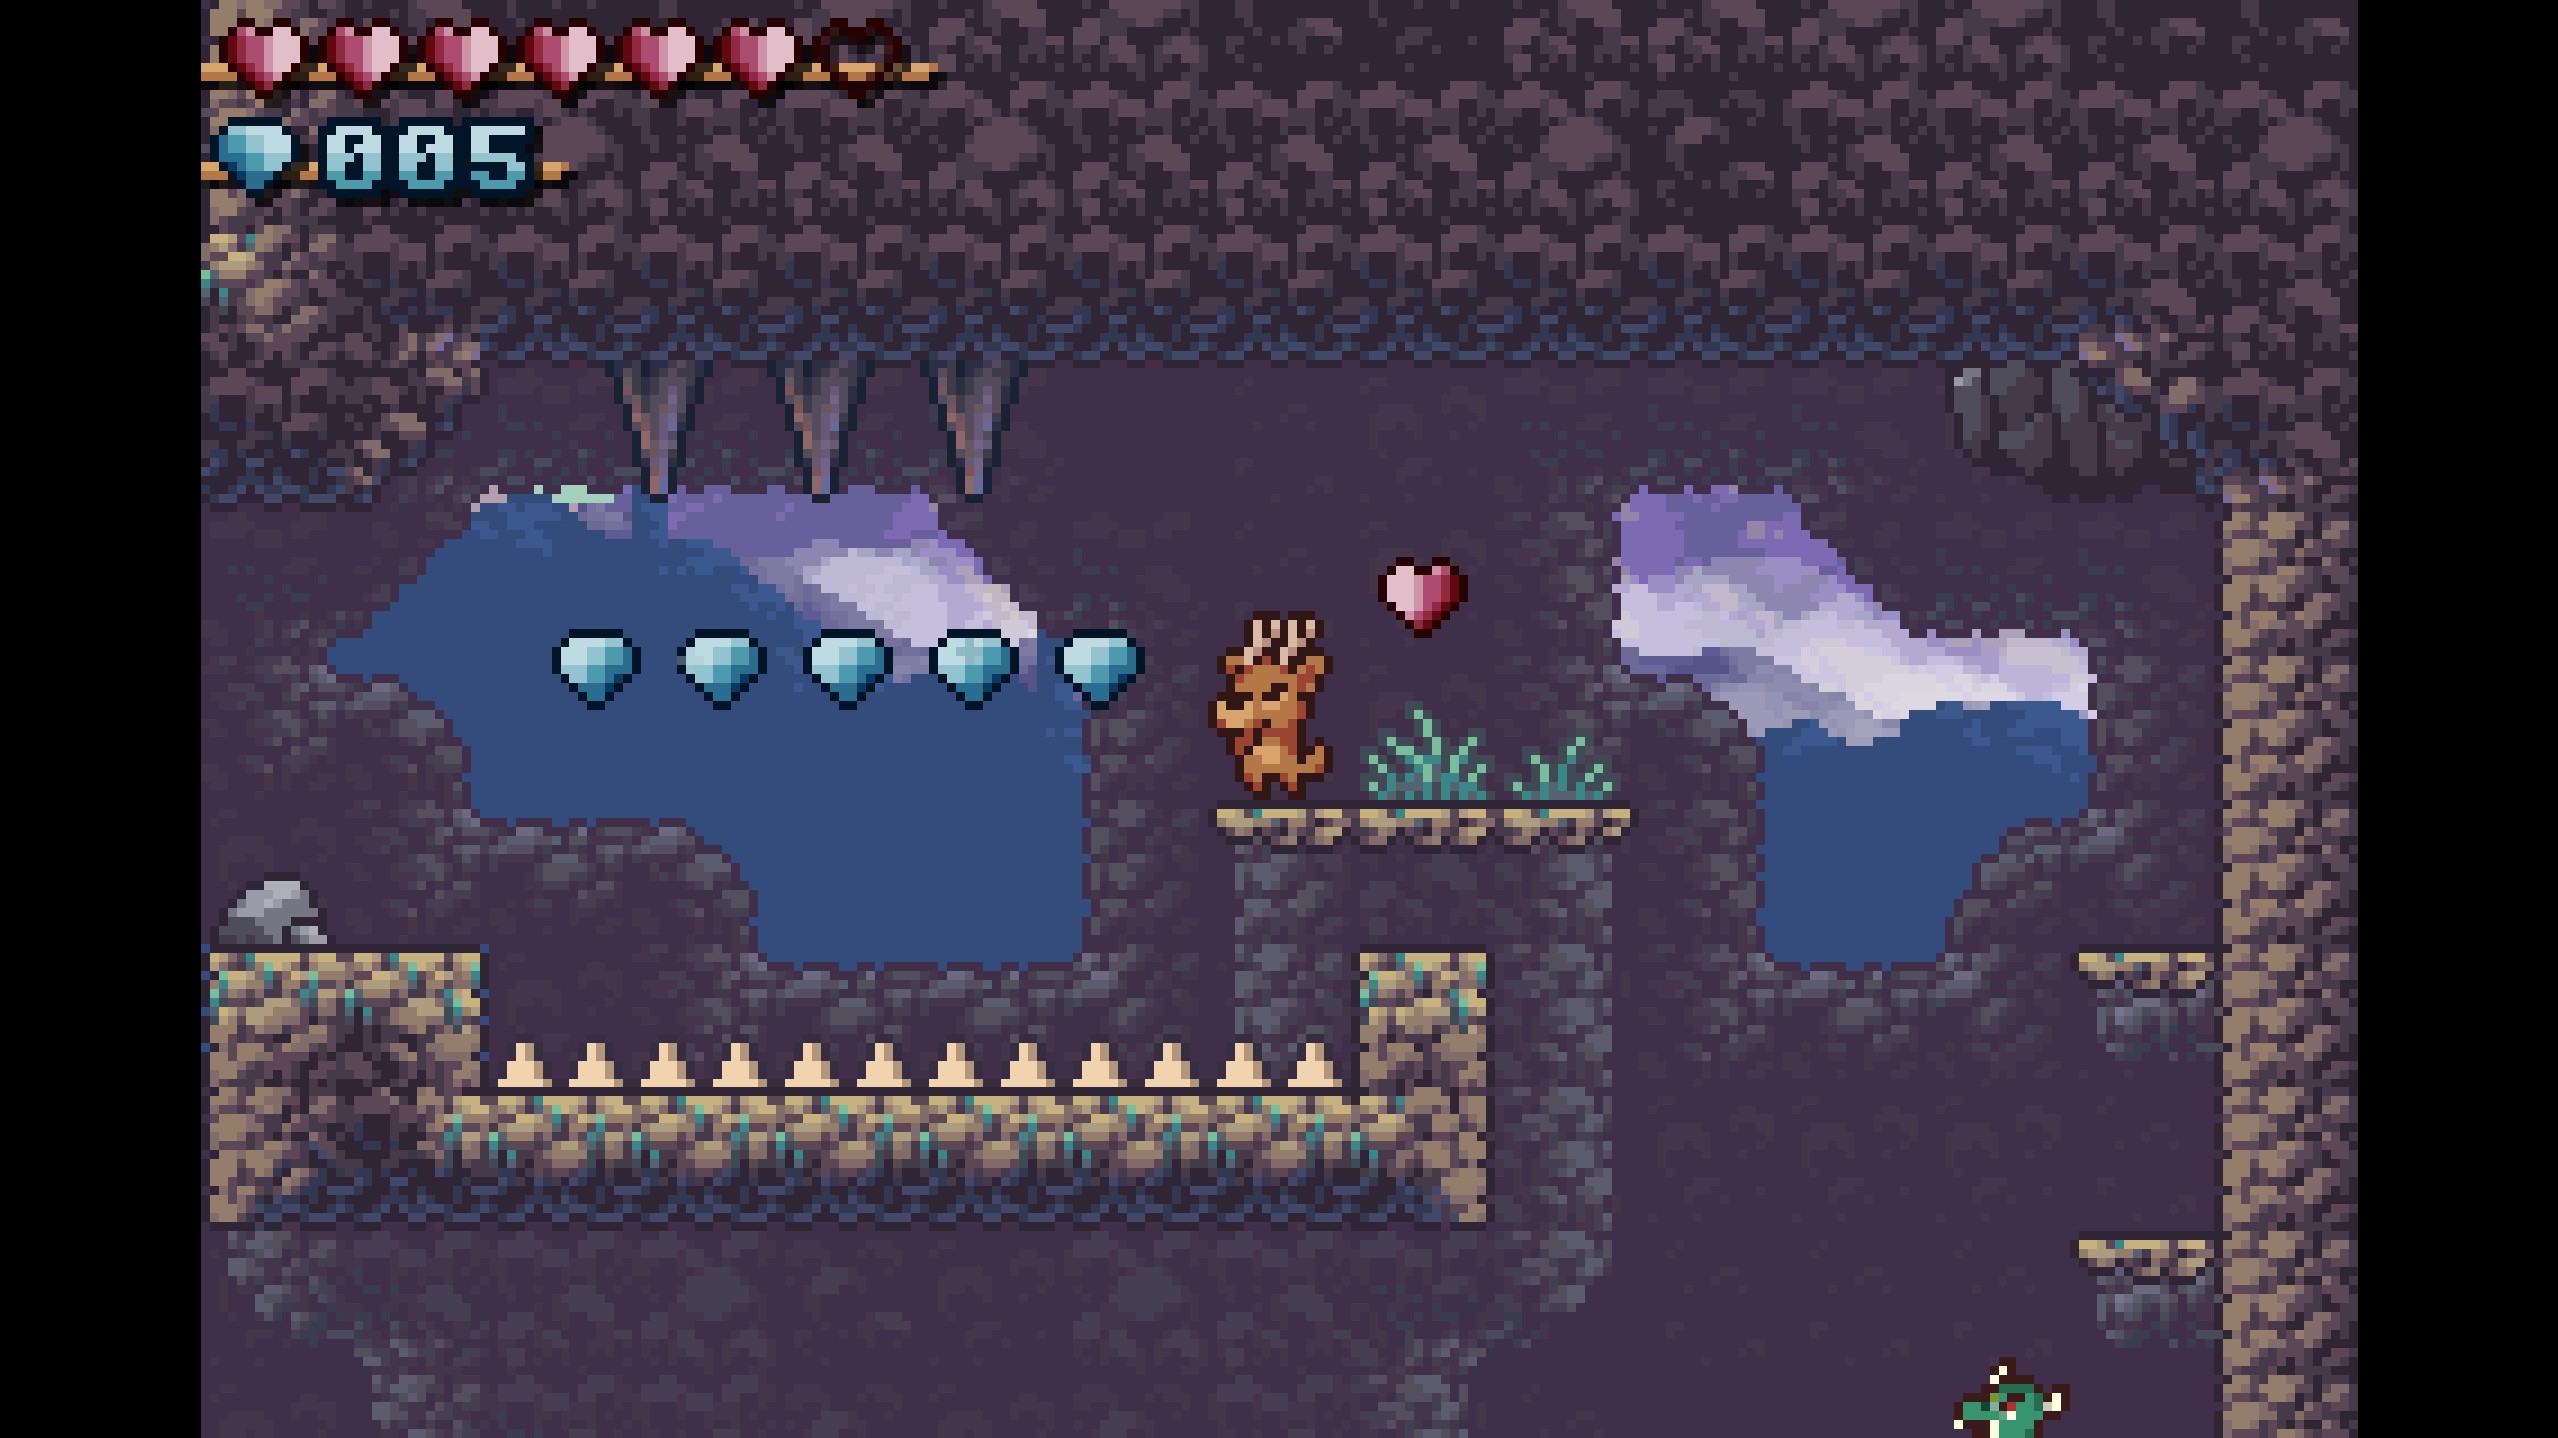
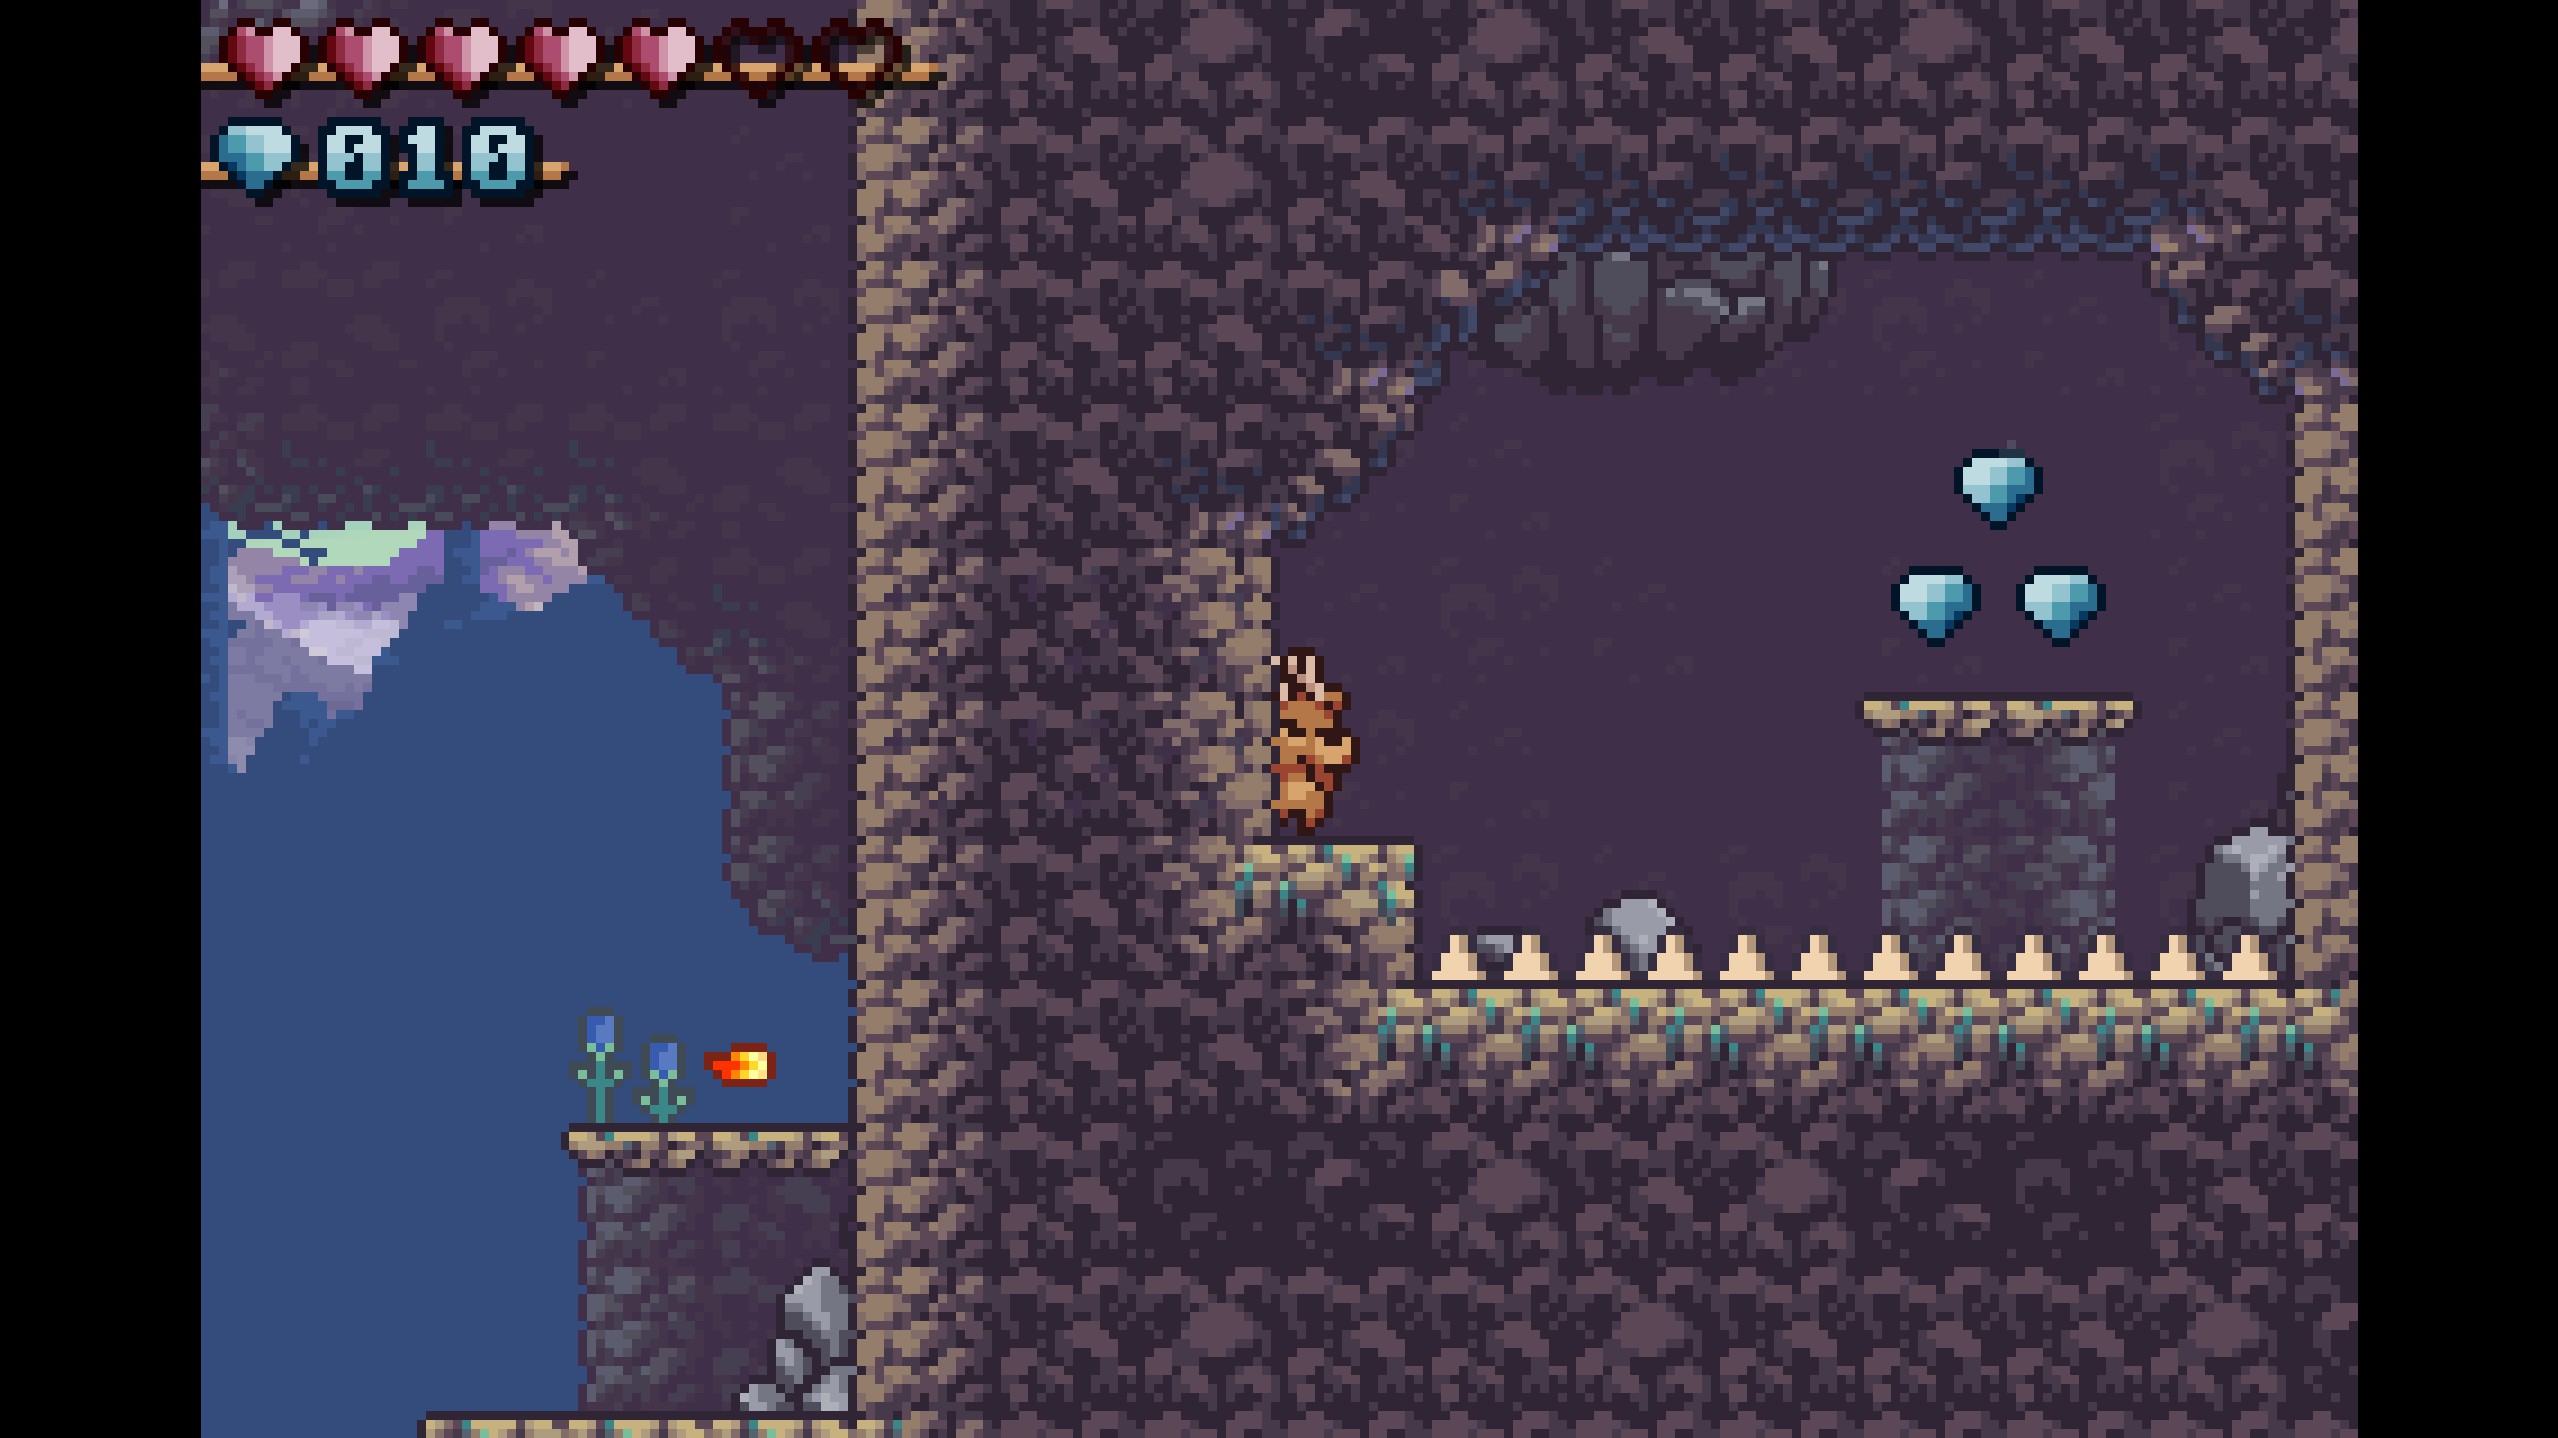
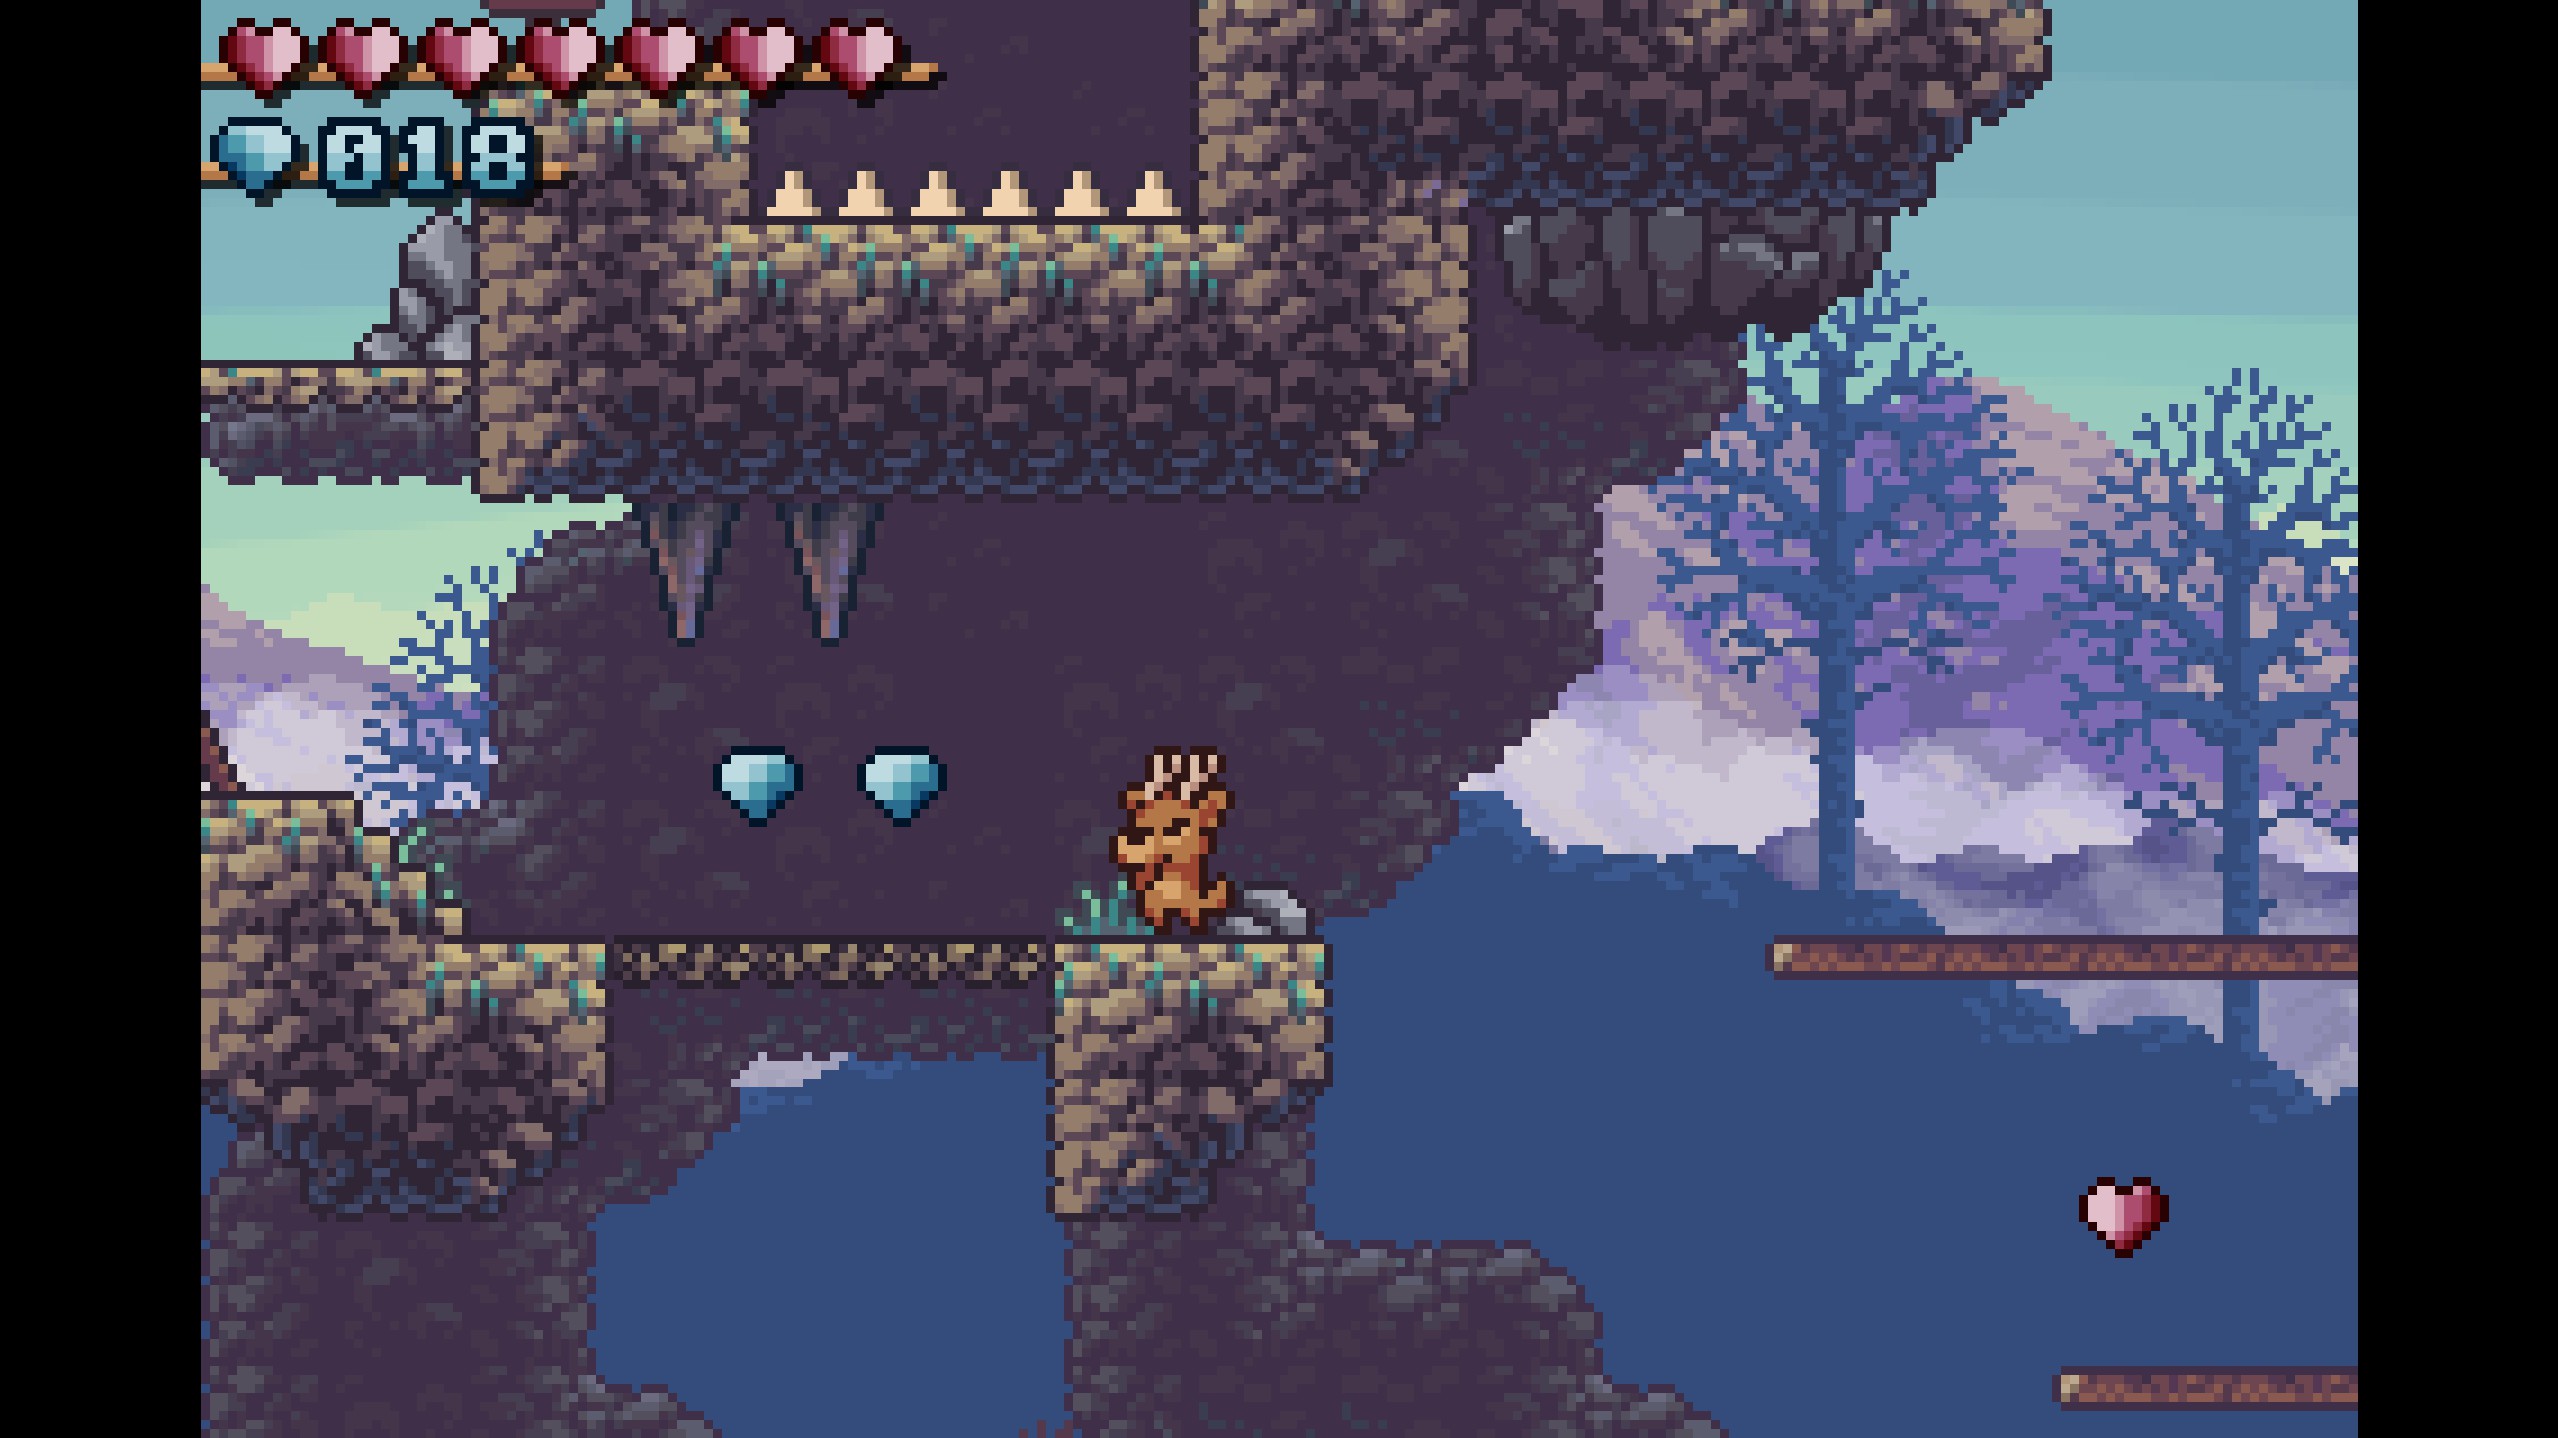
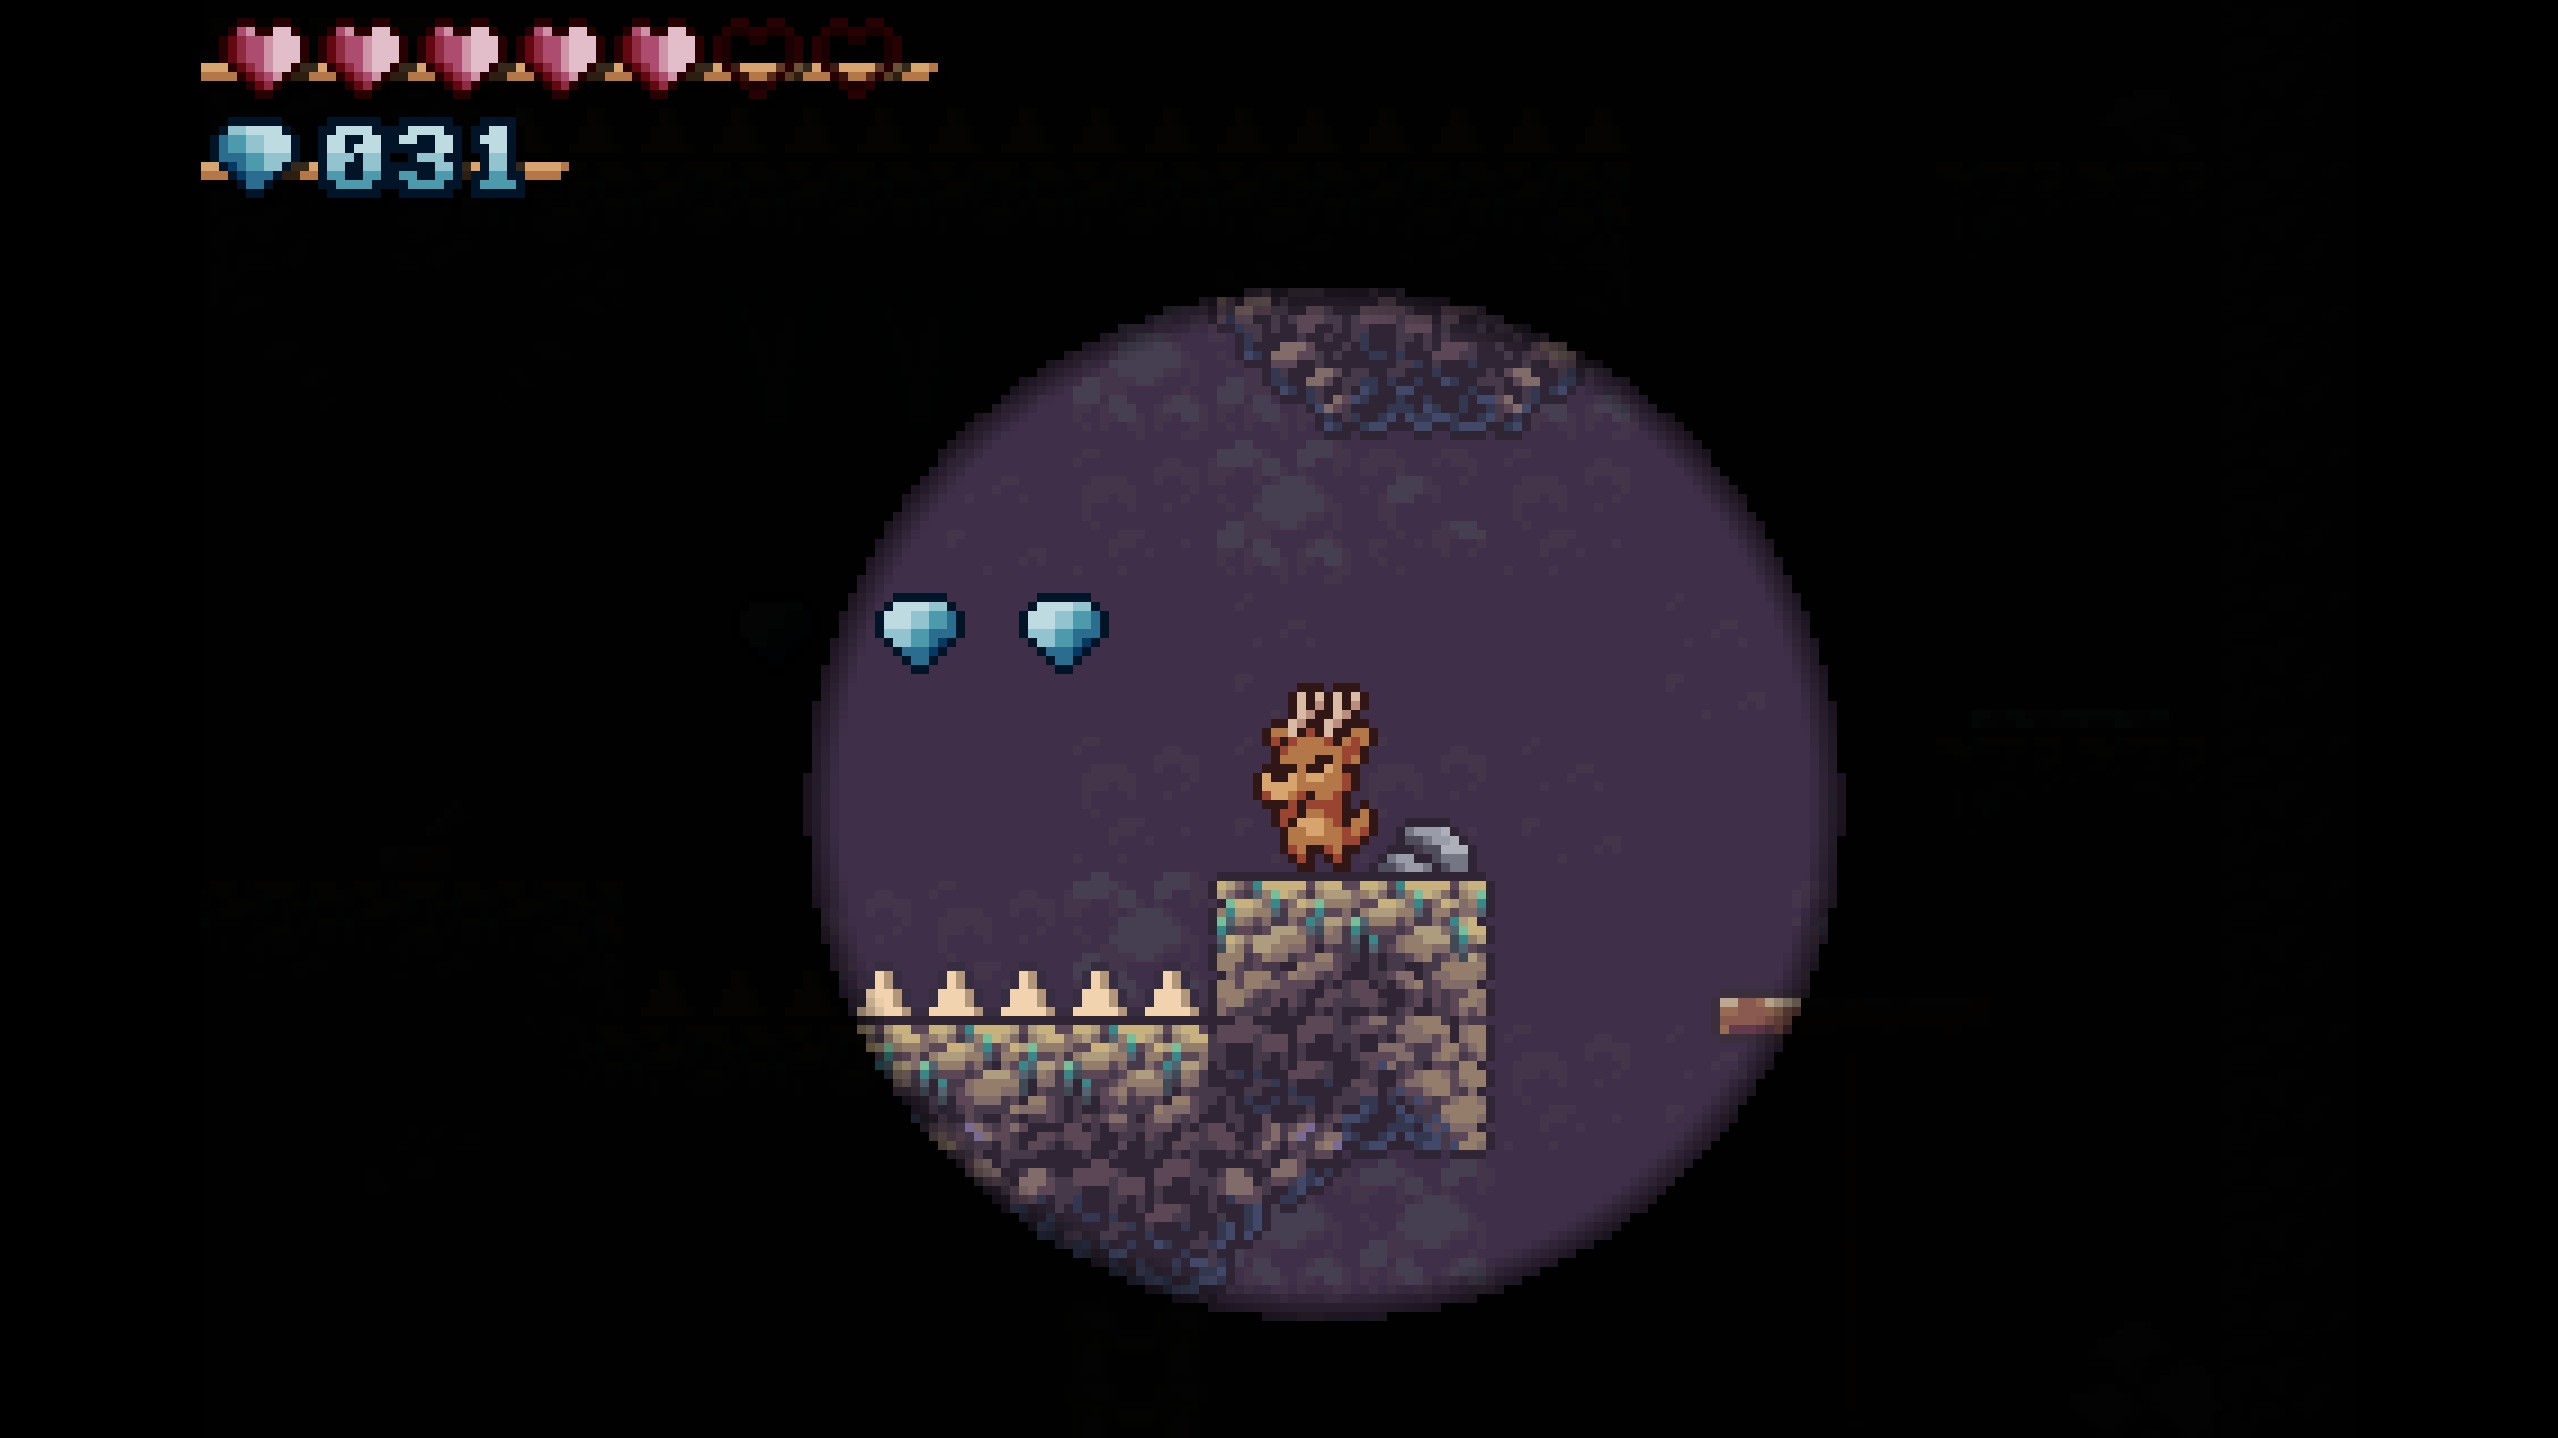
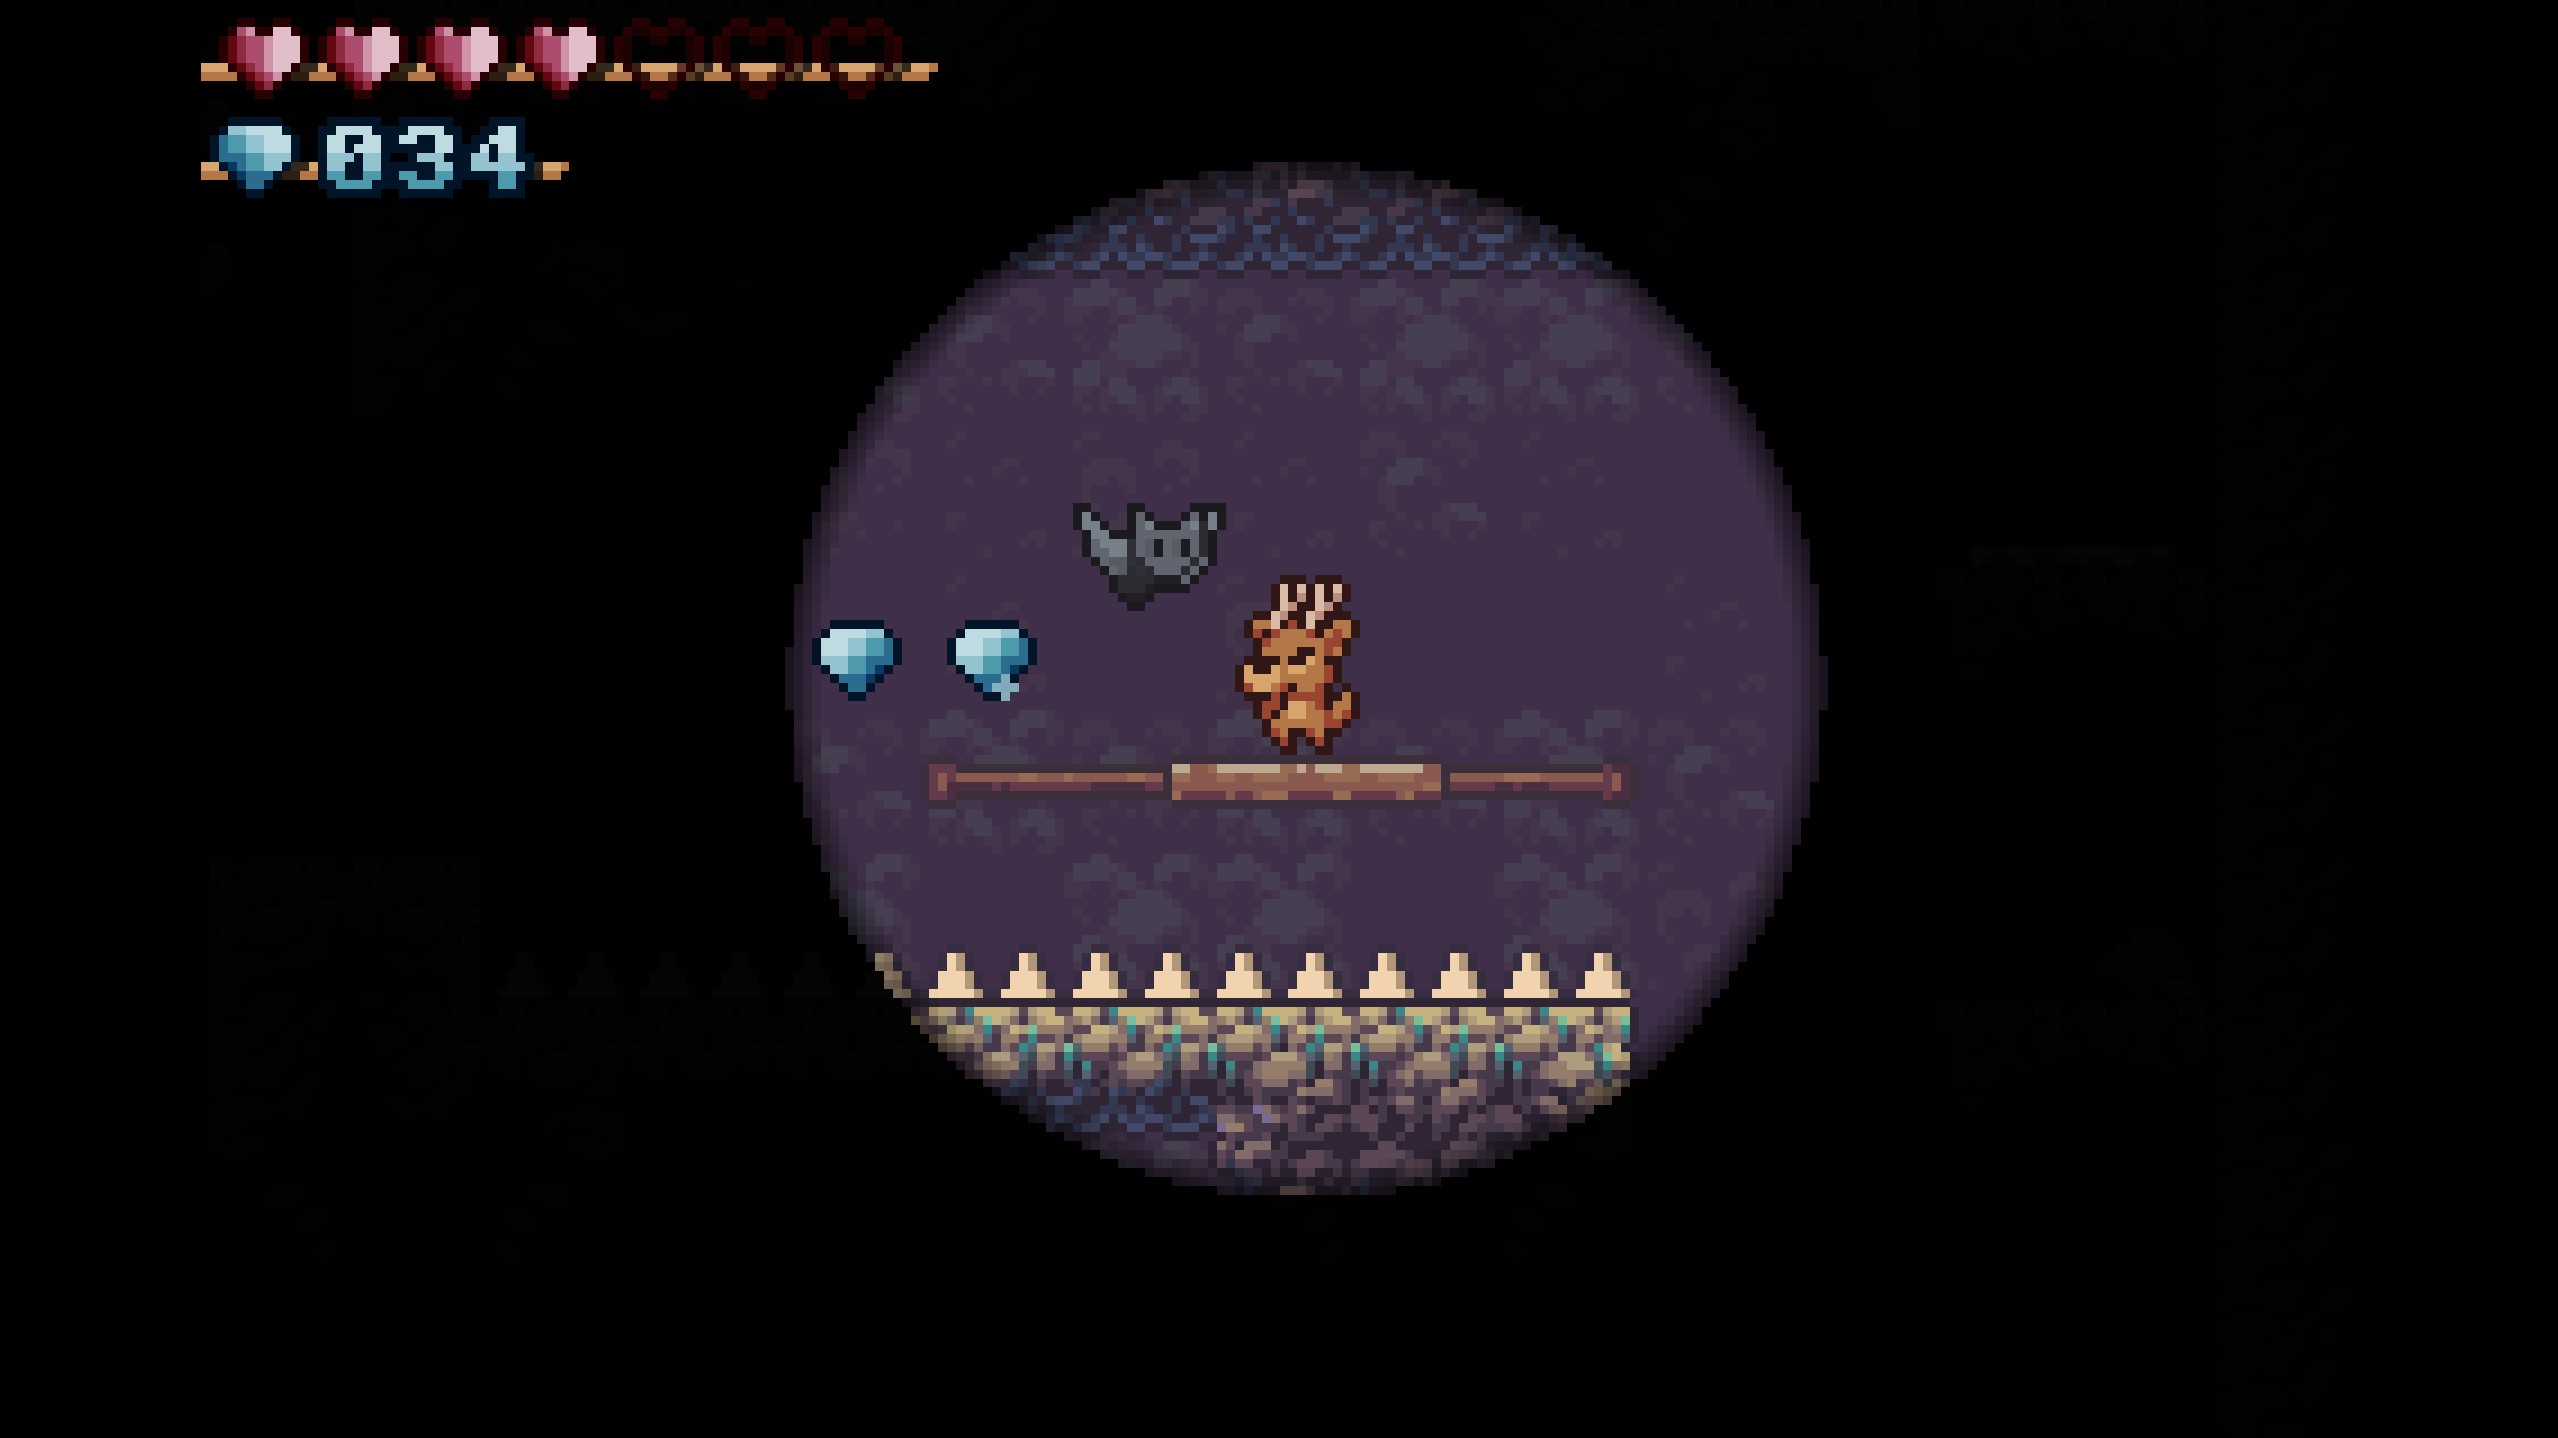
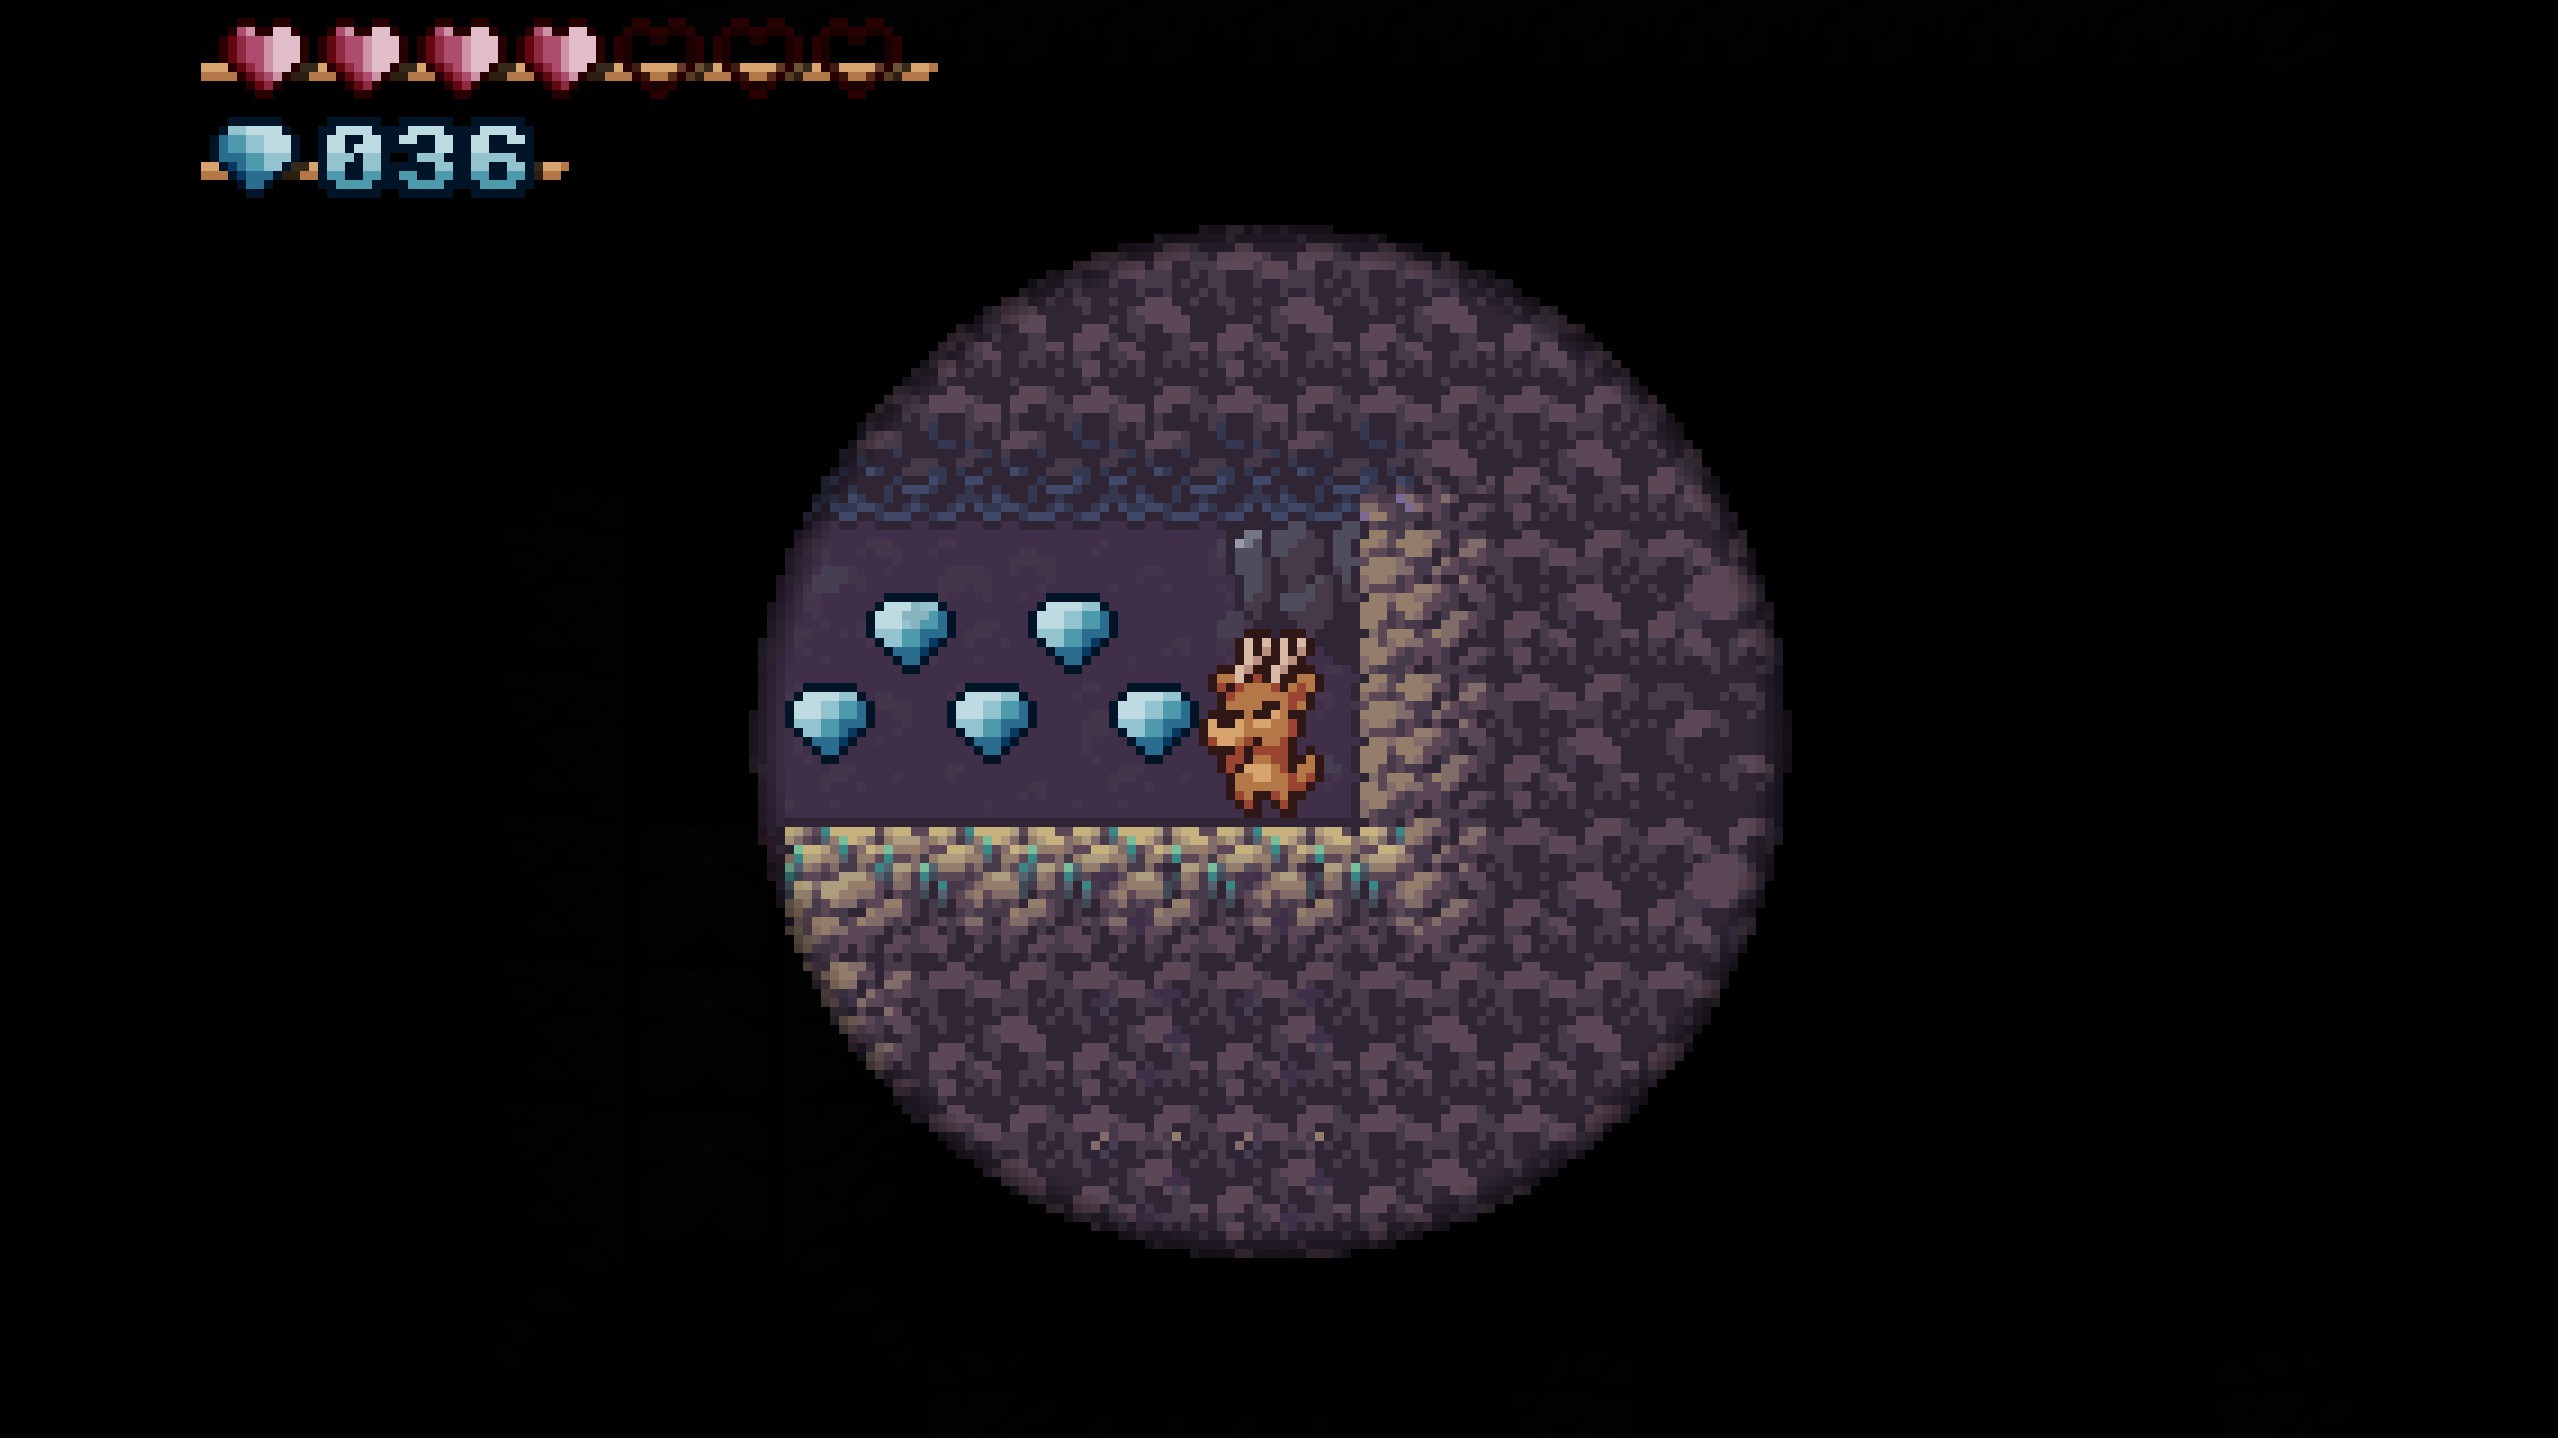
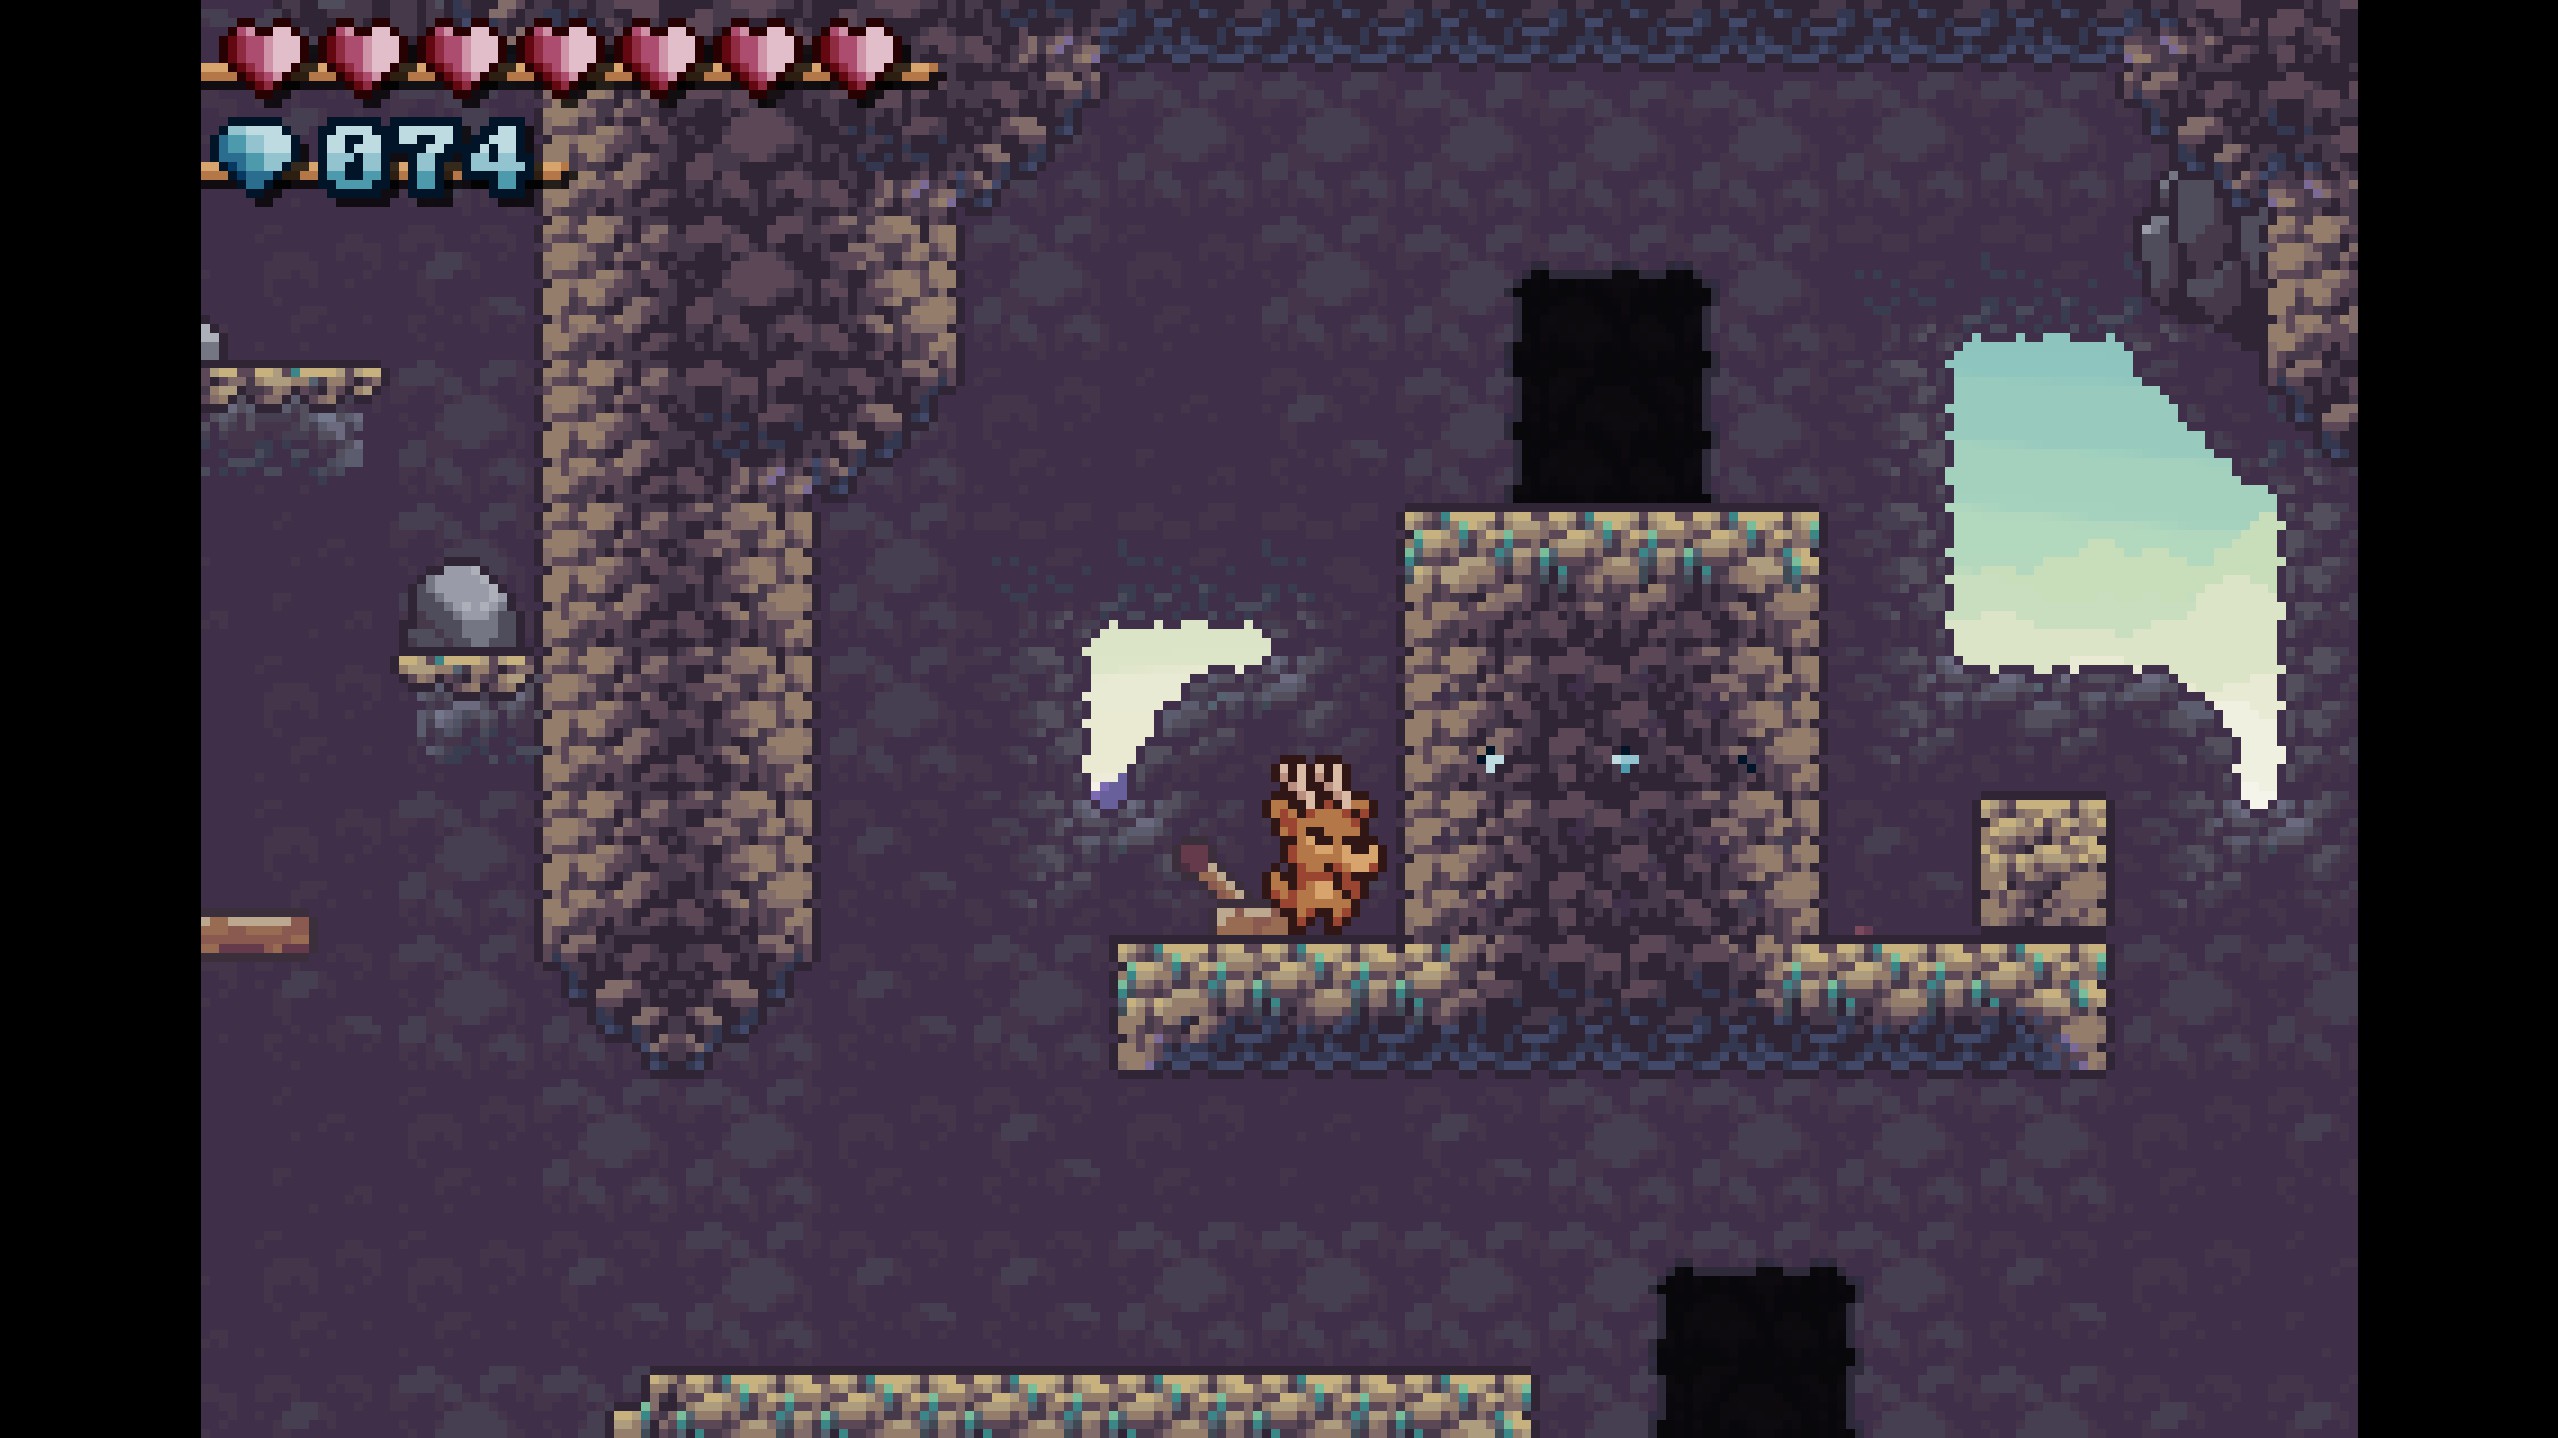
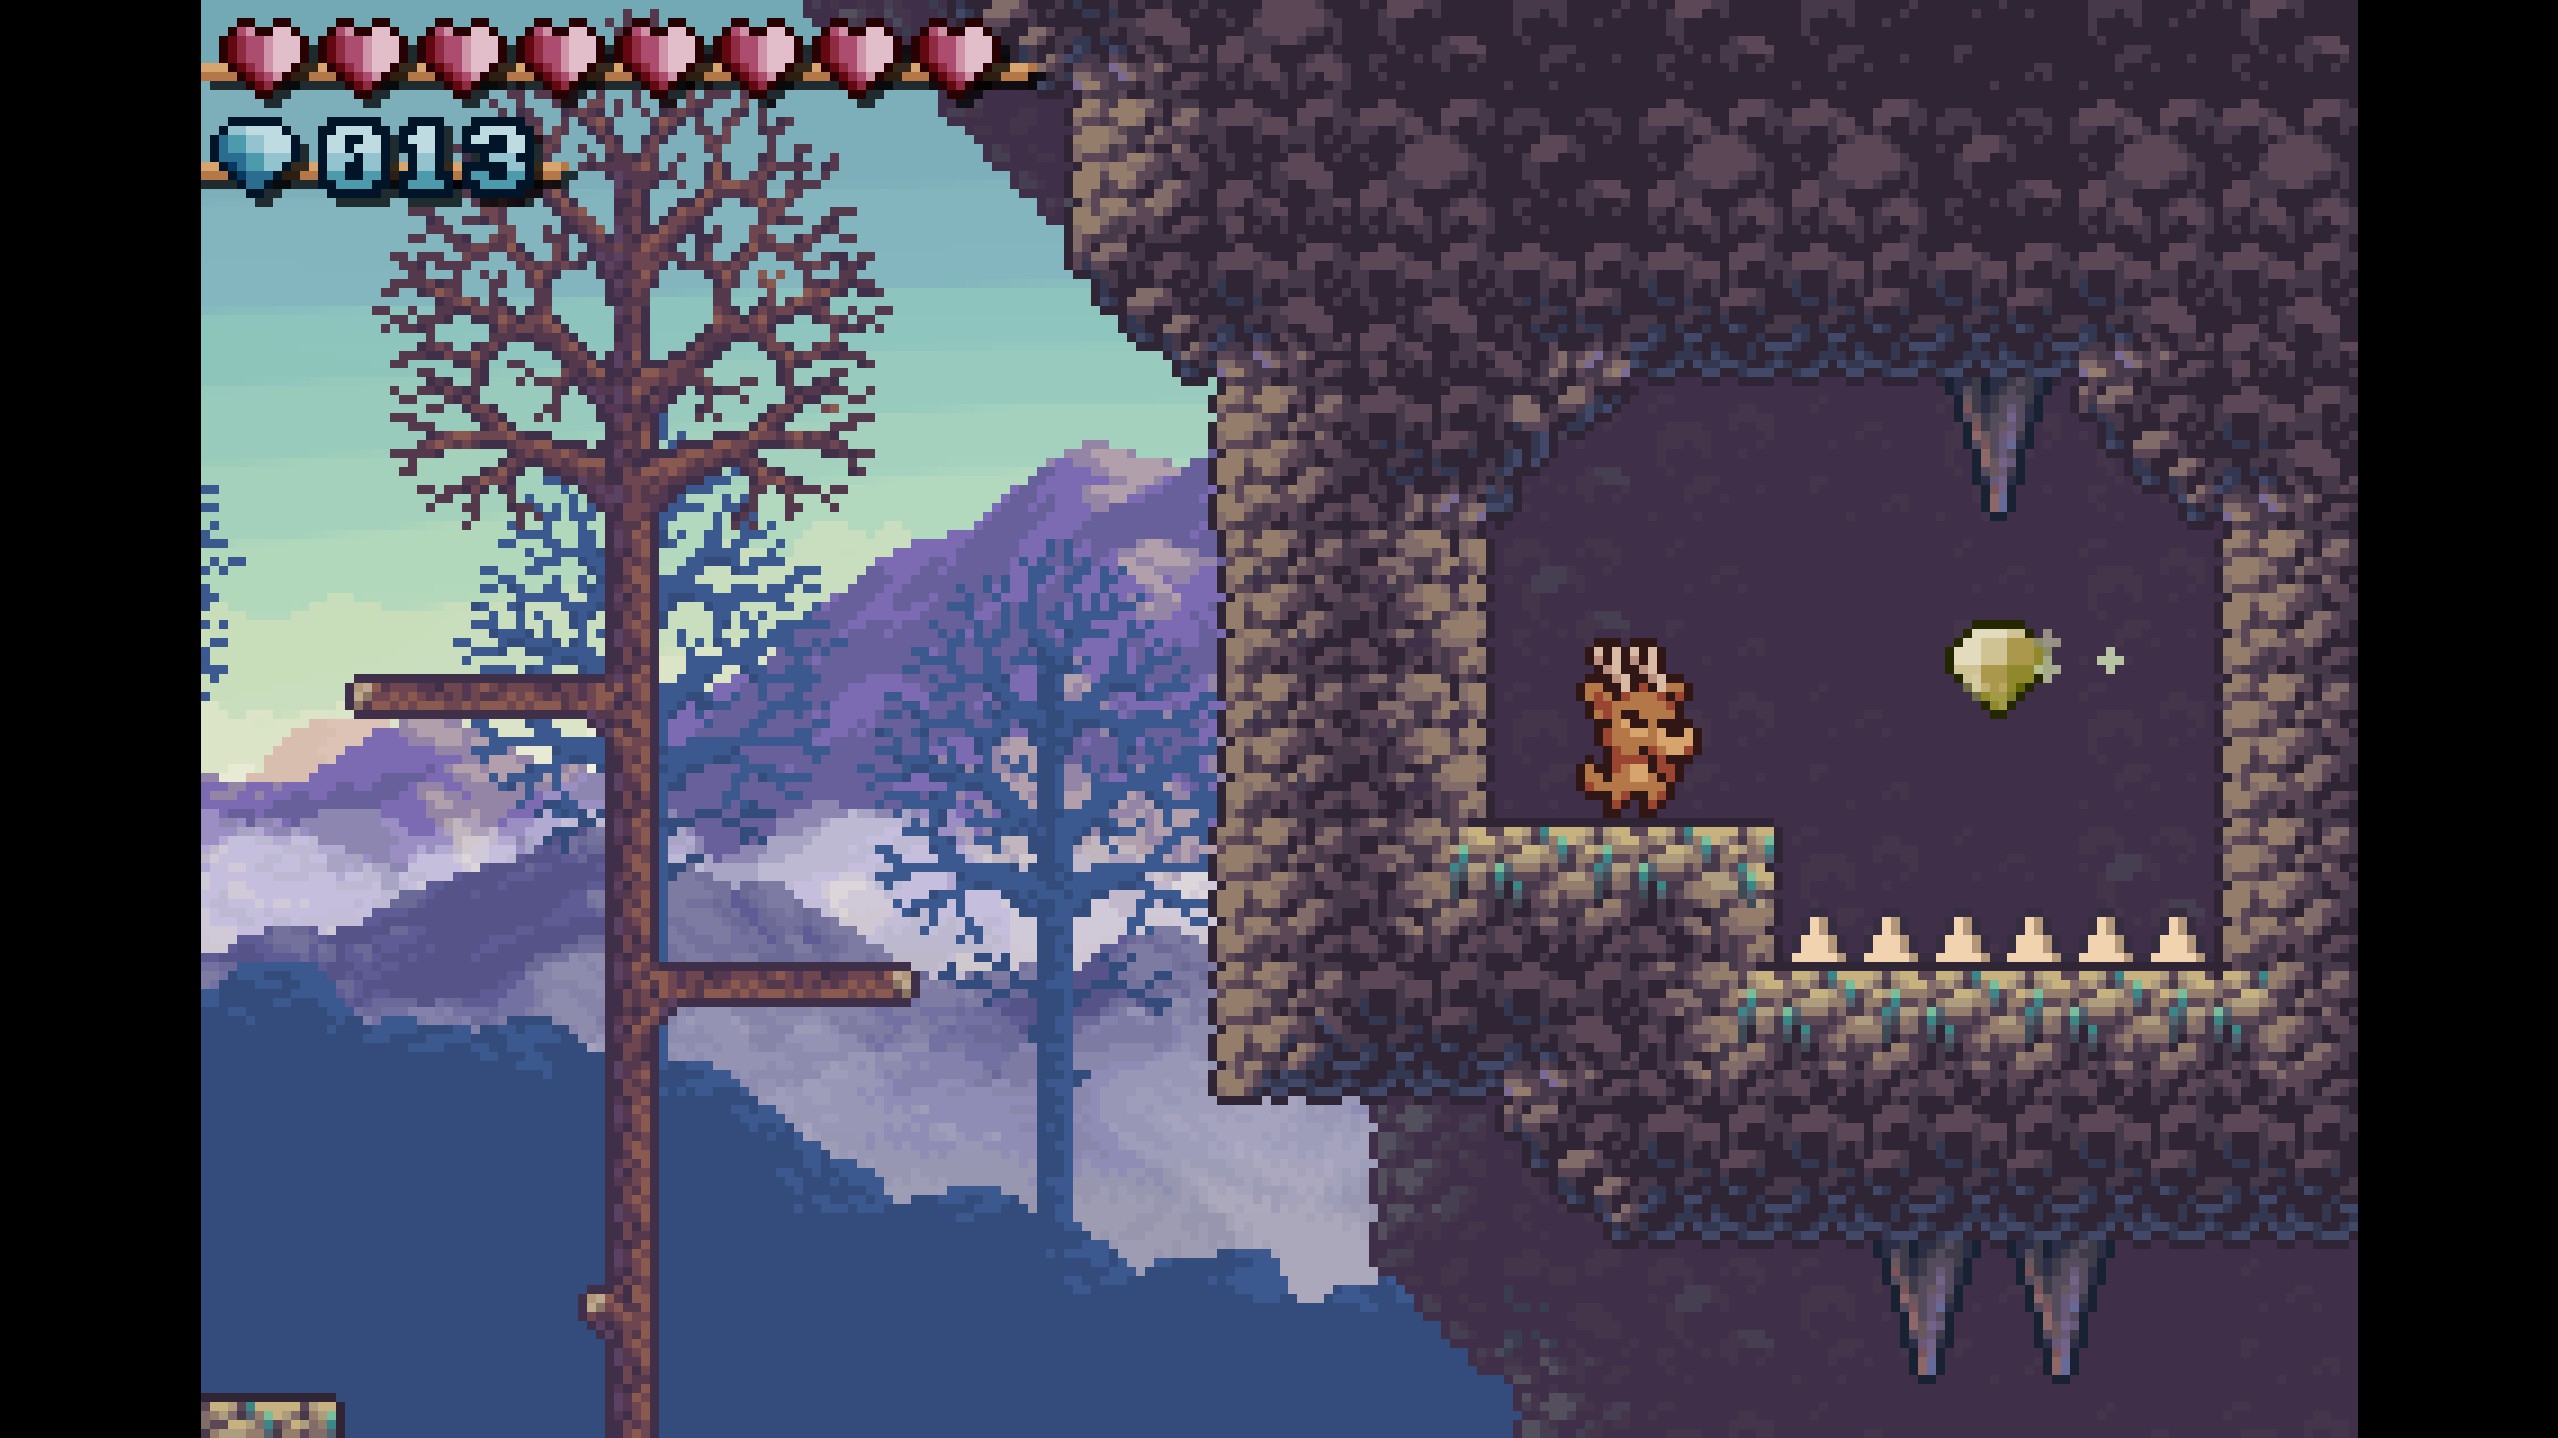
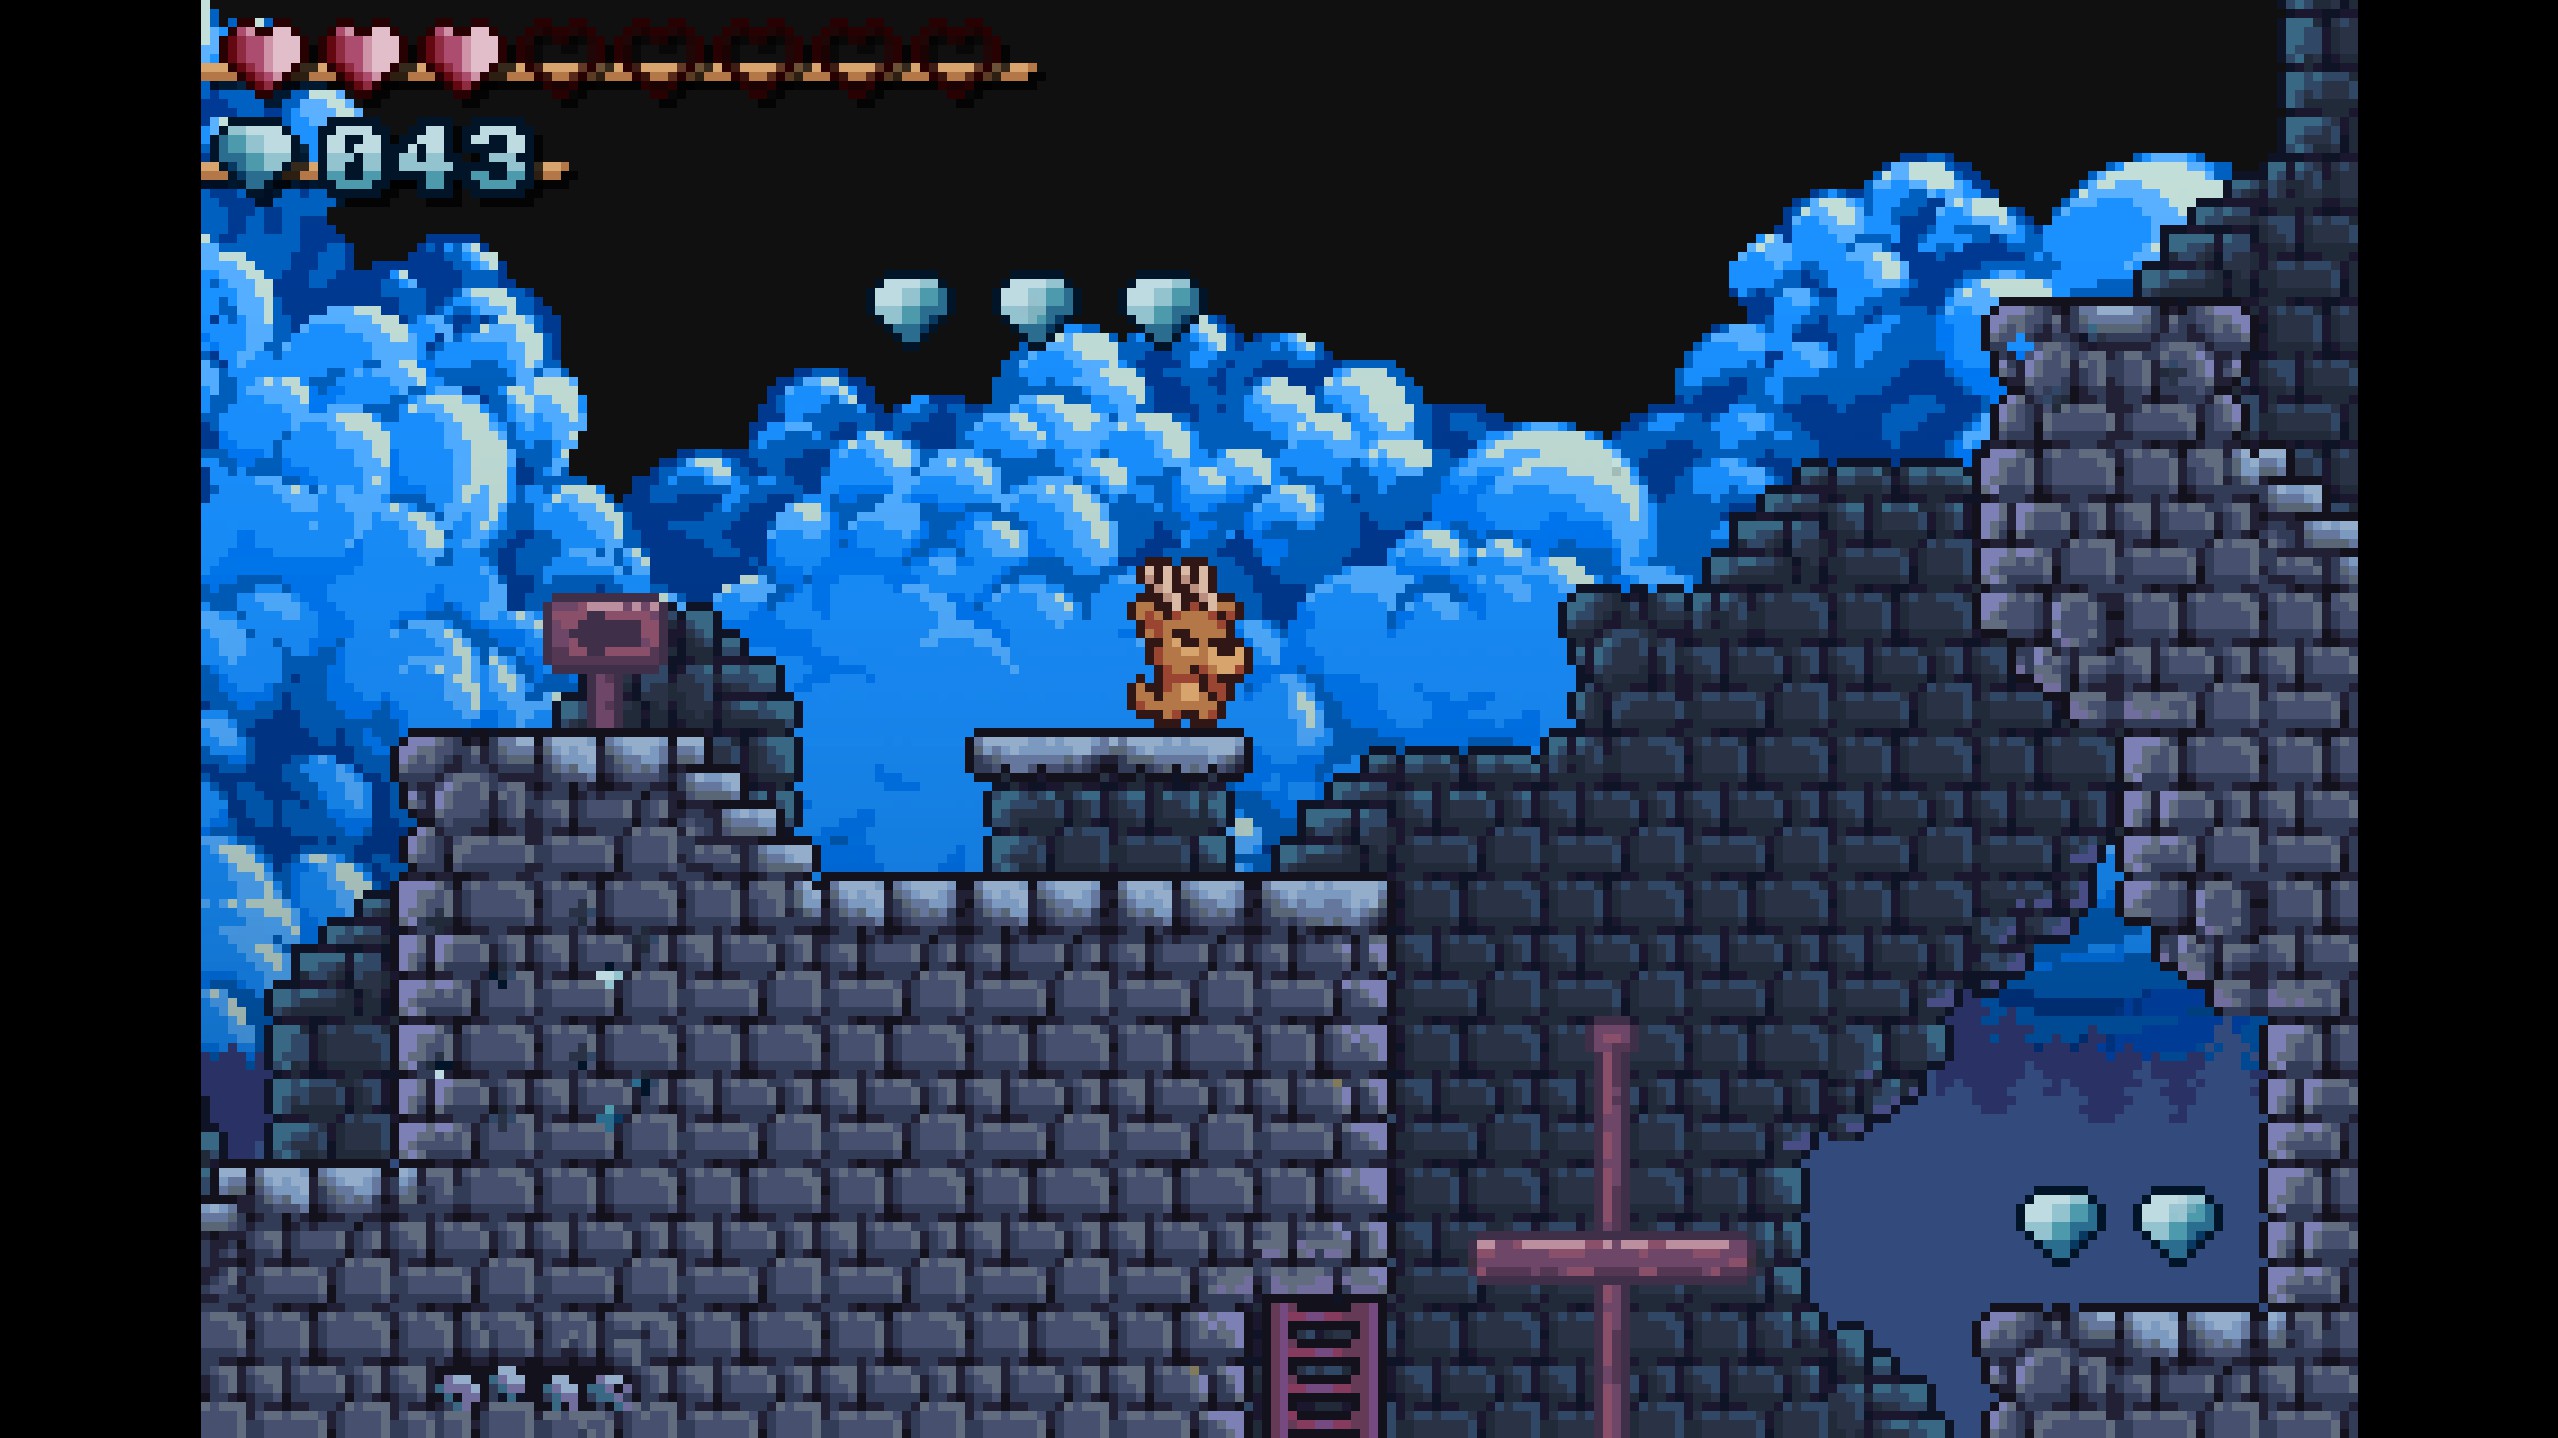
Crystal Caverns
Crystal Caverns is the fourth stage in Ronny's Climb! It's another cave stage, this time with a beautiful purply crystal setting! But, beware of the bats, stalactites, and darkness that lurk around every corner...
It is very easy to get lost in the many branching paths and fake walls of this stage, but not to fear! This guide is here to help.
Gems
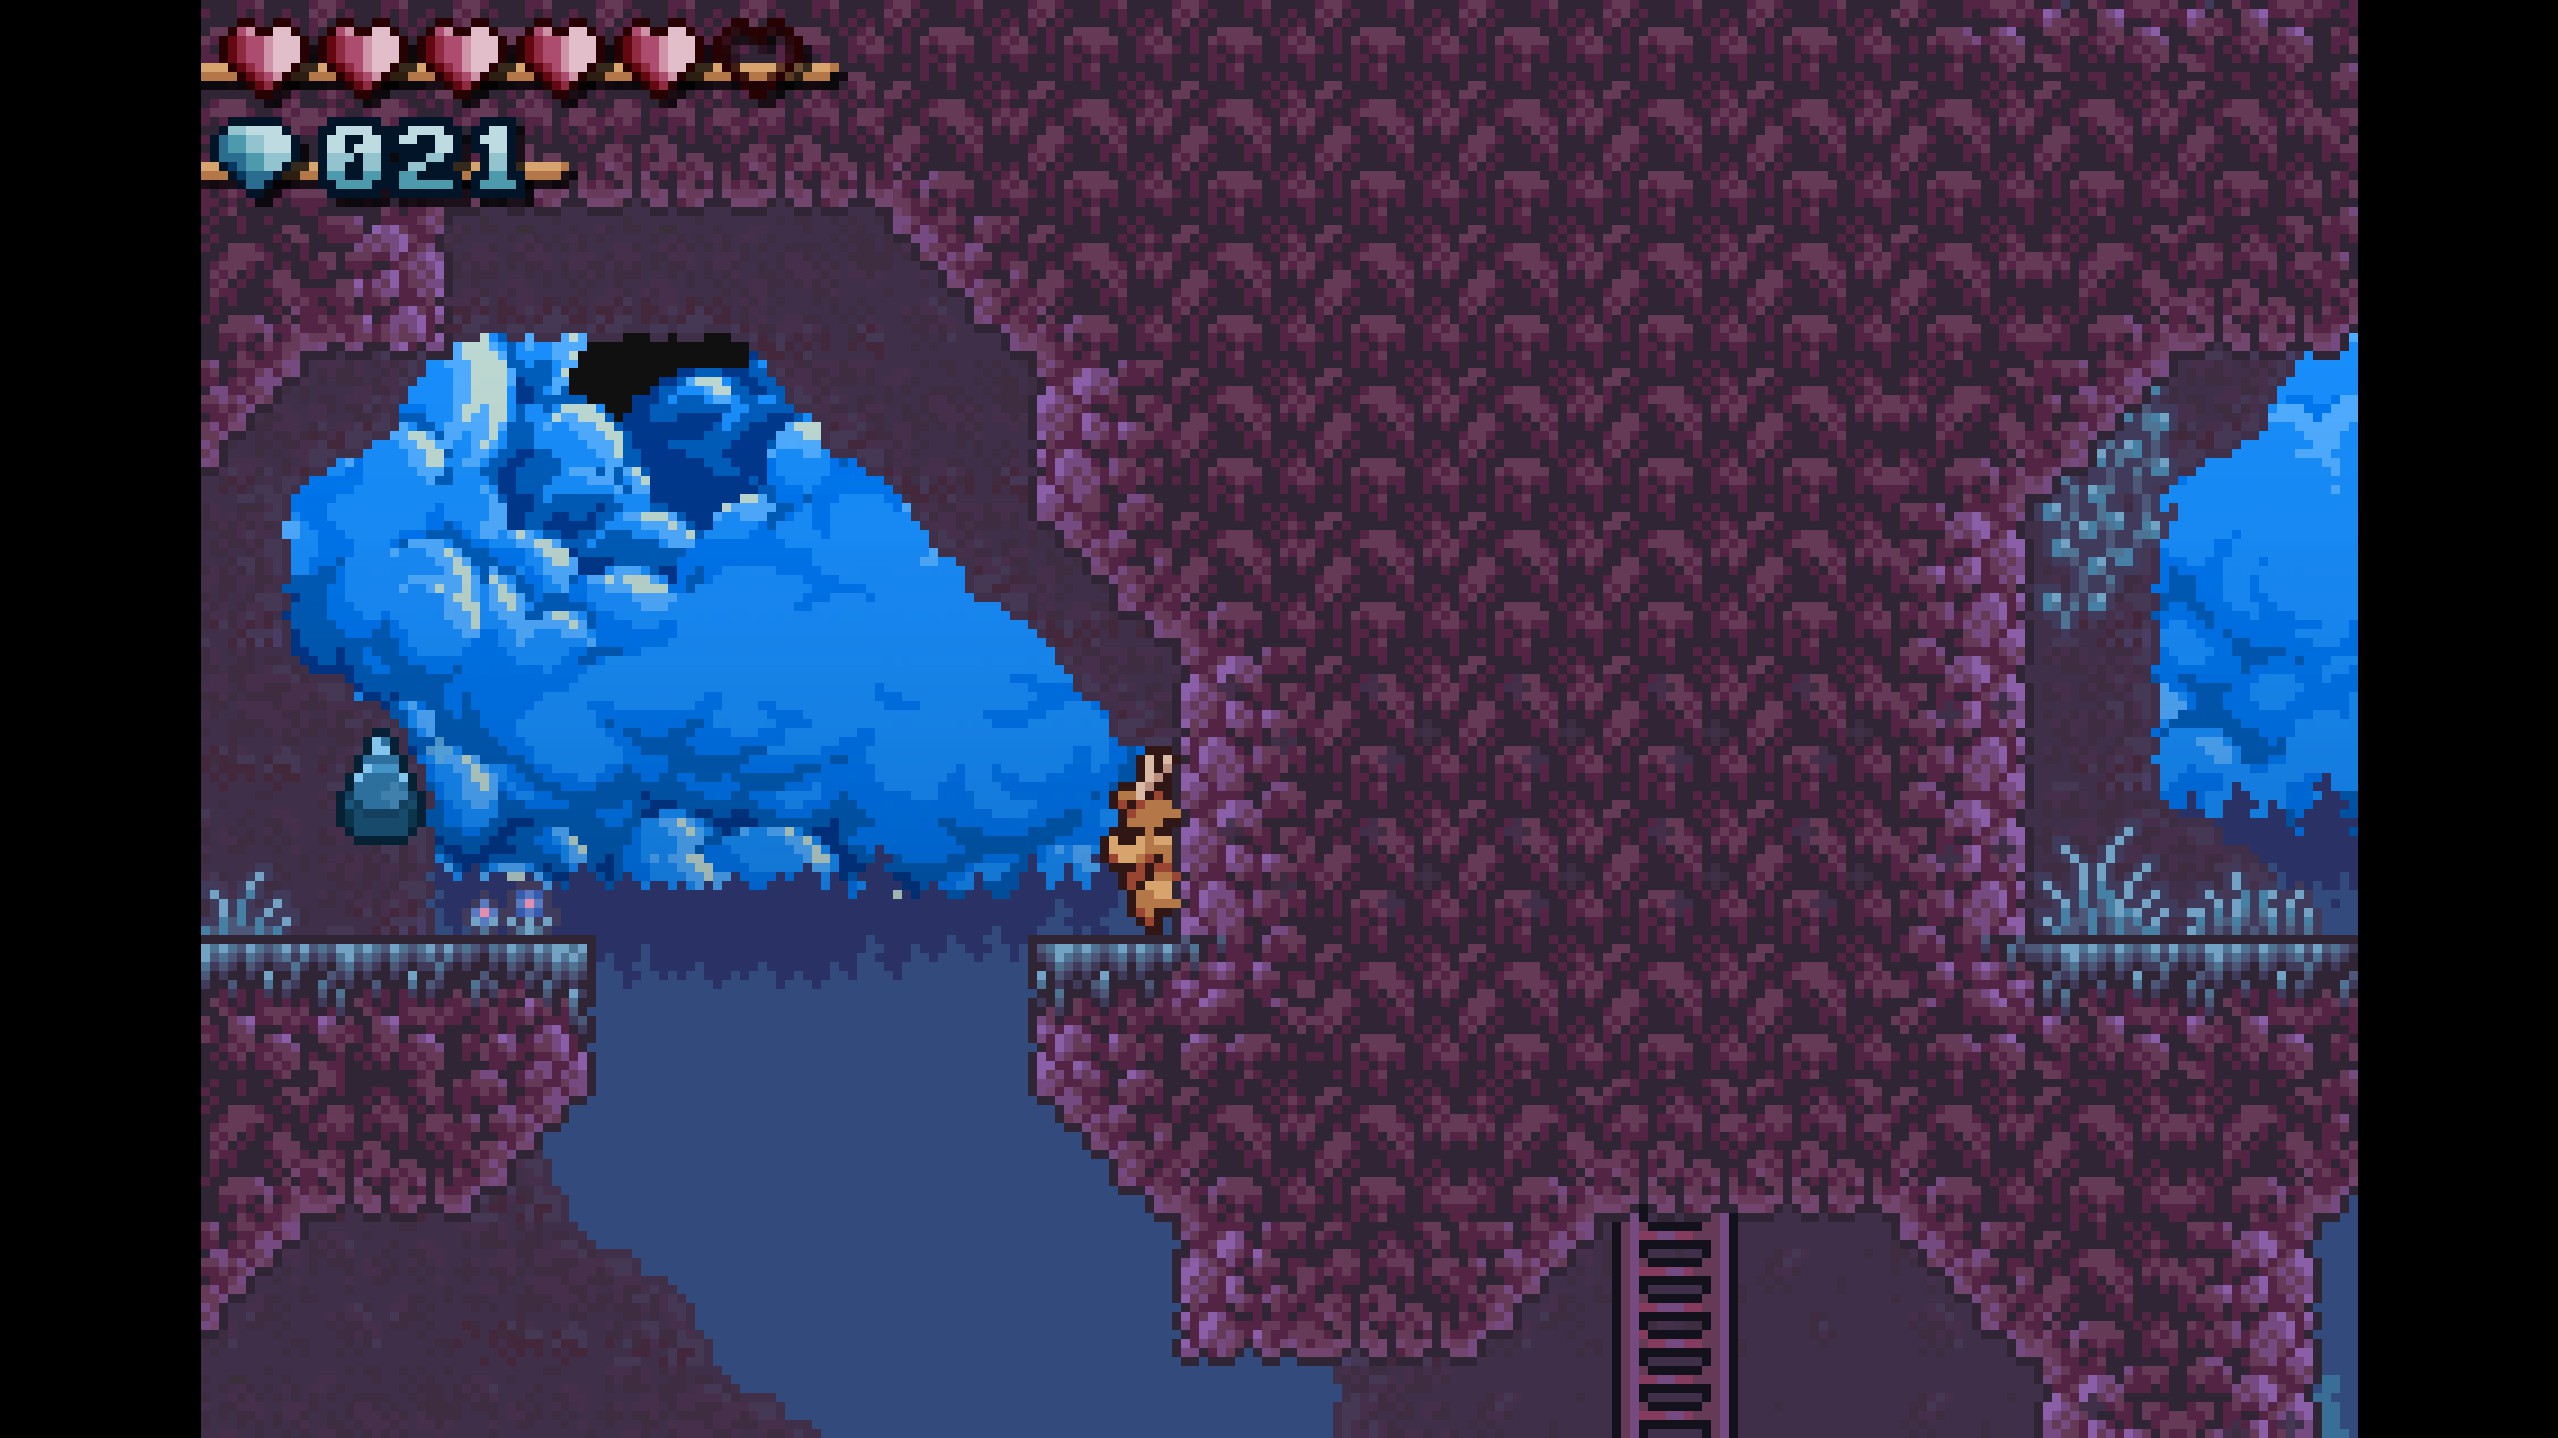
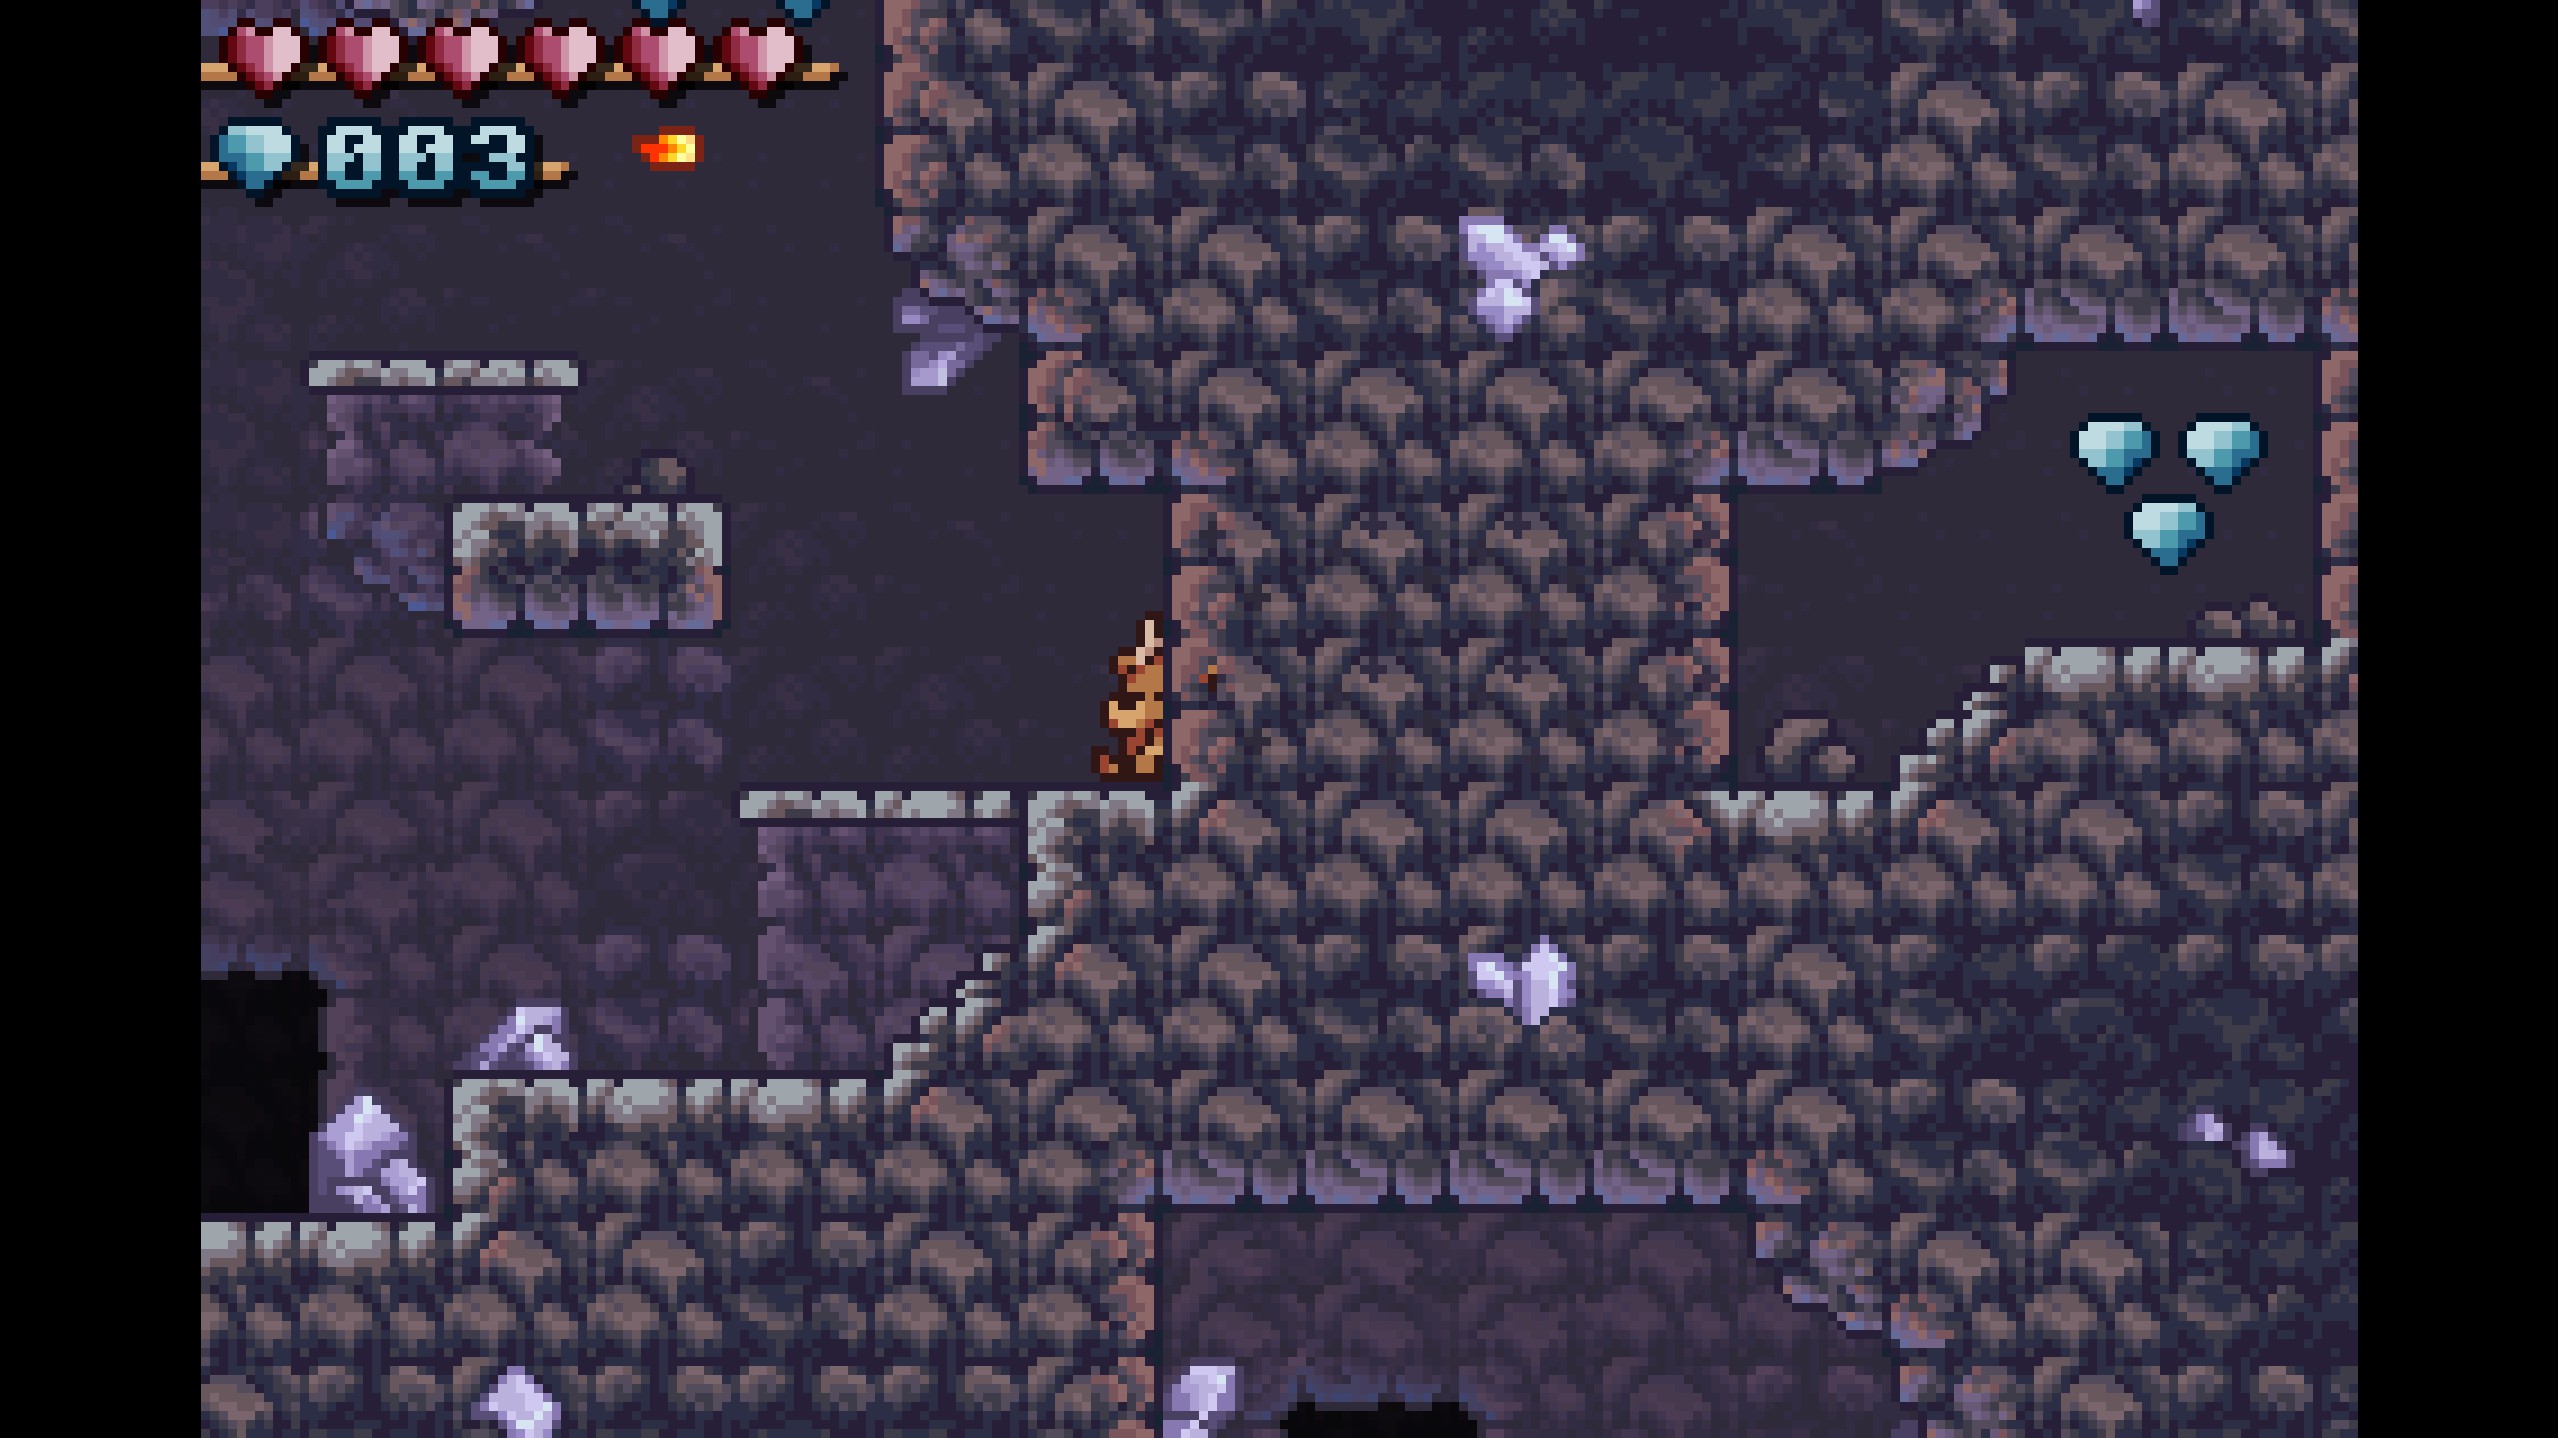
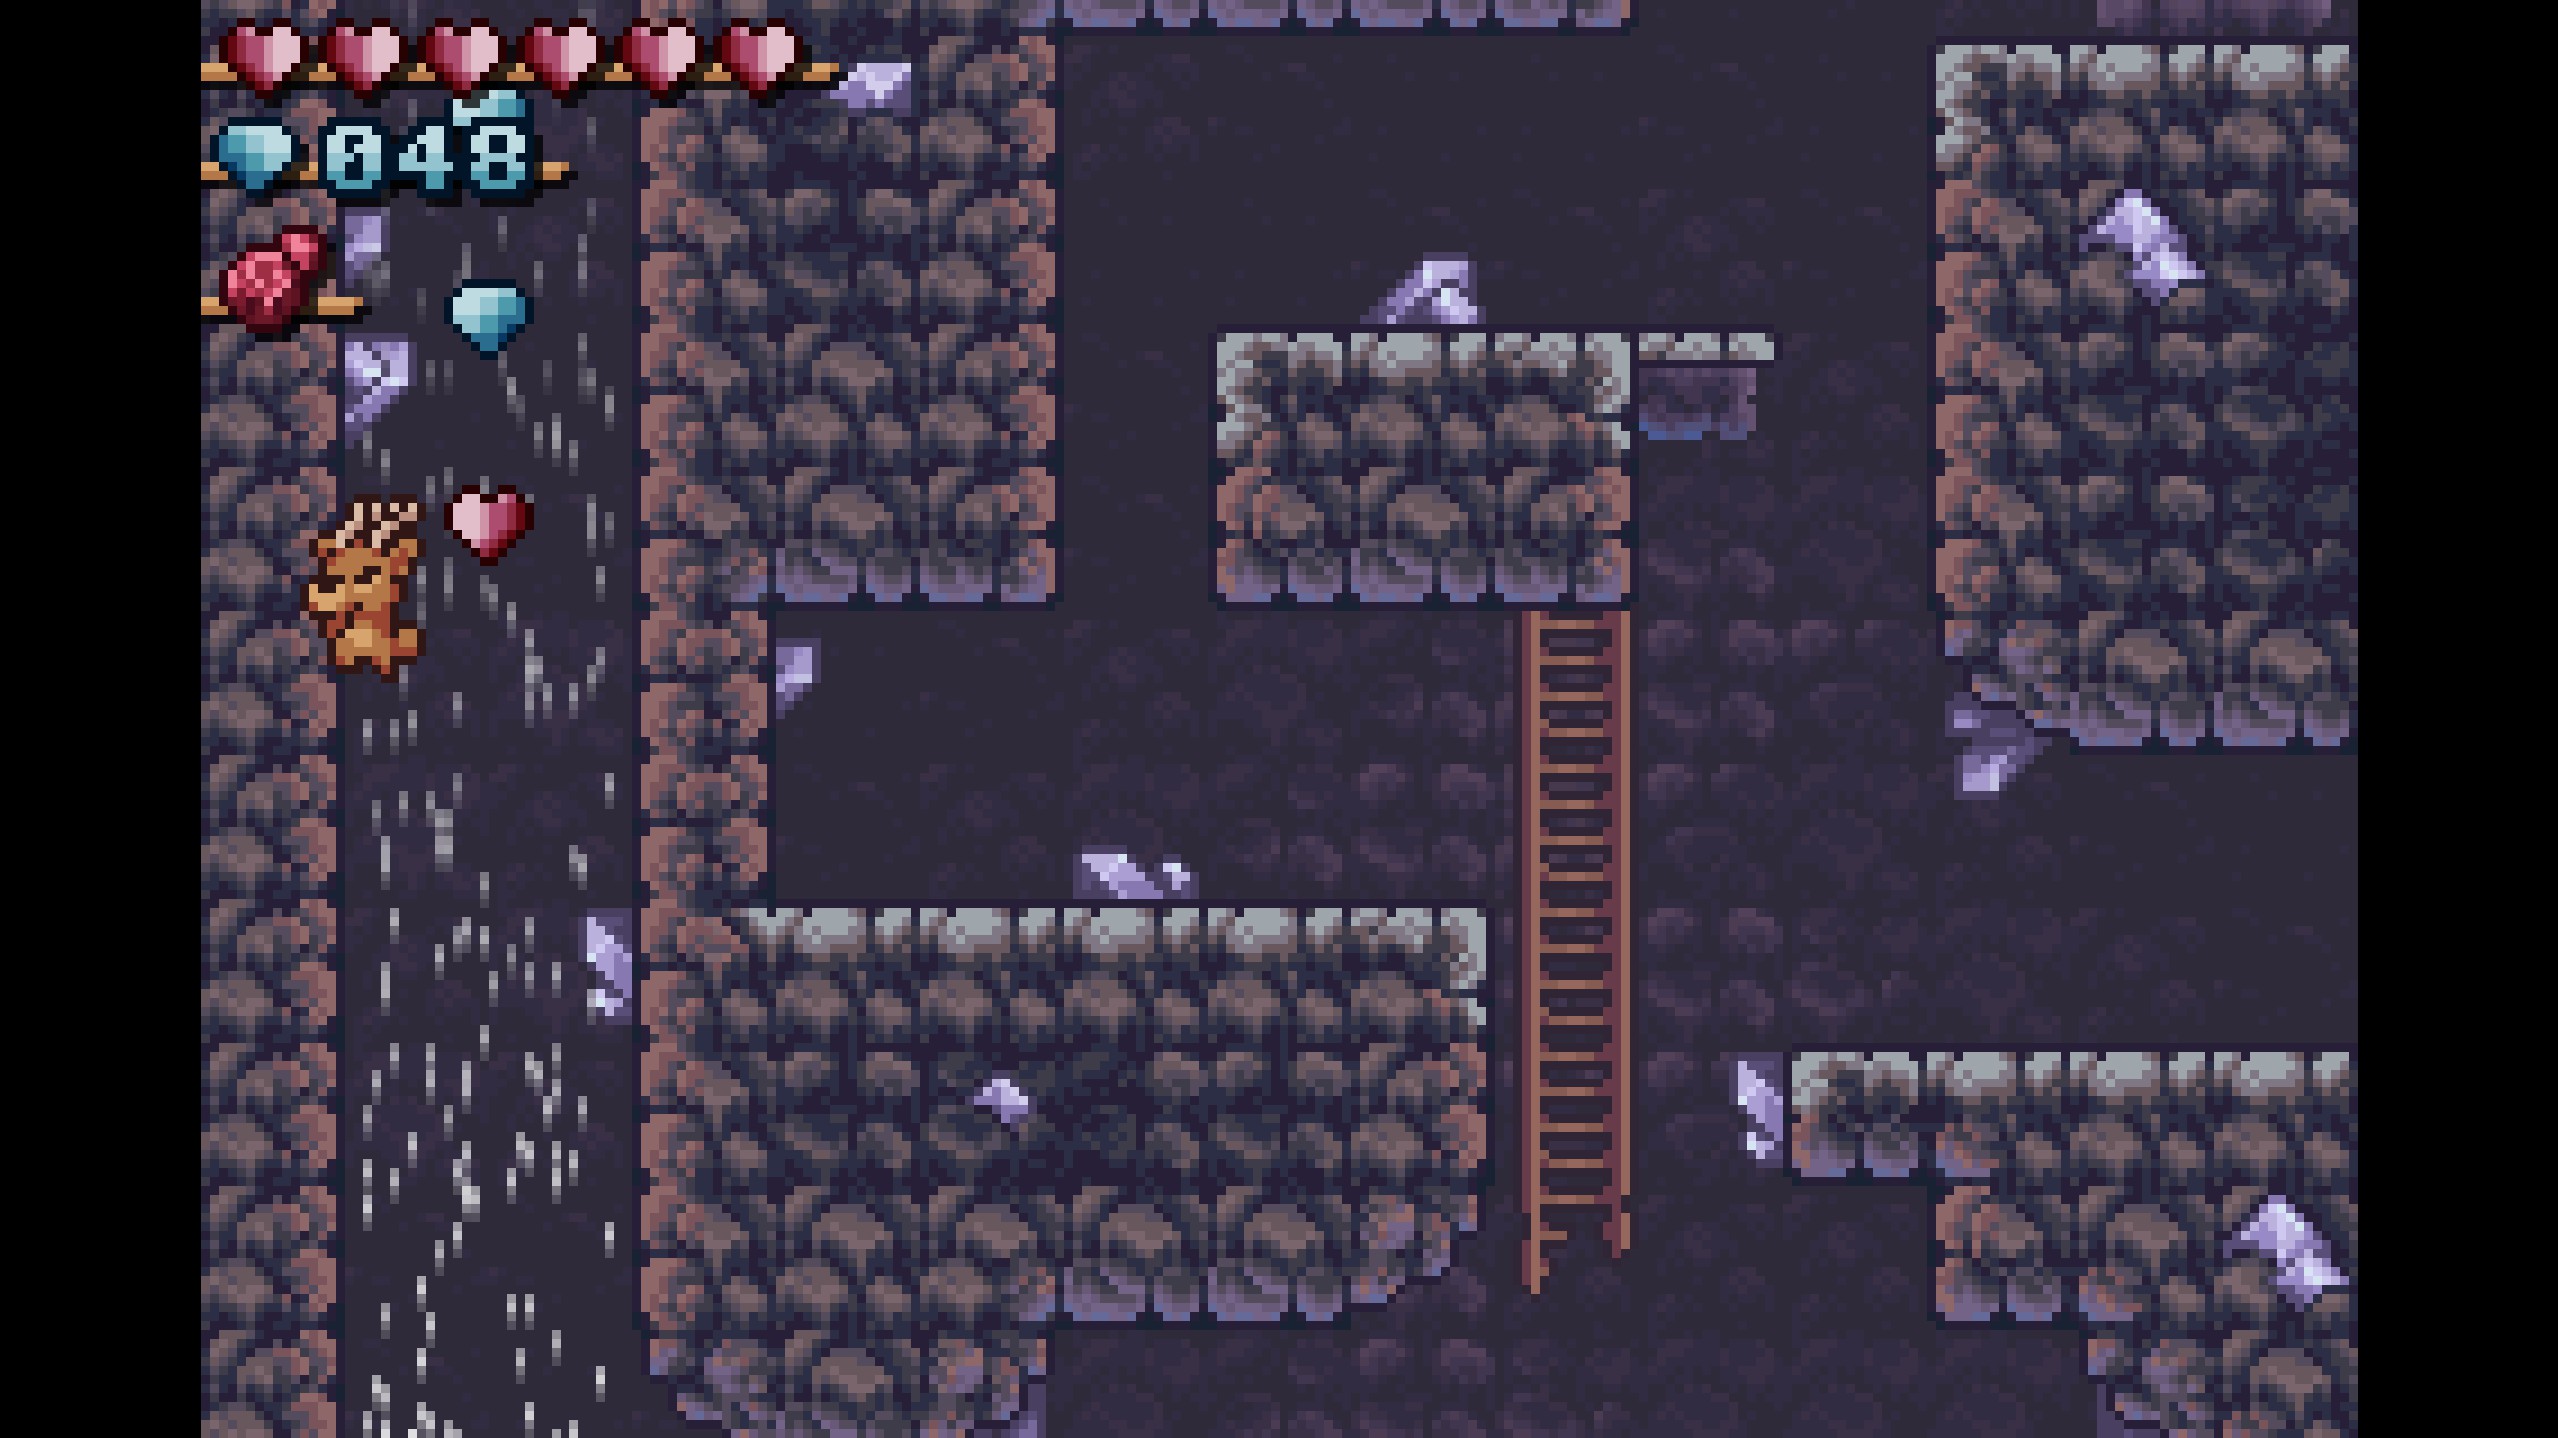
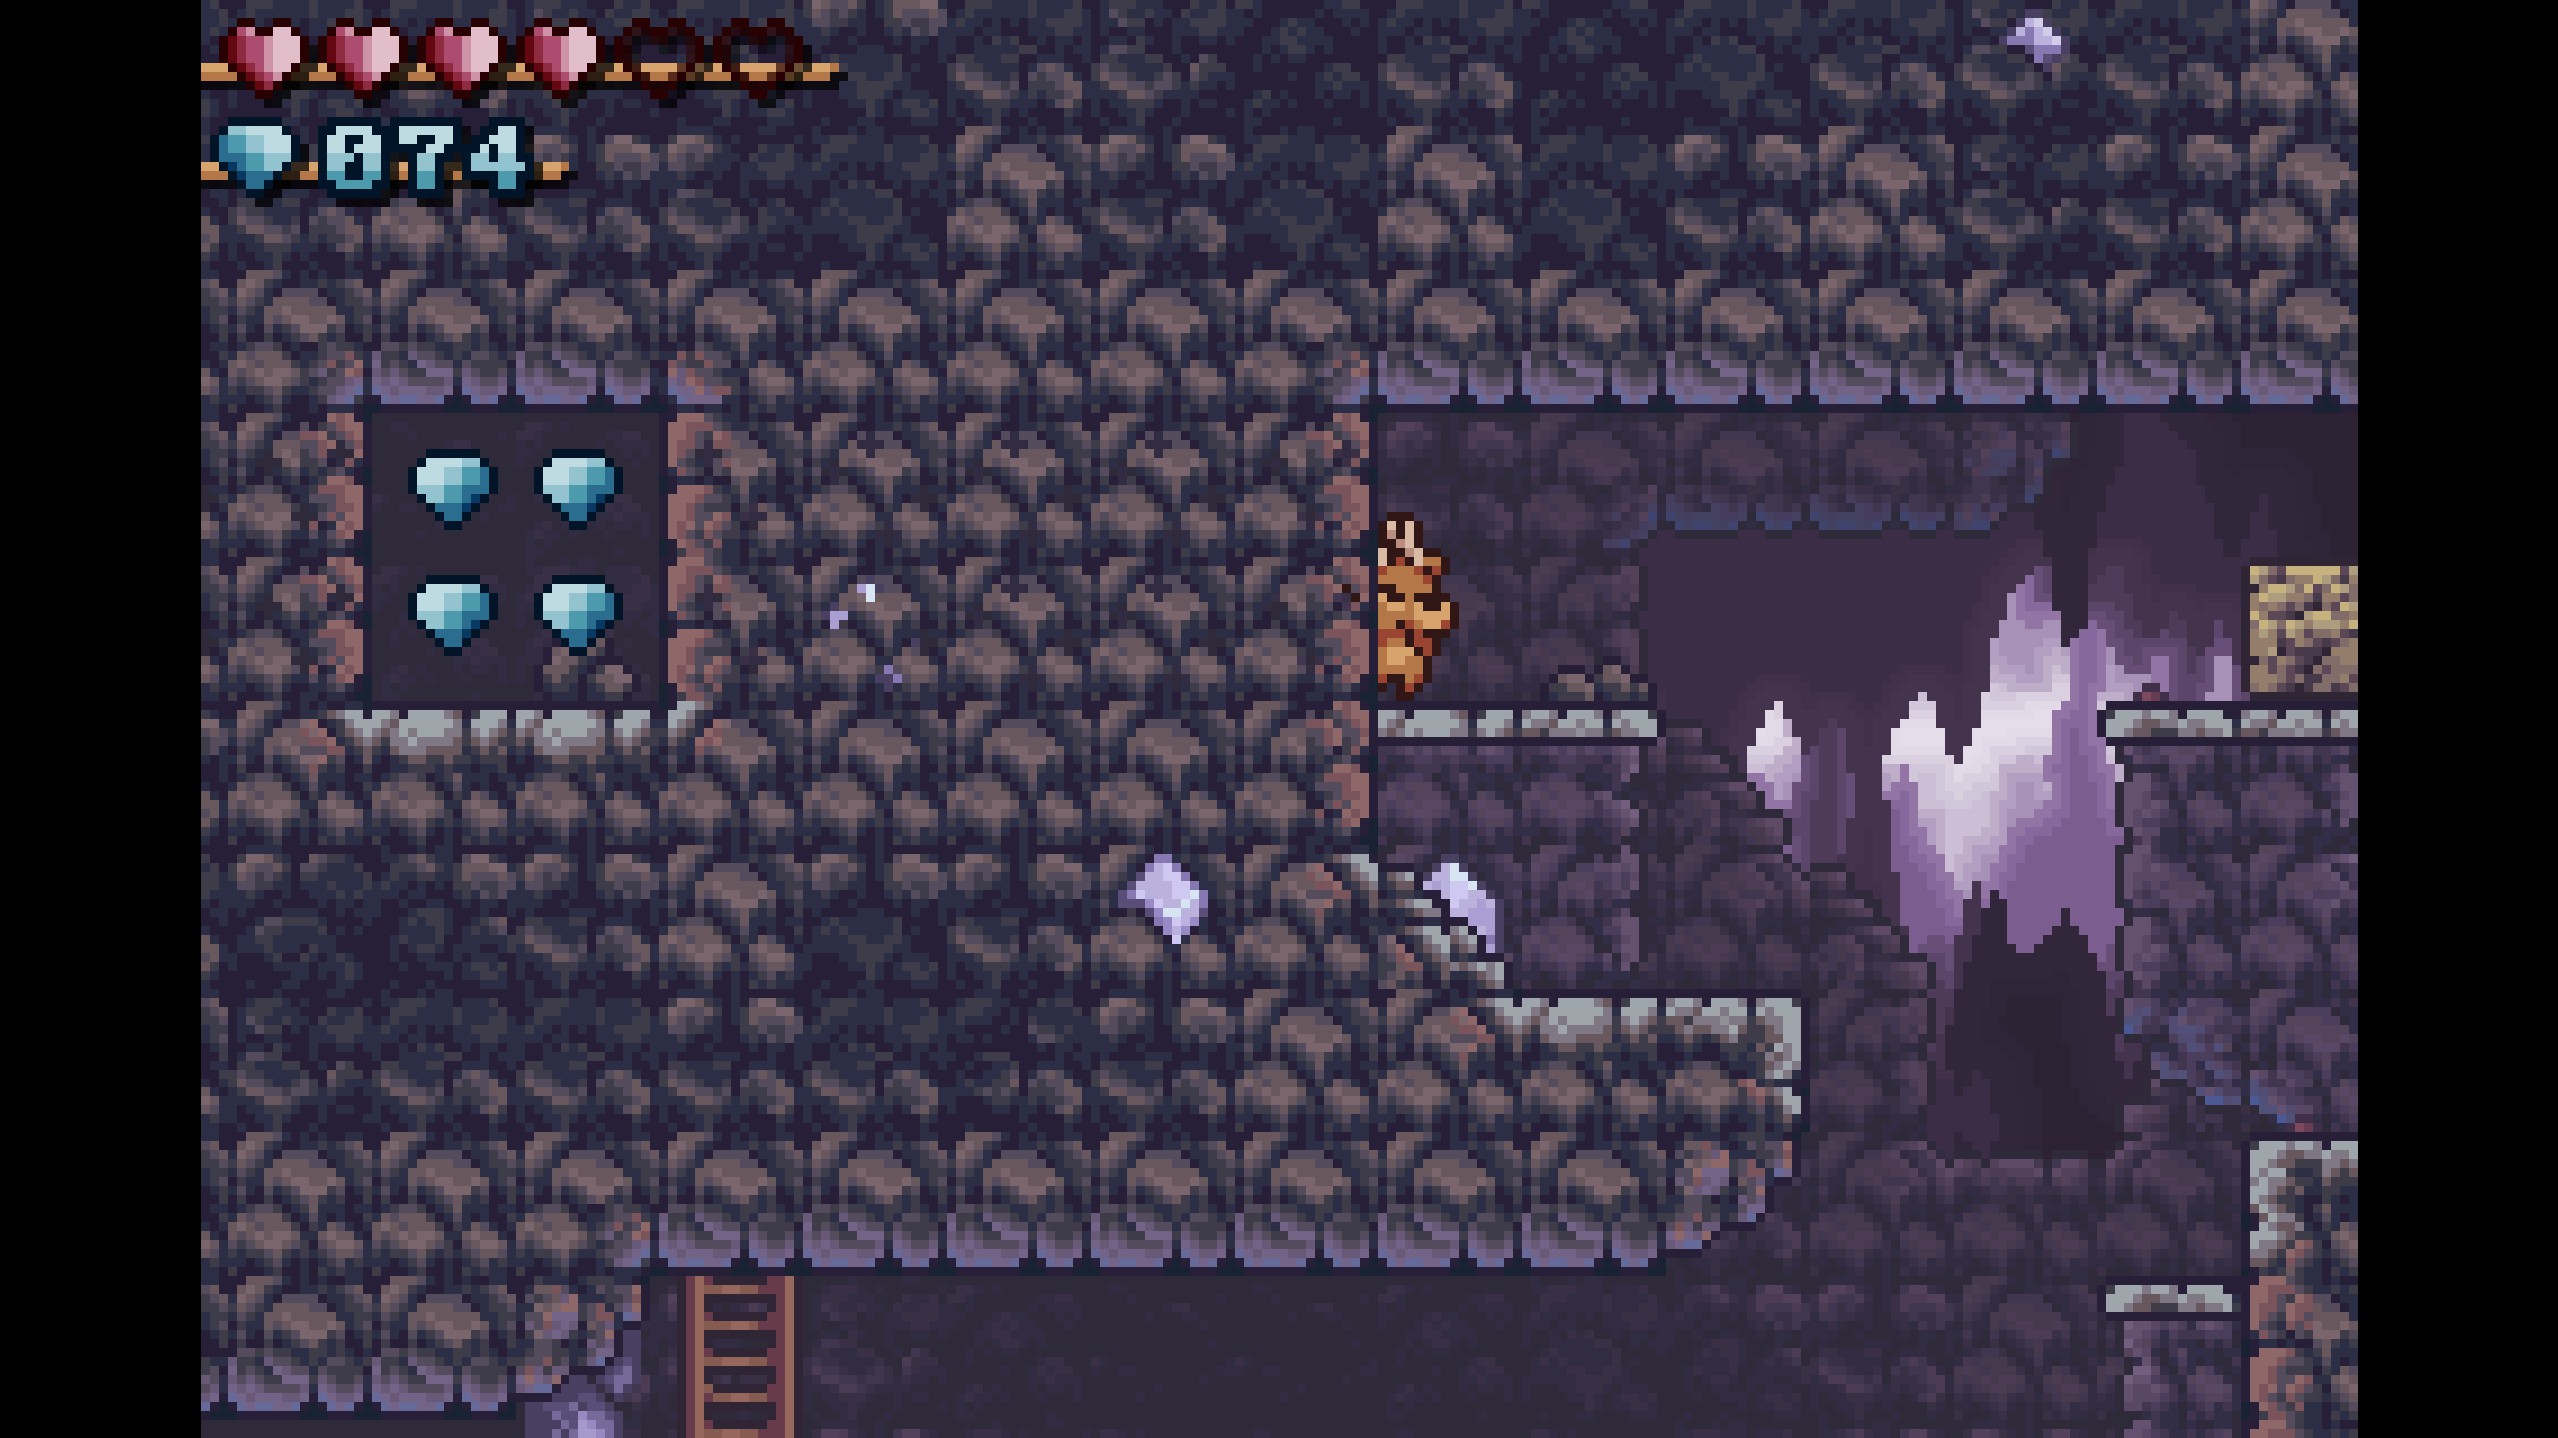
- Gems 1-3
- Run left, dodging the stalactites and passing the first checkpoint. (wow, already?) Jump up the semisolid platforms and climb up the ladder to collect these easy gems, floating beside the weasel brothers!

- Run left, dodging the stalactites and passing the first checkpoint. (wow, already?) Jump up the semisolid platforms and climb up the ladder to collect these easy gems, floating beside the weasel brothers!
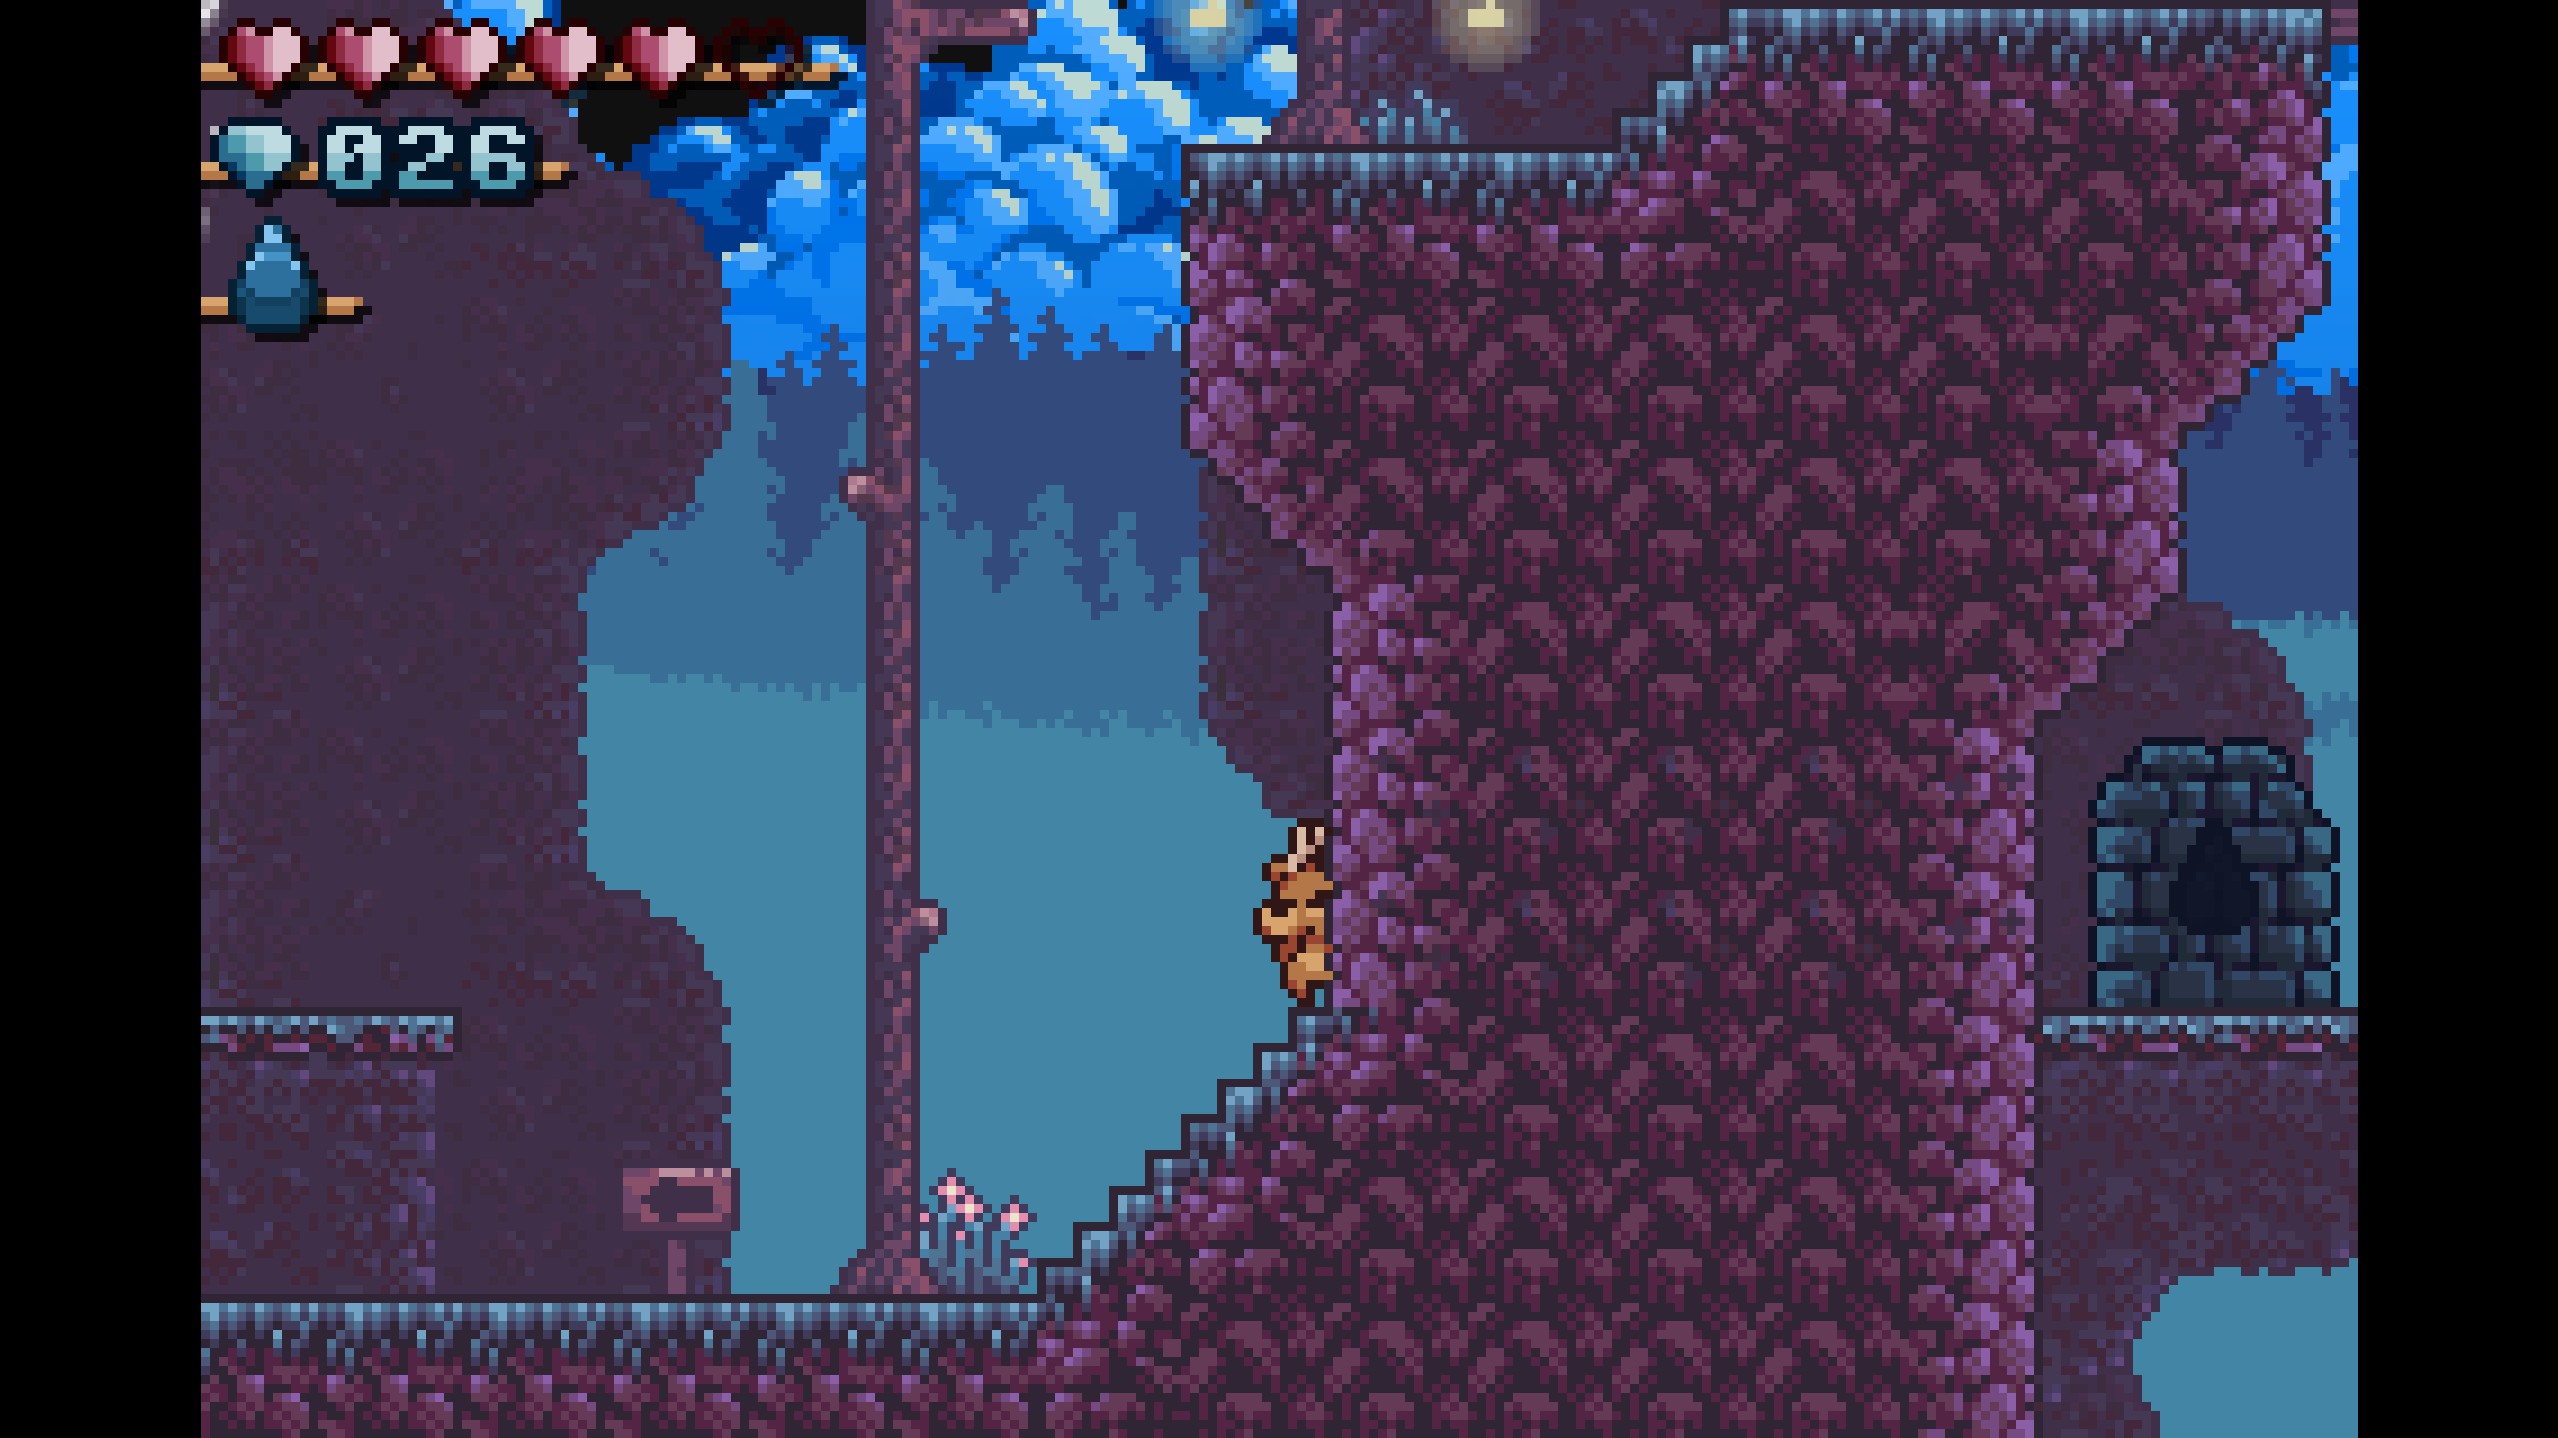
- Gems 4-6
- Head right past the weasel brothers, jump on the jump mushroom, and enter the passageway. Once you emerge, walk right through the fake wall to grab these three easy-to-miss gems!
- Head right past the weasel brothers, jump on the jump mushroom, and enter the passageway. Once you emerge, walk right through the fake wall to grab these three easy-to-miss gems!
- Gems 7-8
- Exit the fake wall and continue upwards in the room to nab these two easy gems. Be sure to dodge the dragon's fireballs!
- Exit the fake wall and continue upwards in the room to nab these two easy gems. Be sure to dodge the dragon's fireballs!
- Gems 9-14
- Continue upwards in the room and enter the lower of the two passageways. You'll enter a room with semisolid platforms and frogs. Make your way up and enter the higher of the two passageways, using the ledge on the left to reach it. Once you emerge, jump up and collect the gems!
- Continue upwards in the room and enter the lower of the two passageways. You'll enter a room with semisolid platforms and frogs. Make your way up and enter the higher of the two passageways, using the ledge on the left to reach it. Once you emerge, jump up and collect the gems!
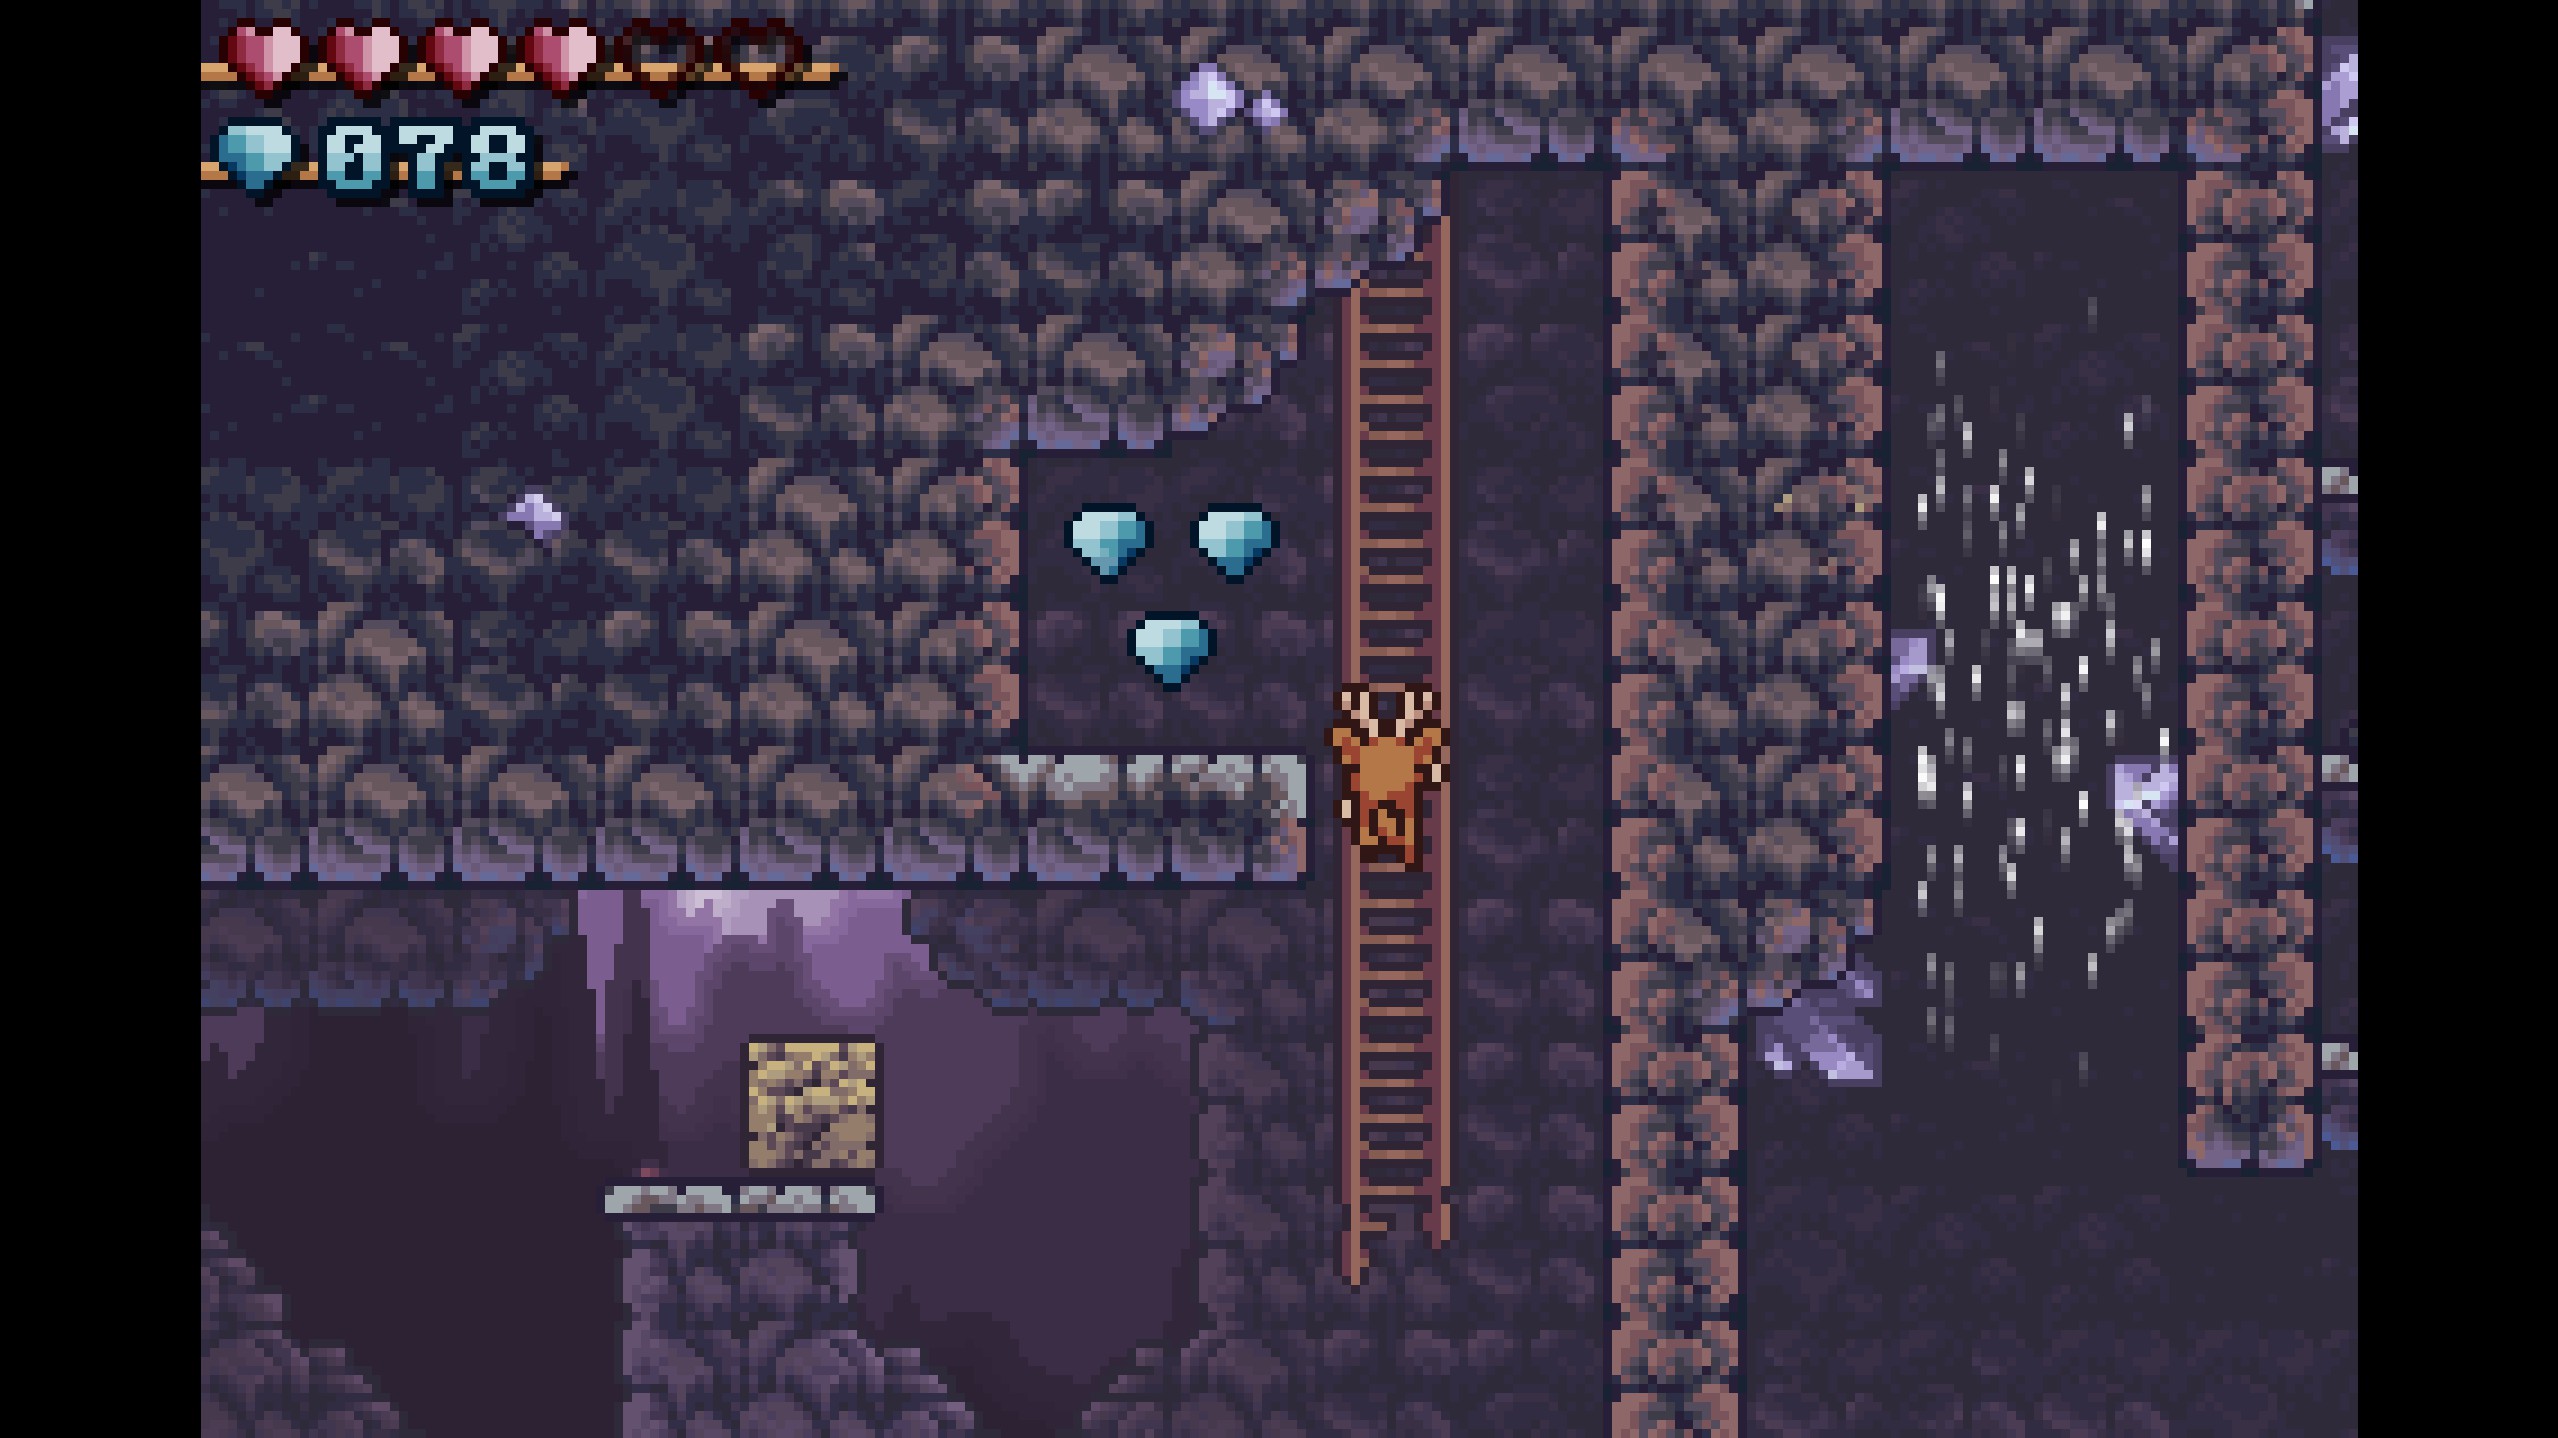
- Gems 15-17
- Backtrack all the way to the first room you entered. This time, enter the higher of the two passageways. Then, make your way to the left passageway and enter it. From there, you can collect the gems floating atop the moving platform!
- Backtrack all the way to the first room you entered. This time, enter the higher of the two passageways. Then, make your way to the left passageway and enter it. From there, you can collect the gems floating atop the moving platform!
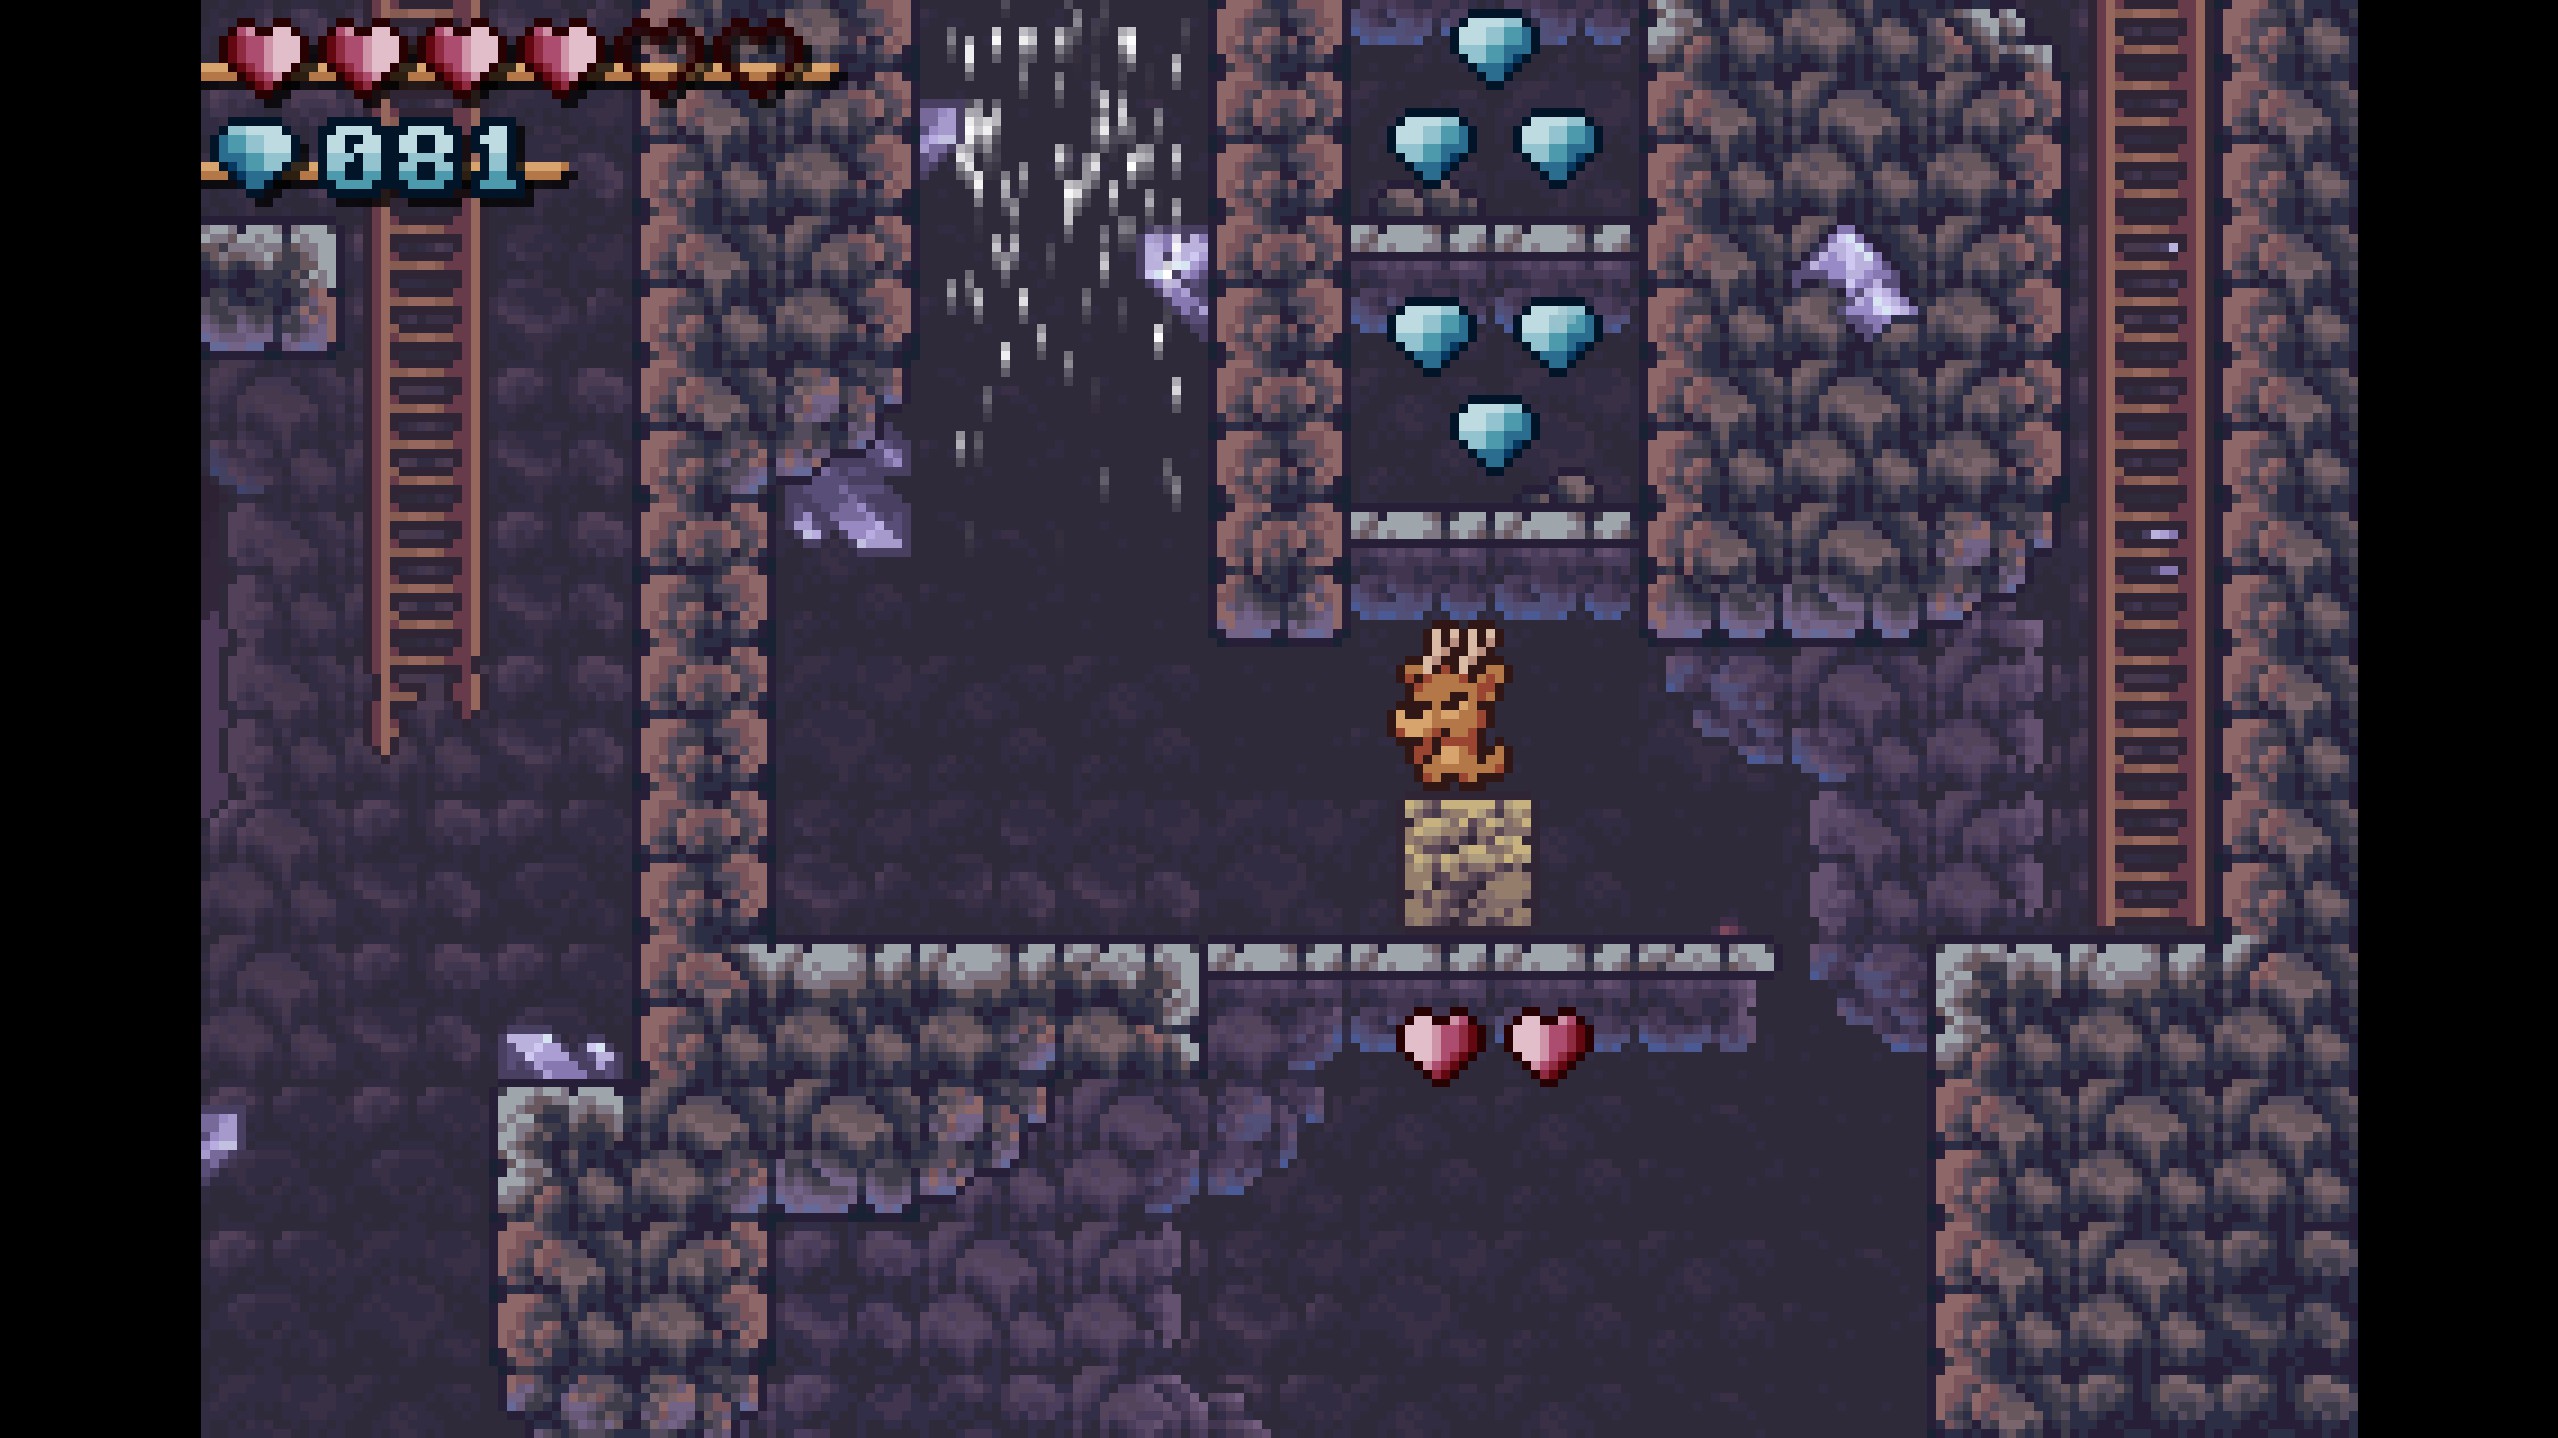
- Gems 18-21
- Push the stone that's to the right of the moving platform all the way down. Then, move it all the way to the left and jump off of it to reach the gems!
- Push the stone that's to the right of the moving platform all the way down. Then, move it all the way to the left and jump off of it to reach the gems!
- Gems 22-25
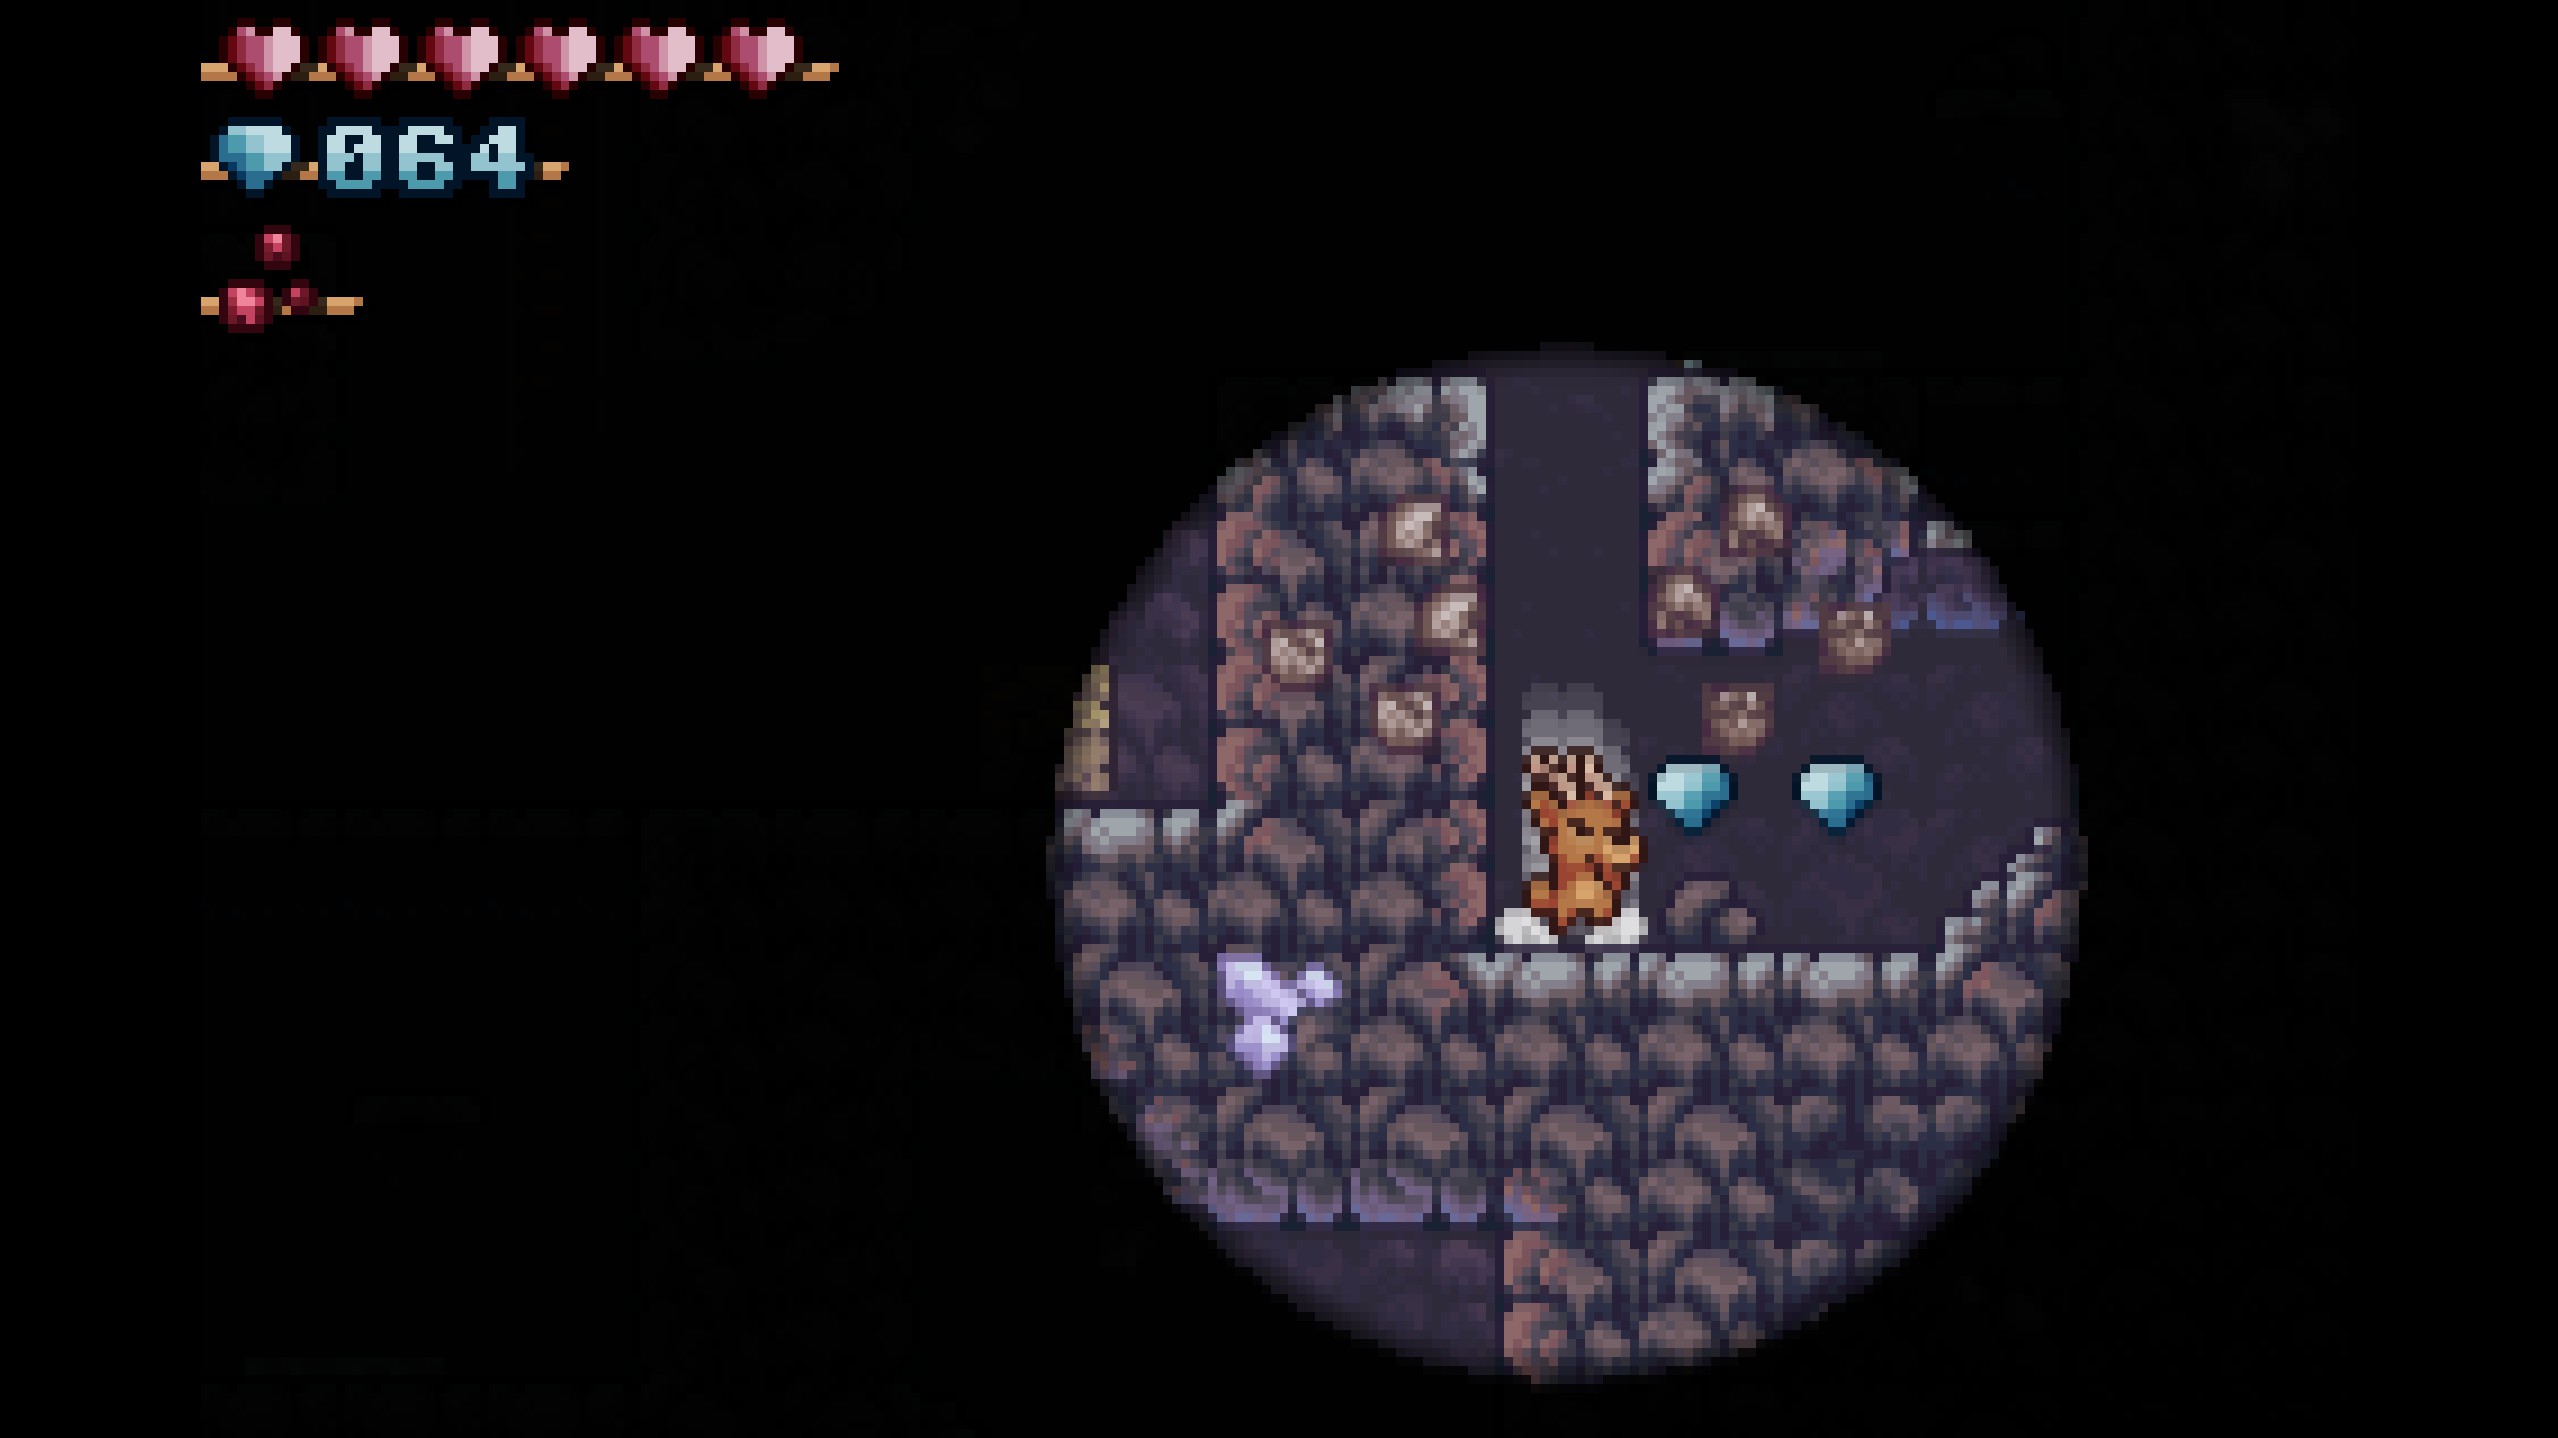
- Now, position the stone below the right passageway. Jump off of it and go through. Once you emerge, you'll see the first ruby, but don't let it distract you! The gems are hiding behind a fake wall to the left.

- Now, position the stone below the right passageway. Jump off of it and go through. Once you emerge, you'll see the first ruby, but don't let it distract you! The gems are hiding behind a fake wall to the left.
- Gems 26-29
- After collecting the ruby, ground pound through the breakable rocks to effortlessly collect four more gems! You'll land next to the weasel brothers from before.
- After collecting the ruby, ground pound through the breakable rocks to effortlessly collect four more gems! You'll land next to the weasel brothers from before.
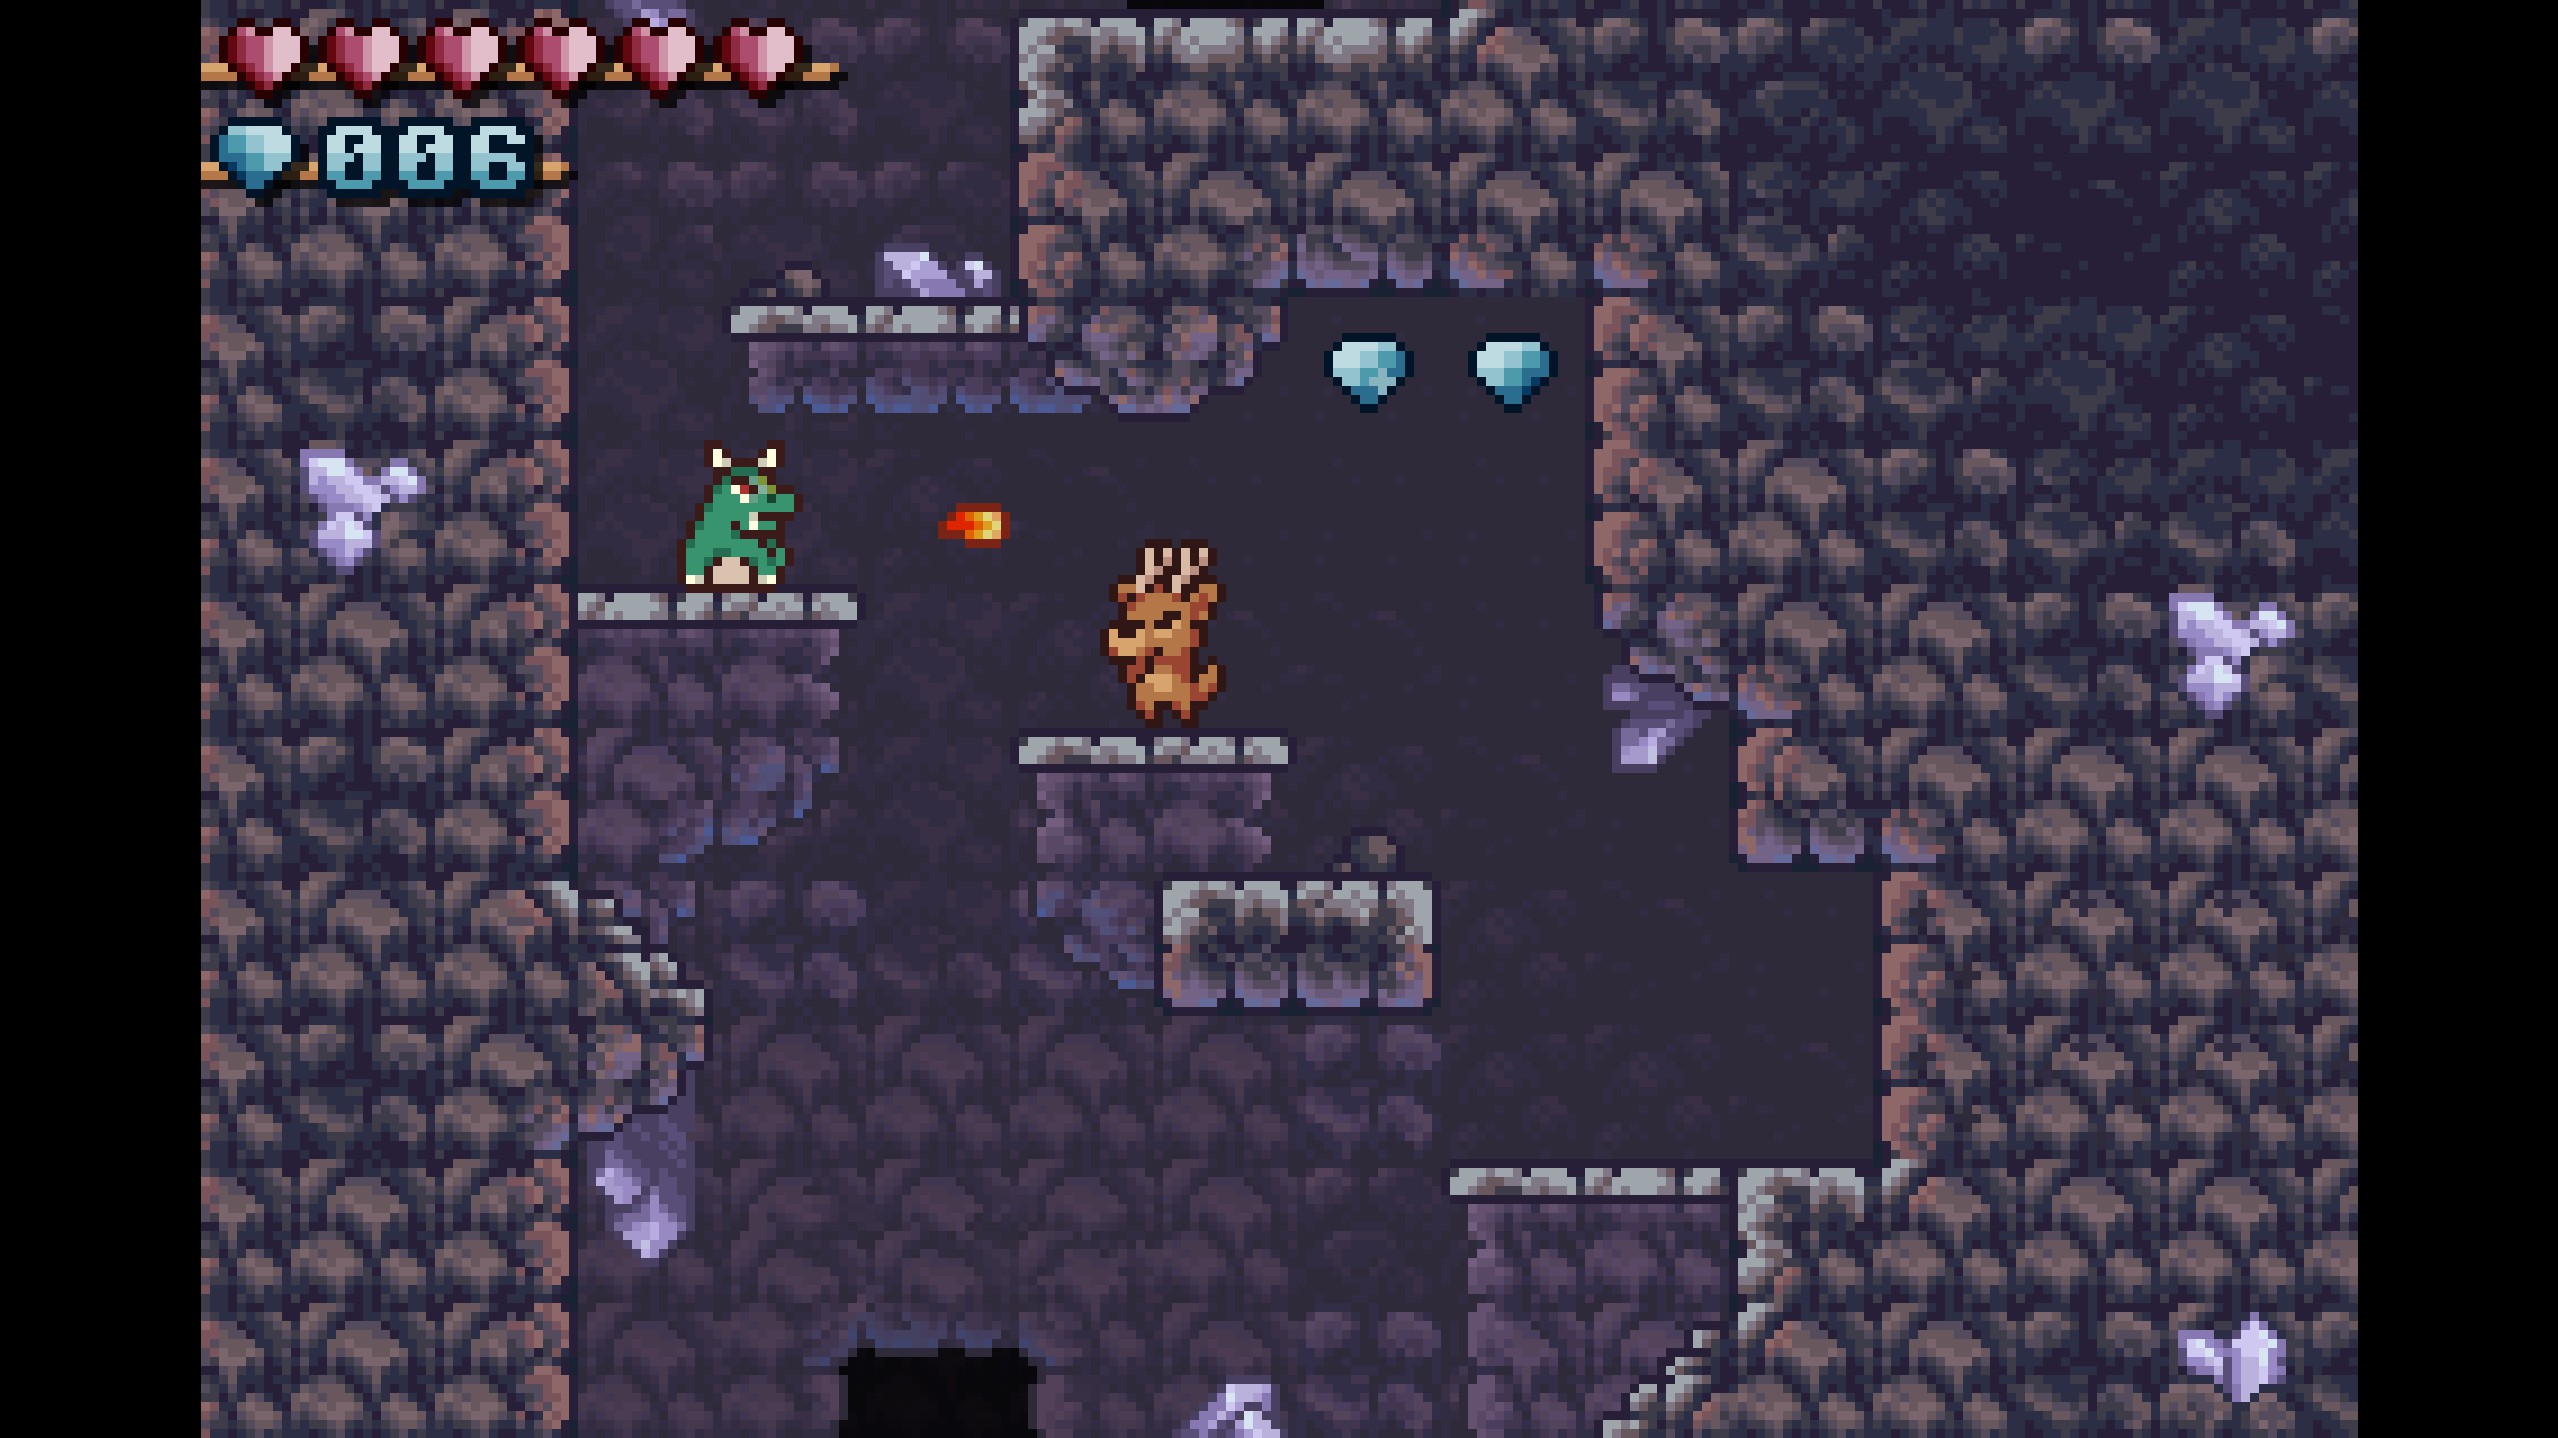
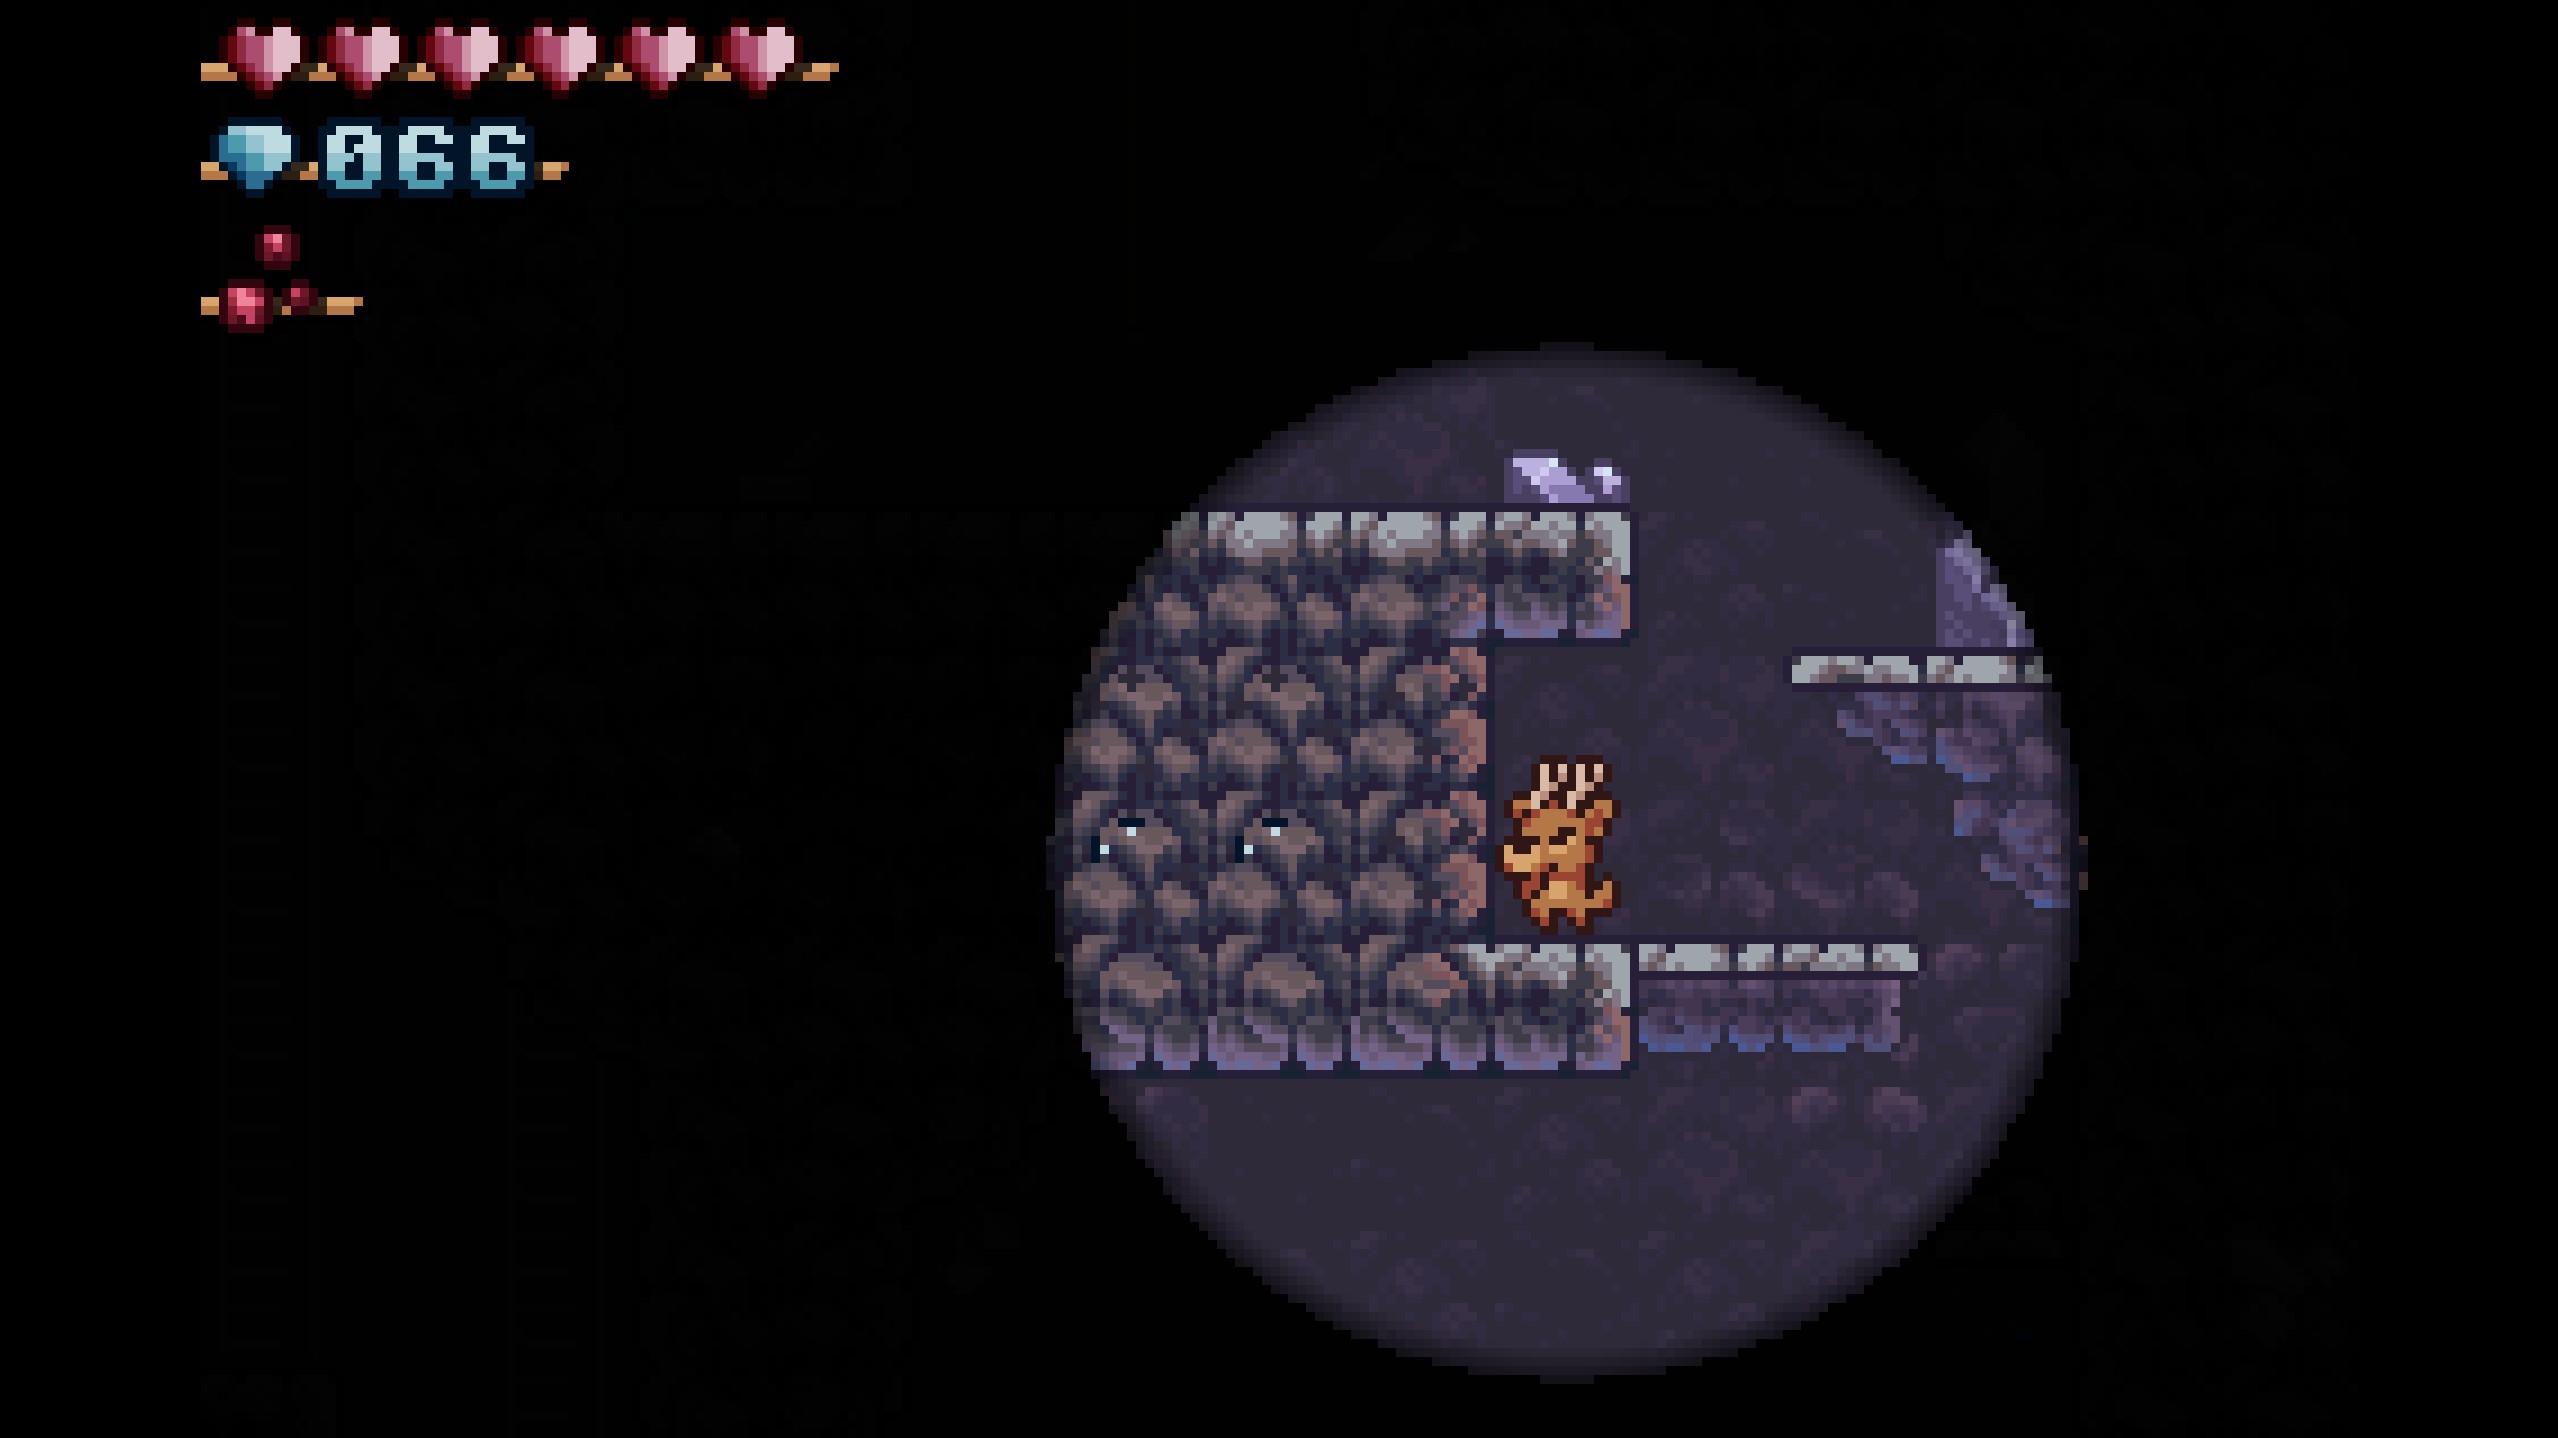
- Gems 30-31
- Head left of the weasels and up into a room with two red slimes and a dragon. The gems are hiding behind two tall crystals to the left!
- Head left of the weasels and up into a room with two red slimes and a dragon. The gems are hiding behind two tall crystals to the left!
- Gems 32-34
- Continue upwards in the room and walk though the fake wall to collect three more gems! Then, ride up the moving platform to collect the second ruby.

- Continue upwards in the room and walk though the fake wall to collect three more gems! Then, ride up the moving platform to collect the second ruby.
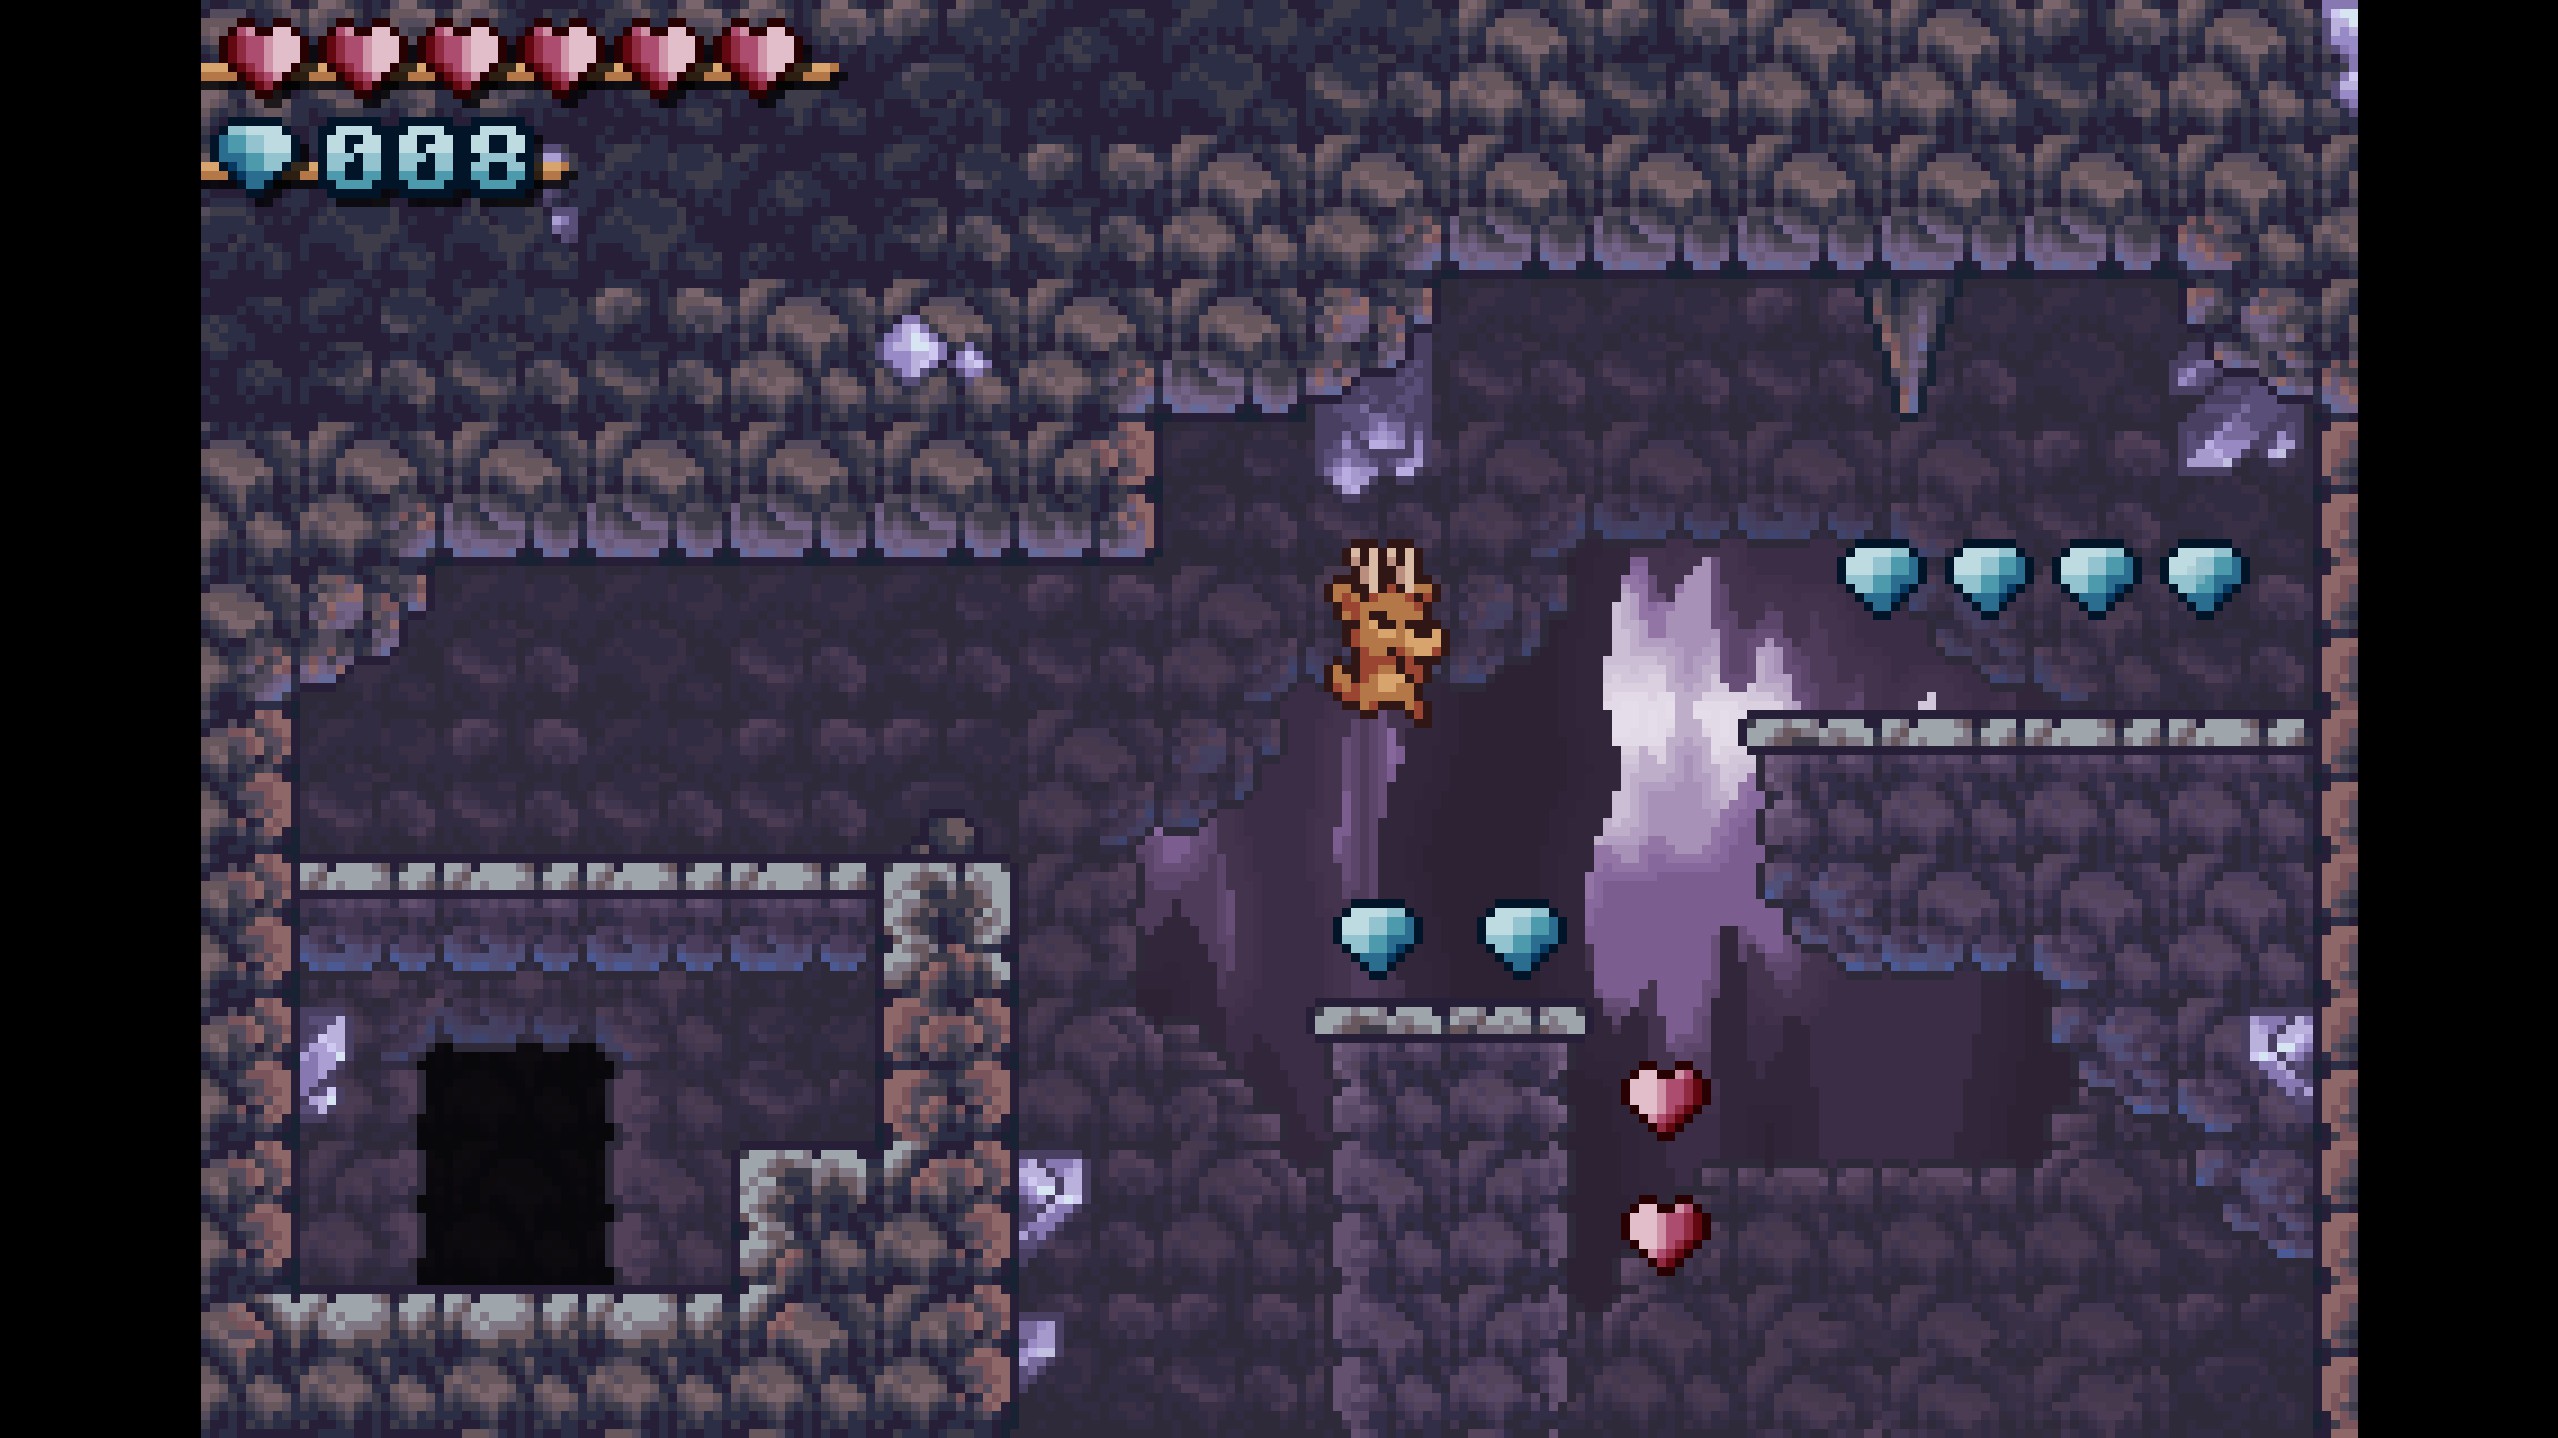
- Gems 35-36
- Backtrack down the room and head into the chasm below that's to the left of the gate. Climb down the ladder to your right and dash over some spikes to collect the gems!
- Backtrack down the room and head into the chasm below that's to the left of the gate. Climb down the ladder to your right and dash over some spikes to collect the gems!
- Gems 37-40
- Climb back up the ladder and head to the left. Ground pound through the breakable rocks to reach the gems!

- Climb back up the ladder and head to the left. Ground pound through the breakable rocks to reach the gems!
- Gems 41-48
- Climb down the hanging ladder and drop into the large chasm below with the moving platform. Skillfully ride around and dodge the dragons' fireballs to collect all the gems!
- Climb down the hanging ladder and drop into the large chasm below with the moving platform. Skillfully ride around and dodge the dragons' fireballs to collect all the gems!
- Gems 49-51
- Drop down to the bottom of the large chasm and ground pound through the breakable rocks. Activate the lever and ride up the wind draft it creates to collect the gems! From there, you can jump up and collect the third ruby.
- Drop down to the bottom of the large chasm and ground pound through the breakable rocks. Activate the lever and ride up the wind draft it creates to collect the gems! From there, you can jump up and collect the third ruby.
- Gems 52-54
- Head back down to the chasm that's below and to the left of the gate. Climb back down the ladder to your right and you'll be in the area from gems 35-36. This time, go to the right, entering the dark section of the caverns. Climb down the hanging ladder and ground pound through the breakable rocks to your left to collect the gems hidden within!
- Head back down to the chasm that's below and to the left of the gate. Climb back down the ladder to your right and you'll be in the area from gems 35-36. This time, go to the right, entering the dark section of the caverns. Climb down the hanging ladder and ground pound through the breakable rocks to your left to collect the gems hidden within!
- Gems 55-57
- Climb down the ladder to your right. Don't forget to push down the stone! At the bottom of the ladder, there will be a ledge high up to the left. Jump onto it and walk through the fake wall to reach the gems!

- Climb down the ladder to your right. Don't forget to push down the stone! At the bottom of the ladder, there will be a ledge high up to the left. Jump onto it and walk through the fake wall to reach the gems!
- Gems 58-64
- Go back to the ladder. (the one beside the hanging ladder) To the bottom left, there will be an opening with two breakable rocks at the end. Ground pound through them to reach an area with spikes, stalactites, a moving platform, and, most importantly, the gems! Three of them are floating above the spikes and can easily be collected, but the other four (not pictured) are past a fake wall to the right of the jump mushroom. Make sure you don't accidentally use the jump mushroom or you'll have to go back down!
- Go back to the ladder. (the one beside the hanging ladder) To the bottom left, there will be an opening with two breakable rocks at the end. Ground pound through them to reach an area with spikes, stalactites, a moving platform, and, most importantly, the gems! Three of them are floating above the spikes and can easily be collected, but the other four (not pictured) are past a fake wall to the right of the jump mushroom. Make sure you don't accidentally use the jump mushroom or you'll have to go back down!
- Gems 65-66
- Push the stone all the way down to the bottom, below the hanging ladder, if you haven't already. Then, move it to the right and jump off of it to reach the next area. Ground pound through the breakable rocks there to reach the gems!
- Push the stone all the way down to the bottom, below the hanging ladder, if you haven't already. Then, move it to the right and jump off of it to reach the next area. Ground pound through the breakable rocks there to reach the gems!
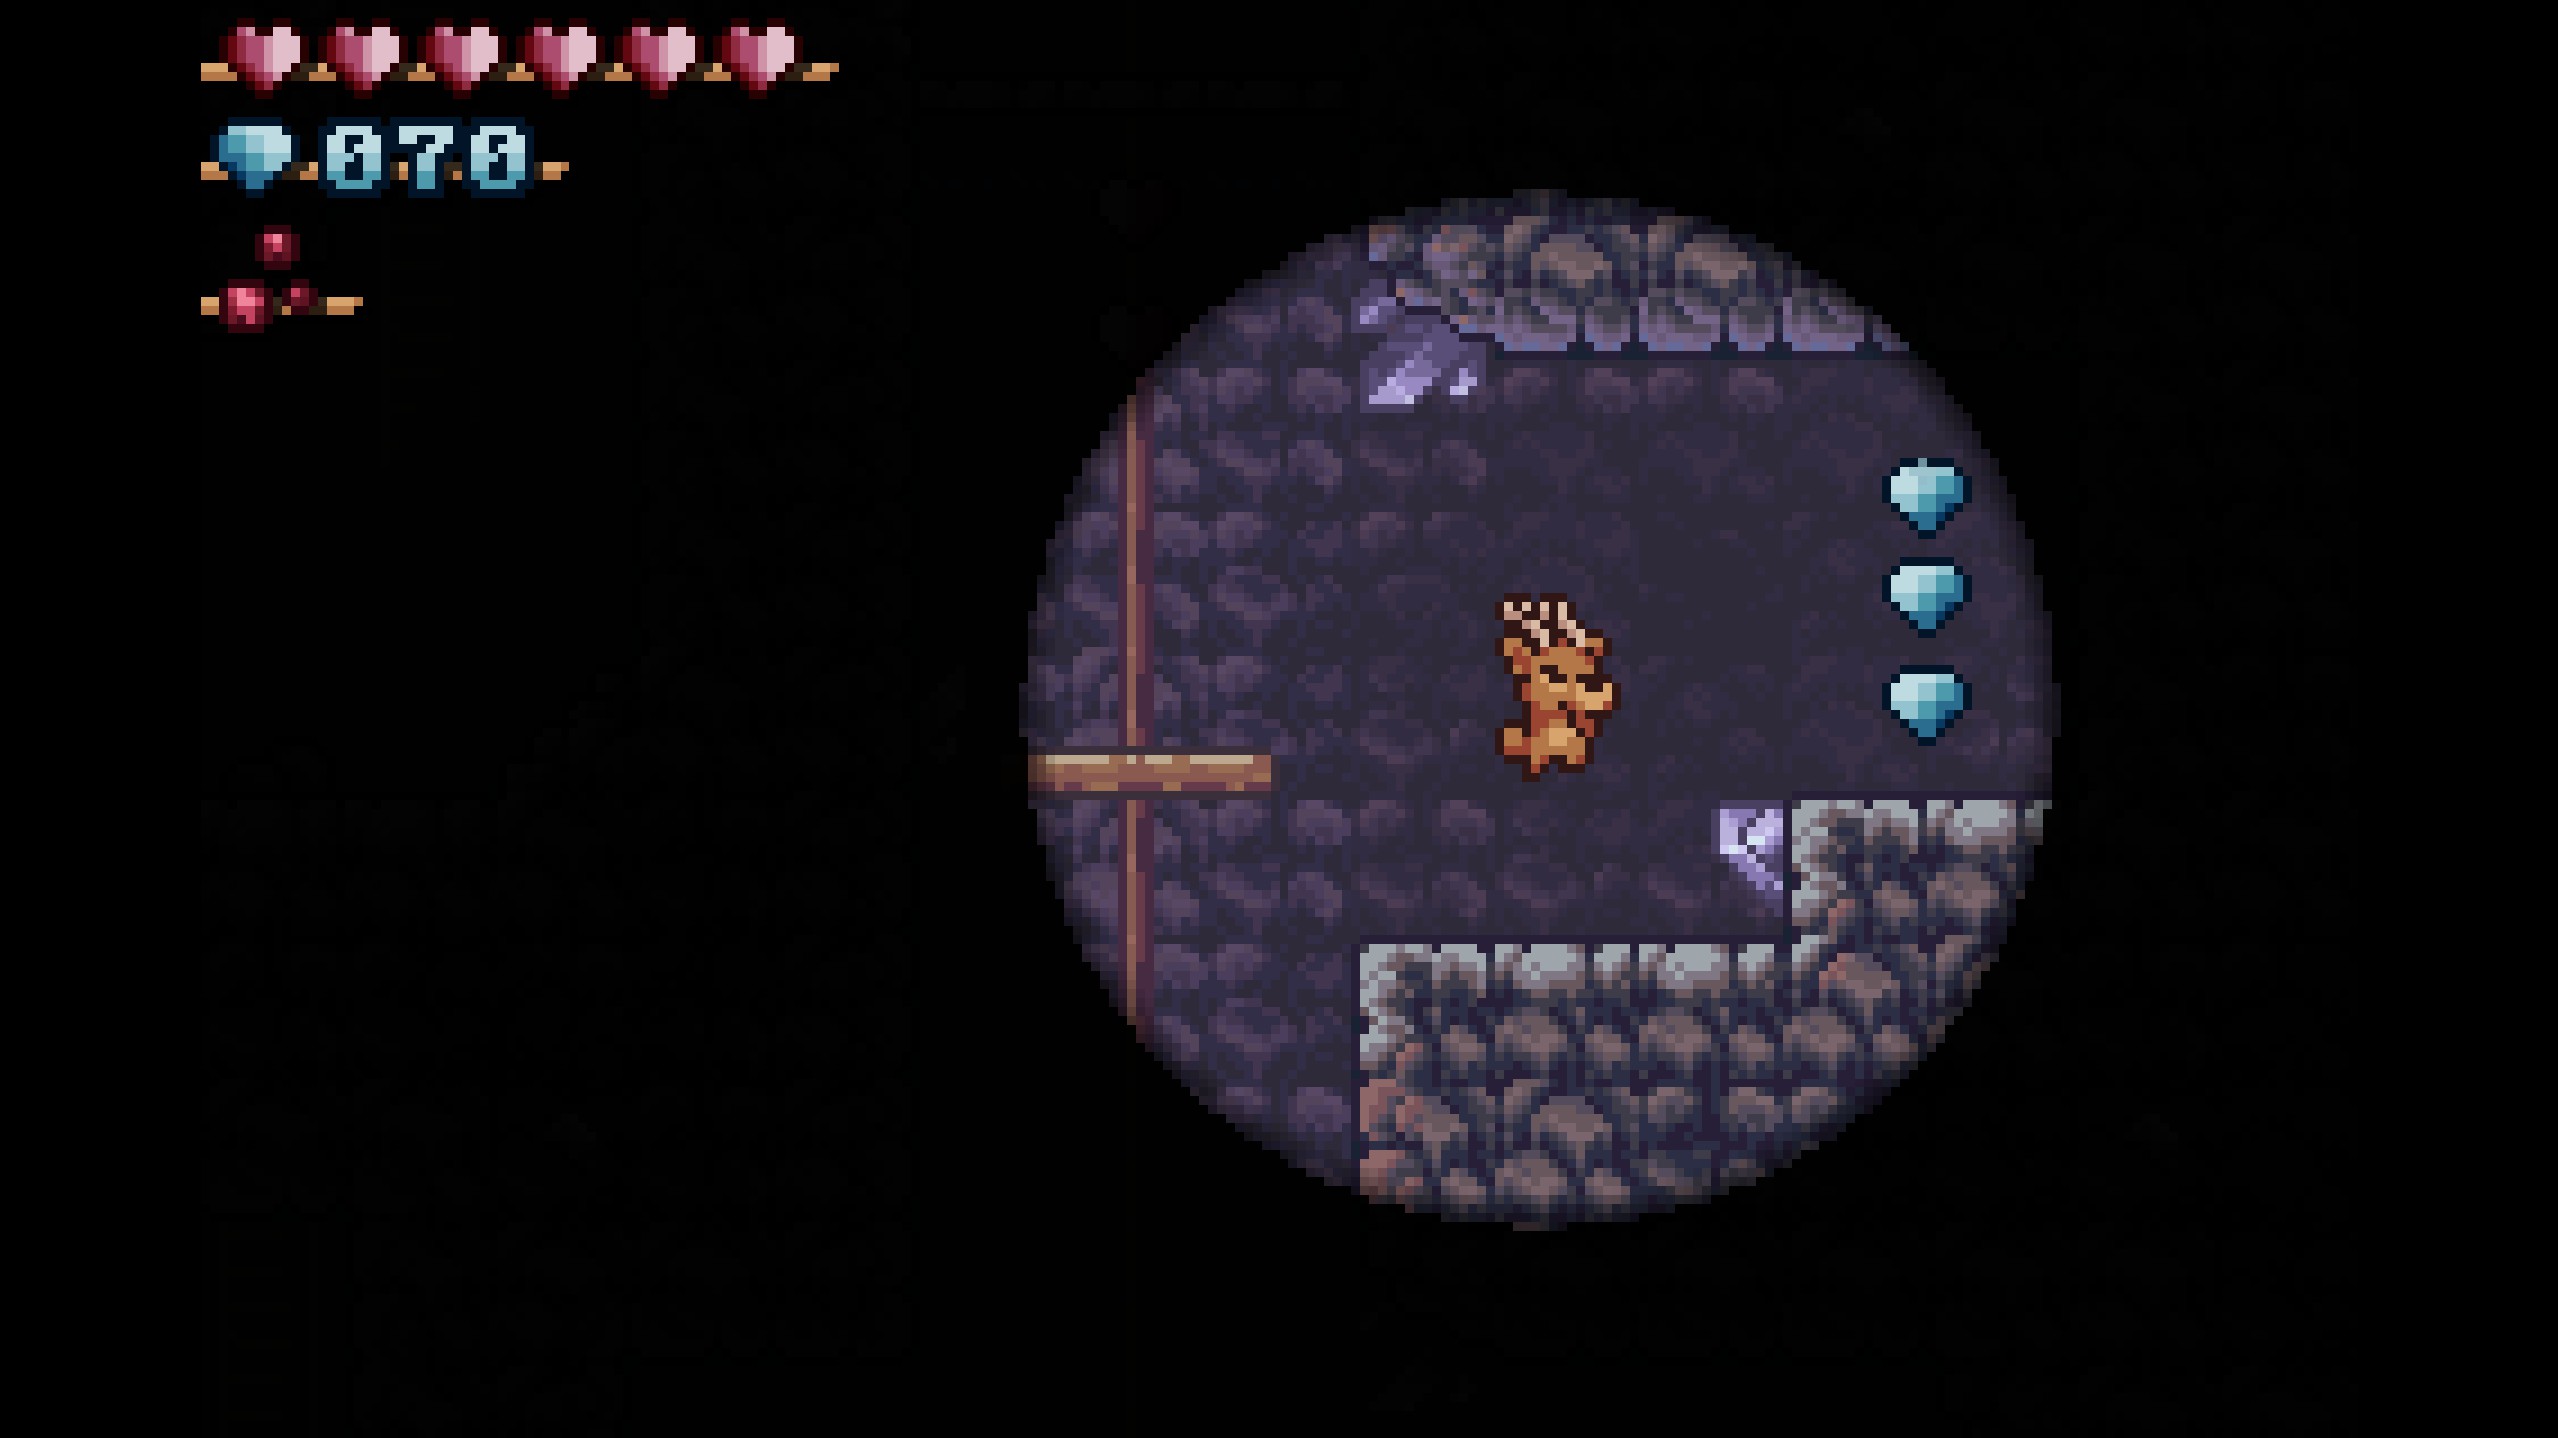
- Gems 67-70
- Continue upwards, but don't forget to grab these gems hiding behind a fake wall to the left! They'll be near three ledges, just before the lever.
- Continue upwards, but don't forget to grab these gems hiding behind a fake wall to the left! They'll be near three ledges, just before the lever.
- Gems 71-73
- Continue upwards, flick the lever to fix the moving platform, and ride it on up! These 3 gems are hanging out in an opening to the right halfway through your ride.
- Continue upwards, flick the lever to fix the moving platform, and ride it on up! These 3 gems are hanging out in an opening to the right halfway through your ride.
- Gem 74
- Ride the moving platform all the way up and jump off to the now-accessible right area! Precisely ground pound through just the middle breakable rock to collect this rare singular gem. Then you can climb up the hanging ladder and collect the fourth and final ruby!
- Ride the moving platform all the way up and jump off to the now-accessible right area! Precisely ground pound through just the middle breakable rock to collect this rare singular gem. Then you can climb up the hanging ladder and collect the fourth and final ruby!
- Gems 75-78
- With all four gems collected, make your way to the gate and unlock it! Go through the passageway and you'll emerge at the start of the second section of the stage, next to a handy-dandy checkpoint! Continue through the area, up a jump mushroom, and through a fake wall to the left to collect the gems!
- With all four gems collected, make your way to the gate and unlock it! Go through the passageway and you'll emerge at the start of the second section of the stage, next to a handy-dandy checkpoint! Continue through the area, up a jump mushroom, and through a fake wall to the left to collect the gems!
- Gems 79-81
- Head back to the right, past the stone, and up the hanging ladder to reach the gems!
- Head back to the right, past the stone, and up the hanging ladder to reach the gems!
- Gems 82-87
- While still on the hanging ladder, jump through the fake wall to your right and push down the stone hidden inside. Then, ground pound above the wind draft to bypass it and fall down with the stone. Position the stone below the semisolid platforms and jump up to grab a bunch of gems!
- While still on the hanging ladder, jump through the fake wall to your right and push down the stone hidden inside. Then, ground pound above the wind draft to bypass it and fall down with the stone. Position the stone below the semisolid platforms and jump up to grab a bunch of gems!
- Gems 88-93
- Instead of continuing onward, climb down the ladder to your right and jump back into the wind draft using the stone. Climb down the hanging ladder to reach a flat area below. Three of the gems are hiding in a fake wall to the upper left, (you'll have to fall into it on your way down) and the other three are plainly visible above the direction sign.
- Instead of continuing onward, climb down the ladder to your right and jump back into the wind draft using the stone. Climb down the hanging ladder to reach a flat area below. Three of the gems are hiding in a fake wall to the upper left, (you'll have to fall into it on your way down) and the other three are plainly visible above the direction sign.
- Gems 94-98
- Go back up and push down the stone that's sitting beside the hanging ladder. Move it to the right and jump off of it to reach the area you were previously in that contained gems 78-83! Continue onward this time, going left past the dragon and entering the passageway beside the broken moving platform. Once you emerge, ride the moving platform there and collect the gems. Beware of stalactites! Before going through the next passageway, be sure to nab the two extra gems (not pictured) in the fake wall to your right.
- Go back up and push down the stone that's sitting beside the hanging ladder. Move it to the right and jump off of it to reach the area you were previously in that contained gems 78-83! Continue onward this time, going left past the dragon and entering the passageway beside the broken moving platform. Once you emerge, ride the moving platform there and collect the gems. Beware of stalactites! Before going through the next passageway, be sure to nab the two extra gems (not pictured) in the fake wall to your right.
- Gems 99-100
- Go through the passageway and, when you emerge, flick the lever. You can now ride the previously-broken moving platform up to grab the gems! Now just push down the stone and use it to reach the right ledge with the final passageway of the stage. Congrats!
- Go through the passageway and, when you emerge, flick the lever. You can now ride the previously-broken moving platform up to grab the gems! Now just push down the stone and use it to reach the right ledge with the final passageway of the stage. Congrats!
Treasure Hoarder Badge
The Treasure Hoarder Badge is earned by carrying all four rubies at the same time in Crystal Caverns. This means you cannot put any rubies in their slots by the gate until you've collected all four of them. To be honest, this is probably the easiest badge in game, as I accidentally earned it on my first playthrough without even trying! Just be sure to go around the gate when moving from section to section so you don't inadvertently trigger the rubies to go to their slots.
If you need help finding the locations of each ruby, refer to my gem guide above, which also doubles as a ruby guide!
Grounded Badge
The Grounded Badge is earned by beating Crystal Caverns without using any jump mushrooms. Although most can be avoided with a careful jump, there are three that can be especially tricky. Also note that you won't be able to collect all of the gems when attempting this badge, as some of the optional paths require the use of jump mushrooms.
The first jump mushroom that can be confusing is the one right after you collect the dark section's gem. Normally, you'd use this jump mushroom to exit the section and return to the main area with the gate. However, since jump mushrooms are a no-no for this badge, and since there's no way to avoid this particular one, you'll actually have to climb back down the ladder and do a bit of backtracking through the dark section to safely return to the main area. The same logic applies for another mushroom later in the level beside one of the levers.
Another confusing jump mushroom is this one midway through the second section of the caverns, after you've made it past the locked gate. At first glance, it appears that there is no other way to get up on the semisolid platform without jumping on the mushroom. However, there is an alternate path! Refer to gems 79-81 and 82-87 in my gem guide above for the exact steps, but in short, there's a fake wall to the right of the hanging ladder that bypasses the jump mushroom entirely.
The final and most confusing jump mushroom to avoid in Crystal Caverns is the one at the very end. Once again, it appears that the only way to get up to the semisolid platforms is with the mushroom! However, like before, there exists an alternate path! Simply head to the right, where there's a fake wall, and jump up the hidden platforms. From there, you can climb the hanging ladder to safety and beat the level!
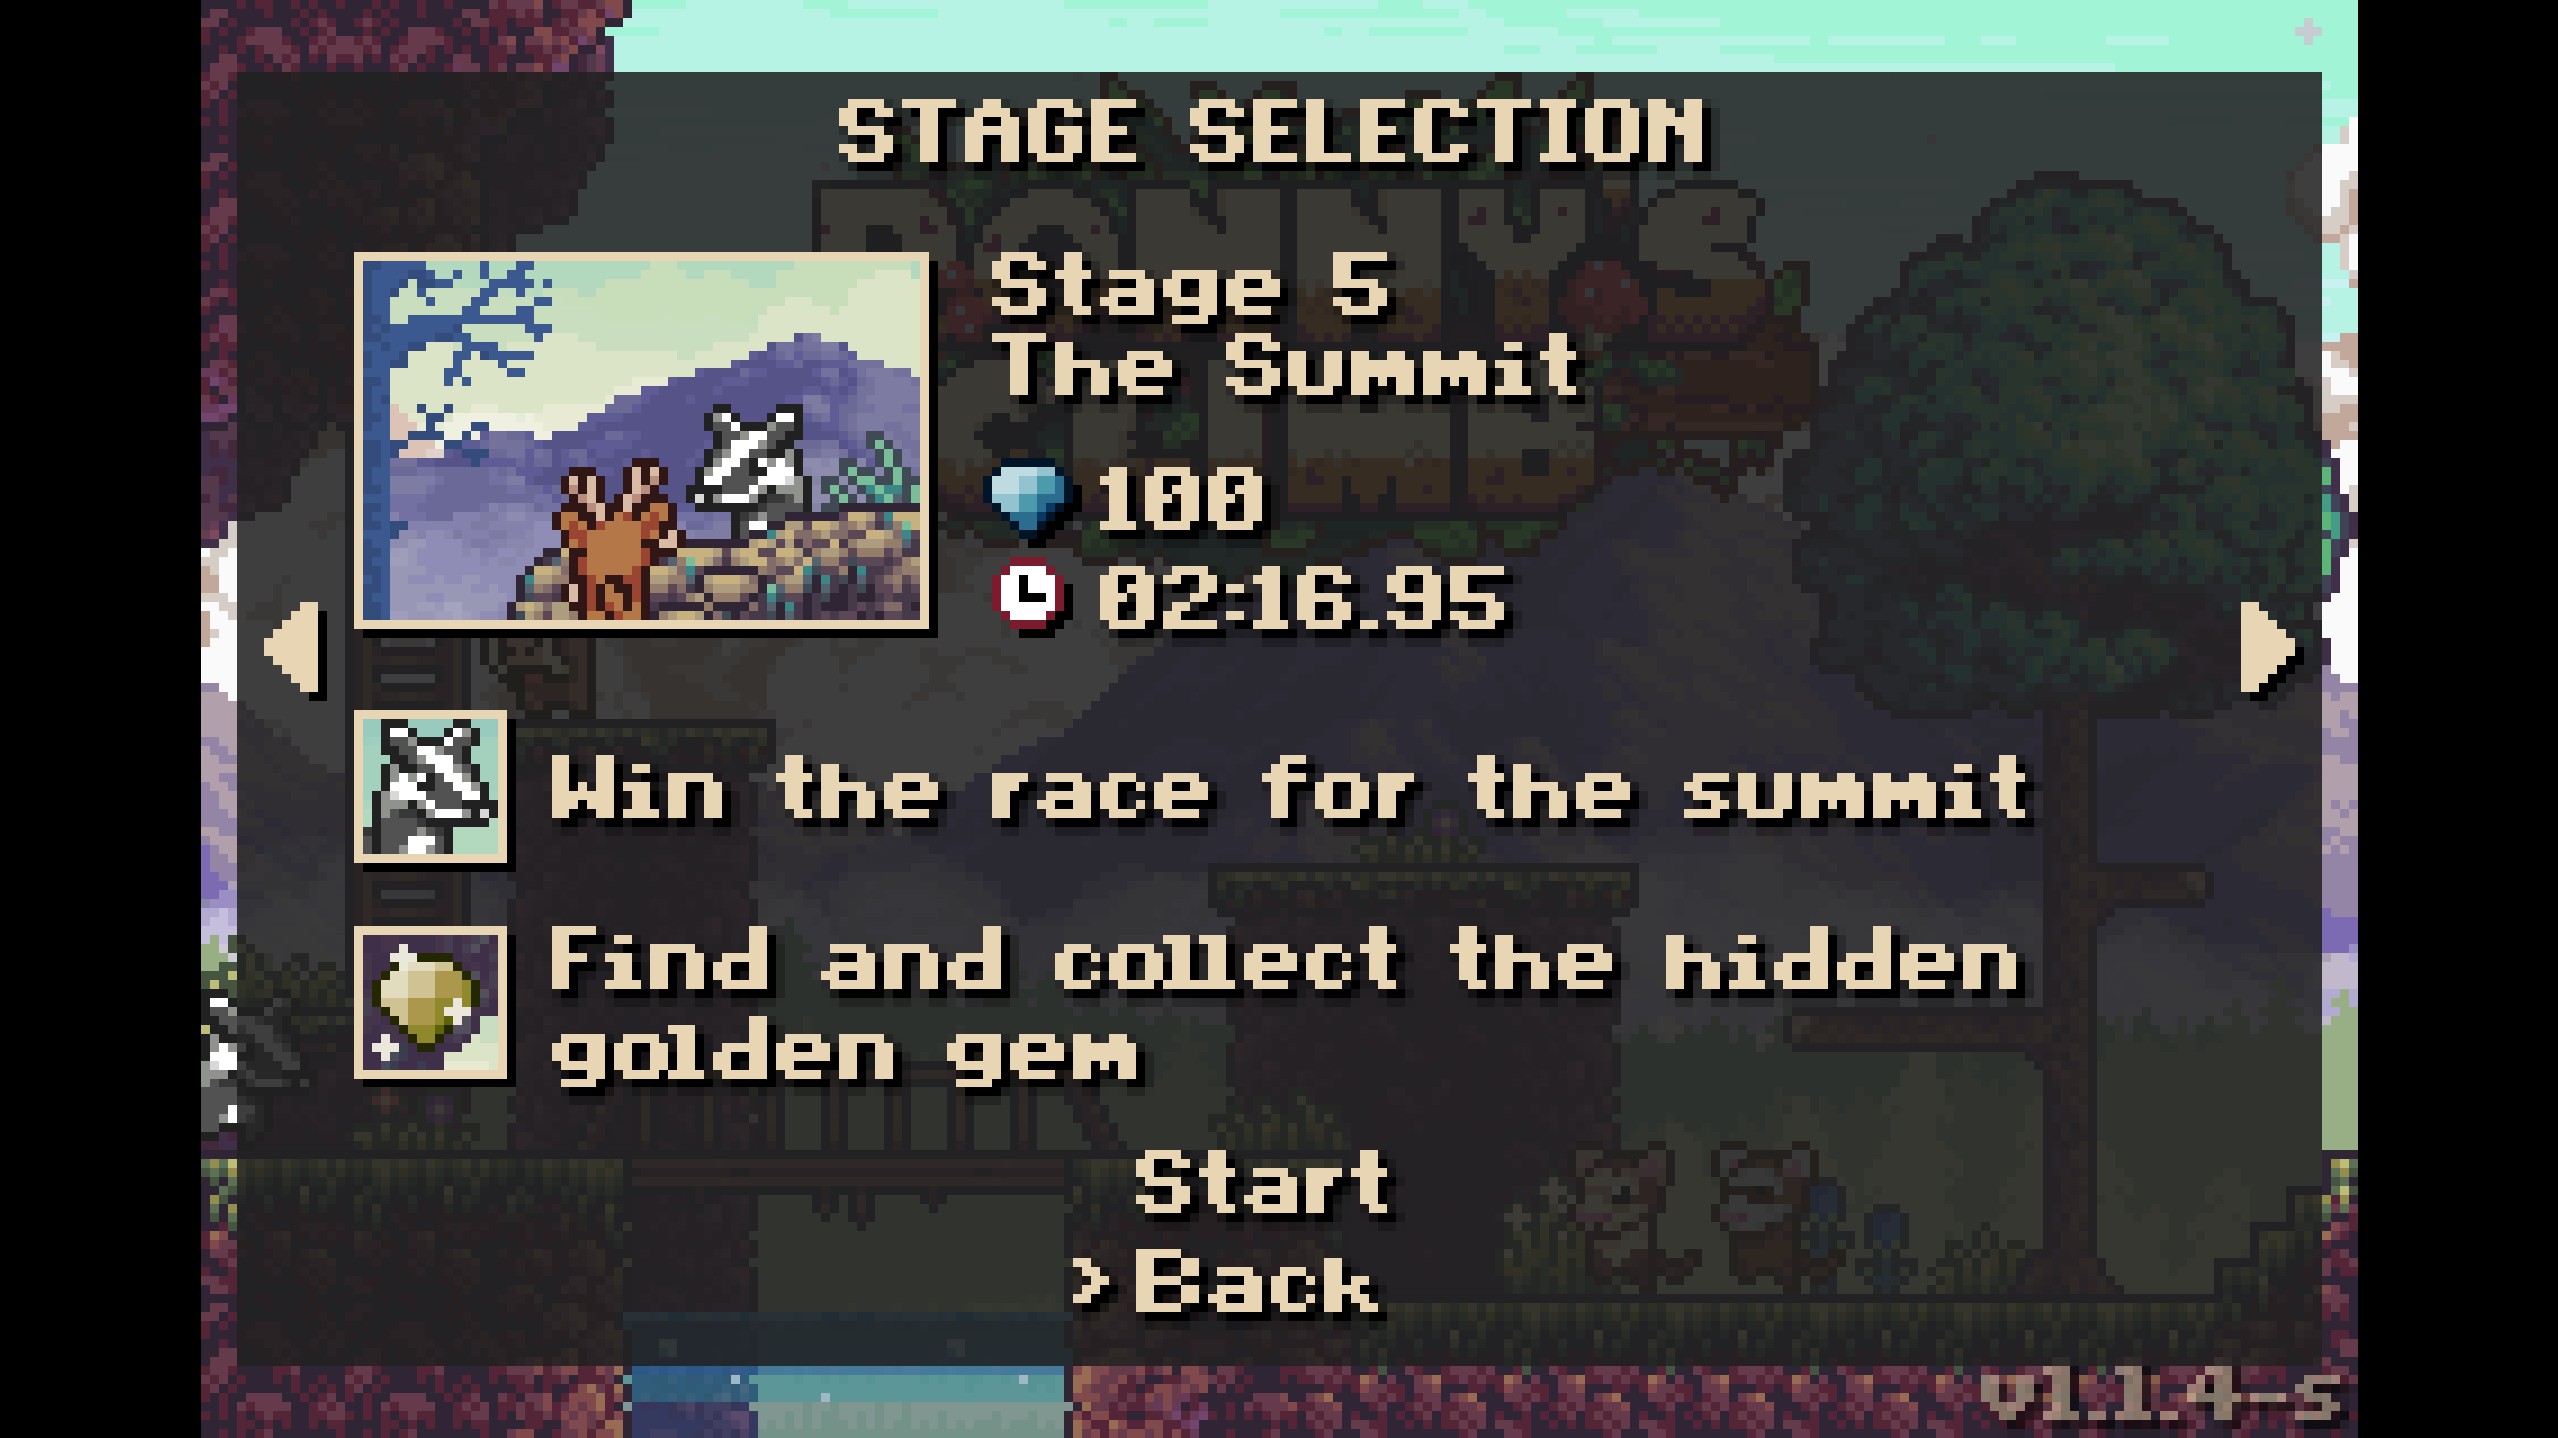
The Summit
The Summit is the fifth stage of Ronny's Climb! It features a barren, rocky landscape with a few trees and shrubbery. It is a very dangerous level, with enemies, spikes, and pits everywhere!
Gems
- Gems 1-3
- The first gems in the summit are easily collectable right at the start!
- The first gems in the summit are easily collectable right at the start!
- Gems 4-5
- Continue into the opening past gems 1-3 and ride up the wind draft to collect two more easy gems!
- Continue into the opening past gems 1-3 and ride up the wind draft to collect two more easy gems!
- Gems 6-10
- Head back down into the opening and go right. There is a moving platform above a bed of spikes, with stalactites and a dragon making the already dangerous situation even worse. I'm pretty sure it's impossible to not get hit here, so just damage boost through, jump up the ledges, and dash through some more spikes and stalactites to the left to collect the gems!
- Head back down into the opening and go right. There is a moving platform above a bed of spikes, with stalactites and a dragon making the already dangerous situation even worse. I'm pretty sure it's impossible to not get hit here, so just damage boost through, jump up the ledges, and dash through some more spikes and stalactites to the left to collect the gems!
- Gems 11-13
- Exit the opening and continue upwards through the main path. These gems are hiding behind a fake wall to the right, just above where the dragon's fireballs are hitting!
- Exit the opening and continue upwards through the main path. These gems are hiding behind a fake wall to the right, just above where the dragon's fireballs are hitting!
- Gems 14-15
- Continue past the dragon, up the hanging ladder, and stand on the breakable platforms to break them! The gems are hanging out just below.

- Continue past the dragon, up the hanging ladder, and stand on the breakable platforms to break them! The gems are hanging out just below.
- Gems 16-18
- Continue up through the stage and collect the gems floating atop a semisolid platform! Just be sure to dodge the onslaught of fireballs, dragonflies, bats, and slimes!
- Continue up through the stage and collect the gems floating atop a semisolid platform! Just be sure to dodge the onslaught of fireballs, dragonflies, bats, and slimes!
- Gems 19-20
- Continue through the stage and collect these two easy gems atop some breakable platforms!
- Continue through the stage and collect these two easy gems atop some breakable platforms!
- Gems 21-23
- Continue through the stage and these three gems will be waiting for you above a large jump with a dragon!
- Continue through the stage and these three gems will be waiting for you above a large jump with a dragon!
- Gems 24-25
- These two gems are hanging out above a moving platform to the right later on in the stage. Just watch out for the stalactites!

- These two gems are hanging out above a moving platform to the right later on in the stage. Just watch out for the stalactites!
- Gems 26-28
- Continue upwards and collect these gems above another large jump!
- Continue upwards and collect these gems above another large jump!
- Gems 29-31
- These easy gems will be waiting for you just after the first checkpoint!
- These easy gems will be waiting for you just after the first checkpoint!
- Gems 32-34
- Continue past the checkpoint into the dark section of the stage! Head up the hanging ladder, dodging the dragons' fireballs, and go right. Ride up the moving platform and collect these gems floating above a bed of spikes to your left! Then, flick the lever in the area where you land.
- Continue past the checkpoint into the dark section of the stage! Head up the hanging ladder, dodging the dragons' fireballs, and go right. Ride up the moving platform and collect these gems floating above a bed of spikes to your left! Then, flick the lever in the area where you land.
- Gems 35-36
- Dash back across the bed of spikes and go up using the jump mushroom. There will be another bed of spikes with a moving platform. Floating above it are the gems!
- Dash back across the bed of spikes and go up using the jump mushroom. There will be another bed of spikes with a moving platform. Floating above it are the gems!
- Gems 37-41
- Go back to the right again and jump up to the topmost semisolid platform using another jump mushroom. Head right into the fake wall and jump up while inside it. You'll land on a very sneaky hidden semisolid platform and be able to collect the gems from there!
- Go back to the right again and jump up to the topmost semisolid platform using another jump mushroom. Head right into the fake wall and jump up while inside it. You'll land on a very sneaky hidden semisolid platform and be able to collect the gems from there!
- Gems 42-47
- Ground pound through the breakable rocks in the secret area and you'll be back down to where you were. Push the stone all the way down and to the left and use it as a platform to escape the dark section! Two of the gems are hanging out above a jump mushroom immediately after the exit, and four more are hiding behind a fake wall to the right of the mushroom.
- Ground pound through the breakable rocks in the secret area and you'll be back down to where you were. Push the stone all the way down and to the left and use it as a platform to escape the dark section! Two of the gems are hanging out above a jump mushroom immediately after the exit, and four more are hiding behind a fake wall to the right of the mushroom.
- Gems 48-54
- Continue upwards using the jump mushrooms and you'll land on one of two moving platforms circling around two dragons! Dodge their fireballs to collect a ton of easy gems!
- Continue upwards using the jump mushrooms and you'll land on one of two moving platforms circling around two dragons! Dodge their fireballs to collect a ton of easy gems!
- Gems 55-58
- Head upwards using the wind draft and you'll reach the second checkpoint! Unlock it, and then jump over to the ledge left of the wind draft. (you may need to jump into the draft again from below to give yourself the momentum) Once there, easily collect the four gems above some breakable platforms!
- Head upwards using the wind draft and you'll reach the second checkpoint! Unlock it, and then jump over to the ledge left of the wind draft. (you may need to jump into the draft again from below to give yourself the momentum) Once there, easily collect the four gems above some breakable platforms!
- Gems 59-60
- Ground pound through the breakable rocks beside the second checkpoint to easily collect two more gems!
- Ground pound through the breakable rocks beside the second checkpoint to easily collect two more gems!
- Gems 61-66
- Head right and enter the passageway. You'll be taken high up where there'll be two fake walls, each hiding 3 gems! You'll have to jump from the semisolid platform to reach the upper one, but you can just walk into the lower one.
- Head right and enter the passageway. You'll be taken high up where there'll be two fake walls, each hiding 3 gems! You'll have to jump from the semisolid platform to reach the upper one, but you can just walk into the lower one.
- Gems 67-71
- Head left and collect these easy gems beside a tree! (don't worry about the ones below the bridge, we'll grab those later)
- Head left and collect these easy gems beside a tree! (don't worry about the ones below the bridge, we'll grab those later)
- Gems 72-74
- Head back to the passageway you emerged from and ground pound through the rightmost set of breakable rocks to collect the gems!
- Head back to the passageway you emerged from and ground pound through the rightmost set of breakable rocks to collect the gems!
- Gems 75-77
- Enter the passageway at the bottom and jump down to the lever. Flick it, then walk through the fake wall in the middle to nab the gems! Then, make sure to push down the stone.
- Enter the passageway at the bottom and jump down to the lever. Flick it, then walk through the fake wall in the middle to nab the gems! Then, make sure to push down the stone.
- Gems 78-81
- Move the stone you just pushed down to the right and jump off of it to reach the gems!
- Move the stone you just pushed down to the right and jump off of it to reach the gems!
- Gems 82-84
- Head back to the left and ride up the newly-fixed moving platform beside the checkpoint. These three gems will be waiting for you past some frogs and dragonflies!
- Head back to the left and ride up the newly-fixed moving platform beside the checkpoint. These three gems will be waiting for you past some frogs and dragonflies!
- Gems 85-88
- Jump up to the tallest branch of the tree and dash right over a big gap to reach a secret area below the bridge, where you'll find the gems!

- Jump up to the tallest branch of the tree and dash right over a big gap to reach a secret area below the bridge, where you'll find the gems!
- Gems 89-91
- Climb up the hanging ladder back beside the tree to collect these easy gems!
- Climb up the hanging ladder back beside the tree to collect these easy gems!
- Gems 92-94
- At the top of the hanging ladder, above the semisolid platforms and to the left is a fake wall containing the gems!
- At the top of the hanging ladder, above the semisolid platforms and to the left is a fake wall containing the gems!
- Gems 95-98
- Head right past the dragons on the trees to reach an area with spikes, moving platforms, and the gems!
- Head right past the dragons on the trees to reach an area with spikes, moving platforms, and the gems!
- Gems 99-100
- Continue up the semisolid platforms to find the last two gems of The Summit hanging out alongside a red slime! Congrats!
- Continue up the semisolid platforms to find the last two gems of The Summit hanging out alongside a red slime! Congrats!
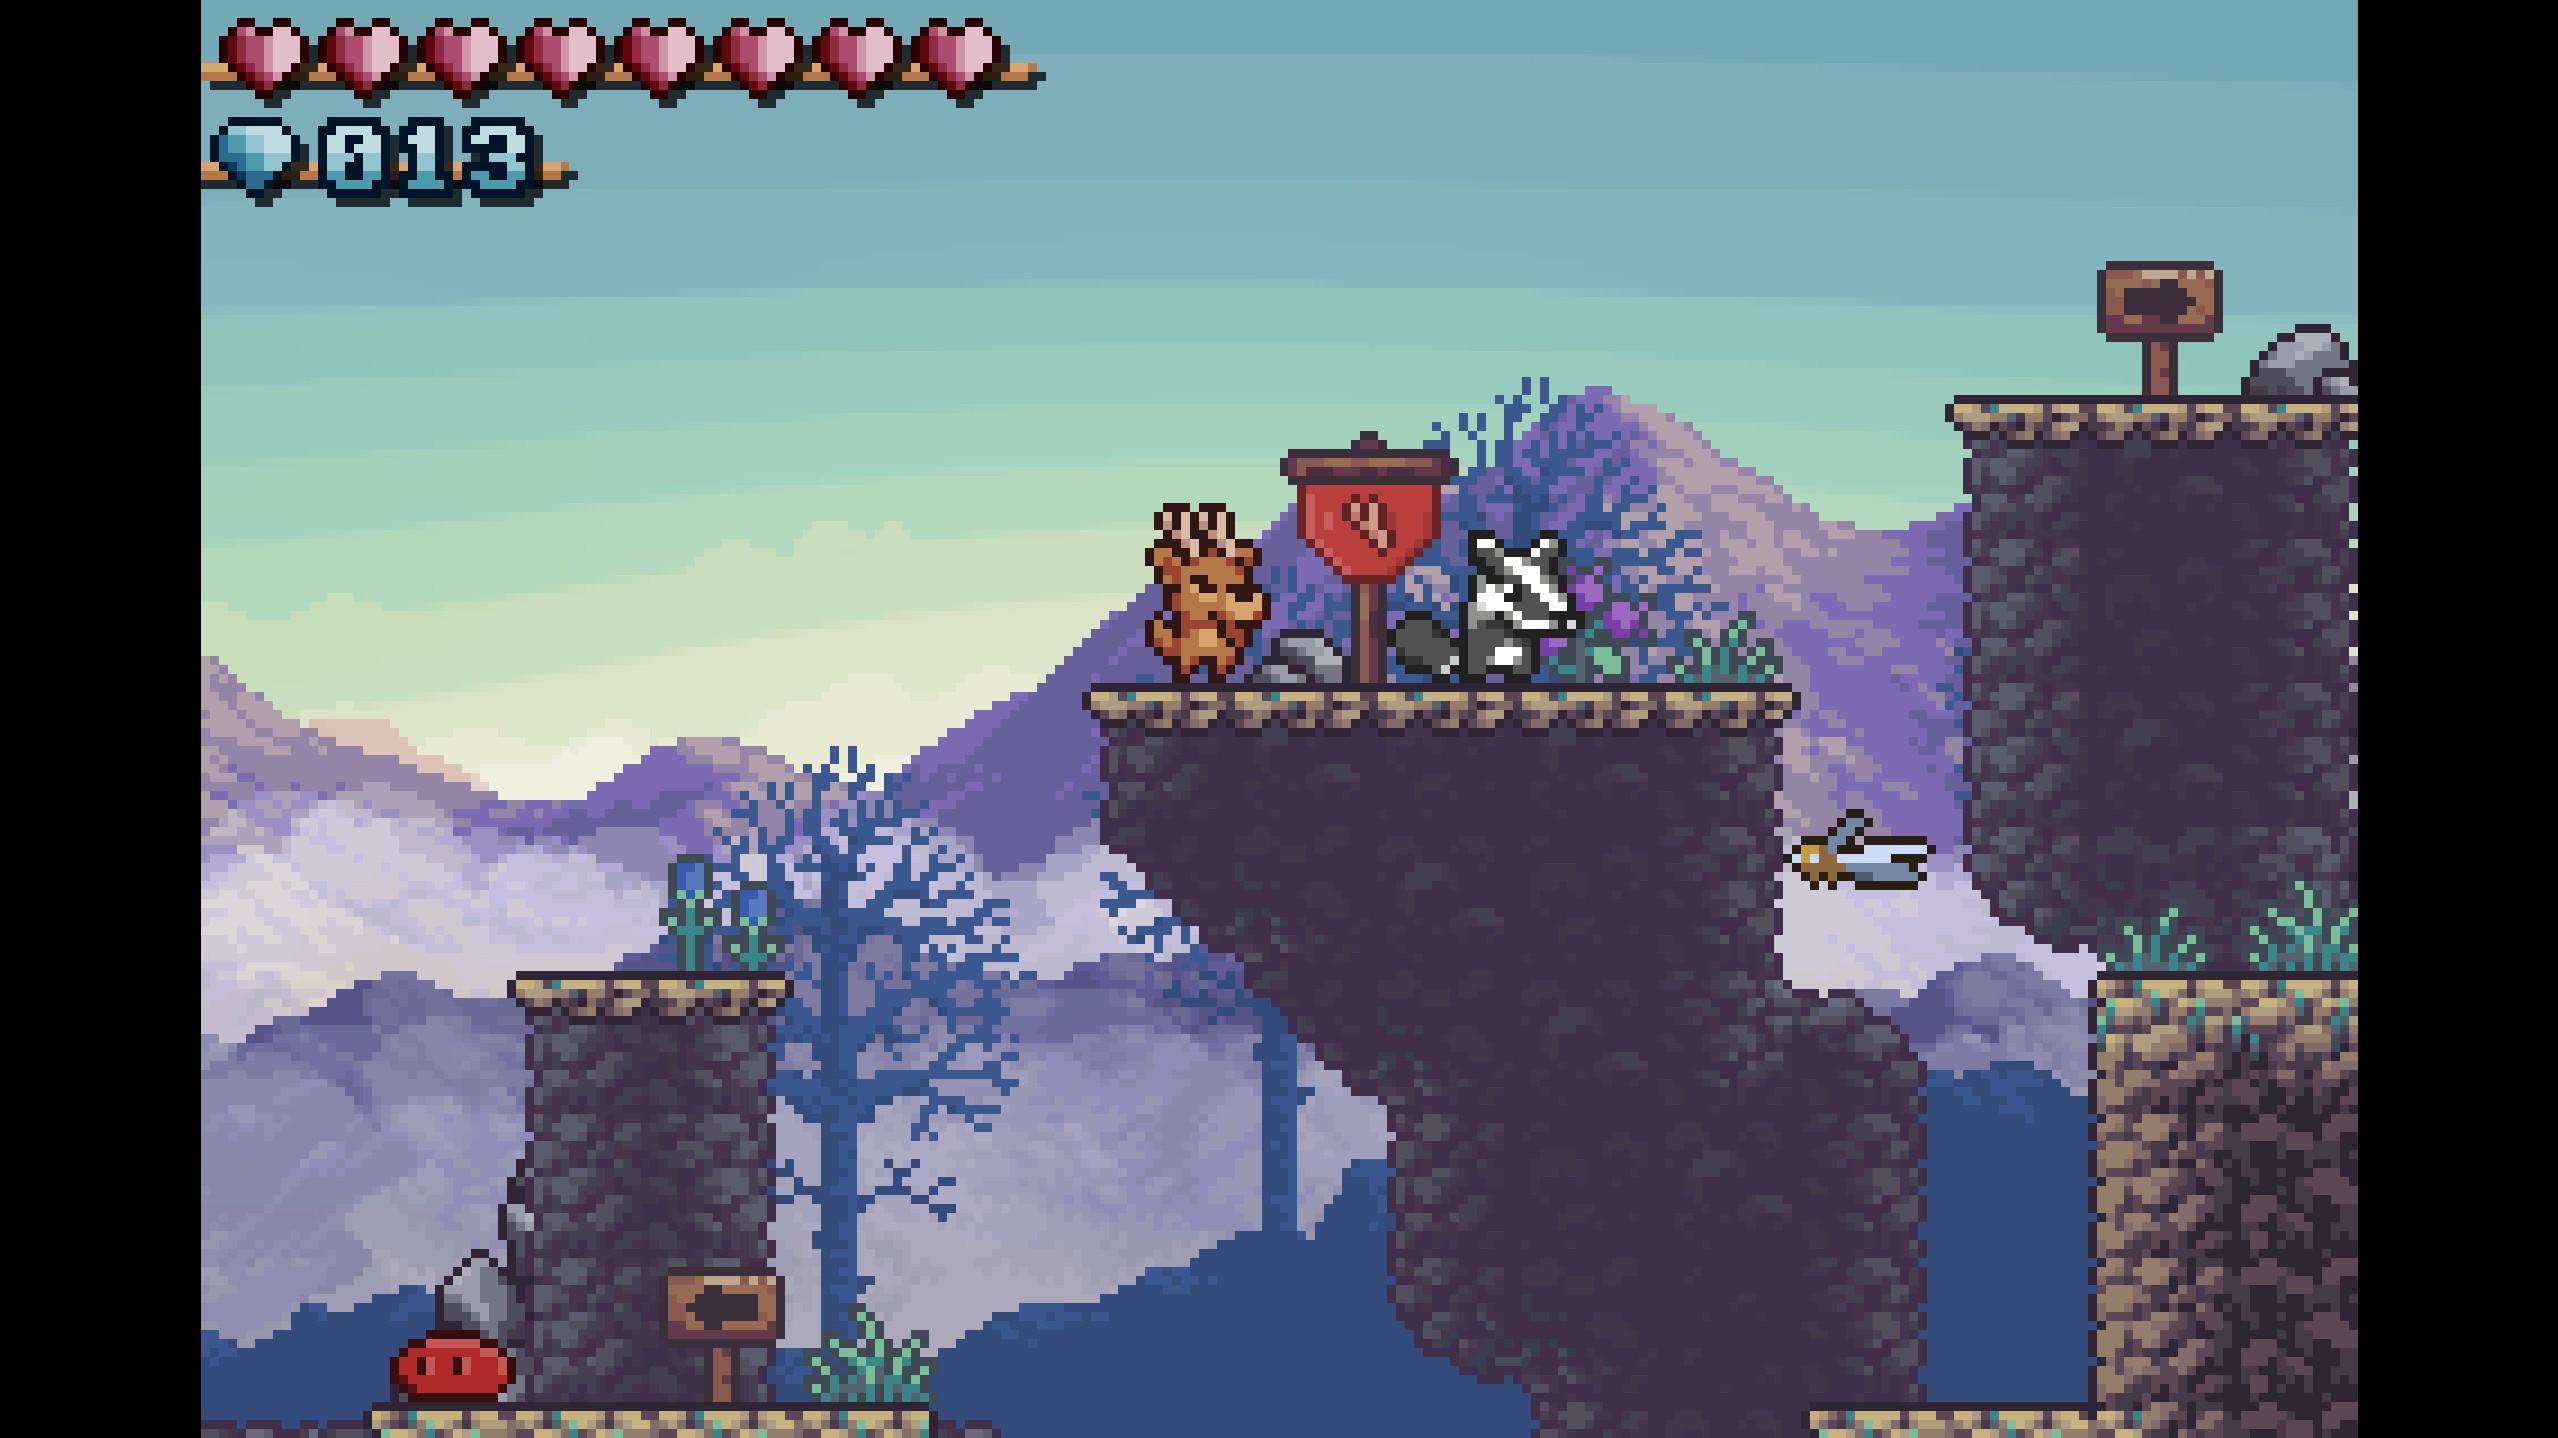
Winner Badge
The Winner Badge is earned by winning the race against the badger to the first checkpoint in The Summit. To start the race, make your way through the first bits of the stage until you encounter the badger. Talk to him, and he'll bring up the idea of a race. After you finish your conversation, he'll be off!
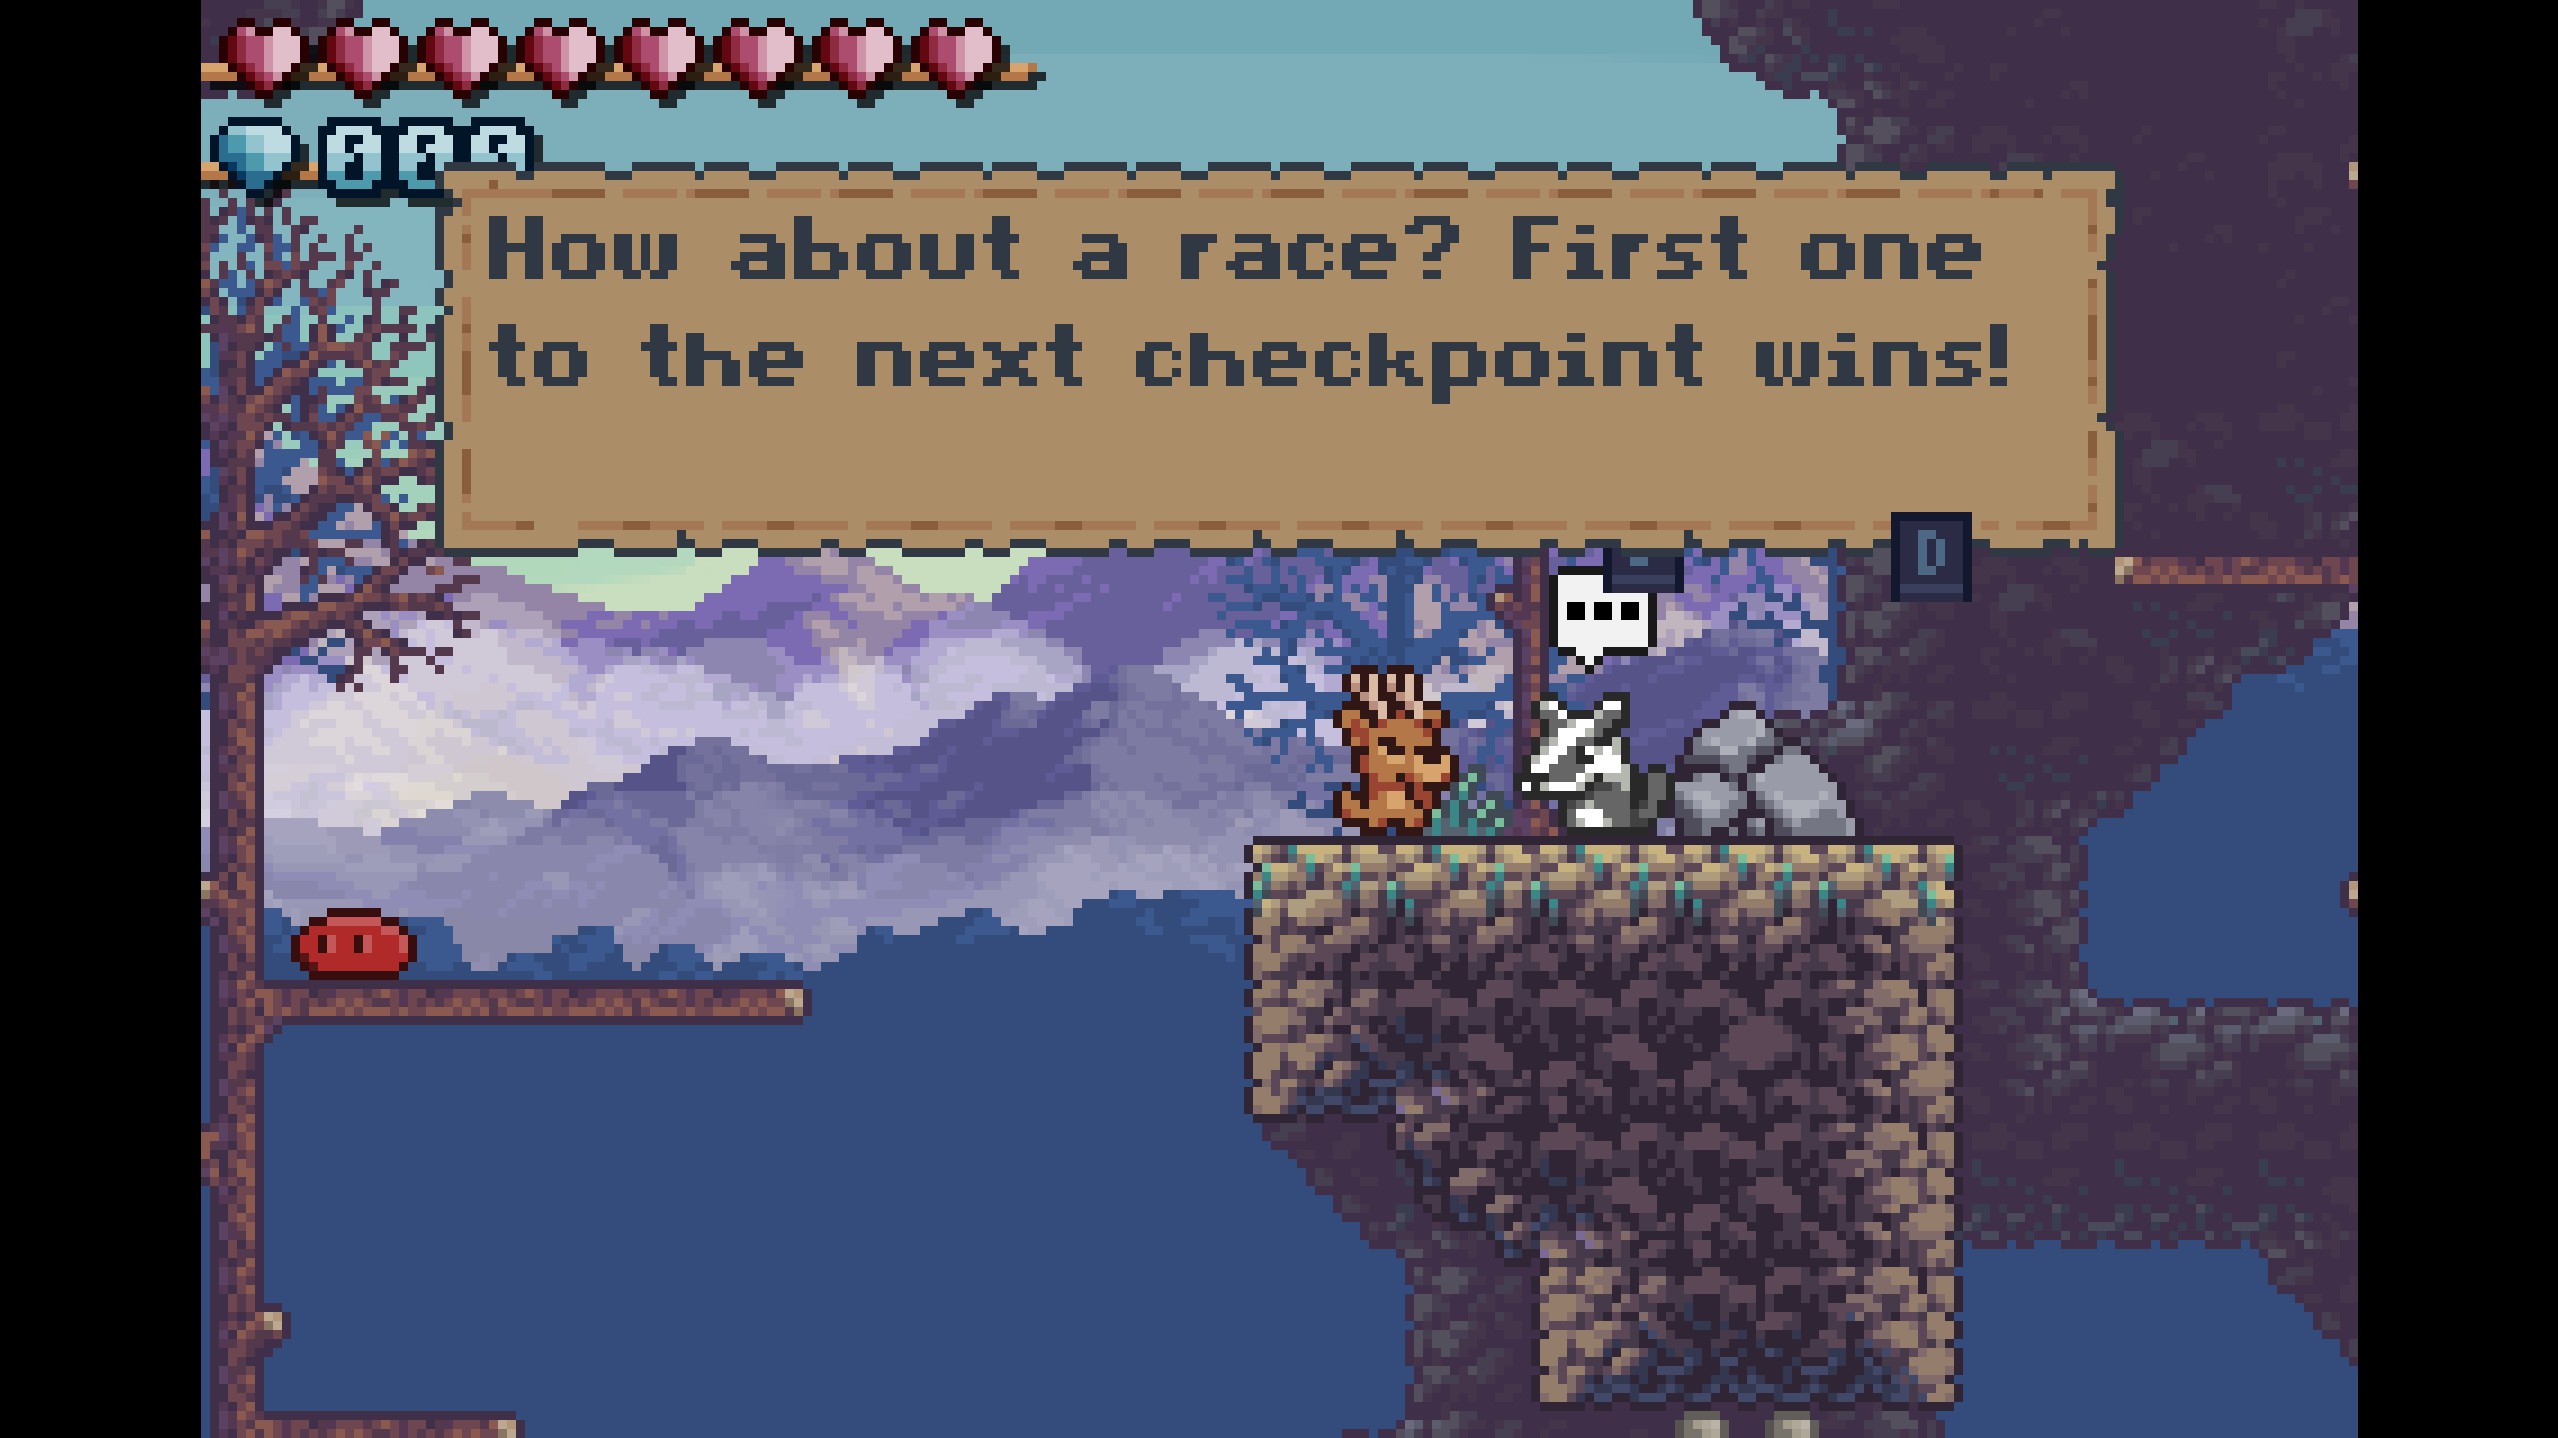
The badger can cheat by high jumping across much of the stage's obstacles, but don't worry, you can cheat too by making good use of your dash ability! Once you've made it to the first checkpoint, the badger will arrive soon after, panting and out of breath. Congratulations! You've won the race.
Concealed in Stone Badge
The Concealed in Stone badge is earned by collecting the hidden golden gem in The Summit! To find the golden gem, simply make your way to the first checkpoint of the stage. Then, instead of going up and to the right, go down and to the right, onto some tree branches.
Then, jump off the lower of the two branches into a fake wall to the right! The wall will disappear, revealing the hidden golden gem in all of its shiny, golden goodness. Simply collect it to earn the badge!
Finale
Finale is the sixth and final non-bonus stage of Ronny's Climb! It takes place in the same environment as The Summit, and features a chase section with the evil warthog boss, followed by an actual battling section, named "The Final Confrontation." There are no gems to collect in this stage, just two very difficult badges!
Self-Sufficient Badge
The Self-Sufficient Badge is earned by leaving the dark cave in Finale without using the lever or the stone to help you get your way around. This is probably the hardest badge in the entire the game!
In the cave, the lever is used to fix a broken moving platform. From there, you'd normally ride the moving platform up and push down the stone, and then jump off of it to get on top of the left semisolid platform and continue onward. However, since both the lever and the stone are a no-no for this badge, you'll have to preform some well-timed jumps.
First, stand on the semisolid platform that's beneath the broken moving platform. Wait for a bat to spawn that's 1 or 2 blocks above you and jump onto it. Then, jump off of the bat to reach the broken moving platform without ever needing to fix it!
Then, you'll need to do the same trick once more. Jump onto and then off of a bat flying below the left semisolid platform to get the height that you would've otherwise needed the stone to get!
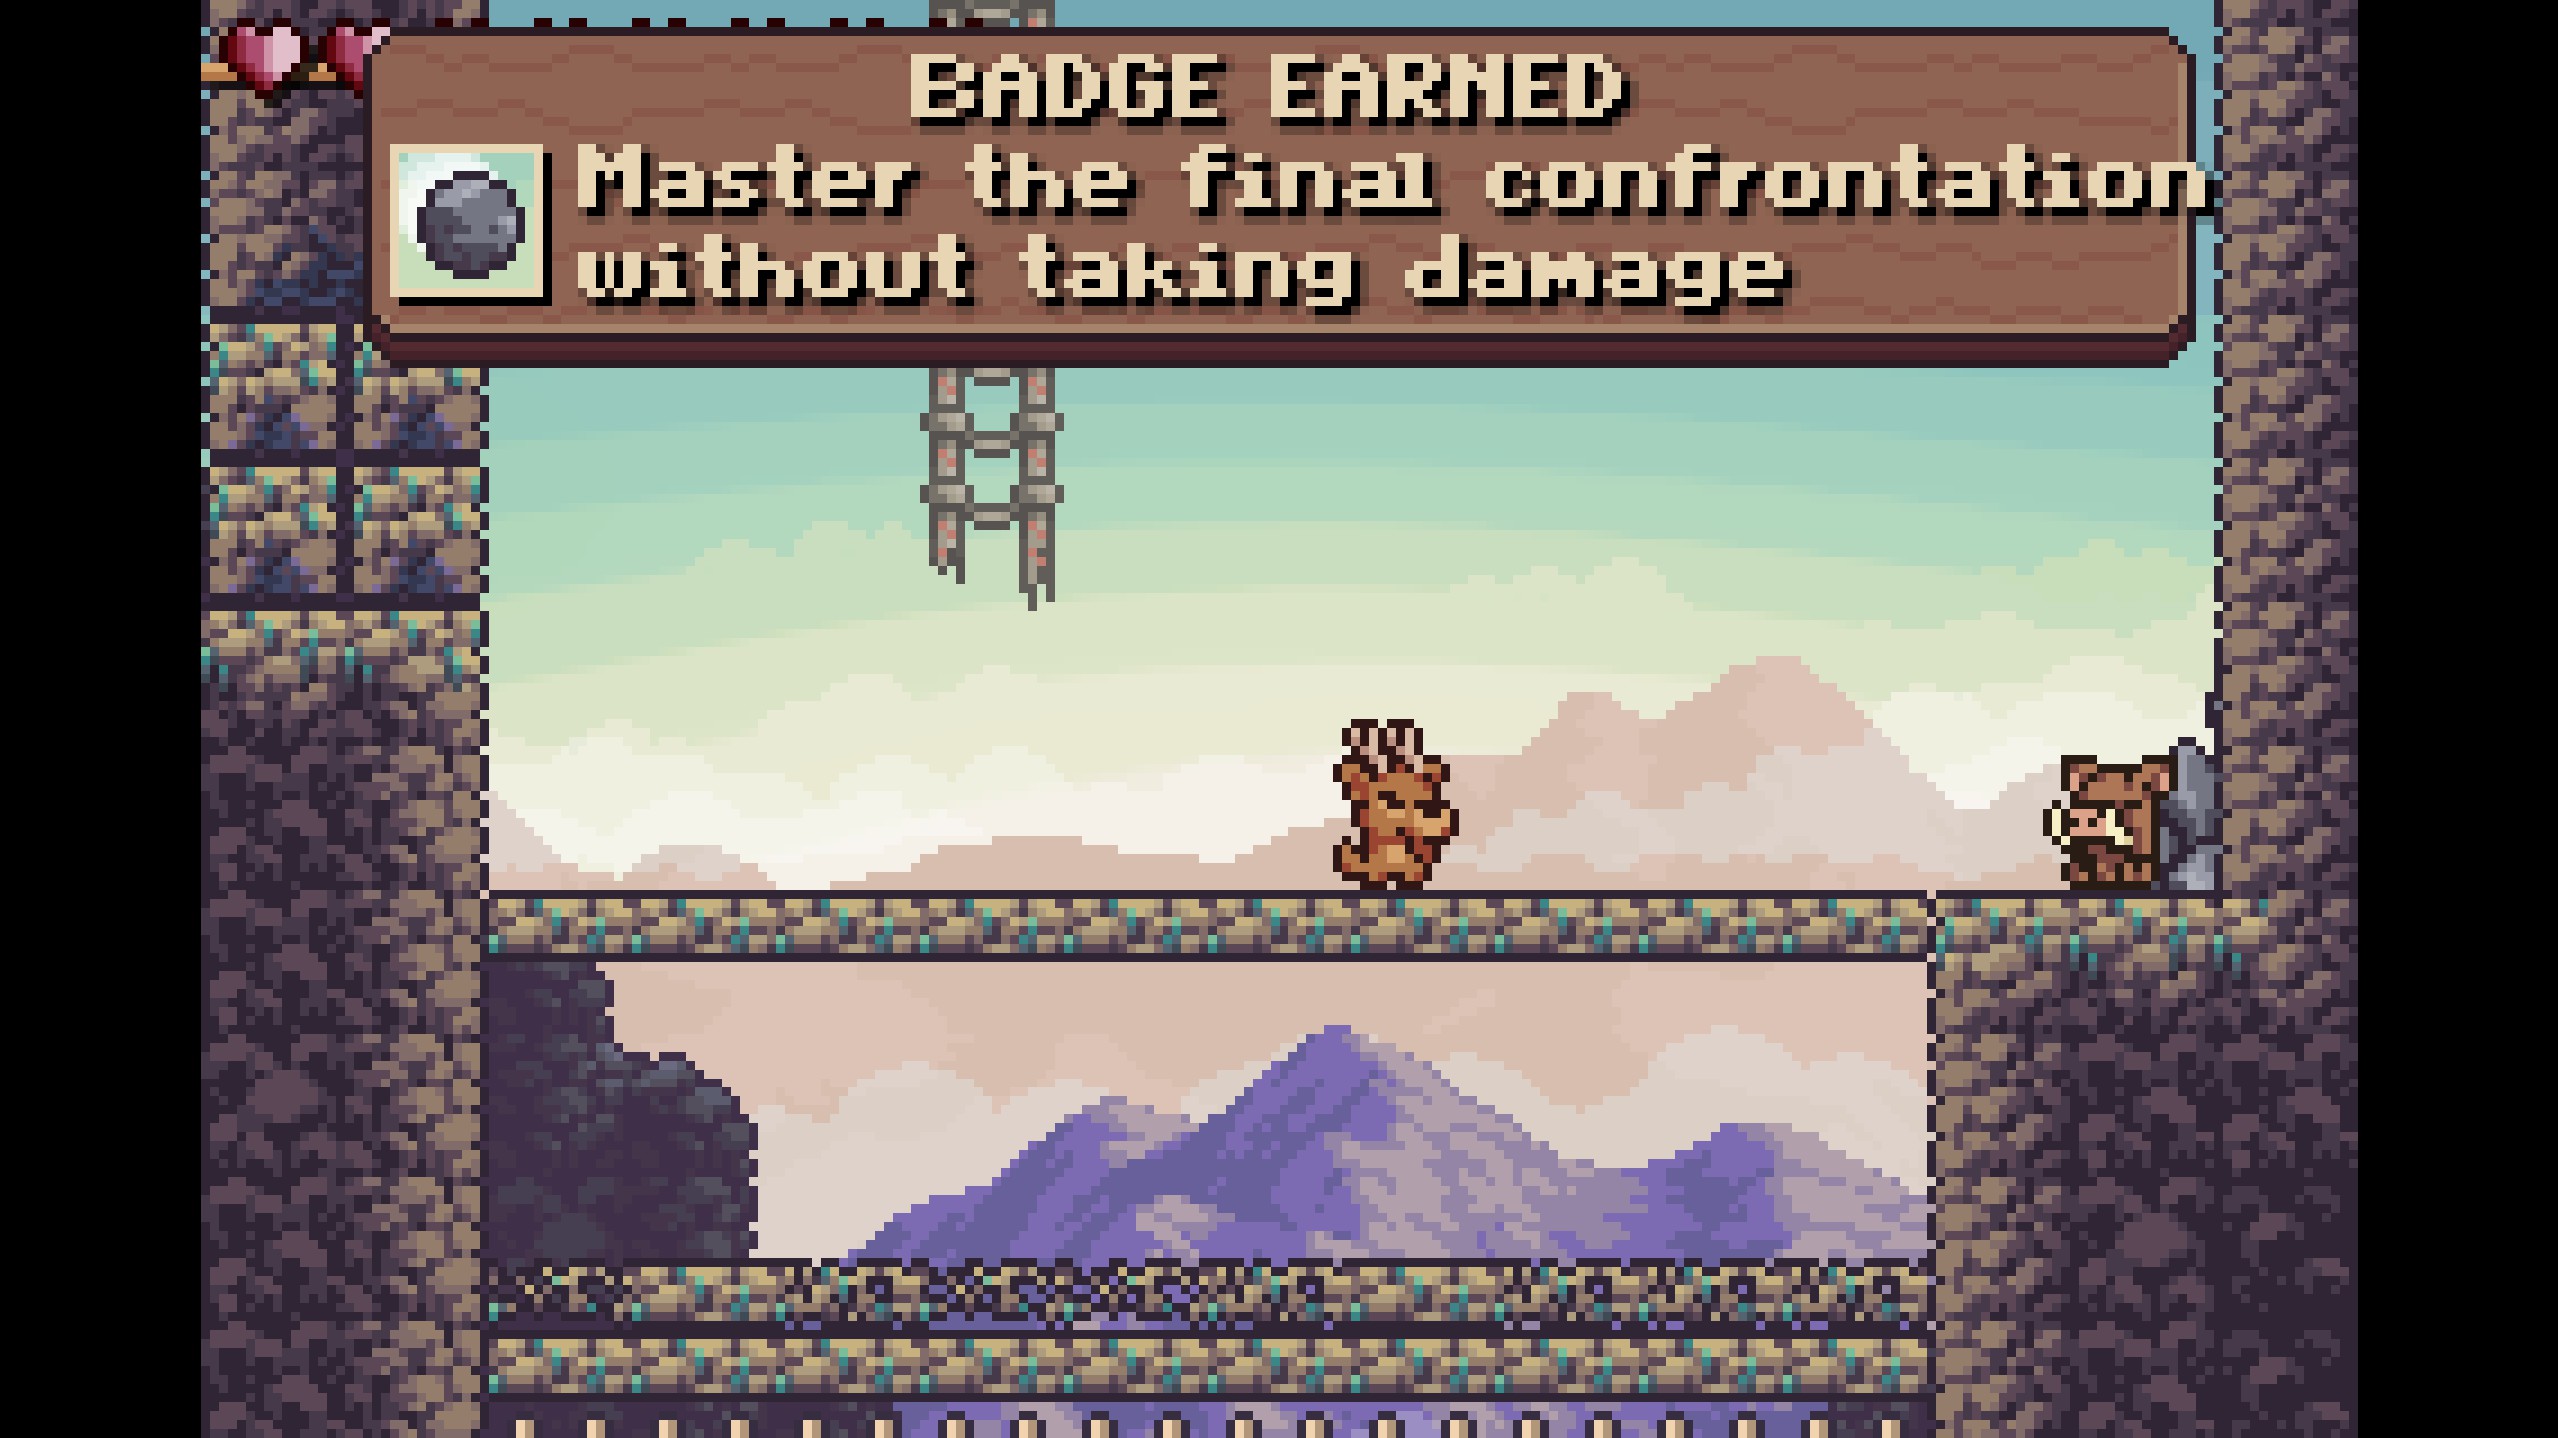
A Flawless Victory Badge
The Flawless Victory Badge is earned by defeating the evil warthog boss in Finale without taking any damage.
This is one is a toughie. my best strategy is to hang out in the corner below the warthog's wall, only moving if boulders are about to fall there. The reason why that corner is so important is because the boulder that the warthog occasionally throws can't actually hit you from there, it just breaks upon contact with the upper edge! From there, just stay focused and time your jumps with the bats and the warthog will go down in no time! If you do end up getting hit, just intentionally die so you can retry the fight from the checkpoint. Good luck!
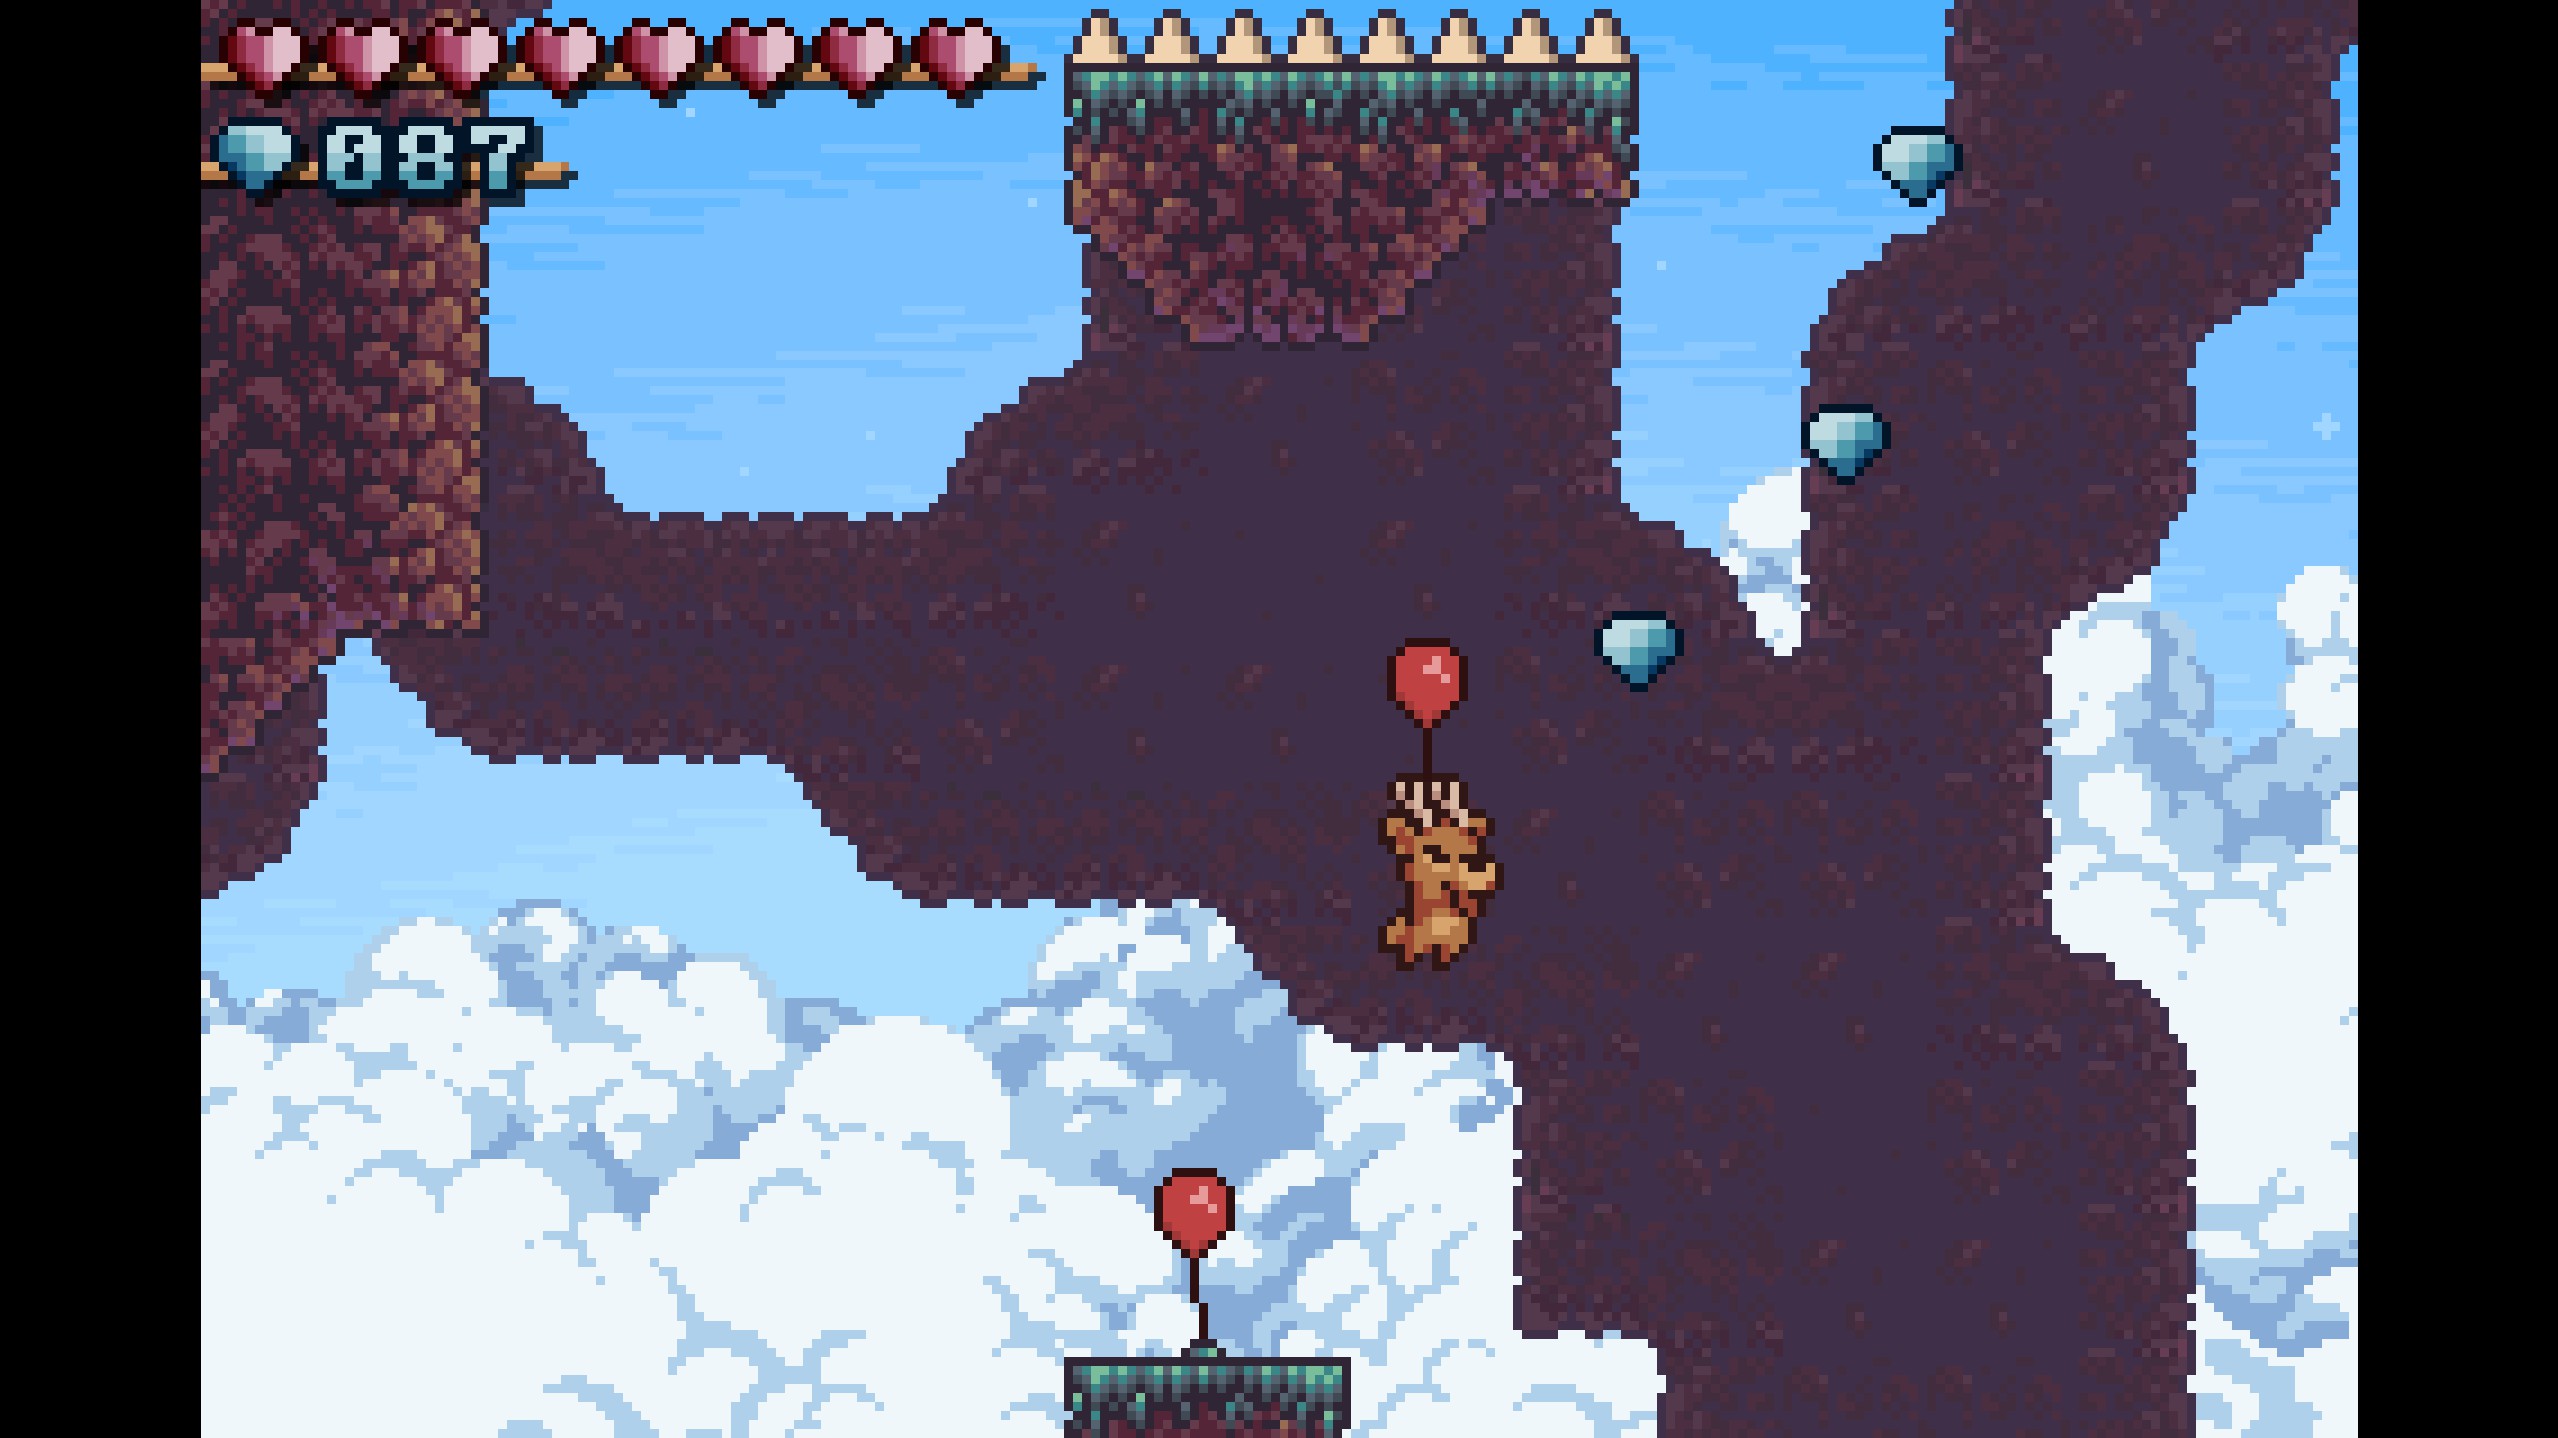
Balloon Bonanza
Balloon Bonanza is the first bonus stage in Ronny's Climb! It is a vertically-based level that forces Ronny to float to the top with balloons, all the while dodging spikes, bats, dragons, and more!
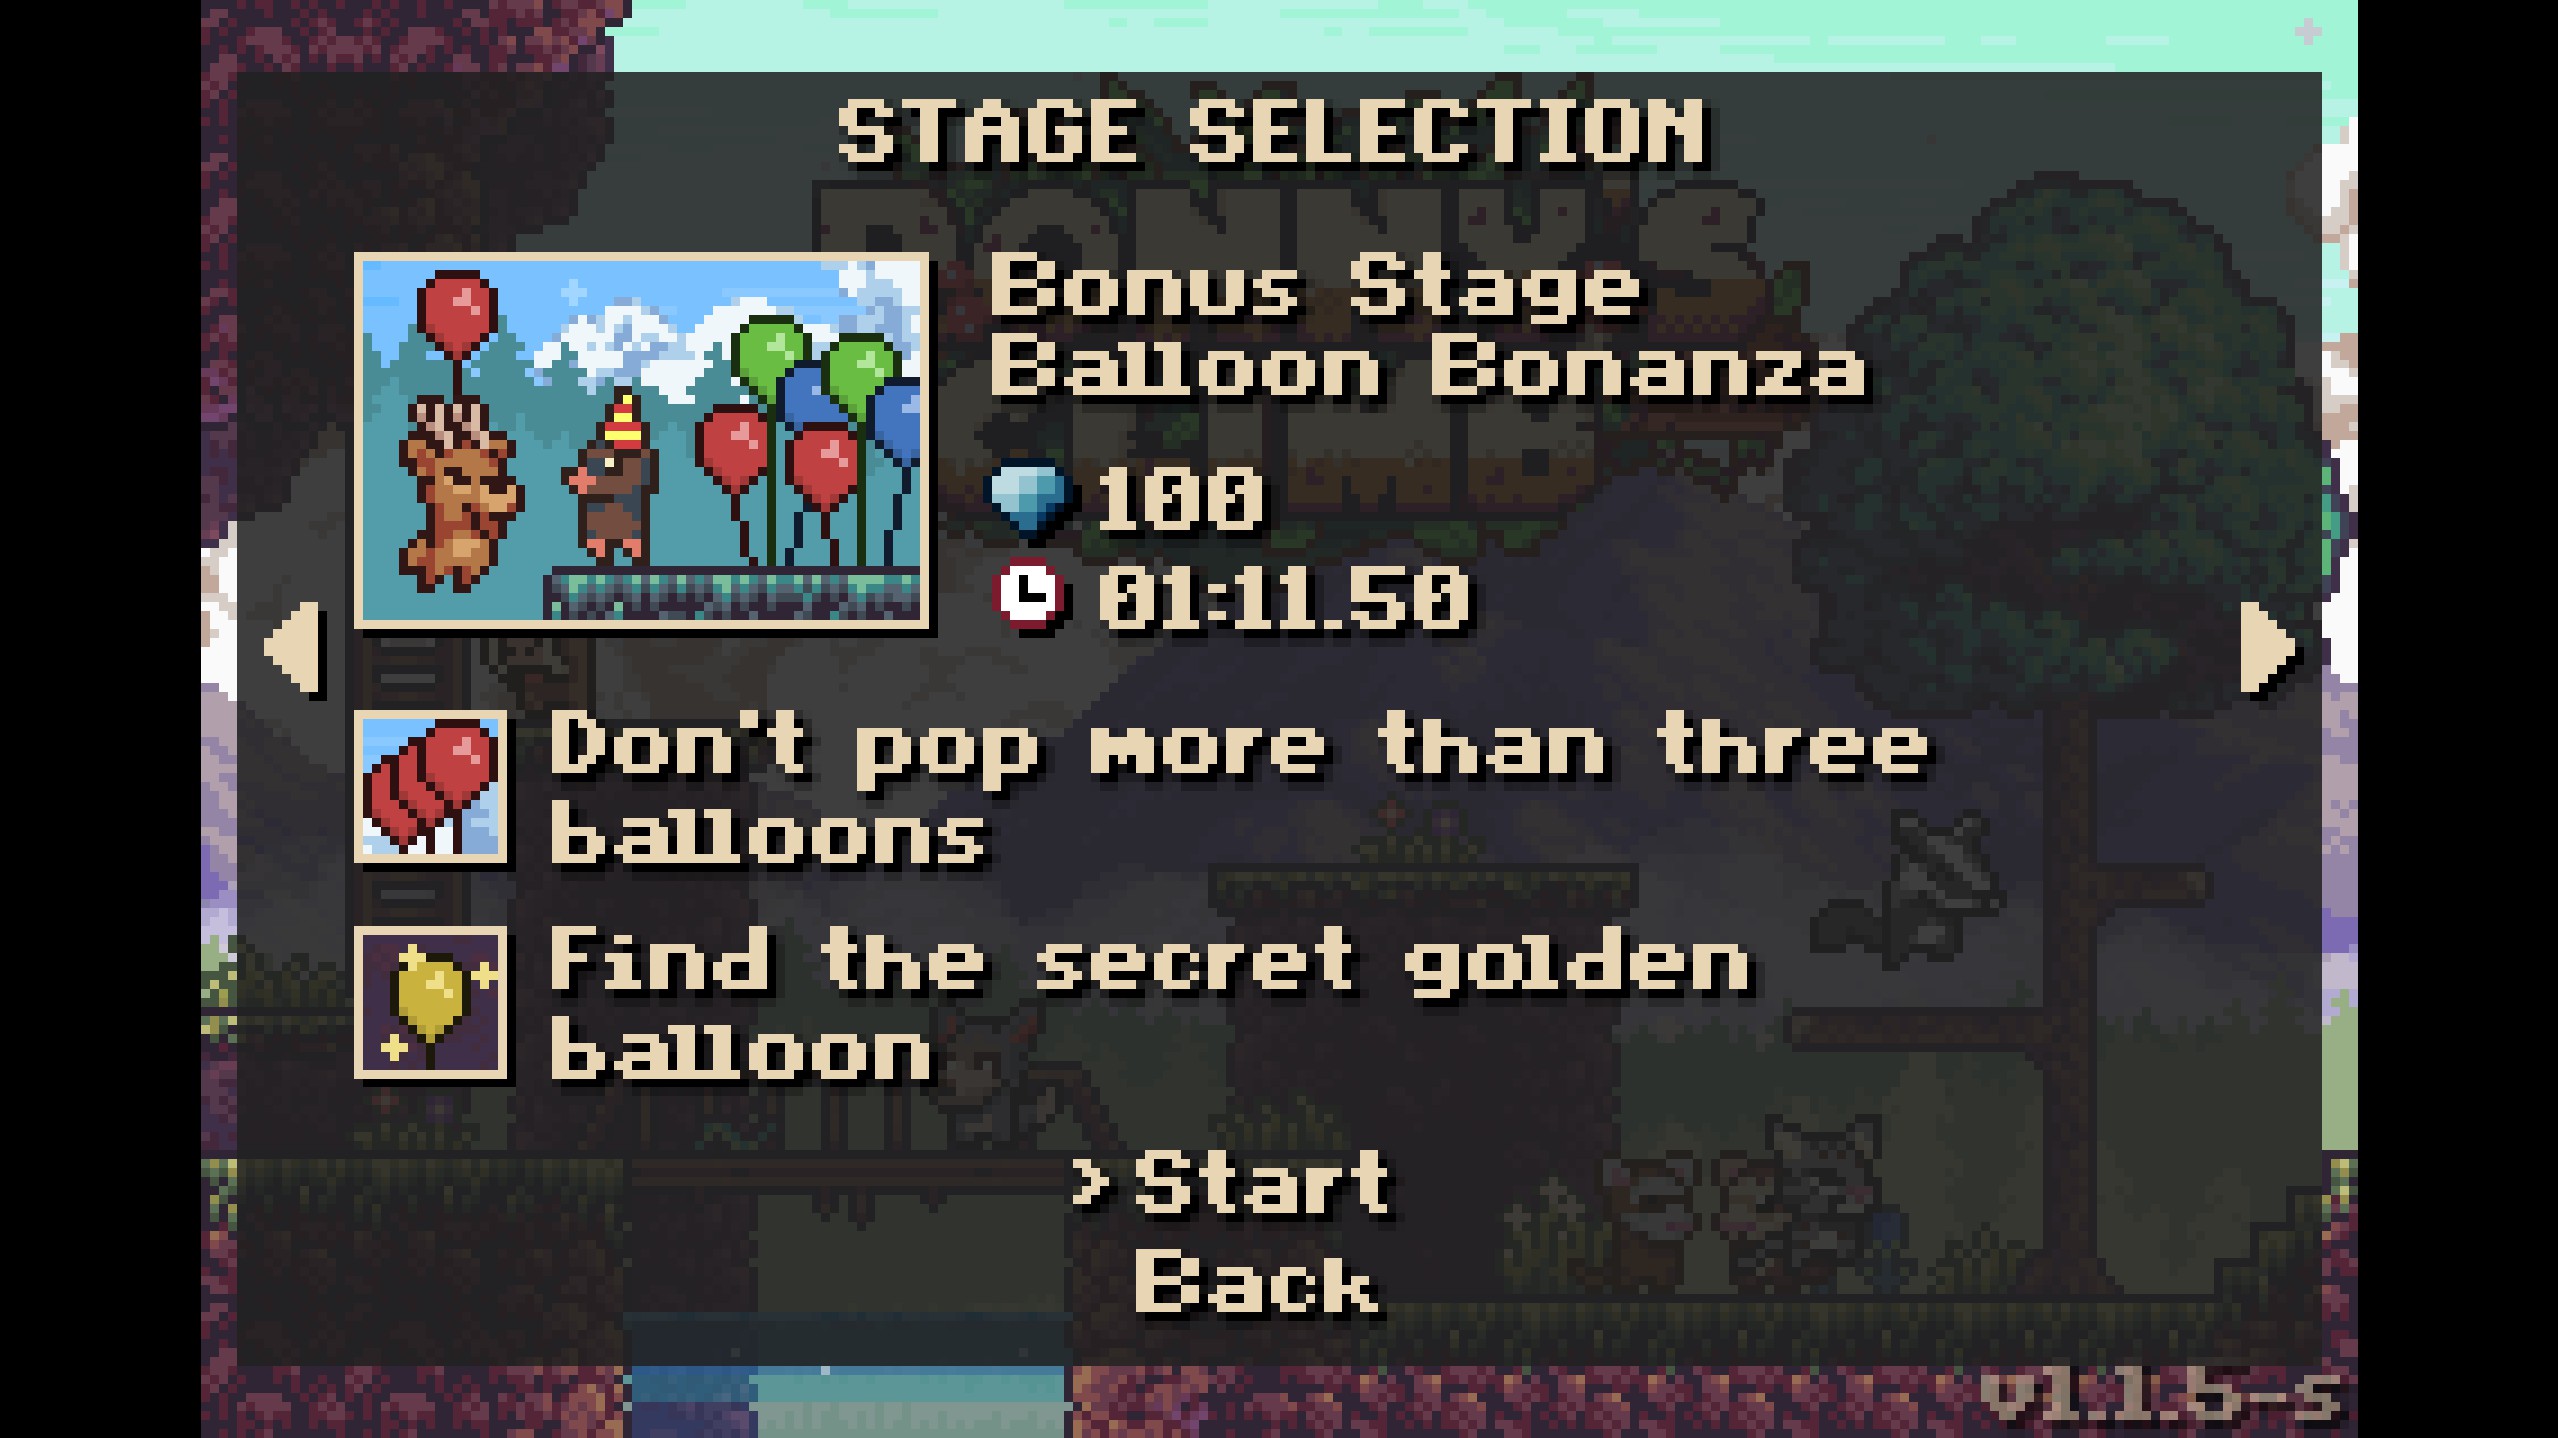
Unlocking
Balloon Bonanza is unlocked by inputting a secret code on the main menu! The code is found in The Summit. Progress all the way through the level until you reach the final section with the moving platforms and spikes just before the end.
If you're eagle-eyed, you'll notice that there's a single ground tile on the far right without any spikes on it! Simply jump from the tallest platform and dash over to reach it. From there, you'll fall through some fake ground down to a hidden area with a sign that contains the code.
Gaming nerds will recognize this sequence of inputs as the Konami Code, a famous cheat code first popularized by Konami in many of their releases, starting with Gradius for the NES in 1985!
Gems
- Gems 1-3
- The first three gems in Balloon Bonanza can be easily collected over a bed of spikes at the start!

- The first three gems in Balloon Bonanza can be easily collected over a bed of spikes at the start!
- Gems 4-6
- Make your way right past the bridge and collect three more gems floating over another bed of spikes! Try falling and dashing from the taller left point so you don't get hit.
- Make your way right past the bridge and collect three more gems floating over another bed of spikes! Try falling and dashing from the taller left point so you don't get hit.
- Gems 7-10
- Jump up the tree and collect the four gems waiting for you at the top!
- Jump up the tree and collect the four gems waiting for you at the top!
- Gems 11-17
- Go left onto the platform with the balloon, but avoid it for now. Hop over the balloon and, instead, jump and dash to the left to get in the wind draft. From there, you can jump up to collect the group of four gems and then fall down the hole to get the other three!
- Go left onto the platform with the balloon, but avoid it for now. Hop over the balloon and, instead, jump and dash to the left to get in the wind draft. From there, you can jump up to collect the group of four gems and then fall down the hole to get the other three!
- Gems 18-21
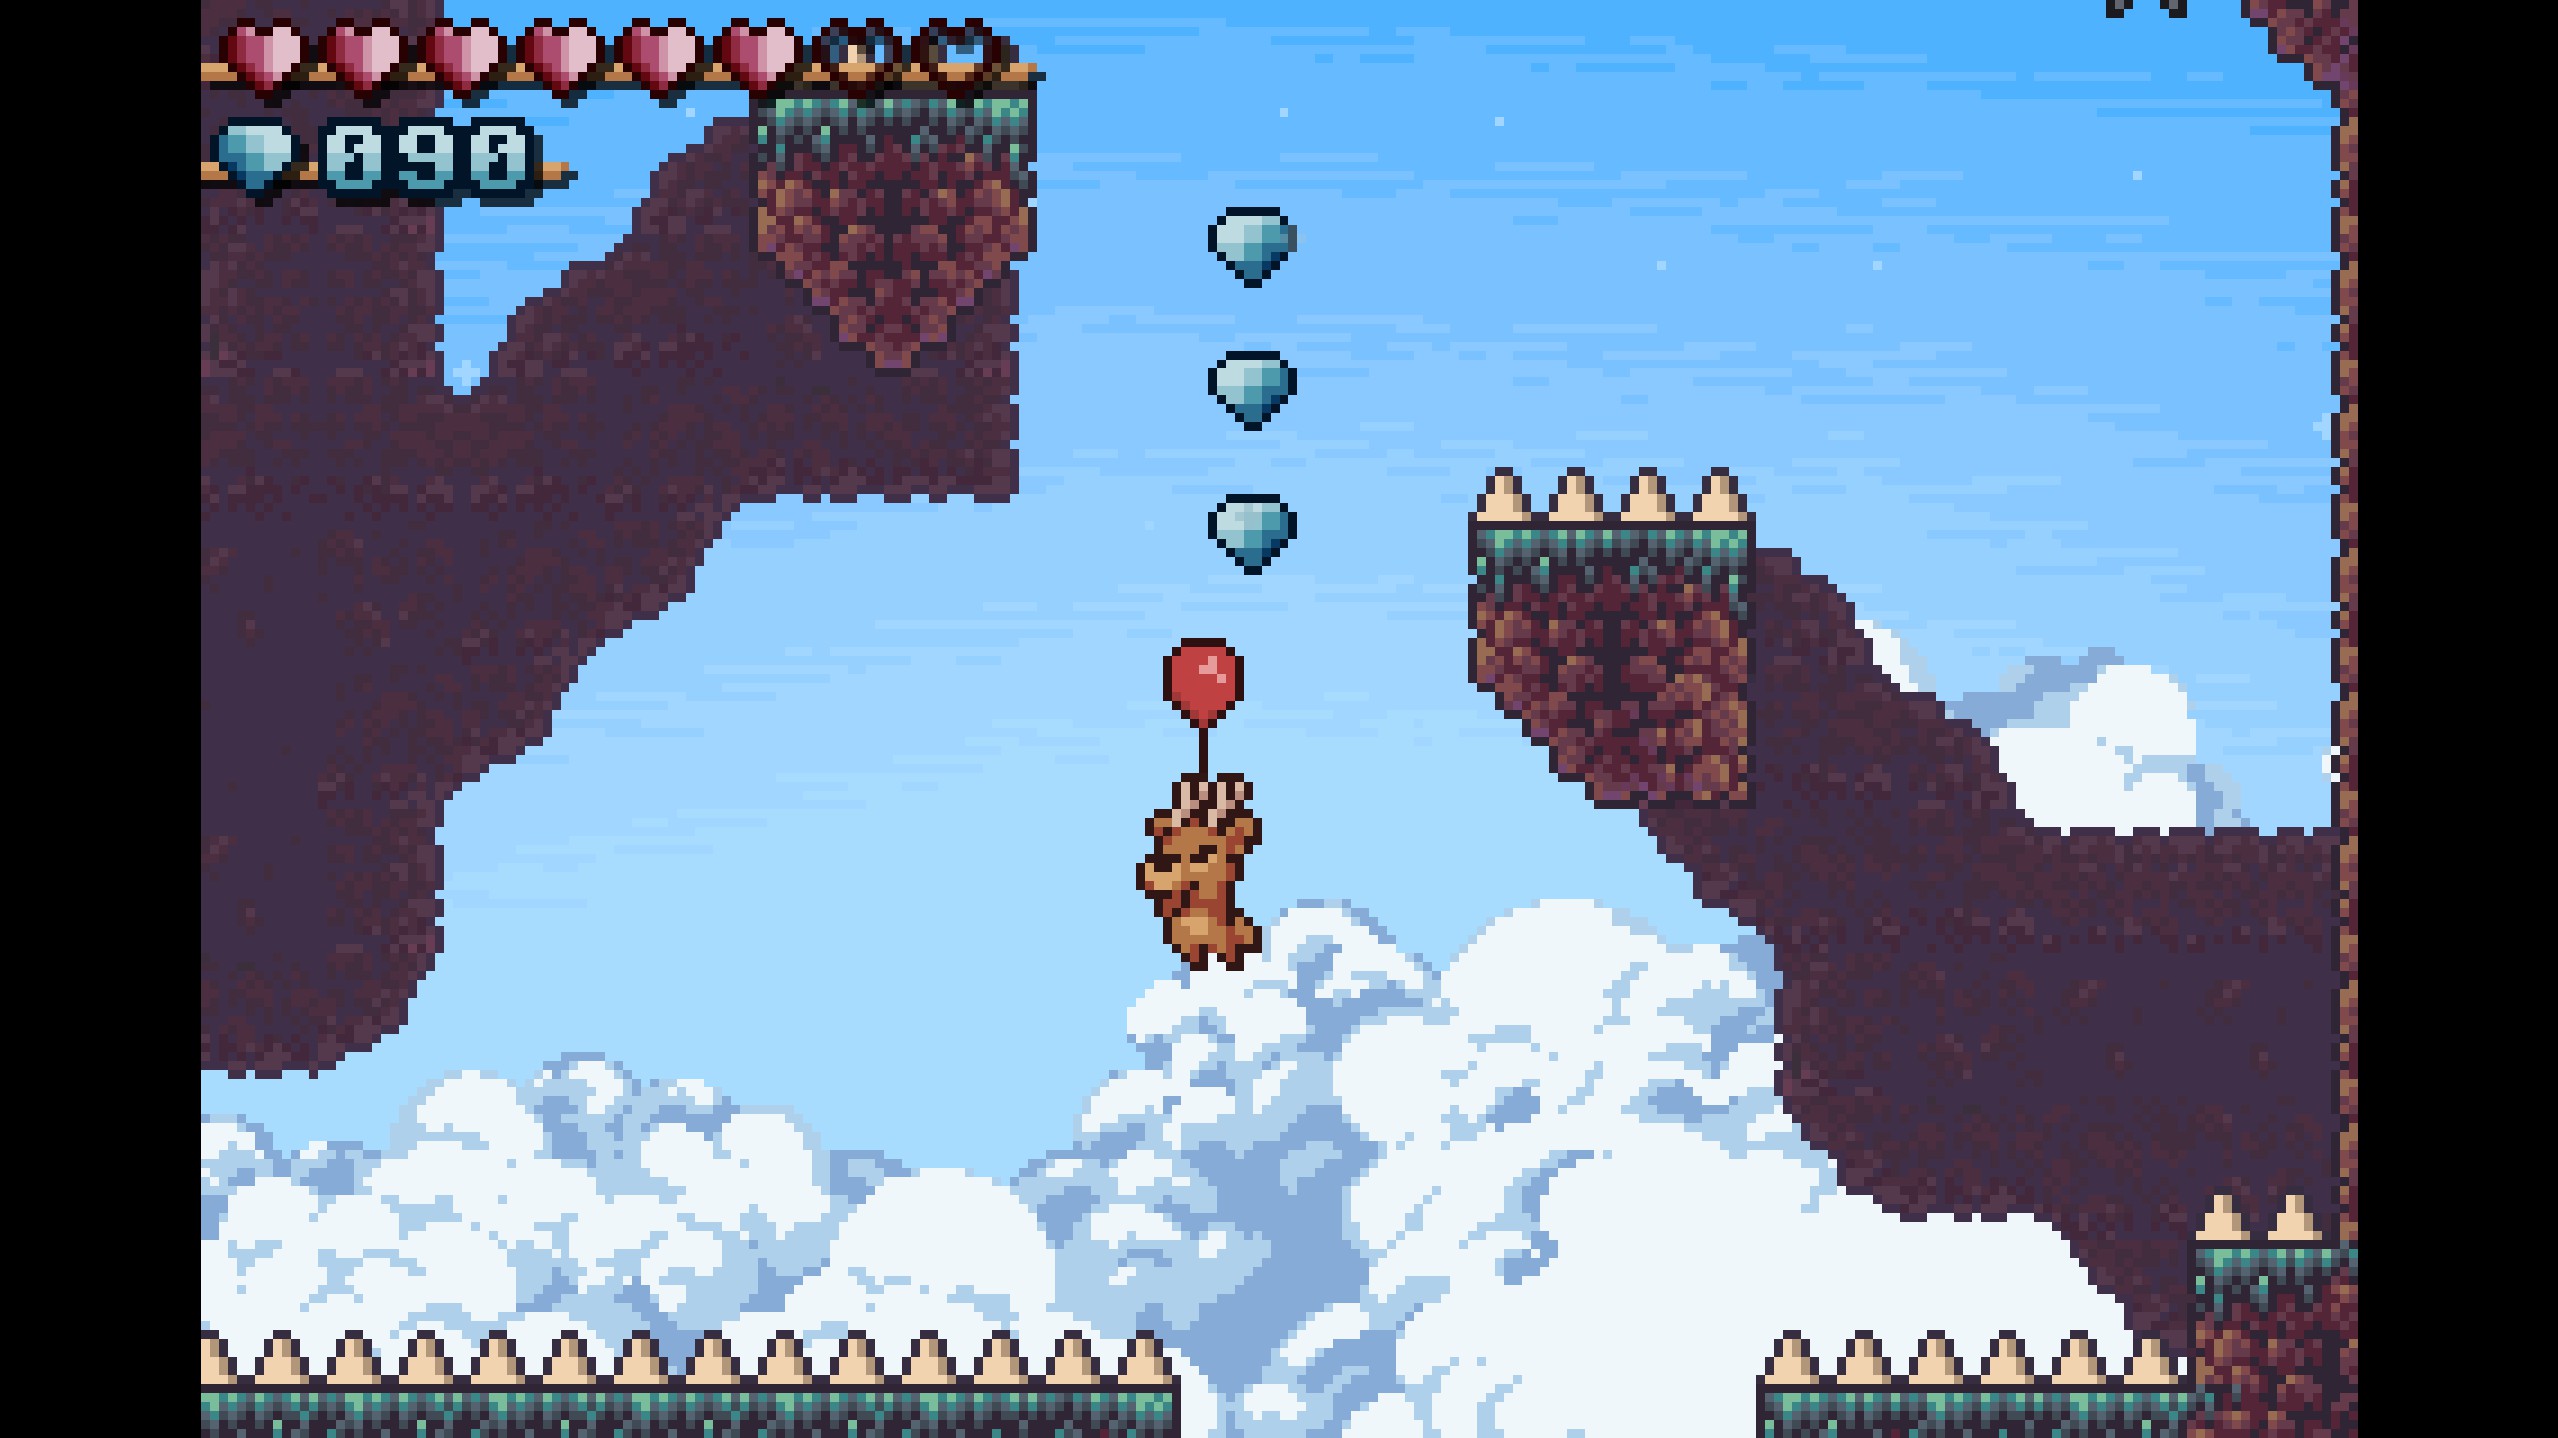
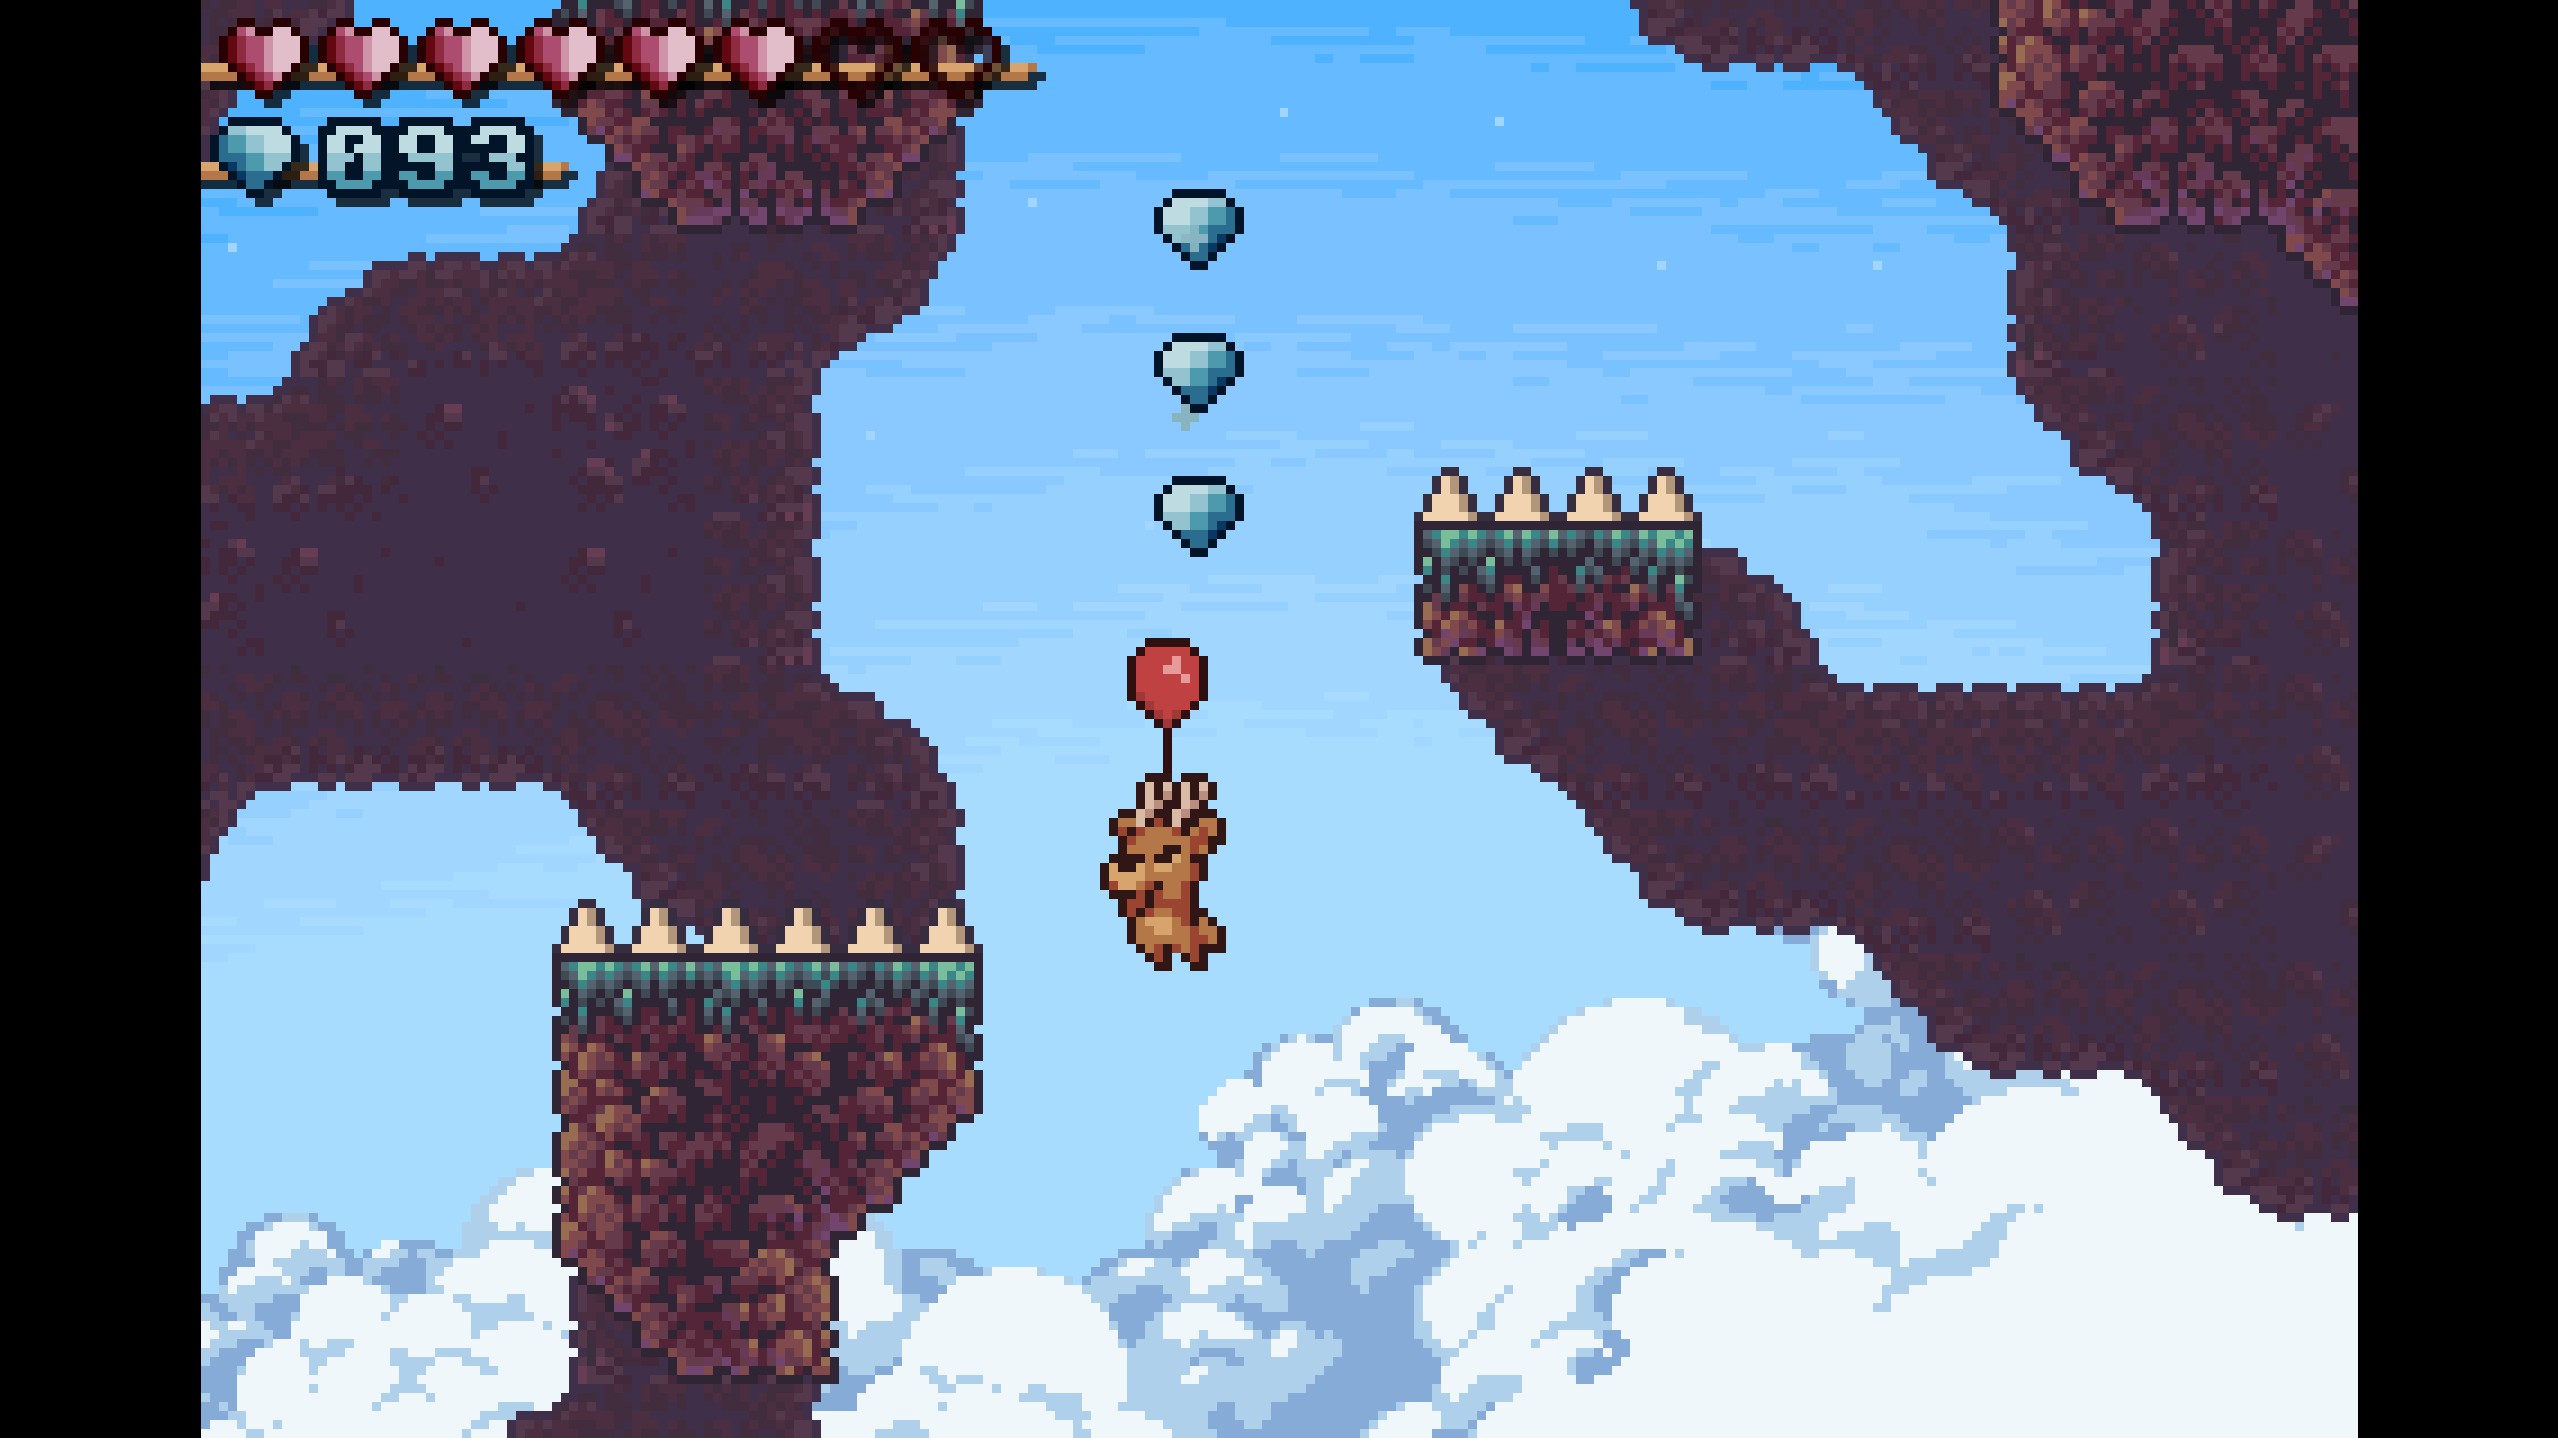
- Now go back to the balloon and collect it! You'll start floating upwards and can easily collect these 4 gems. A tip for the balloon gems: go slow by pressing the down key so you can concentrate and see the gems coming instead of being surprised and having little time to react.
- Now go back to the balloon and collect it! You'll start floating upwards and can easily collect these 4 gems. A tip for the balloon gems: go slow by pressing the down key so you can concentrate and see the gems coming instead of being surprised and having little time to react.
- Gems 22-25
- Keep floating upwards and collect these gems to the right!
- Keep floating upwards and collect these gems to the right!
- Gems 26-29
- Immediately after collecting gems 22-25, go right. You'll pass through a fake wall and can the collect the gems!
- Immediately after collecting gems 22-25, go right. You'll pass through a fake wall and can the collect the gems!
- Gems 30-35
- Upon reaching the ceiling, your balloon will pop, but there's still more gems to collect below! To the left, just below the ledge with the directional sign, there is a hidden wall that contains a bunch of gems. You can reach it with a skillful jump and dash, or, if you need, you can fall back down and get another balloon.
- Upon reaching the ceiling, your balloon will pop, but there's still more gems to collect below! To the left, just below the ledge with the directional sign, there is a hidden wall that contains a bunch of gems. You can reach it with a skillful jump and dash, or, if you need, you can fall back down and get another balloon.
- Gems 36-40
- Head left past the first checkpoint and onto the moving platforms. Carefully make your way left to the bottommost platform and collect the gems!
- Head left past the first checkpoint and onto the moving platforms. Carefully make your way left to the bottommost platform and collect the gems!
- Gems 41-44
- Head to the tall right moving platform and jump off of it to reach the ledge with the gems!
- Head to the tall right moving platform and jump off of it to reach the ledge with the gems!
- Gems 45-57
- Continue upwards to the area with the second balloon. Instead of collecting it, head right and jump across the hanging ladders to collect three gems. Then, head up the wind draft to collect seven more! Lastly, ground pound through the breakable blocks at the top to collect an additional three!

- Continue upwards to the area with the second balloon. Instead of collecting it, head right and jump across the hanging ladders to collect three gems. Then, head up the wind draft to collect seven more! Lastly, ground pound through the breakable blocks at the top to collect an additional three!
- Gems 58-60
- Go back to the balloon, collect it, and immediately float over to the left to collect the gems!
- Go back to the balloon, collect it, and immediately float over to the left to collect the gems!
- Gems 61-63
- Continue floating upwards and dodge the dragons' fireballs to collect three more gems!
- Continue floating upwards and dodge the dragons' fireballs to collect three more gems!
- Gems 64-66
- Continue up past the dragons and float over to the right to collect the gems!
- Continue up past the dragons and float over to the right to collect the gems!
- Gems 67-73
- Continue upwards and, at the top, your balloon will pop. Push down the stone that's next to the bridge and jump off of it to get the first three gems. Then, drop down below the bottommost wind draft and jump up under the bottommost bridge using the jump mushroom to grab the other four!
- Continue upwards and, at the top, your balloon will pop. Push down the stone that's next to the bridge and jump off of it to get the first three gems. Then, drop down below the bottommost wind draft and jump up under the bottommost bridge using the jump mushroom to grab the other four!
- Gems 74-77
- Now, push the stone all the way to the right and jump and dash off it towards the right. You'll pass through a fake wall and collect the gems hidden inside!
- Now, push the stone all the way to the right and jump and dash off it towards the right. You'll pass through a fake wall and collect the gems hidden inside!
- Gems 78-87
- Drop back down the bottommost wind draft and head to the right. You'll reach an area with spikes, a moving platform, a tree, and plenty of gems!
- Drop back down the bottommost wind draft and head to the right. You'll reach an area with spikes, a moving platform, a tree, and plenty of gems!
- Gems 88-90
- Head back up, pass the second checkpoint, and grab the balloon. Once you begin floating up, collect these three gems over to the right!
- Head back up, pass the second checkpoint, and grab the balloon. Once you begin floating up, collect these three gems over to the right!
- Gems 91-93
- Continue floating up and scoot over to the left to collect these three gems. Watch out for those annoying bats!
- Continue floating up and scoot over to the left to collect these three gems. Watch out for those annoying bats!
- Gems 94-96
- Continue floating up and scoot over even more to the left to collect these three gems!
- Continue floating up and scoot over even more to the left to collect these three gems!
- Gems 97-100
- Keep floating up and pass by the last two dragons to collect the final four gems of Balloon Bonanza! Congrats!

- Keep floating up and pass by the last two dragons to collect the final four gems of Balloon Bonanza! Congrats!
Threading the Needle Badge
The Threading the Needle badge is earned by beating Balloon Bonanza without popping more than three balloons. Since there are three separate balloon sections in the stage, which all conclude with you being forced to pop your balloon, you can not make ANY mistakes! My best advice for this badge is just to take it slow and steady.
Hidden High Above Badge
The Hidden High Above badge is earned by finding the secret golden balloon in Balloon Bonanza! The golden balloon is found at the end of the second of the three balloon sections. Float all the way up to where you would normally pop your balloon on the ceiling, but then head right immediately, towards the rightmost of the two indents in the ceiling, above where the stone spawns. You'll pass through a fake wall and enter a secret area!
Keep floating up, dodging the frog and the dragon you find there, to collect the golden balloon! Then, simply hop back down to the semisolid platform, head back down from there, and beat the level like normal!
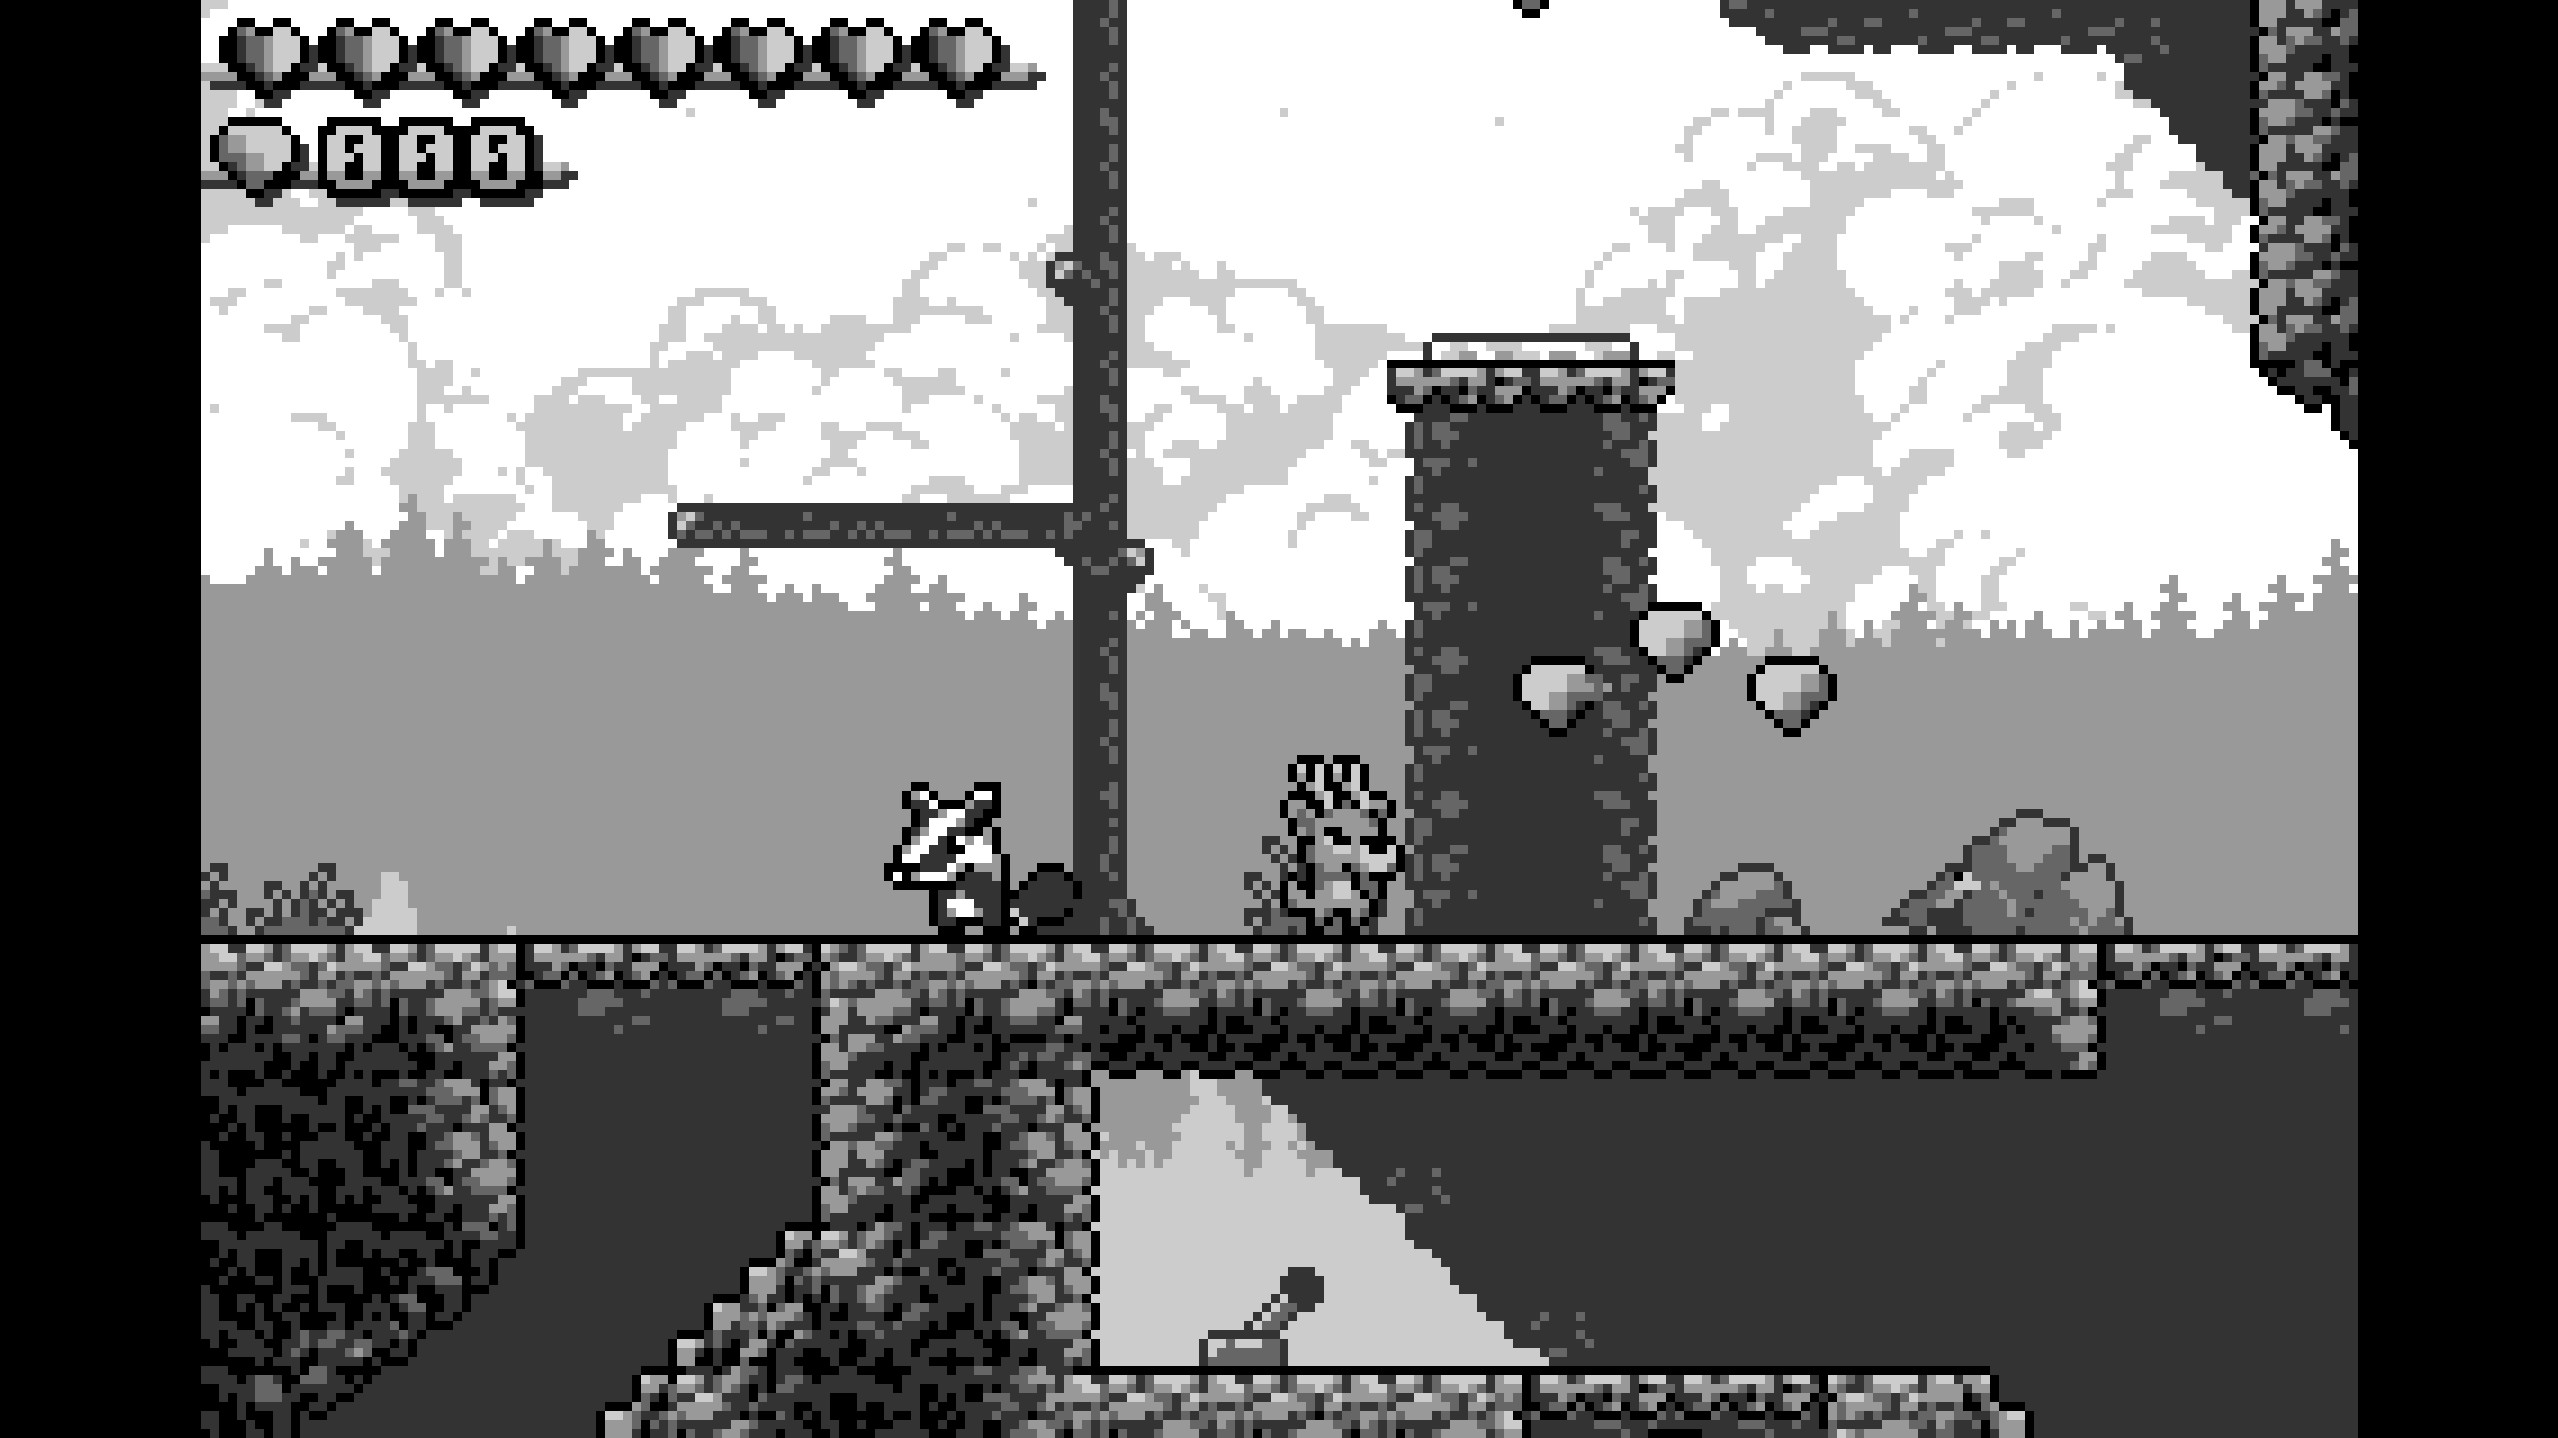
Retro Ridgeclimb
Retro Ridgeclimb is the second bonus stage in Ronny's Climb, added as part of the 1.1 update. The entire stage is black and white, meant to mimic the style of old Gameboy games!

Unlocking
Like with Balloon Bonanza, you need to input a code on the main menu to unlock the stage. This time, the code is hidden in Treetop Trails. Progress through the stage normally until you reach the the top of the castle, right before the end. You'll see a high-up ledge that to the right of the moving platform.
It looks impossible to jump up there, but worry not! Simply jump off of the semisolid platform and dash and you'll just barely make it over, past some fake walls that make the ledge look taller than it really is. Then, climb up the ladder and read the sign at the top to get the code!
Gems
- Gems 1-3
- Easily collect these three gems at the stage!
- Easily collect these three gems at the stage!
- Gems 4-7
- Head right and ground pound through the breakable rocks to enter the cave section. Bounce left off the jump mushroom to collect the gems!
- Head right and ground pound through the breakable rocks to enter the cave section. Bounce left off the jump mushroom to collect the gems!
- Gems 8-10
- Climb across the two hanging ladders to your right to collect the gems!
- Climb across the two hanging ladders to your right to collect the gems!
- Gems 11-21
- Climb down the hanging ladders and defeat the two dragons at the bottom on the floating landmass. To your right, there will be a bunch of breakable platforms. Stand on them to fall through and collect 7 of the gems! Make sure to dash before you fall into the spikes at the bottom! Then, jump right off the semisolid platforms at the bottom into a fake wall inside the floating landmass to collect the other 4 gems. (not pictured)
- Climb down the hanging ladders and defeat the two dragons at the bottom on the floating landmass. To your right, there will be a bunch of breakable platforms. Stand on them to fall through and collect 7 of the gems! Make sure to dash before you fall into the spikes at the bottom! Then, jump right off the semisolid platforms at the bottom into a fake wall inside the floating landmass to collect the other 4 gems. (not pictured)
- Gems 22-24
- Jump up the semisolid platforms and climb up the left hanging ladder. To your left are three gems floating above a bed of spikes. Be careful!
- Jump up the semisolid platforms and climb up the left hanging ladder. To your left are three gems floating above a bed of spikes. Be careful!
- Gems 25-28
- Head left of the semisolid platforms and jump across the one-tile-wide platforms. Each one has a gem floating above!
- Head left of the semisolid platforms and jump across the one-tile-wide platforms. Each one has a gem floating above!
- Gems 29-32
- After jumping across all of the one-tile-wide platforms, hop on the moving platform at the end with the help of the jump mushroom and ride it up to collect four more gems!
- After jumping across all of the one-tile-wide platforms, hop on the moving platform at the end with the help of the jump mushroom and ride it up to collect four more gems!
- Gems 33-40
- Jump off the moving platform and defeat the dragon. You'll reach an opening just below one of the levers! First, collect two of the gems floating below the jump mushroom. Then, jump onto the left ledge and collect four more gems hiding behind a fake wall there. Lastly, jump on the jump mushroom to collect the final two gems! Make sure to flick the lever once you're up there, too!
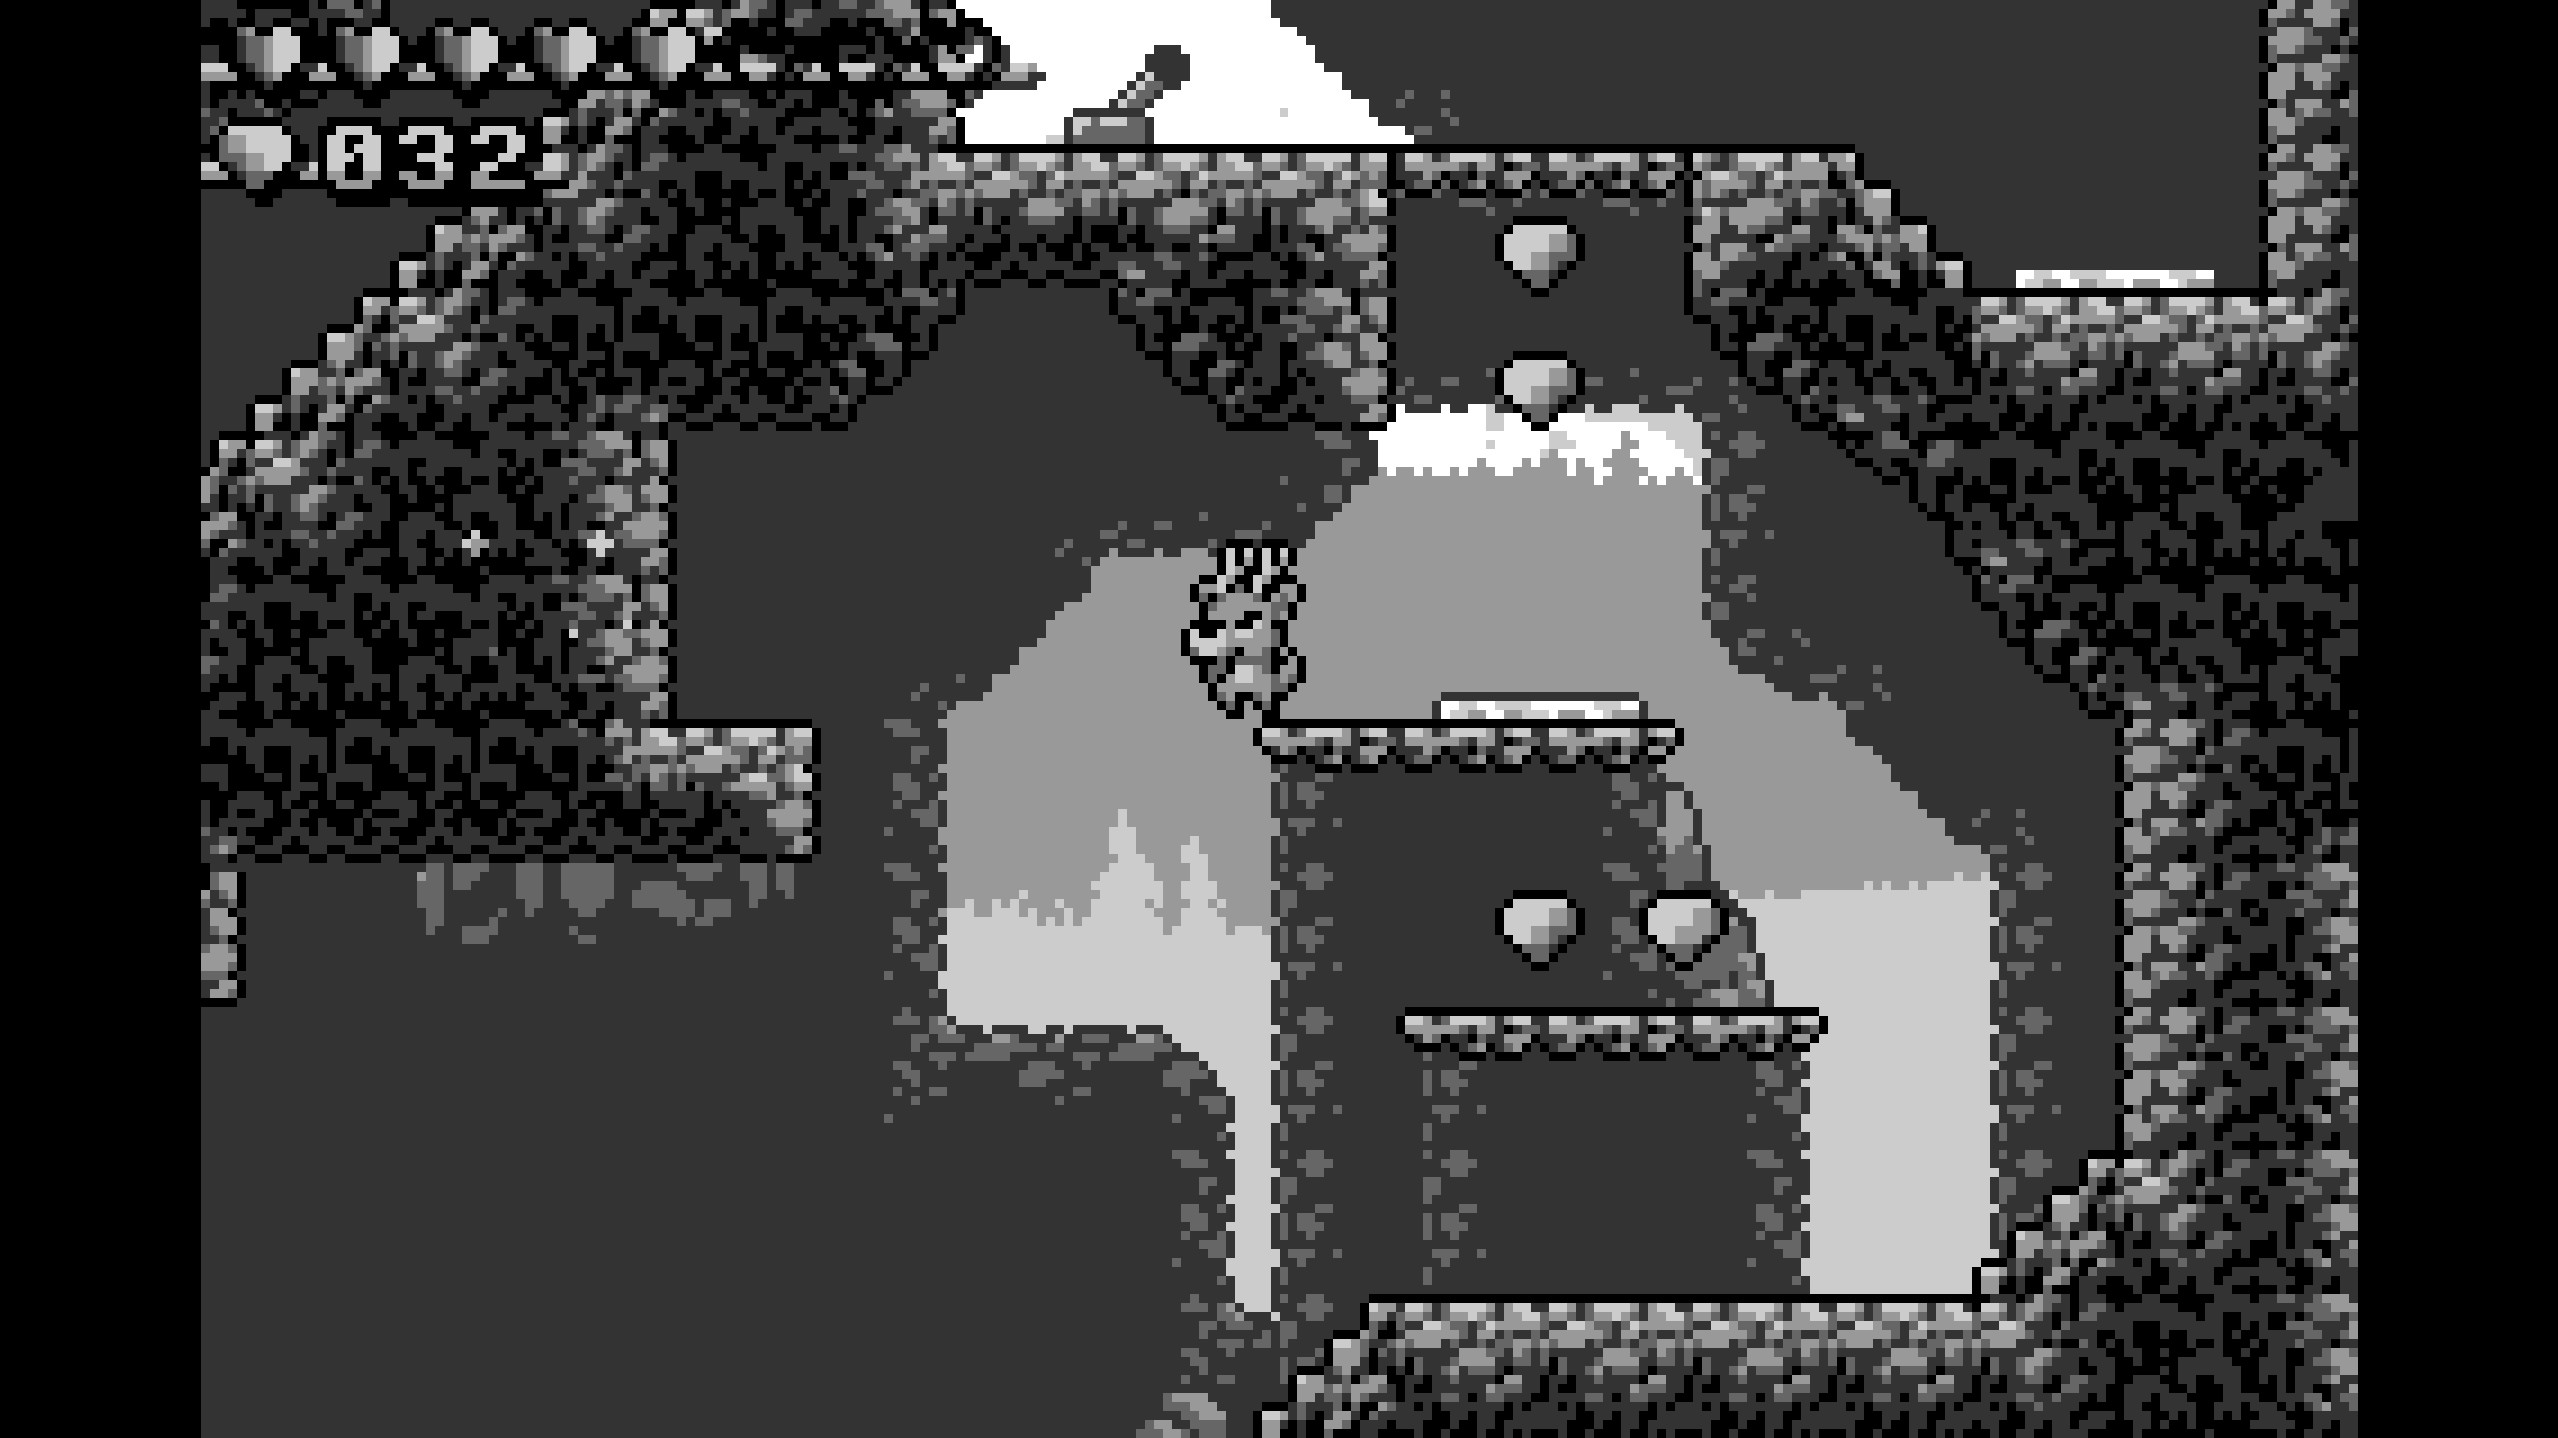
- Jump off the moving platform and defeat the dragon. You'll reach an opening just below one of the levers! First, collect two of the gems floating below the jump mushroom. Then, jump onto the left ledge and collect four more gems hiding behind a fake wall there. Lastly, jump on the jump mushroom to collect the final two gems! Make sure to flick the lever once you're up there, too!
- Gems 41-43
- Ride up to the bottom branch of the tree at the start using the newly-created wind draft. Jump on the jump mushroom to your right to collect the gems!
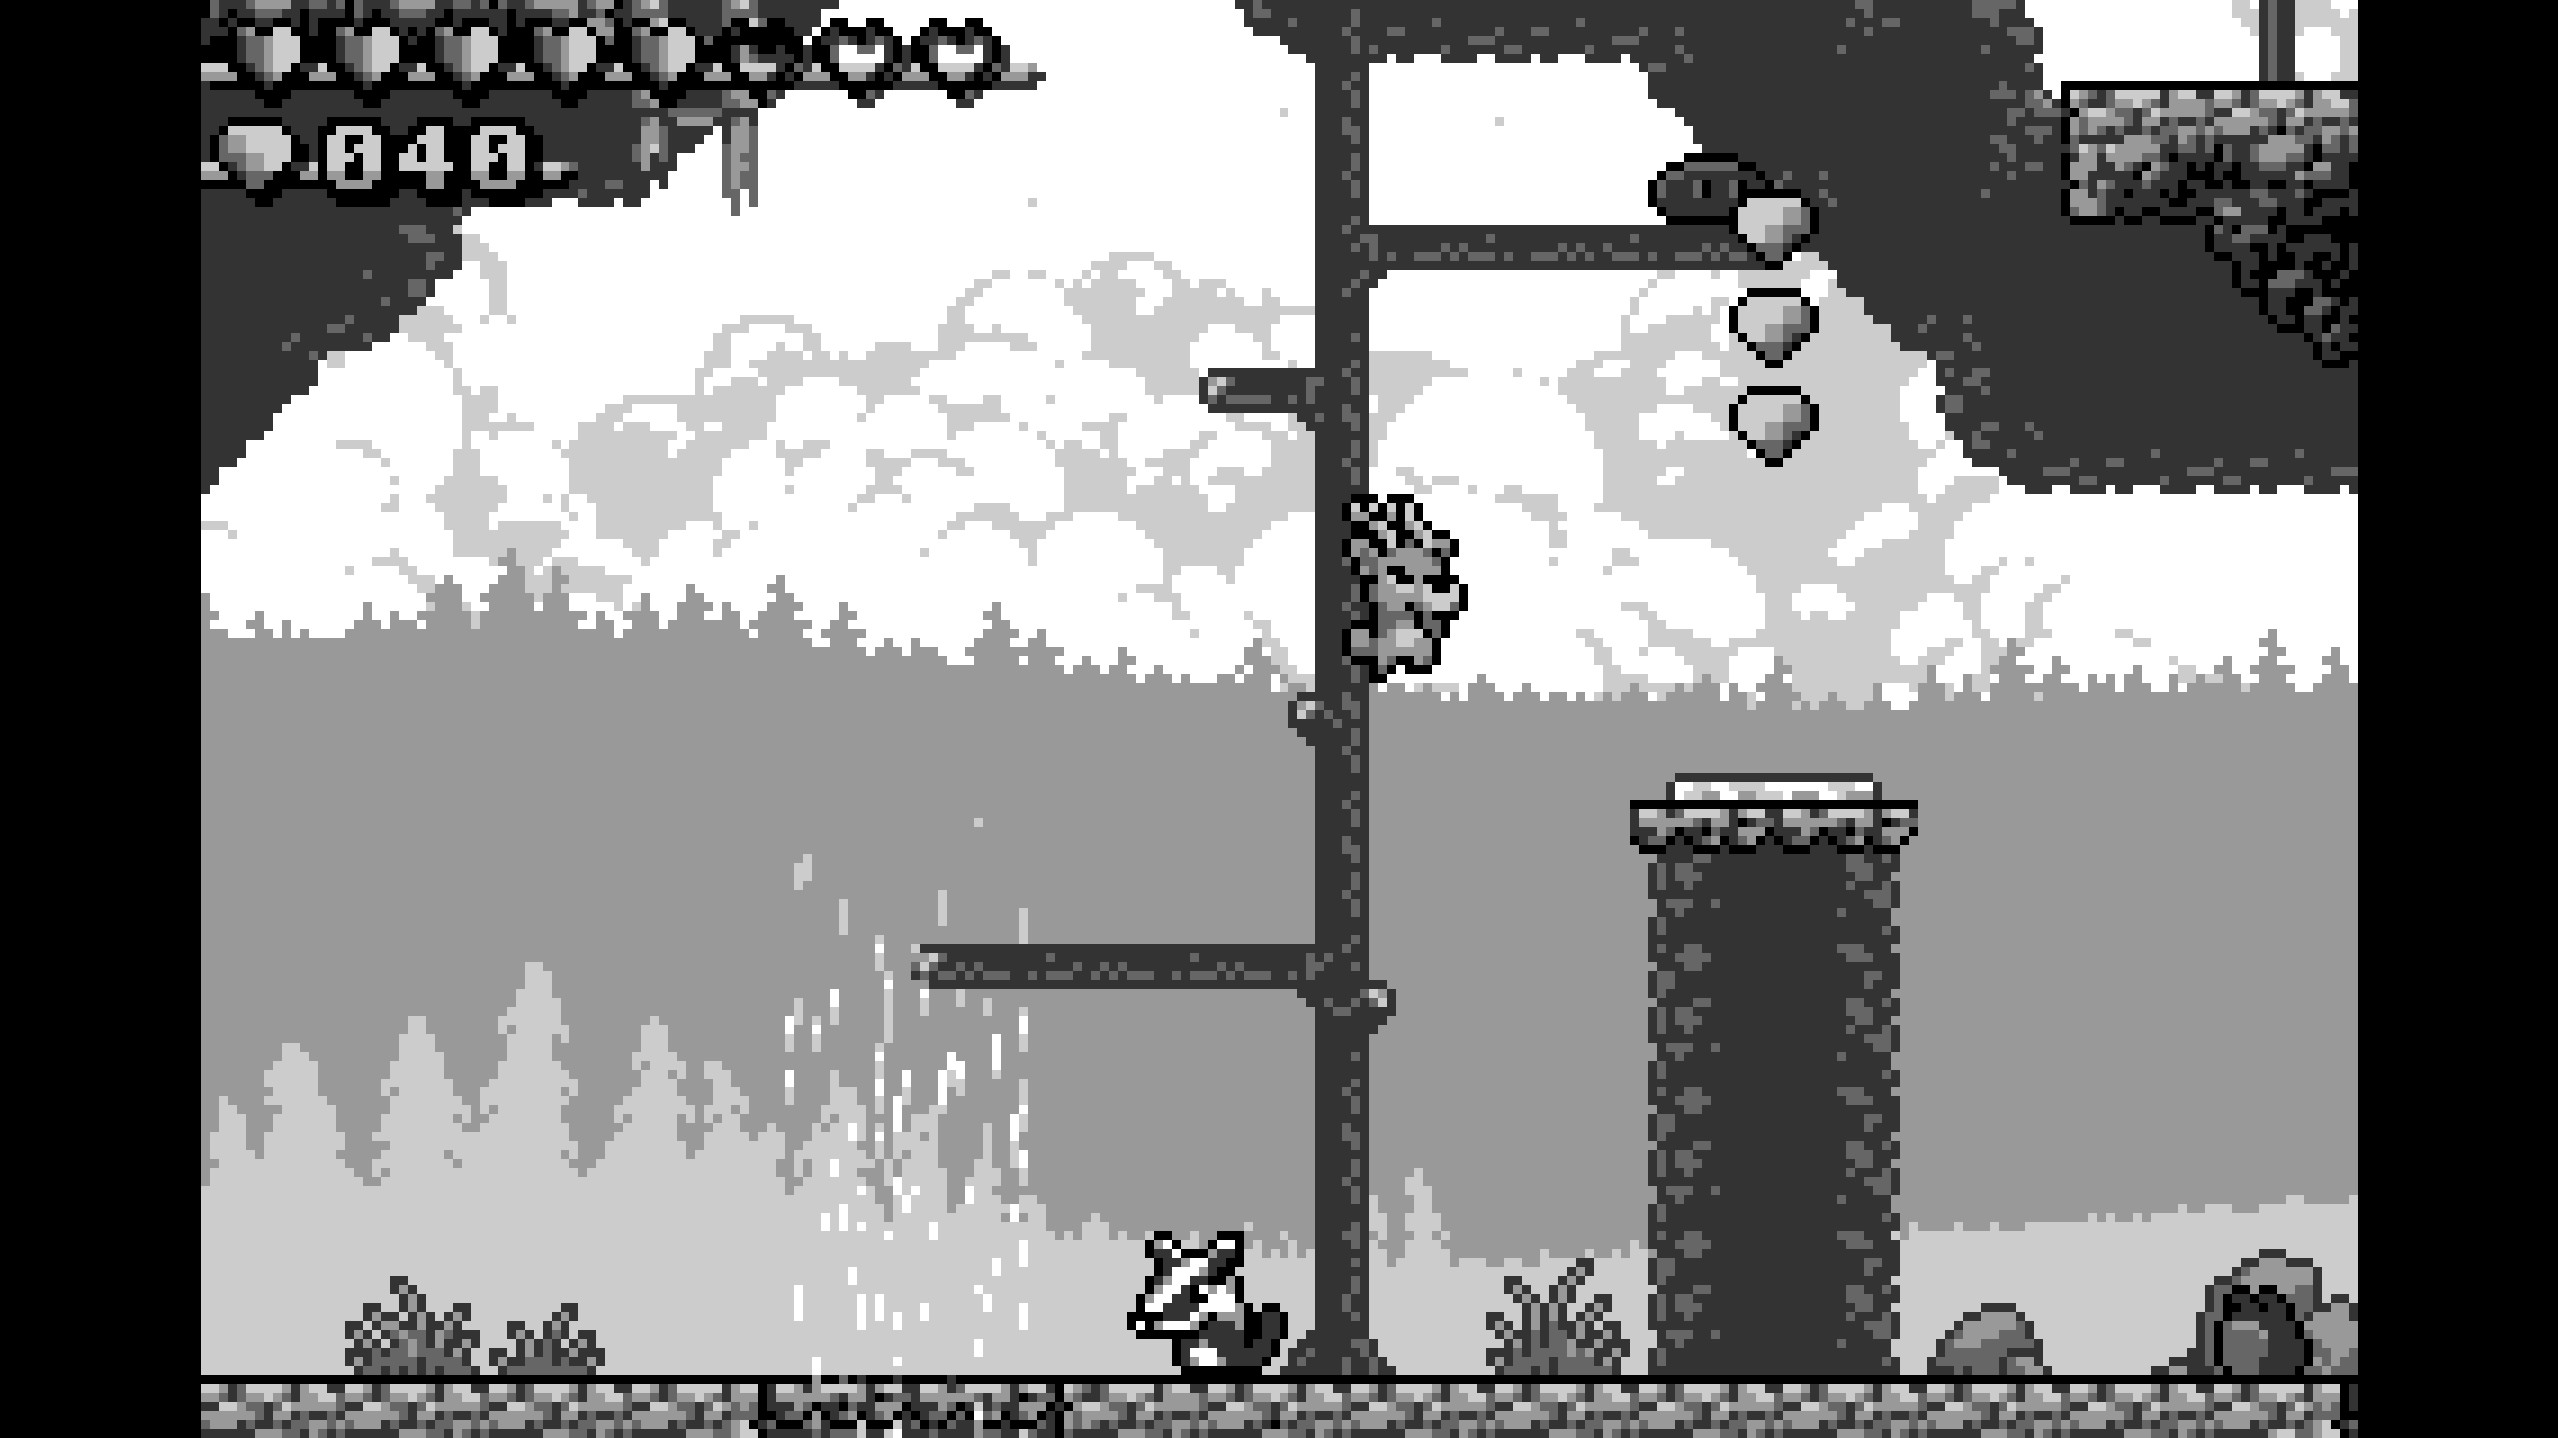
- Ride up to the bottom branch of the tree at the start using the newly-created wind draft. Jump on the jump mushroom to your right to collect the gems!
- Gems 44-46
- Continue upwards, grab the checkpoint, and collect the three gems on the slope beside it!
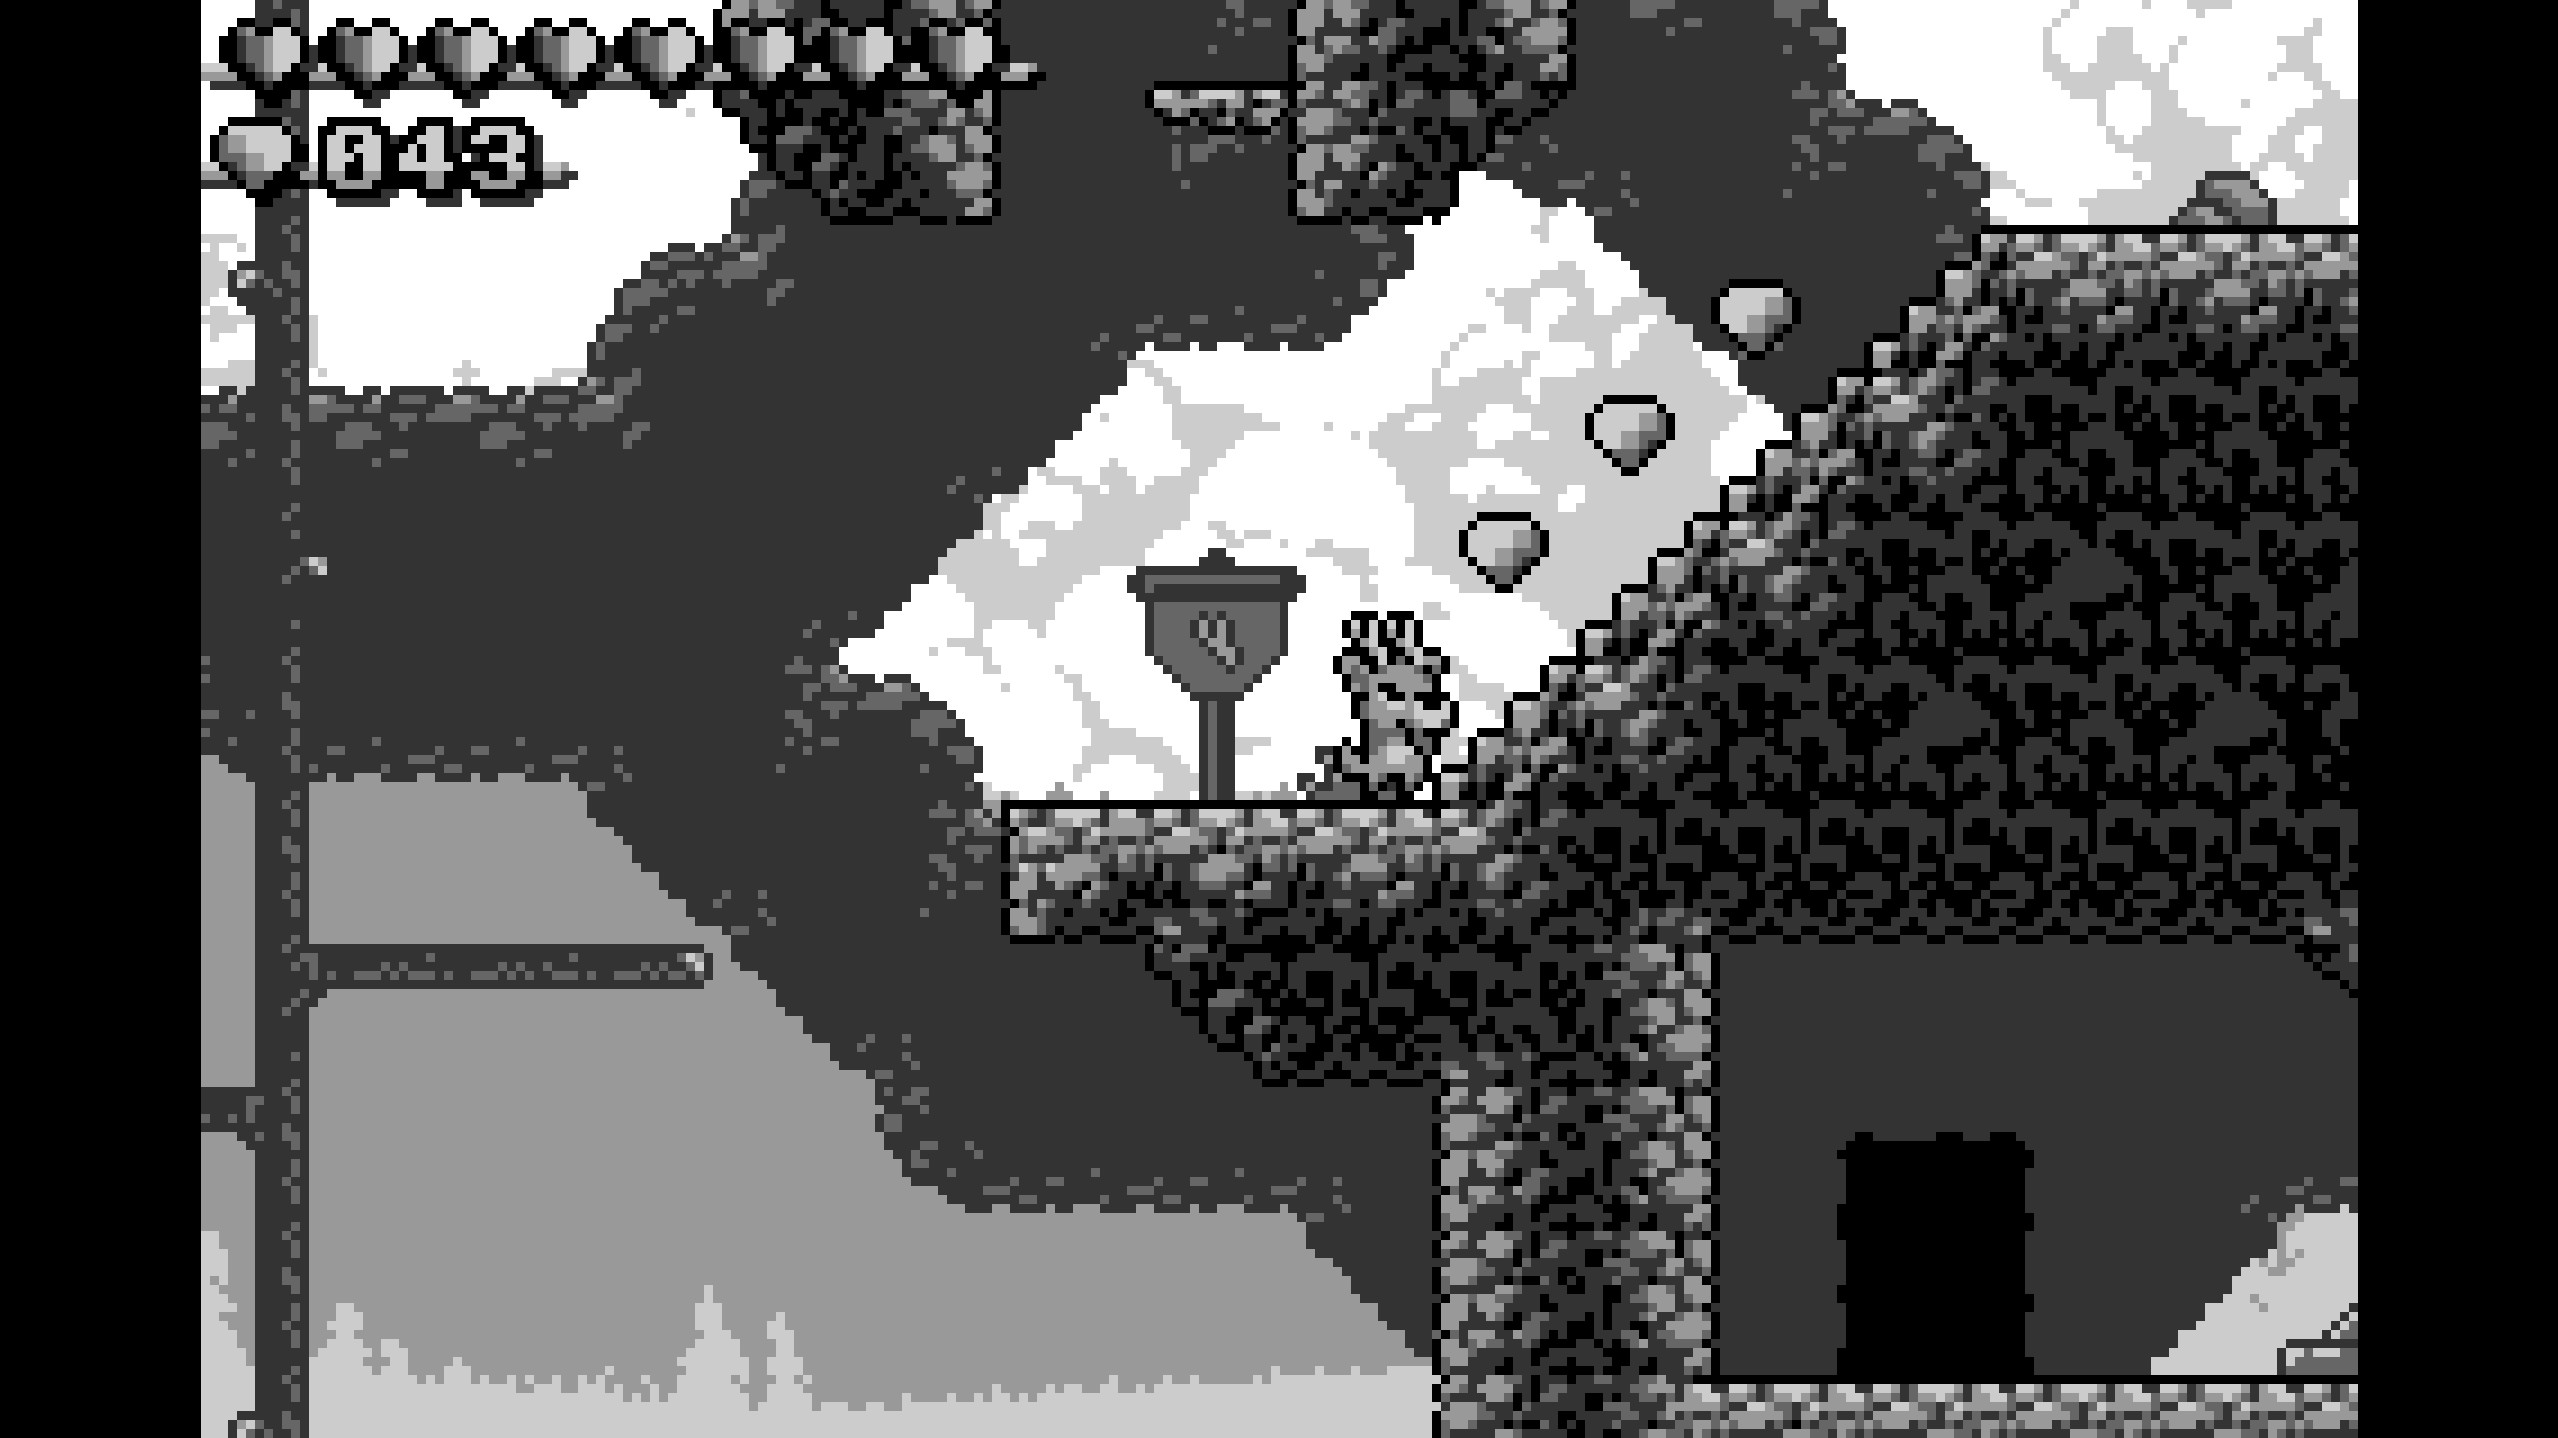
- Continue upwards, grab the checkpoint, and collect the three gems on the slope beside it!
- Gems 47-50
- Jump back onto the tree and jump over to the hanging ladder on the left. Continue upward, pausing when you reach the topmost tree branch. Jump to the left and you'll go past a fake wall hiding tons of gems!
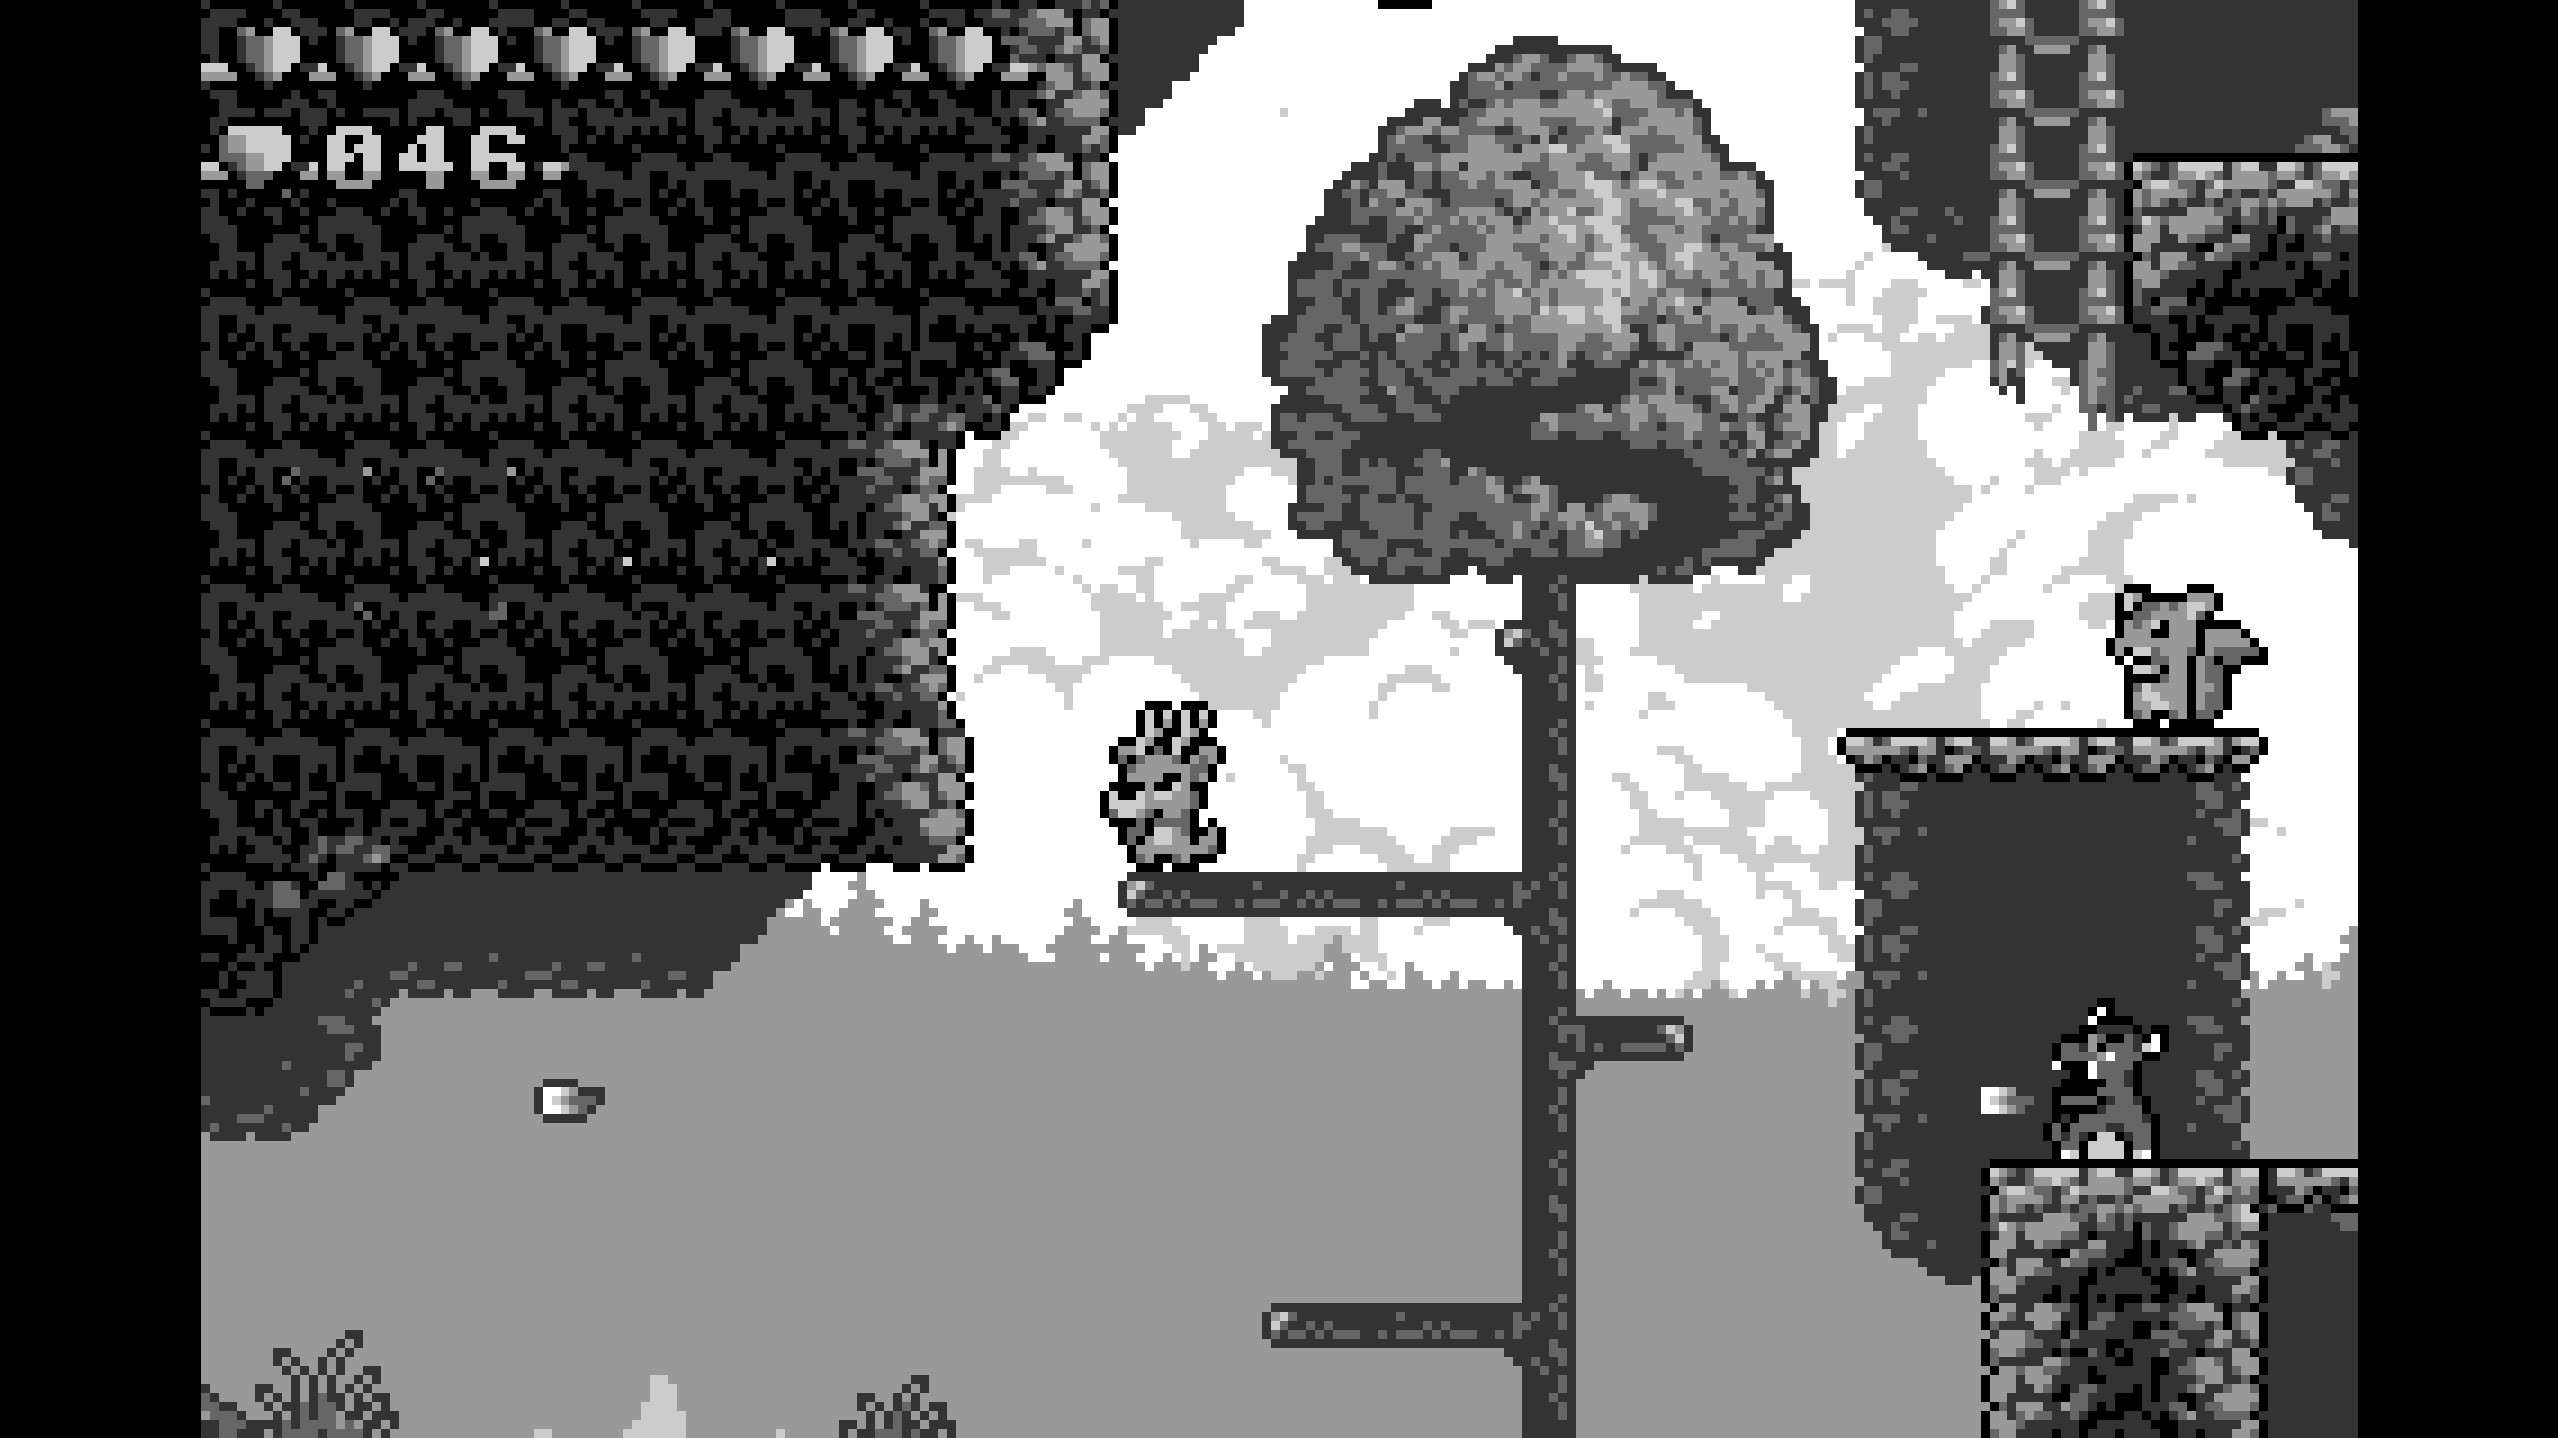
- Jump back onto the tree and jump over to the hanging ladder on the left. Continue upward, pausing when you reach the topmost tree branch. Jump to the left and you'll go past a fake wall hiding tons of gems!
- Gems 51-54
- Continue up past the squirrel and collect these easy gems hanging out on two moving platforms!
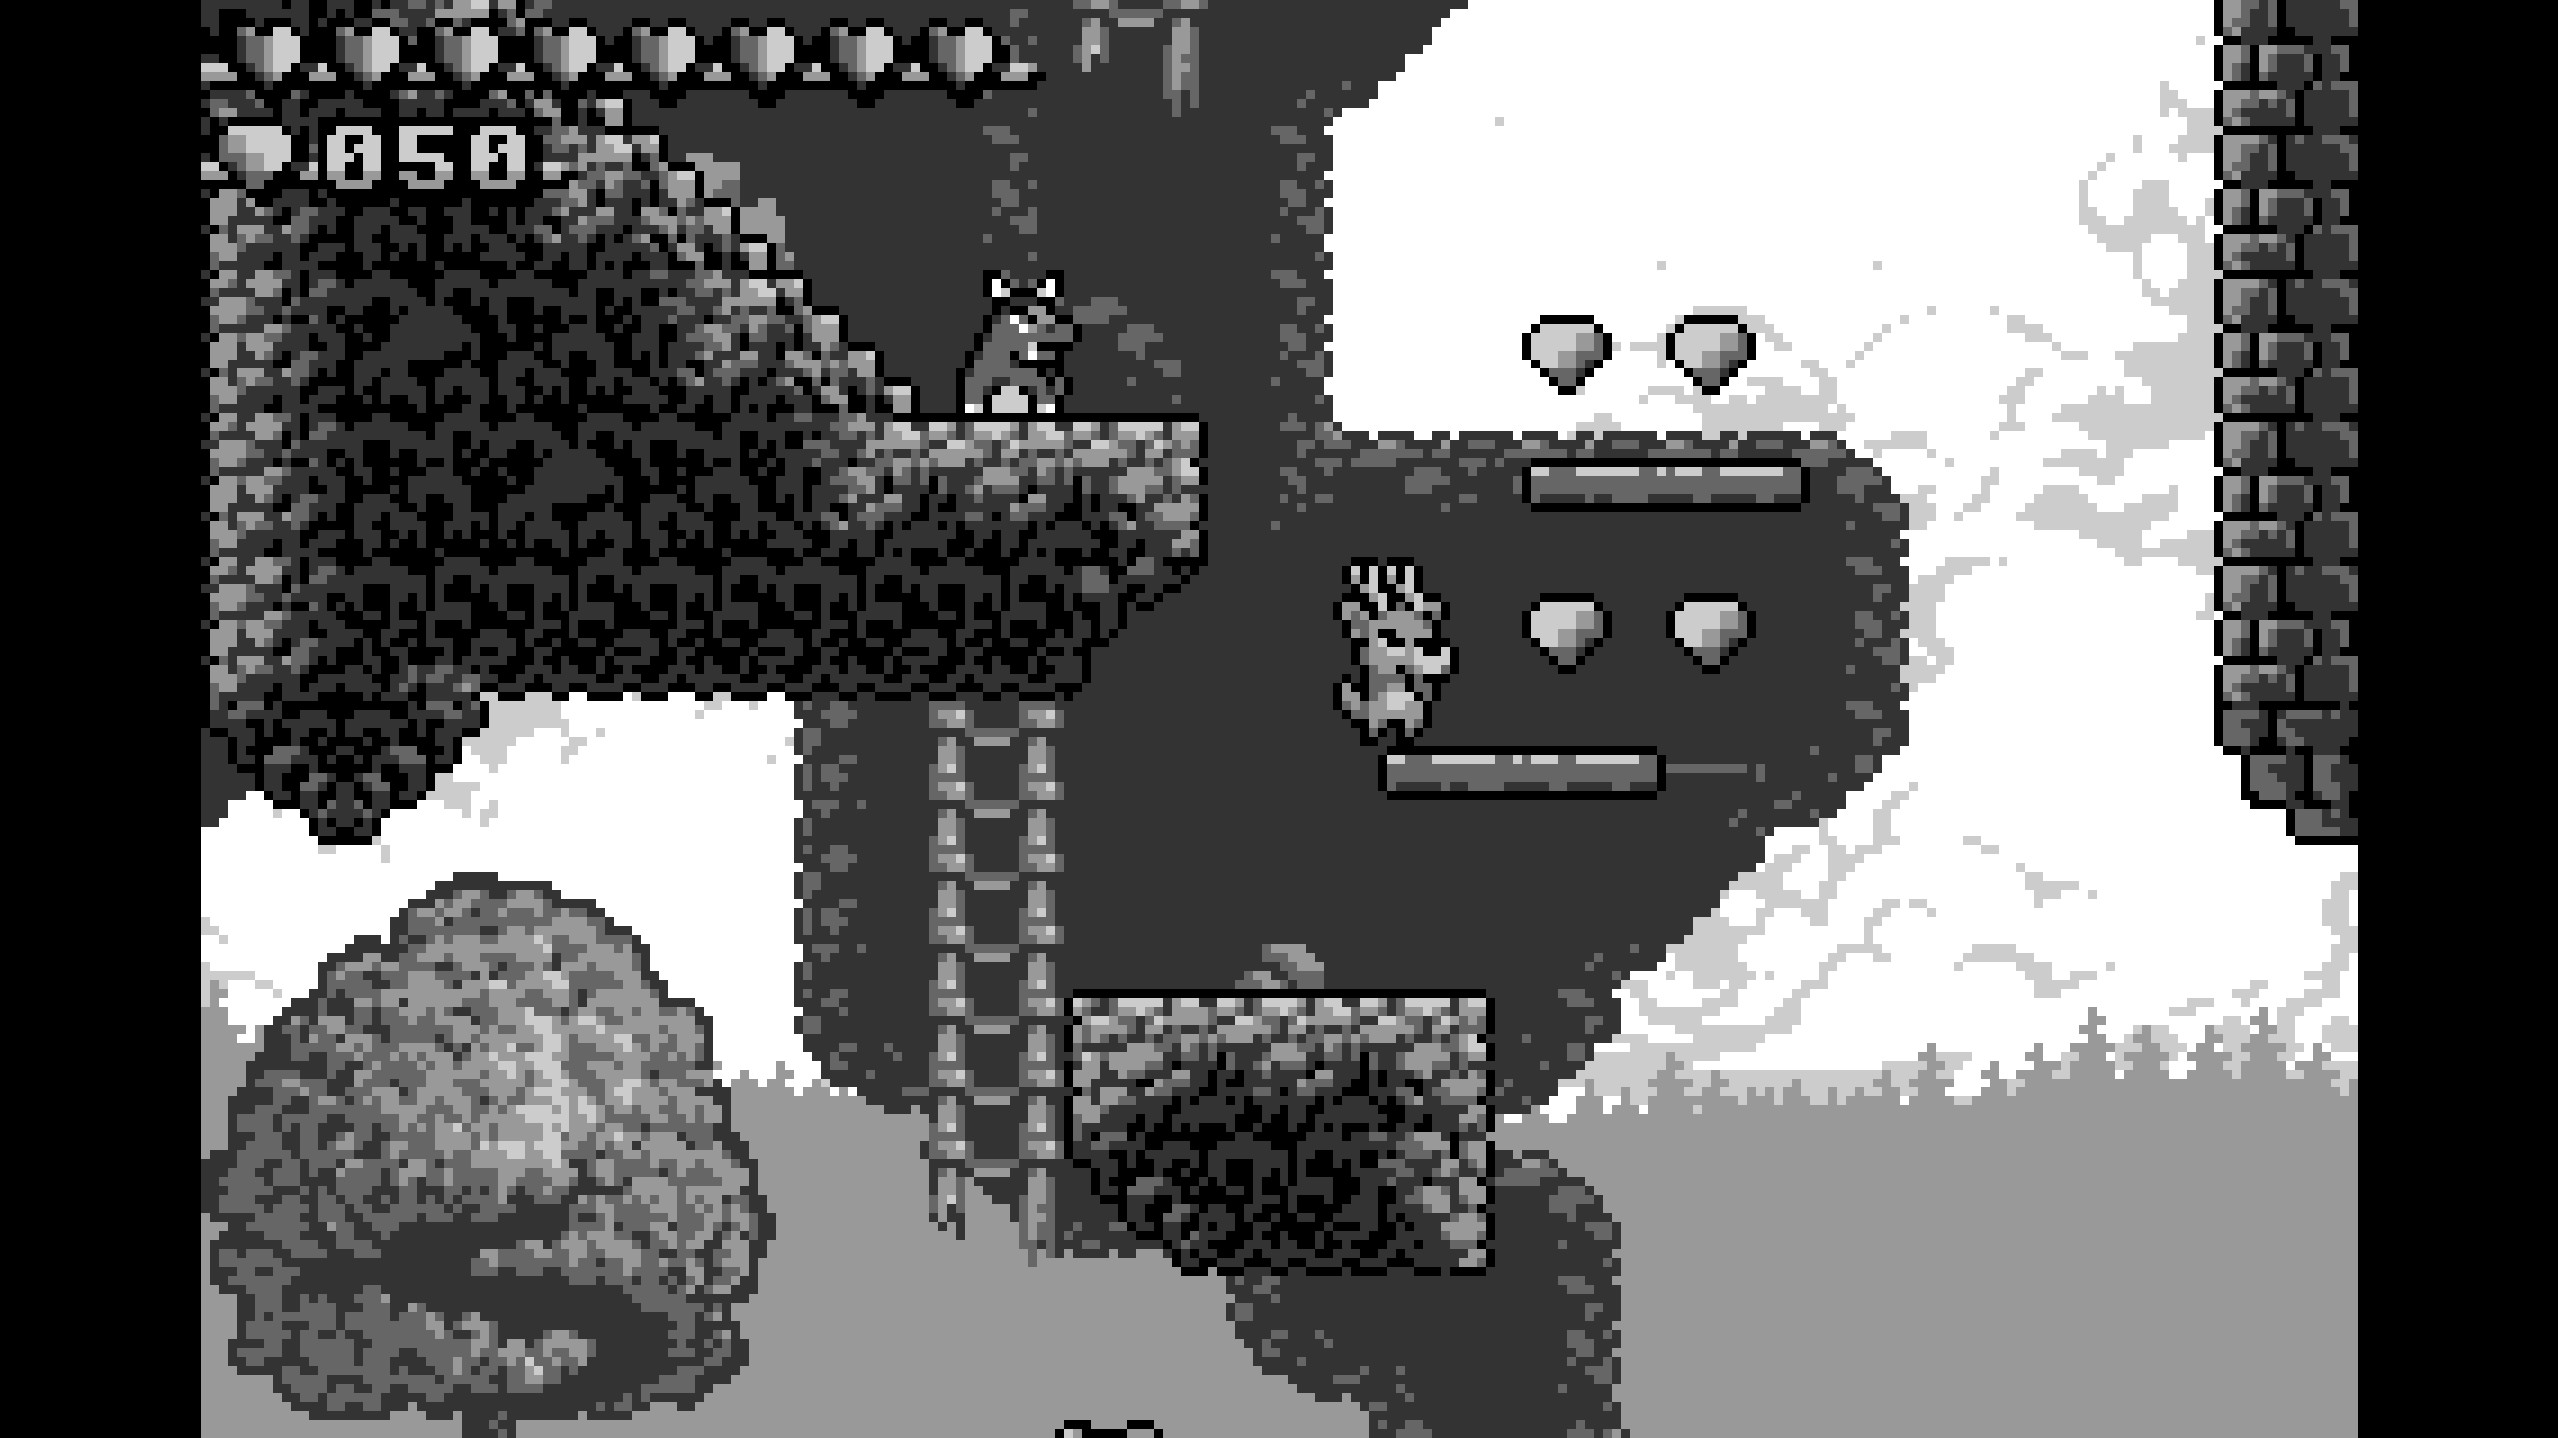
- Continue up past the squirrel and collect these easy gems hanging out on two moving platforms!
- Gems 55-61
- Continue past the moving platforms and head up the left slope. There you'll find a tree with a ton of slimes and also a ton of gems both on top and below!
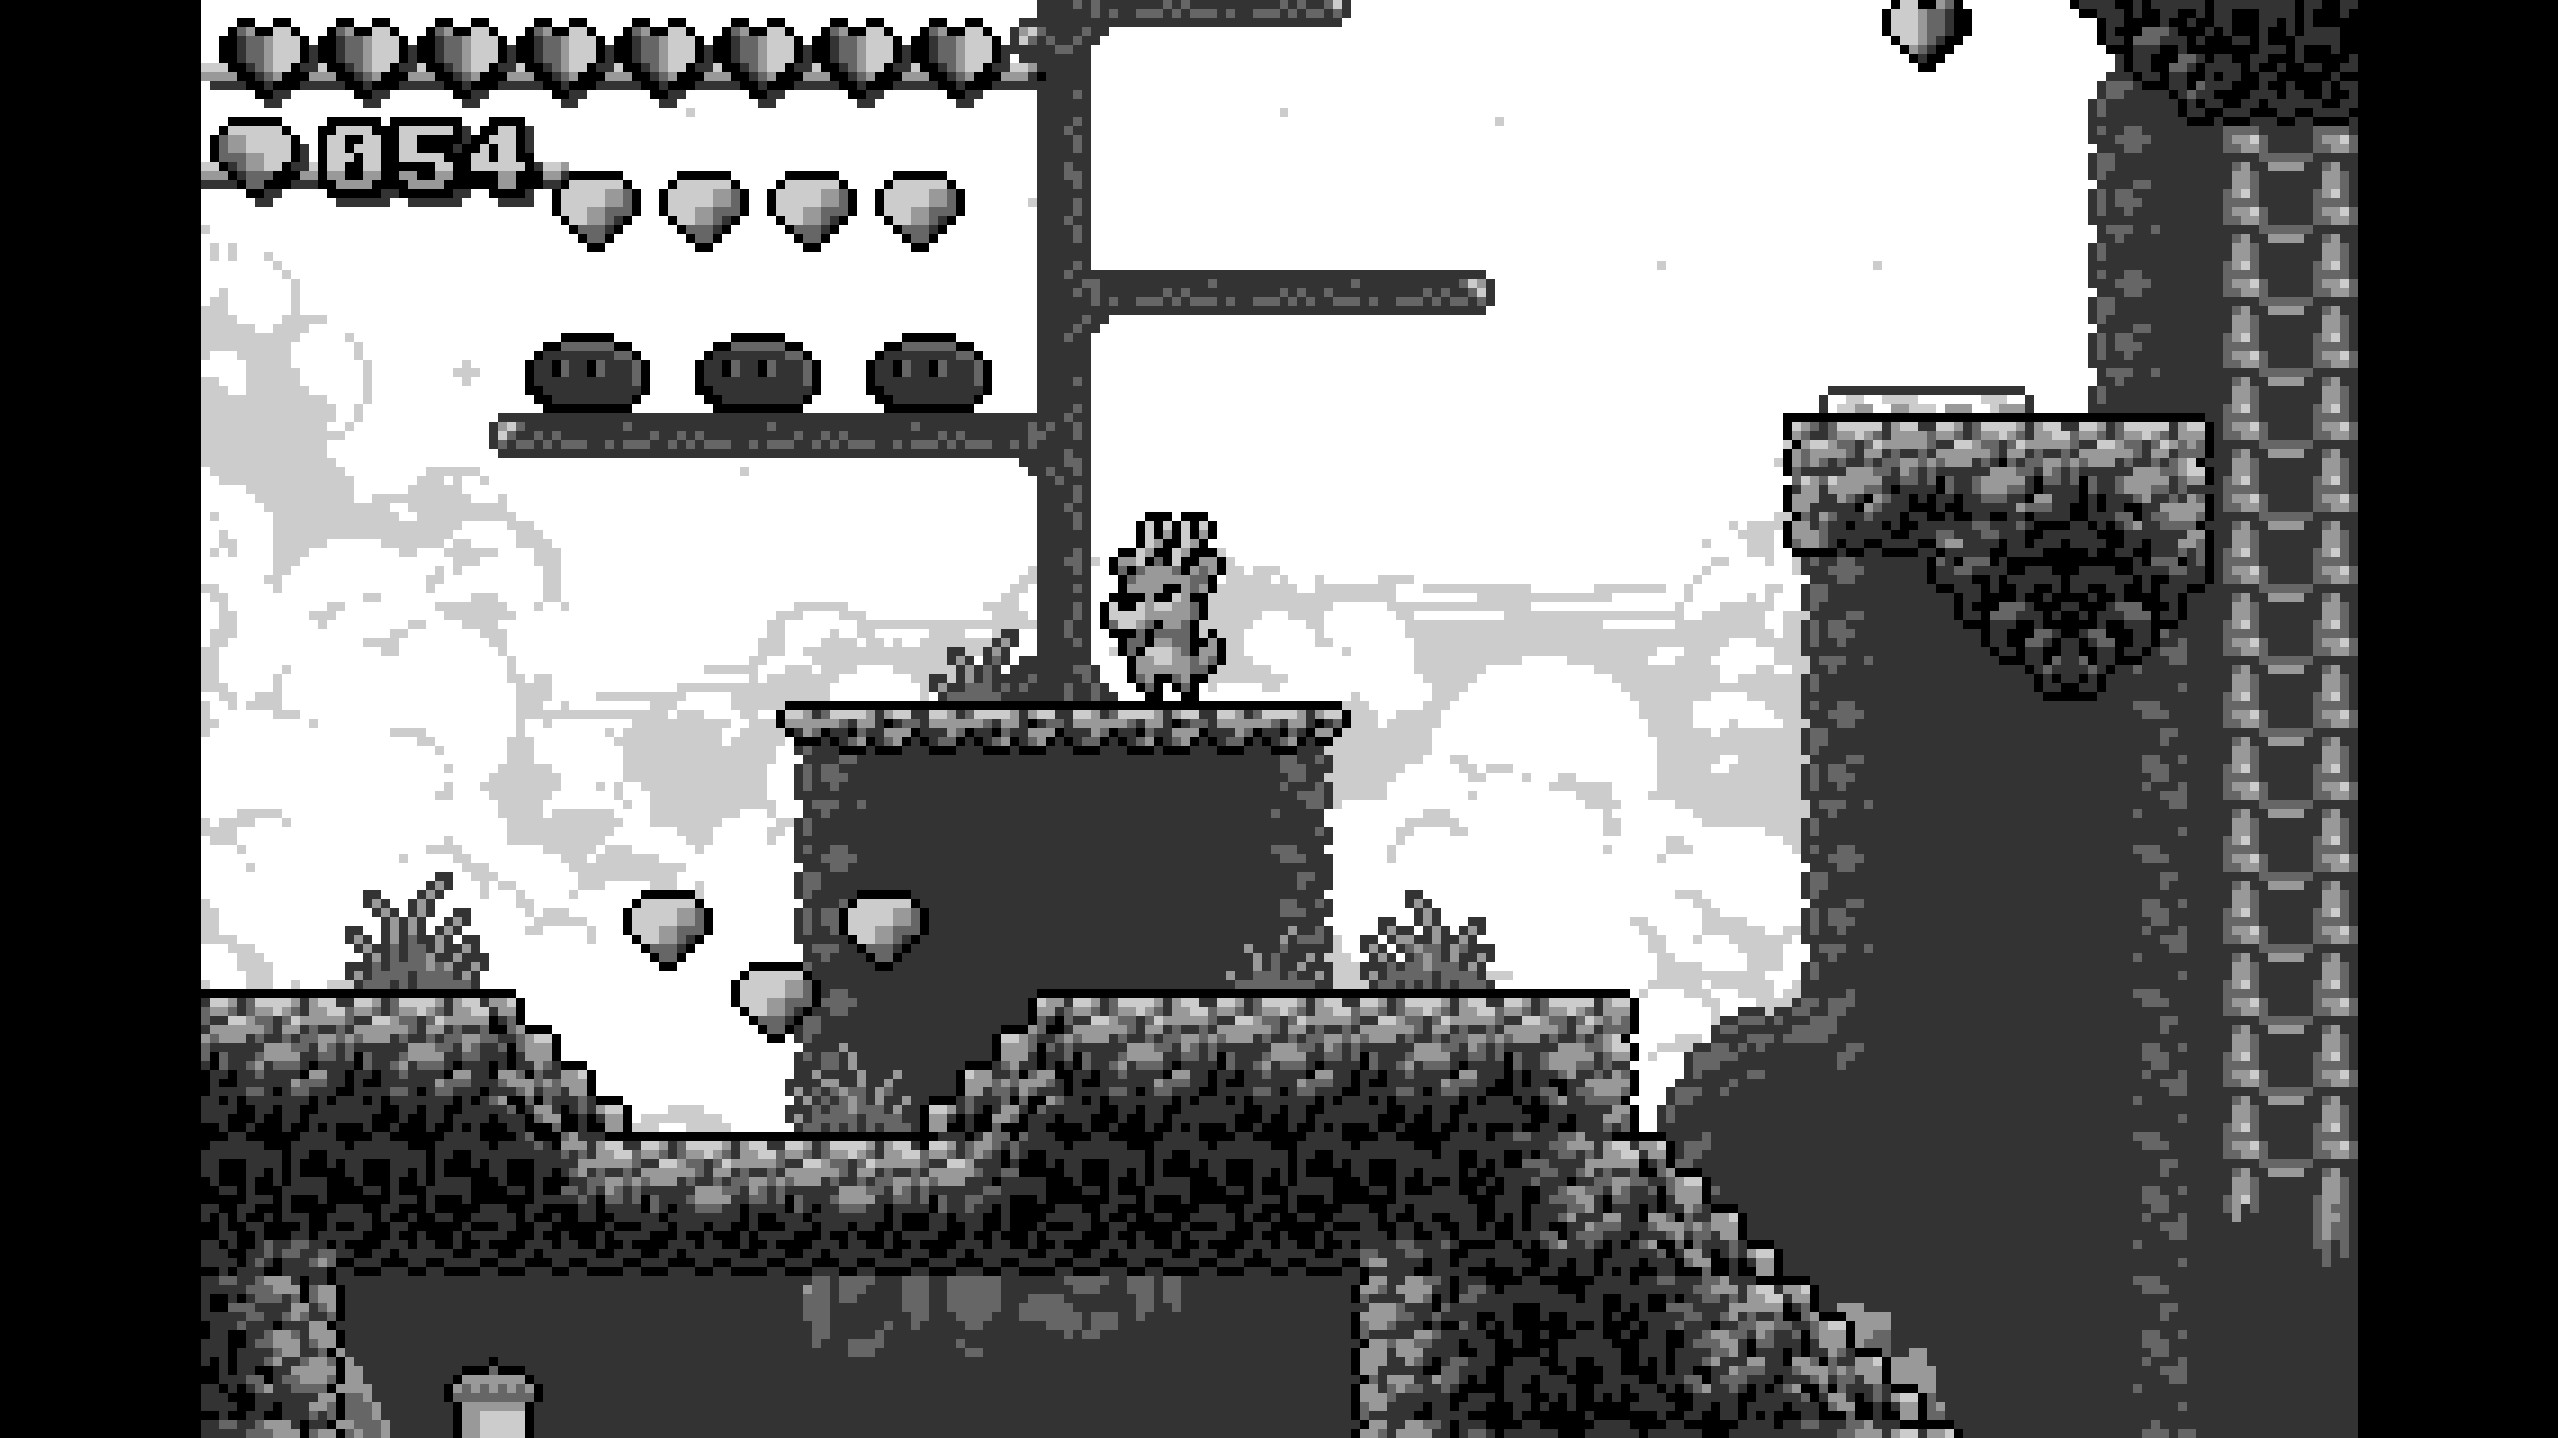
- Continue past the moving platforms and head up the left slope. There you'll find a tree with a ton of slimes and also a ton of gems both on top and below!
- Gems 62-86
- Continue upwards. There are a LOT of gems here! Ground pound through the two breakable rocks to get the first two, then jump into the brick ledge to the bottom right to find four more behind a fake wall. Next, head up the semisolid platforms, each containing two gems, and ride up the moving platform to get its four gems! (not pictured) Lastly, hop off of the platform to the bottom and jump over to the castle slope on the right. Dash over some spikes and you'll find a group of 4 gems and, further to the right, a group of eight! (also not pictured)

- Continue upwards. There are a LOT of gems here! Ground pound through the two breakable rocks to get the first two, then jump into the brick ledge to the bottom right to find four more behind a fake wall. Next, head up the semisolid platforms, each containing two gems, and ride up the moving platform to get its four gems! (not pictured) Lastly, hop off of the platform to the bottom and jump over to the castle slope on the right. Dash over some spikes and you'll find a group of 4 gems and, further to the right, a group of eight! (also not pictured)
- Gems 87-91
- Ride up the moving platform and jump off at the top. Climb up the hanging ladder and collect the gems floating above a bridge! Then, continue to the right and collect the key item for later use.

- Ride up the moving platform and jump off at the top. Climb up the hanging ladder and collect the gems floating above a bridge! Then, continue to the right and collect the key item for later use.
- Gems 92-94
- Jump all the way back down to the area with the squirrel. Head right and flick the switch across the bridge. This will open the castle door. Head down to the checkpoint and make your way right into the castle. Waiting for you near the entrance are three easy gems!
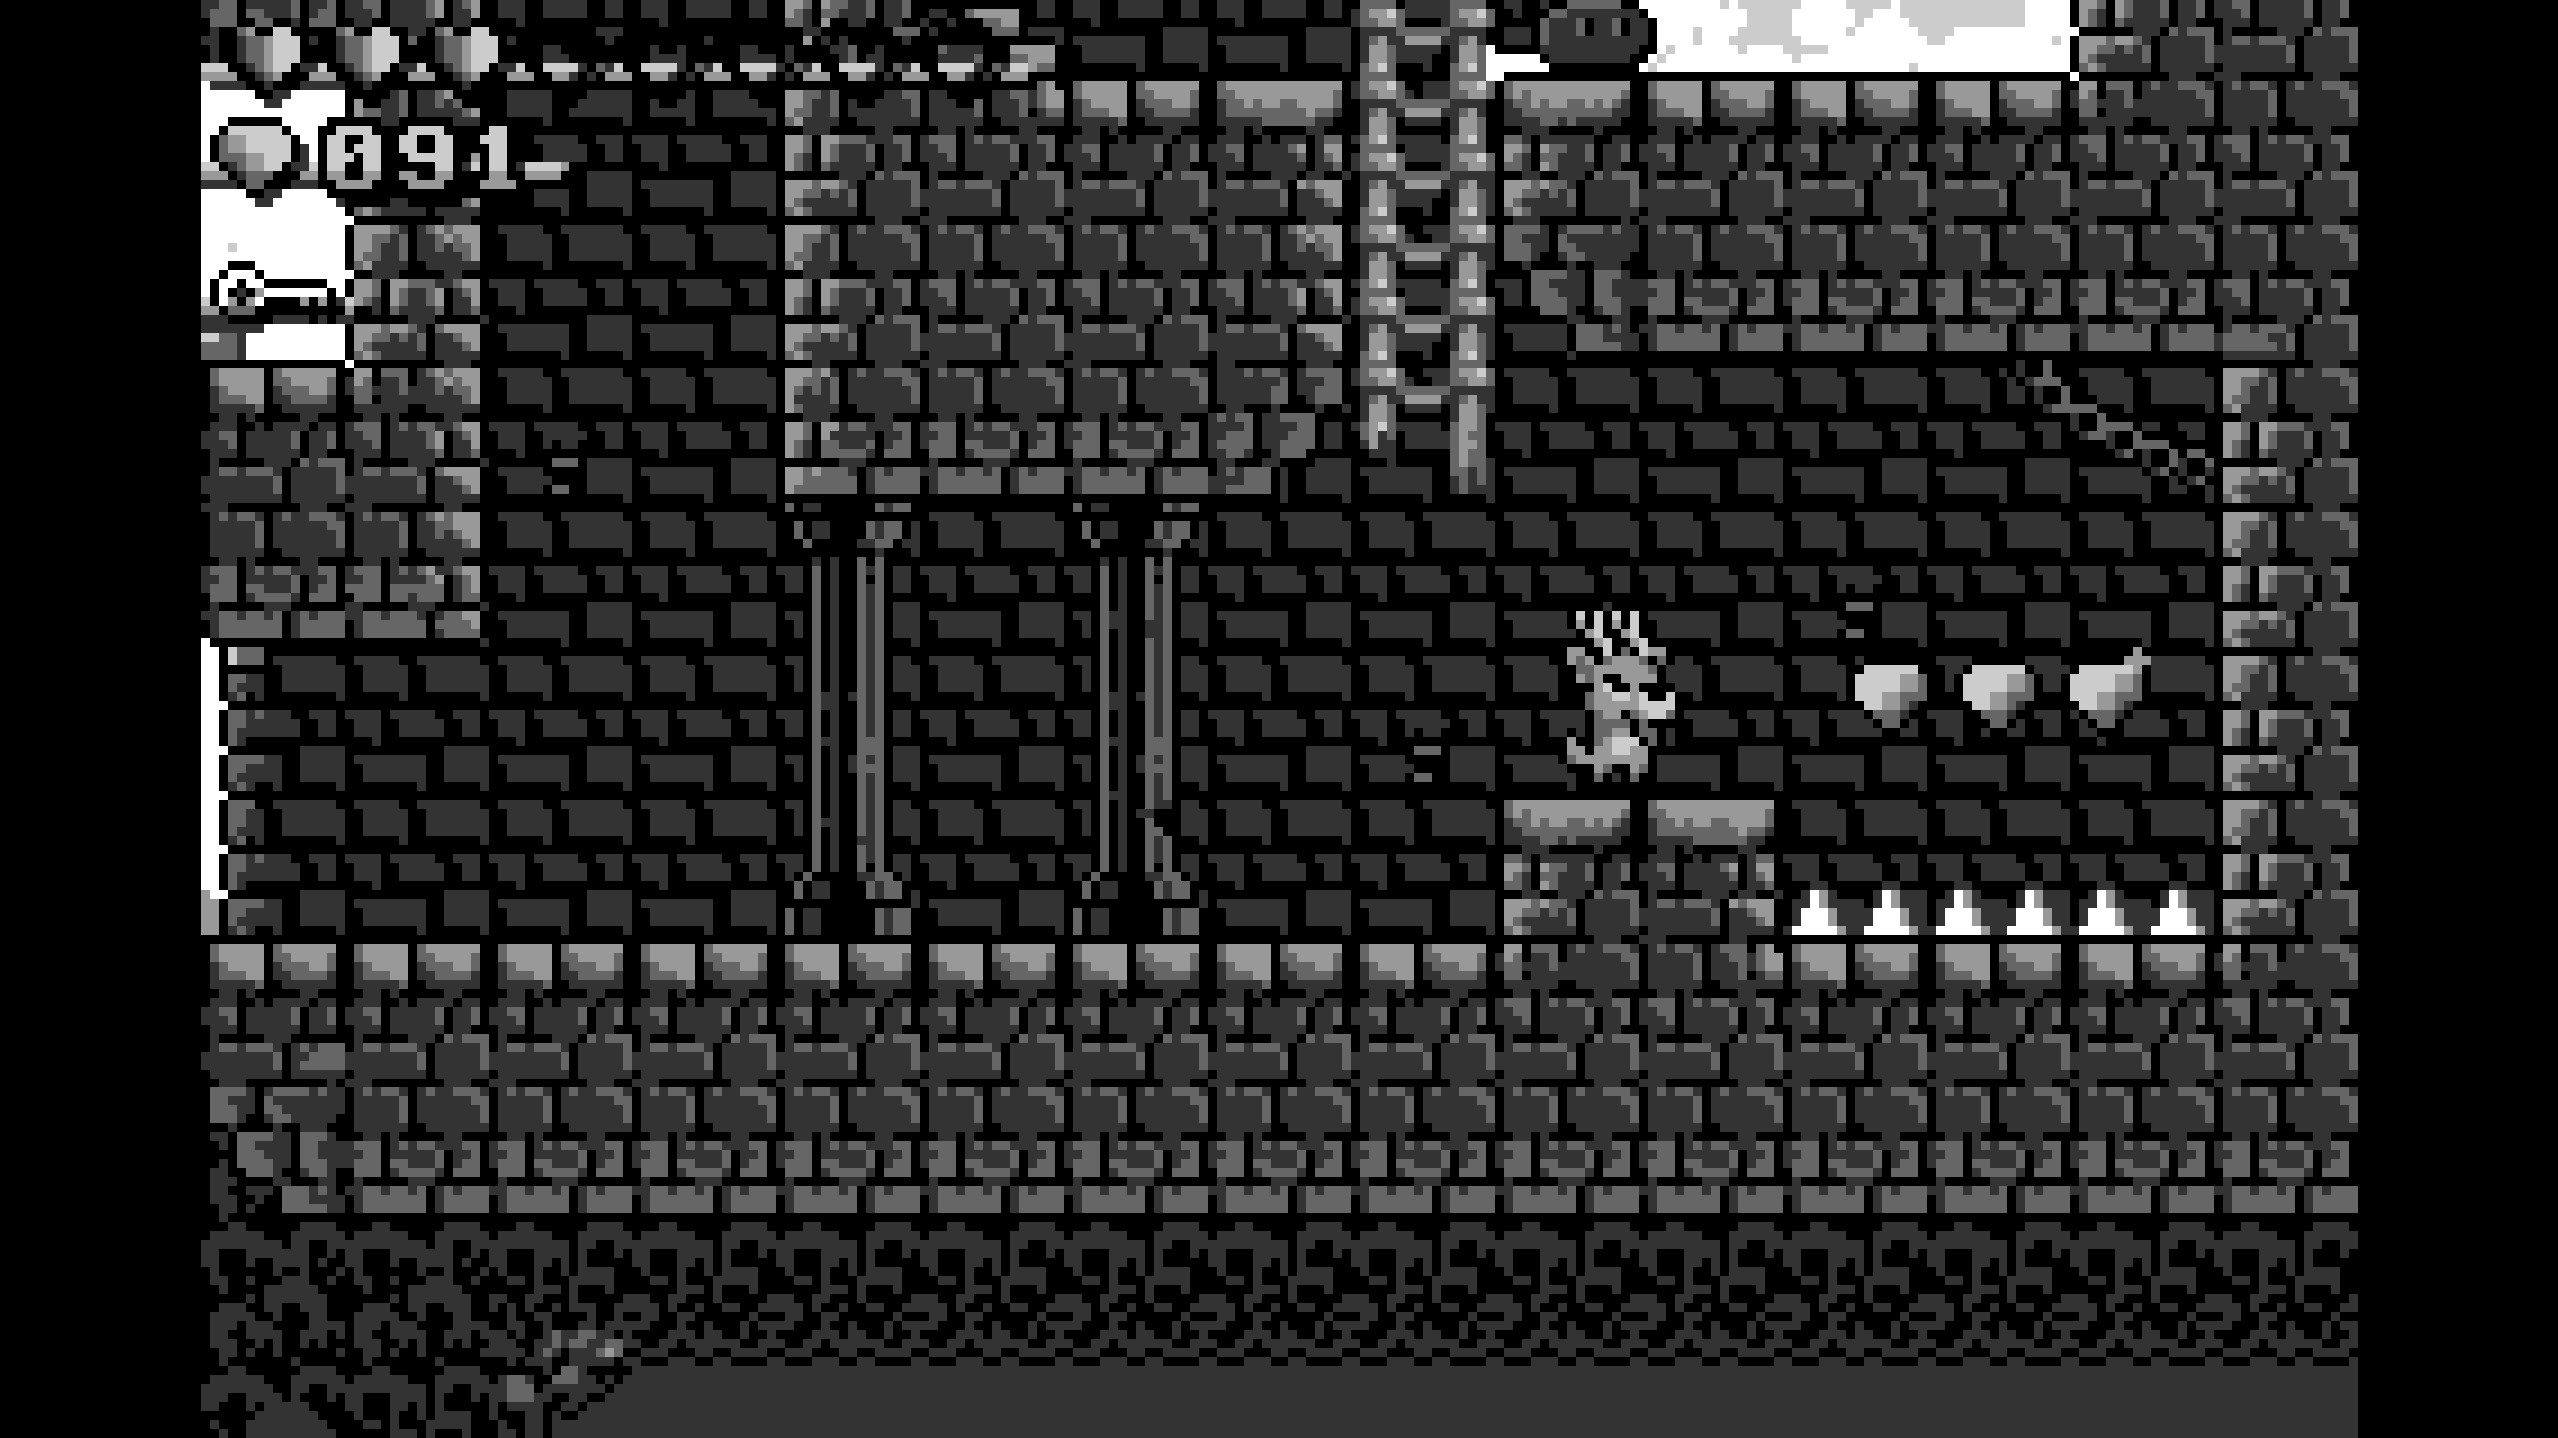
- Jump all the way back down to the area with the squirrel. Head right and flick the switch across the bridge. This will open the castle door. Head down to the checkpoint and make your way right into the castle. Waiting for you near the entrance are three easy gems!
- Gems 95-98
- Climb up the hanging ladder and defeat the dragon to the left. Behind it are four more gems!
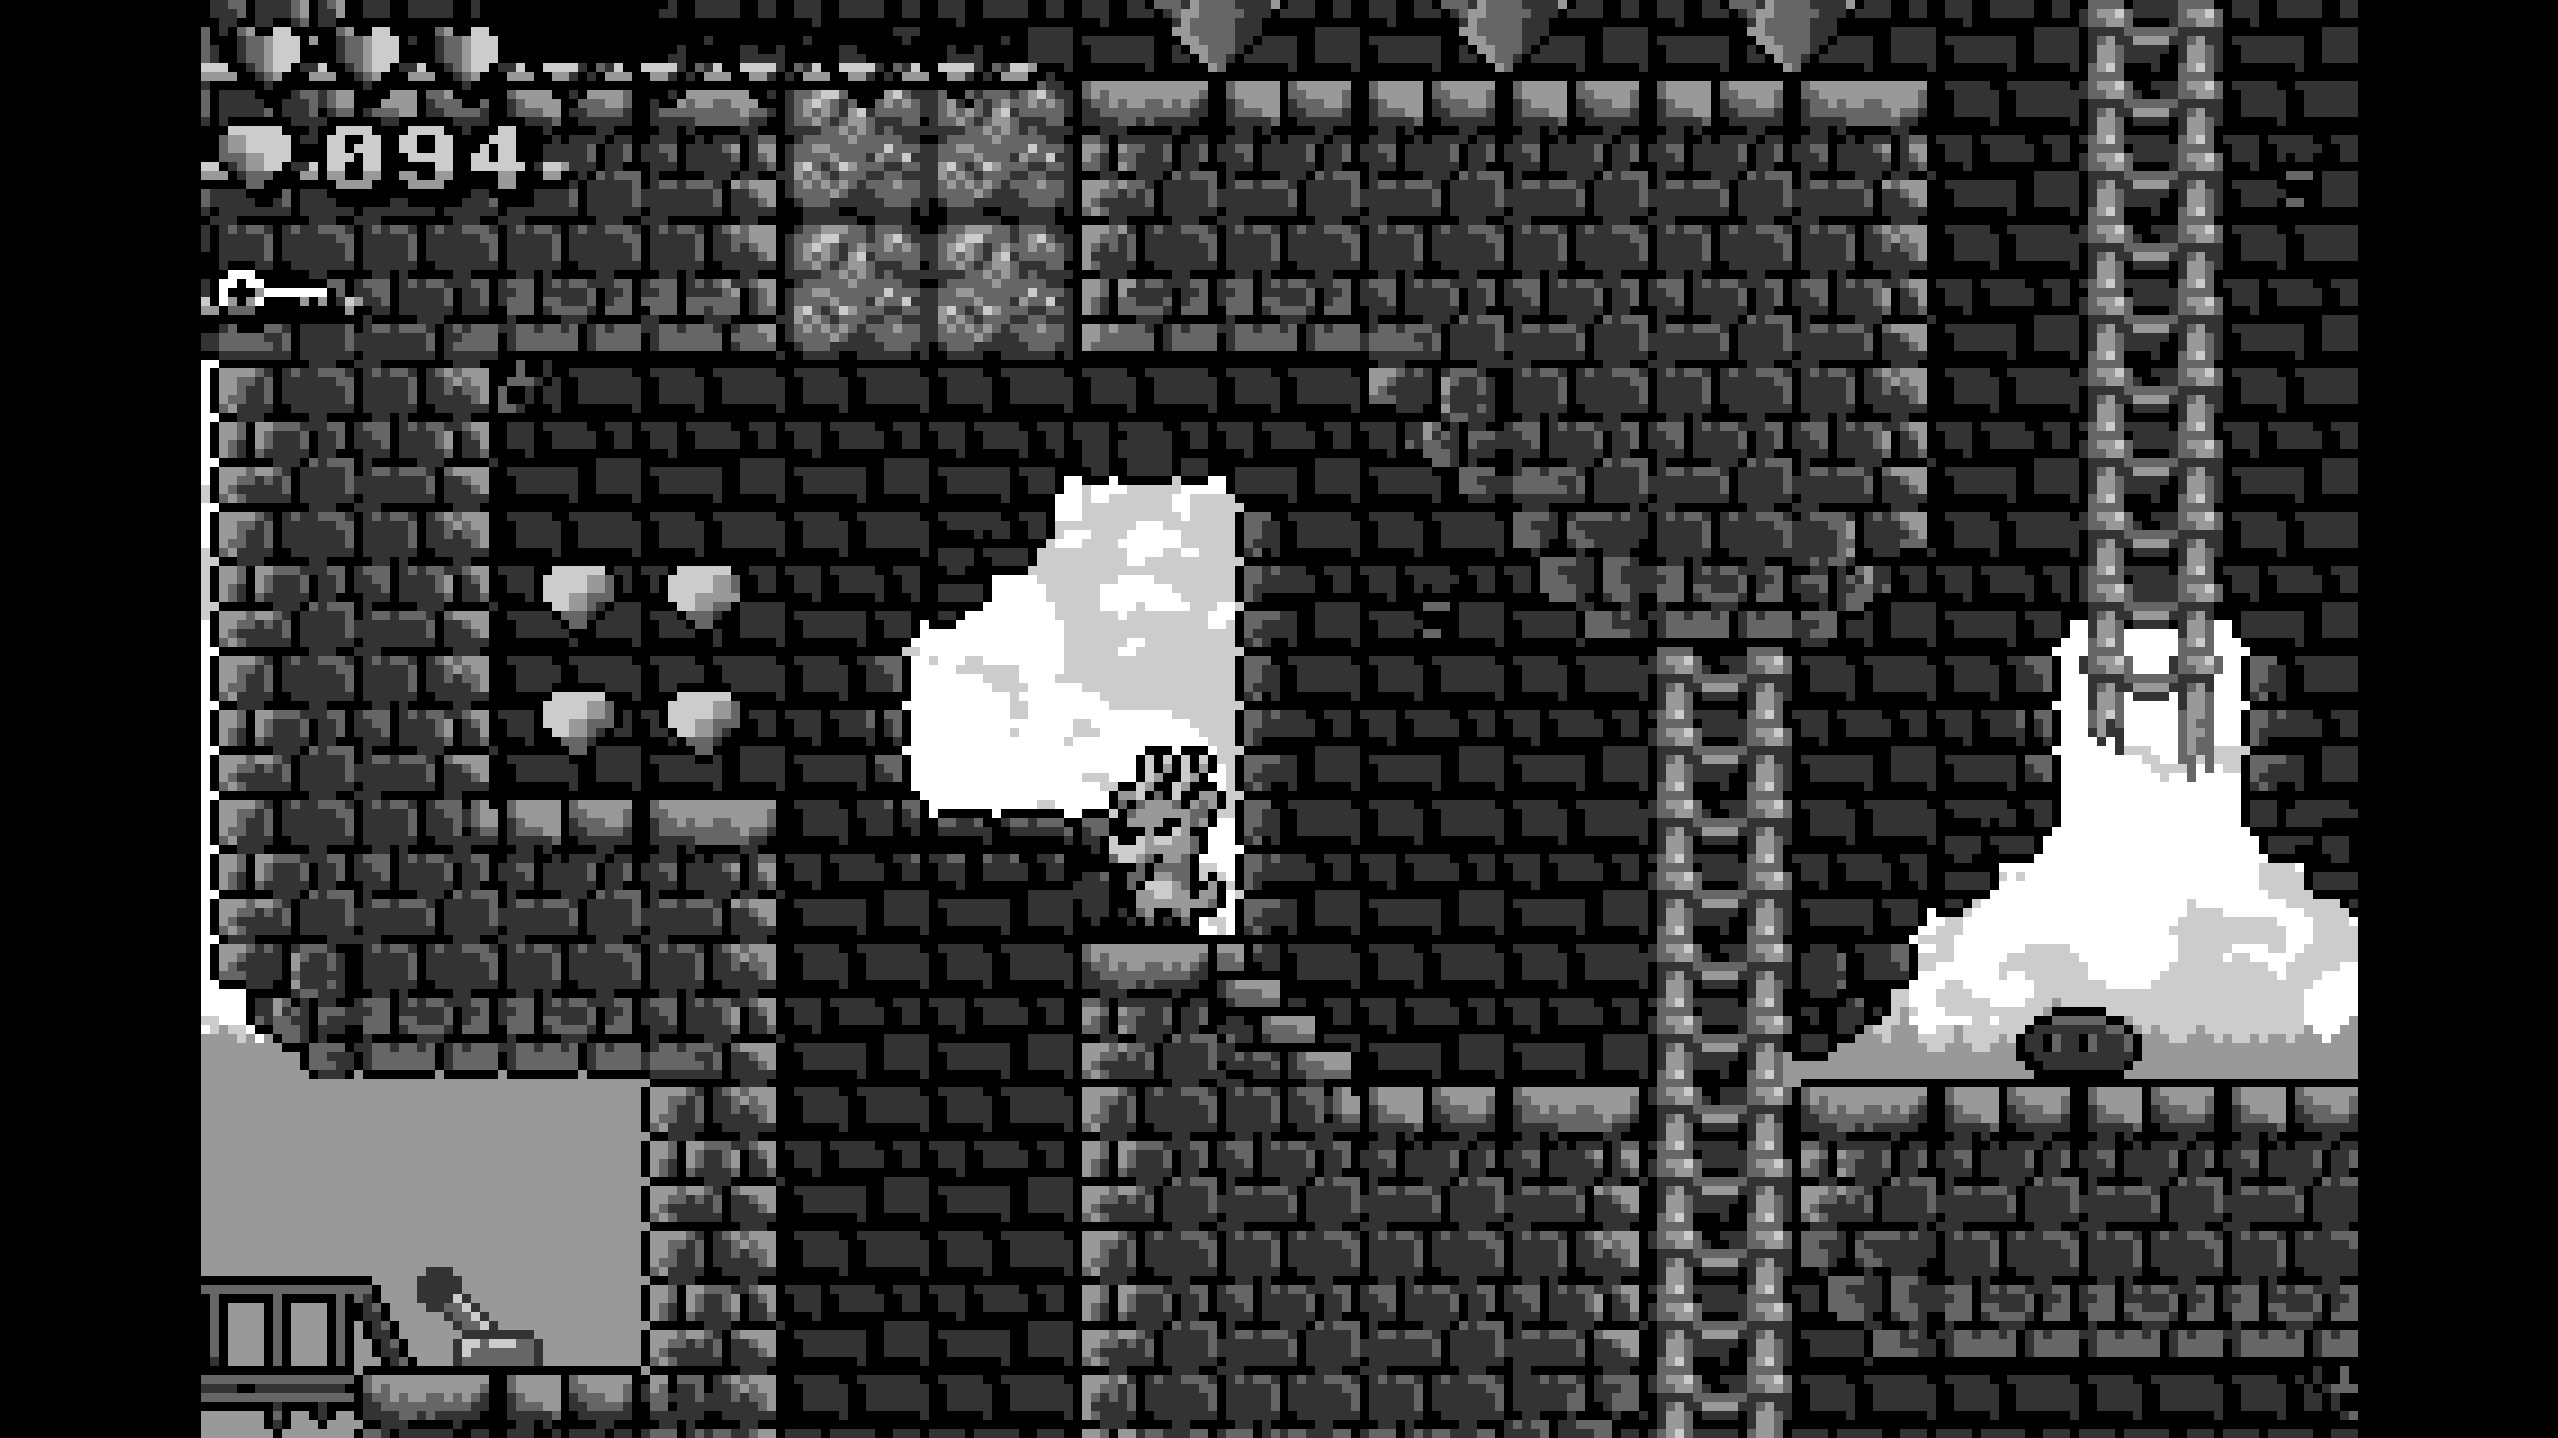
- Climb up the hanging ladder and defeat the dragon to the left. Behind it are four more gems!
- Gems 99-100
- Climb up the other hanging ladder and dodge the skewers to collect the final two gems of Retro Ridgeclimb. Congrats!
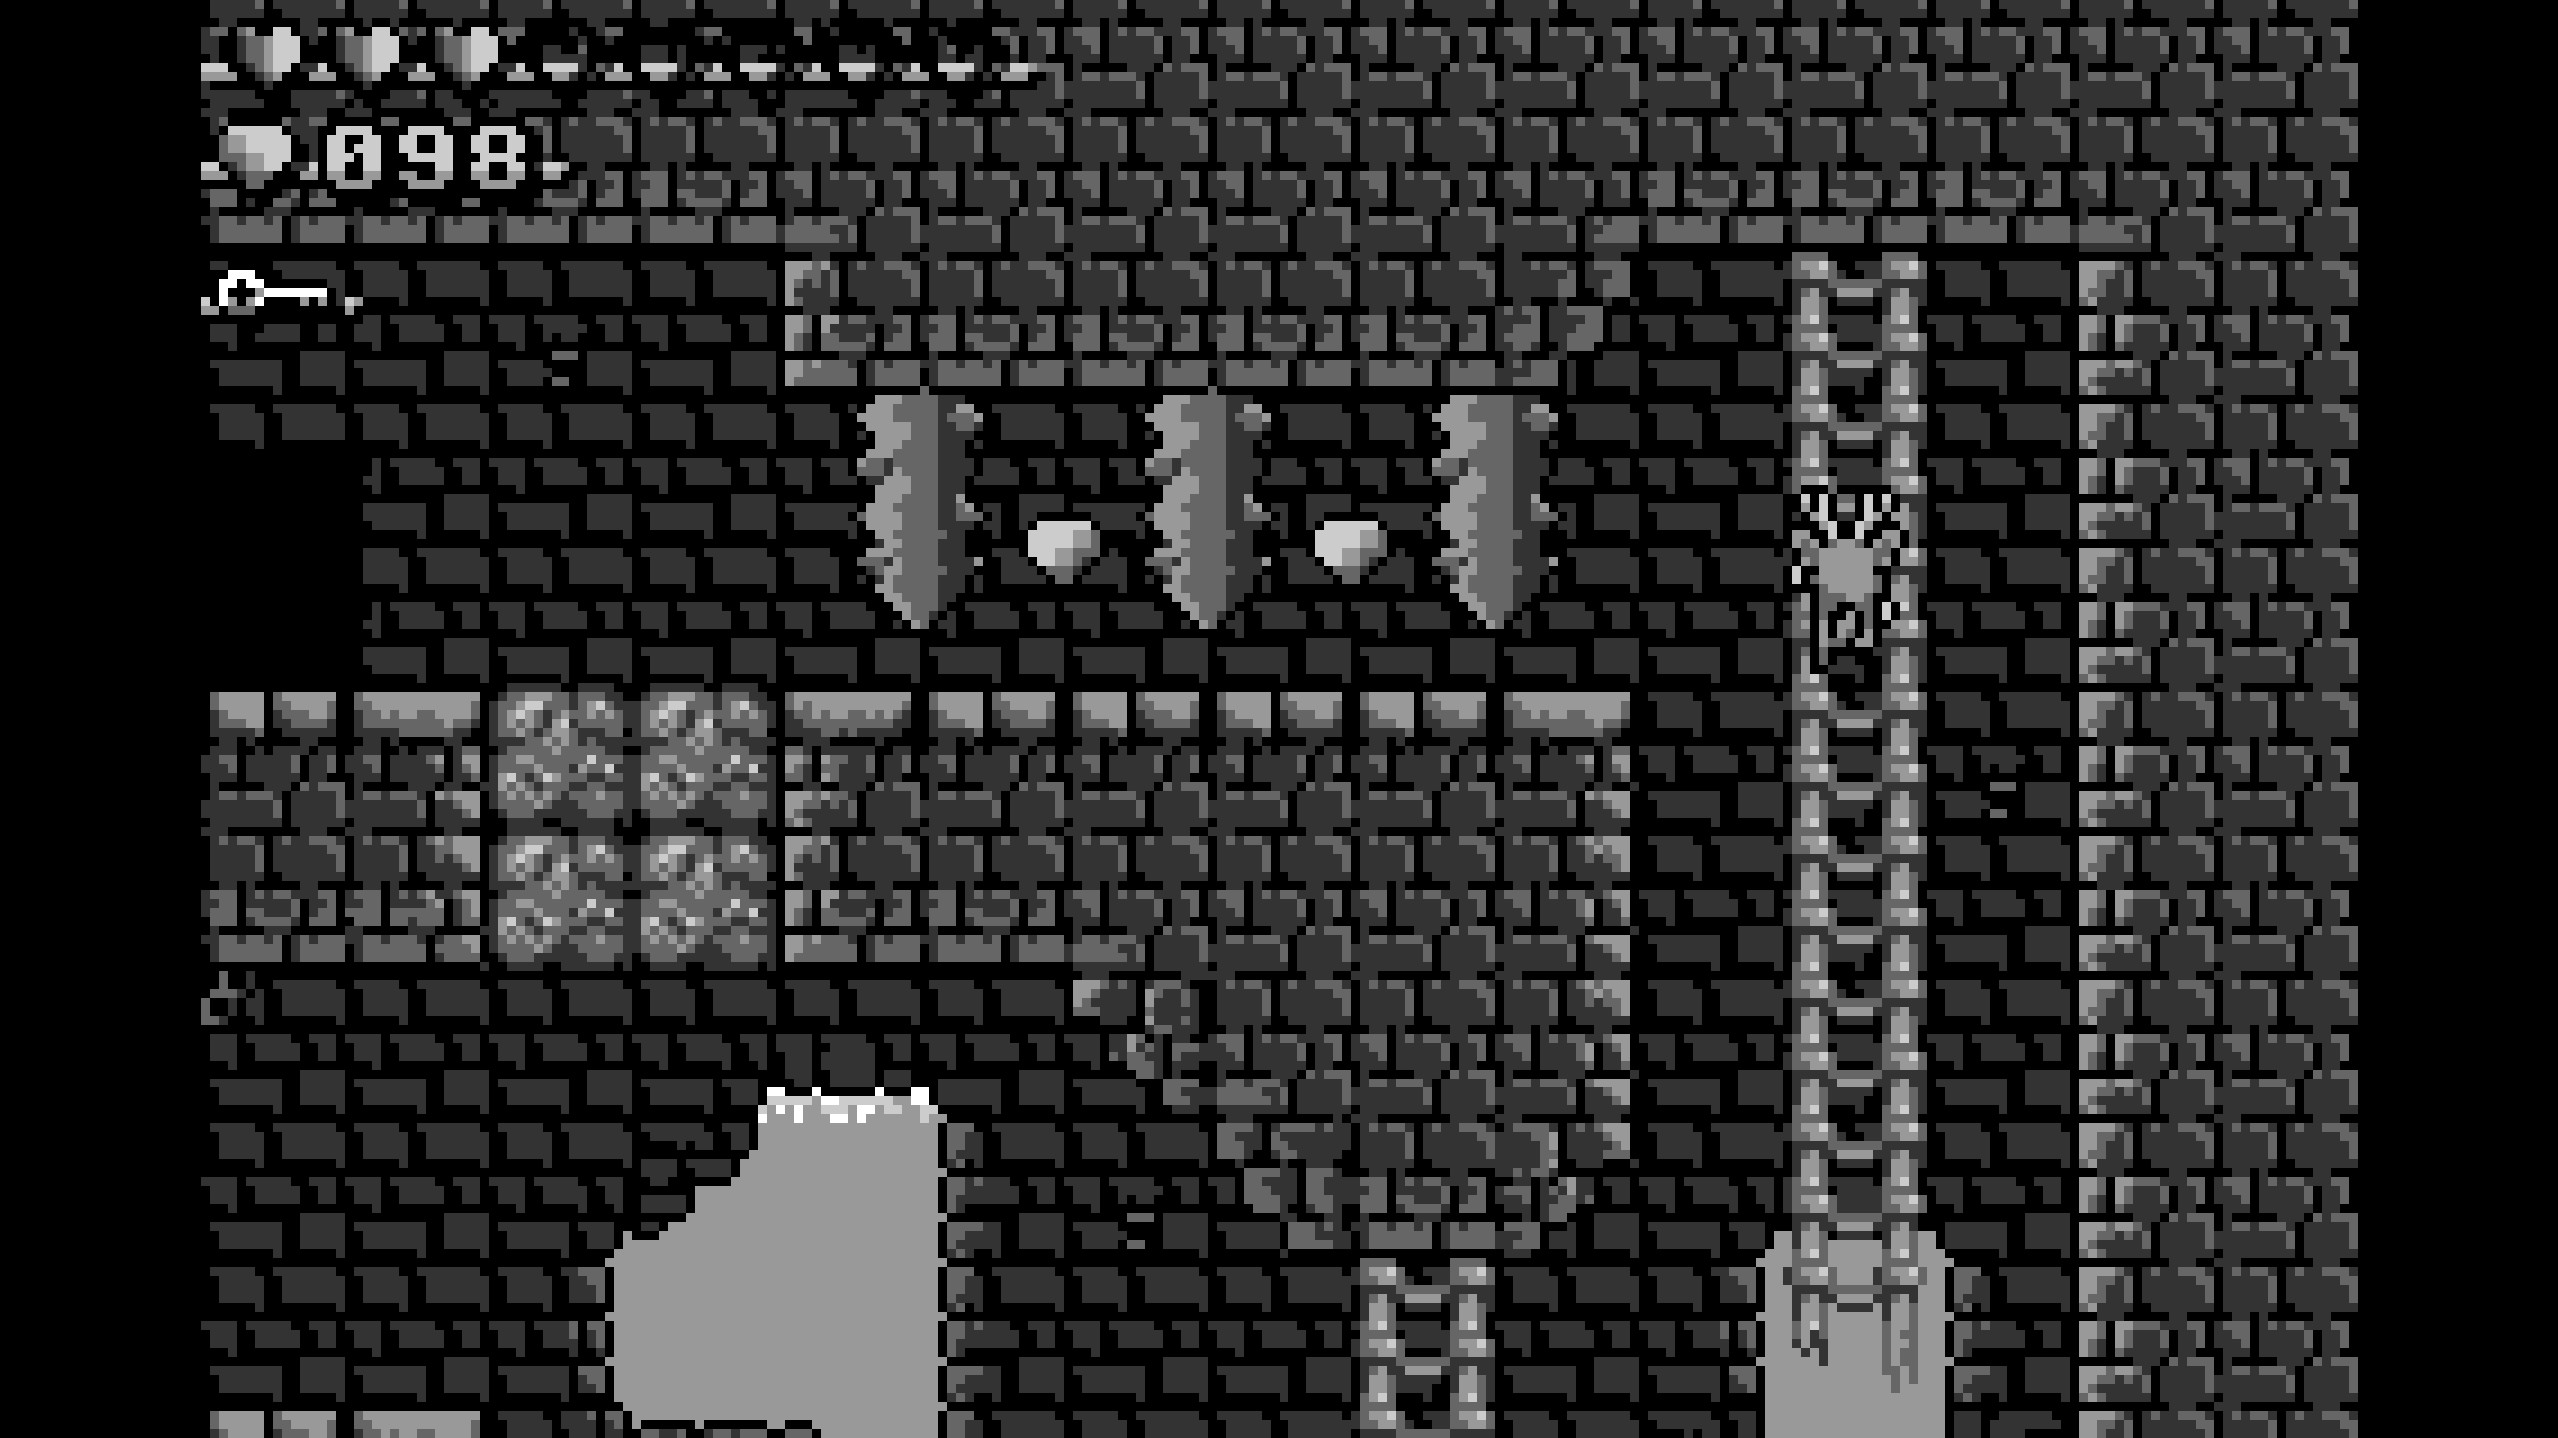
- Climb up the other hanging ladder and dodge the skewers to collect the final two gems of Retro Ridgeclimb. Congrats!
Fun With Switches Badge
The Fun With Switches Badge is earned by solving the optional switch puzzle in Retro Ridgeclimb.
To get to the puzzle, progress through the level normally, passing the squirrel as you head up the mountain. Once you get to the area with the two breakable rocks below the vertical moving platform, stop. Take a leap of faith plus a dash of faith to the bottom right, where there's a second hidden brick ledge below the upper one with the gems. Once there, walk right past a fake wall to enter a secret room of the castle that contains the puzzle!
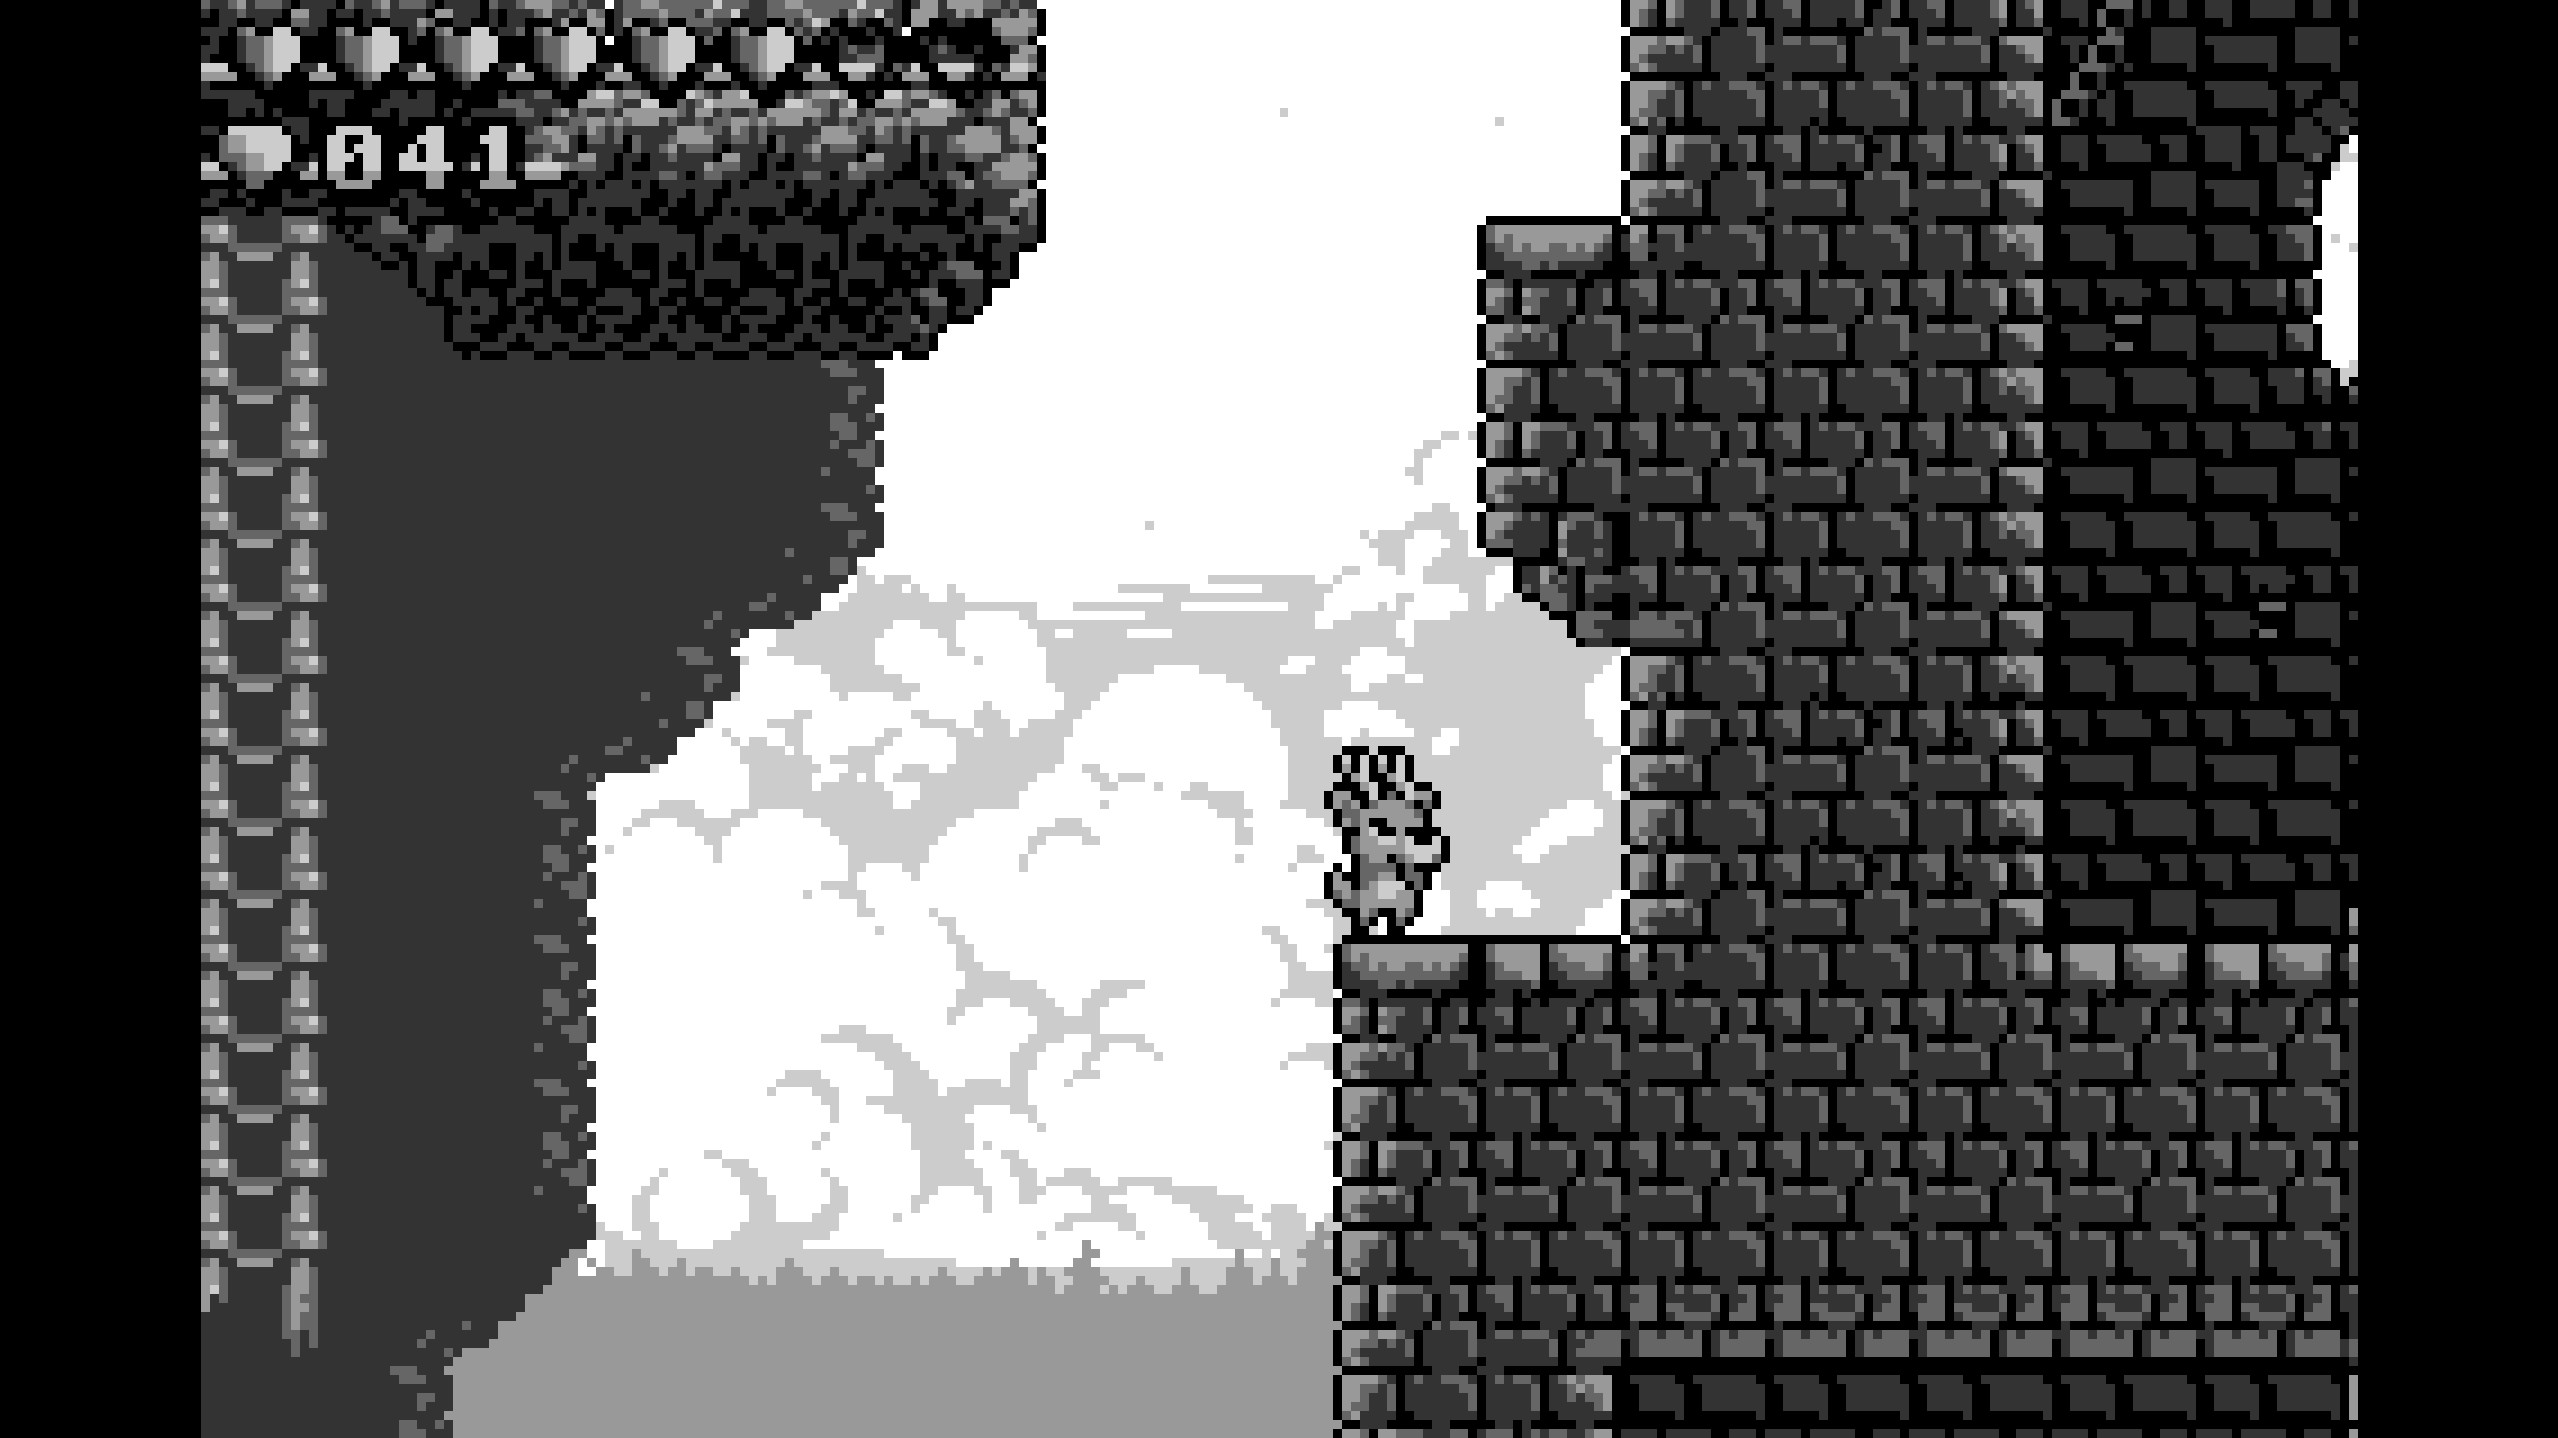
Now, to solve the puzzle, you have to turn all five lights on by activating the right switches in the right order. The correct ones to hit are, numbered from left to right, one, three, four, then five. Once the puzzle has been solved, a portrait of Ronny will appear above the lights and the switches will sink into the ground. Oh yeah, and you'll also be awarded the badge!

Winter Is Coming Badge
The Winter Is Coming Badge is earned by finding all three of the squirrel's missing nuts in Retro Ridgeclimb.
- Nut 1
- Progress through the stage normally until you reach the fake wall left of the big tree where gems 47-50 are located. Go through the fake wall, but once you reach the leftmost edge of it, jump up, then up again, then move to the right some, and jump up twice more. You'll emerge in a secluded area under the ground where the first nut is located!
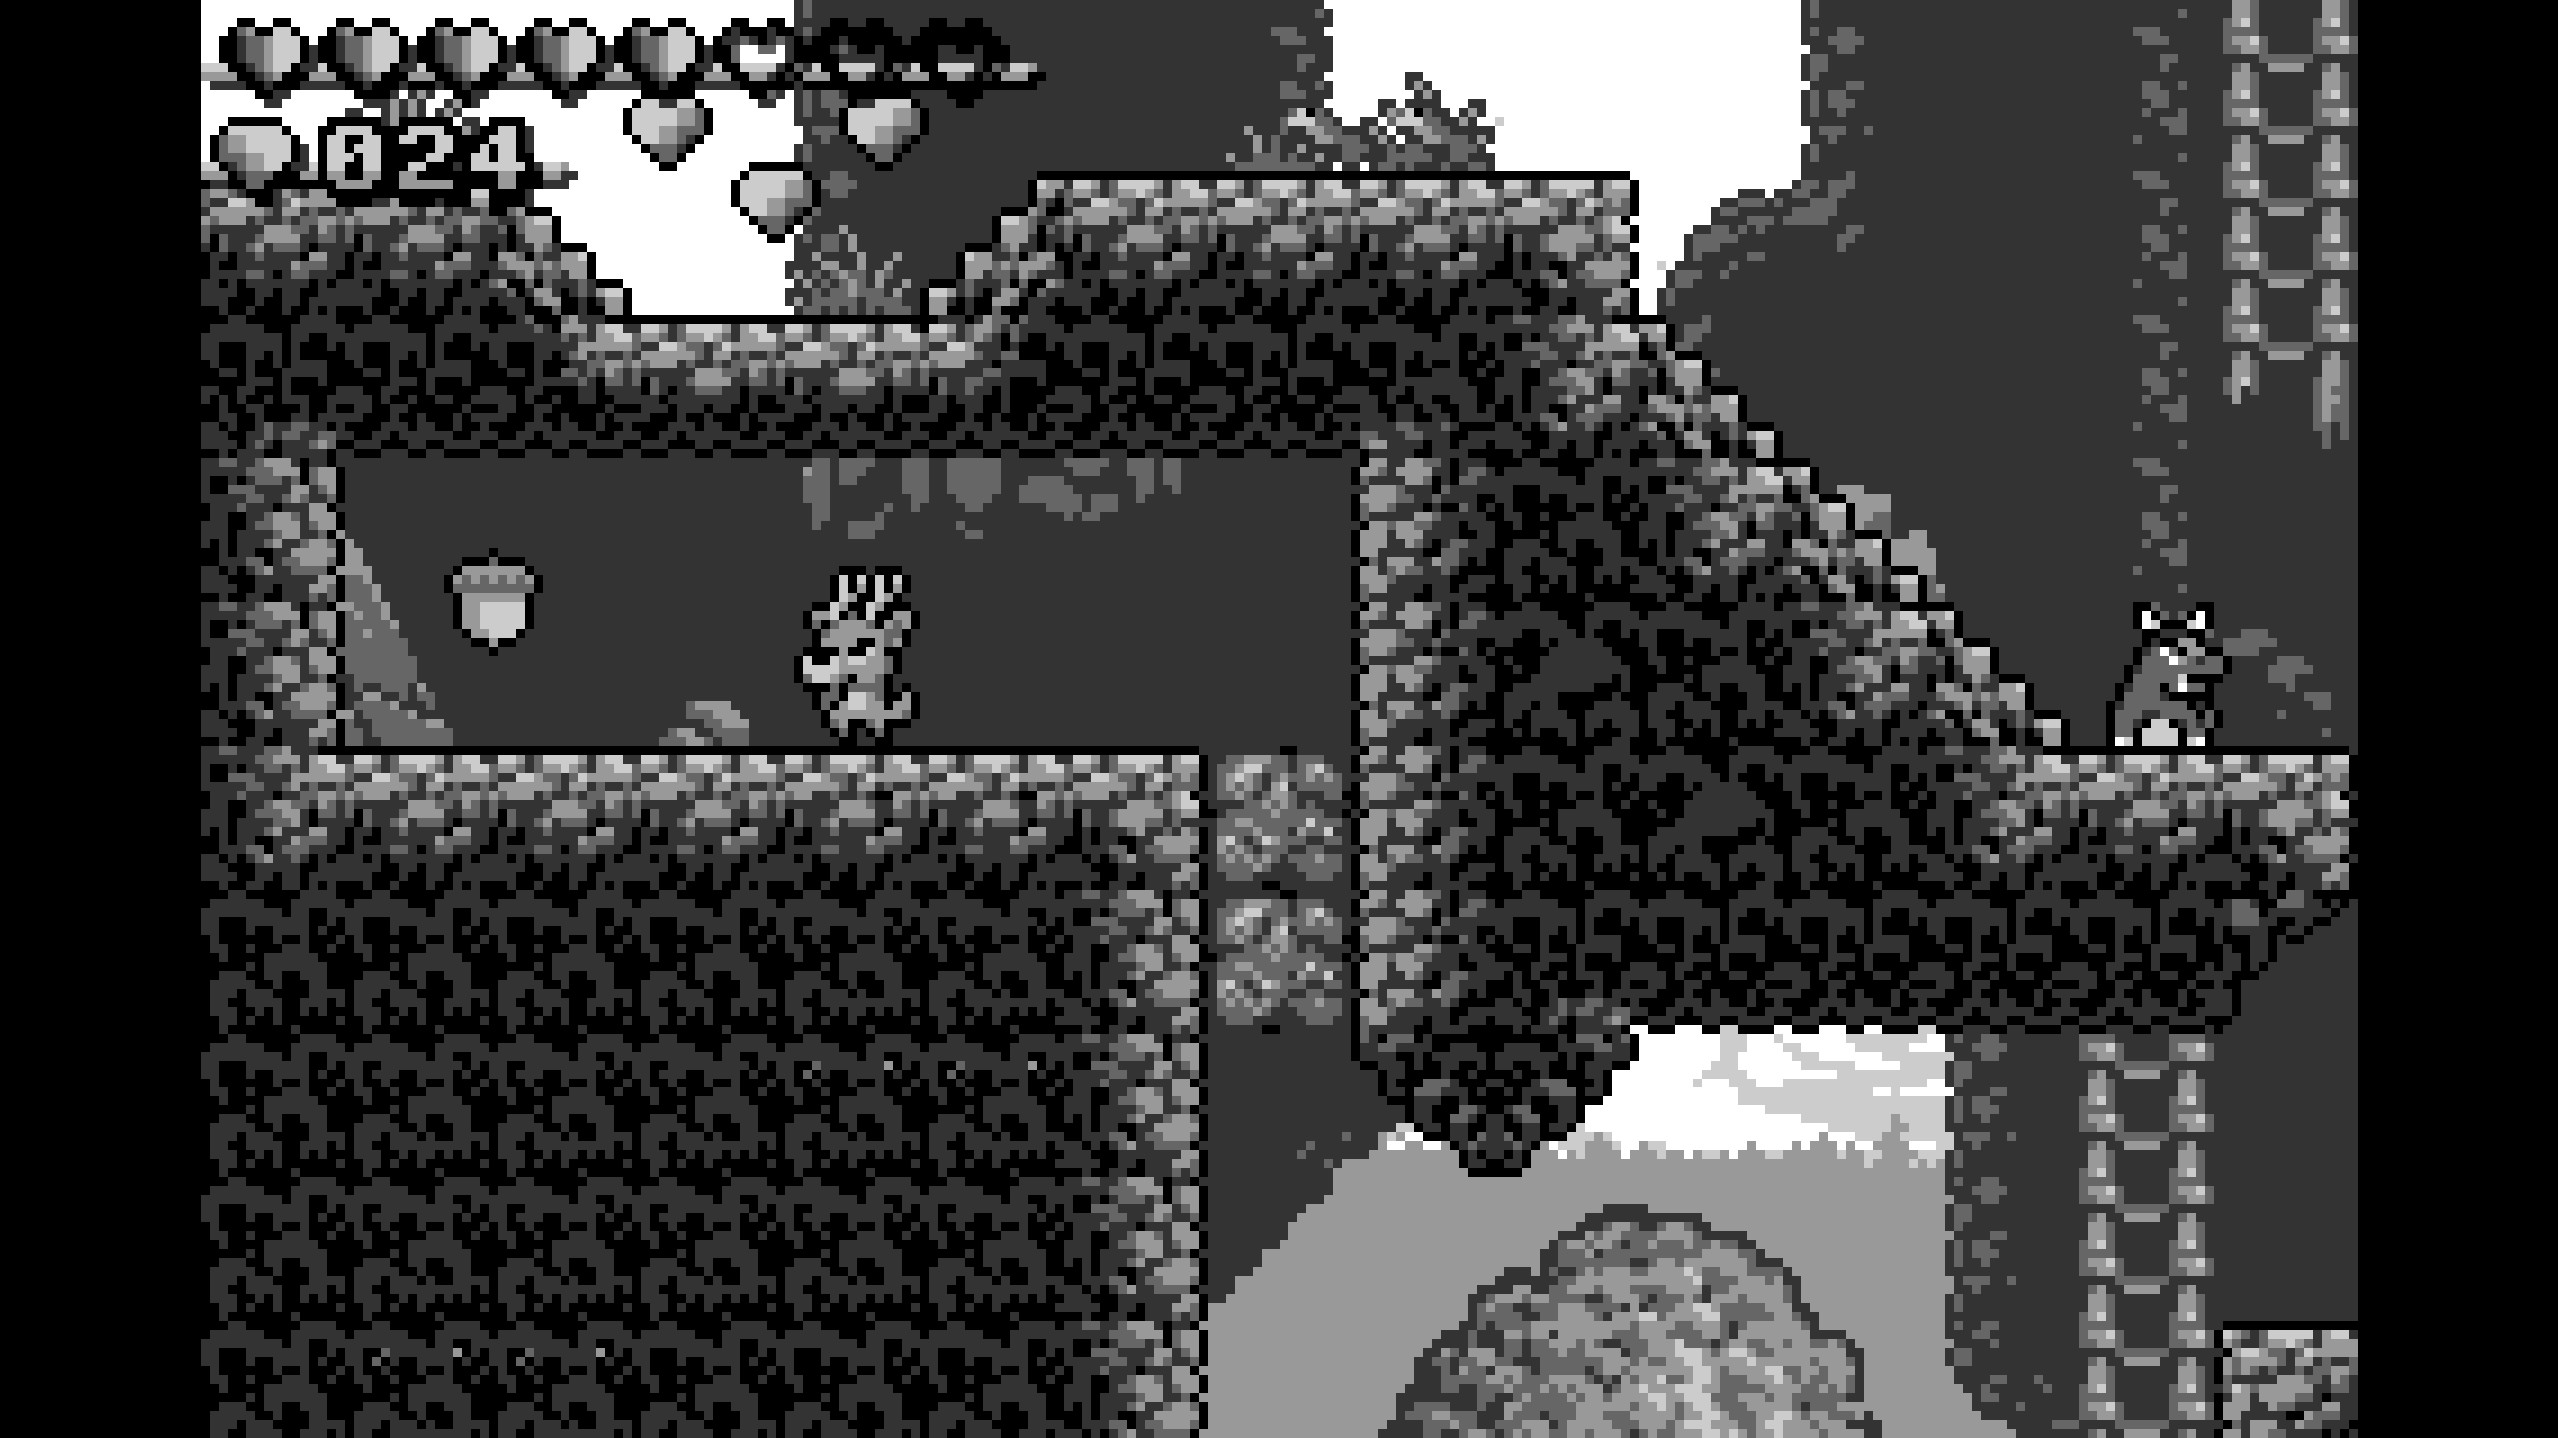
- Progress through the stage normally until you reach the fake wall left of the big tree where gems 47-50 are located. Go through the fake wall, but once you reach the leftmost edge of it, jump up, then up again, then move to the right some, and jump up twice more. You'll emerge in a secluded area under the ground where the first nut is located!
- Nut 2
- To reach this nut, you need to go to the top of the tree with gems 55-61 and the three slimes. Progress upwards a bit until you reach the two semisolid platforms below the vertical moving platform. Jump and dash left to reach one of the tree's branches, and jump up the tree from there. Once at the top, ground pound through some breakable rocks to get the second nut!
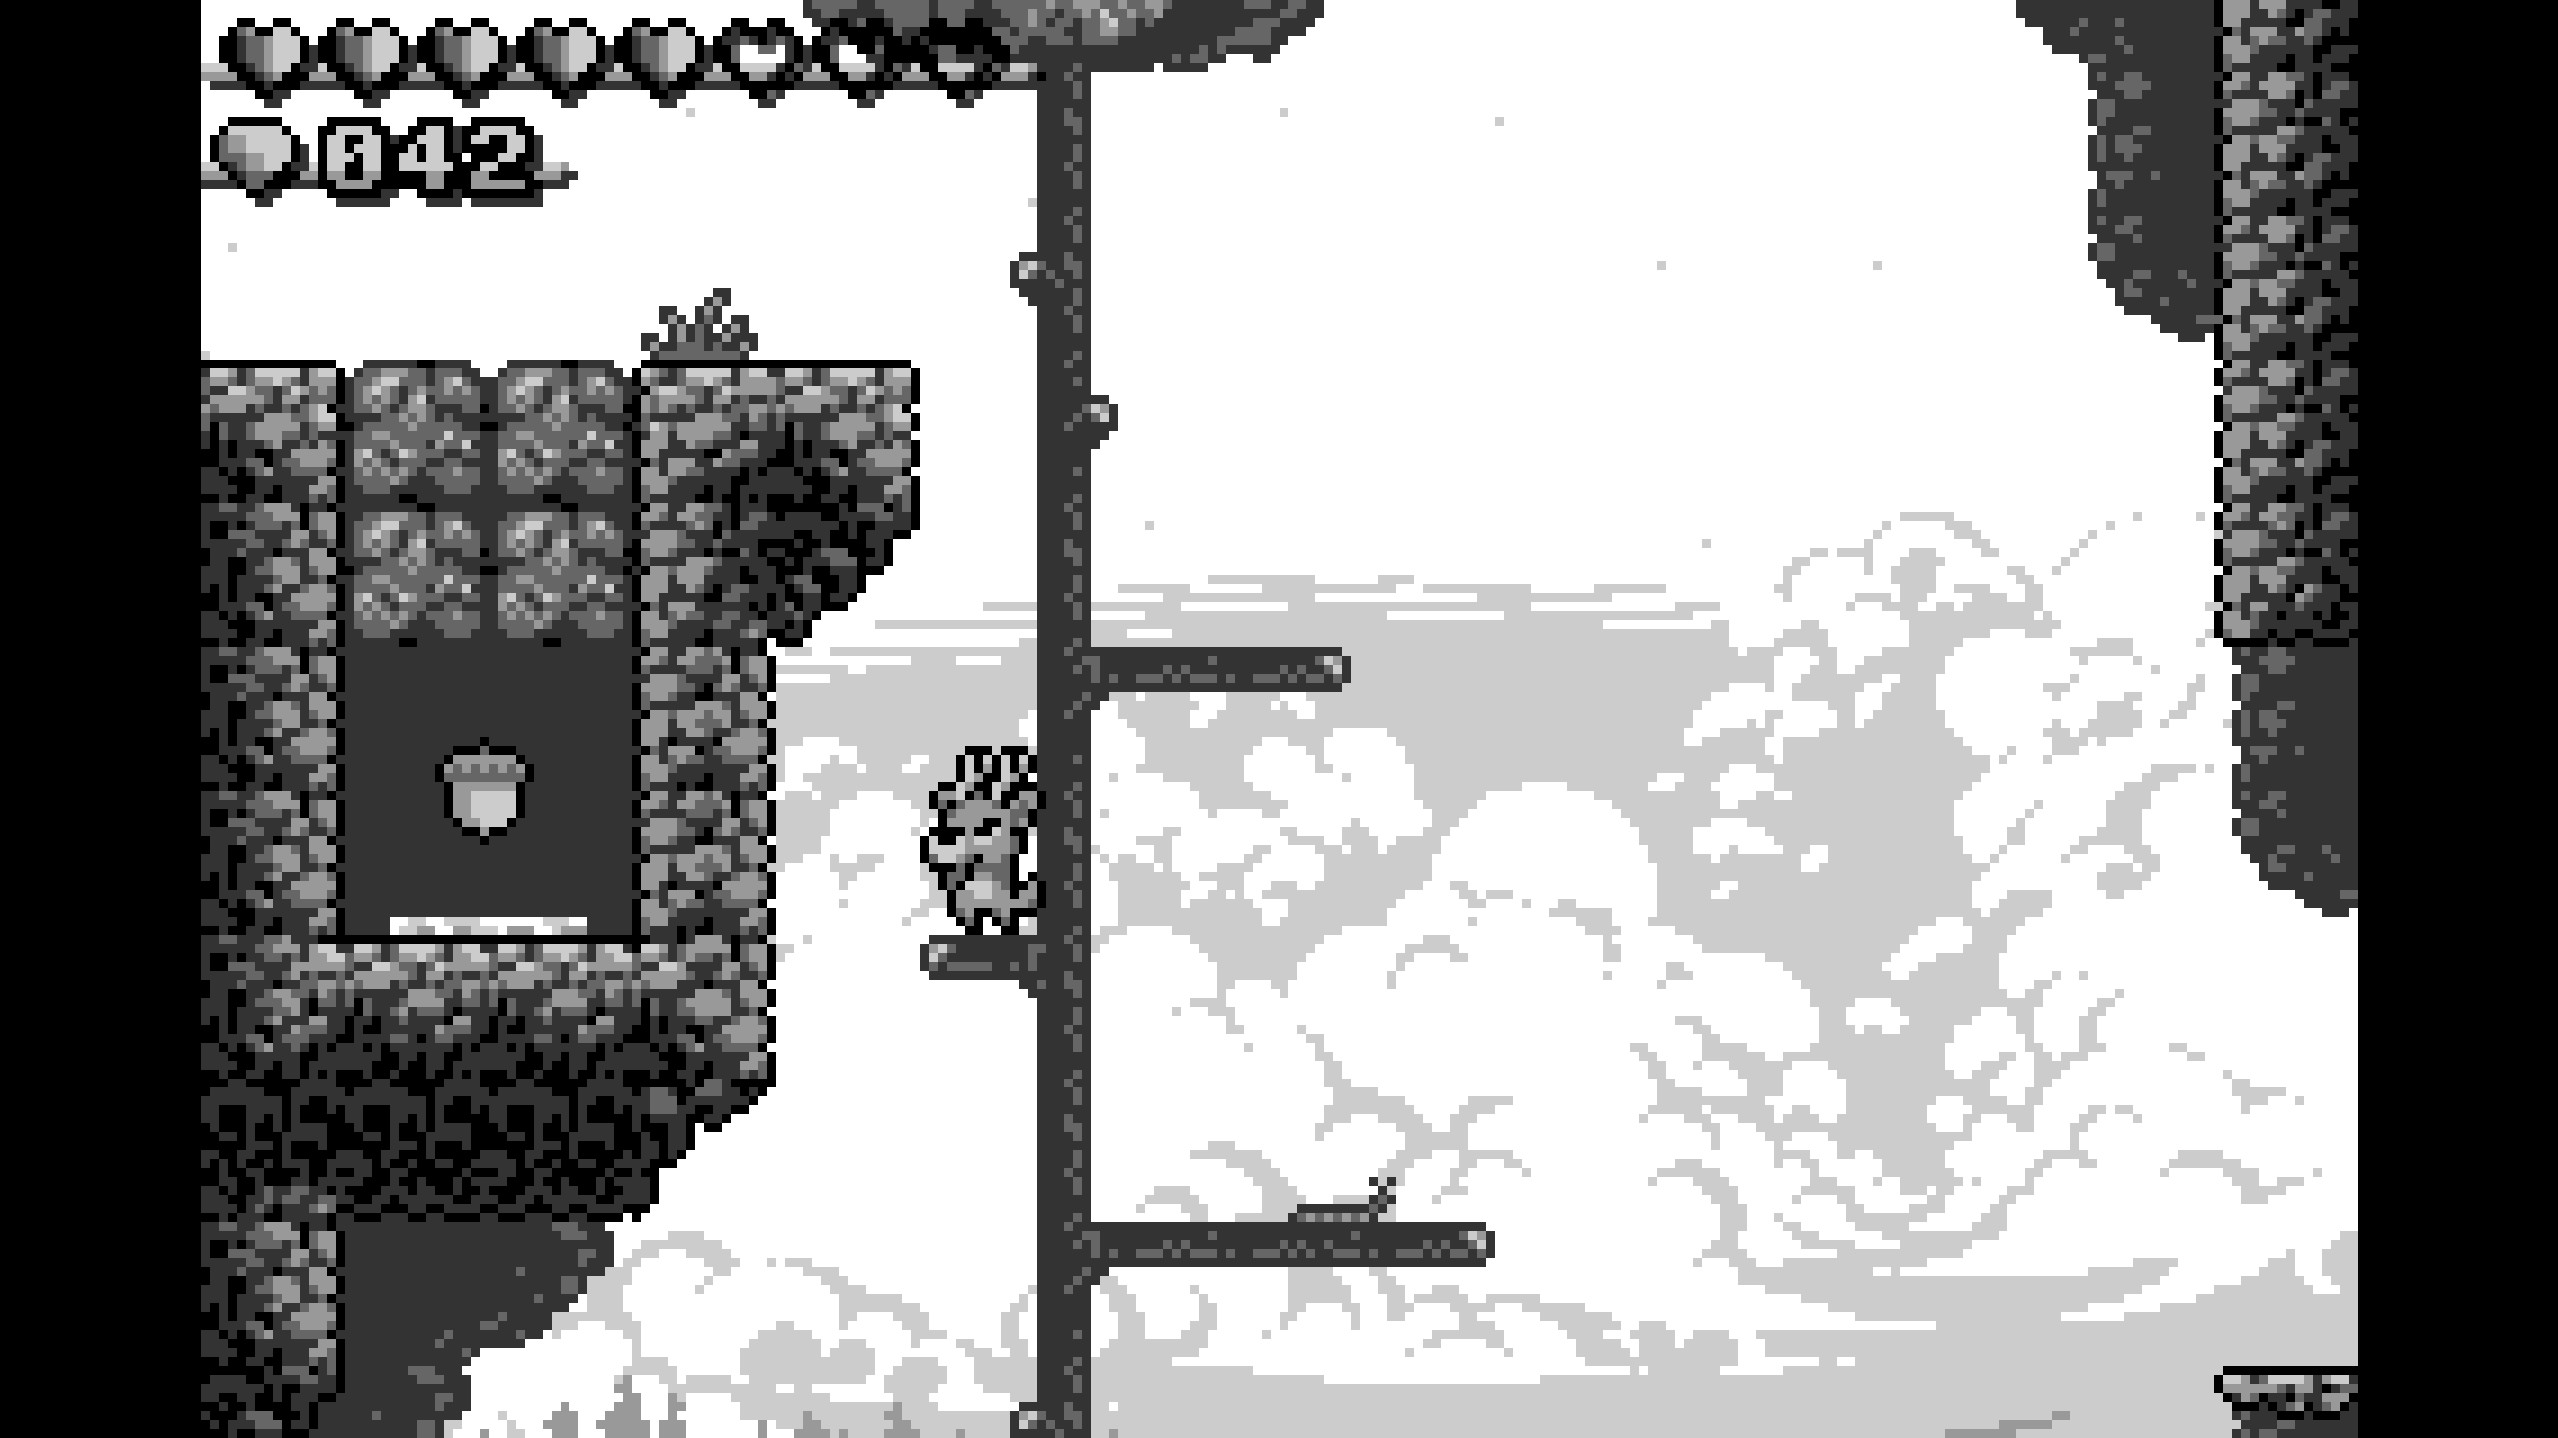
- To reach this nut, you need to go to the top of the tree with gems 55-61 and the three slimes. Progress upwards a bit until you reach the two semisolid platforms below the vertical moving platform. Jump and dash left to reach one of the tree's branches, and jump up the tree from there. Once at the top, ground pound through some breakable rocks to get the second nut!
- Nut 3
- Continue upwards through the normal path until you reach the bridge area with the five gems and the key. Jump and dash left off of the floating landmass that the bridge is attached to and you'll go past a fake wall! Continue upwards from there, dodge some dragons, and the final nut will be waiting for you at the top!
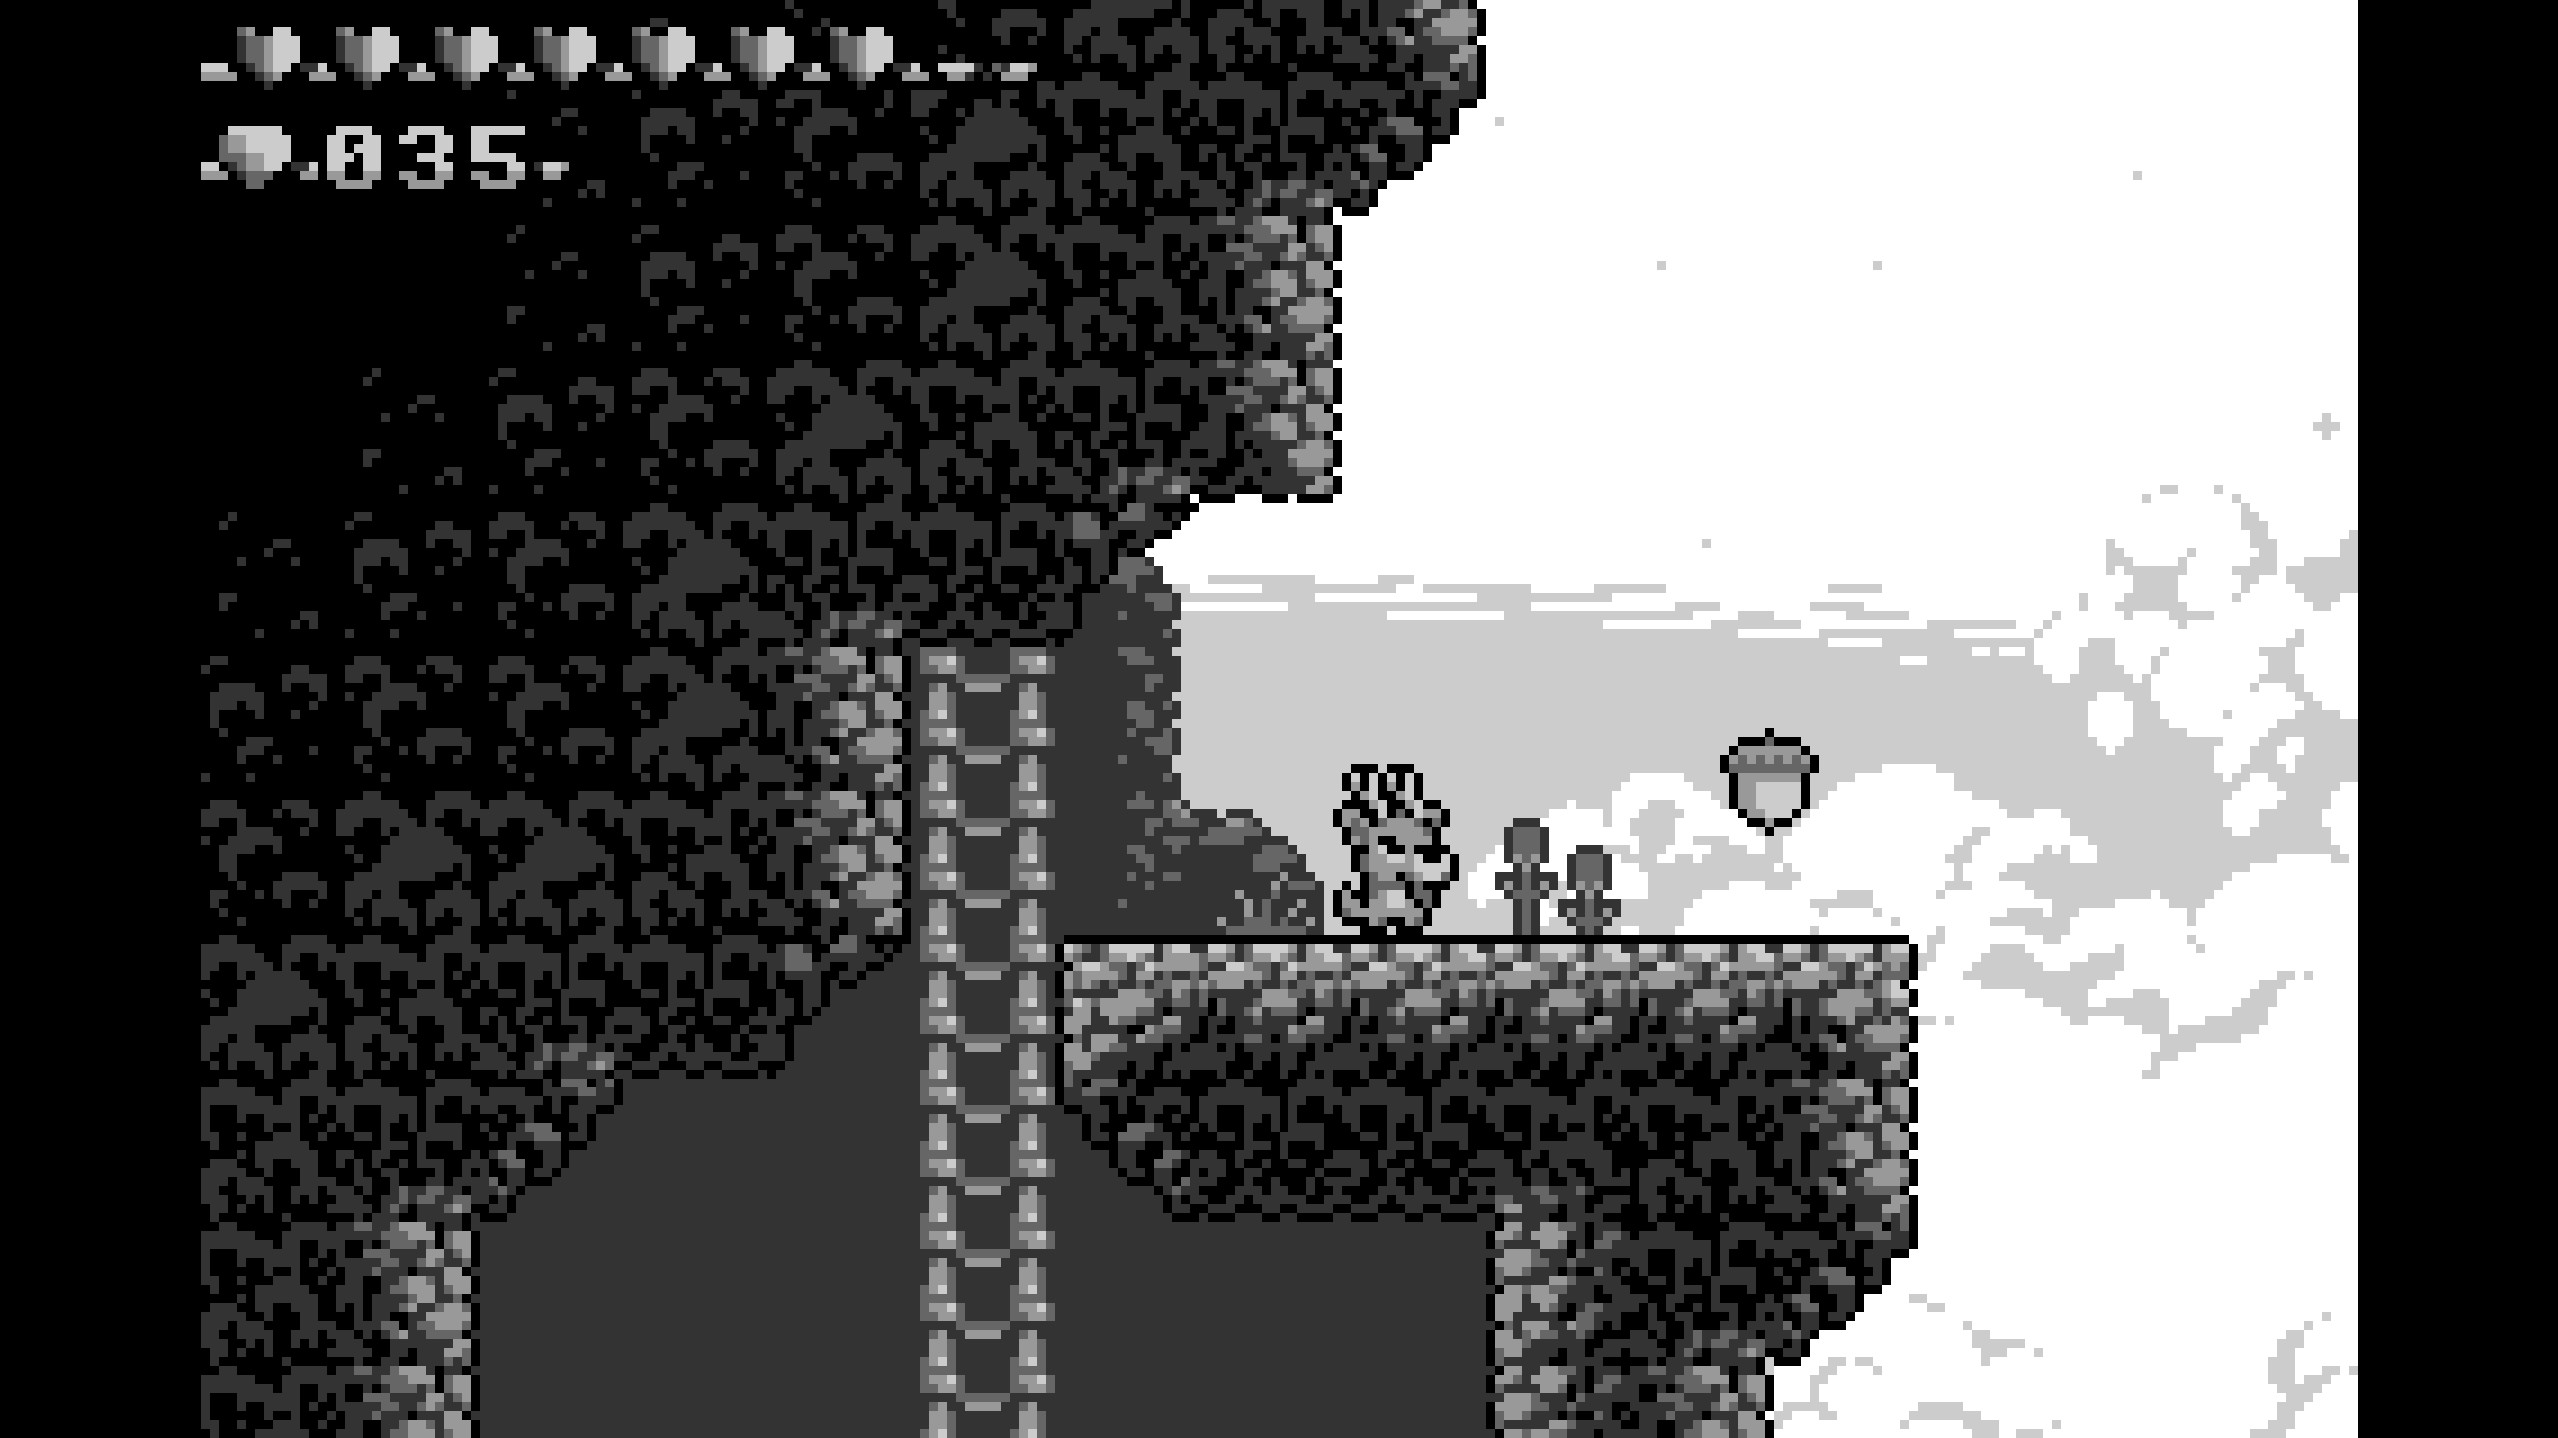
- Continue upwards through the normal path until you reach the bridge area with the five gems and the key. Jump and dash left off of the floating landmass that the bridge is attached to and you'll go past a fake wall! Continue upwards from there, dodge some dragons, and the final nut will be waiting for you at the top!
After you collect all three nuts, you will automatically earn the Winter Is Coming Badge! This is the last thing you need to do for 100% completion in Ronny's Climb. If you made it this far, I offer you a hearty congratulations! Zephyrix, the developer, has stated that there will be more content updates in the future, so when they arrive, I'll be sure to update this guide with the latest info. Goodbye for now!